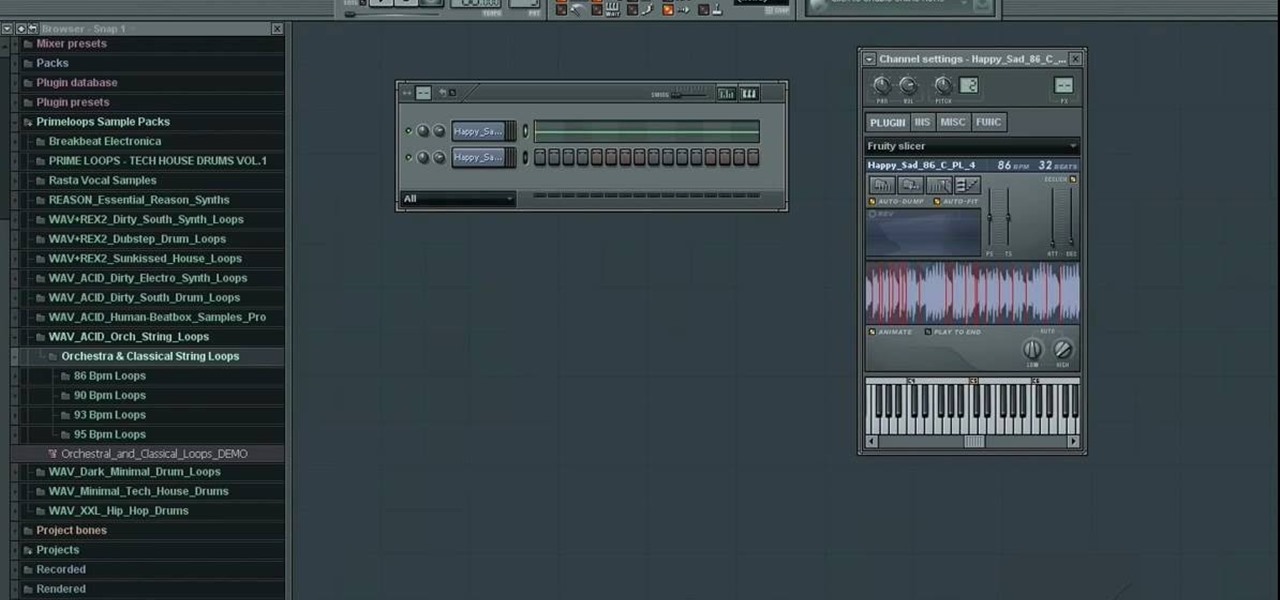
This how to video describes how to use Fruity Loops to chop up orchestral loops and integrate them into your project. First you take a sample and adjust the knobs on the Fruity Loops interface to achieve the desired result. This video is great for anyone who is learning Fruity Loops Studio or simply learning how to create songs from smaller orchestral samples. The video itself lasts about ten minuets and will help you achieve the musical prowess you desire.
Writing a song? Want your chorus to have a strong impact? Jimmy Kachulis of Berkleemusic gives songwriting tips on how to make the chorus stand out from the verses even when you use the same chord progressions.

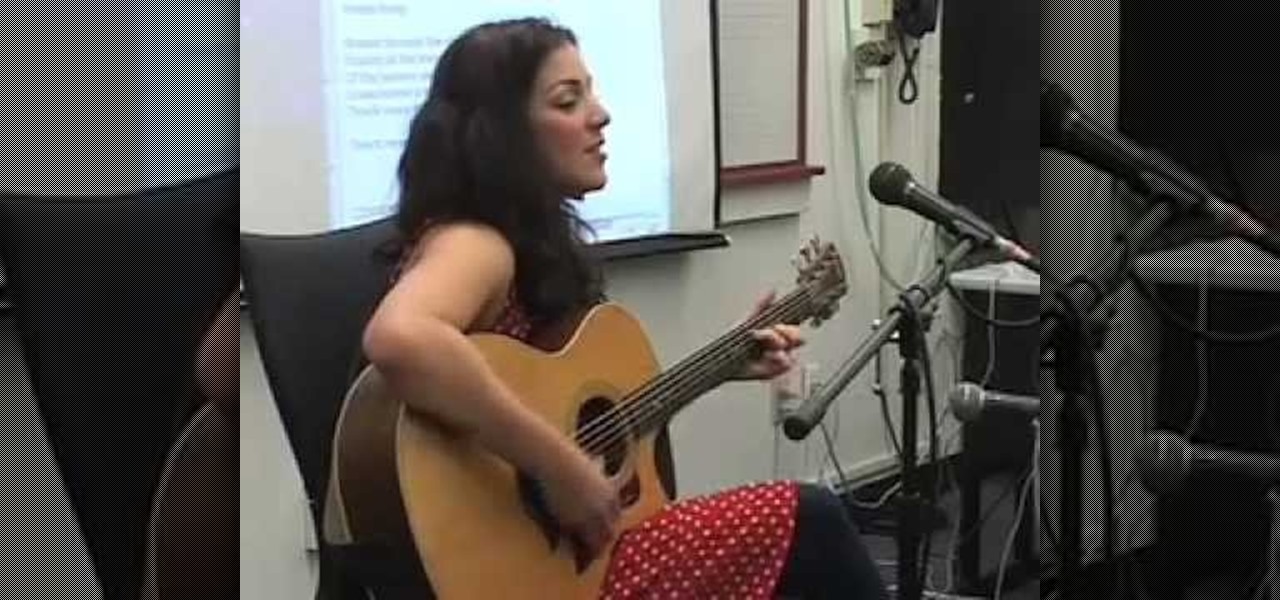
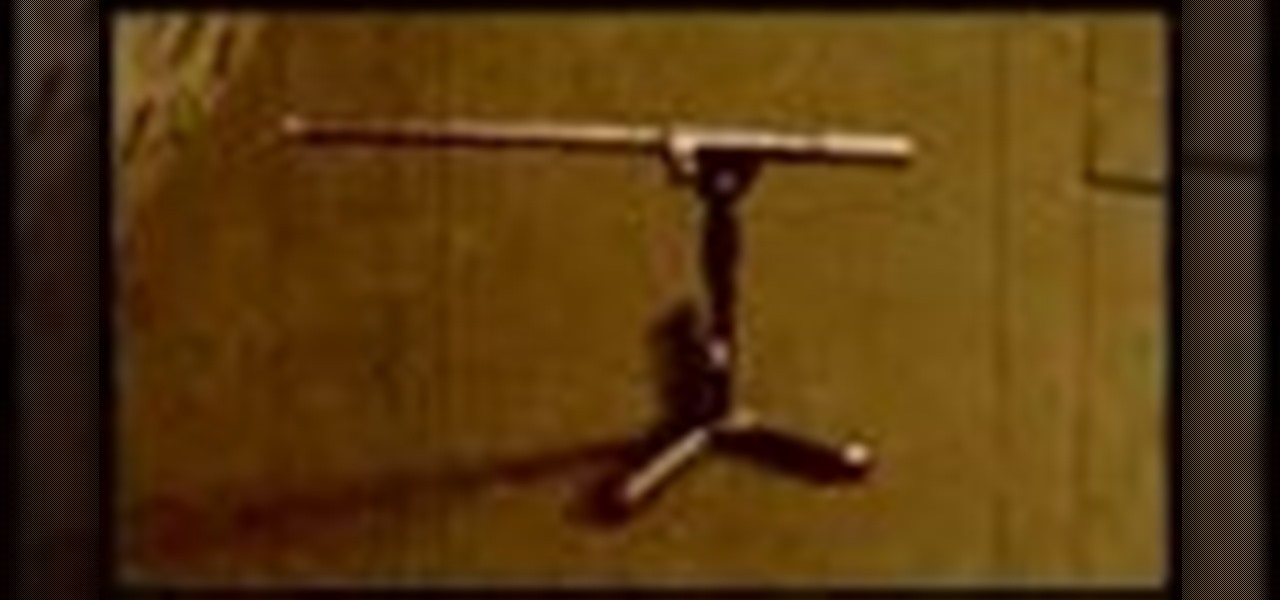
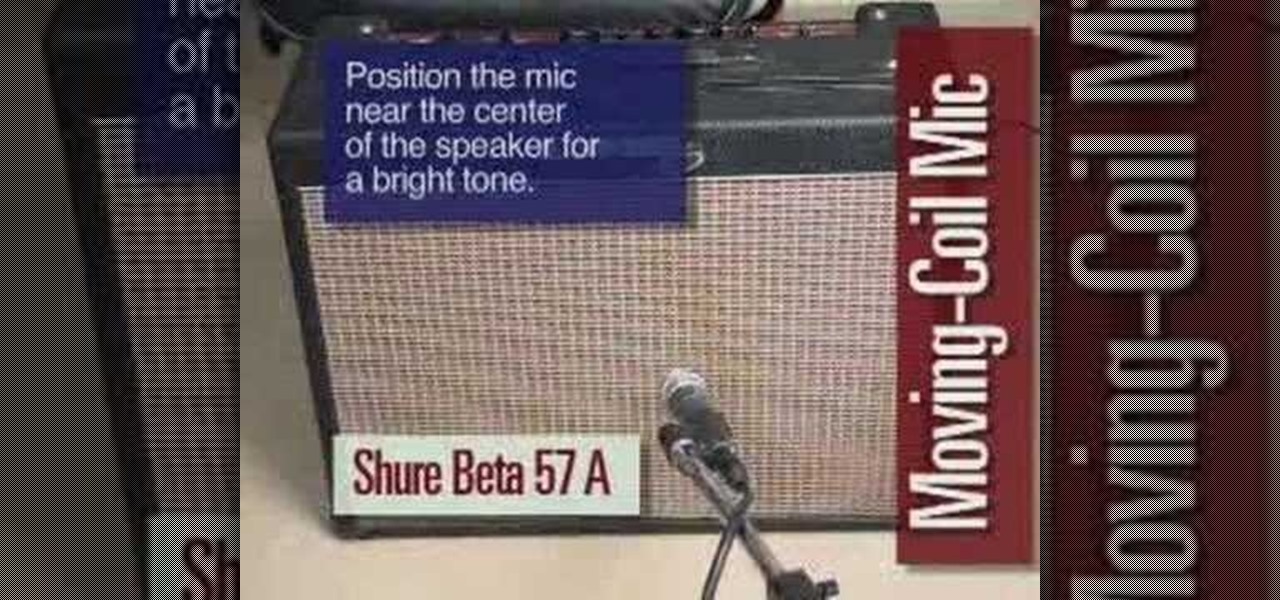
Check out this instructional recording video that shows you how to mic a guitar. This installment focuses on guitar recording techniques, covering the basics of acoustic and electric guitar recording and some of the options you as an engineer have after the recording is done. Any recording has to start by getting it right at the source. When recording guitar, new strings are a must. Having the instrument set up properly so that it plays well in tune is also important. Once the guitar plays an...
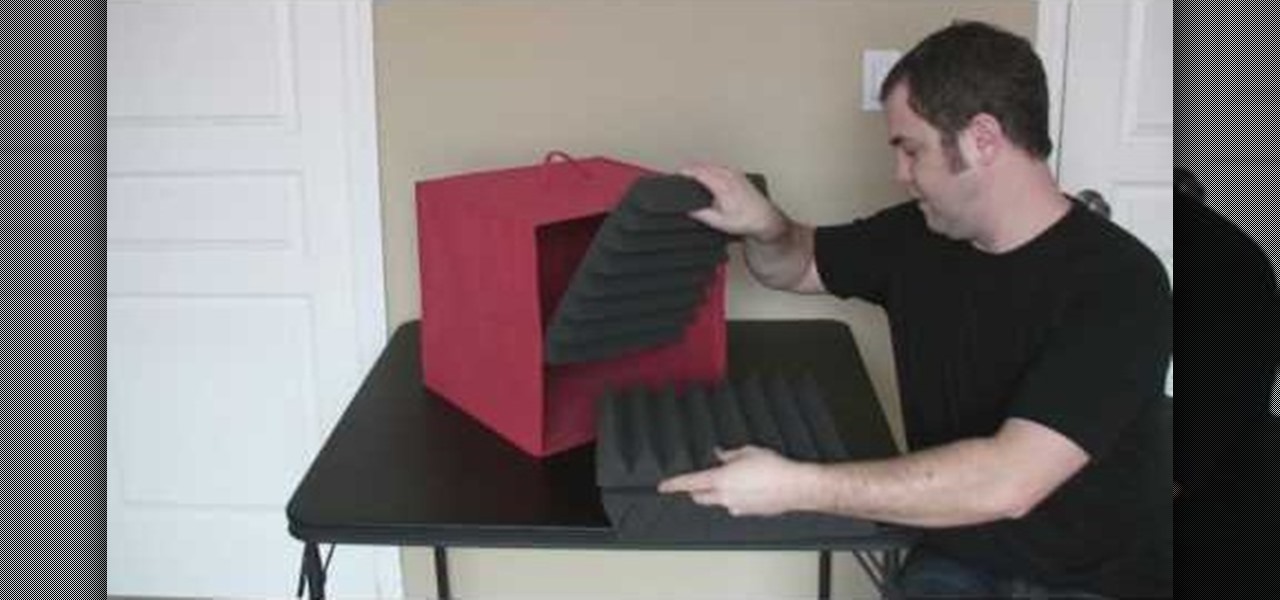
Insipired by Harlan Hogan's Porta-booth, here's a video showing you how you can get a great sound booth that fits in your suit case and goes anywhere. The video shows you how to build the booth and a convenient way to pack it for travel. Details on where to get the parts are here at our creator site.
"An older gentleman told me the other day "no one makes any records anymore!" Well, I thought to myself; "millions of people make records every week, just not on vinyl or tape like in the old days..."

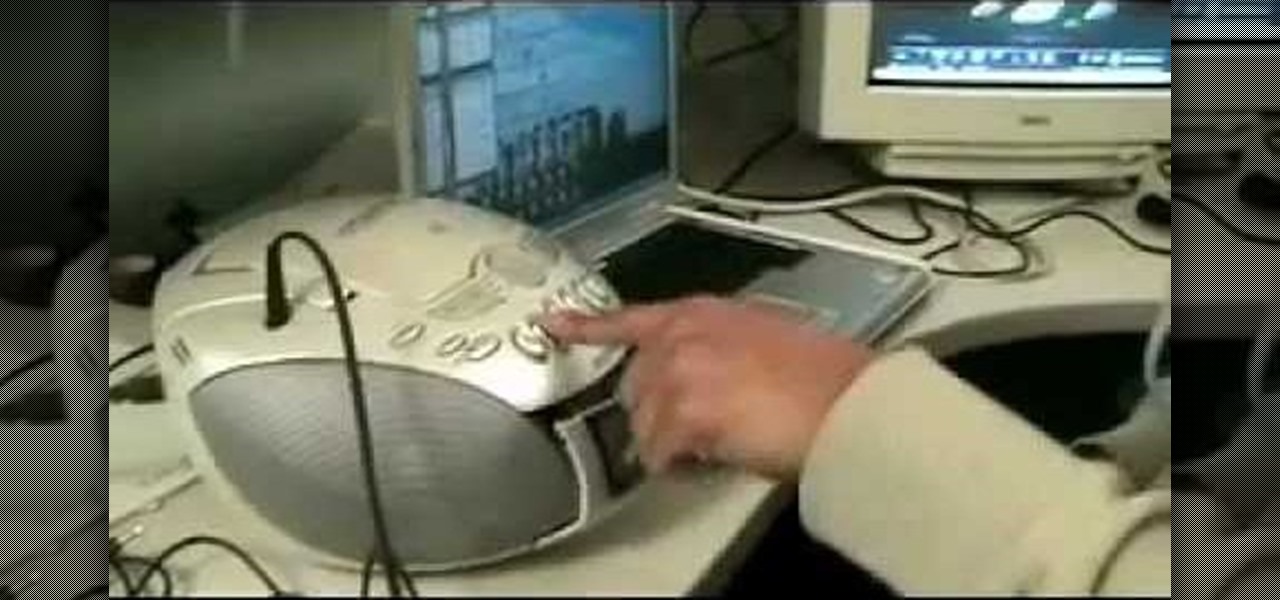
FL Studio is a power piece of music-generating software, but it can be kind of cranky about working with peripherals, including MIDI keyboards and controllers. Watch this video for a step-by-step guide to connecting a USB keyboard or controller to FL Studio.

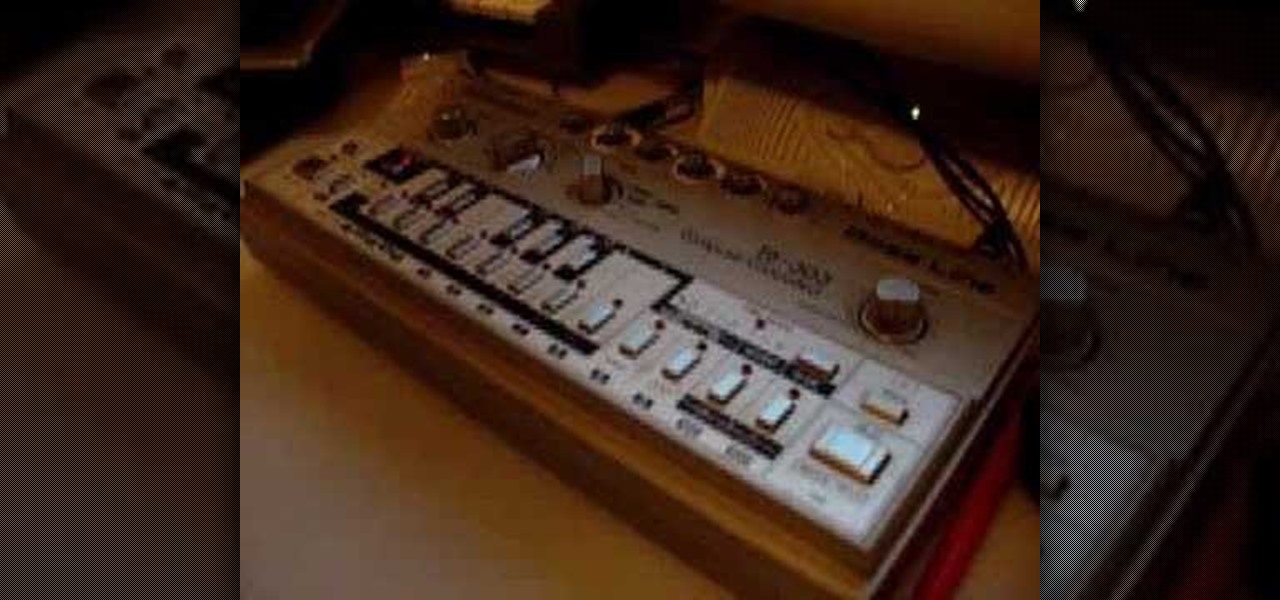
Unfortunately for electronic music, there are not very many Roland TB-303's in the world and the ones that are here are quite old. Many suffer from broken tactile switches, which can cause them to play double notes and have other problems. Watch this video to learn how you can replace the switches yourself and get your amazing piece of gear working perfectly.
The TB-303 is nothing short of legendary on the electronic music scene. It is possible there would be no such thing as house music without it. They are rare and extremely complicated, so if you're lucky enough to have one you should pursue whatever help you can get on playing it properly. Enter this video, which will teach you how to quickly and easily program your 303 and get on your way to making phat old-skool tracks.
Dubstep and drum and bass have brought the "wobble bass" style of synth beat to the masses, and you'd better learn how to make one if you want to keep your tracks modern. Watch this video to learn all about making dirty wob-wob bass lines using Massive a quasi-analog PC synthesizer.
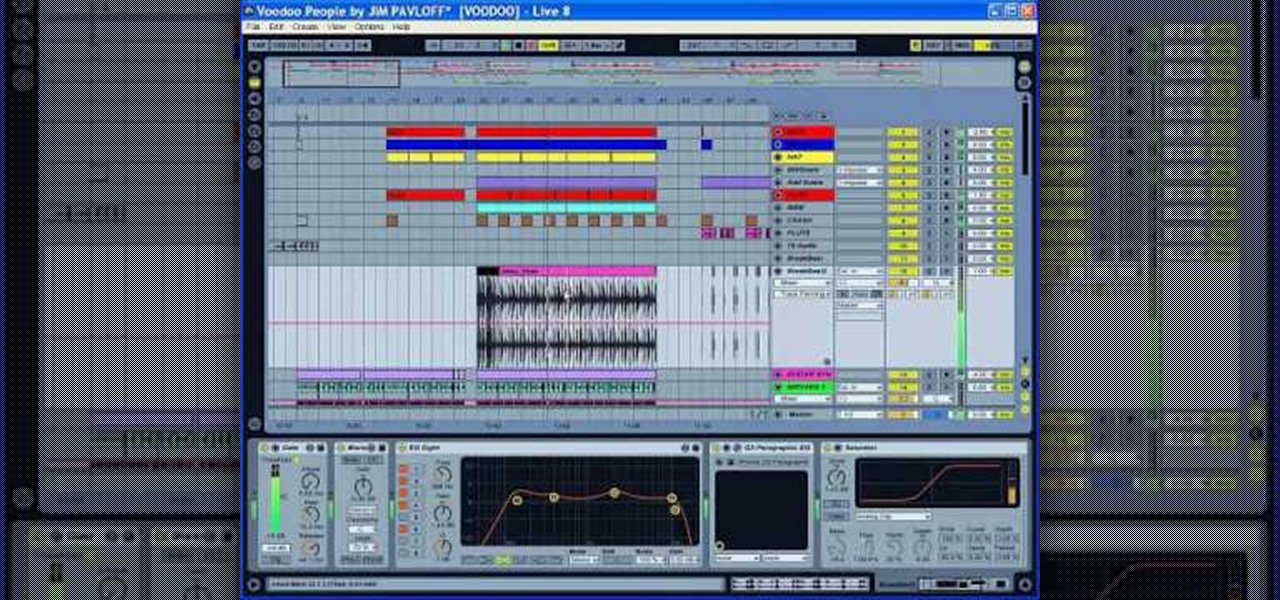
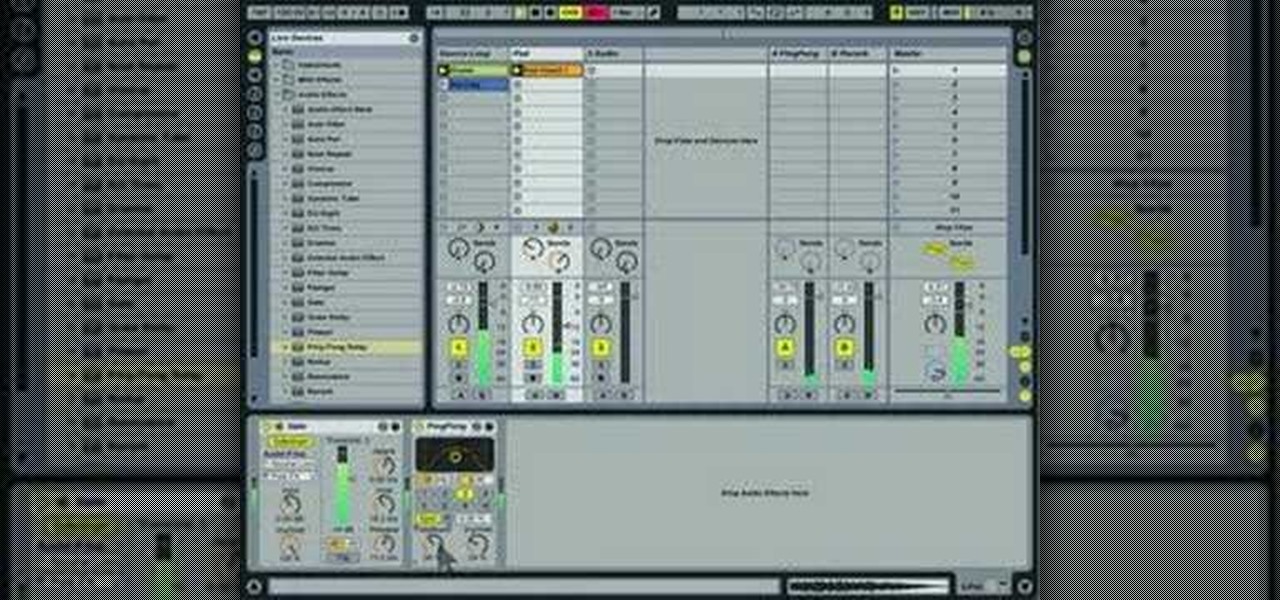
The Prodigy were one of the first groups to really grasp the potential of electronic music and bring it to the forefront of pop, and they are still fucking legend on the electronic scene. If you have Ableton Live 8, check out this video to learn how to produce their classic song "Voodoo People" in Ableton, including what samples to use and what to do with them.
Ableton Live can turn your computer into an electronic music producing and sequencing machine pretty quickly, but making sure your sound card is configured correctly before you use it on stage is crucial. Watch this video to learn how to set up your sound card for Ableton Live quickly and easily.
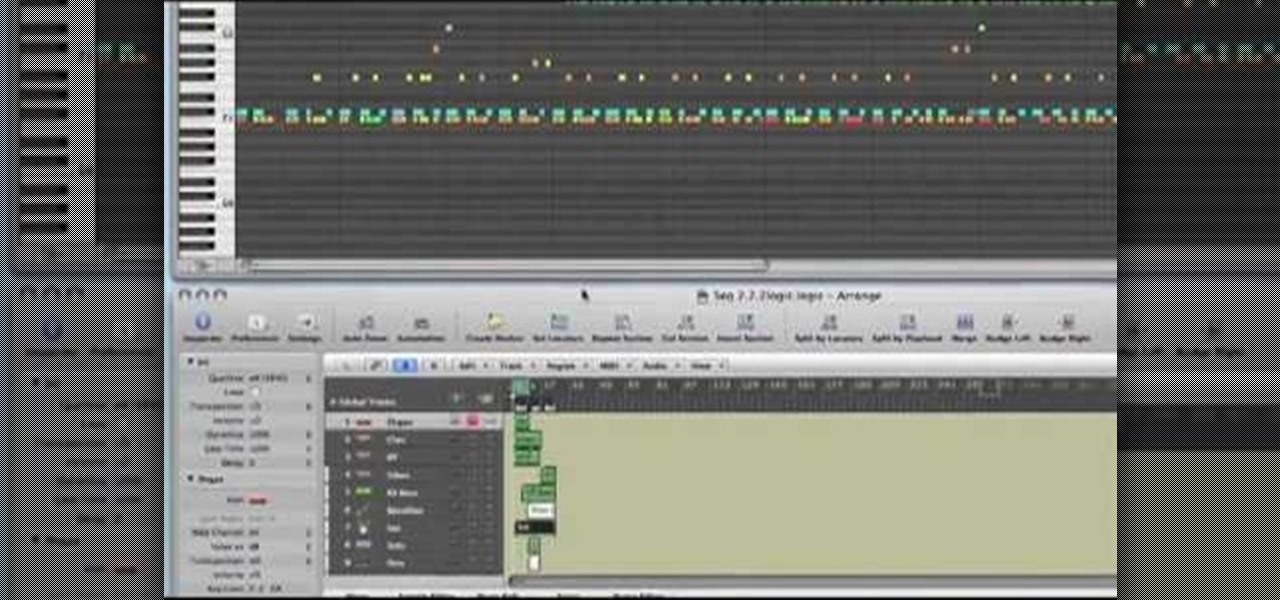
In this tutorial, we learn how to use Logic Pro: Screensets. First, open up the score editor in a separate window to do your editing. Then, open up your arrange menu and edit the piano part of the music. This is a good approach because the windows can both be large, but it can get cluttered quickly. Screen sets allow you to set up windows and save them as a screen set at the top of your screen in the software. When you do this, it will stay locked so those windows always stay the same. Set th...
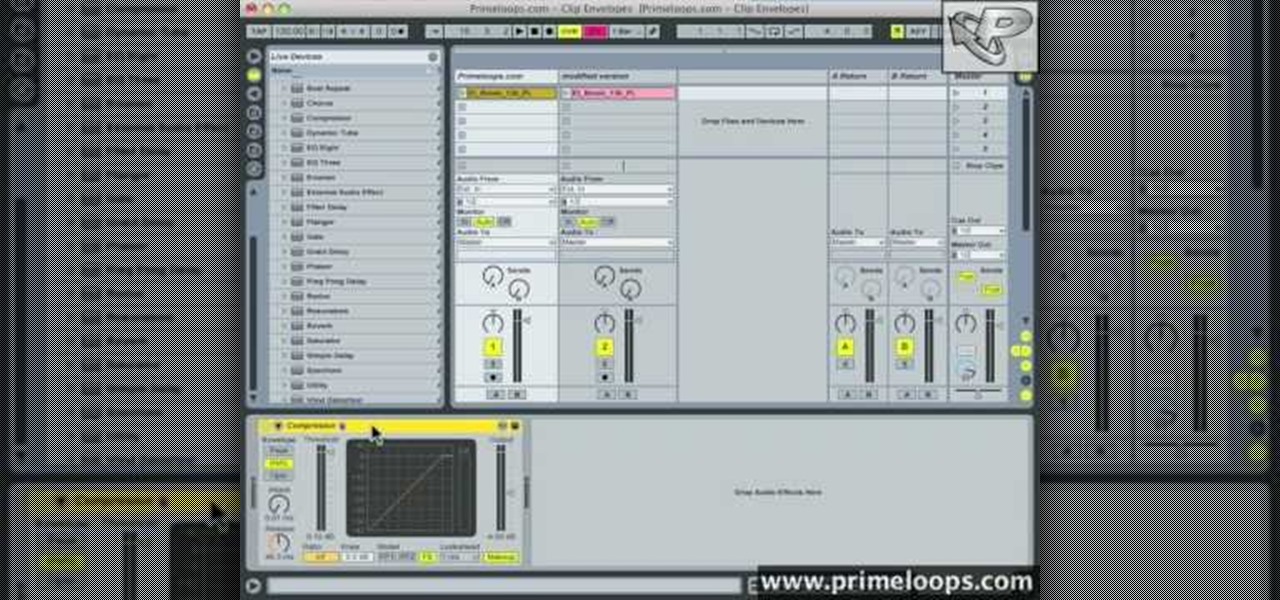
In this tutorial, we learn how to use clip envelope modulation in Ableton. This allows you to change parameters over time. You can access this by selecting your audio clip, then hitting the "E" button in the lower left hand corner. Now, you will see the envelope section where you will be presented with drop down menus. These will allow you to choose parameters and modify the tuning or position. This is an easy way to do extreme tuning changes in your audio. Continue to play around with the cl...
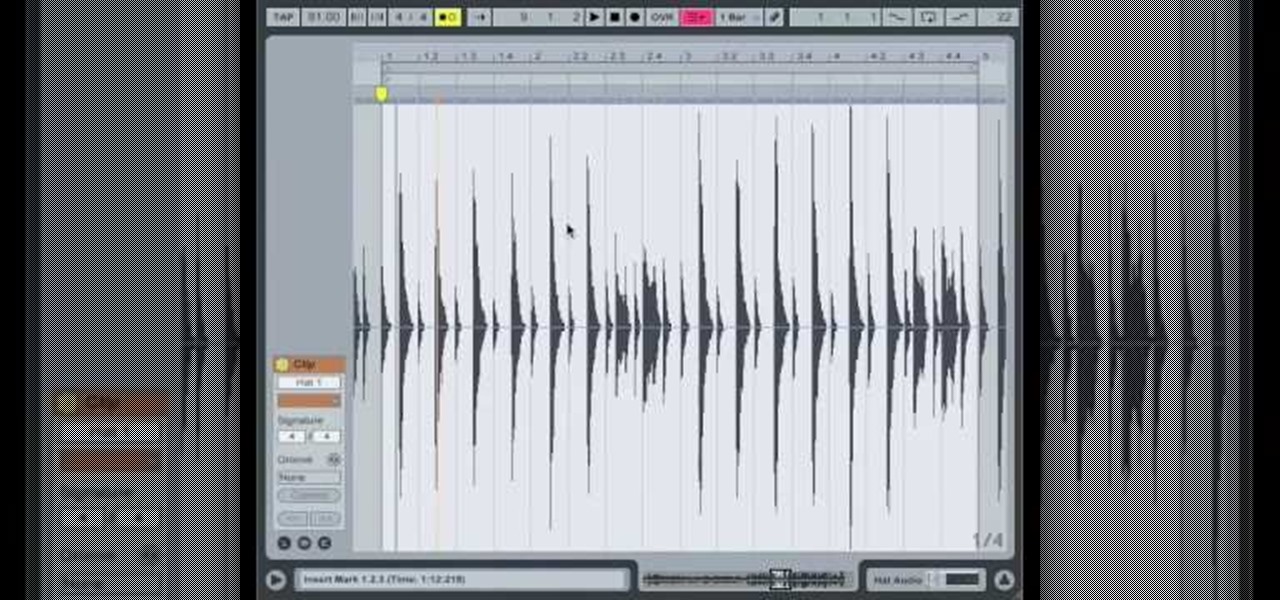
In this video, we learn how to use Ableton Live 8: Quantizing audio. To find the bars you want to use, find the up and down arrow keys. These will jump the loops back and forth based on the width of the loop race itself. Press play to search around for the best four bar section in your music. Now, set your first attack in your loop by zooming in on the hit. Hover over the audio and create a warp marker to drag from each of the bars. Label it as the beginning of your clip to the end, then save...
In this video, we learn how to write a song for film or television with Brad Hatfield. When you collaborate with other people, you will be invited into a new network of people. The web of people will keep expanding to help you learn new skills and how to write different songs. Try to understand what works for both you and the artist so you don't get emotionally involved. When you write songs for film or television, you will want to listen to feedback and give each other direction on how you w...
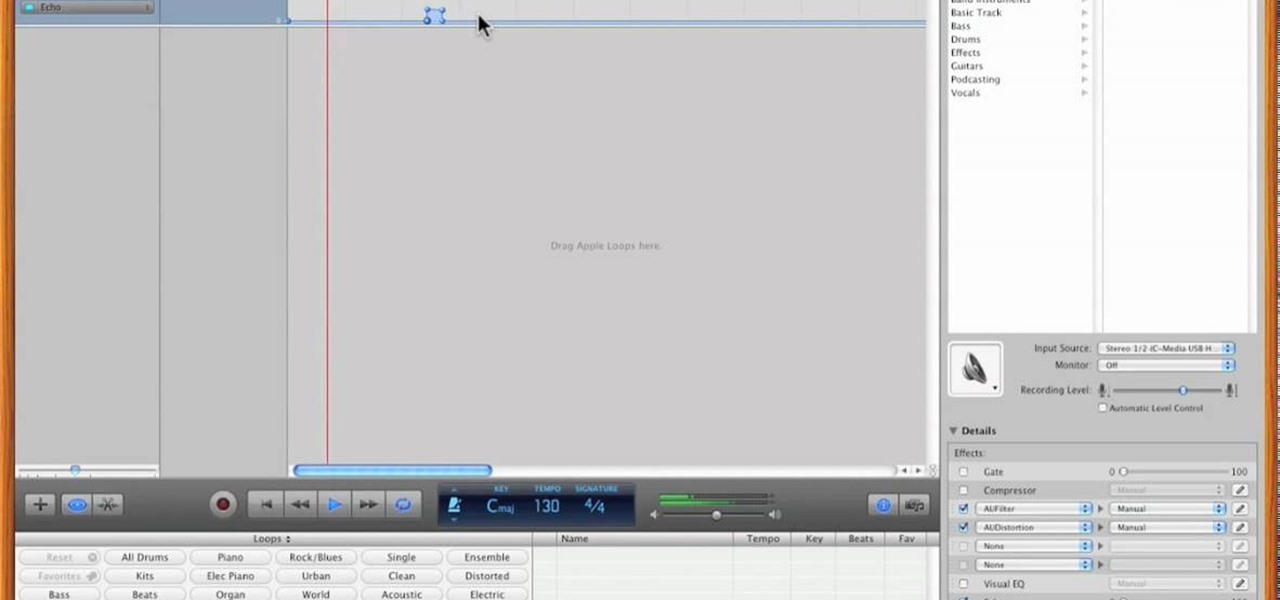
In this video, Nick teaches us how to use effects automation in Garageband. Any effects you use on your track will allow you to change the effects over time if you change how you want it. First, load up your track and loop it up by clicking on the loop button. Once finished, load up effects so you can automate them later. Hit the "i" button, then go to the details tab on the bottom. Now, change the effects you would like for automation. For the first one, go with the "au" filter, then for the...
First you need to do is press the t button in your keyboard and add a new mono track. Choose mono in format and click OK.
In this video, we learn how to understand melodic rhythm and lyric rhythm. First, say your lyrics out loud talking, instead of singing them to see how they speak out loud. You want your lyrics to sound the same in the song as you would if you were singing them. Try to change the tone of words to change up how it sounds while you are singing it. You will see that it makes a big difference when you sing it. When you do this, you will take the the preposition off as the big spotlight note and pu...
In this tutorial, we learn how to write a song using melodic phrases and lyric phrases. Instead of talking in syllables, you want to use a musical phrase. Practice humming your song without using words, so you know the road map of where the music should go. Make sure your words go with the melody of the music, and the lyrics match how the song flows. If they don't, you can create a new phrase so it matches the melody. Play your song and substitute different words to see how they fit with the ...
One of the many significant problems with Apple's ubiquitous iTunes music player and iPod MP3 players is their lack of native support for FLAC, the highest-quality type of condensed digital music file. This video features step-by-step instruction for converting your FLAC files into ALAC files, which have similar quality and can be played on on your iPod.
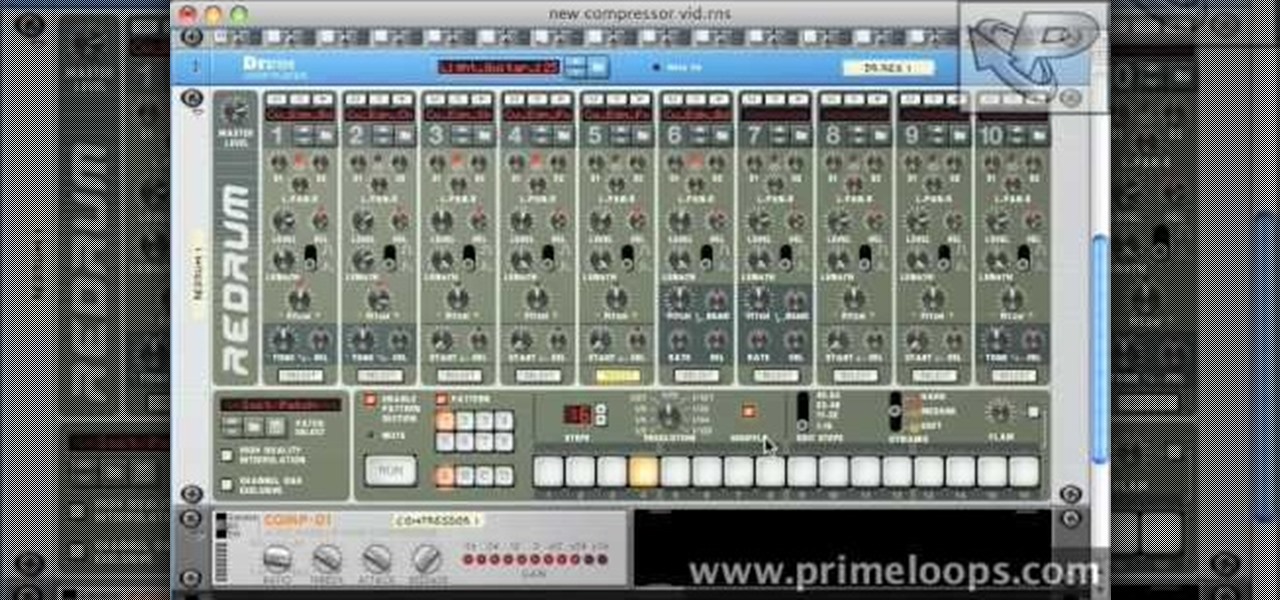
This tutorial video will show you what the purpose of compression is and how compression works through its parameters. Your instructor illustrates a drum beat and a plucked guitar line. Beginning with how to compress the drum beat, take (download) a drum sound pack without compression and to add compression using the software right click on the drum machine, choose create, and then choose combo on compressor. The virtual compressor has all the dials and adjusters found on any basic compressor...
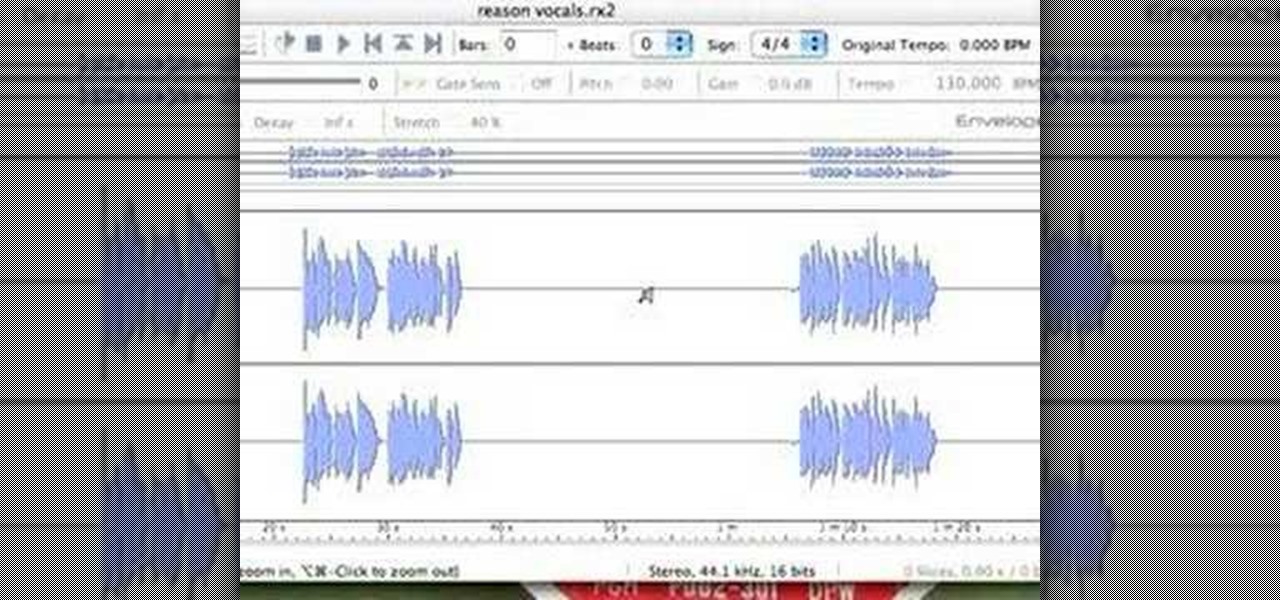
Josh shows how to correctly add vocals into Reason software without timing or drift audio issues. The purpose of learning how to do this is to be able to add additional creative flair to a song, which Josh shows in a separate tutorial. To learn how to do this, you can begin in GarageBand or any other digital audio software program. To successfully do this, make sure you begin and end on a measure and export on a one into Reason. This ensures a seamless addition. In the next step outlined in t...
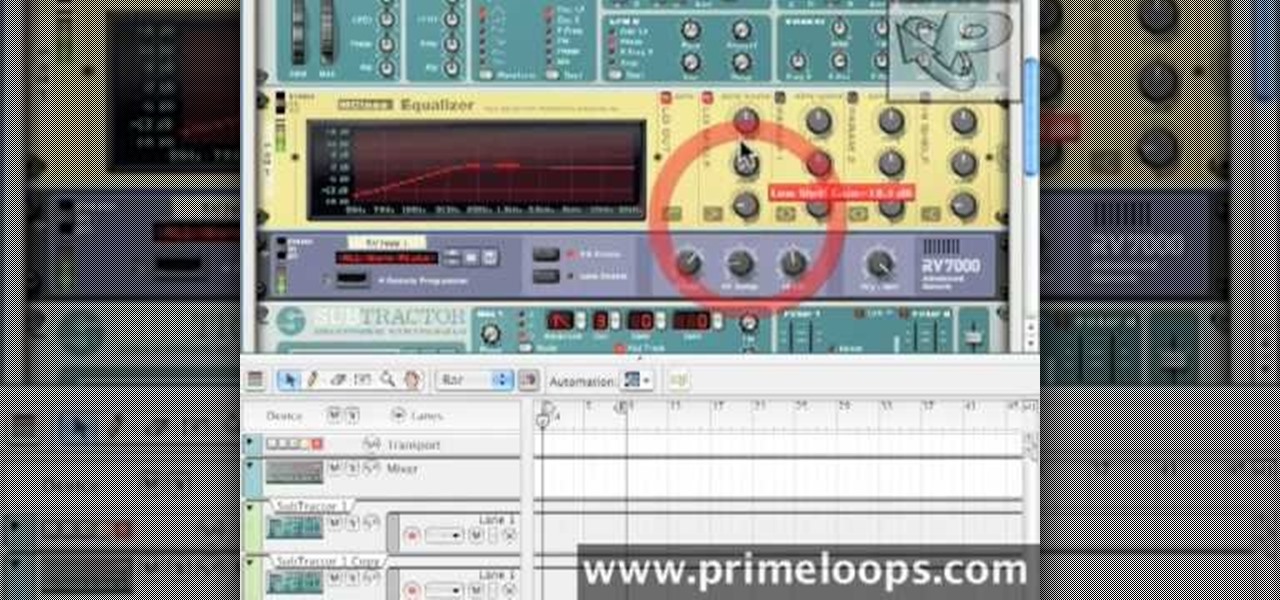
If the bass sounds in a song need to be amplified, learn how to beef up the bass using Reason 4.0 with this video tutorial. Nick from PrimeLoops shows how this process can be done first by creating a copy of the bass patch that can be altered with a filter and reverb. This new sound can then be mixed back into the original bass sound. Nick shows step by step what to do in Reason 4.0 to create the desired effect.
Get to know how to use Logic Pro's arrange page in this short tutorial. Use the arrange area to work with the audio of your song. Change the timeline by choosing a time and beat. Use the toolbar area to do some functions. Use the icons to easily open up media and list areas. Use the bin to store your audio. Use the browser to look for your audio songs. Use the event list editor to edit your MIDI information. Use the inspector to view the channel strips of your track. Use the editors in the bo...
A helpful video for all budding musicians as it clearly explains the Gate sidechain feature in the Ableton Live. The maker of this video simply explains how the feature works and how to use it, clarifying what can sometimes be a daunting program to use. A great tutorial from a very good series produced by Huston Singletary to help newer users. The tunes created through the video are also a great inspiration as it is demonstrated how easy it is to create nice sounding music using these techniq...
Musicians who want to take their music to the next level, will want to learn how to create an interesting wobble/fidget effect for the bass. The video takes us through the steps of using Malstrom software to create a wobble/fidget effect that is commonly heard in fidget house music. In order to create this effect, you must have already created a dirty electro bass synth. Once this effect is created, it can be added or combined with just about any other effect at varying frequencies for intere...
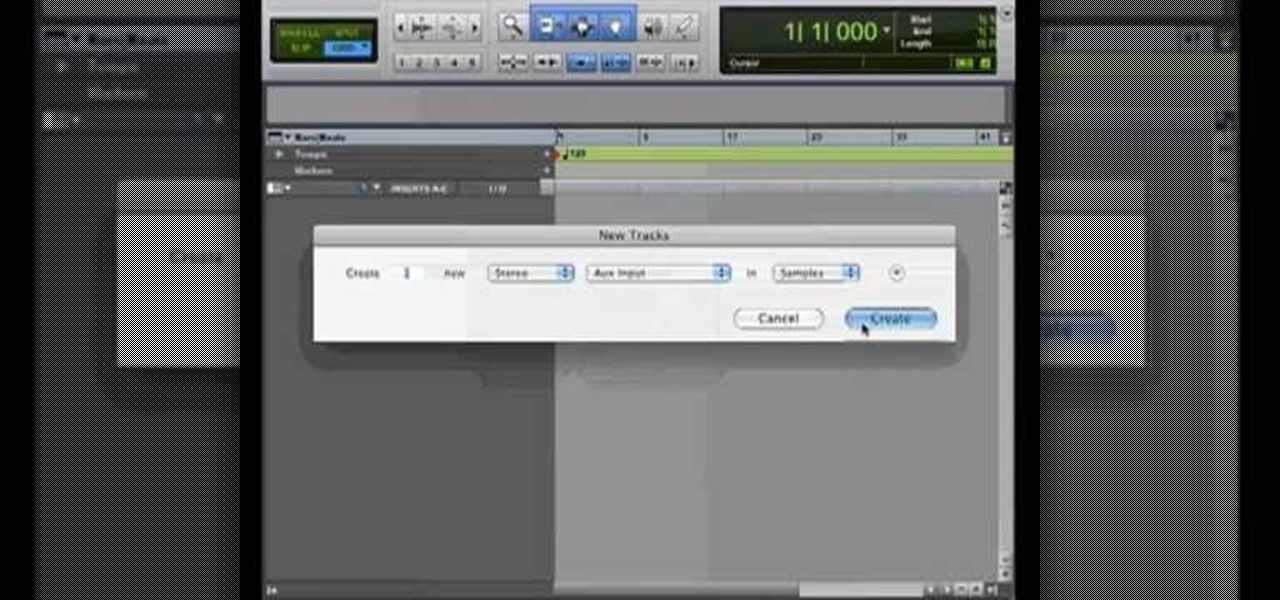
After finally completing a rhythm section using Reason software, you may want to rewire using Protools. First decide how to feed Reason into Protools. The best, would be to re-patch individually into Protools, however the demo here shows a simpler approach that will be easier for anyone to use. First and foremost, Shut down Reason and boot a new session in Protools. Then add an AUX input and instantiate the rewire plug-in to connect to Reason. Make sure the main Reason stereo is feeding track...
This six-part video tutorial, goes over how to make beats in Adobe Director. The six different videos go over the following:
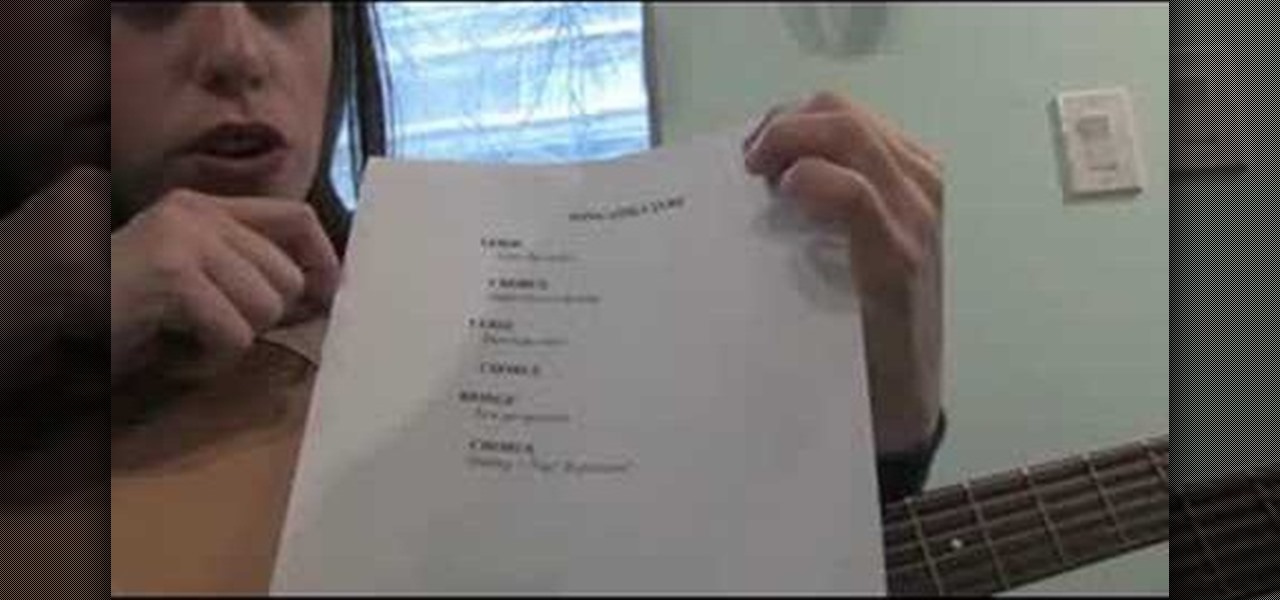
It's OK to break the rules of songwriting, but know the structure of a song first so that you can break the rules intelligently. Learn how to write a song in this free music video. Structure is important in every aspect in life, so why not your song?
Check out this instructional recording video that shows you how to mic a drum kit for a live performance. This uses a minimalist set up with the Shure drum microphone kit. The kit includes six mics and three clips. Record your drum kit during a live performance by learning how to mike it with this recording tutorial video.
Want to record guitar? Learn from the professionals at PreSonus while host Bill Gibson shares his techniques for recording guitar with this instructional recording video. Discover the typical mic choice for recording an acoustic guitar and how to mic the speaker with this recording tutorial video. Record professional sounding audio quality of your music for your guitar by learning the various types of microphones to use.
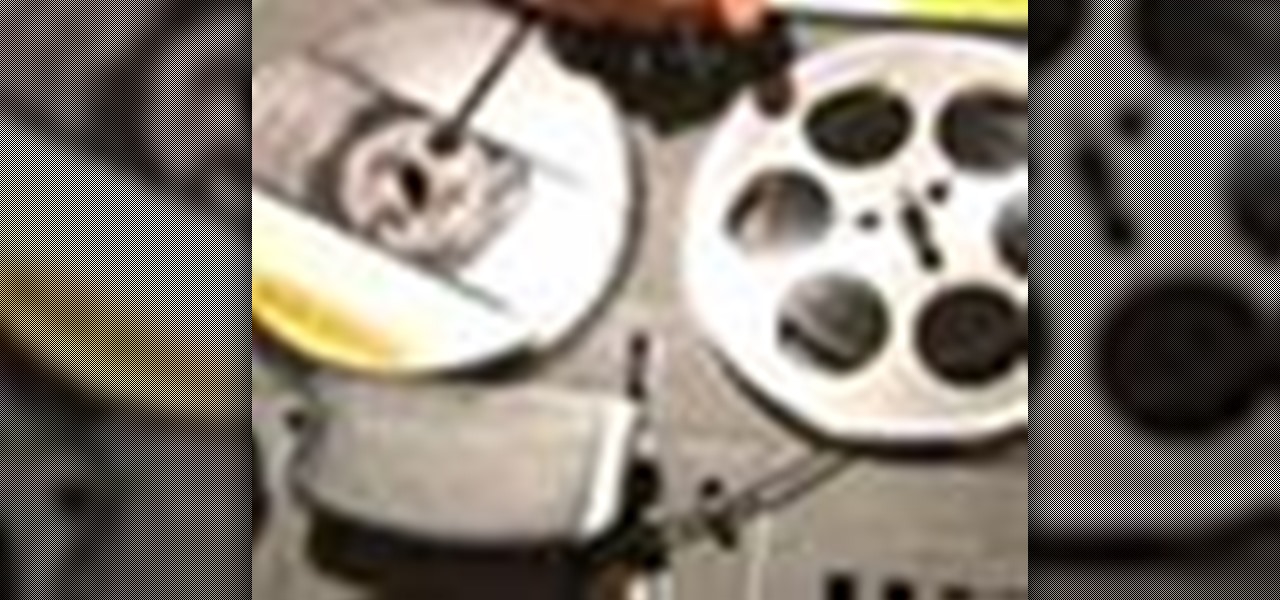
Analog reel-to-reel tape is some of the most in-demand recording equipment today. Learn how to use a reel-to-reel tape machine in this free video series that will allow you to utilize this piece of musical recording equipment.
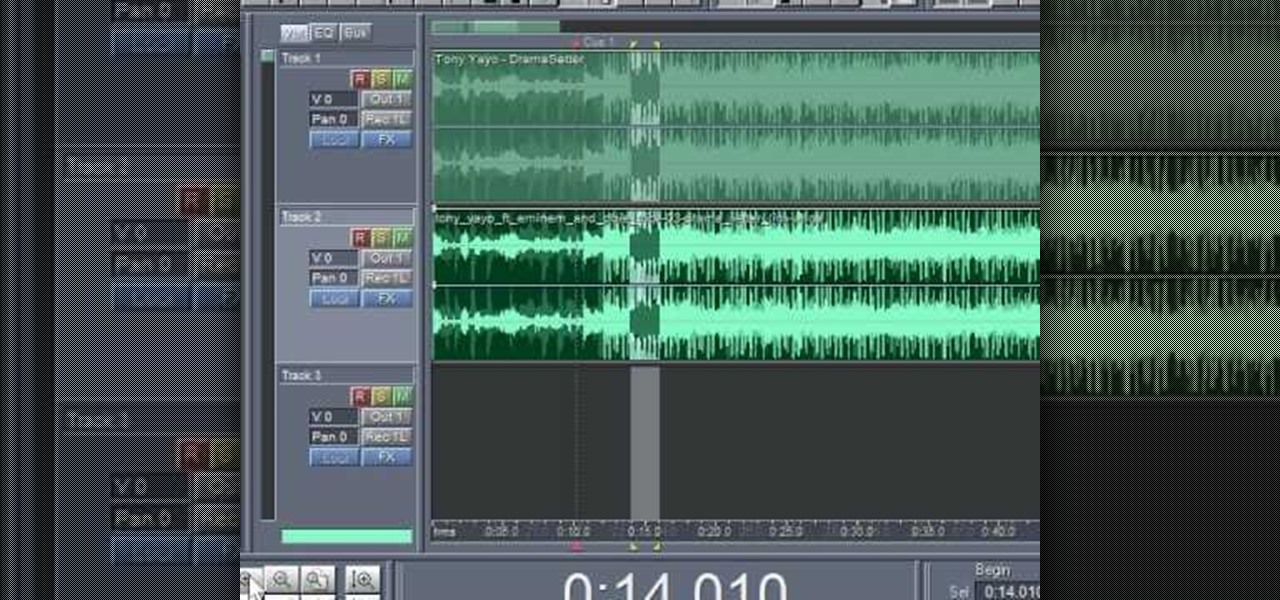
This shows you how to extract vocals from a song to create an acapella version using inversions. You need the full version of the song as well as an instrumental one.
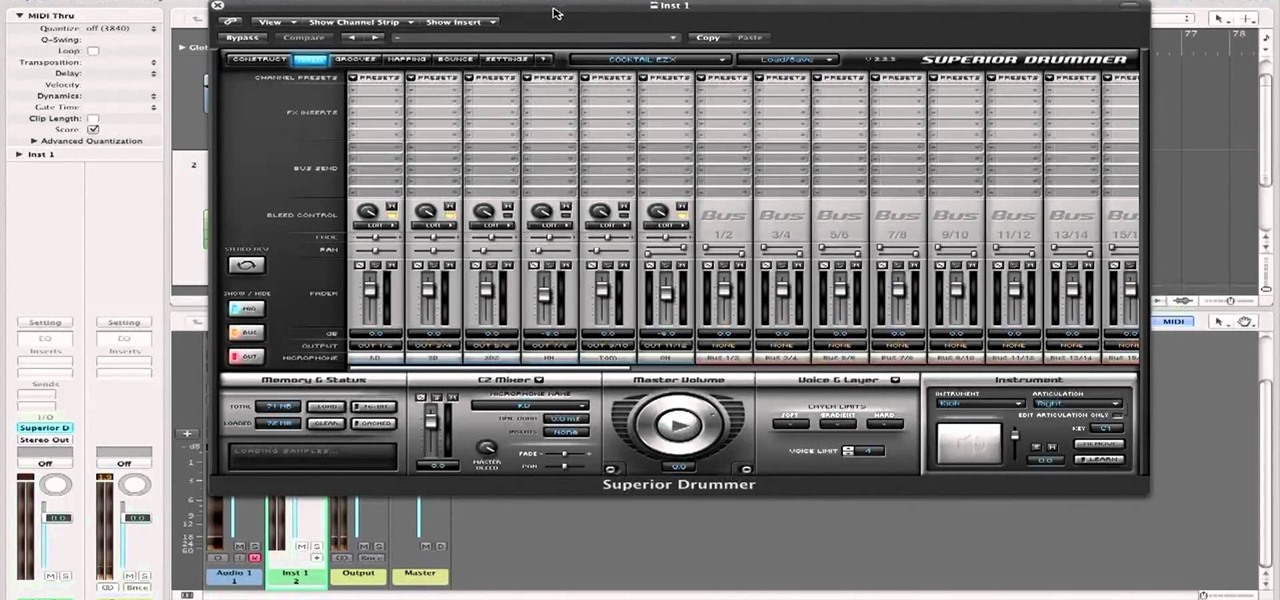
Utilize the mutli-out function using the Toontrack Superior Drummer plugin with the Logic sound program! This tutorial lets you create very professional sounding drums that you can add into your music projects. Select from a variety of different drum types.
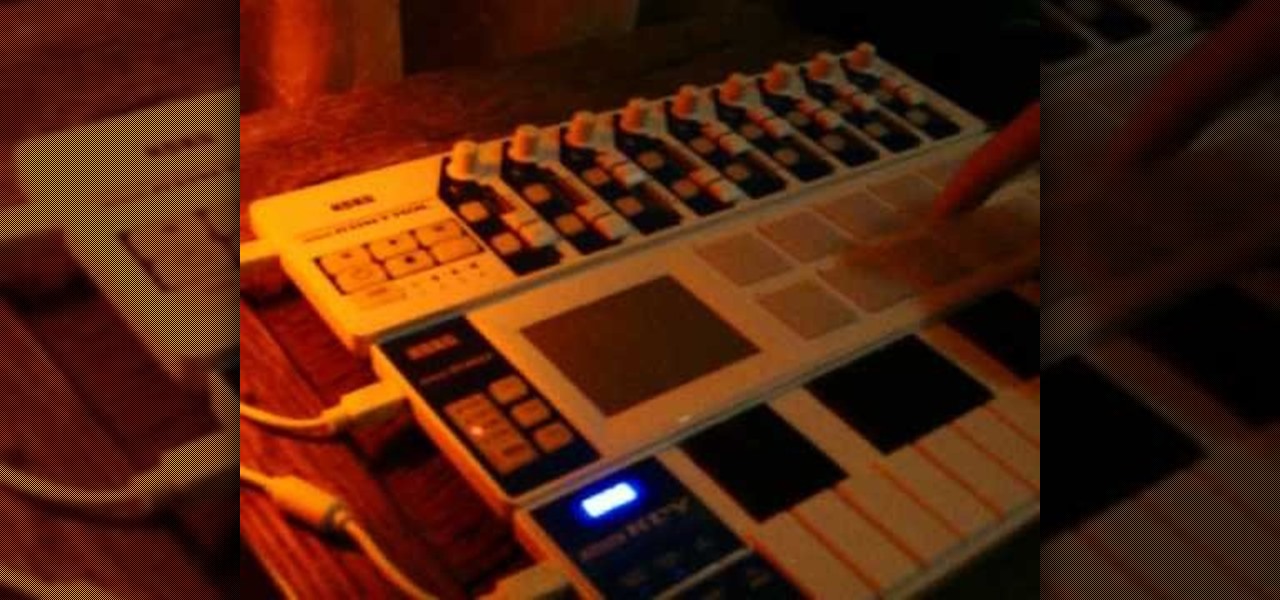
Ableton Live 7 is so popular mostly because it is easy to use on the fly, but it's still complex like everything else in electronic music. Watch this video to learn how to map a MIDI controller (in this case a Korg nano-series) in Ableton Live 7
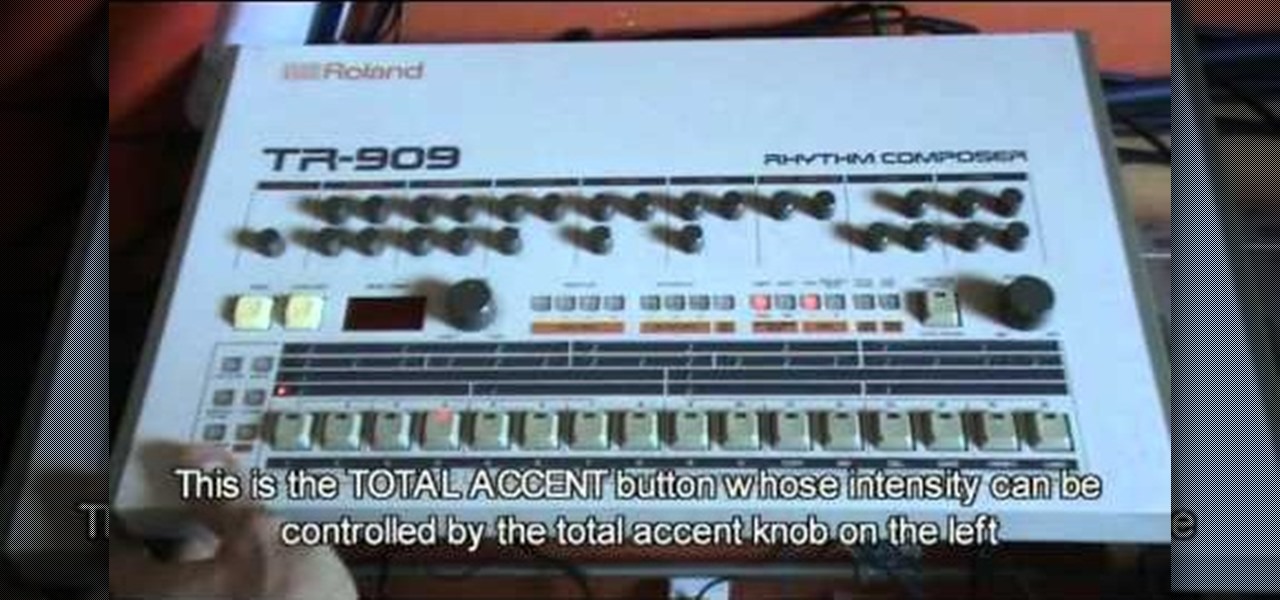
The Roland TR-909 Rhythm Composer is one of the greatest drum machines ever made, and one of the pillars of electronic music. If you're lucky enough to have one and aren't quite sure how it works (they are quite intimidating) watch this video to learn how to make a simple beat really quickly on your lovely 909.
The Roland TB-303 and TR-909 synths are two of the four most important pieces of gear in the history of electronic music, but every year they get older, more cranky, and further away from our contemporary ideas of what an interface should look like. They can be really hard to figure out how to use, but fortunately for you this video will teach you how to program both instruments and start creating the phat tracks these devices were made to create.
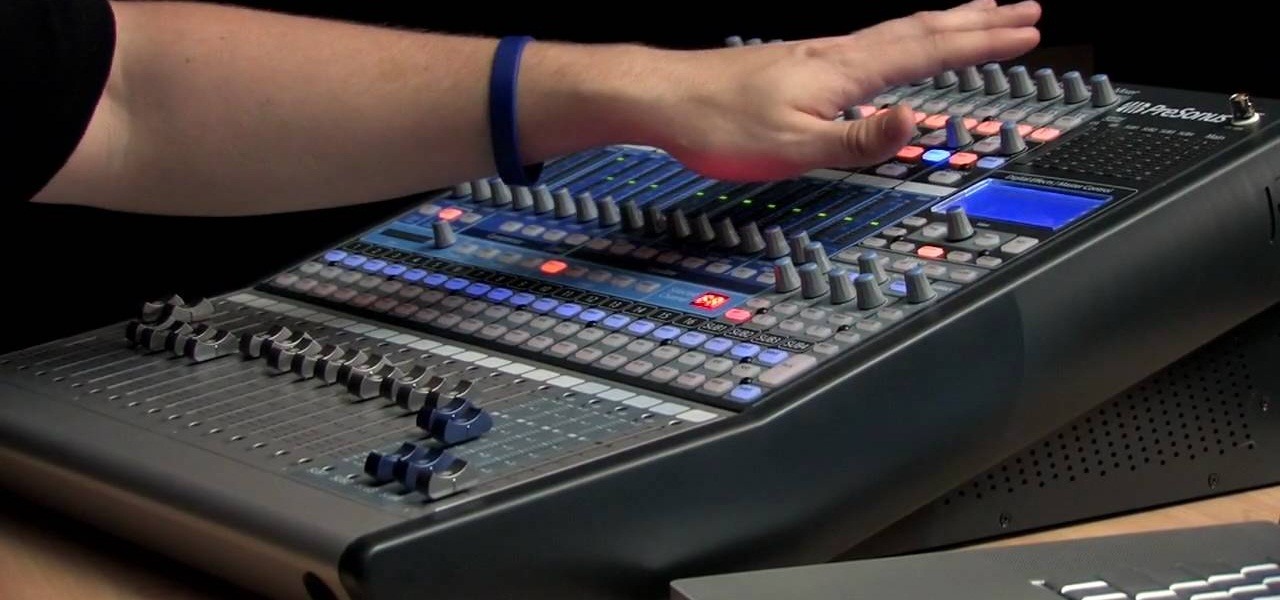
In this video, Rick show us how to cut monitor feedback with StudioLive 16.4.2. First, assign your microphone to ox 1. Then turn it up and go to the master output of Ox 1 and turn it up until you hear feedback happening. Then, hit the select button on Ox 1 and you can change the compression for any channel. Take out low rumble by putting the low band on and putting it in shelf mode. This will create a high pass filter. Take out frequencies below 130 hertz and then go back to ox 1 master and t...
In this video, we learn how about routing FX using the StudioLive with Brandon Hays. To recall an effect, select the effect button and then page down to gt the list of effects for A and B. Once it's been selected, hit the recall button and then find the mono delay for the vocalist in B. Now, send the channels to these effects and add a snare drum to channel two. Then, add send different levels of drums to channels six and seven. You have sixteen channels to assign different effects to. As soo...
In this video, we learn how to use automation in Studio One. Controlling is a system you use to control the devices that control the software. Control link has a window on the song interface in the upper left hand corner. You can quickly move parameters as you edit the automation. Make sure you change it if it's for an instrument or an audio track. Add an automation track to the window, by clicking the "A" button that will give you sounds for the same instrument. This will avoid automation en...