Starting a film? A storyboard is a great way to visualize a motion picture or animation through a series of illustrations or images displayed in sequence. Learn how to go about creating a storyboard in pre-production with help from this free video from EOS Lighting.
Recording professional-sounding music at home is cheaper and easier than ever before, but still neither cheap nor easy compared to, say, grilled-cheese-sandwich-making. If you need some help getting started watch this video, which will teach you all about mics, cables, digital interfaces, and the other elements of the modern home recording studio.
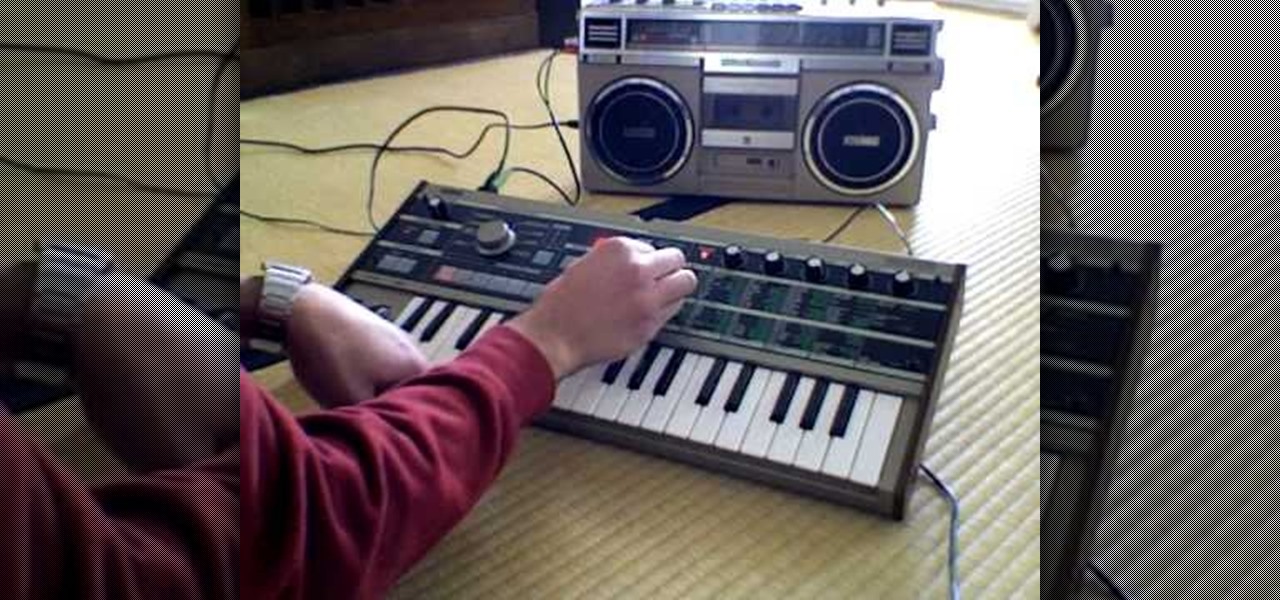
Trance music in it's pure form is a dark, brooding music that can bring you down just as fast as it lifts you up. If you produce trance and have been trying to nail the synth pluck / lead that gives so much of trance it's brooding vibe, watch this video to learn how to make a patch on a MicroKorg that sounds just right.
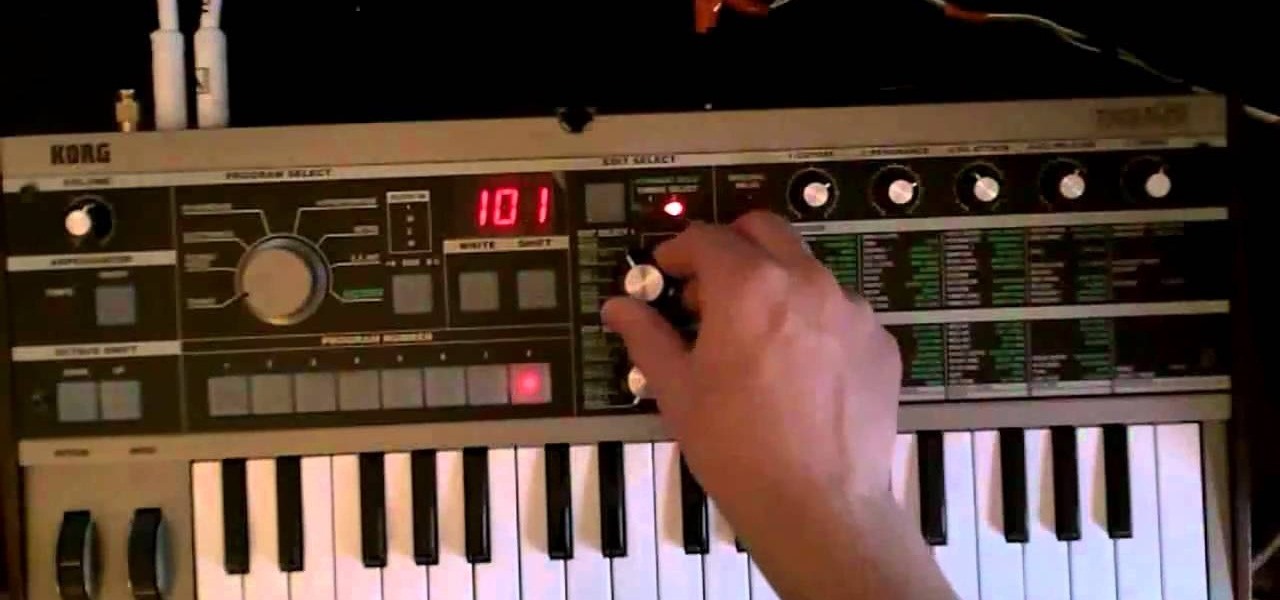
Vangelis was probably the best-known piano composer of the 1980's, showing everyone what the future of the instrument could be. If you love his work with the Yamaha CS 80 on the Blade Runner soundtrack (and who doesn't) watch this video to learn how to program a patch that emulates it on a MicroKorg.
FL Studio is one of the biggest names in digital music-making software, and Korg the biggest in physical gear. Unfortunately, FL Studio and the Korg nanoKontrol USB controller don't get along out of the box, and the transport buttons on the Korg won't work with FL Studio. That is, until you perform the steps in this video that will lead to a blessed union of software and hardware.
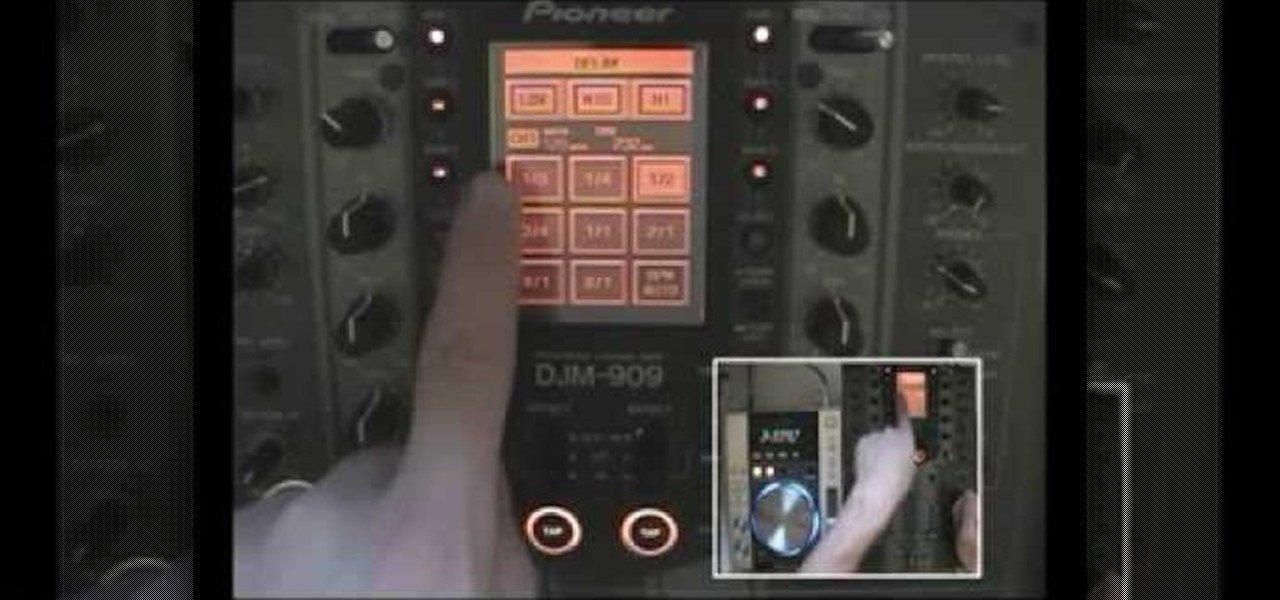
The Pioneer DJM-909 mixer is one of the finest and most expensive DJ mixers on the market. If you can afford one, you're a lucky dog. And if you've gotten one and are wondering just how much you can do with it, watch this video. It will teach you how to use the many effects and other tricks in the mixer to make the best music you can.

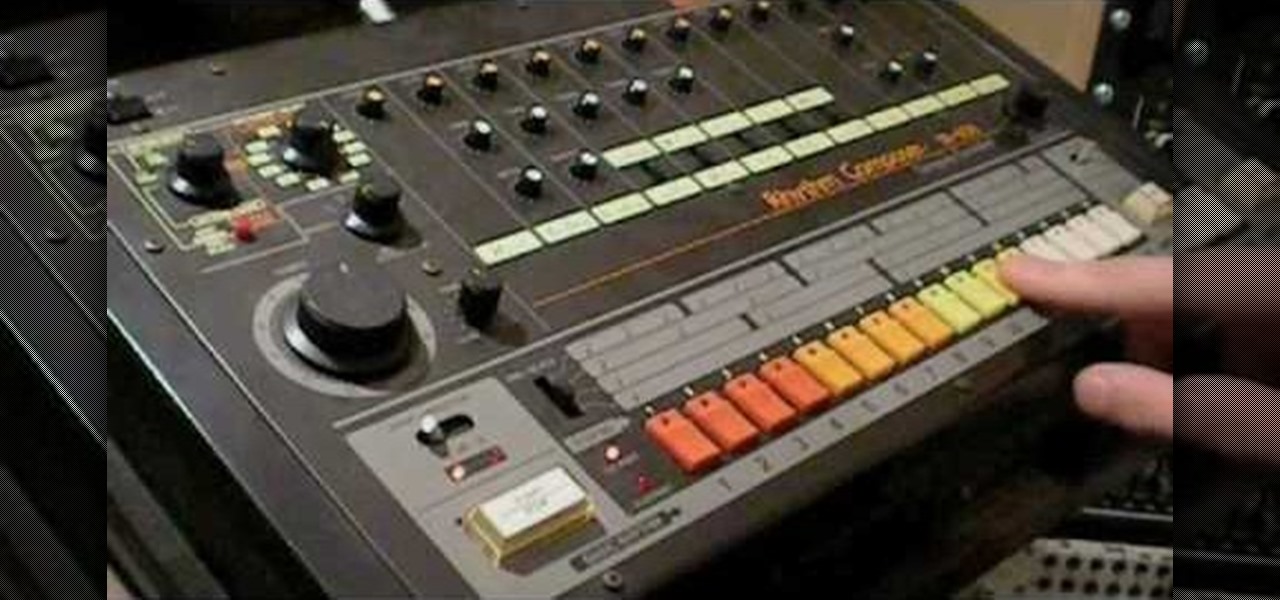
The Roland TR-808 drum machine is one of the most important modern instruments, forming the backbone of both hip-hop and electronic music percussion. If you have gotten your hands on one, you're a lucky devil, but you have a long way to go before you can unlock it's true potential. Watch this video to learn how to program an 808 all the way up to a 64-step beat!
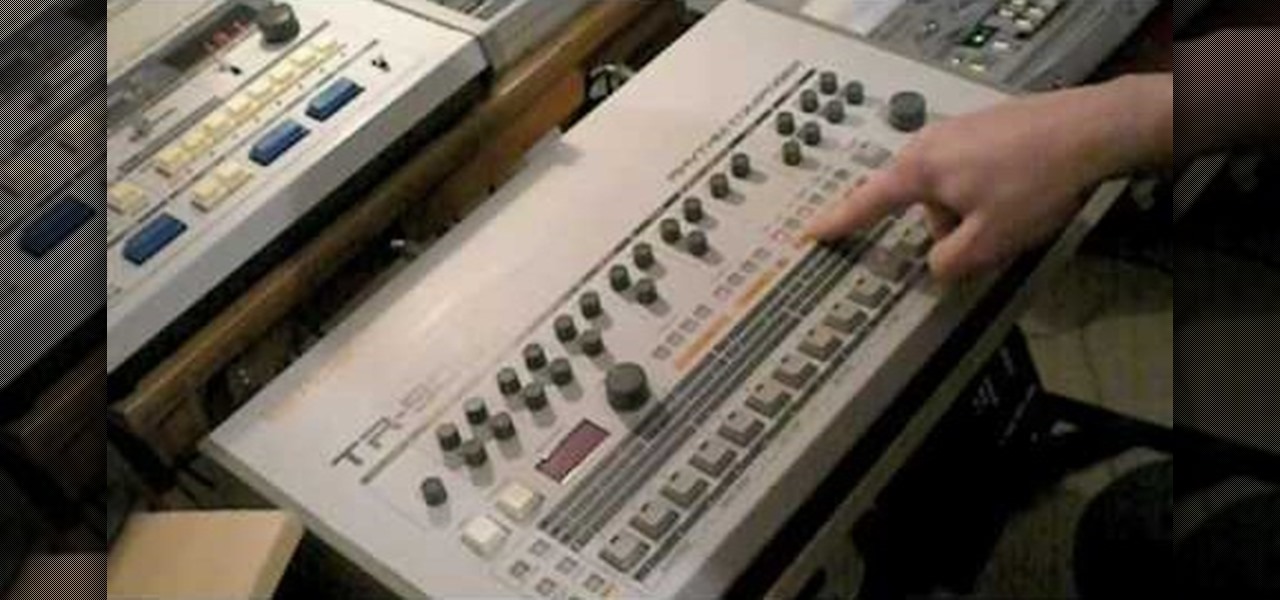
Old drum machines make some of the coolest sounds in modern music, but can be very hard to get used to for beginners. If you're lucky enough to have gotten your hands on a Roland TR-909 Rhythm Composer drum machine, watch this video to learn how to program it.
Do you yearn for the days when house music had a soul and didn't sound like something that combat robots are supposed to dance to? Check out this video. It features a veteran DJ explaining all sorts of techniques for creating old-skool house beats, mostly using amazing 1980's equipment like the Roland TR-808 and 909.
A shuffle LFO (low-frequency oscillator) is a cool effect in many synths that gives bass lines a swing feel to them. In this video you'll learn how to apply a shuffle LFO to any sound that you can access on your computer using NI Massive, a quasi-analog PC synth.
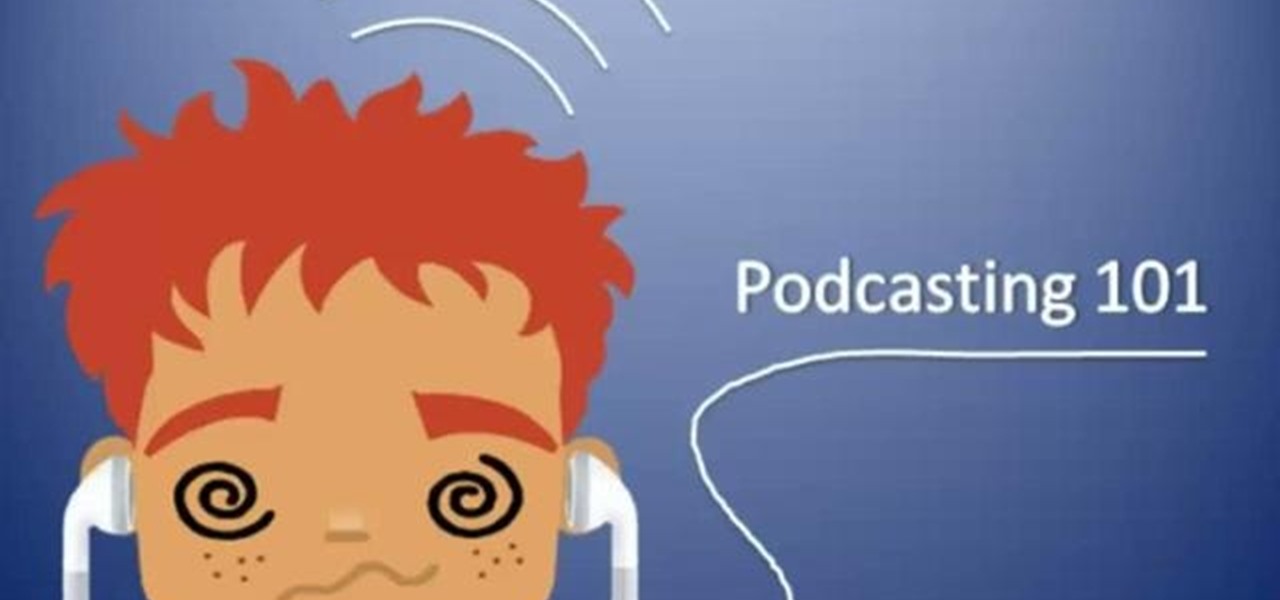
Podcasting is a great way of doing your own form of radio broadcasting, among other forms of other recorded media from the comfort of your own home! But, you don't need to have an iPod to do it or listen to it (a common myth). In this video you will learn what a podcast is, how to create one, publish it and then get subscribers!
The Moog synthesizer is the most intimidating instrument ever made from a playing standpoint. Sitting down at one, it is possible that without prior knowledge you would be unable to make any sort of sound with one. Fortunately, this video for analog synth beginners will show you how the basics of making sounds using a Moog. Many of these techniques work on other old analog synths as well.
Moog synthesizers can create a limitless variety of analog synth sounds, but making them make the cool, thick, full sounds you want to use in your music can be daunting. This video offers a variety of great tips for using multiple oscillators to create the types of sounds you want on your Moog. You lucky devil.
The Moog is the original and arguably still the king of the analog synthesizers. It looks like an old phone switchboard, and can create a dizzying variety of unique, warm sounds. This video will show you some advanced features of the Moog, including how to use the sequencer to add filters to your tones.
If you're interested in writing pop songs these days, you pretty much have to know how to create a sick beat on your computer. What better way to practice than replicating the beat of a popular song and learning it's tricks? This video will teach you how to make the beat to the Nicki Minaj hit single "Your Love" using Sony ACID. Watch and learn!
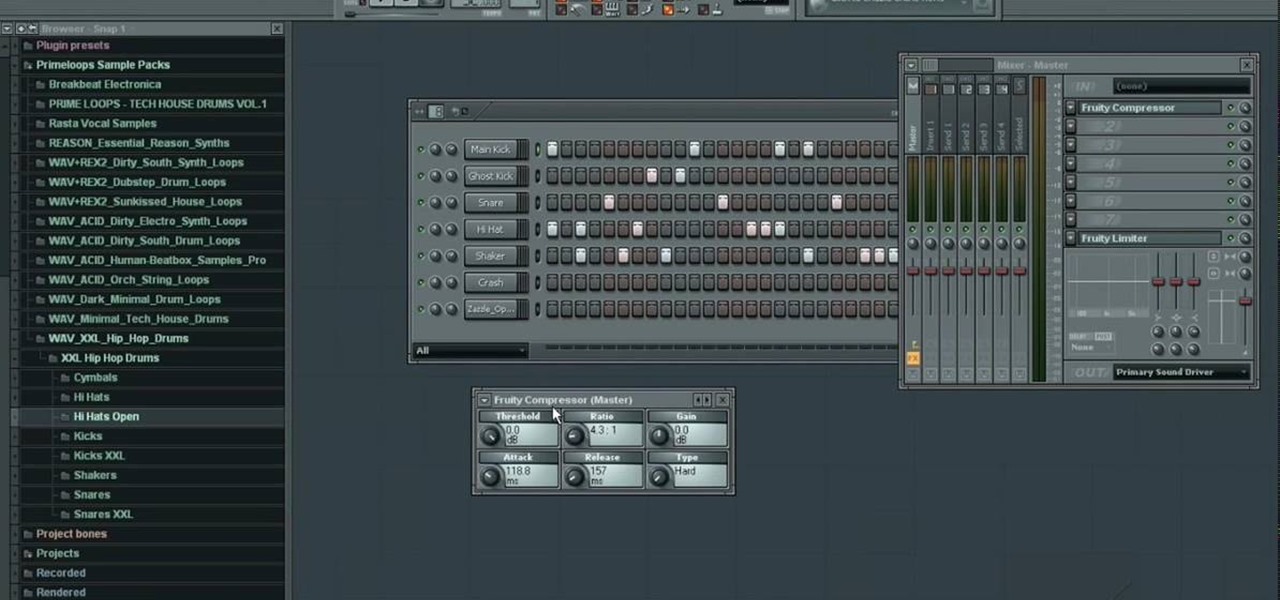
In this video we learn how to make a hip hop beat in FL Studio. First, load up your drum sounds from the browser to the interface. After this, change the hits on the drums to make the beat sound different. Edit how high the volume is on the snare drum and then change the ghost kick so it's not too loud either. Once you have this figured out, add in the high hat and the shaker patterns. Once you have these added in and you like the volumes that they are at, you will have your very own hip hop ...
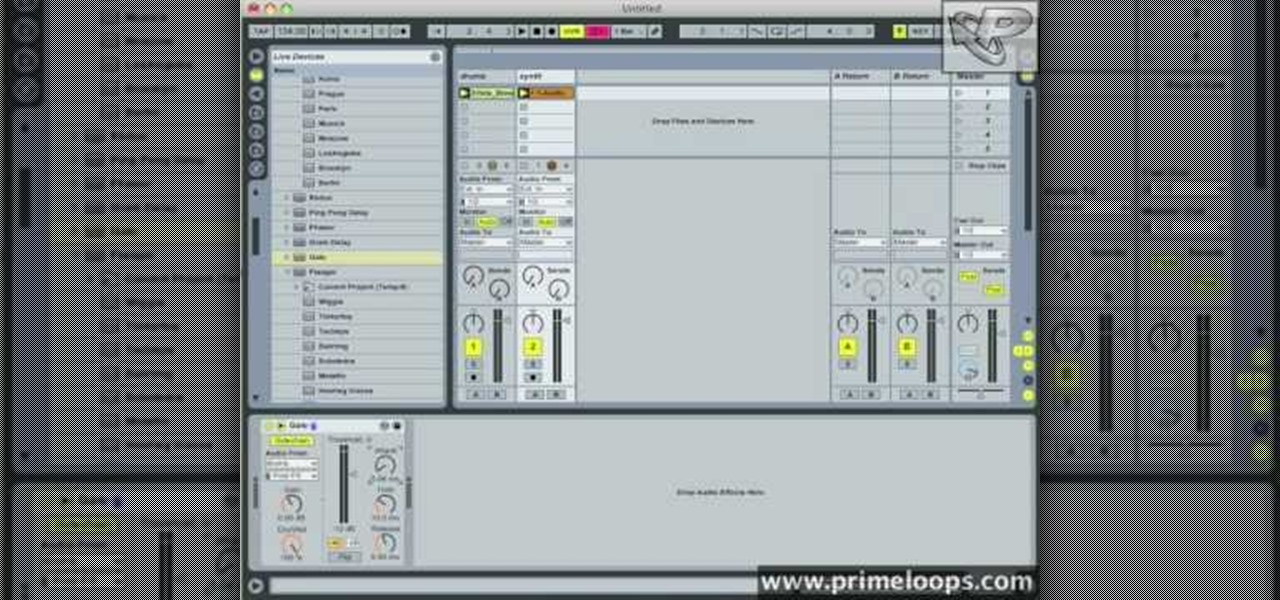
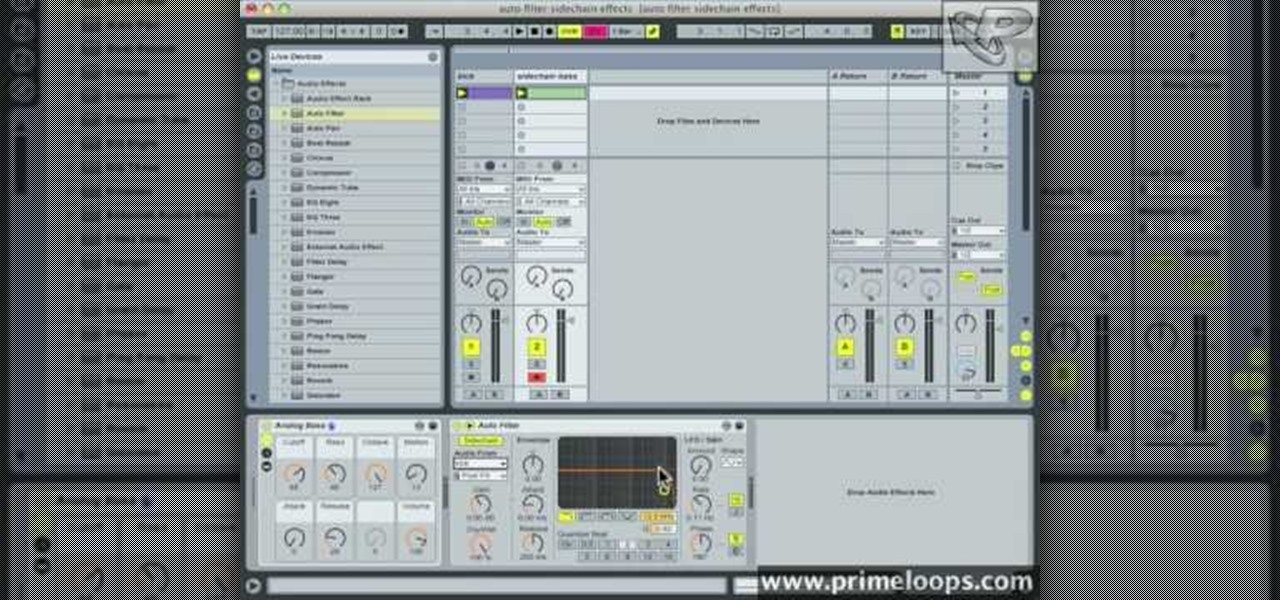
In this video, we learn how to use a sidechain gate on synths & drums in Ableton. First, drag a gate device onto your synth track. This will turn down the volume of the synthesizer device very quickly. Once you do this, you will have a sidechain view, turn it on by clicking the green button. Then, bring the attack down to 0 ms and bring your hold down to 3.9 ms. When this plays, you will hear an electronica type of beat. This is a simple way to make your synth lines more exciting. Save this w...
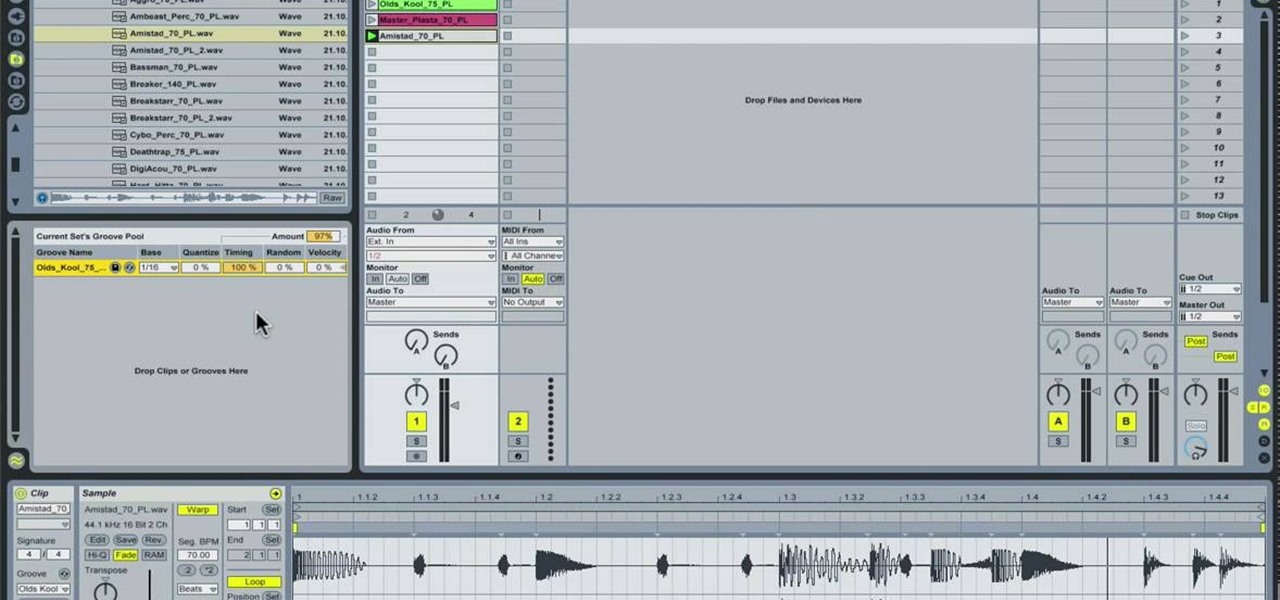
In this tutorial, we learn how to use the groove function in Ableton Live 8. A group settings consists on points along the timeline where hits sit. If you have something with no groove applied, it will sound robotic. By adding a groove, you will shuffle around the midi from the hard quantized parts. This will add more human element to the audio. There is a button on the left with two lines that show the library with options you can use. You can also apply this to other clips, scroll through t...
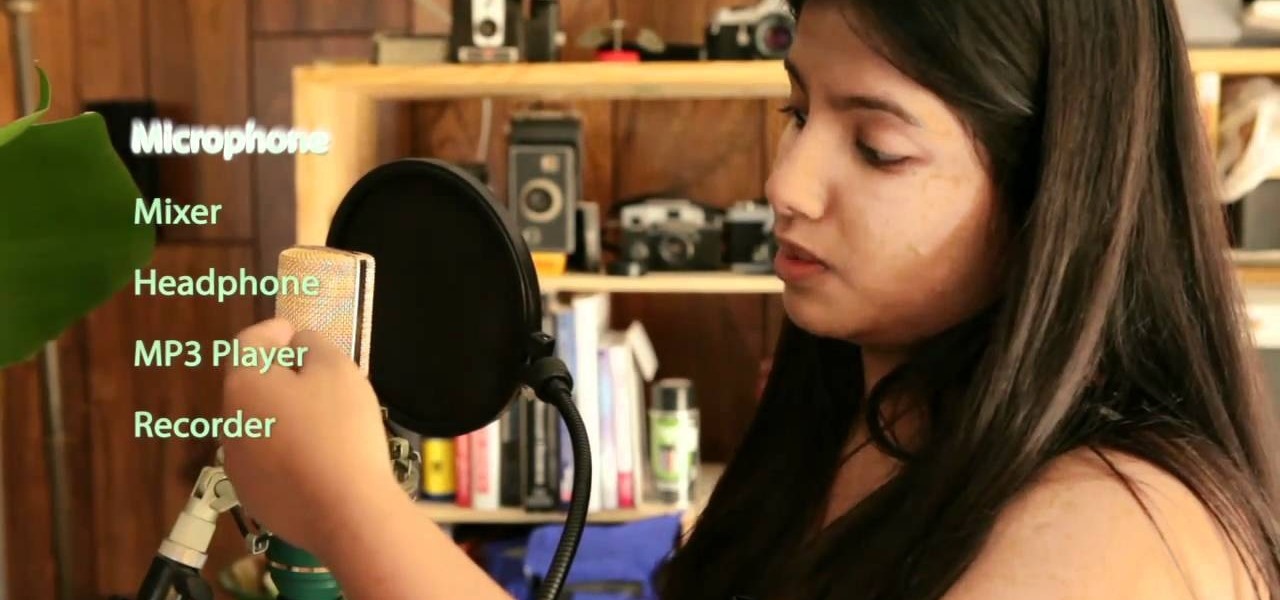
If you're a musician, but can't cover the cost of an expensive recording studio to get your song onto a playable media, then this video is what you need. It will show you how to make your own high-quality home music recording studio on a shoestring budget! If you're trying to get the attention of big music record labels, you need some hgih-quality sounds, but you don't need the high-quality costs! The setup is pretty simple— a microphone, MP3 player, sound mixer, headphones and a good-quality...
In Ableton, you can set follow actions to tell clips to do something on a timed basis. The time can be immediate or random, but it is automated. This is more efficient than doing the follow actions manually. Go to clip view, type "L". This launches the settings which gives the space of time in which the follow action happens. You can set more than one follow action. You can determine when and how often the action will take place. You can determine when the clips occur automatically. The clips...
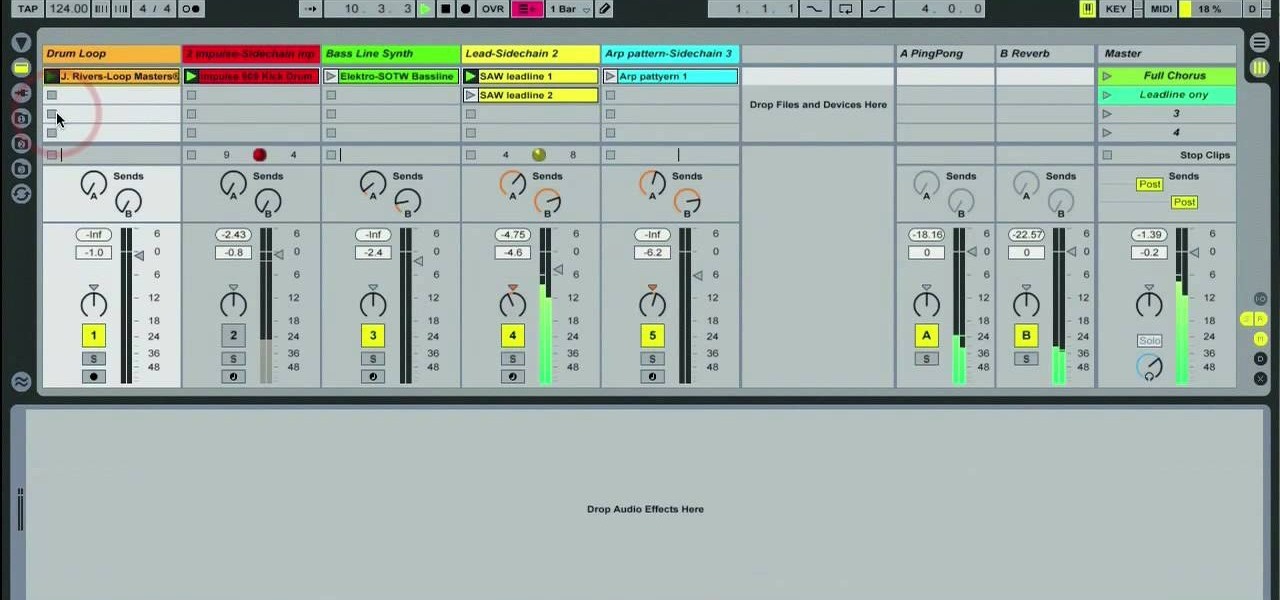
In this video, we learn how to use sidechain compression in Ableton Live 8. First, set up your tracks on the software. Open up the compressor and select the sidechain so you can decide how the impulse will sound on the different tracks. From here, change the filter type and anything else you need to change. After this, go and mute your kick drum from the track so you can better hear with the sidechain that you have activated. Continue to play your tracks and play around with how they sound, t...
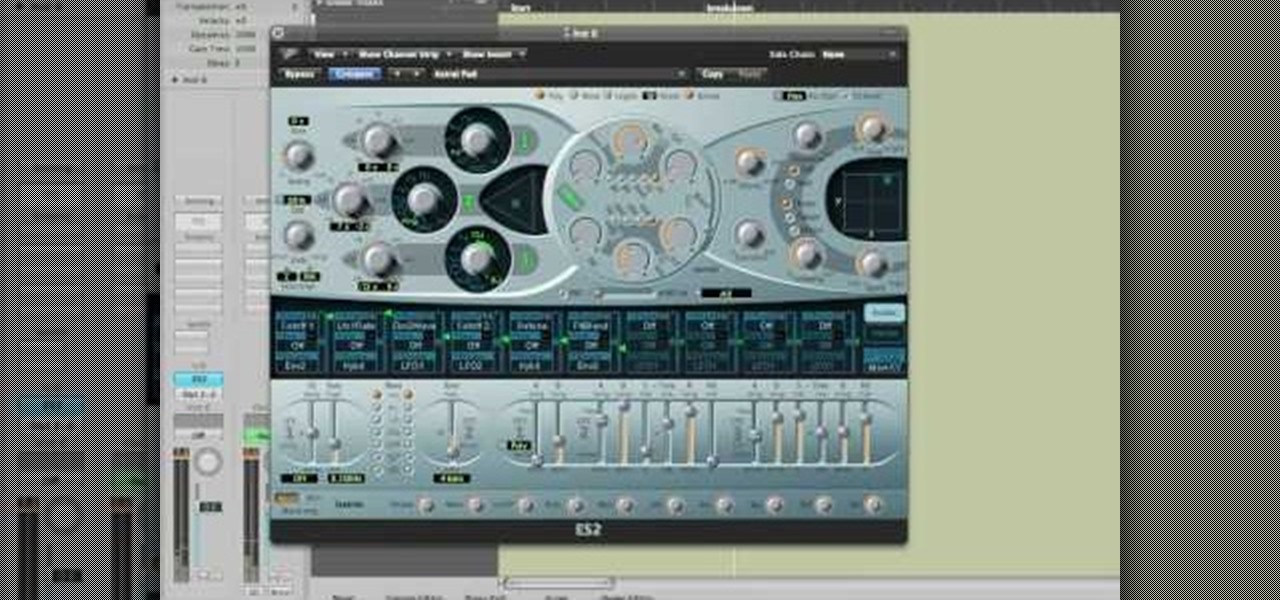
In this video, we learn how to use Logic Pro: Changing presets in Logic instruments. First, insert the ES2 and add in a preset that you like. You can also use key strokes to step through presets instead of using the mouse to click through all of them. By doing this, you will save time while you are going through presets to audition a bunch of presets to find the one you want. Use the drop down menu within the instrument to find the different presets and then choose one you would like to inser...
In this video, we learn how to record audio in Ableton. When you are ready to record audio, you will need to first make sure everything is set up correctly. Check the audio input and output so you can choose the sources and configure them so they are correct. You will want to choose the level of input you have and find where the record and on buttons are. There will be a signal of the input when you are recording so you can see what the level of noise is while you are recording. As you monito...
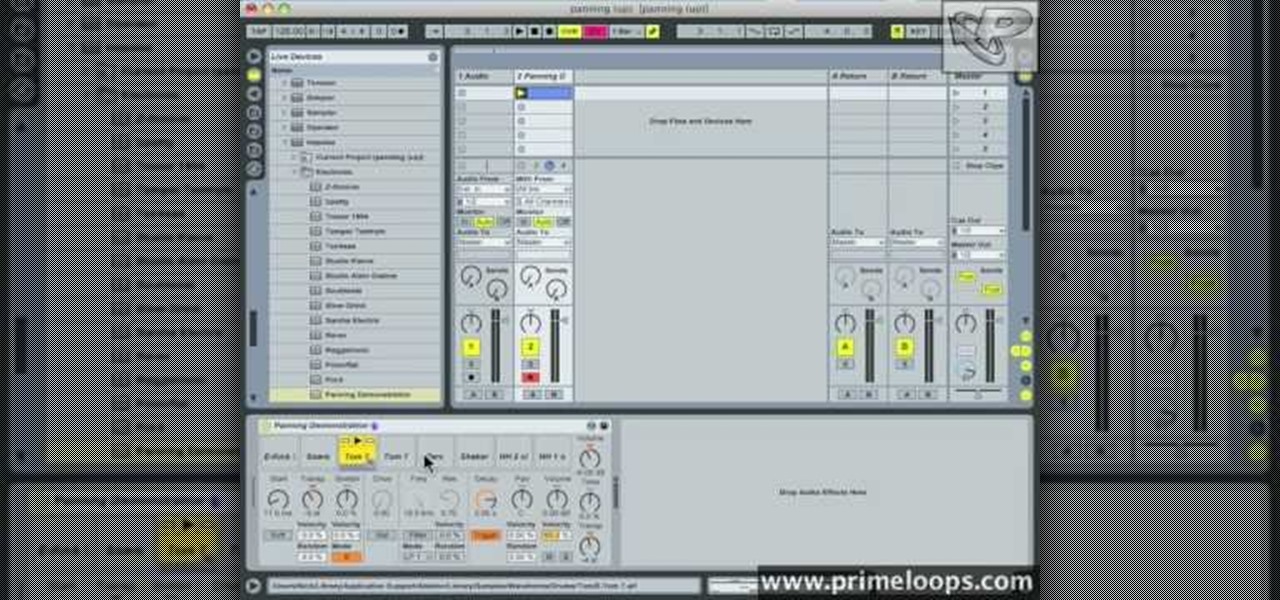
In this video, we learn how to pan your drums in Ableton. First, load an impulse and lay out your drum pattern. Play it back to see how it sounds. Then, pay attention to panning the individual elements of your drum track. When you click on the bottom, you will be able to see where the panning is. Pan in a way so the sounds on the track play off of each other. They should be panned opposite of each other so when you play it back you will be able to hear how the track plays much more smoothly. ...
There are courses available on the internet to instruct you on how to use Pro Tools to produce music. There are graded assignments in a workshop environment. You will be able to get feedback on your work from your peer group. The students in classes are at various levels. Some are professionals and some are amateurs.
This short video tutorial will outline the process of making acoustic wall panels using a simple wooden frame and rockwool insulation. These DIY broadband acoustic panels, or bass traps for treating music studio rooms, performance rooms or home theater rooms, will save you tons of money.
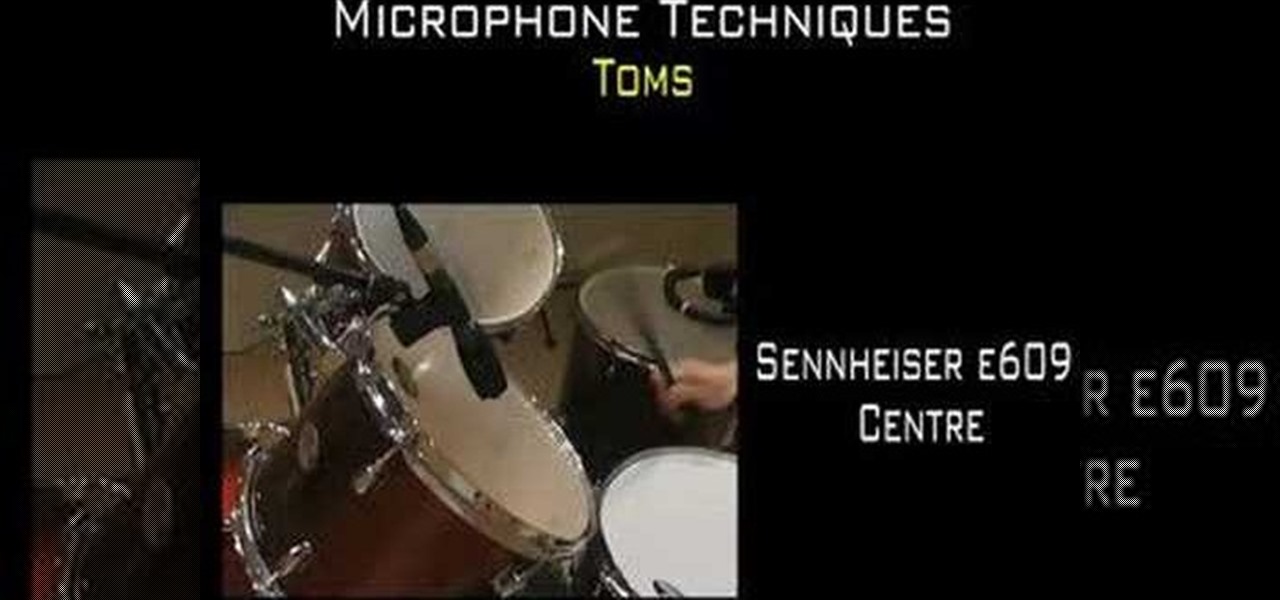
Capturing a live drum kit is arguably the most challenging aspect of recording a band. Fortunately, the Internet is awash in video tutorials like this one, which presents a detailed, easy-to-follow overview of the recording process. This series addresses microphone choice, placement, overheads snare and toms.
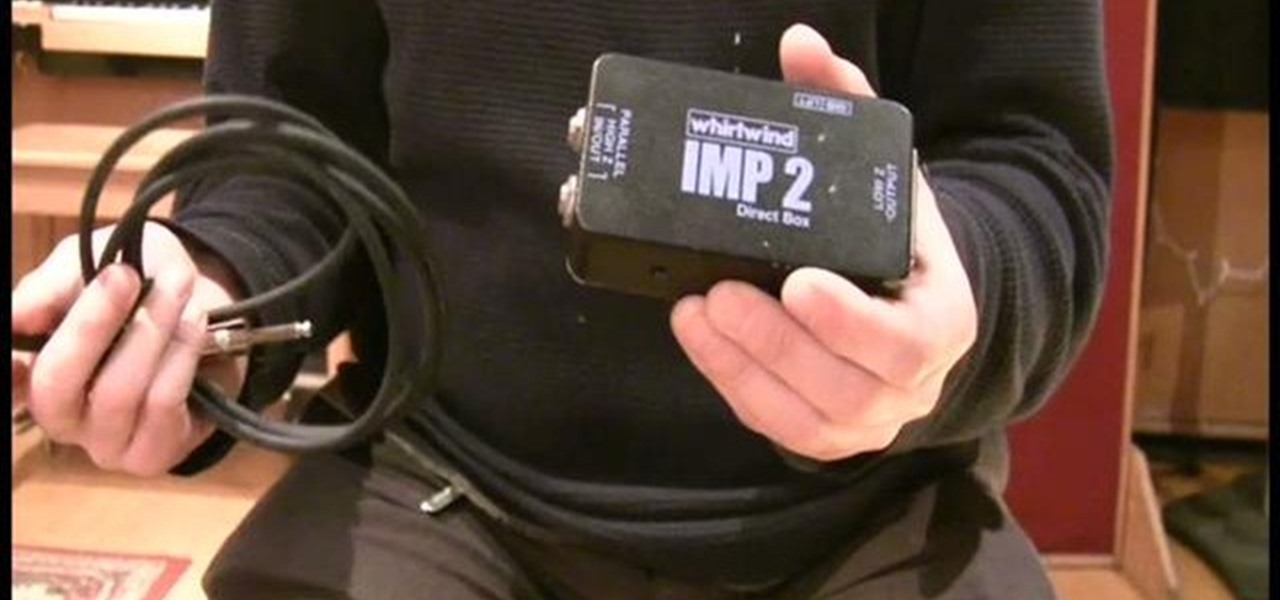
No amp? No problem. In this home recording how-to, you'll see how to use a DI (direct injection) box for recording an instrument like a guitar, bass or keyboard directly into a console or interface. For more information, including very detailed instructions, and to get started using DI boxes in your own recording, watch this free video tutorial.
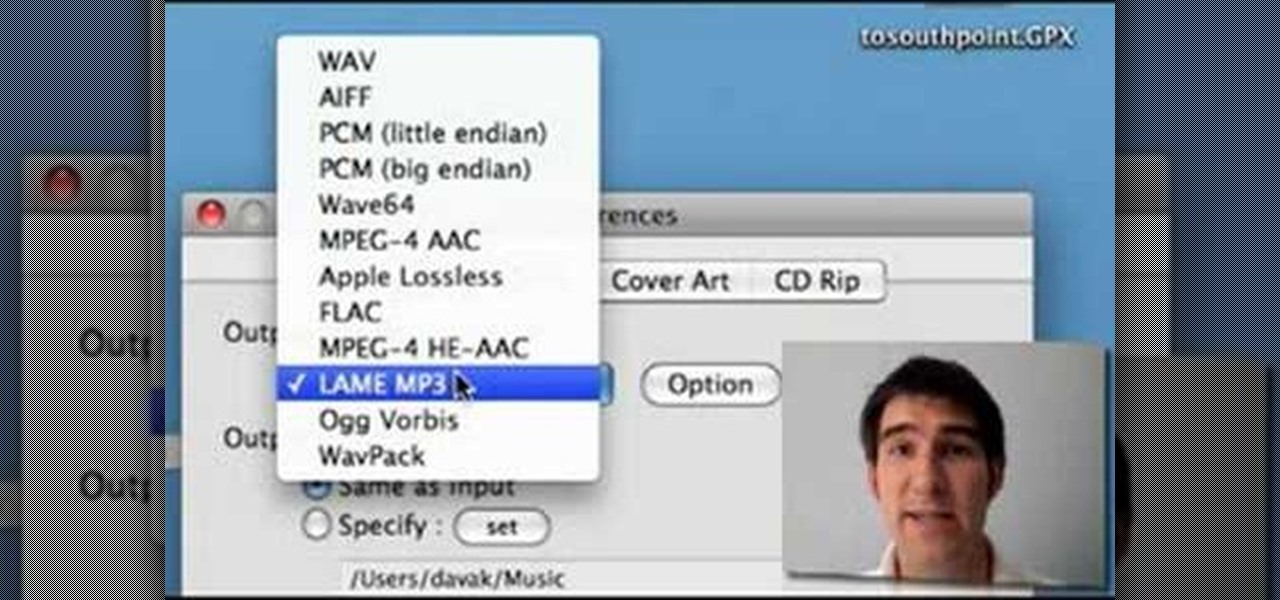
FLAC files are a great way to compress audi files. Unfortunately, iTunes does not support these files outright. But don't worry, you can make those files work on your Mac. This video will show you how make FLAC files compatible wiht iTunes.
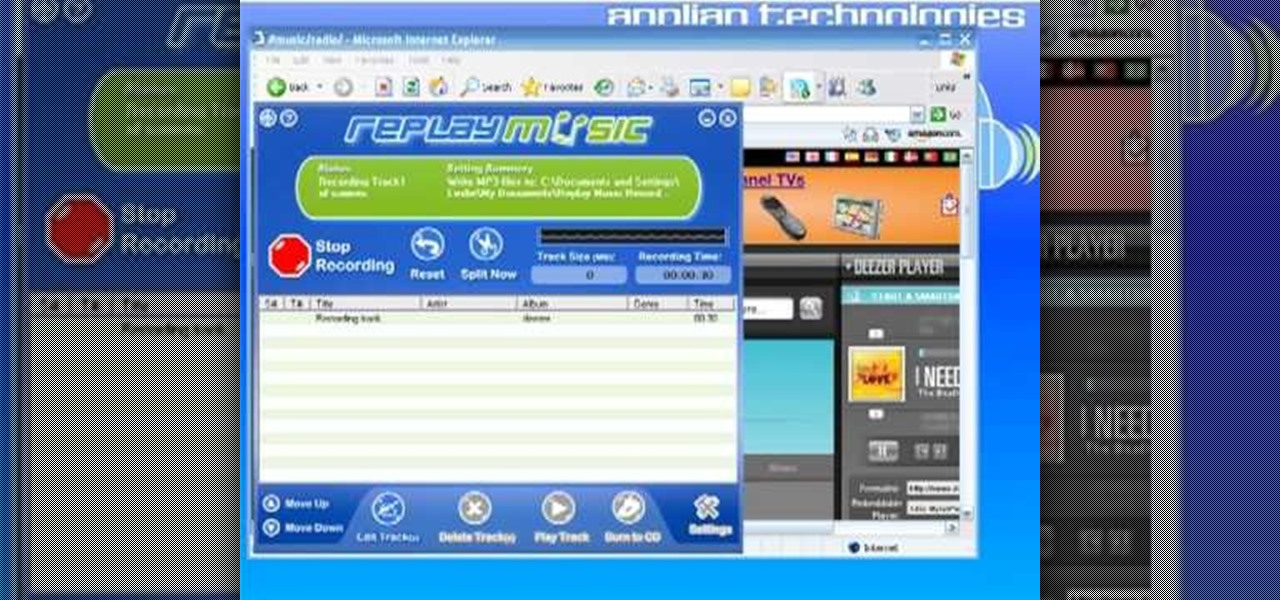
Replay Music makes it possible to record audio from the web. No longer do you have to listen to streaming audio on the web and have to go back online to revisit your favorite moments. Replay Music enables you to download any audio streaming on the web straight to your computer so you can listen to it whenever you want.
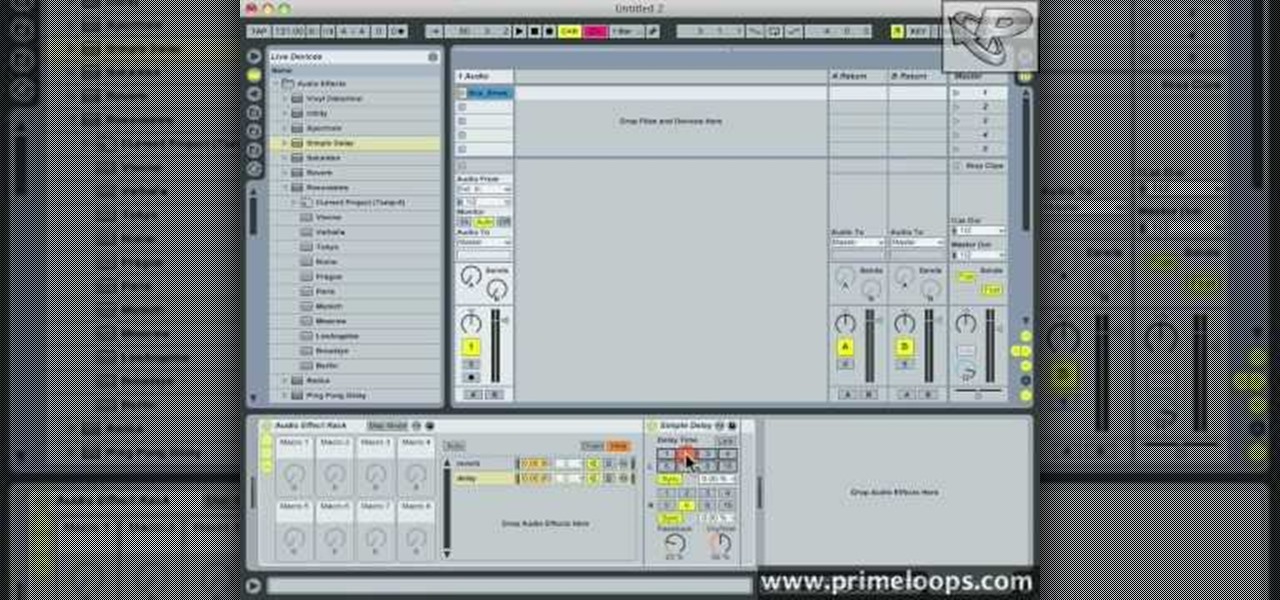
This video is a tutorial for a music producing software program called Ableton Live 8. In this tutorial he shows you how to apply effects to effects to audio using the audio effect rack function. The way this function works is by being dragged into the bottom of the program and being applied as a place to hold various effects. Using the effect rack you can modulate and manipulate the sound waves in the effect. This is a very convenient tool to have in Ableton because it allows you to have mor...
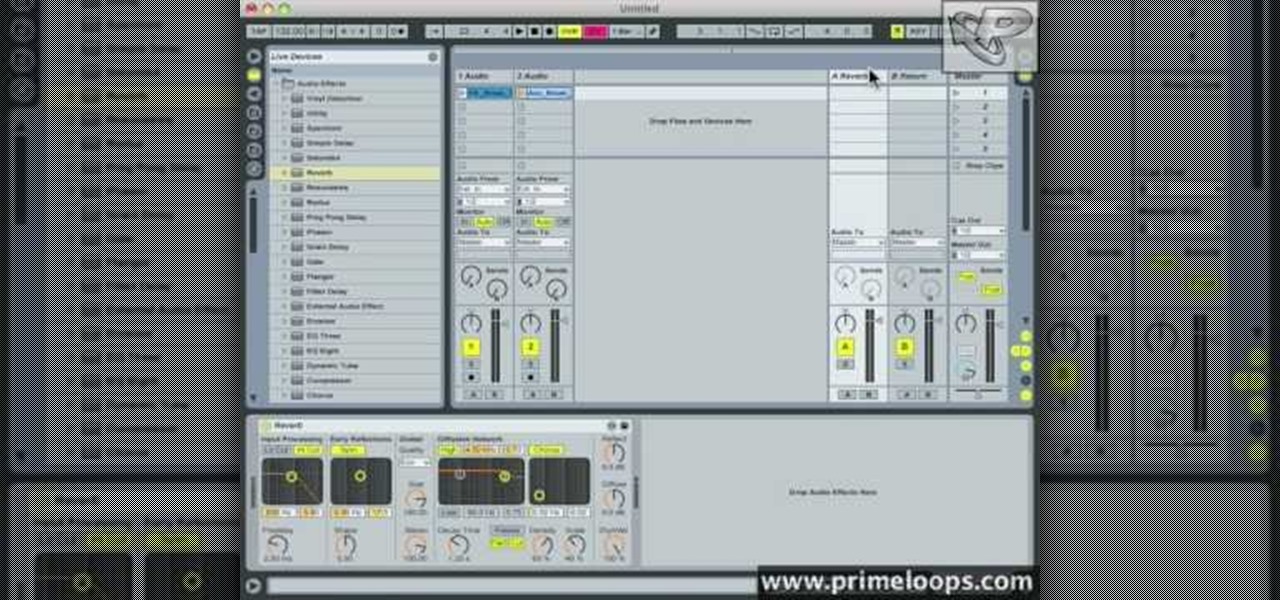
Nick from Primeloops shows how to most effectively use the effect sends in Ableton Live. He explains how most people use the effect send, and why that may not be the best way to go. He covers the basics of dry audio and wet audio and how to manage them for optimum effect. If you watch this short video, you can learn the basics of sends and returns and find out how to apply effect settings to multiple tracks which is of great benefit if you want to save time and cpu power.
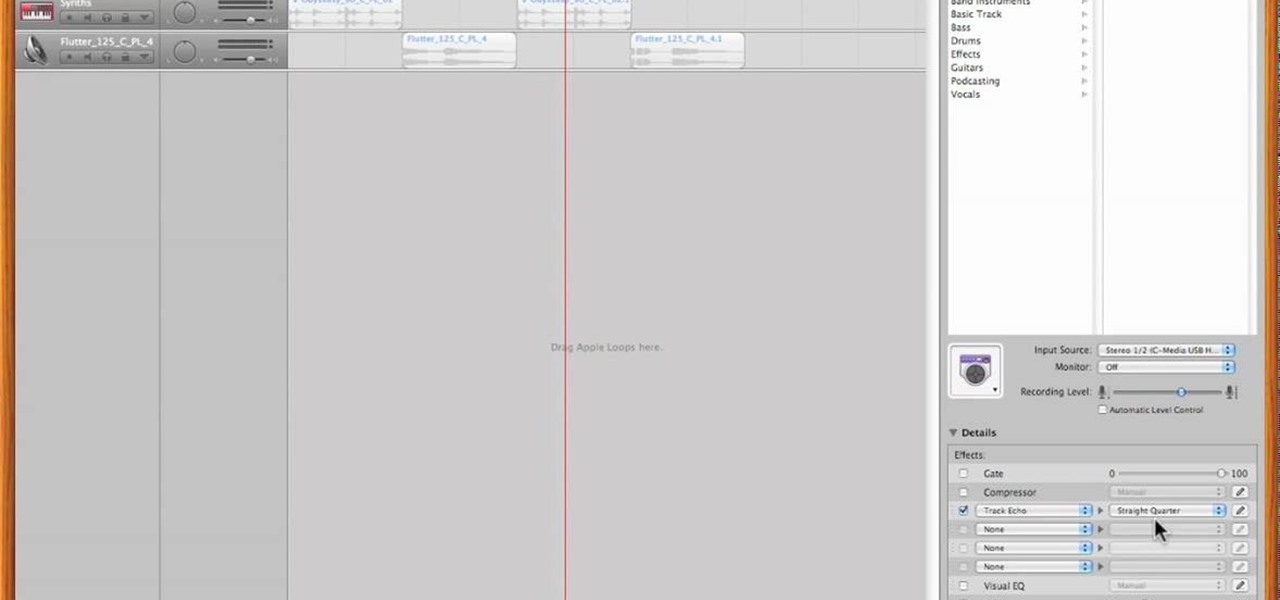
PrimeLoops teaches you how to use loops on Garageband. There are 2 different types of loops - regular and Apple. The last come in .aiff proprietary file format and the information contained has more information than a regular .wav file. To access them click on the small eye symbol in the lower part of the program window. You can switch to music, podcast and all loops. You also have a Favorites tab and you will see the loops that you mark as a favorite. You can also search for all loops in the...
This video shows how to do audio side chain compression to improve your production audio mix. Side chain compression is an easy way to balance the base and the drums. Using a compressor, you can cause your base to drop in volume when the drums are hitting so that one is not over-powering the other. This video walks you through step by step instructions for configuring your compressor to balance based on threshold level, the attack time, and release time. This is an excellent source of audio p...
In this video tutorial, viewers learn how to create atmospherics using the Arpeggiator in Ableton Live. In this tutorial viewers are shown how to create useful arpeggiated effects using the Arpeggiator in Ableton Live. Ableton Live is a loop-based software music sequencer and DAW. The Atmospheric effect gives a deep, low fade out that can be used for breakdowns or a harmonic background in music tracks. This video will benefit those viewers who produce music and would like to learn new music e...
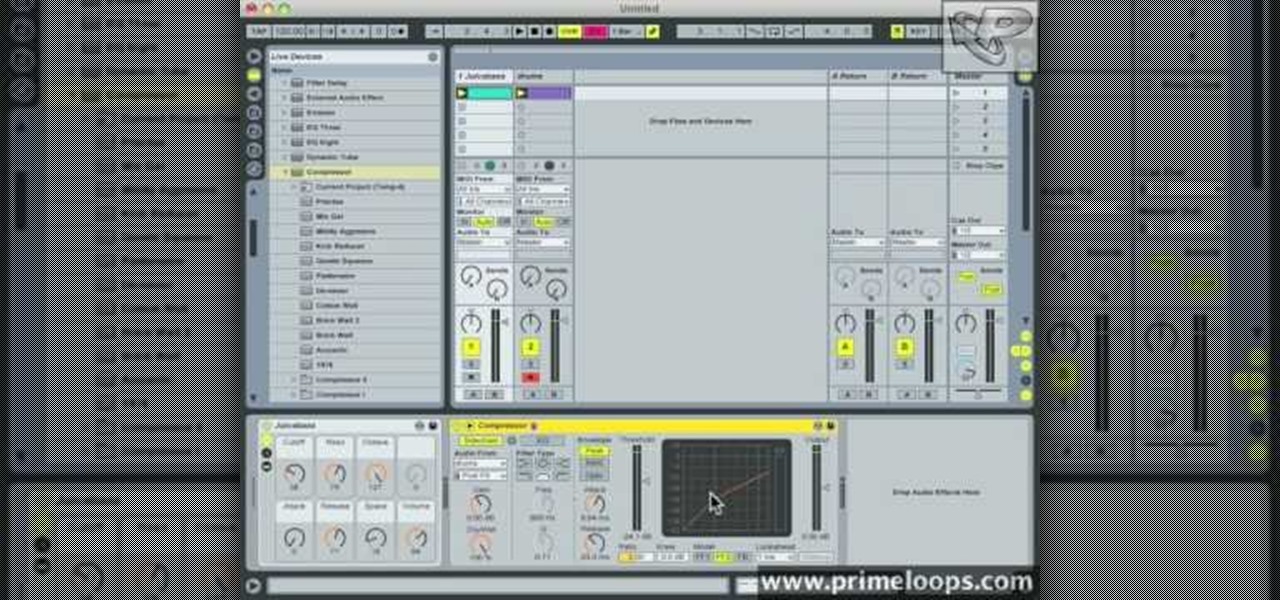
How to Use EQ and Compression With Your Beats in FL Studio Nick from Prime Loops shows us how to use EQ and compression effects to add flair to a beat. Dovetailing off a previous tutorial that showed how to create a beat, this step-by-step instructional video shows what buttons and effects to use, what they do, and in what order they can be used. According to Nick, whether one chooses to compress first or use EQ first, is a matter of personal taste. To add an additional spark to a hip hop bea...
Open your program to a new live set. By using three keys (in Ableton Live), Command (Ctrl), Shift and t, you can create a short cut. Create two new midi tracks making one for (side chain) bass and one for (side chain) kick. To rename a track choose the two keys Command (Ctrl) and r. Next, you can load up the presets, located on the side bar list, one a bass, and, then a basic kick drum by opening up impulse, electronics and Tremor 1994. Now create a couple of patterns. To do this go an empty ...
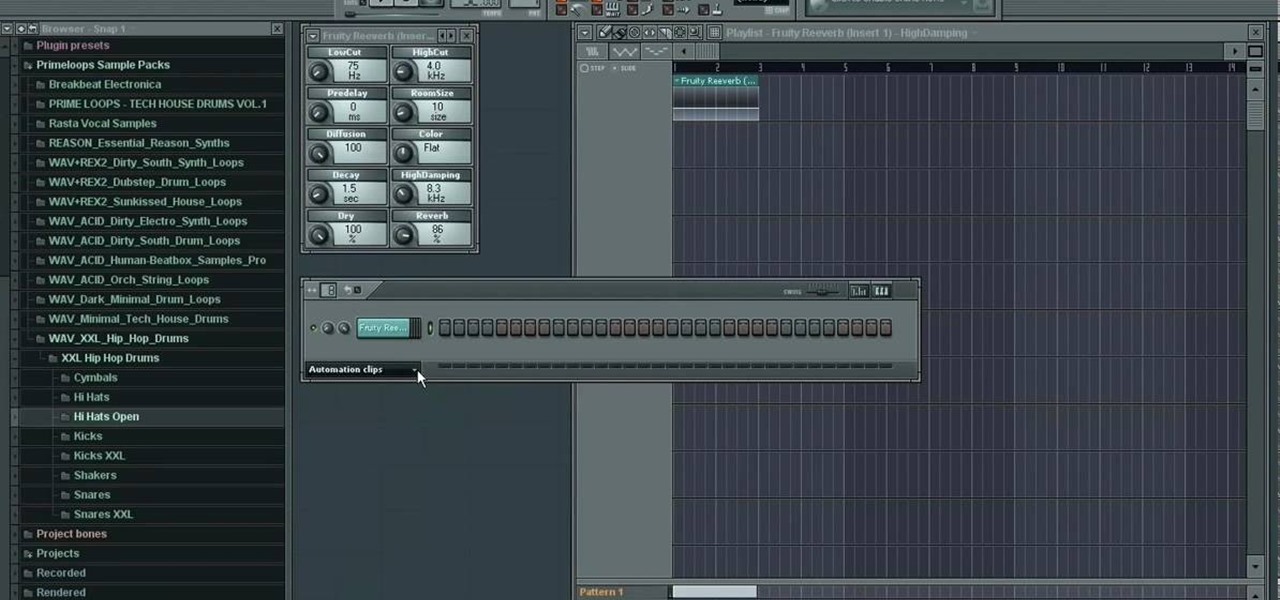
Prime Loops provides exclusive techniques from industry professionals to help enhance your music production, mastering skills & gain exposure. Their tips and tricks through tutorial videos are quick and easy to learn. In this video, they show the user how to add effects automation on beat. This video carries on from a series of previous videos. It goes through basic automation, adding it to the drum beat already made in the first FL Studio Tutorial. This tutorial gives the user the lowdown on...
This video is an informative packed tutorial in the new Ableton 8 sound mixing software and shows a new work flow improvement upgrade from earlier versions of the program. It shows you how to use the new sequencing feature within the "piano view" instead of the traditional xox sequencing from earlier Ableton programs. This tutorial also shows you how to add notes easily in the sequencer in the "piano view" with a few clicks of the mouse. It also shows you shortcuts within the sequencing feature.
Learn to use Garage band like a pro in less than ten minutes with this step by step guide to the program. Create the exact sound effects and beats you've been looking for, right from the comfort of your own home without any expensive classes or equipment. Add echoes, stop sounds for a more dramatic effect or bring out hidden sounds to the forefront. Anyone can create unique music with this tutorial guide, so get ready to get up and dance to your own dance beats!