Kameron Kay teaches us how to make a floating flower crystal toe ring in this tutorial. You will need: stretch cord, large crimp bead, flat nosed pliers, flat backed crystal flower, glue, and small scissors to make this. First, cut out your chord to the exact size that you need. After this, use glue to attack the ring into the middle of the string. Place a crimp bead on the bottom to help the bead stay in place, then glue these together as well. Next, tie this together and attach an end to th...
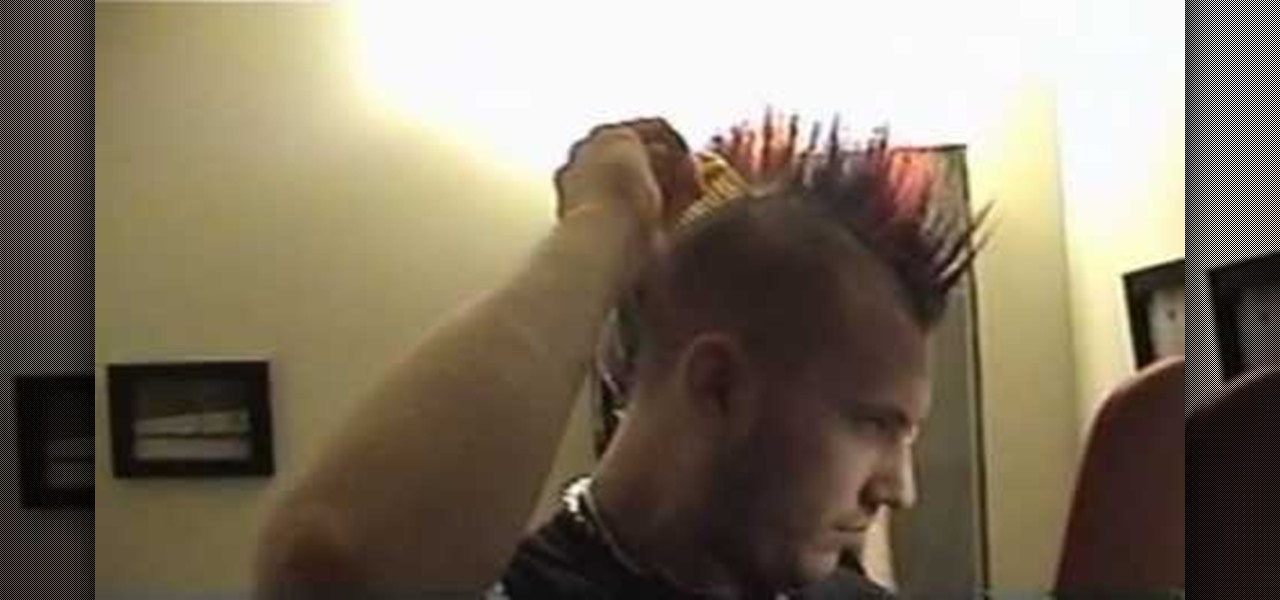
This video explains how to spike a mohawk super high using bar soap. The things you will need in order to do this are... soap, hair glue, hairspray, a hairdryer, a hand-held mirror, and a pick/comb.
Rings add a chic finishing touch to any outfit, but quality rings can be expensive and affording more than one or two is difficult for girls on a budget. If you're a big fan of wearing some bling on your fingers but don't feel like spending your entire paycheck on them, watch this video to learn how to make your own.
What a unique bow. Your gifts will be beautiful under the Christmas tree. Materials you will need are: plastic wrap, hot glue, LEDs, scissors, pliers duct tape, glue gun and glue, toothpicks and 3 volt batteries. First you take the plastic wrap and cut it about 5 times the size your bow is going to be. Take the end and push it together. Now make one side of the bow, push together, and make the other side of the bow. Keep going back and forth until the plastic wrap is at the end. The left over...
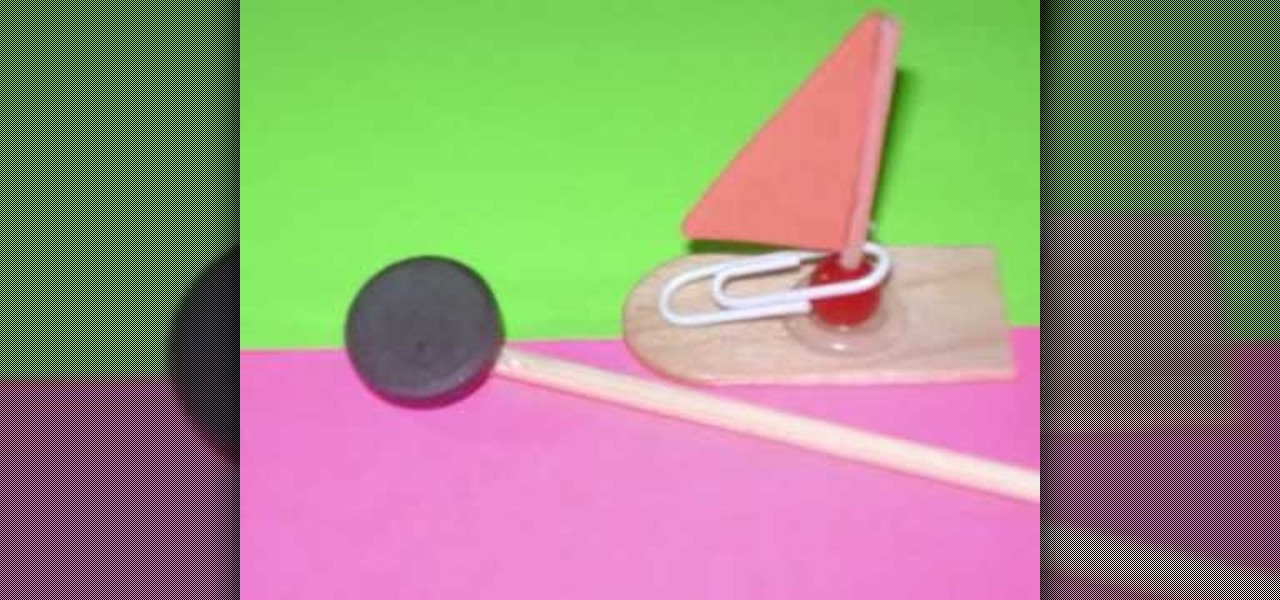
In this video, we learn how to craft a magnet boat with kids. You will need: a paper clip, a small triangle piece of foam, 1 magnet, 1 recycled stick, 1 recycled popsicle stick 1 bead, and a hot glue gun. First, attach the toothpick to the bead, then glue the triangle to the top of the toothpick. Next, cut 1/4 of the popsicle stick and attach the sail to the middle of the popsicle stick and use the paperclip the make it stay on the bow. Now, place the boat in water and attach a magnet to the ...
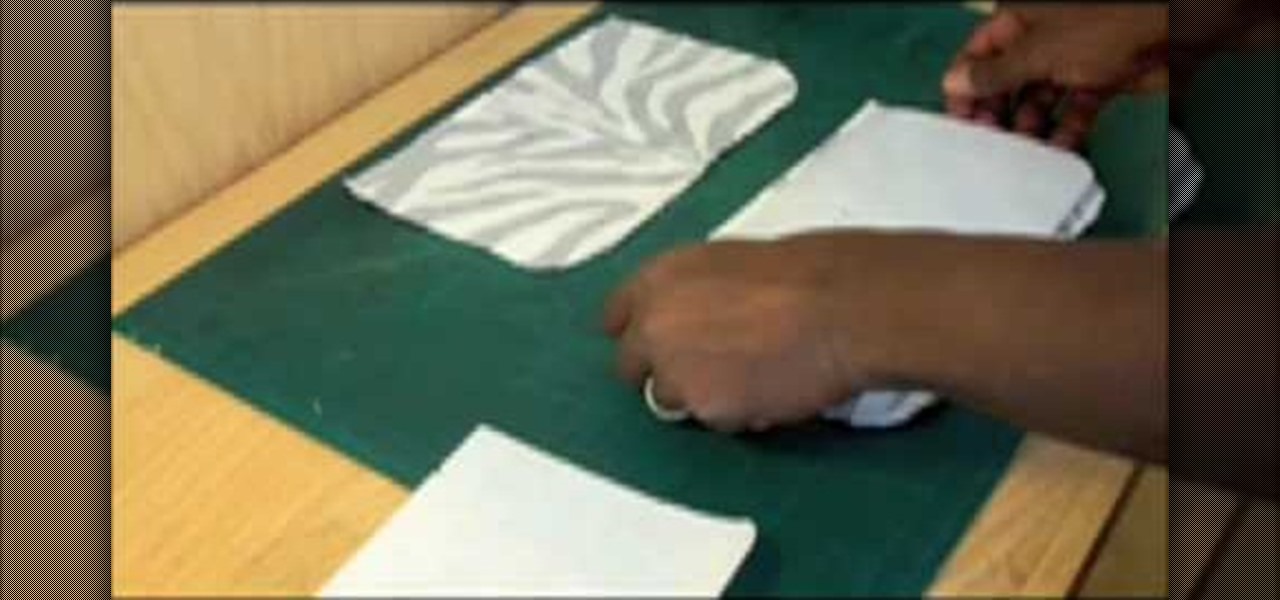
First you must take inventory of all items in order to be able to create your bag. Make sure all labels are in the correct order. Lining should be ready before attempting to begin construction. The stay should be 10in long and 4in wide. Pocket the stays and glue the stays to the outside fabric. Use the notches to line everything up. Take the magnetic snap and attach it to the front and back. Take a knife and cut holes for the magnetic snap. The magnetic snap comes with a washer. Use cardboard...

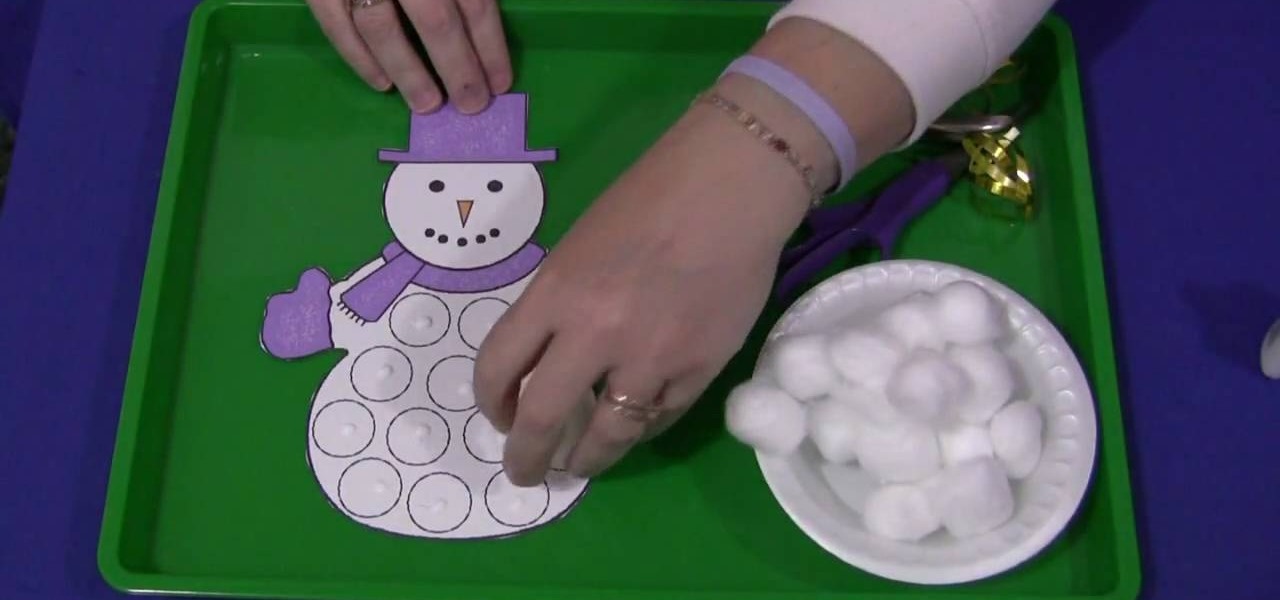
Shelley Lovett from ChildCare shows us how to make a cotton ball snowman. This is a great activity for developing fine motor skills. The snowman comes in a several variations, there is a snowman that has circles on its tummy so that children would have to try and place the cotton balls inside the circles. There is a snowman that comes in black and white so that the children could decorate the snowman's scarf, mittens and hat. Now on the plain tummy snowman, you'd just apply glue all over the ...
Is your kid's desk all cluttered? Help them stay organize by making an easy desk desk set for your child's school supplies. Watch this how to video tutorial as our host shows you how to make a pencil holder using a can, paper and some glue. Have your children help you with this fun activity.
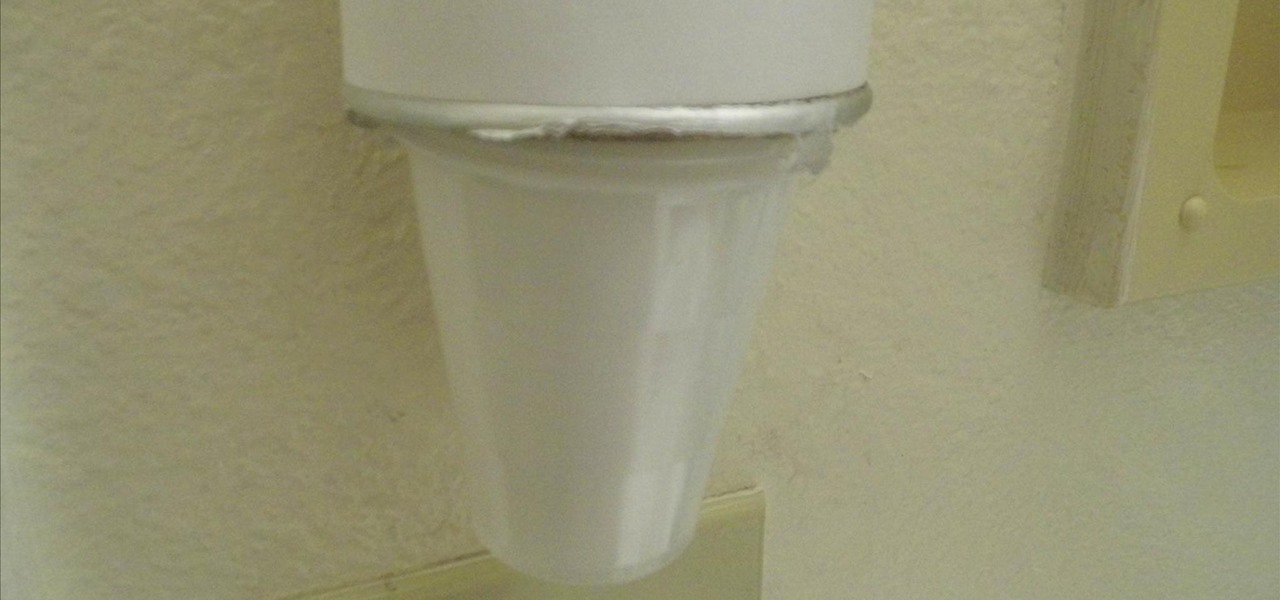
You've probably tried just about every method of hanging your holiday decorations: nails, thumbtacks, sticky hooks, and, in desperation, even tape. Each method can leave a host of complications when removed, though, from chipping paint to visible holes.
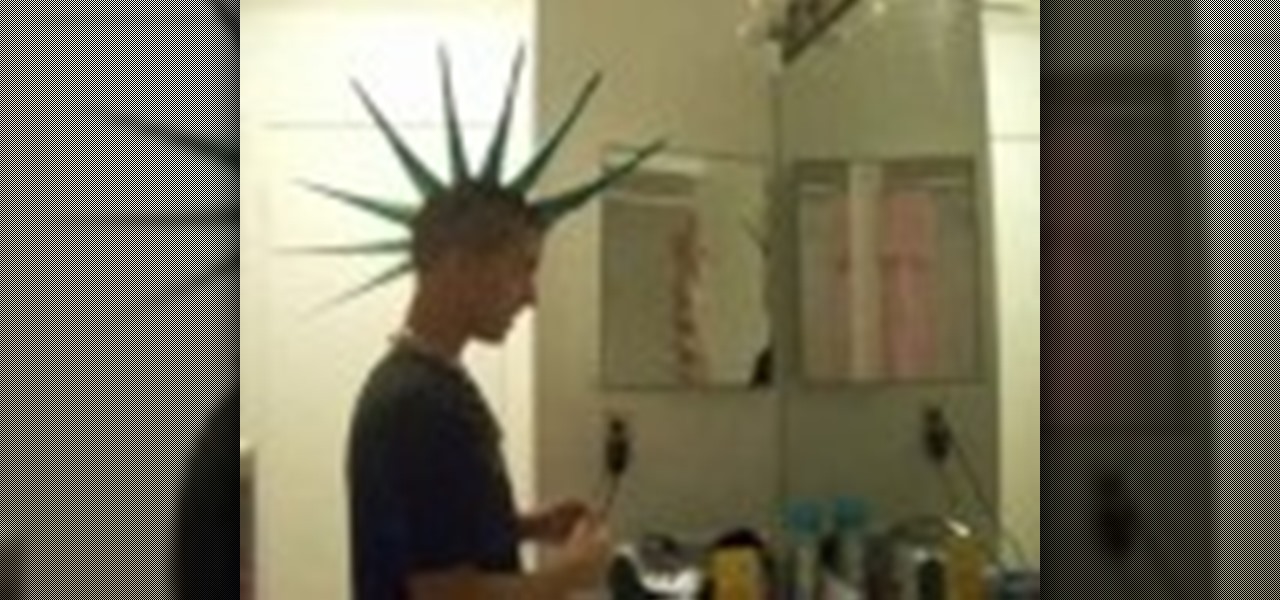
How to make a liberty spike mohawk. Gather glue, freeze spray, a blow dryer, a brush, and some rubber bands. Brush hair until it is nice and fluffy. Take rubber band and perform spikes around your entire head. After setting your hair up in the spikes use the freeze spray to spray your hair completely. Inside and outside of the spikes. To ensure proper coating run your fingers through your hair especially at the base to make sure they stay up. With blow-drying blow-dry your hair while pulling ...
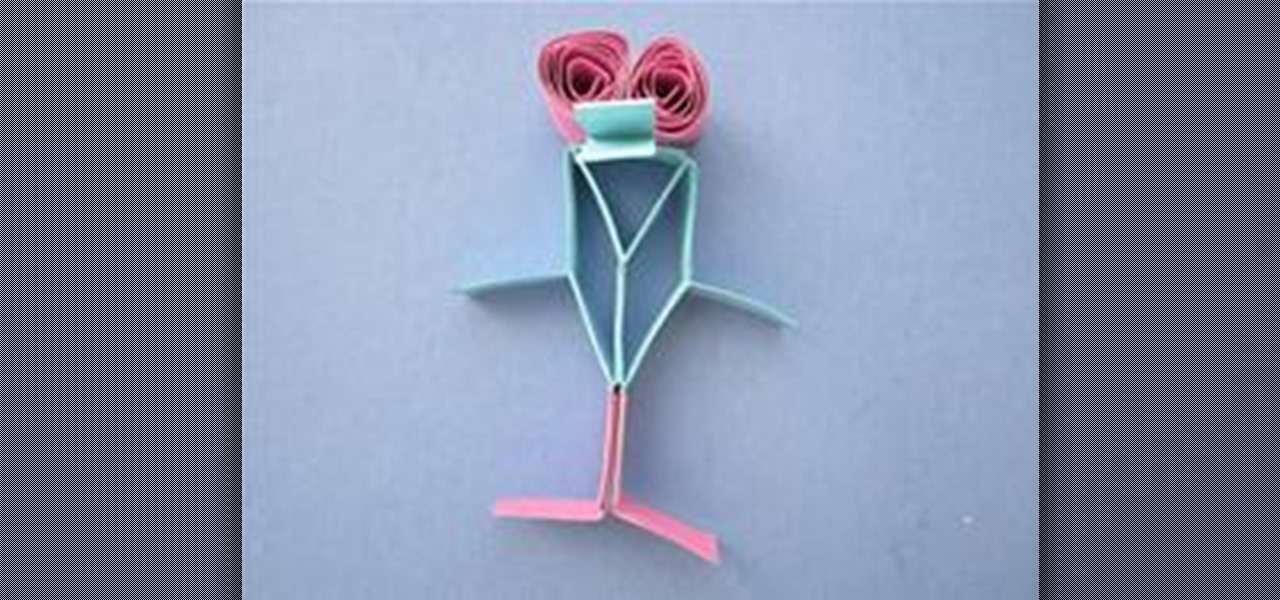
Use geometry to make an adorable and fun heel klickin' friend using McCormick vertex elements! You will need:
Cover a heart shaped or round box with designer paper
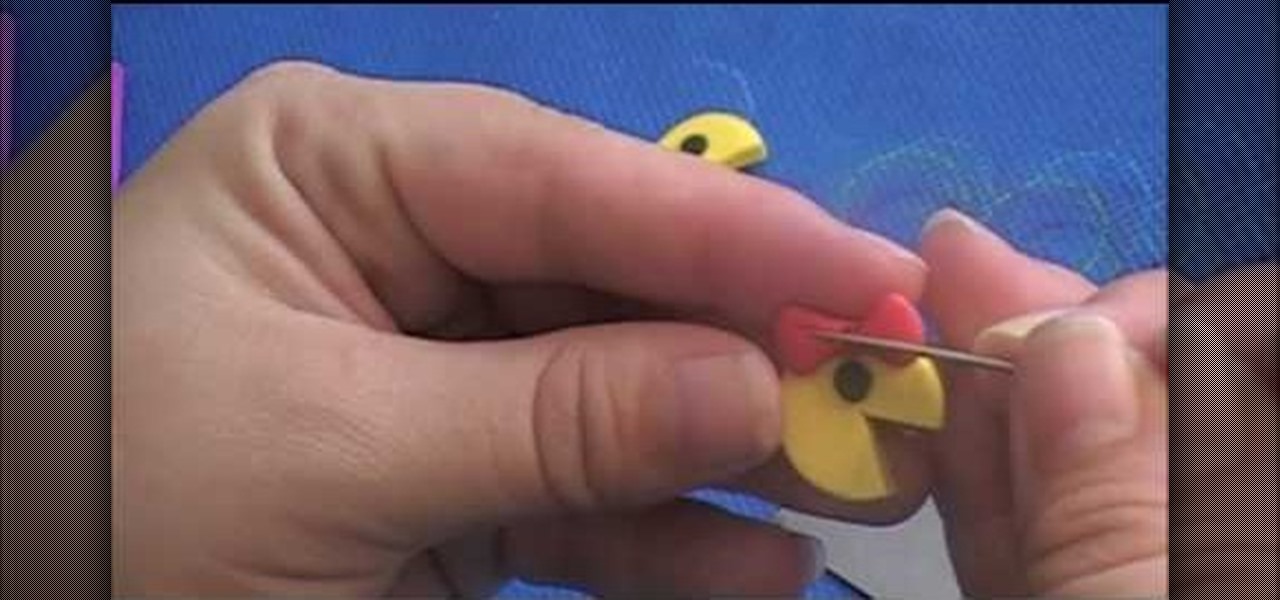
kriquit describes how to make a PacMan charm bracelet in this video. She uses various colors of polymer clay to make Mr.. and ms. PacMan and the little ghosts. The color she uses are red, blue, pink, orange, yellow and white and black for the eyes. She also says that you need some hardware tools: a poster roller, wire tools, quick drying glue, needle tool, a flexible razor blade (to cut the polymer clay), chain for the bracelet, 24 gauge wire and a lobster clasp. She makes the shapes using th...
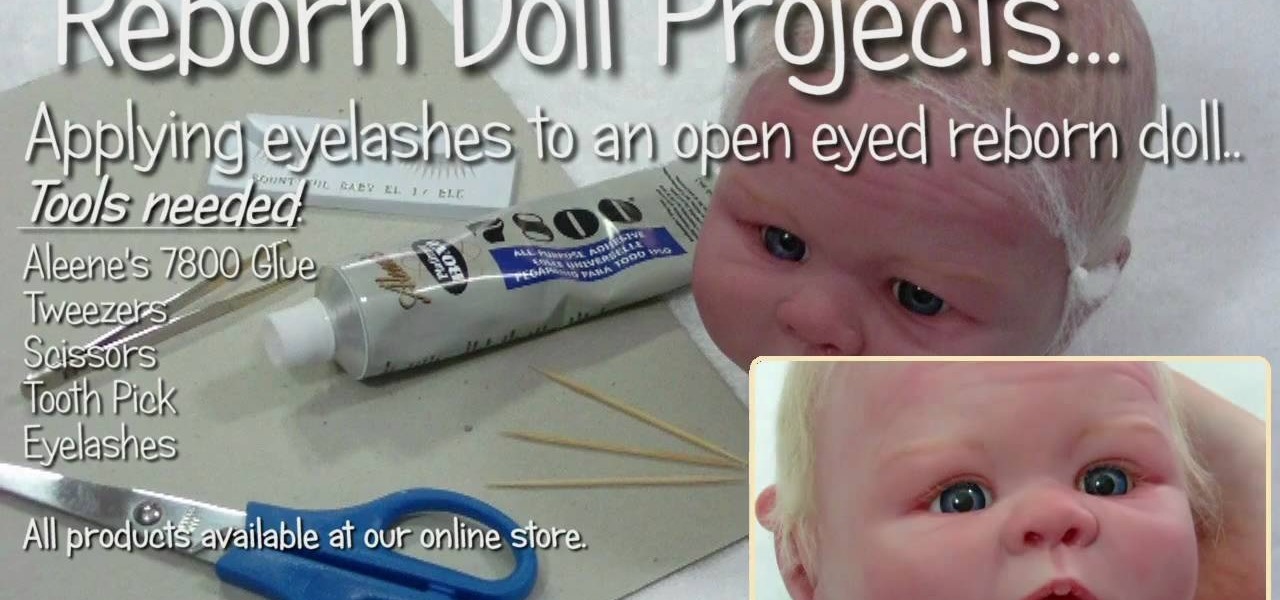
In this video, we learn how to apply eyelashes to open eyed reborn baby dolls. First, you will need to prepare the glue by placing it on a flat surface and letting sit for a couple minutes. Then, take the new eyelashes and remove the existing glue with tweezers. After you do this, dip the base of the lashes into the glue. Do this slowly and make sure to wipe off any excess glue when you're finished. Place the glue evenly around the entire lash. Now, bring the lash to the eye and insert it int...
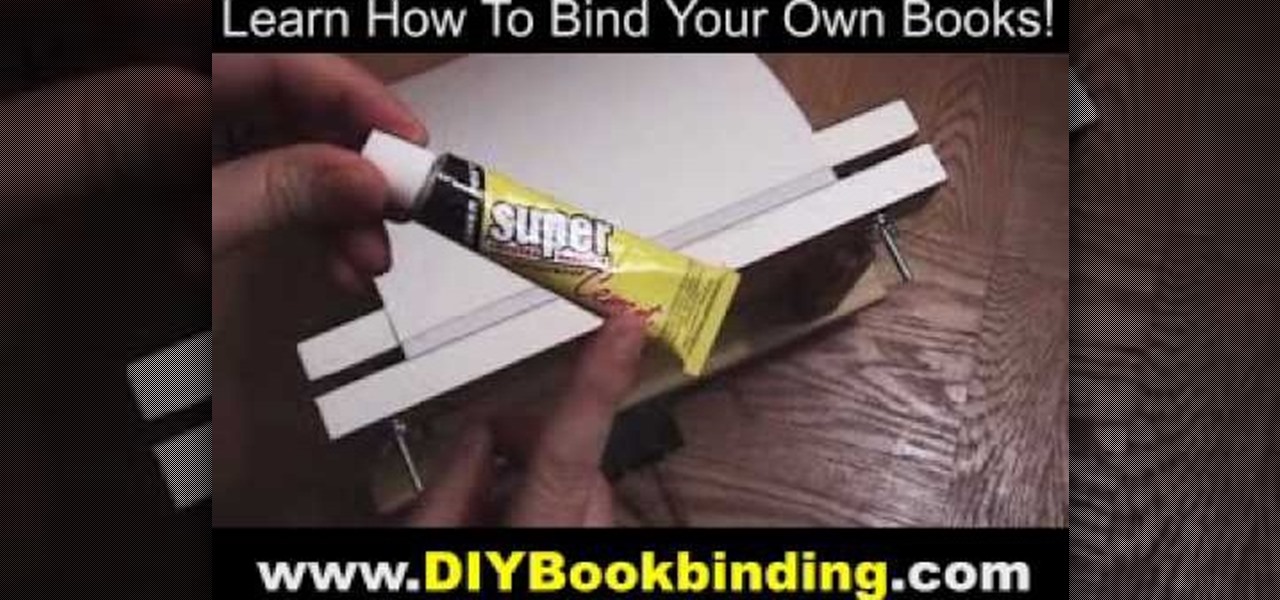
You Tube user go to guy enterprises teach you how to make glue bound paperback book. You will print you book on a4 paper, 2 pages per side, on each side. That means you'll have 4 pages in total on a sheet of a4 paper. Fold the paper in the middle and make stacks of the pages. You will also need an adjustable wood placement for the pages. Make sure you also have a piece of card stock for the black cover. Then align everything up, clamp it down to make the pages staying tight. On the spine of t...
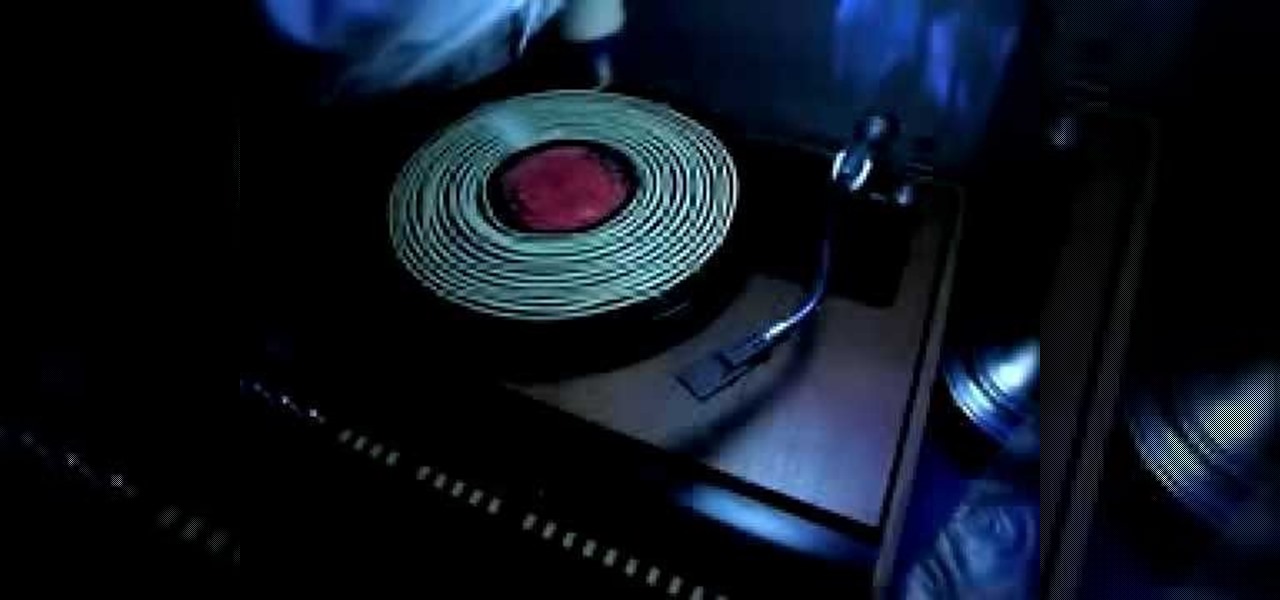
This video shows how to clean old records using Titebond II wood glue. He has the record turning slowly on the turntable, and while it's turning, slowly squeezes a line of glue around and around onto the surface of the record, starting from the middle. He explains that it takes between four and twelve hours for the glue to dry completely. After the glue is applied to the entire record, he takes an old credit card and spreads the glue evenly onto the record, all the way out to the edge. When t...
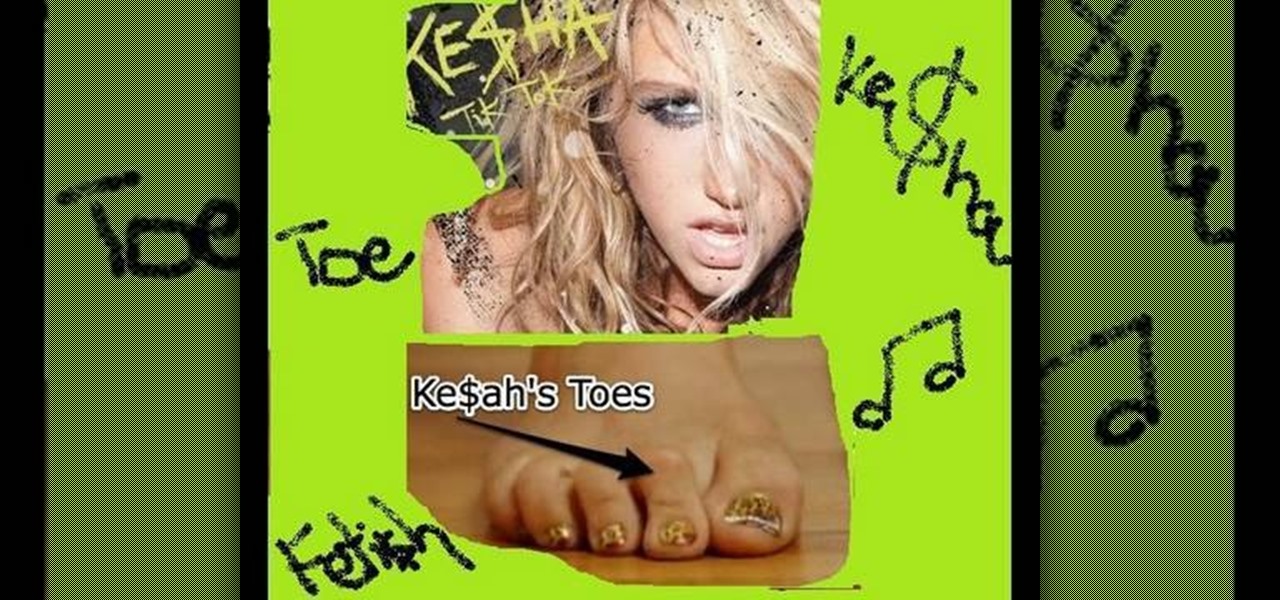
This tutorial teaches you how to do the same nail design as Ke$ha from her video "Tik Tok" had her nails done. First you apply a base polish to protect your nails. Apply a gold polish all over the nail, about three solid coats and then let them dry. Paint on a rich wine color to the corner of each nail end. Use a dotting tool and clean polish to pick up the rhinestones. Apply a little bit of nail glue on the seam of the two colors to help the Rhine stones stay put. Take a fine tip brush with ...
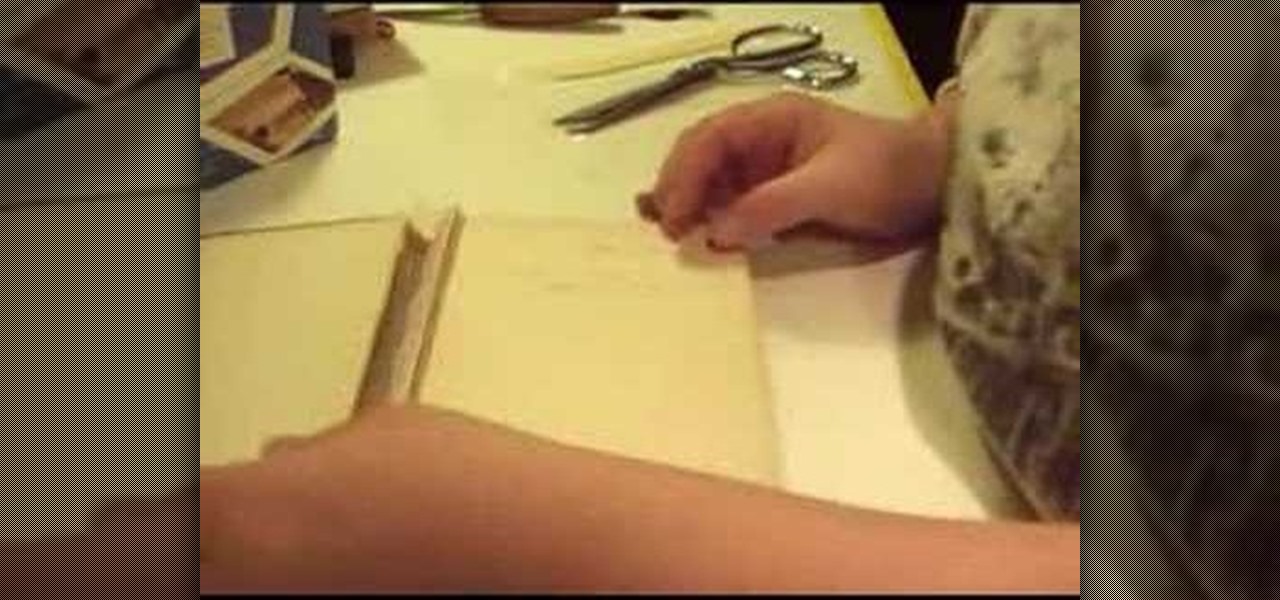
In this video molly1216 explains her method of repairing a hardcover book hinge. She mentions that this method should be used for inexpensive books that are not worth being sent to professionals.
Have a bunch of old magazines sitting around the house you'd like to recycle? Use old magazines to make a cool basket that suits your more eco-friendly side. Learn how to make a coiled basket out of magazines with help from this how-to video.
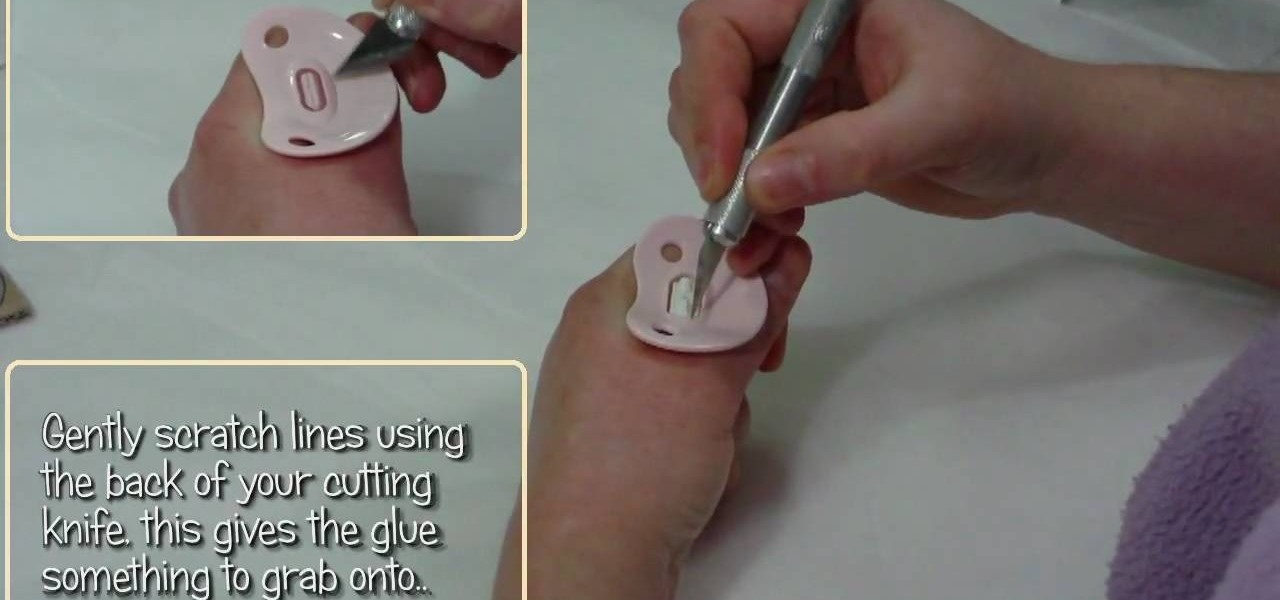
In this tutorial, we learn how to glue a magnet onto a dummy/pacifier for a reborn doll. First, gather all the tools you need to do this project. After you have these, remove the teeth from the pacifier. Next, scratch lines using a cutting knife so the glue grabs onto the center better. After this, apply the glue and the magnet, then place it on the dummy and press it there for several seconds until it is firm in the right place. After this, glue the surface of the pacifier onto the baby, the...
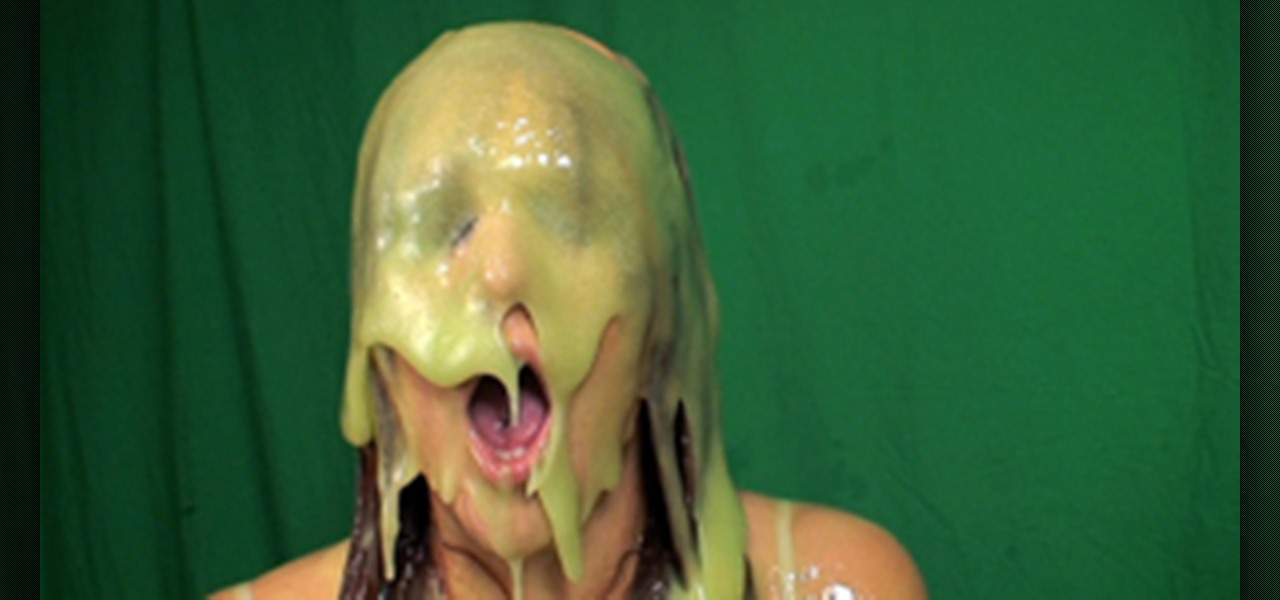
Make Slime! This one is easy. Just mix equal parts of glue and water and then add an equal part of liquid starch. Just like that you have gooey slime. The more you play with it the more fun it becomes. This acclivity causes the polymer chains in the glue to cross link with chemicals in the starch. The result is an awesome stretchy slime.
This is a quick and fun craft for making cute little fluffy penguins out of pom poms. You'll need one large black pom pom, one medium white pom pom, one medium black pom pom, three small orange pom poms, two small black pom poms, a pair of googly eyes and a hot glue gun or textile glue. Be careful around the hot glue gun!
In order to make a ribbon tree, you will need the following: 50 2" pieces of ribbon, scissors, a hot glue gun, hot glue sticks, and a floral tree.
In this tutorial, we learn how to make stacked hair bows. Start off with three separate bows: red, white, and blue. Make sure there is a string still hanging from the red one, but the strings on the white and blue are cut off. Now, put glue from a hot glue gun and place it on the middle/side of the blue ribbon, the glue the white one where the glue is and hold together. Next, take the red bow and glue it to the center of the blue and white bow. Hold the red bow in place until it's completely ...
In this tutorial, we learn how to craft a pom-pom ladybug with your kids! The materials you will need are: 1 large red pom pom, 1 medium black pom pom, 1 pipe cleaner, 2 googly eyes, and one piece of lace. Start off by gluing the black and red pom pom's together with a hot glue gun. Next, use a hot glue gun to glue the googly eyes onto the black pom pom. Now glue black pipe cleaner around the red pom pom to make a stripe on the back of the ladybug. cut the pipe cleaner into little round shape...
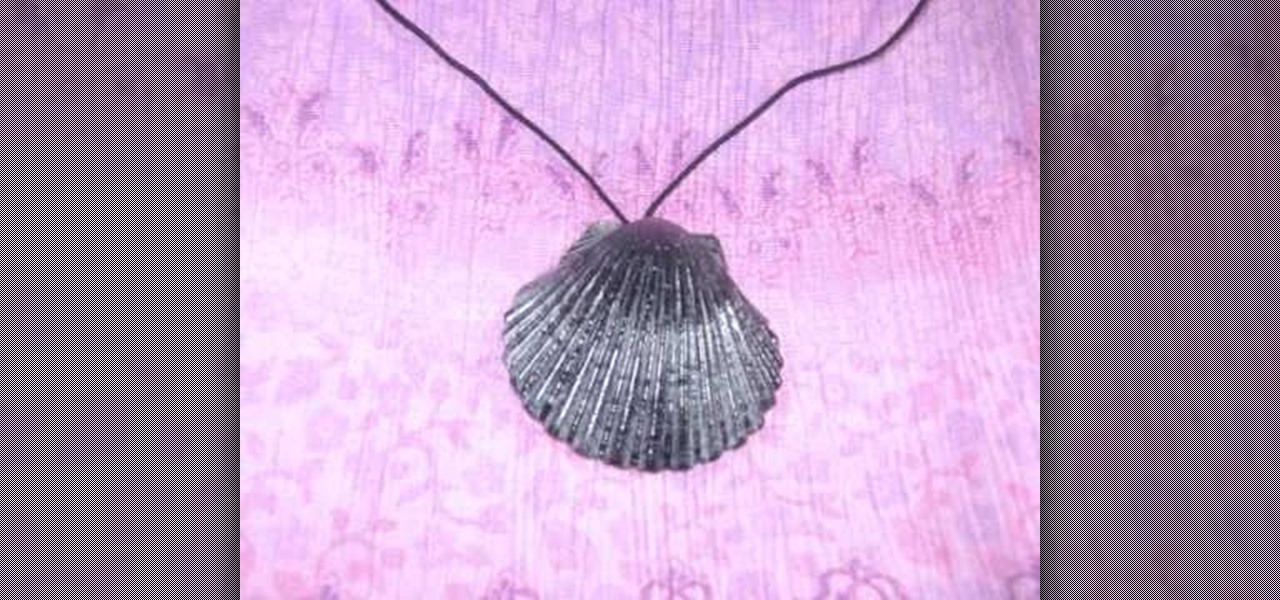
In this tutorial, we learn how to make a simple shell necklace with your kids. To make this, you will need: a sea shell, a hot glue gun, and a necklace string. First, tie your string into a knot at the end of it. Next, grab your shell and apply glue with the hot glue gun to the inside base of it. Now, press the knot that you just made onto the glue in the shell. Let this set up until the glue is completely dried, and you're finished! You can apply more glue to the top if you want a more secur...
Sue at Paper Source demonstrates how to glue like a pro. PVA is a great paper glue, while methyl cellulose extends drying time (which is perfect for precise adjustment) and is also reversible (making it really handy for archiving). Watch this video crafting tutorial and learn how to use PVA and methyl cellulose glues.
If you're anything like me, you probably rinse your mouth out after you brush your teeth. I know technically you're supposed to not rinse your mouth out after brushing, but I just can't stand the feel of the excess toothpaste in my mouth. It's a surefire way to dry it out.
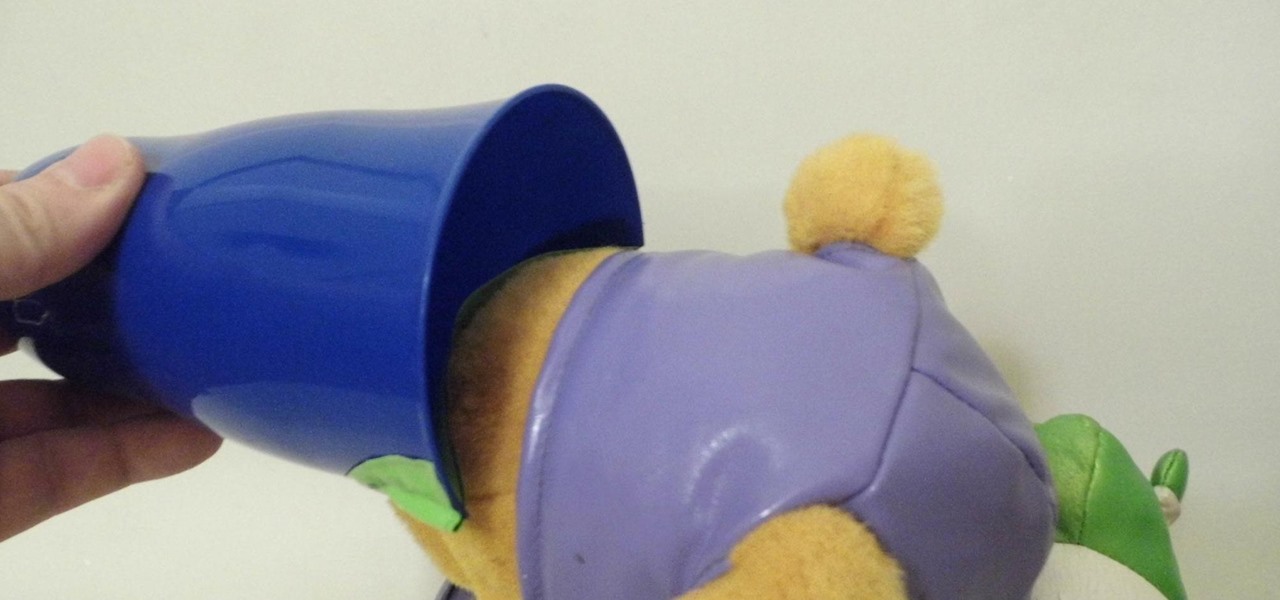
For those of us with small children, bath time can be very fun. Kids usually love splashing about and playing with their toys in the water! One thing they don't love however, is getting water in their eyes or on their face.
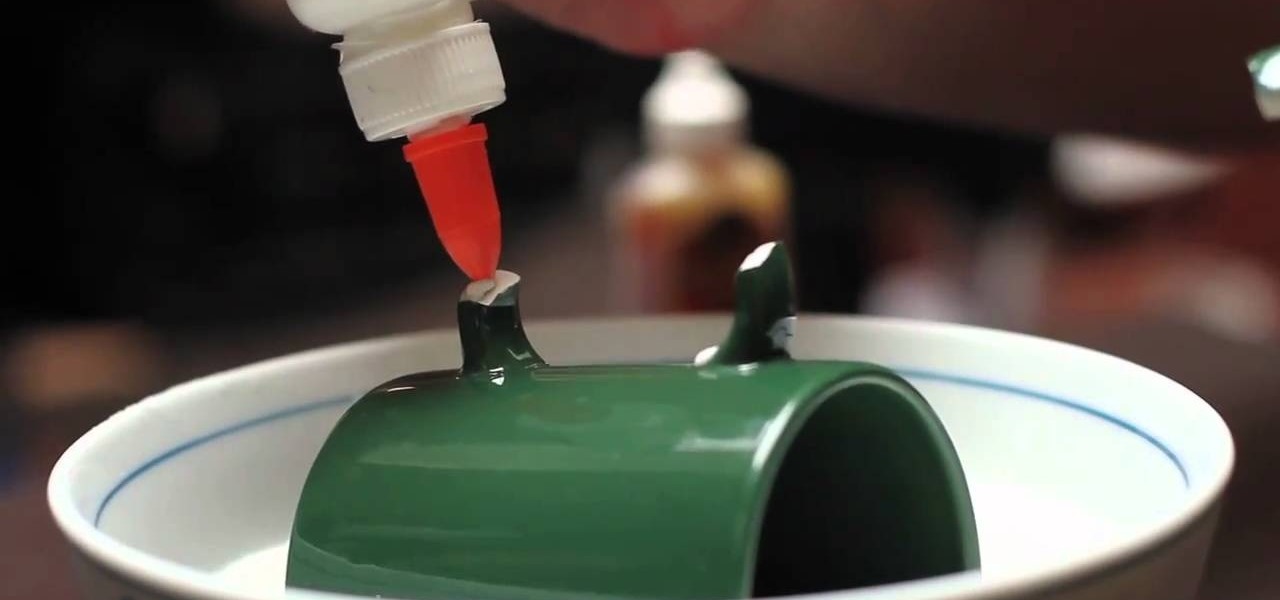
Did you accidentally drop your favorite Star Wars mug on the kitchen floor? Don't lament your cruel fate and sweep the mug pieces up to toss in the trash can; instead, just glue it back together.
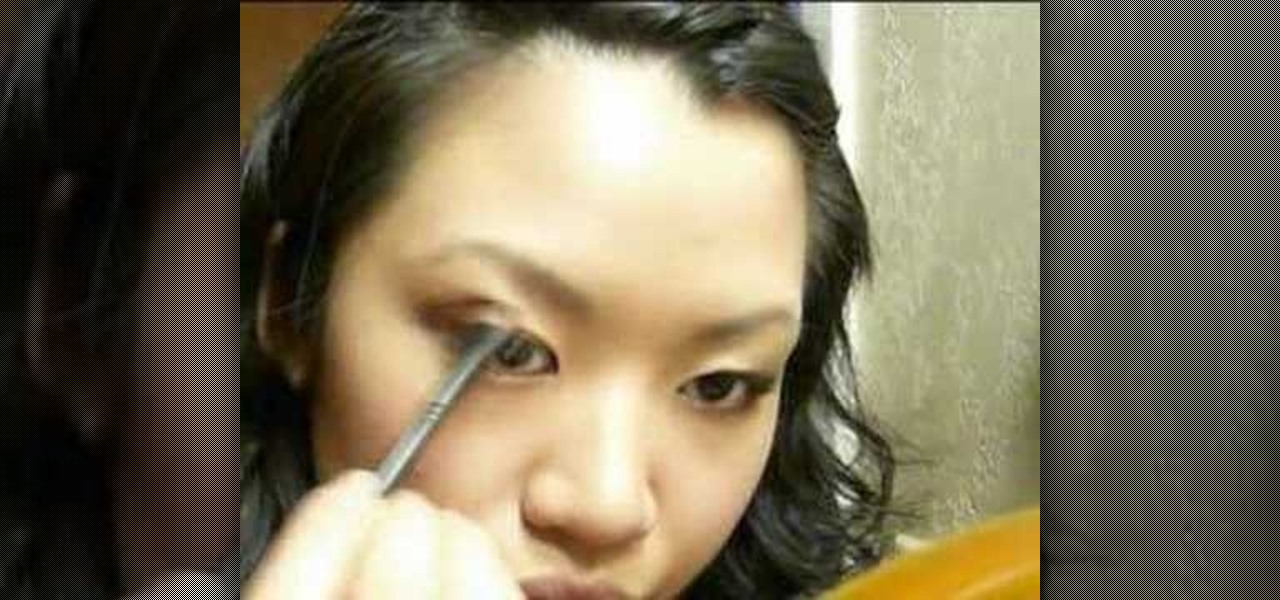
How to apply eyelid glue & makeup to Asian monolids This is a tutorial on applying glue to the eyelid if you have a monolid. This will give the eyelid a crease and make the eyes open wider.
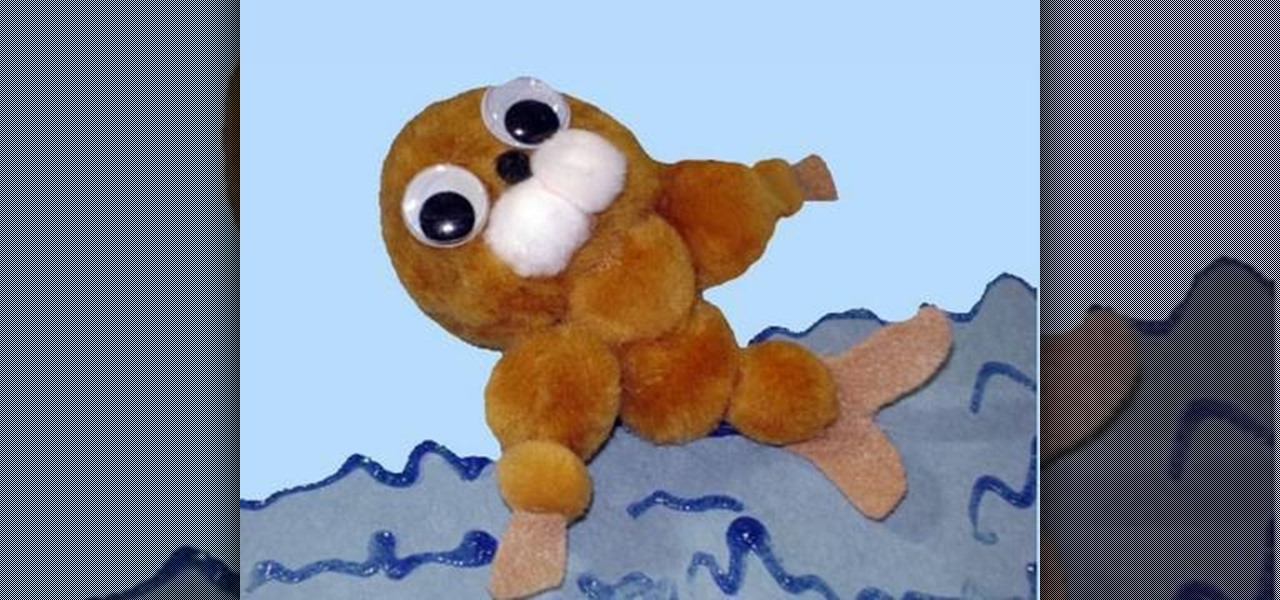
In this video tutorial, viewers learn how to make a pom pom seal. The materials required for this project are: 1 large brown pom pom, 4 medium brown pom poms, 3 small pom poms, 2 white pom poms, 1 small piece of brown felt, 2 googly eyes, glue and scissors. Begin by gluing the brown pom poms together. The large pom pom is the head, 4 medium pom poms are the body and 2 small pom poms are the hands. Then glue the 2 white pom poms and mini black pom pom on the head for the mouth and nose. Glue t...
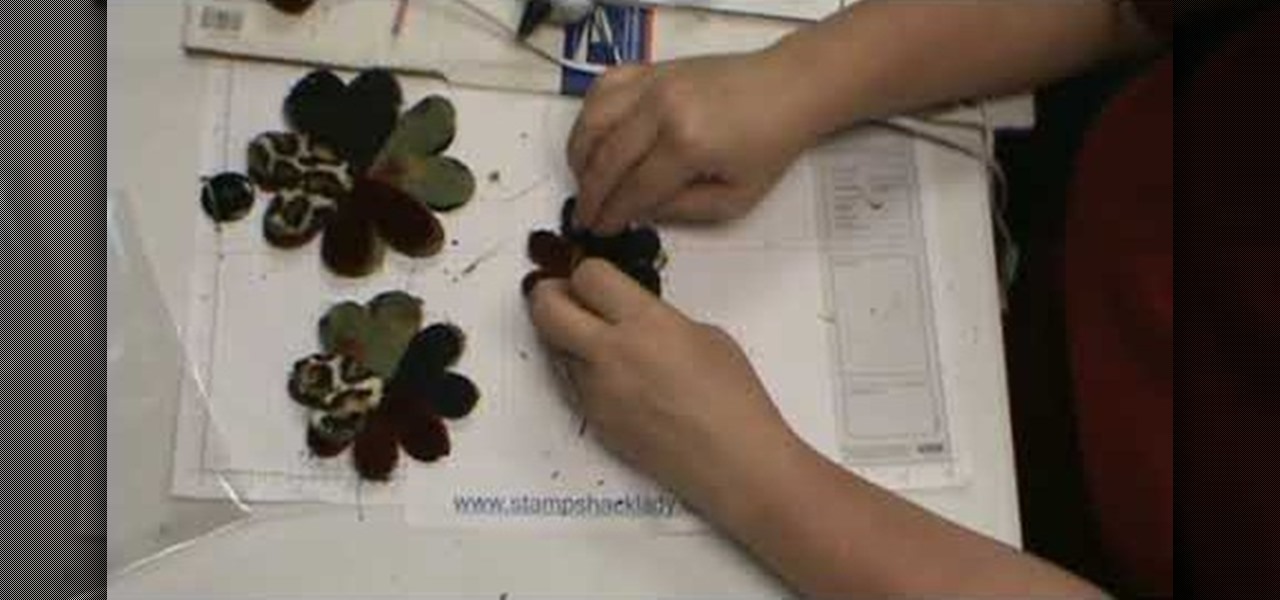
In this video, we learn how to assemble a flower-fold die-cut with a glue gun. First, cut out different fabrics in the flower shape. Put them all into different piles according to their sizes. After this, put hot glue into the middle of the fabric and fold the flowers in half. When finished, put the pieces together with hot glue going in a circle. Continue to do this with all the different sizes. When you are done, all the colors of fabrics should show, then place a button in the middle with ...
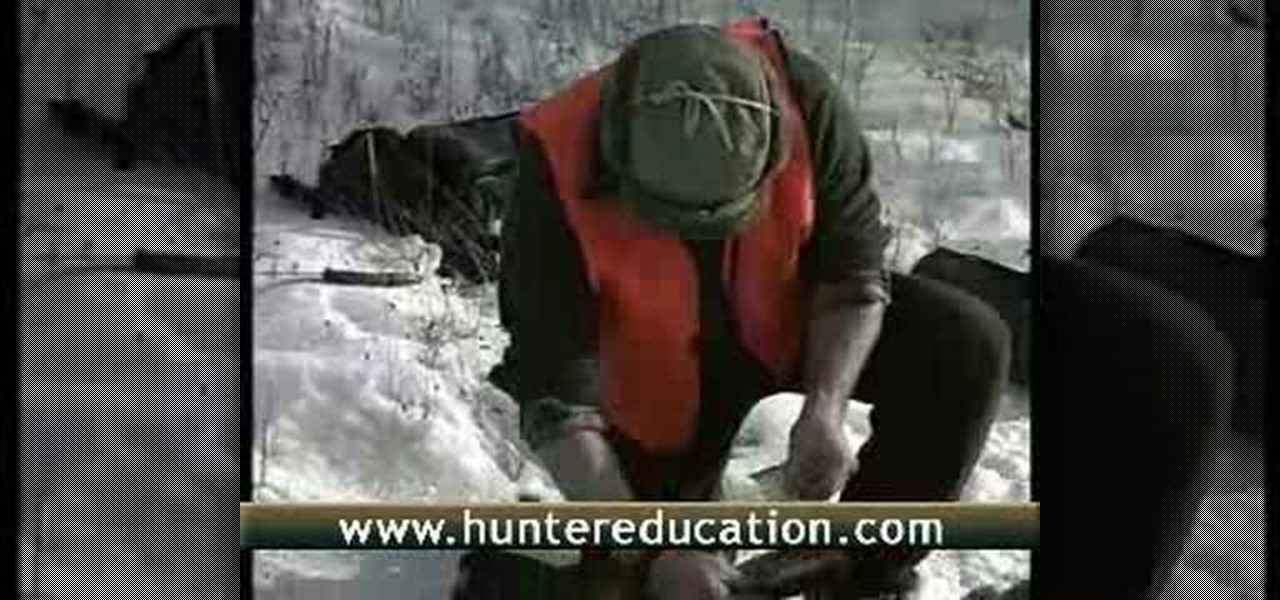
In this tutorial, we learn how to make sure your game is really dead. One of the best things is to stay away from the feet, then touch the eyes with the end of your rifle. If there is no reaction at all, then the animal is dead for sure. After this, you will need to attach a validated elk tag to the animal, making sure it's secured. Glue it to the ear using your hands and pressing it down for several seconds. In different states, there are rules and regulations as to where you have to apply t...
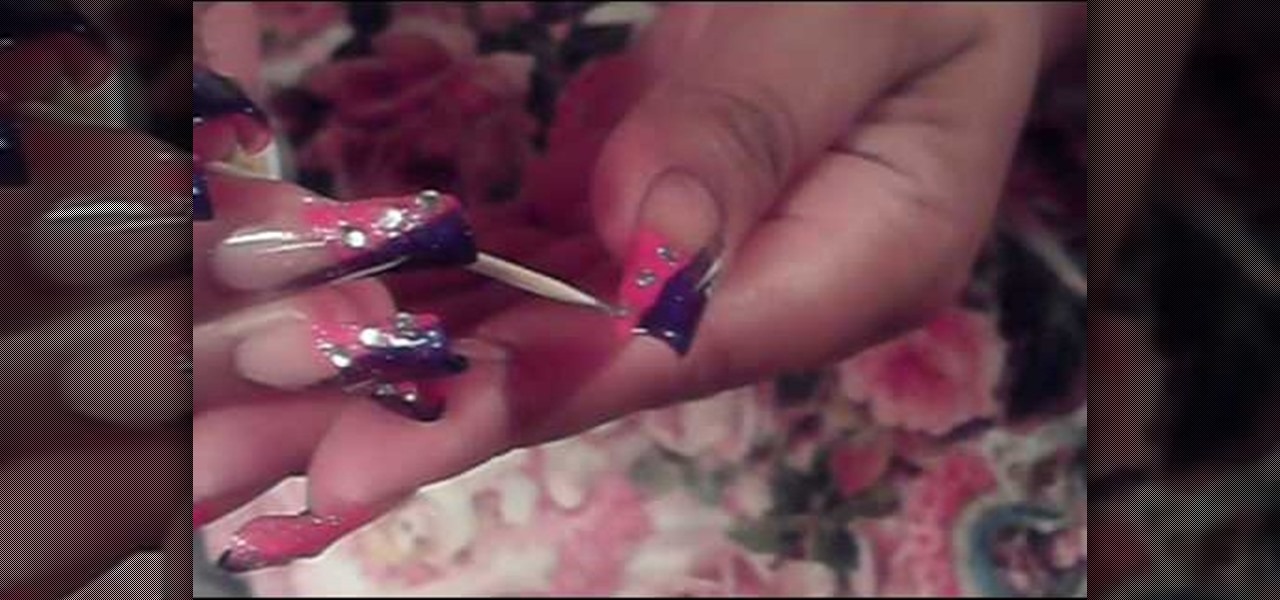
In this video, we learn how to paint your nails in a pink and purple French manicure. Start off by cleaning your nails from any dust, debris, or colors. Then, you will paint on black to one side of your nail with a fine tip brush. After this has dried, paint pink on the other side of the nail, a pink glitter color would be the best. Next, you will wait for this to dry and then paint on a white line in between these two colors. From here, you will apply three small rhinestones with nail glue t...
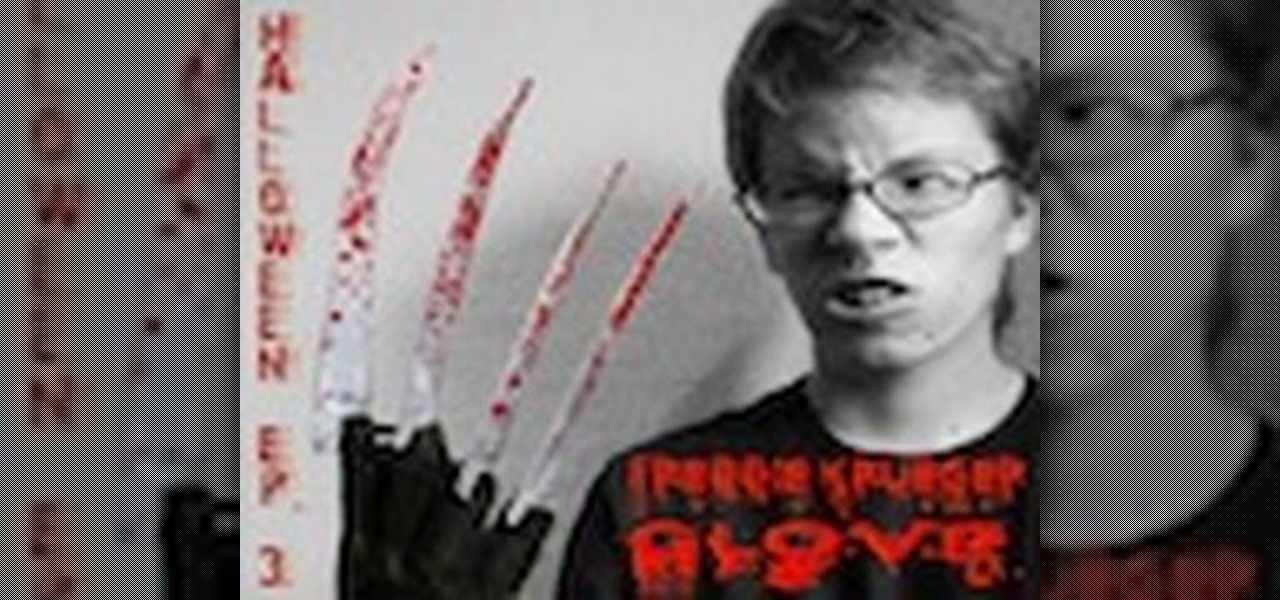
In this tutorial, we learn how to make a Freddie Krueger glove. You will need: a saw, sandpaper, silver spray paint, black paint, brown paint, old glove, tin from a can, plexi glass, shiny cardboard, and a hot glue gun. Start off by using your paper roll to cut off a strip of it that will start on the joints of your hands, then cut this in half. After this, make a cut in the top of it and on the sides of it. Do this again for the four fingers, then wrap it around the glove fingers. After this...
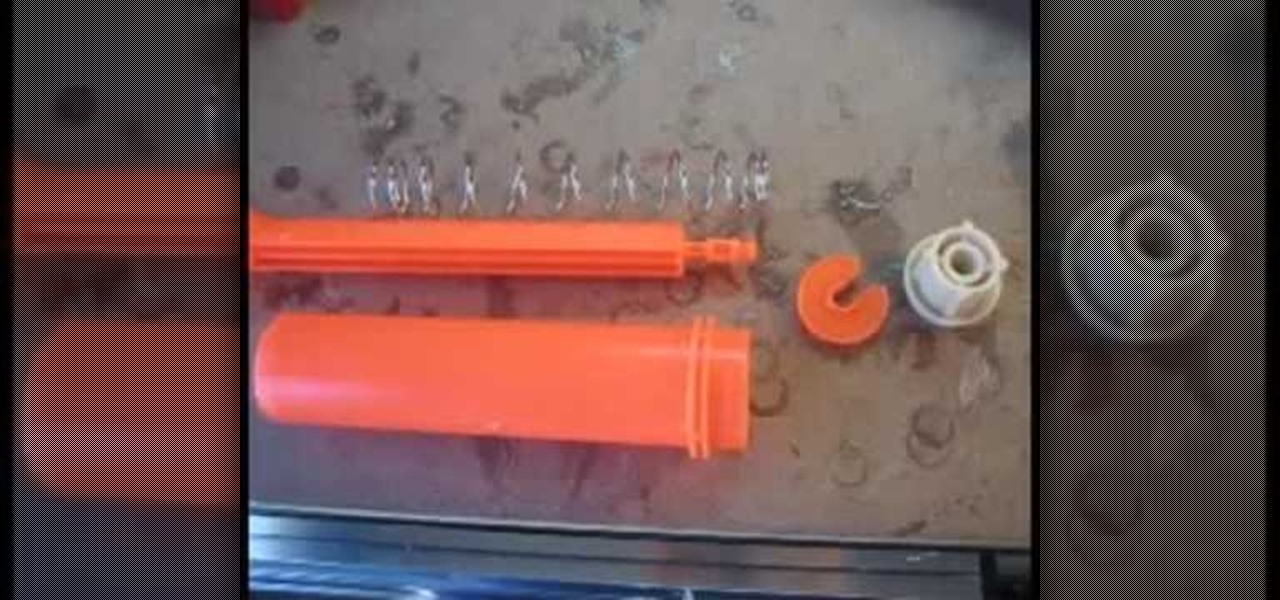
In this Hobbies & Toys video tutorial you will learn how to modify a Nerf Big Bad Bow to shoot farther. Open up the front part of the shell by removing the screws. Make sure the spring on the launch piece stays together and pull out the barrel. Then dismantle the white restrictor piece and drill a hole in the center for more airflow as shown in the video. Now cut off the orange barrel as close to the wall as possible with a pipe cutter and sand it off. Take an extra piece of CPPC pipe and ram...
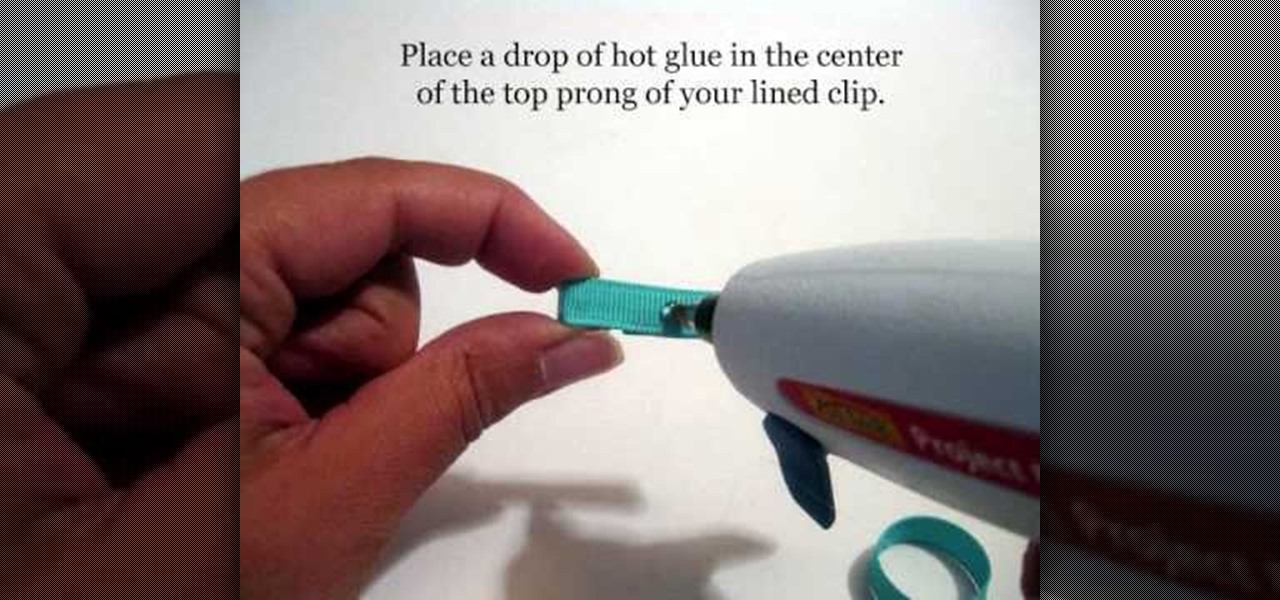
This video shows us how to make infant mini clip hair bows.This requires a high temperature hot glue gun.Three ribbons of the length 4",3" and 1.75" are required.Also needed are an alligator clip,sharp scissors and a lighter.Take the ribbons and seal it with a lighter just enough to melt the ends.Insert a 4 inch long ribbon in between prongs of alligator clip.Make sure the ribbon is centered and flat side of alligator clip is down.Quickly fold the ribbon over the top prong and press firmly to...
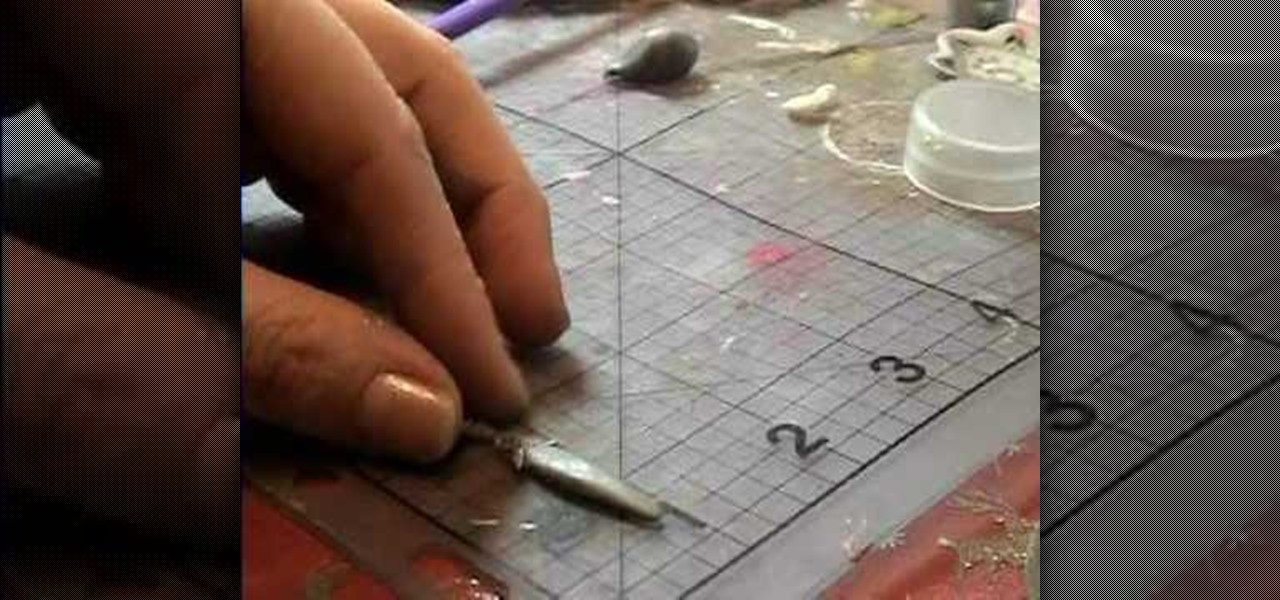
Garden of Imagination is demonstrating how to make a miniature knife for the doll house. This knife has a clay blade and a metal handle. The metal handle is made of a hanging earring finding. Now some black clay is taken. It is rolled and flatten and made into the shape of the blade. Now this is fixed to the handle and some glue is applied so that it stays permanently. Now the knife is ready. Now this is to be baked and after that some glaze is applied using brush so that it gets a shining ef...
John Hunt demonstrates how to do Cross Stitch that is used on steering wheel covers in this video. He takes a piece of dowel and wraps it with pre-glued leather. Next he threads two needles with cotton thread that has been pulled through bees wax so they stay in the leather better. Next he begins to sew. You have to sew the first half of the cross stitch with one needle and thread, and the other half with the other needle and thread. Sew till you get to the end pull both needles off the threa...