In this video we learn how to draw manga/anime clothes and folds. Start out by drawing the collar of the clothing up and around the neck. As you draw down, make sure you add in a bump for the elbows in a long sleeve shirt. Then, draw in the cuffs for the shirt and add in lines on them. Draw down from the elbow bump, creating two bumps near the wrist to show a baggy sweater. Make sure to add in the small details like zippers and strings on the top. Finish off the sides, leaving a gap between t...
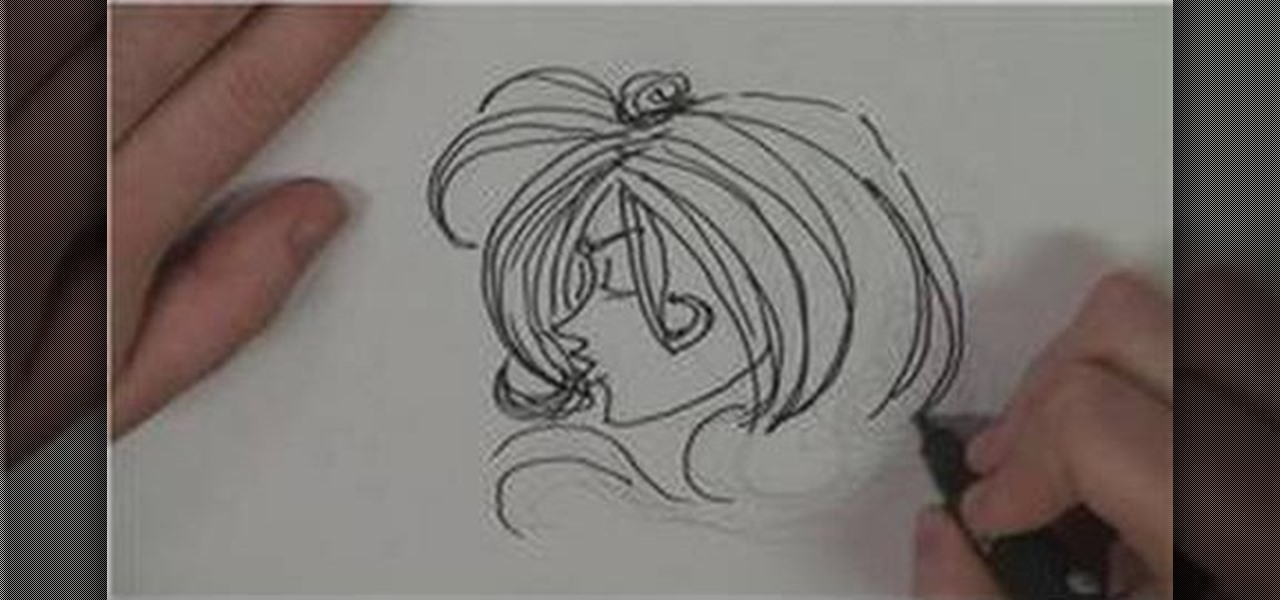
In this video tutorial, viewers learn how to draw human hair. This video shows viewers how to draw long hair. Begin by outlining the shape of the hair. Then start building upon the outline of the hair. Hair is very wavy and branches out. The hair outline should be organic and not straight to look more realistic. Once you have finished designing the hair, you can add extra details such as accessories or hair. This video will benefit those viewers who are interested in art and drawing, and woul...
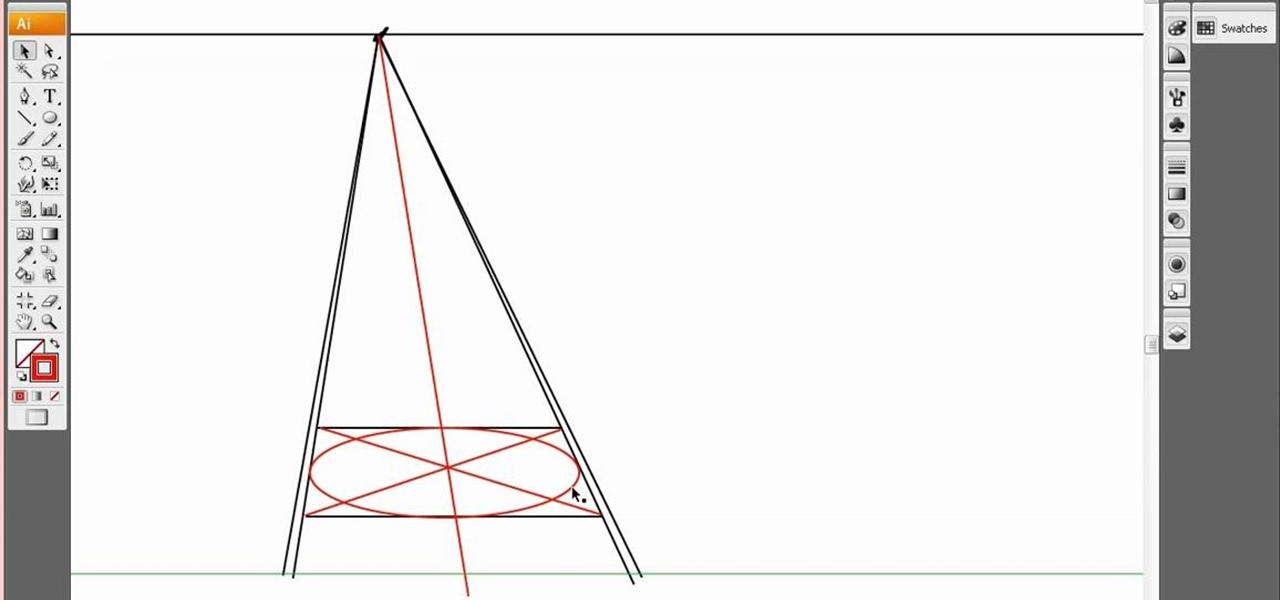
If you want to accurately represent objects in three-dimensional space, then it's vital that you have a good grasp of perspective. This three-part, three-dee drawing lesson presents and overview of drawing with single-point (or one-point) perspective.

In this video, we learn how to draw an anime eye step by step. Start out by drawing the outline of the eye. Then, fill in the eye with details and create shadows as well. From here, you will add in further details, including the shading and lines that make it look more realistic. Make sure you draw in the creases for the top and the bottom of the eye as well as the lashes on the top and the bottom. Draw in the details on the inner corner of the eye and add a white spot to make the eye appear ...
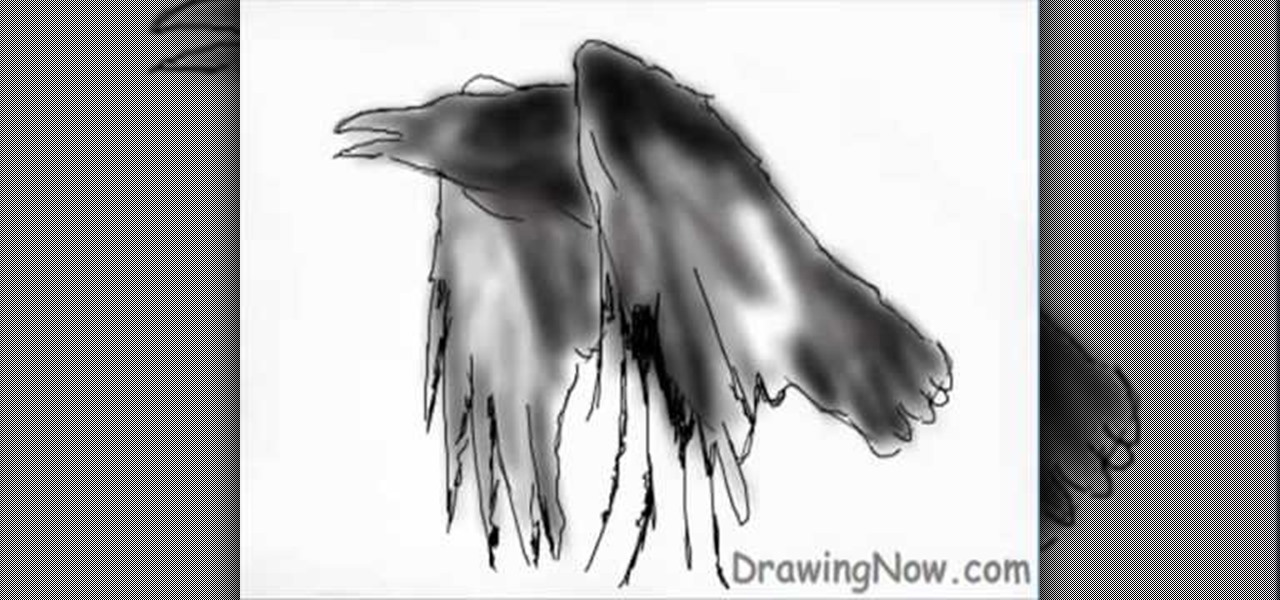
In this tutorial, we learn how to draw wolf paws. First, draw a rectangle on the paper and then draw in curves inside the rectangle that will give you a base for the paw's features. After this, draw two lines coming up from the paw and then draw claws on the bottom of the paw. After this, erase the sides of the rectangles. Start to add in additional lines for the claws on the paws and then add in details for the knuckles. To finish, draw in lines for the hairs and then finish off the paw with...
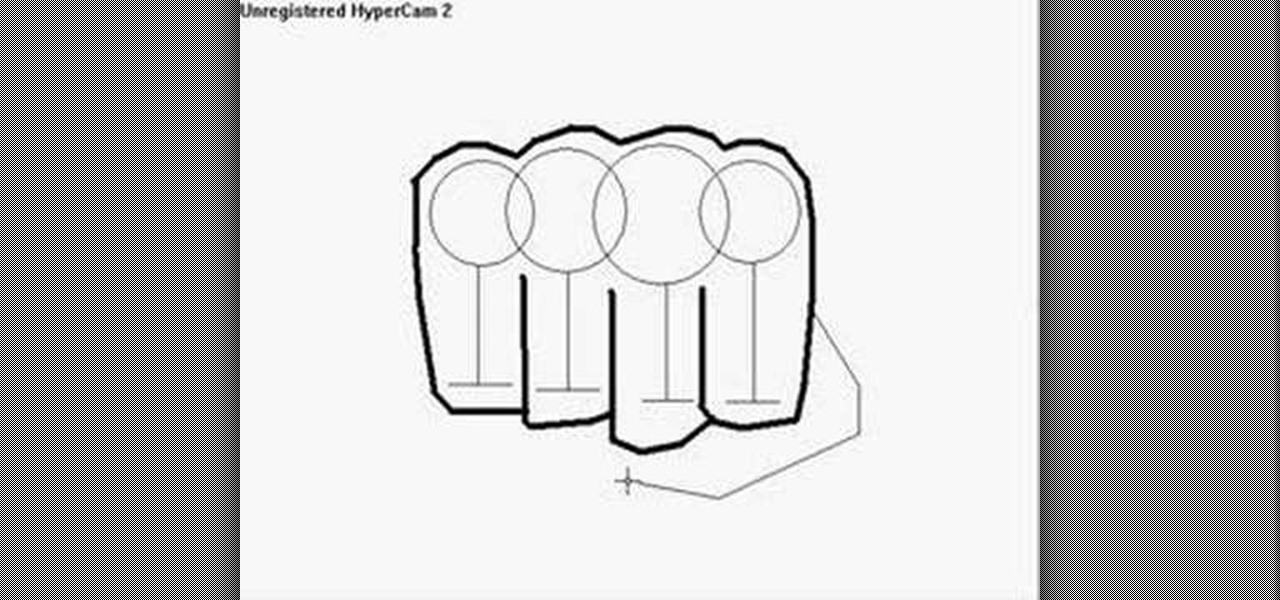
In this tutorial, we learn how to draw a fist. Start off by drawing for circles linked to each other, then draw lines coming down from the middle of each circle. Then, draw a line across the bottom of each vertical line, going horizontally. After this, use a dark line to outline around the circles and the bottom of the lines. Make sure to draw a line in between each of the individual lines. Next, add a couple of curved lines to make a thumb appear on the side. To finish, erase the original ci...

In this video, we learn how to draw Hamtaro. Start off by drawing the large head, followed by the body and the ears. After this, draw the arms and legs onto the character. Next, outline the drawing in a darker pen, then add in additional details. Draw on the eyes, nose, and pupils. Don't forget to draw on the paws and feel as well as lines to make it look like fur. To finish up this picture, you will need to add colors to the hamster. You can go with the traditional colors, or change them up ...
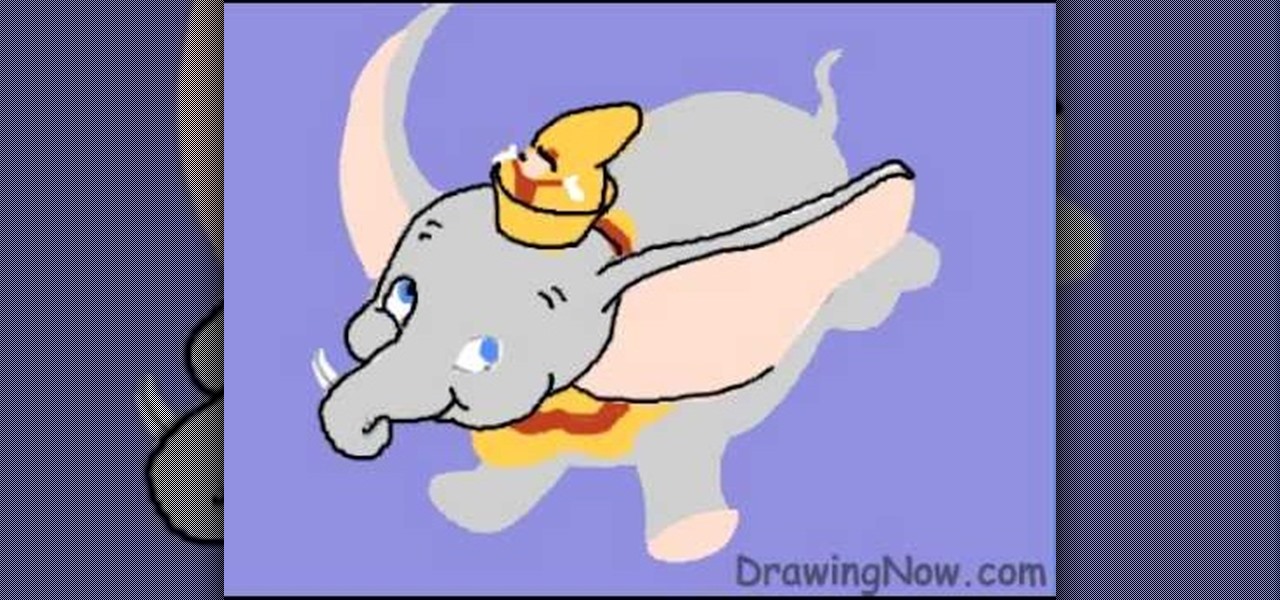
In this tutorial, we learn how to draw Walt Disney character, Dumbo. First, draw the ears flying out in the air, then draw the head outline around it. After this, draw in the trunk outline, the eyes, and the hat. Next draw in the body and legs of the character as well. Next, color the background of the drawing and then start coloring the character in with gray. Next, use a paintbrush to outline the body, then add in any details you see fit. Color in the inside of the ears and then color in th...
This video details how to draw a penguin that is skiing downhill. You start off by drawing the eyes in an oval shape, and drawing a line cutting them in half for the eyelids. Don't forget dots for eyes! Following that, you draw the penguin's mouth and the top half of the body, including the flipper. You will next draw the ski poles and the lower half of the body. Of course, in order to ski the penguin will need two feet, and two skis so you should probably draw those too. You can now add deta...
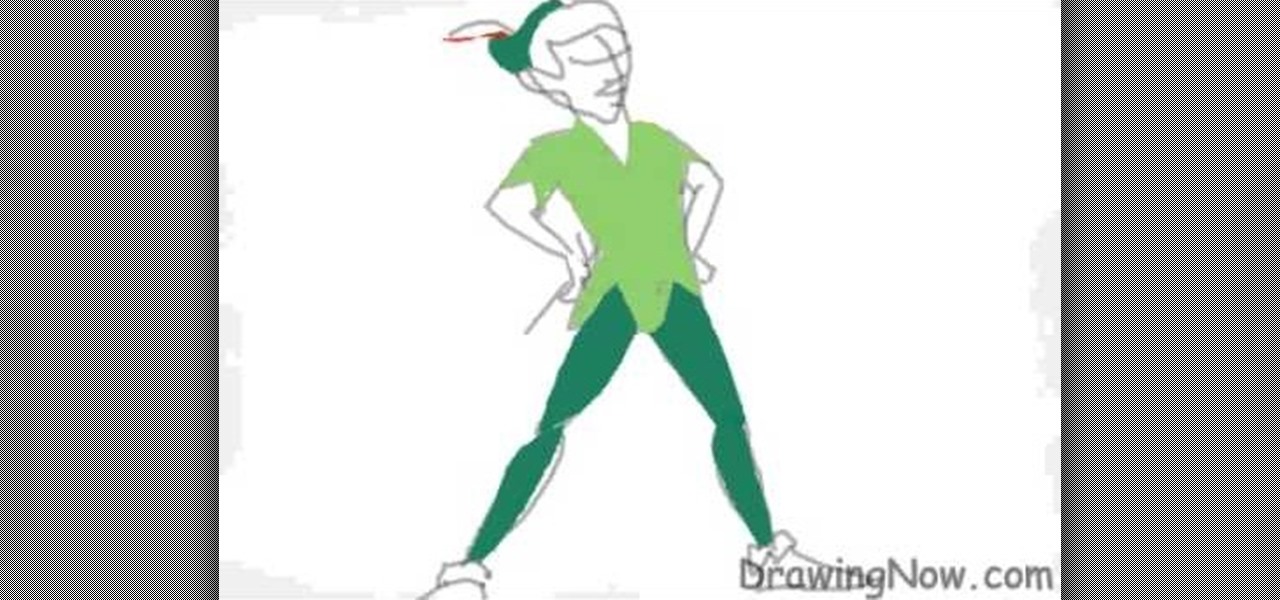
This video turns teaches how to draw Peter Pan with ease. In less than 2.5 minutes he is drawn. Not only is he drawn be he is also colored. The drawing starts with a simple outline of the head and body. Color is then added to the hair, face, and clothing. Then some simple shading is done in the correct areas, such as the hair, eyes and shirt. It is so easy one could easily draw it by hand or on the computer using a paint-like program. The complete drawing is very recognizable and also very si...
In this video cholowiz13 teaches you how to draw Chilly Willy. You start with a big circle for the head. Inside, draw two ovals and two smaller circles there. These will be the eyes. You then create another oval adjacent to that which will be the cheek. Draw a triangle facing outward, which will be the beak. Draw the body next and two flat feet at the bottom. One arm should be behind his back and the other extending, showing the letters you will draw. Also add a hat on top of his head and dra...
DrawingNow teaches you how to draw musical instruments on a computer. Start by drawing a guitar and then draw all the other instruments on top and near it. Use straight lines for the neck and interior. Use curves on the outside. Make sure to draw simple shapes and add detail later. Also, don't over complicate your drawing. Remember to keep proportions. The trombone is all about curves and circles. Don't be scared if it doesn't come out smaller than the guitar. Finally add drums and you can al...
To draw a spiral staircase: Basic materials needed
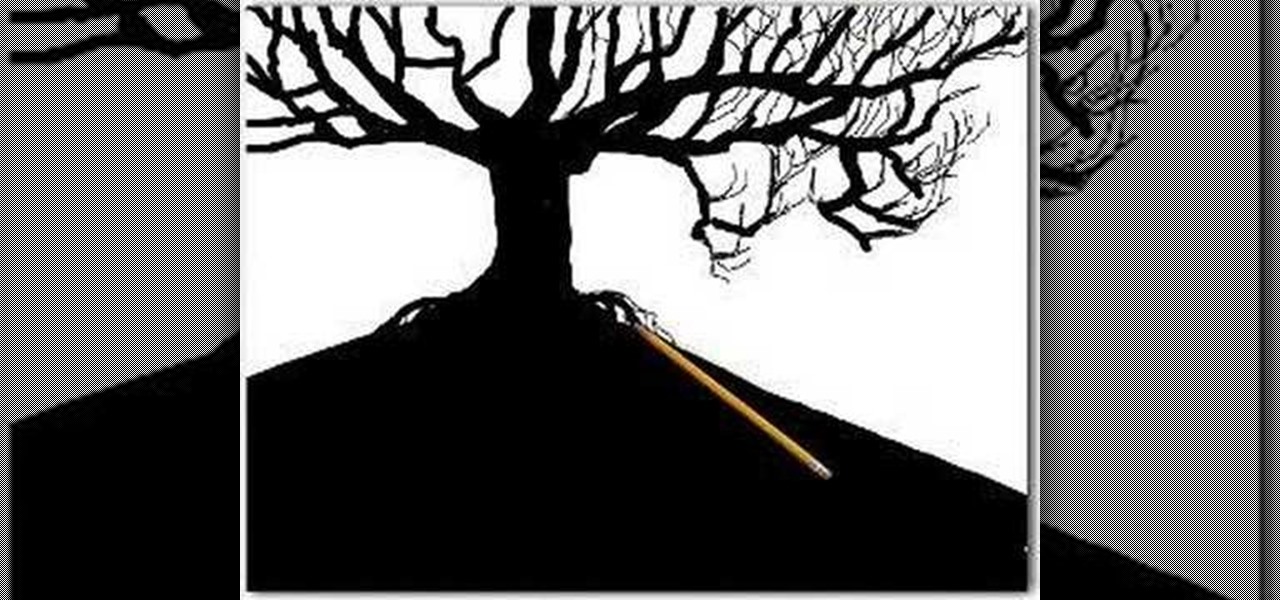
Whether you are pursuing drawing as a professional or as a hobby or you are just a common person, we're pretty sure that you have drawn a tree somewhere in your lifetime. This video merely shows how to do the same in a better way. Though there is no narration (just background music) in this video, it is easy to understand the additive method of drawing. The artist starts off with a broad tree trunk and then starts adding thinner branches to the trunk that spread outwards. Then, even more thin...
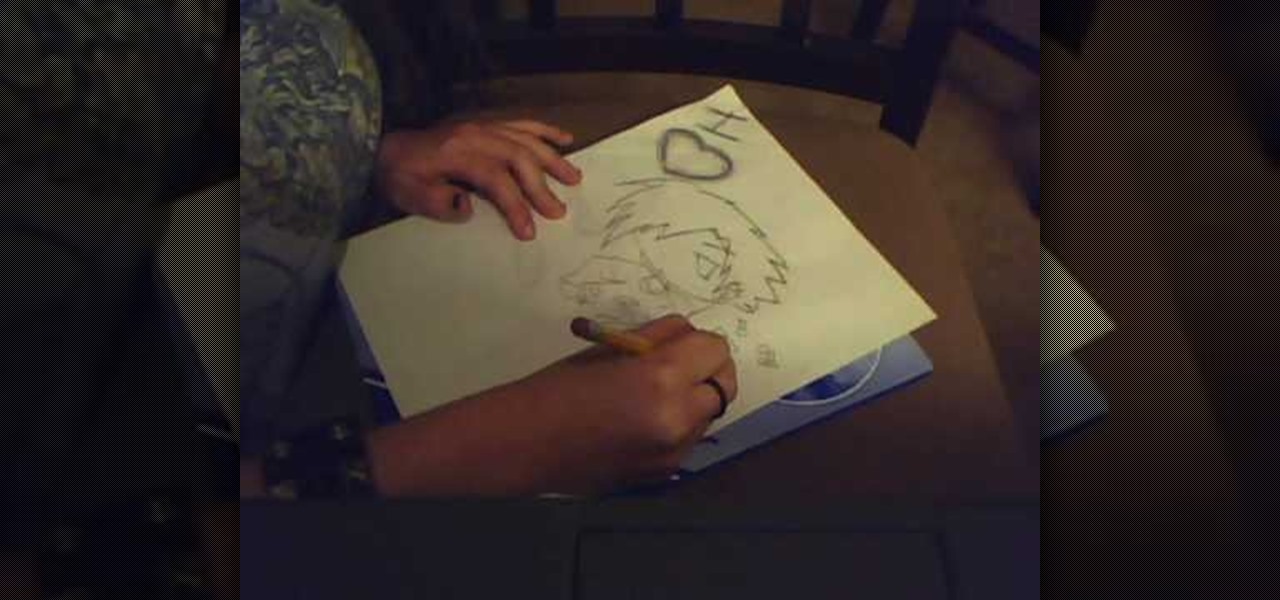
In this tutorial, we learn how to draw a manga girl. Start out with a pen on a piece of paper and draw the eyebrows in the upper middle part of the paper. Color the brows in, then draw in the eyes, along with their creases and the bottom of them. Next, you will draw in around the face and add in the point for the chin. Add in the details for the face, making sure to draw in the eyelashes. When finished with the features, draw bangs on the front of the face, then draw hair all around the sides...
In this tutorial, we learn how to draw and color a room with art markers. Start off by drawing a basic room, using a vertical vortex as your map of where everything goes. Draw in the stairs as you see them, then draw the hallways, windows, picture frames, and more. Draw in the carpet that is on the floor, then add in any other details you may have in the home. After this, start to add color to your picture as you prefer. Color the walls and the floors in different colors that blend together a...
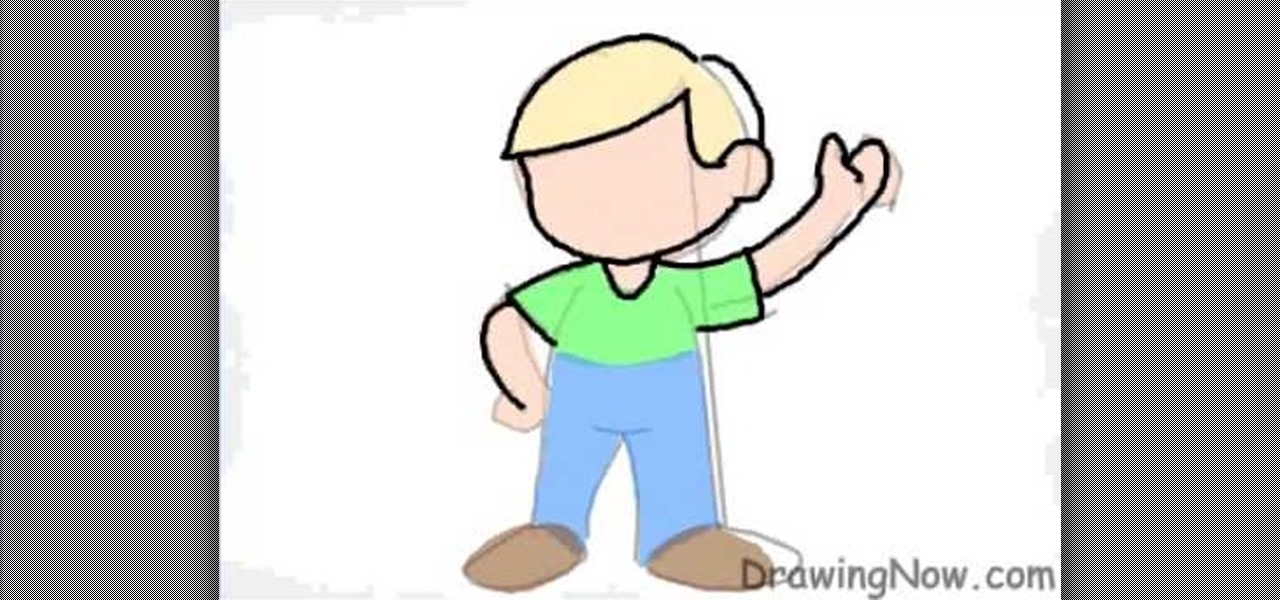
In this tutorial, we learn how to draw a cartoon figure of a boy. Start out by drawing a large circle for the head, then drawing the arms underneath and a circular body. next, draw the hair onto the boy, and add shoes, a shirt, and pants. Now, color the hair yellow, the body skin color, the shirt green, and the pants blue. Outline the drawing with black ink, then add on the facial features. Start with two circular eyes, a nose, and a small mouth that is a curved line. Add in more hair to the ...
In this video, we learn how to draw the manga character, Katara. Start out by drawing the basic outline of the character. Have her hands out in the air, like she is in a striking position. Then, add in the details of her face and hair, then work your way to adding in the details of her arms and the rest of her body. Draw a long dress on her, adding in the lines to show folds in the dress. Once you have finished with all the details, start to add in the colors to the skin and the outfit. Finis...
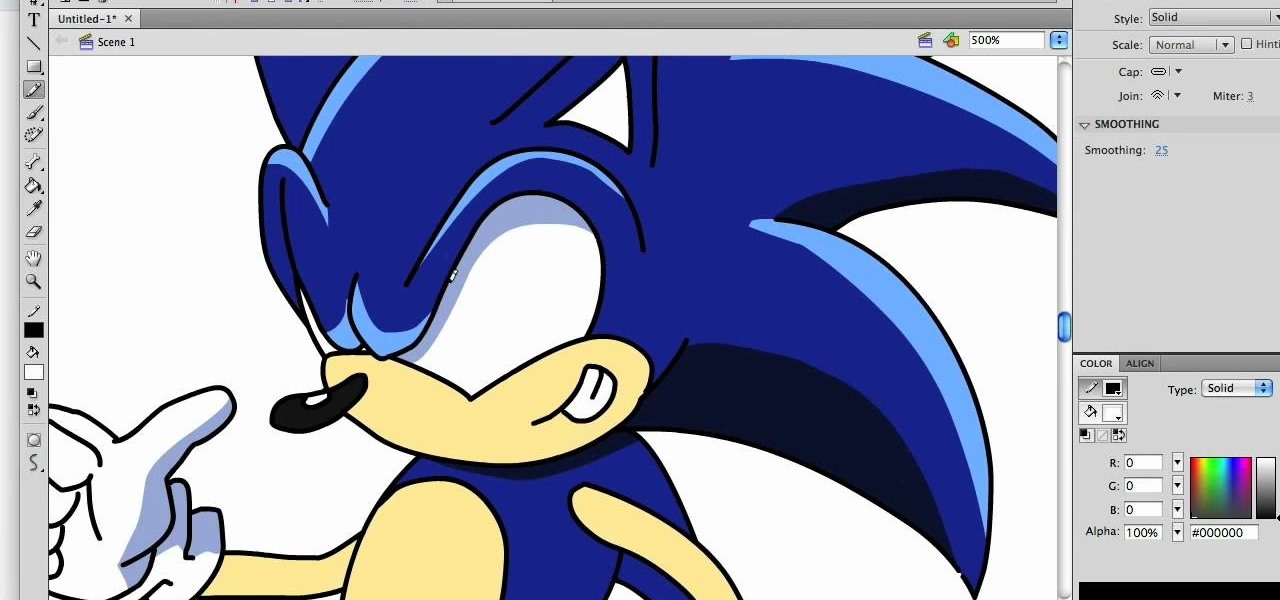
In this tutorial, we learn how to draw a hyper-stylized Sonic the Hedgehog. To start, you will draw the outline of the entire body of Sonic. Make sure you draw in the huge spikes for the hair as well. Next, you will draw in the eyes, muzzle, and nose on the face. Then, you will draw in the stomach area, the feet, and the hands. After this, clean up any background lines and color the character in completely. Next, shade in darker colors on the sides of the body to give Sonic more depth and mak...
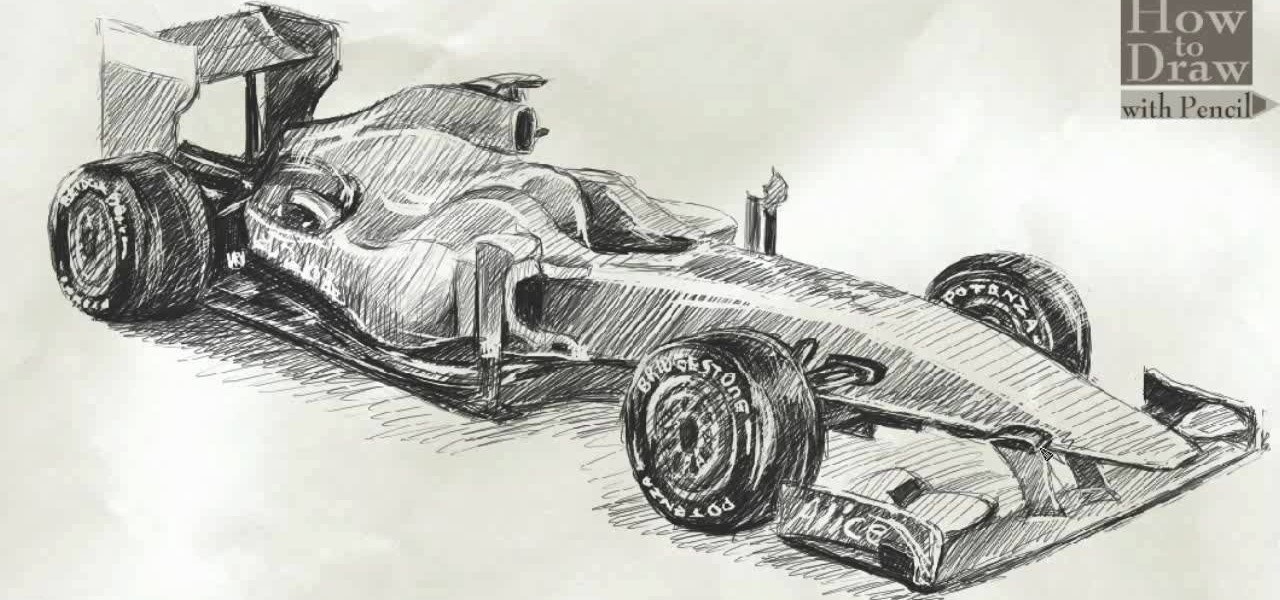
In this video, we learn how to draw a Formula 1 Ferrari F60. Start out by drawing of the car, then start to shade it in. Shade in the wheels and then the rest of the vehicle with a lighter pencil. After this, use the eraser to erase different parts of the car to make it look more realistic. Draw in darker lines with the pencil to make it more shaded. Then, add in shading on the bottom of the car and continue to darken the care until it's completely filled in. Add in writing on the wheels and ...
In this tutorial, we learn how to draw Little Sack Dude. Start out by drawing the outline of the body for the character. After this, draw on the limbs and then add in the details of the face. Once finished, draw in the details of the clothing, then the hands on the character as well. Draw in additional details along the feet and arms, then shade the entire character with the pencil. Once you do this, darken the eyes with the pencils to make them black and then darken the parts of the details ...
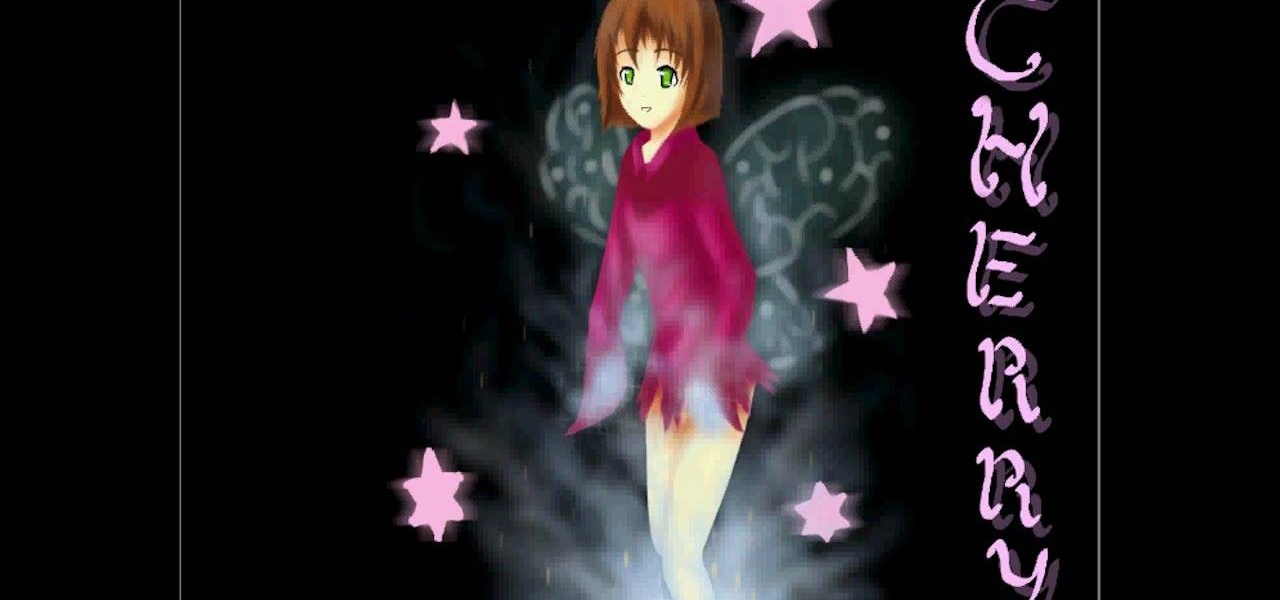
In this video, we learn how to draw a cherry fairy. First, sketch the entire picture before you start to draw in any detail. After this, draw in darker lines where you want the features of the body to go, then start to add in features of the face. Next, add in color to the face and to the outfit of the fairy. Make sure you give her hair and bangs that are surrounding her face as well. Once you have the color completed, create a white light coming from the bottom of the fairy and going up into...
In this tutorial, we learn how to draw Death the Kid from Soul Eater. First, you will need to draw in circles around the body where the joints would go. After you do this, draw the outline of the body around the joint markers. Next, you will start to draw in the arms for the character and add in the full detail of the arms and machinery. Next, use a darker line to create the details in the body and the outline as well. When finished, you will need to add in the details of the face as well as ...
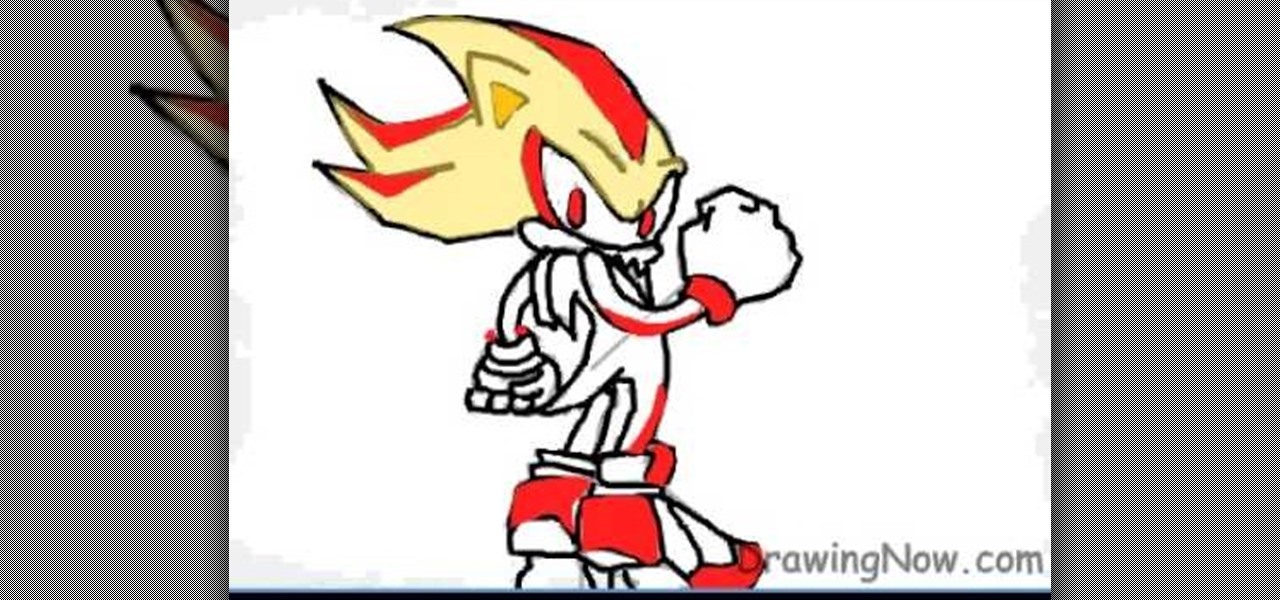
In this tutorial, we learn how to draw Super Shadow from Sonic the Hedgehog. Start off by drawing the spikes for the hair, then draw the ears and the eyes on the face. After this, draw the arms, upper body, lower body, and legs. When you are finished with this, use a dark pen to outline the cartoon character and draw in any additional details. Next, you will add in colors to the character, using reds on the outside of the hair and legs, then orange and tan on the inside. Finish this off with ...
In this tutorial, we learn how to draw an 18 wheeler semi truck. Start out using a pencil to draw the outline of the truck, using lines on a vertical point to make sure everything is even. After this, use your pencil to smudge darker marks throughout the truck. Next, use the pencil to make darker lines for the outline of the truck and add in more details to it. Make sure to draw in the tires, as well as the windshield and the headlights. Turn the paper around to get the best angles while draw...
In this tutorial, we learn how to draw Timmy Turner. Start off by drawing the head, making the front round and the body will be a triangle shape. The back of his head should be a triangle as well. Draw two large circles on the face, followed by arms and legs coming off of the body. Next, draw ears onto his face followed by a shirt and pants on his legs. Draw Timmy's mouth with a large smile and two teeth at the top. His eyebrows should almost touch in the middle, then don't forget to add on h...
Designing a tattoo sleeve is a challenging and important task for any tattoo artist or recipient, as they are huge, expensive, nearly impossible to hide and, like all tattoos, with you forever. This four-part video demonstrates the sketching and inking of a sleeve design with a a biomechanical theme. It is unmeasured and would need to be refined and drawn again before it could go on a body, but is a good place to start.
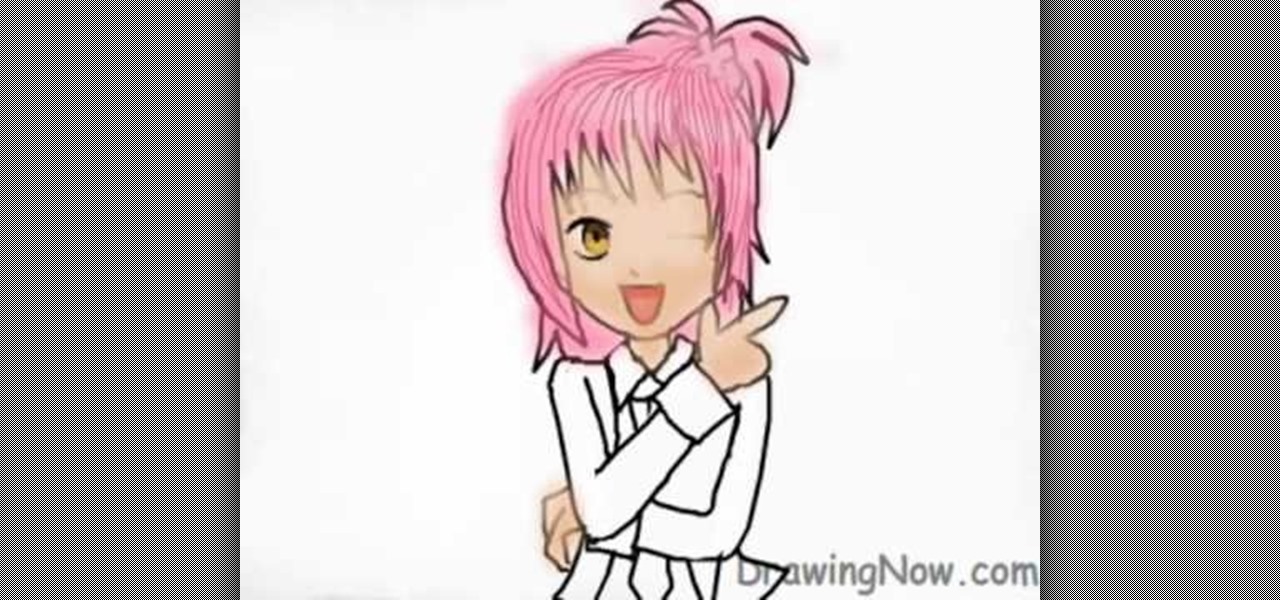
If you love the prolific schoolgirl manga series Shugo Chara, you have probably wanted to draw a replica of the iconic title character for yourself. This video tutorial will teach you how to draw her on the computer quickly and with great detail and color.
First of all you have to draw the rough sketch using light color lines. You have to draw blocks to the size of helmet, chest, two arms, legs and boots. Now start from the helmet and draw the outline. Draw the glass for viewing. Draw the lines as shown on the helmet. Also darken the spots as shown. Now draw the chest guard. Draw the lines to make all the different straps and marks over the armor. You also have to draw a tank at behind. Make the arm and the gloves. Now draw the outline of a gun...
First of all you have to draw the outline using light color rough lines. Draw the face with beak and then draw the two wings hanging down. Also draw a tail at the back of the bird. Now you have to draw the outline by using a pen. Start by making the beak of the bird at the front. Make the wings with the feathers. Also make the outline of feathers to make the tail. Once the main outline of the bird is ready then you have to erase all the previous rough lines. Now you have to darken the body wi...
Sasukeisahotie shows you how to draw an Emo Chibi. Start by drawing a prominently spiky, asymmetrical, "emo" haircut, wider than tall. Then draw a line making the outline of the face from the right bottom of the haircut, to the left clump of hair, again this should be wide. Draw one eye on the face (where the other eye is, it should be hidden underneath hair). Draw in the shirt/jacket/top half of the character underneath the head, but make this smaller than the head. Decorate the shirt with s...
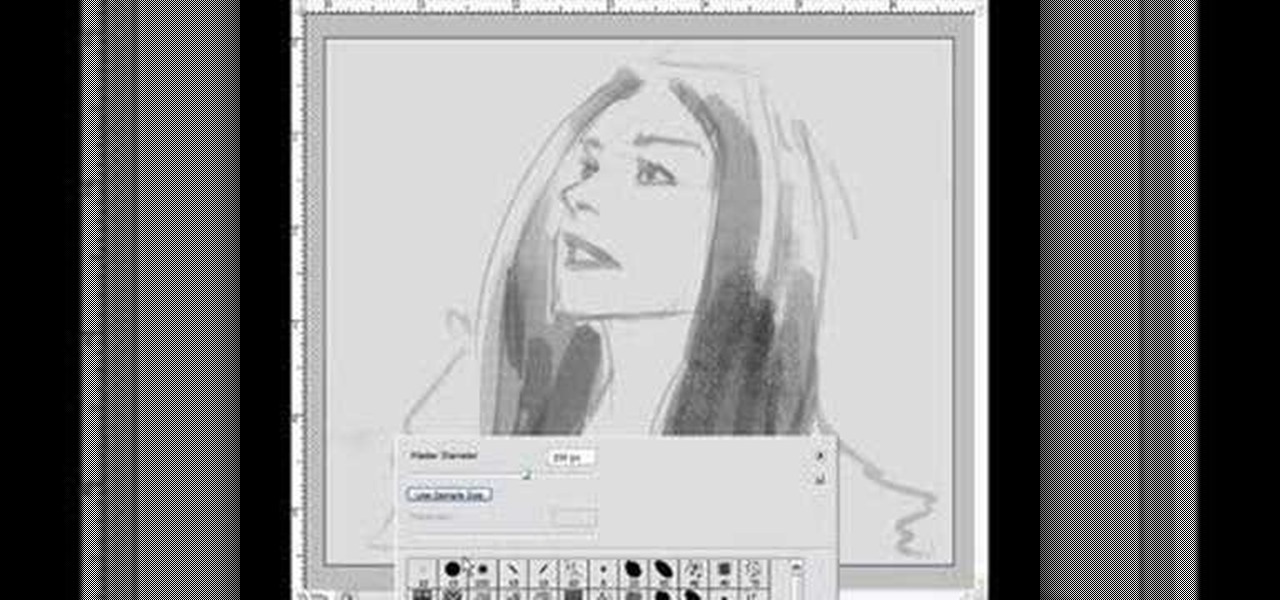
The video shows us how to draw a manga hair on a computer. Firstly draw a oval shape to represent the face though it is not important, just for the sake of using it as a reference. Then draw the outline of the hair formation using a lighter shade and then start drawing the hairdo in the way it is supposed to be and then darken it using the darker shades. Then erase the outline which you had done previously which is not needed now and then color the hairdo with appropriate colors. This kind of...
Interested in sketching and drawing some sceneries? We could start it with a palm tree on a beach scene. You'll require a piece of paper, a pencil and a sketch pen. First draw the base (trunk). Then add some details with circular lines going along the trunk. Then we could start up with the coconuts as well as their details to give a rough effect. Now comes the highlight of the palm-tree leaves which have to be drawn properly to have that edgy effect. Finally add some details on the base of th...
In this free video drawing lesson, we learn how to sketch a female "Dark Angel" anime character. For all of the details, including step-by-step instructions, and to get started drawing this character yourself, take a look.
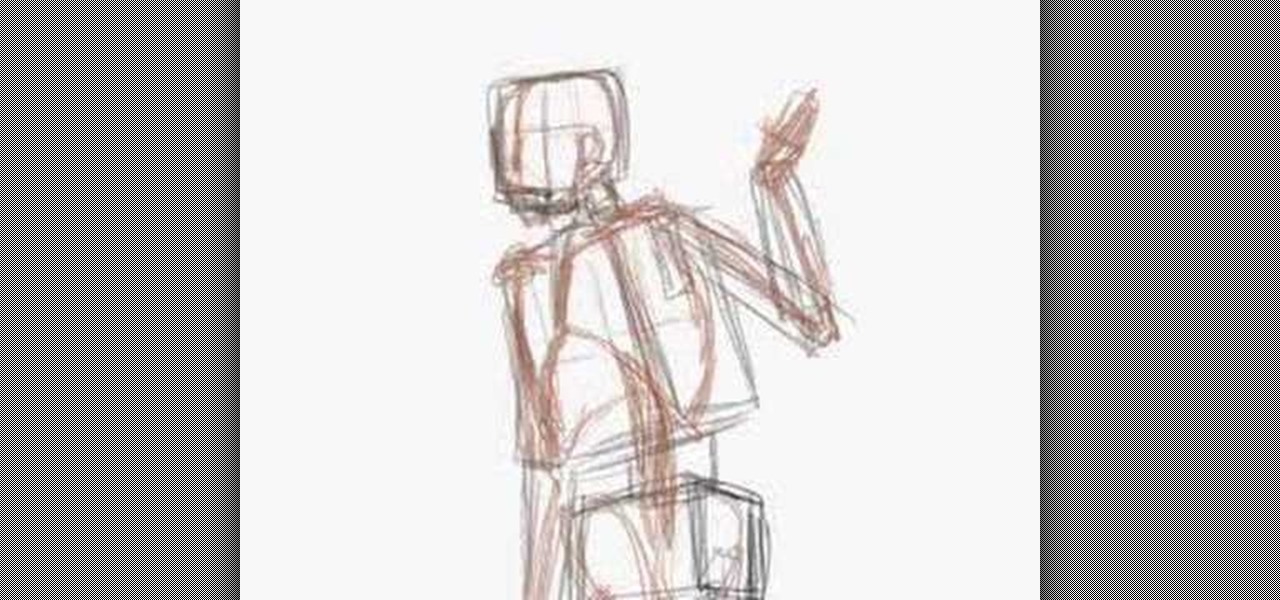
Drawing an anatomically correct human figure isn't difficult when broken down step by step. Learn how to slow sketch people by building the frame from simple boxes to a refined and finished human body. Follow along with this video tutorial and start drawing people in no time!
In this video, we learn how to draw children's heads. For the front view, first draw an oval with a slight point for the chin. Then, draw in the features of the face lightly with the side of the pencil. After this, start to shade the side of the eye in. The child's eye has a large eyelid, larger than an adult's eyelid. The pupil should also be large. For a side view, make sure to show the curves of the chin, nose, and lips. The eye should be soft and the ear should be soft as well. Fill in th...
Kathryn Hagen teaches us how to draw female heads in this tutorial. Start with an oval and dissect it horizontally and vertically. Draw in the hairline, as well as the eyes, nose, and mouth. You can measure out where everything should go by using the lines as a reference point. Add details into the eye, then continue on to add more details to the nose, showing the nostrils. Draw more details on the mouth, then define the center of the lip and shape. Draw on the ears, and add a line where the ...
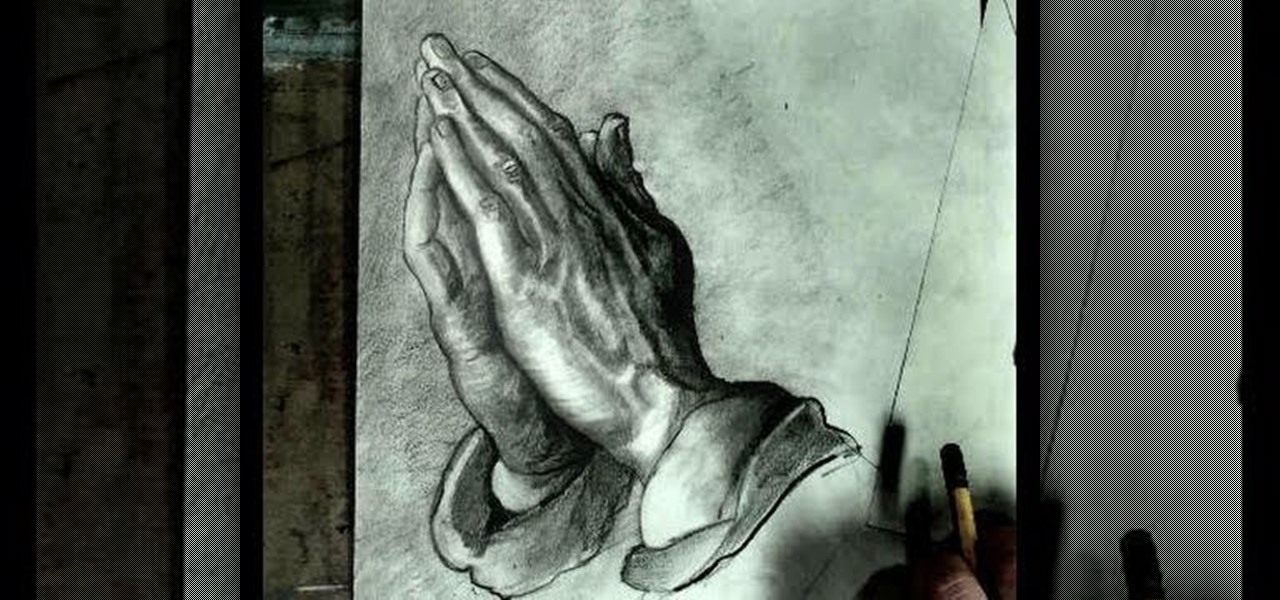
Not only does this tutorial show you how to draw a pair of hands clasped in prayer, it shoes you how to copy the famous Albrecht Durer drawing from the Renaissance. Reduce everything to basic shapes to make everything easier to draw.
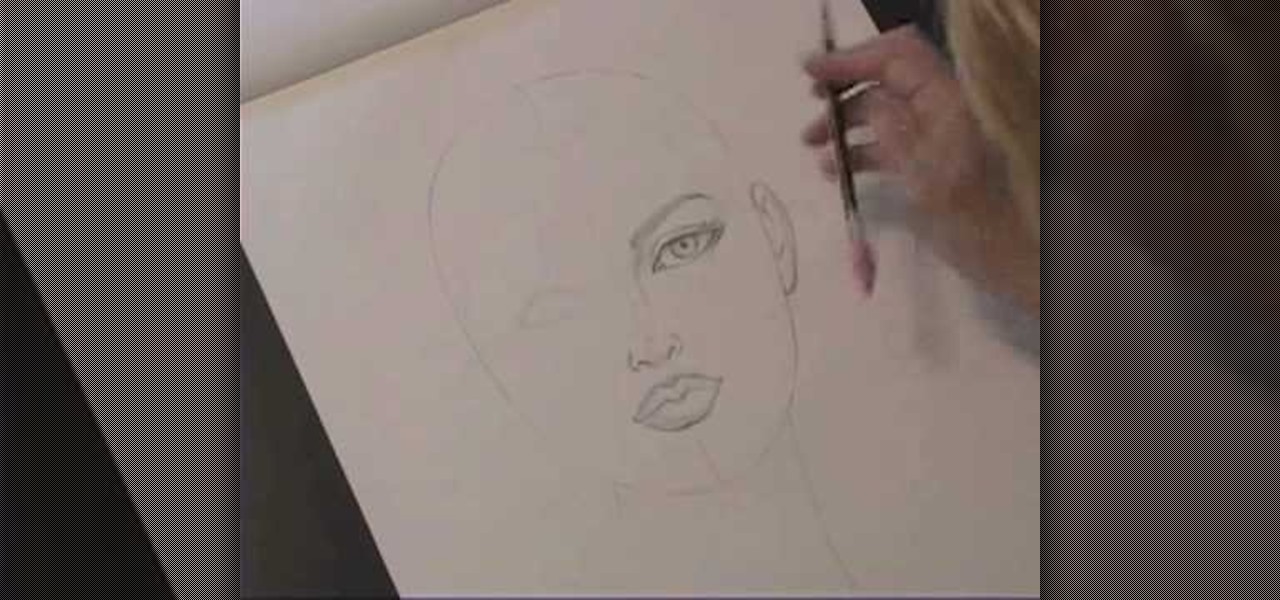
In this tutorial, we learn how to draw a face using charcoal. Start out using a light touch with your pencil to draw the outline of the pencil. After this, use the darker touch of a charcoal brush to draw in the details of the eyes. Draw the eyeline and the creases in the eye, then draw in the nostrils and the middle of the mouth. Draw in shading around the neck and chin to make a difference between the two. Use a light touch of the brush to create shading throughout the entire face, not usin...
If you're looking for an easy way to draw a bull, you've hit the bull's-eye in this drawing tutorial. So, if you've been having trouble drawing this mighty land beast, take the bull by the horns and start sketching! See the illustration process, which outlines an easy male cattle art piece. "Toro" is the Spanish translation of bull.