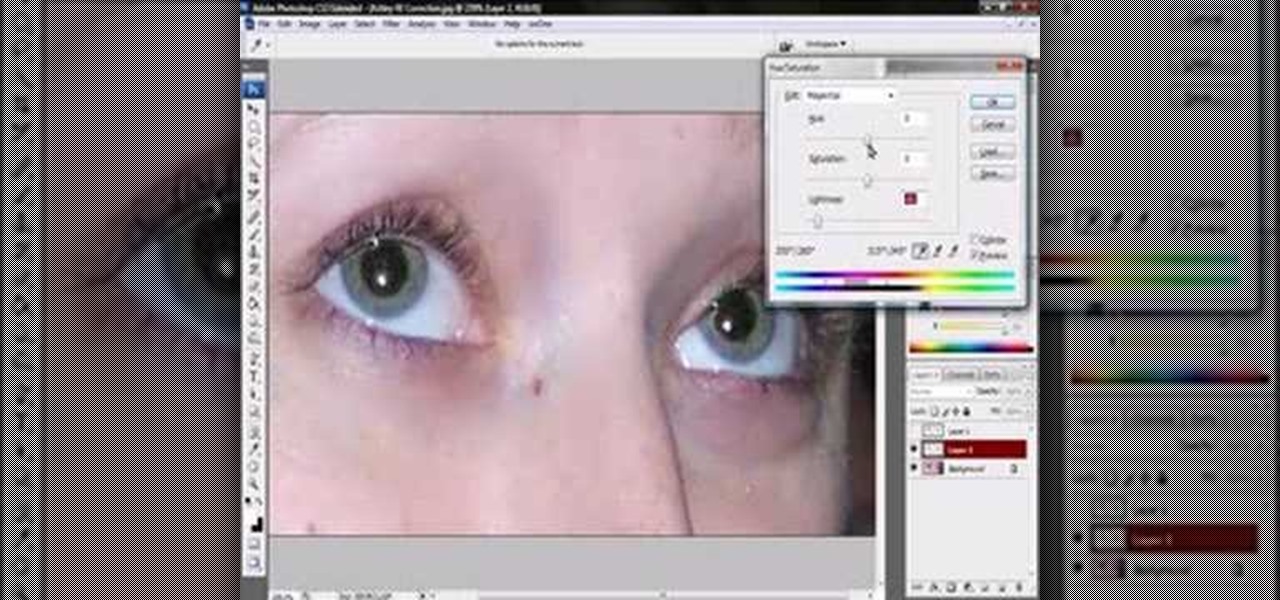
Jordan shows us a simple way to remove the red eye created by the flash of a camera using Adobe Photoshop. No matter where the red eye came from, you can remove it easily from any picture after watching this Photoshop tutorial. There are many ways to remove red eye and some are dirtier than others, but this method will give you a nice natural looking pupil in the end.
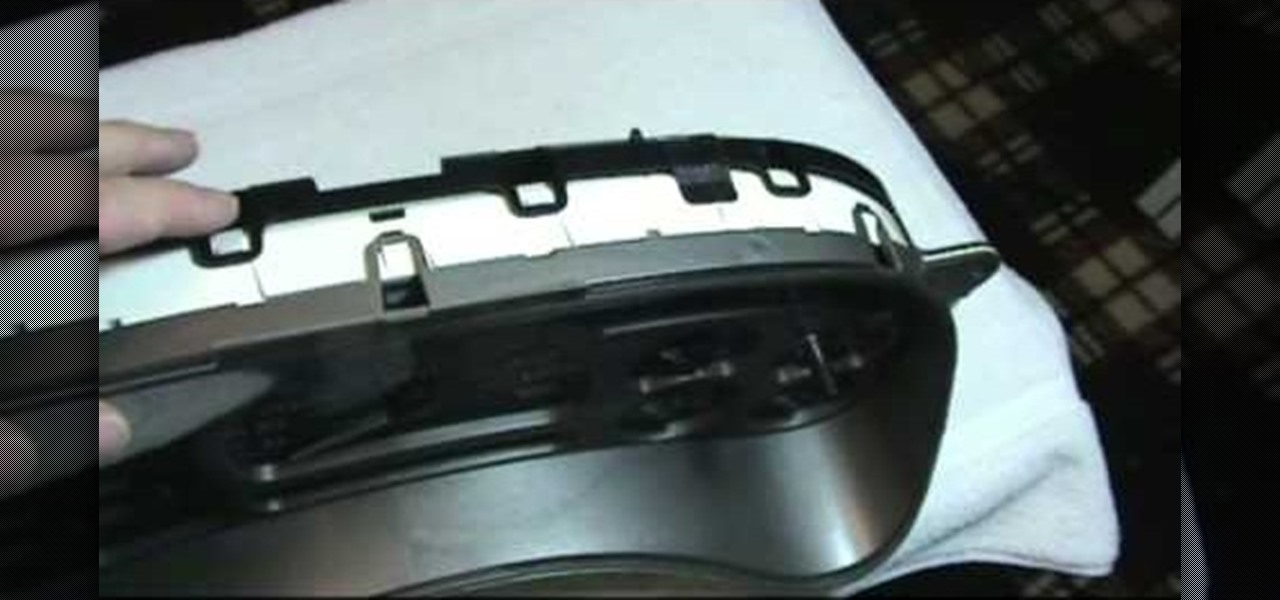
GM cars might be the flagship of American industrial production, but they are not very reliable for the most part. If something is wrong with one of the gages or instruments in your instrument panel cluster, you have to remove the panel and fix it. This two-part video will show you how to do that on most GM vehicles.
Acuras, like their Honda brethren, are blissfully easy cars to work on. If the timing belt on your 2001 MDX has gone bad, you've come to the right place, because this two-part video will show you how to remove the broken one and install a new one.

In order to cut into a fresh pineapple, you will need a sharp knife and a cutting board.
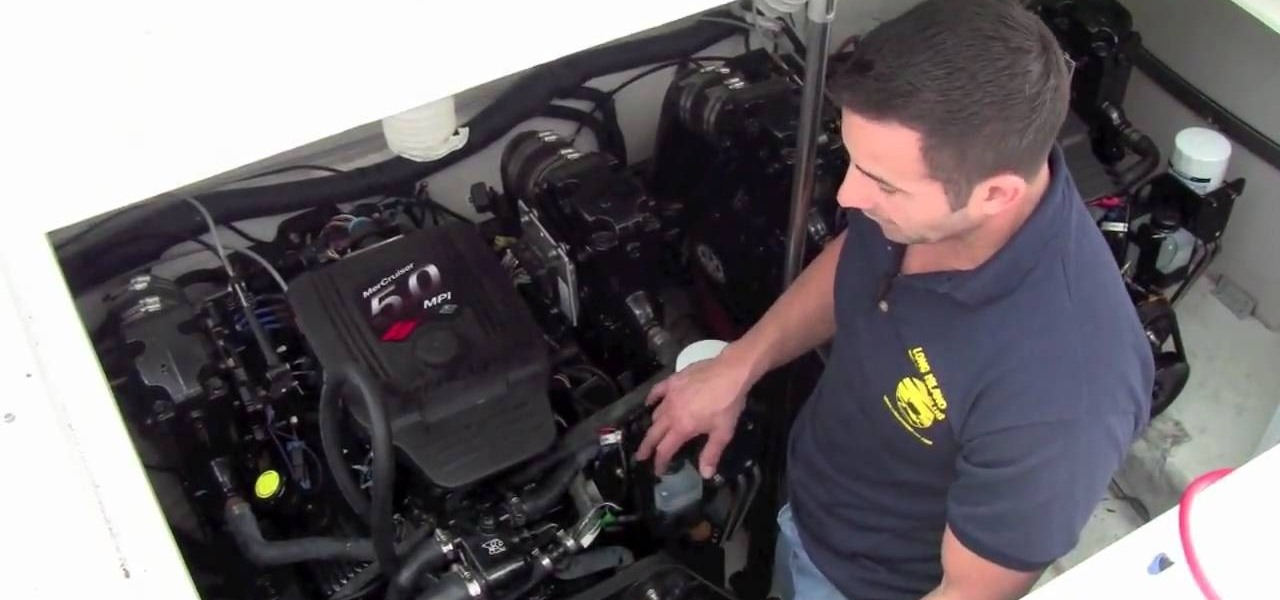
In this Outdoor Recreation video tutorial you will learn how to winterizing your boat engine block. For this you will need some screwdrivers, compressed air and a flexible hose if you have a hot water heater system on the boat. First you got to drain out all the water inside the engine. Remove the two plugs from the block and one plug from the sea pot as shown in the video and drain out all the water. Be careful and don't drop the seals while removing the plugs from the engine. While the wate...

If you need to remove vocals from a song in Pro Tools first you need to open Pro Tools and load the song. First, you need to split this track so go to Track and click split to mono. Now, mute this first track. Next, you want to remove the stereo by panning each the bottom to 0. Now, flip the phase by going to the bottom clicking EQ plugin. Now the vocal is pretty much gone.

This video from OWC presents how to install memory in a 17" Macbook Pro.The operation will take about 15 minutes and doesn't require an experienced user.First you need to provide all necessary anti-static precautions - discharge static electricity, use static-free surface.You'll need #00 Phillips screwdriver and nylon pry tool.You can find these in the Newer Technology 11-piece tool kit.To start, shut down the computer, close it and flip it over.You will need to remove 10 screws. Use #00 scre...
This video shows you how to clean a Thanksgiving Turkey. For this, you will need a turkey. Place the turkey in a clean sink. Remove the plastic bag. Carefully remove the contents from the belly of the turkey. Reach into the belly of the turkey, with your hand and remove the packets. It will likely contain the turkey’s heart, liver, giblets, and neck. When you remove these items, set them aside to be used later. They can be incorporated into the other Thanksgiving recipes, including dressing/s...
So, you've just got yourself an Apple iPad, but it already needs fixed, or you want to check the innards out for yourself, you're going to have to know how to open that sucker up. This video tutorial will show you how to do just that.
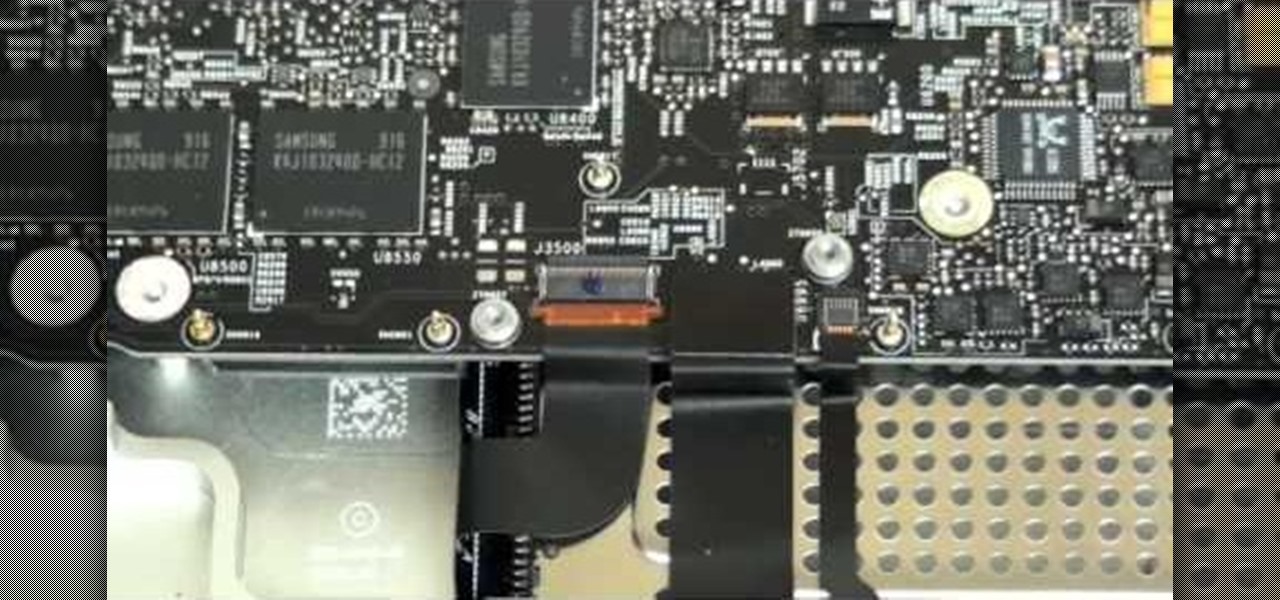
The logic board was a common malfunction in the old PowerBooks, but hopefully the unibody MacBook Pros are a little more resistant to failure, but if you have to get a new one, do it yourself. See how to remove the logic board on a MacBook Pro 17" Unibody laptop.
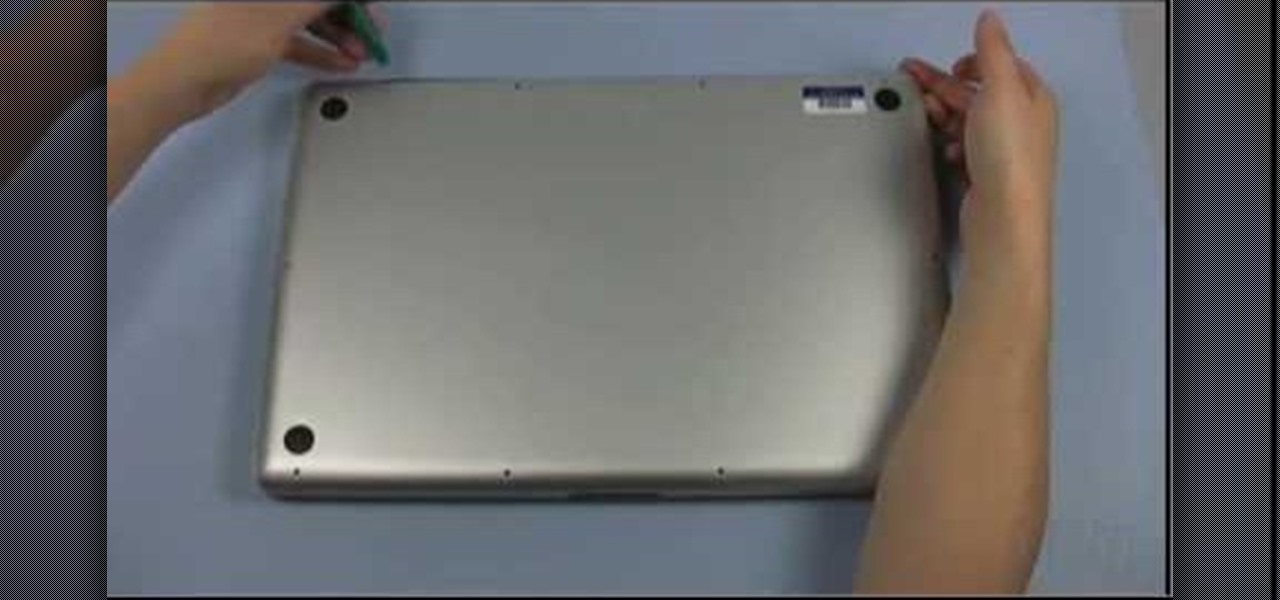
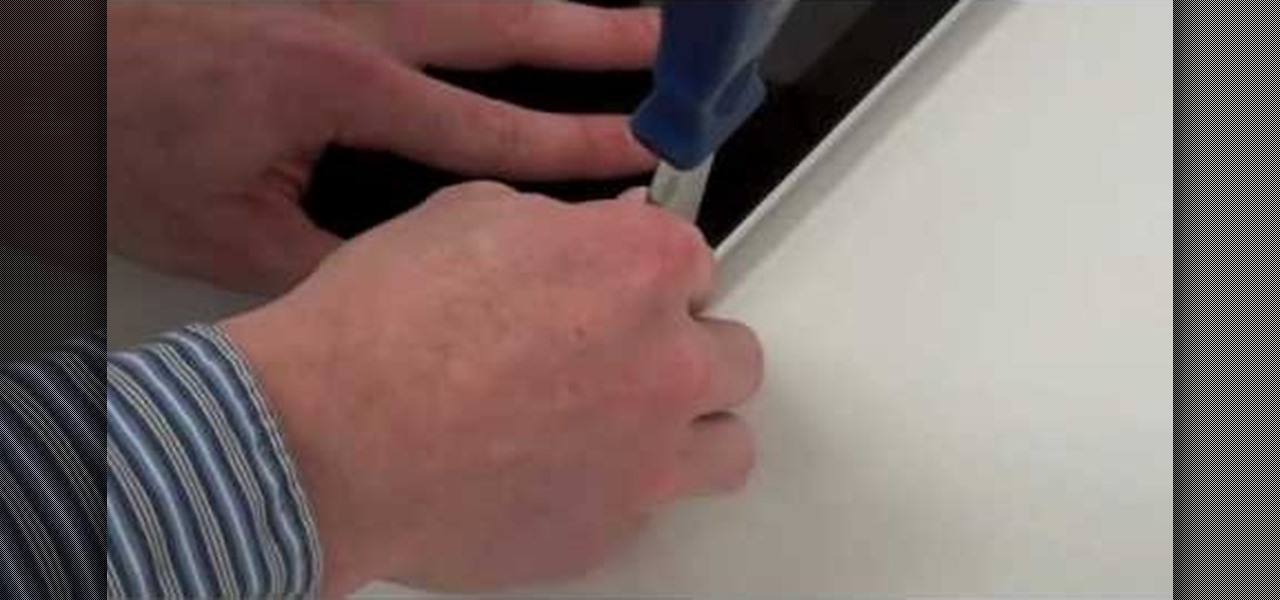
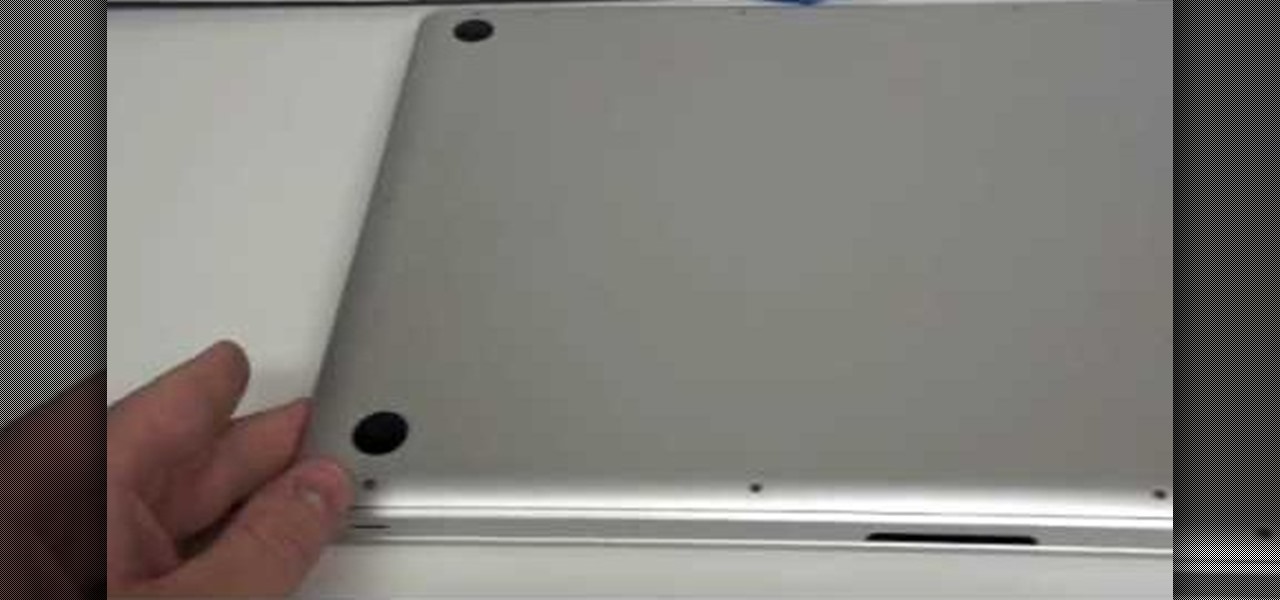
One of the first things you'll have to do when repairing and opening up your MacBook Pro 17" Unibody is taking off the bottom case. This is where you'll access all of your guts. See how to remove the bottom case on a MacBook Pro 17" Unibody laptop.
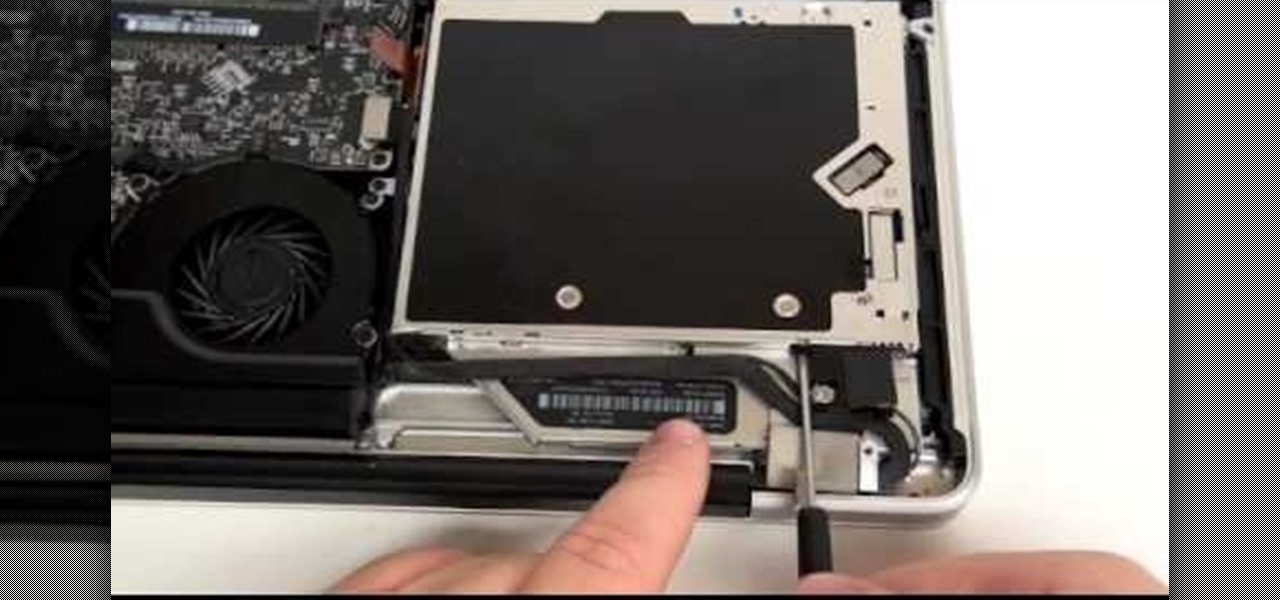
The new Unibody MacBook Pro's are a little different in design than the older MacBooks, so it may be a little confusing on how to see the innards of the laptop. Watch this to see how to remove the hard drive and battery of the MacBook Pro 17" Unibody.
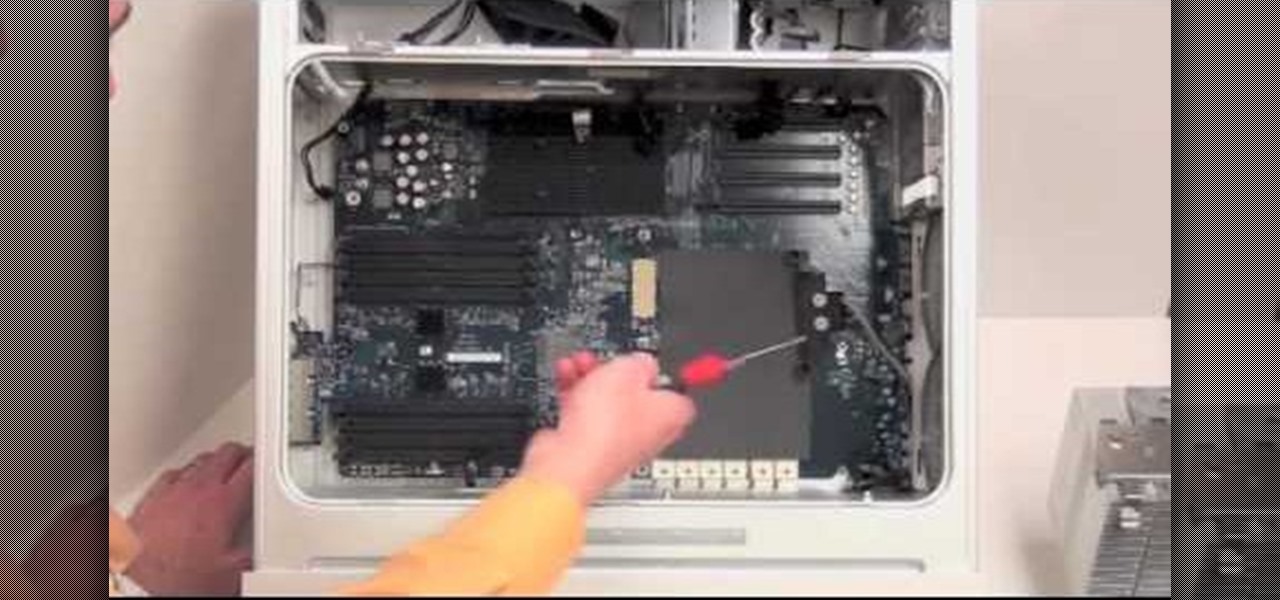
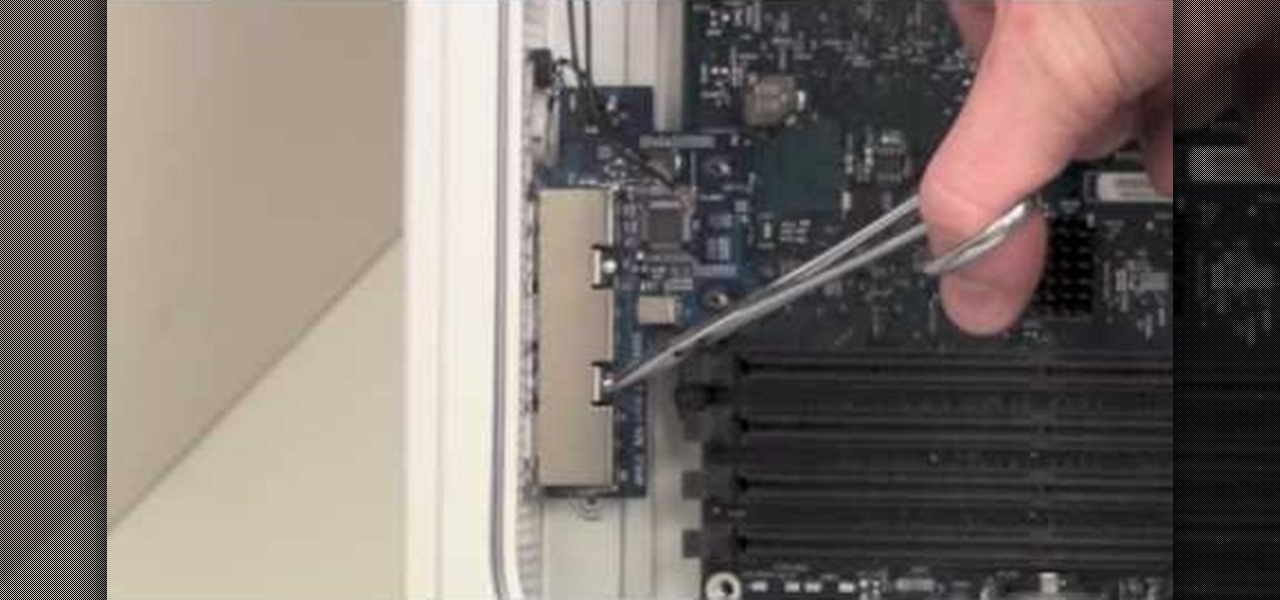
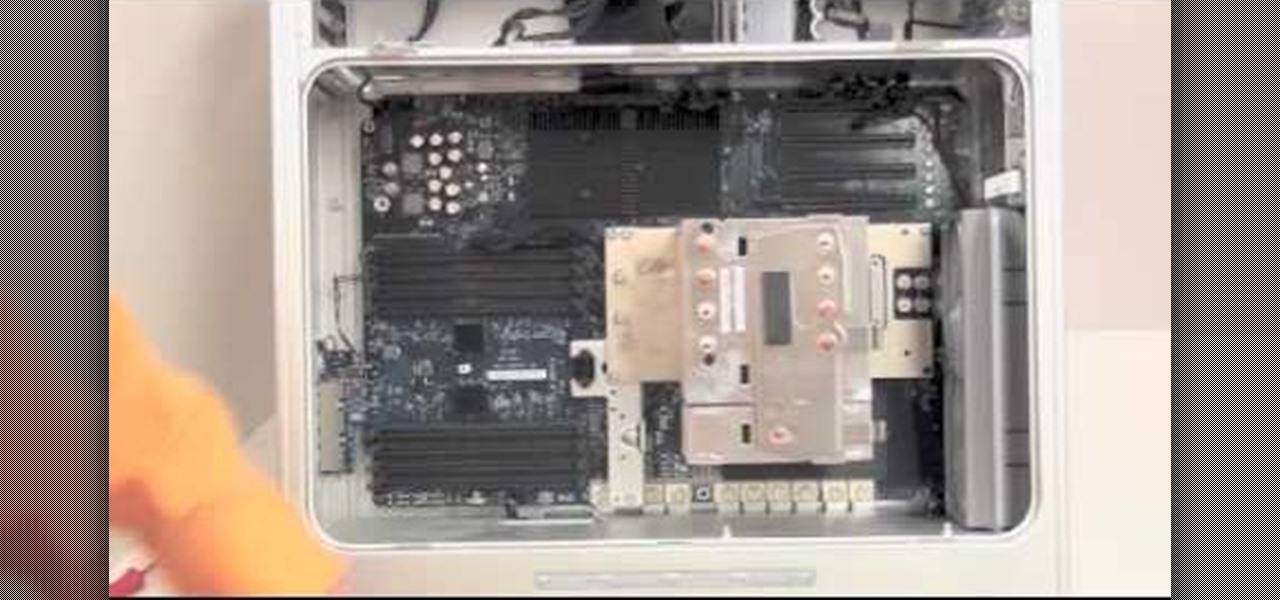
Is your motherboard toast? If your logic board has burned out, it's a sad thing, but you're going to have to replace it. See how to remove the logic board from the Power Mac desktop computer.
Can't turn on your computer? The power button might be broke. If so, you're going to have to replace it, and you can do it yourself. See how to remove the power button from the Power Mac desktop computer.
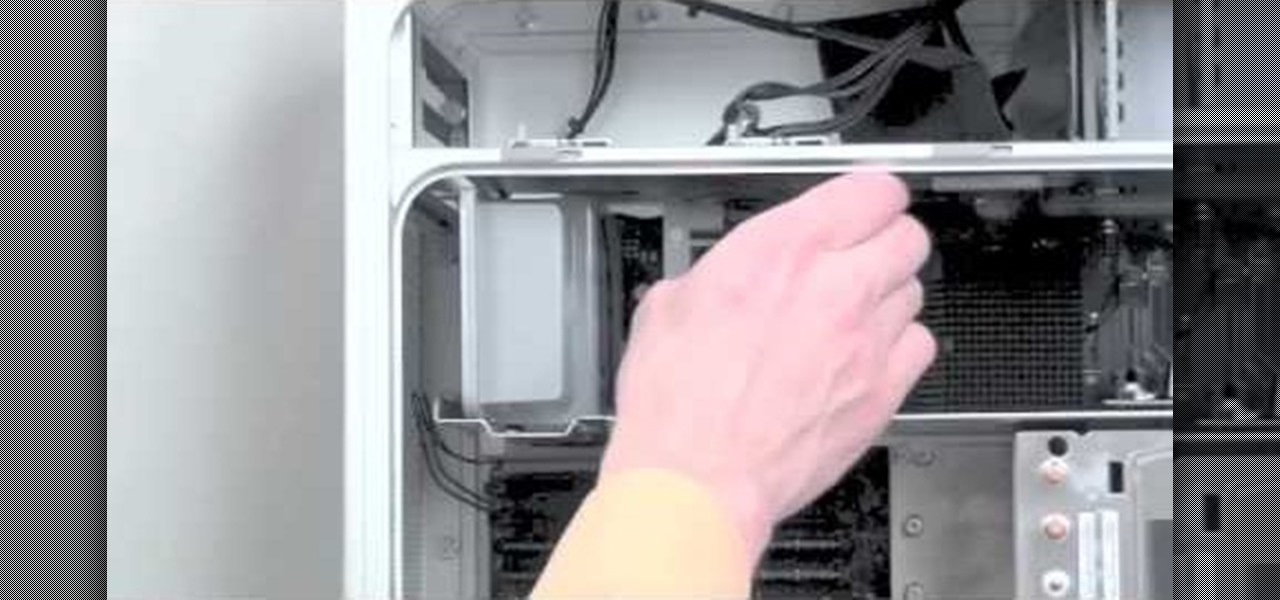
Is your computer overheating? It may be because of a faulty fan. See how to remove the fan in the Power Mac desktop computer.
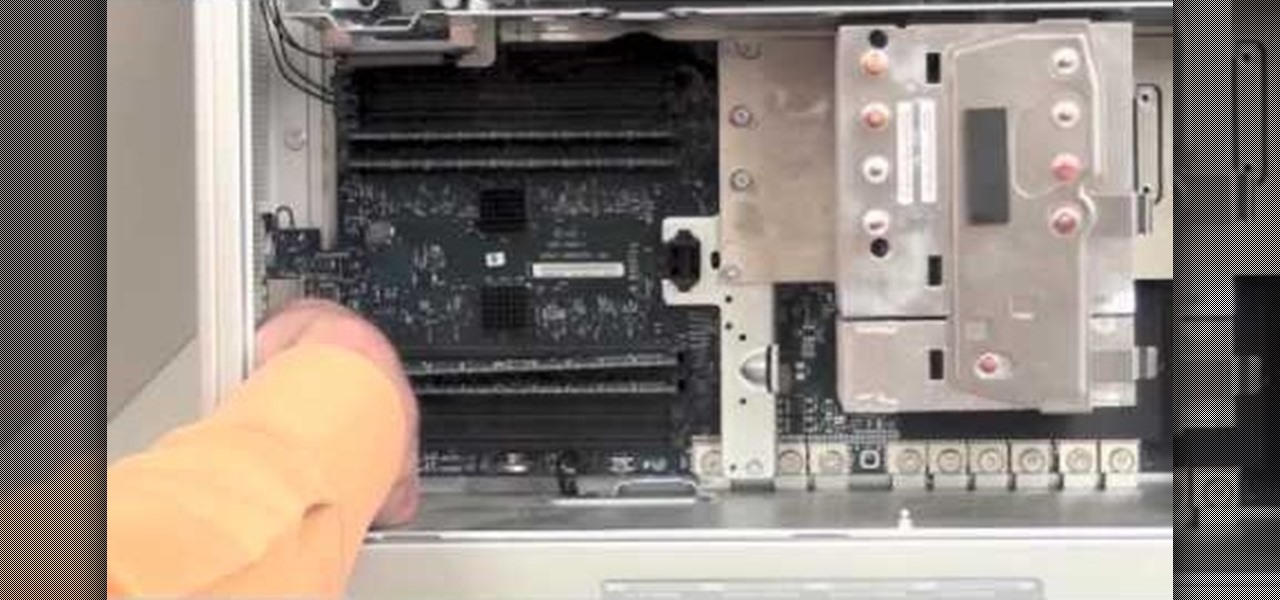
Maybe you only have 1G of RAM in your Power Mac. Maybe you ace some bum memory. Maybe it's just time to upgrade. Either way, this RAM upgrade video can help. See how to remove the RAM memory from a Power Mac desktop computer.
Your graphics card may be a little outdated in your Power Mac, so upgrade it to a one that can handle all of your gaming needs. See how to remove the graphics video card from your Power Mac desktop computer.
Your sound from your Power Mac may be nil, or maybe it just sounds really bad. The speaker may need to be replaced. See how to remove the speaker from the Power Mac desktop computer.
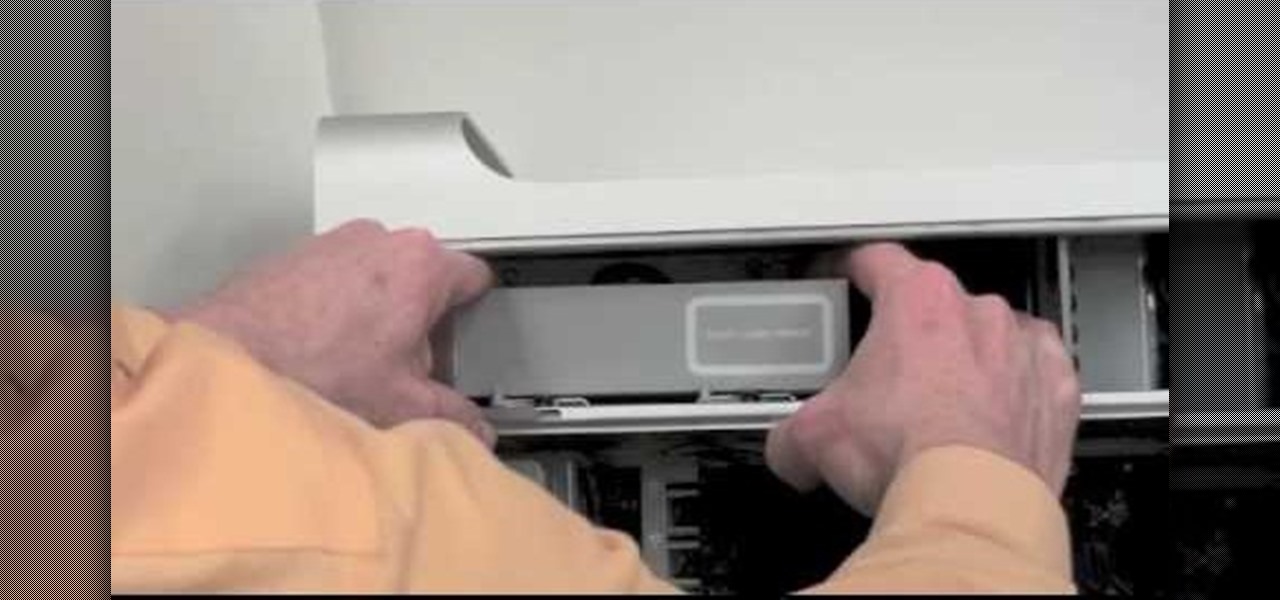
If your discs are getting jammed in your optical drive, or if your CDs and DVDs simply aren't playing in your Power Mac, it might be time to replace that old SuperDrive. See how to remove the SuperDrive optical drive from the Power Mac desktop computer.
Want to upgrade your hard drive in your Power Mac? It's a pretty simple task, once you can get inside your computer. See how to remove your hard drive from you Power Mac desktop computer.
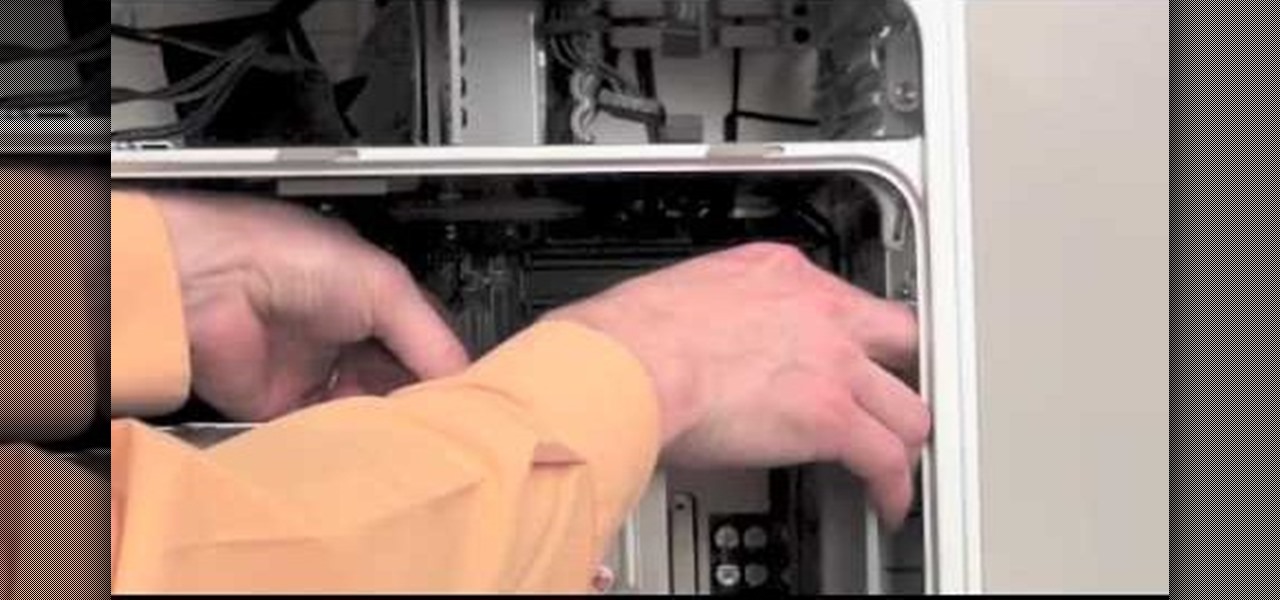
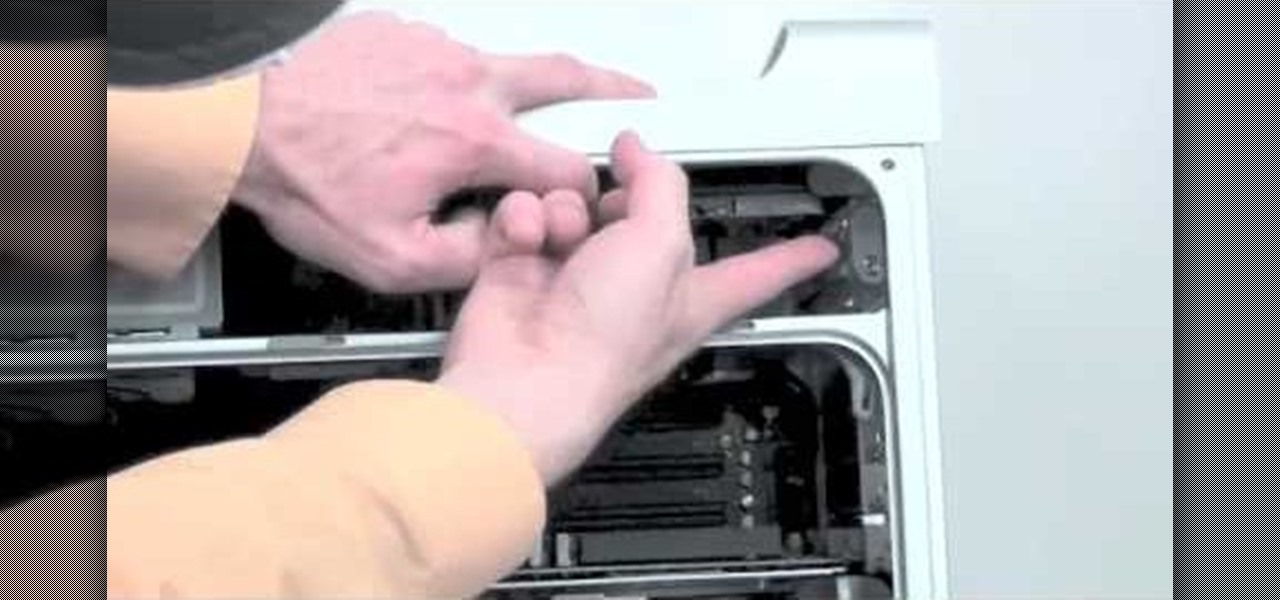
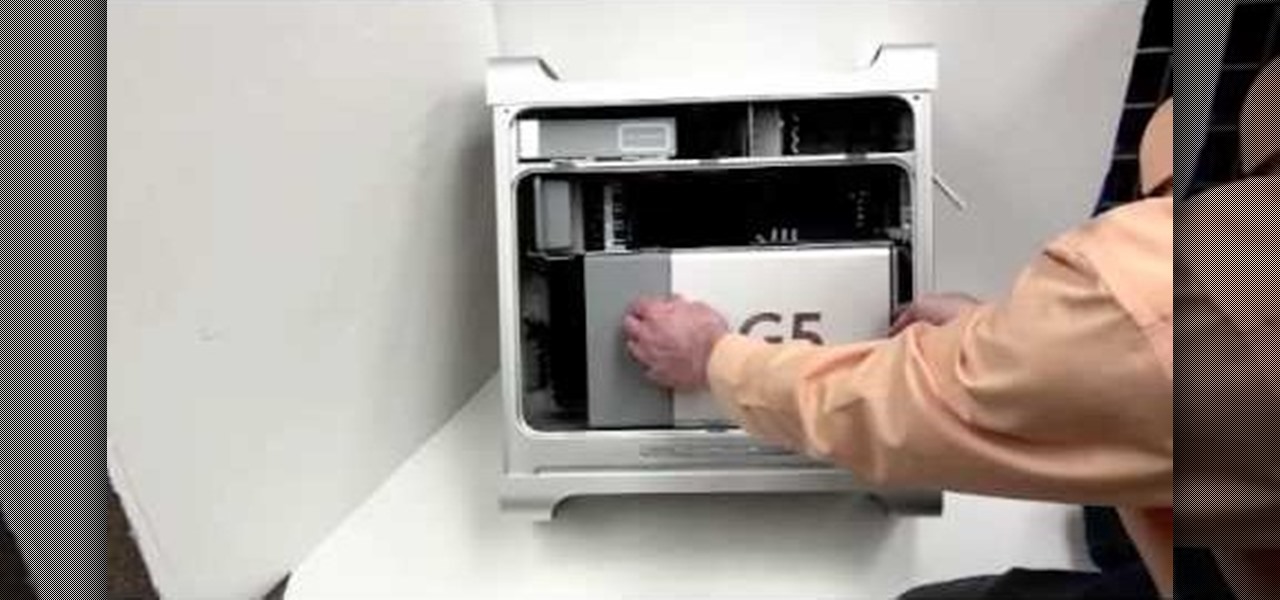
Need to fix your Power Mac? Disassembling the Power Mac could be tricky, but not now. See how to remove the side case and fan from the G5 Power Mac desktop computer.
In this tutorial, we learn how to replace a side mirror on a 1995 GMC Sonoma. First, take a wooden wedge and shove it in the switch inside your door so you don't kill your battery. Now, remove your window handle by sliding a tool inside and popping the handle off. Now remove the panel inside the handle of the vehicle and remove the screws surrounding it. Next, remove the trim clip behind the handle and pry off the trim from around the door handle. Now, remove the door petal and the entire sid...
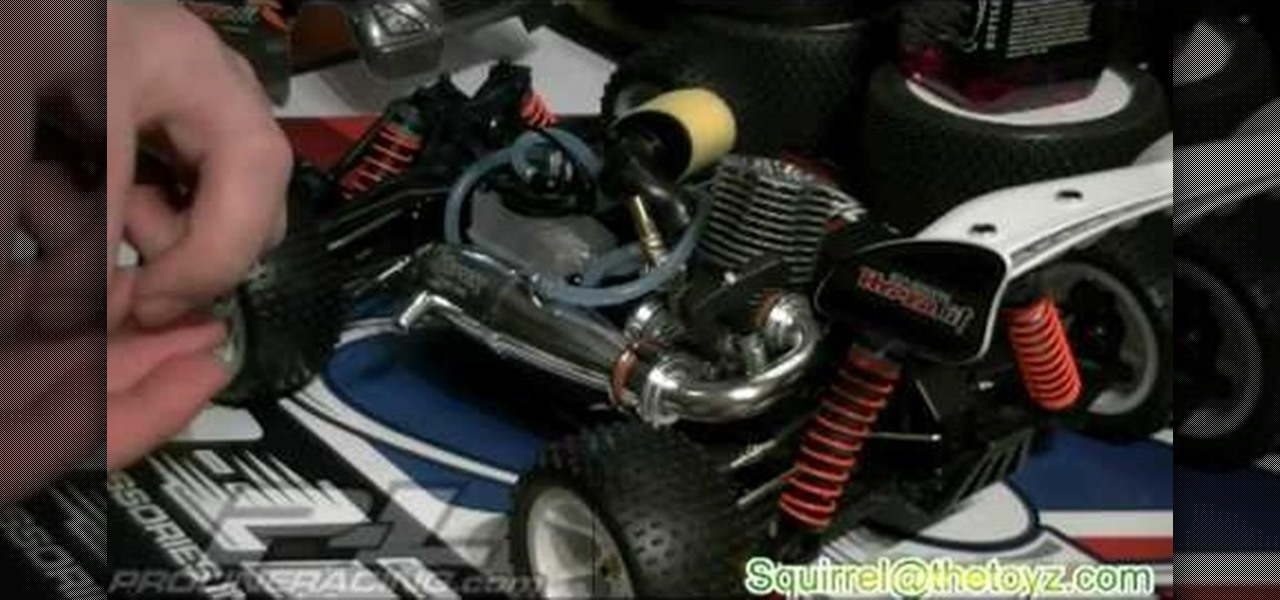
In this video you will learn how to remove a nitro engine from a remote control vehicle. One way you can do this is by removing your mount from the bottom, this can be done by removing the screws on the bottom. Another way to this is to remove the engine from the mount. Aside from the tools needed to remove certain parts, a lot of the pieces are easy to remove as all you need to do is slide them out or pop them out. Squirrel says that its fairly easy to remove but putting them all in is anoth...
Installing a new light fixture is an easy home improvement task. Learn how to properly remove and install a light fixture from a professional handyman in this home improvement video series.
This video series shows you what program is the best free anti-virus program, where to get it, how to download it, how to install it, how to run the scan, and how to remove the viruses. A complete tutorial on how to remove viruses.
In this tutorial, we learn how to safely remove a tick. Using professional tweezers that are pointy are the very best for removing ticks. Blunt tweezers will tear the tick. First, use the tweezers to grab the tick on it's skin in the front. Then, pull up and slow to remove the tick from the skin. Have a steady hand so you don't drop the tick or tear it in half. You can purchase tweezers that are made specifically for removing ticks from CVS stores. Give the area 24 hours to heal after you hav...
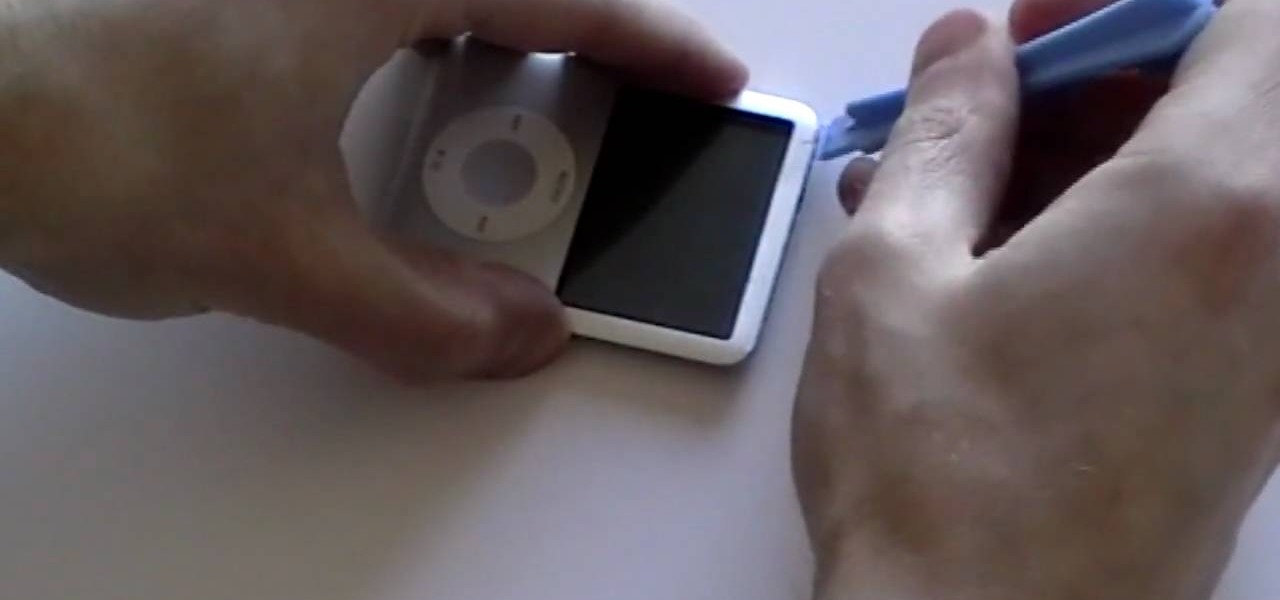
In this how-to video, you will learn now to dismantle an iPod Nano 3rd Generation. First, run a plastic tool on both sides of the device. Once this is done, remove the back cover with your fingers. Next, unscrew the six screws on the circuit board. Store them in a place where they will not be lost. Next, remove the click wheel ribbon cable from the jaw connector. Lift the jaw connector with the tool and use a pair of tweezers to gently remove the cable from the jaw. Next, remove the small met...
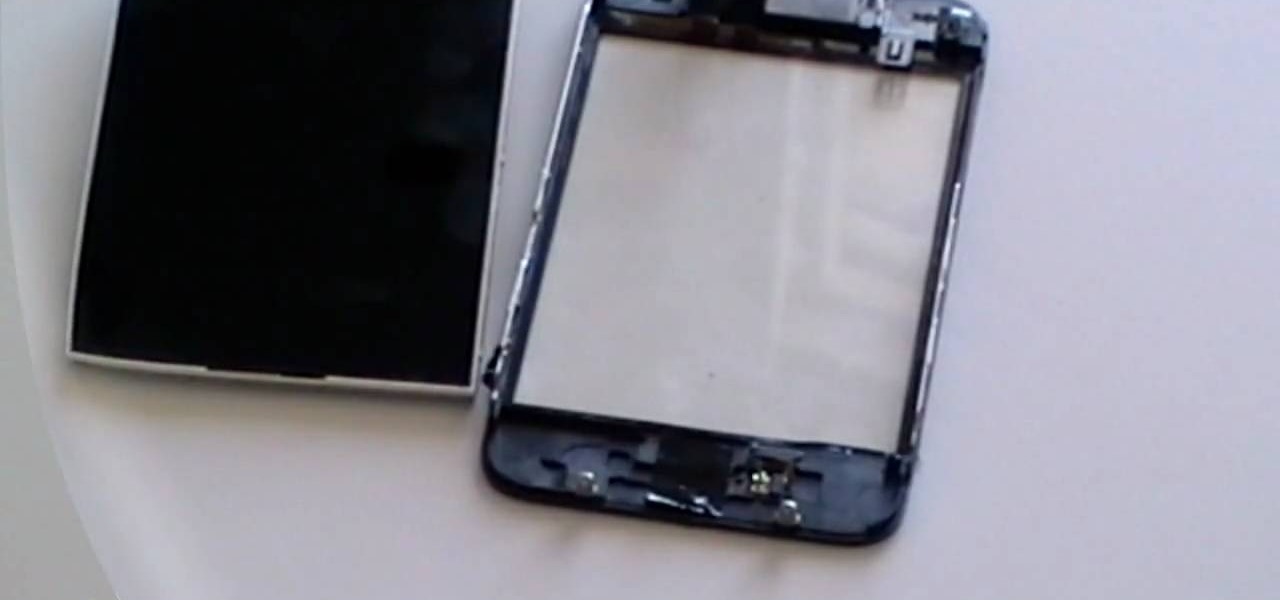
In this how to video, you will learn how to replace the glass digitizer on your iPhone 3G. First, remove the two screws at the bottom and the SIM card at the top. Once these are removed, use the safe pry tool and run it at the bottom between the bezel and back cover. Slowly remove the cover. Pop out the three connecters at the top of the inside. The third connector is in a jaw connected. Place the pry tool in a 90 degree angle to remove it. Now that the connectors have been opened, carefully ...
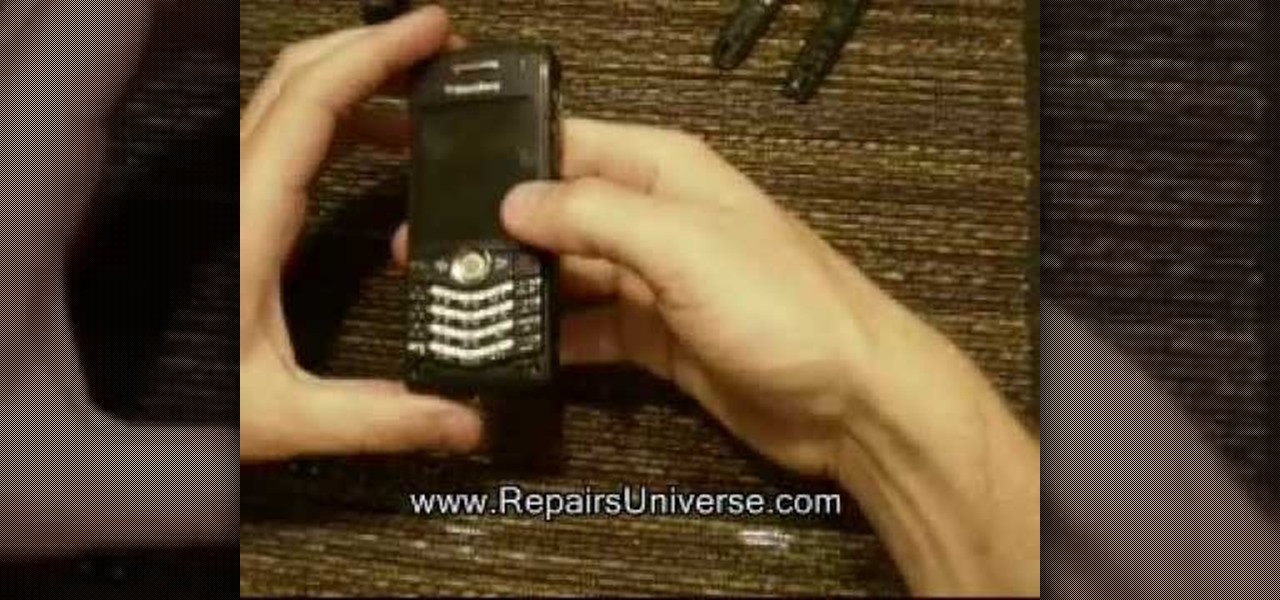
In this tutorial, we learn how to install a replacement LCD screen on a Blackberry Pearl. First remove the cover and battery from the phone. Then, you will take a tool and remove the clips from the left and right side of the back to remove the bottom. You will now find two more screws that need to be removed from the phone that are on the top. Once done, you will nee to pry open the top and bottom of the phone and take it apart. You can now remove the motherboard from the casing which is wher...
This video shows you how to take apart a Microsoft Zune HD. To take it apart, you will need a tri-wing screwdriver. Using the screwdriver, remove the four screws at the corners. Once the screws are removed, you can easily remove the back cover. To remove the bottom cover, slide it off with your fingers. Next use a T5 screwdriver to remove the three screws, one on each side and one in the middle. There is one more tiny screw near the bottom that has to be removed. Using a prying tool to remove...
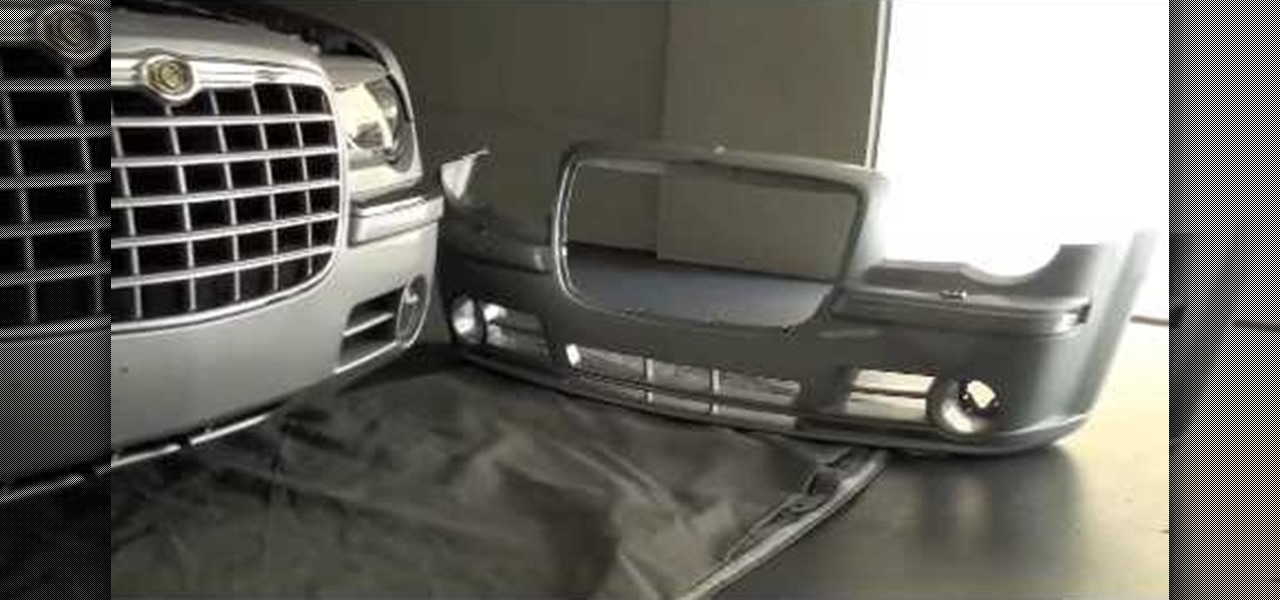
There may come a time when you need to fix your car and you may not have the money needed to do all the maintenance. So the next best choice? Do it yourself of course! In this three part video tutorial you'll find out what it takes to remove the front bumper and grill to a Chrysler 300C.
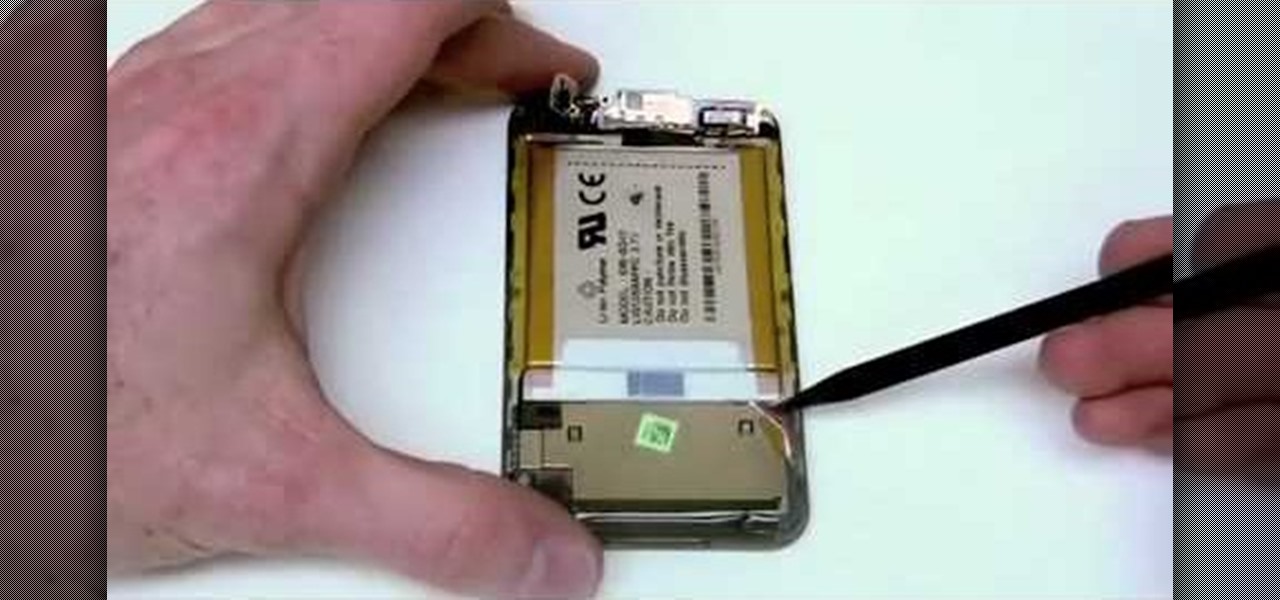
This video describes how to take apart a first generation iPod. To open the iPod, the video recommends using a putty knife or similar flat tool to gently ply open the casing. The presenter recommends being especially careful if this is the first time opening the casing. Once you have the first side open slightly wide work your way around the casing, making sure the entire casing is spread evenly around. Once all the sides are loose, the back casing just slides off. There are then two componen...
This motorcycle maintenance tutorial will show you how to remove and then reinstall body work on a Kawasaki KLR650. It is necessary to remove the body work any time you need to do repairs or maintenance such as oil changes or fluid replacements. If you plan to work on your KLR 650 at all, you definitely want to watch this video and learn how to remove the body work first.
Here is the training video used to teach soldiers how to use the M-209 portable, mechanical cipher machine unit.
As Android owners, we ultimately have to look at our device and ask the difficult question: "Where the hell did all these applications come from?"
Honestly, Android's stock alarm icon is completely useless. It doesn't relay any information other than the fact that, at some point in the future, you have an alarm coming up. Considering how pointless it is, I normally install GravityBox or other similar mods just to get rid of it.
Dropbox lets you store anywhere from 2 GB to 18 GB of data for free, but if you want more cloud storage you're going to have to pay. Even if you do, Dropbox only gives you 500 GB for a pro membership. So how do you get more cloud storage without paying a dime? Start using Flickr.
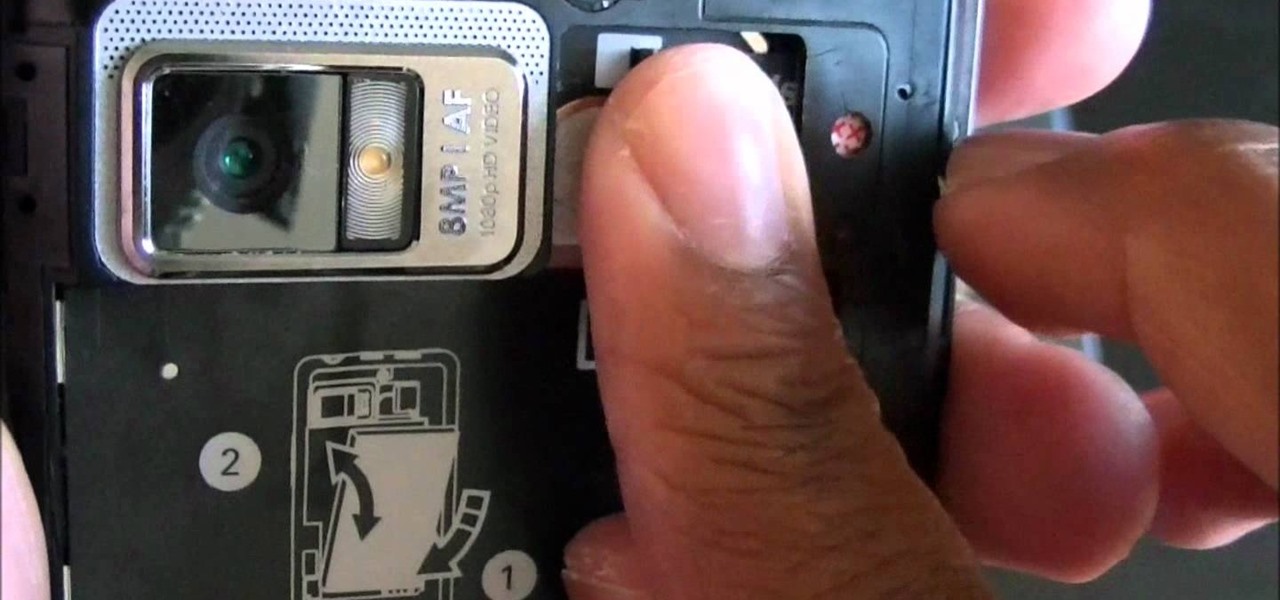
If you need to replace or remove the battery, sim card, or SD card from your new Droid Bionic by Motorola, take a look at this walkthrough on how to remove the back of the case and gain access to all three pieces of the Android smartphone. Yes, you heard right. The Verizon Wireless phone does use a sim card because of its 4G connection.
Making Jello cakes or desserts is really fun, but removing them from the cake mold is really not. Jello has a reputation for being slippery, but it also gets easily sticky and difficult to work with without total ruin.
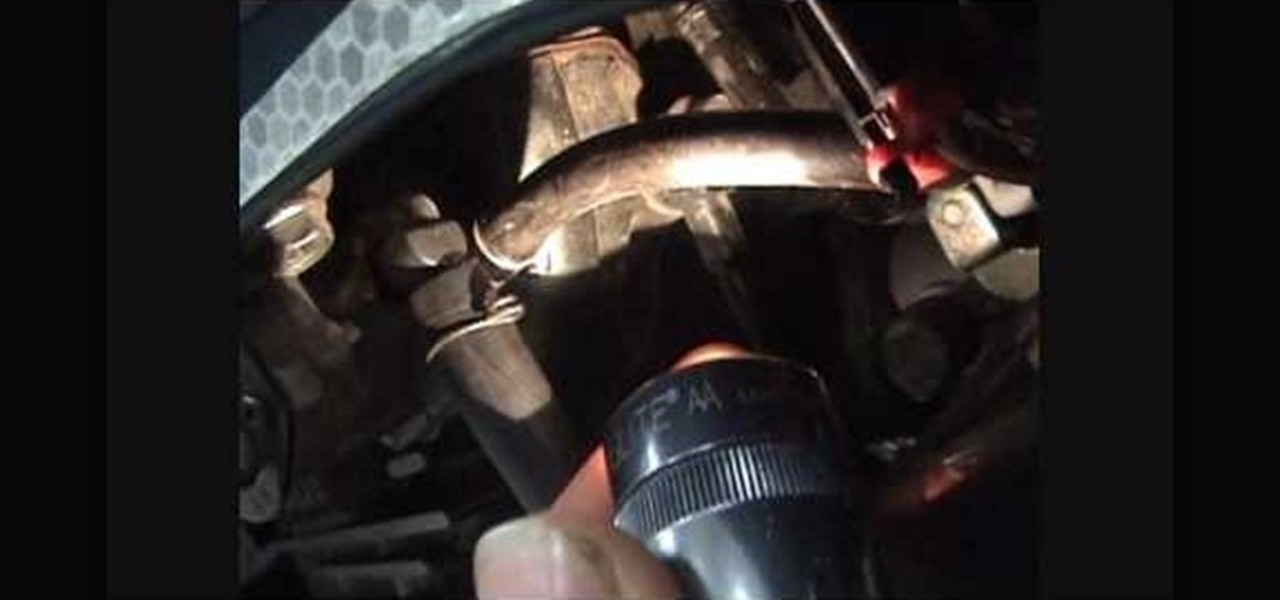
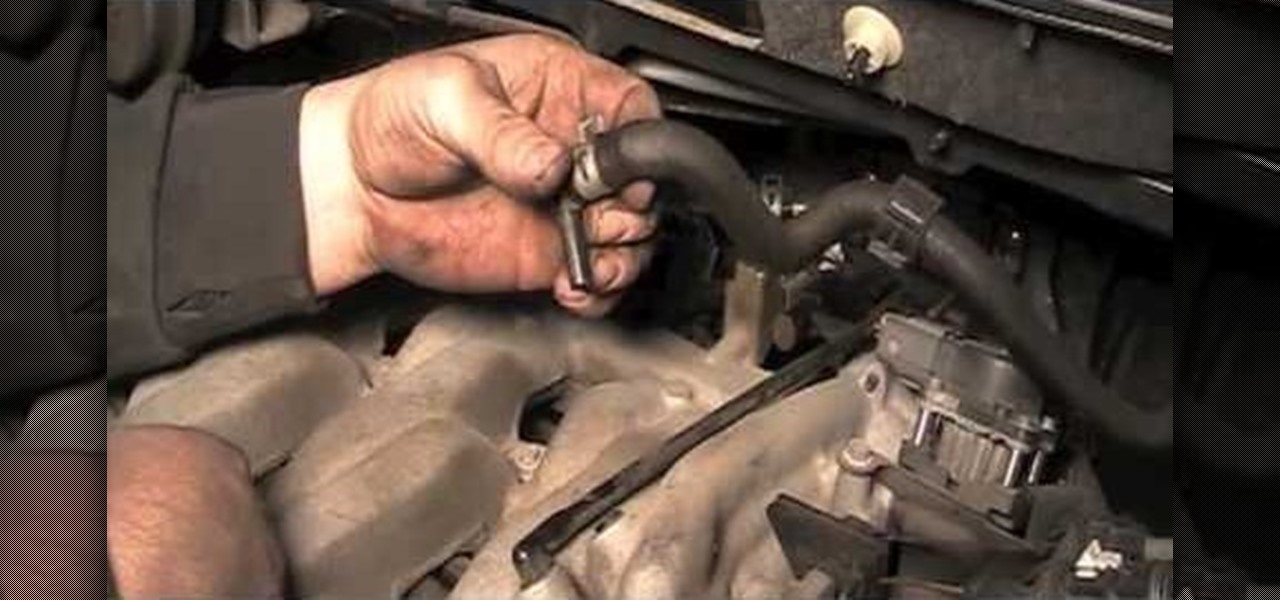
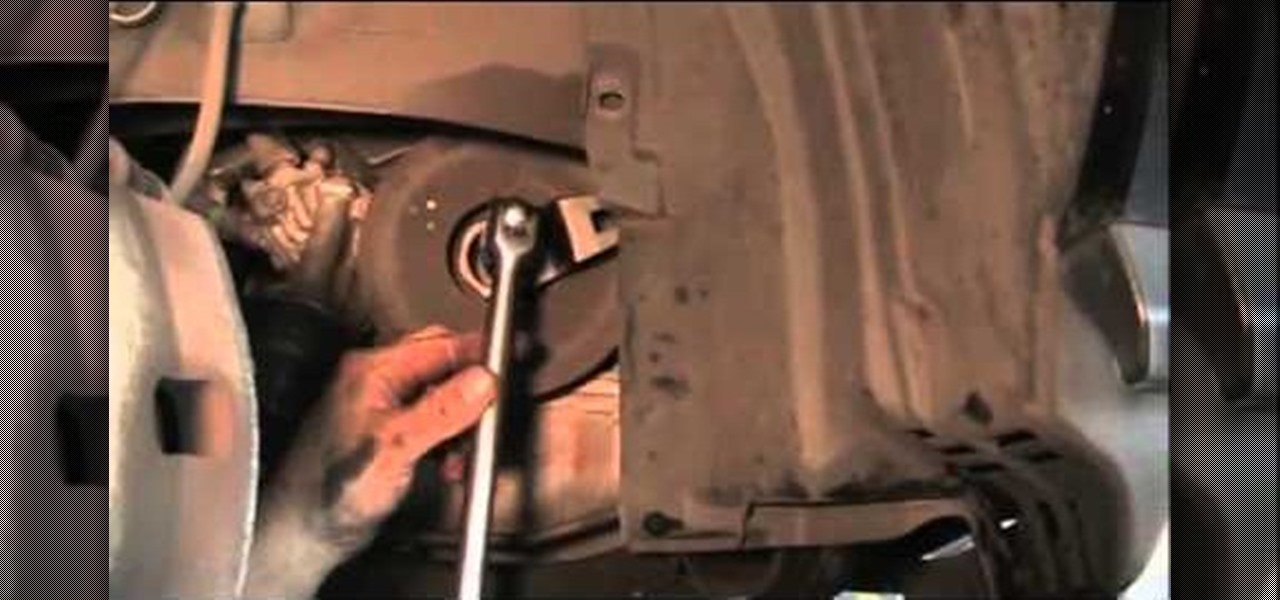
If you've ever tried to remove the brake hoses on a Ford or a Mazda, you may know the pain of the brake hose connector breaking when you try to remove it. Watch this video to learn how to remove the brake hose the easy way.