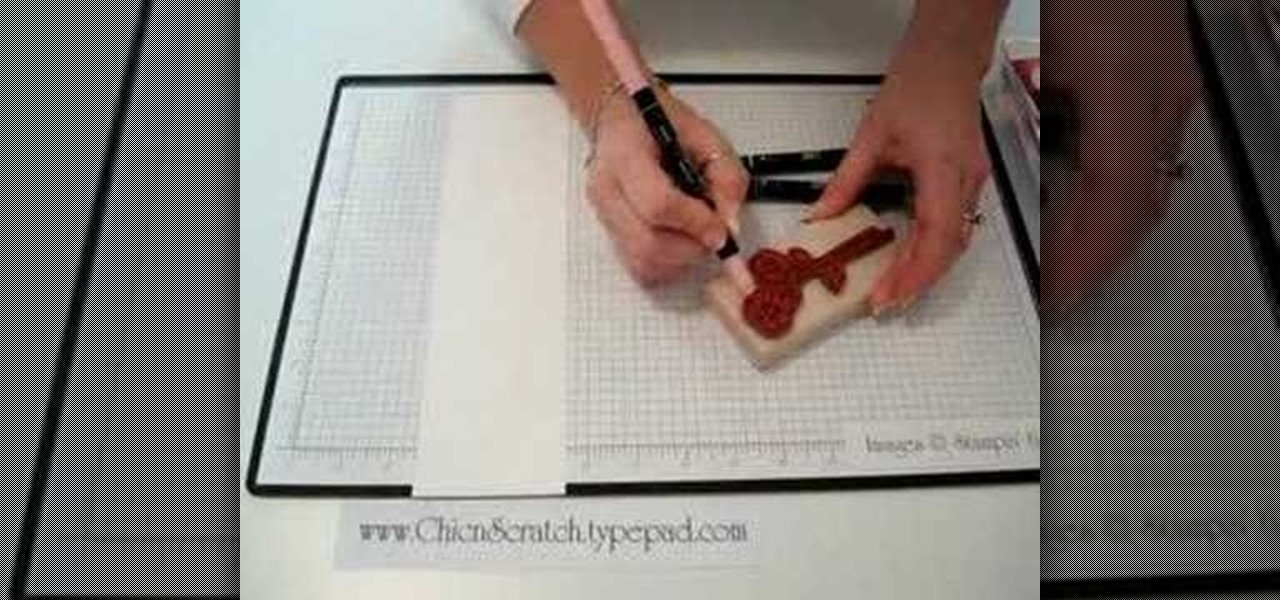
Dried out markers are the worst. They take up space, and for some reason, even though they're totally useless, most of us have at least a few lying around just for the sake of not throwing them out. Luckily, Julie Finn over at Crafting a Green World has come up with a way to repurpose them into alcohol ink, a versatile type of ink that can be used on non-porous materials like plastic, glass, and metal. This is truly a tutorial for the pack rat in all of us. First, a little primer on what you ...

Fluorescein is a commonly used fluorescent dye that is quite hard to come by in a concentrated form. Fortunately, it's used in relatively large quantities in highlighter markers and can be extracted by a fairly simple process. Fluorescein makes spectacular explosions of color as it dissolves into water and can be used for many different purposes that are addressed in the video below.
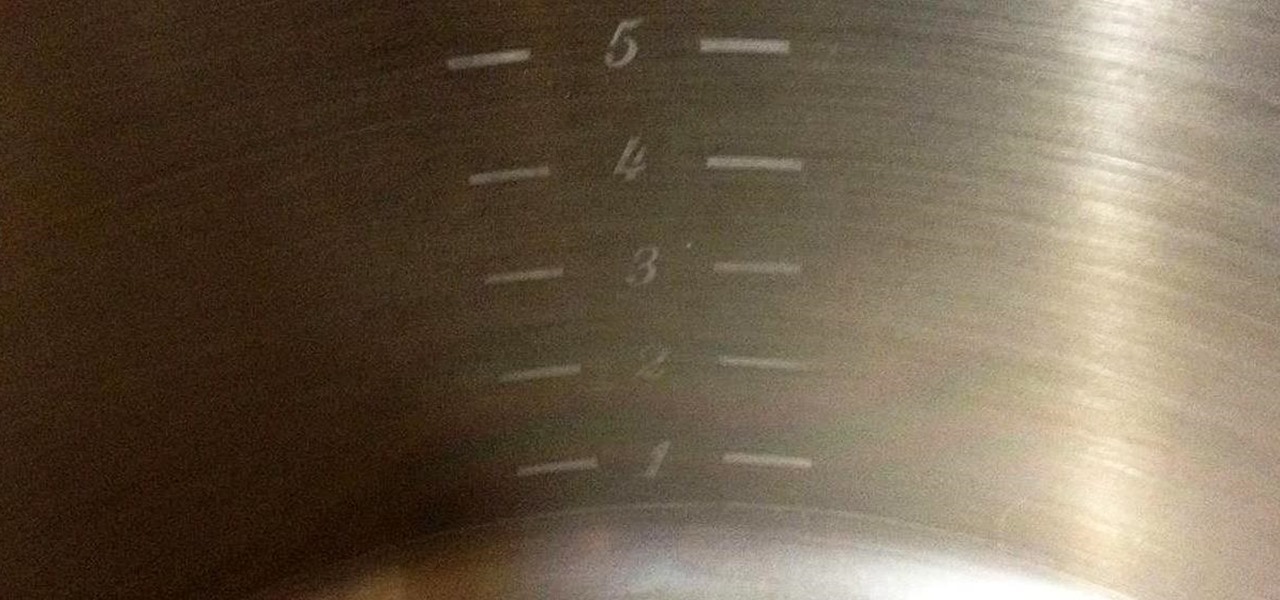
Volume markings on large pots and mixing bowls make life so much easier. They cut out the step of measuring and save you the trouble of washing measuring cups. However, there aren't many containers out there that actually have volume markers in them.
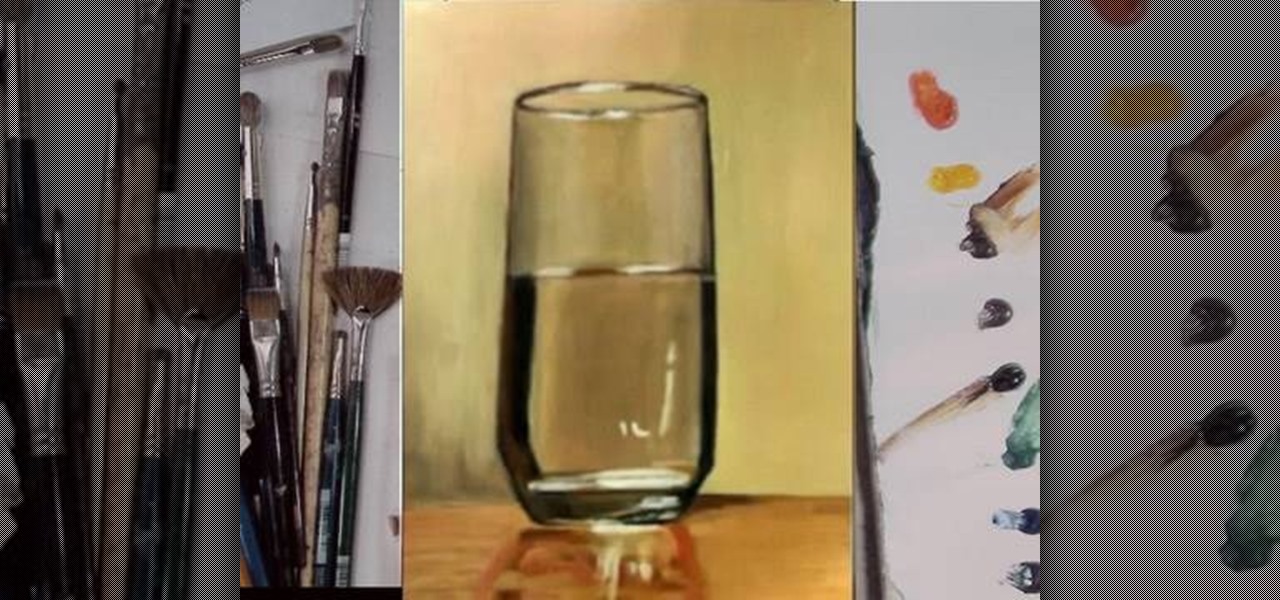
Watch this fine art video tutorial to learn how to Draw a glass of water with illustration markers, colored pencils & oil paint.
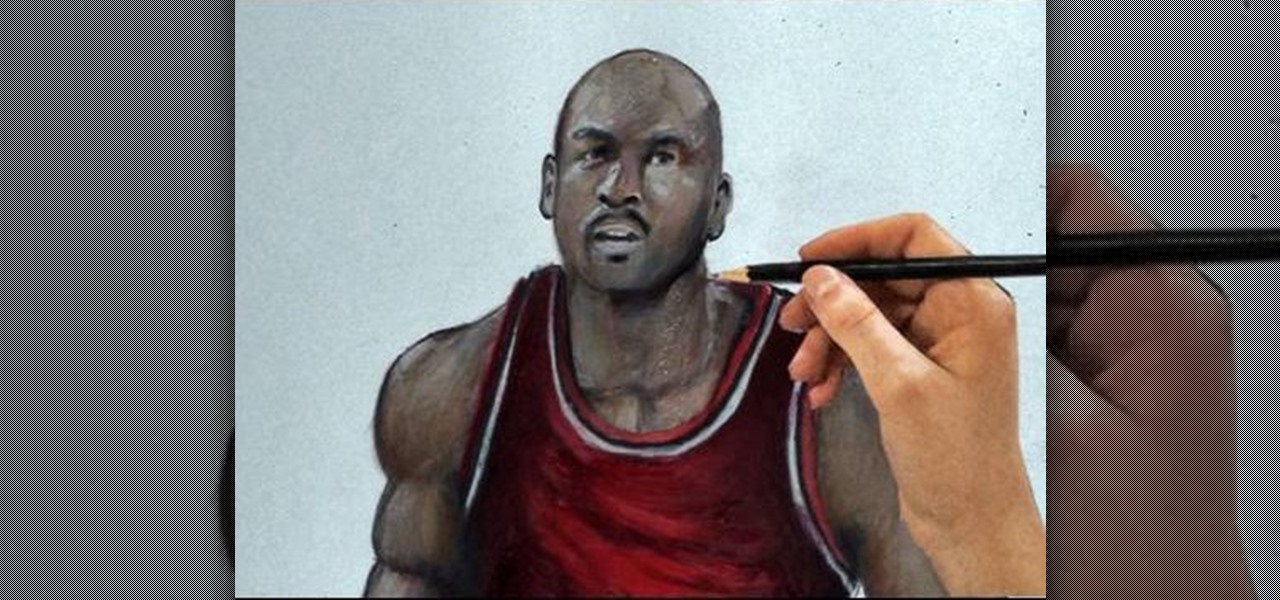
Illustration markers might be hard to use if you're not accustomed to them. You're prone to mistakes and indecisiveness. But that's probably because you don't know how to use them properly. You have to be completely comfortable with them.
Watch this fine art video tutorial to learn how to illustrate with markers and colored pencils. "This video shows my process for making an illustration (non tradigital). I use illustration markers (usually prismacolor) and color pencils (usually prisma once again) and a wax blending stick. I make my illustrations in two steps:

In order to create a watercolor effect with Stampin' Up markers, you will need the following: Stampin' Up markers, Stampin' Up pastels, stamps, color spritzer tool, a water resistant ink, cotton swabs, a blow dryer, aqua painter brush, and watercolor paper.
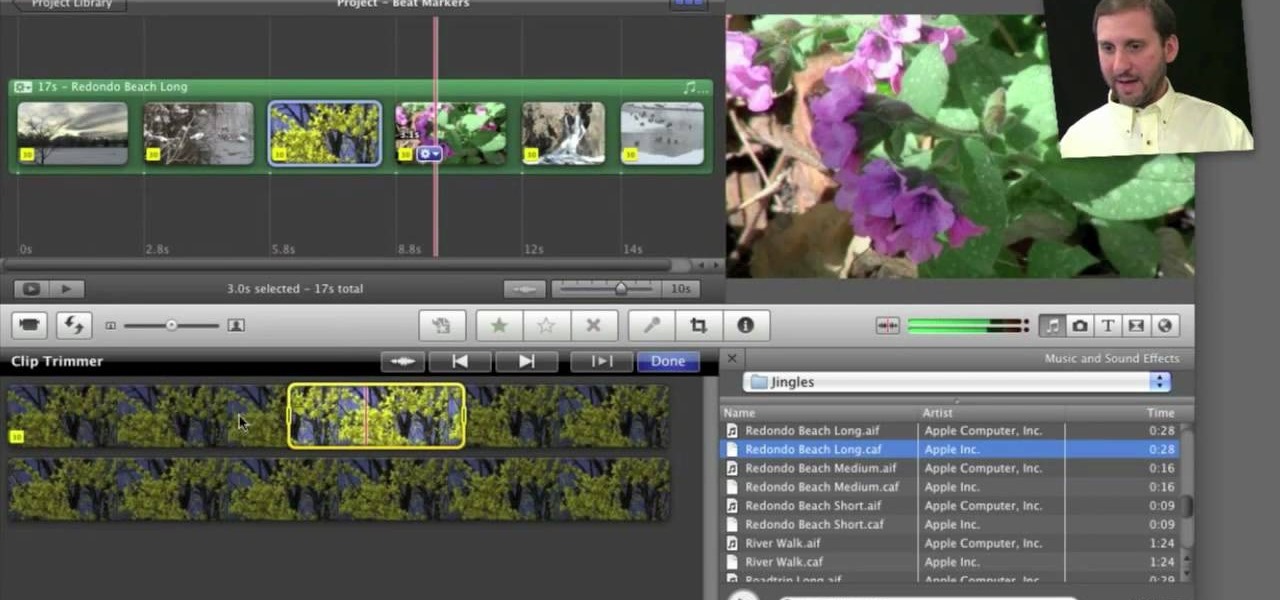
If you're interested in editing music videos one of the things you'll want to know is how to edit on the beat. So, where ARE the beats? This helpful video shows you how to use iMovie 11's beat marker tool to find and mark the beats, so you can cut to your hearts delight.
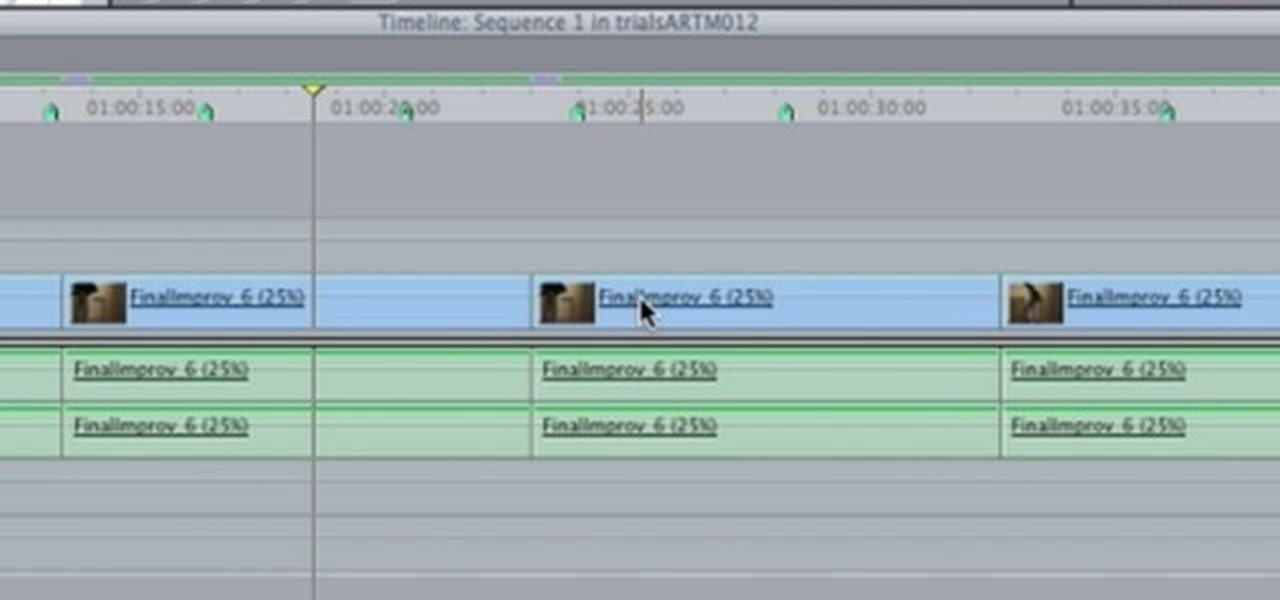
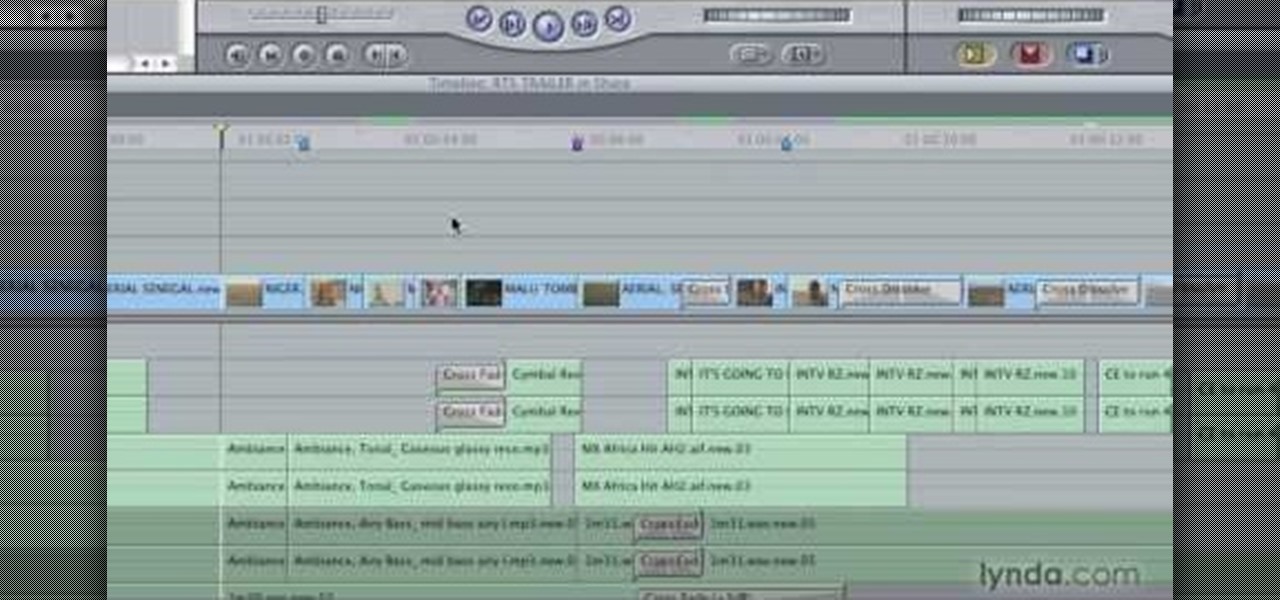
This video editing software tutorial covers using timeline and clip-based markers in the Final Cut Pro timeline. This is a very useful tutorial for Final Cut Pro newbies. Watch and learn how to use markers as a way to organize and manage navigation within Final Cut Pro.
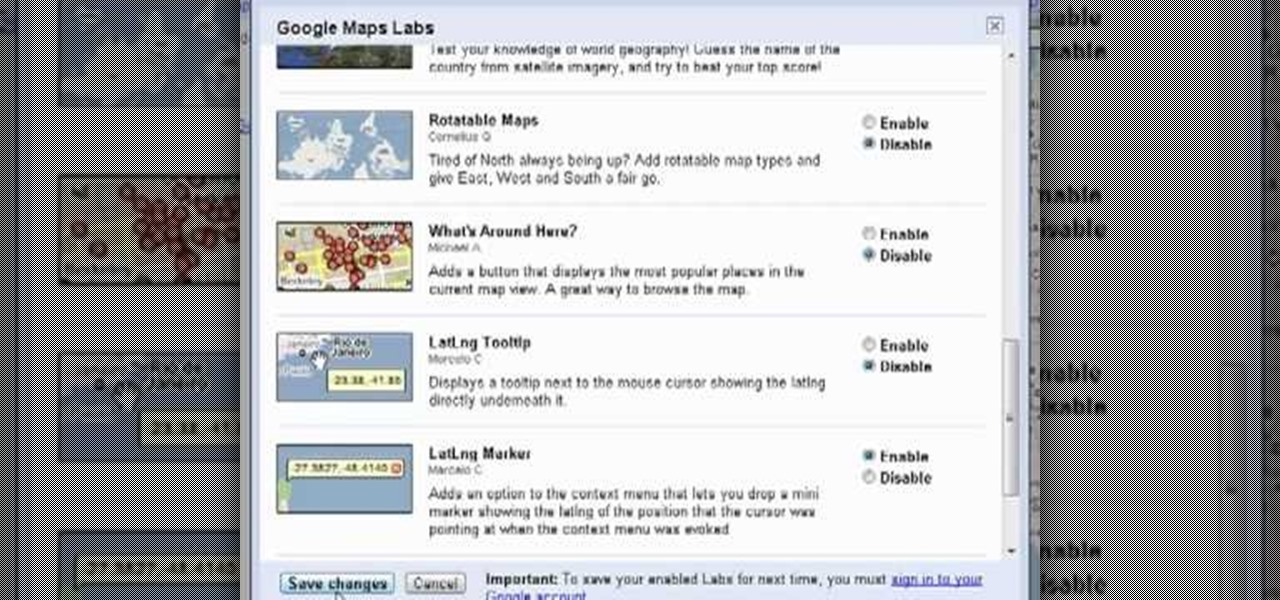
Want to know how to drop latitude and longitude markers on a Google map? This clip will show you how it's done. It's easy! So easy, in fact, that this video guide can present a complete overview of the process in about a minute. For more information, including step-by-step instructions, and to get started incorporating latitudinal and longitudinal coordinates into your own Google maps, take a look.
In this video tutorial, you'll learn how to execute ripple edits within Final Cut Pro 7 by using markers. Whether you're new to Apple's Final Cut Pro non-linear video editor or just want to better acquaint yourself with the Final Cut Pro 7 workflow, you're sure to benefit from this free video tutorial. For specifics, watch this Final Cut Pro lesson.
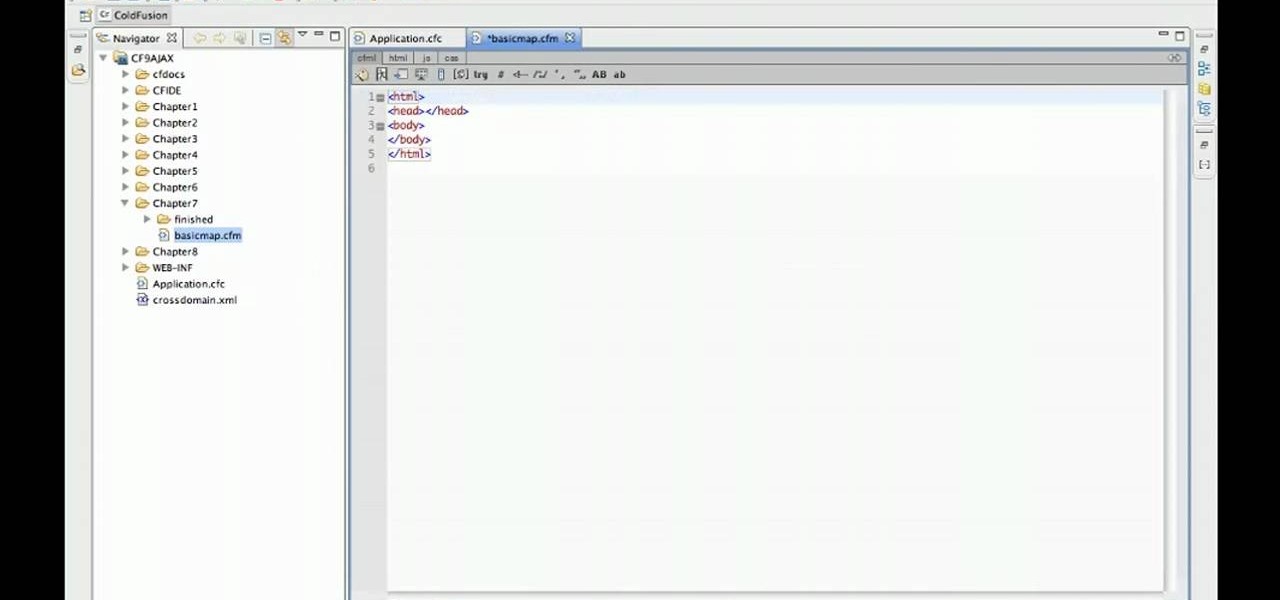
Need some help figuring out how to create maps with markers when working in ColdFusion 9? This clip will show you what to do. Whether you're new to Adobe's popular rapid Internet application development platform or simply wish to become better acquainted with the program, you're sure to find benefit in this free video software tutorial. For more information, including specific, step-by-step instructions, take a look.
Want to selectively adjust the timing of an audio region? Whether you're new to Digidesign's Pro Tools digital audio workstation (or DAW) or just want to learn how to take advantage of Pro Tools 8's new features, you're sure to benefit from this free video tutorial from the folks at Lynda. Specifically, this software tutorial provides a complete overview of how to use warp markers to manipulate timing in your Pro Tools projects.
This video will show you how to make a mouth organ from markers.
Maria Bell demonstrates to create the watercolor project, add color to the watercolor paper by first outlining the image or the shape with the SU marker. Then, distribute the color from the edge of the image or shape to the center of the image or shape with an aqua painter or watercolor brush. Fill in the images with shading details as desired. The technique produces gradient shading and a quick spread of colors without the use of watercolor pencils or crayon. Painting watercolors with SU mar...
Get your sewing tools ready, because it's time for another great tutorial. In this video you'll learn how to make two cool objects easily. One being a stitch marker that helps mark a certain place in a row when knitting. The other object is a coffee cup sleeve that is perfect for making sure you hands don't get burned. A big improvements over the ones that you can throw away and never use again.
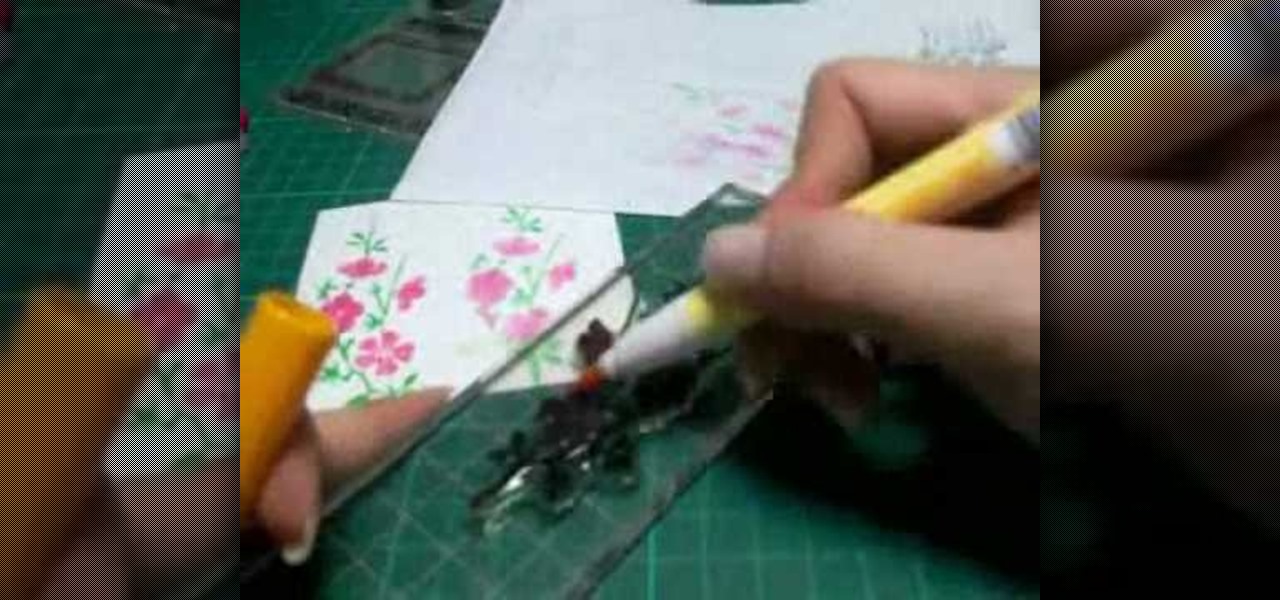
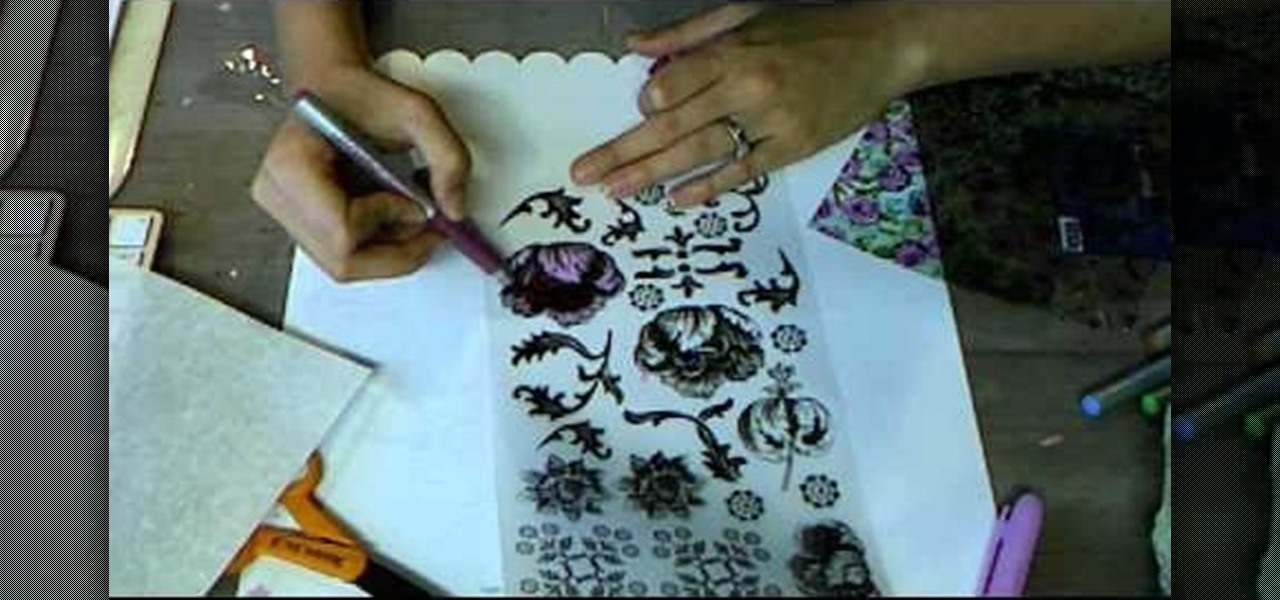
Copic markers have a slightly involved numbering and indexing system, but this how-to video offers advice for using them. Since Copic markers are so expensive, there are tricks for multi-tasking the pens to get more colors out of fewer colors. Watch this video crafting tutorial and learn how to use Copic markers with stencils and card making.
In this Arts & Crafts video tutorial you will learn how to use markers & water to create a watercolor stamp look. You can use rubber and acrylic stamp for this. You will need water based markers, minimister and card stock. Select you stamp and color it with markers as you would do in a painting. For example, you can color the leaves green and flowers red. You can also apply different shades. Then spray water with the minimister and stamp the image. Just stamp and lift, don't keep it too long ...
In this video tutorial, viewers will learn how to color with SU pastels and SU markers with Aquapainter and water. With a cotton swab, rub the pastel directly on the image. In this video, it is demonstrated on a glossy cardstock. Continue to add different pastel colors with your cotton swab. The colors will be subtle. Blow off excess chalk as needed while coloring. With an Aquapainter filled with water, pick up color from the markers and shade your image. This video will benefit those viewers...
With all 6 Crayola Mix 'Ems markers you can create 36 different color combinations. Just match any cap with any marker, press the button and the marker delivers a cool blend effect. Kids will want to try to create all 36 colors. With this how to video you can create 36 great color combinations using just 6 Crayola Mix 'Ems markers with your kids.
Looking for more interesting things to do with your Copic airbrush? This technique shows you how to master the art of airbrushing on a very small canvas, using markers that have been designed to work with this airbrush. Great for holiday projects!
Add some color to your next project which uses rub ons! This tutorial shows you how to take several colored ink markers, color in your rub ons and then transfer them to your current project for a unique and colorful addition!
If you're interested in doing more with your graffiti, this tutorial can be one way out of many. In this video tutorial, you'll find out how to blend colors with your graffiti markers. It can make for a more colorful and interesting piece of work that is sure to stand out. So good luck and enjoy!
In this tutorial, we learn how to make knit stitch markers. First, knit to the middle, doing two stitches together, then flip stitch over. When you get to the middle of your item, place your marker on the stitch to keep track of where the loops are at. You can purchase a knit stitch marker from a variety of different craft stores. Use this as often as you'd like, especially if you need help finding the gap when you are creating something. Set this aside when you are finished, and make sure yo...
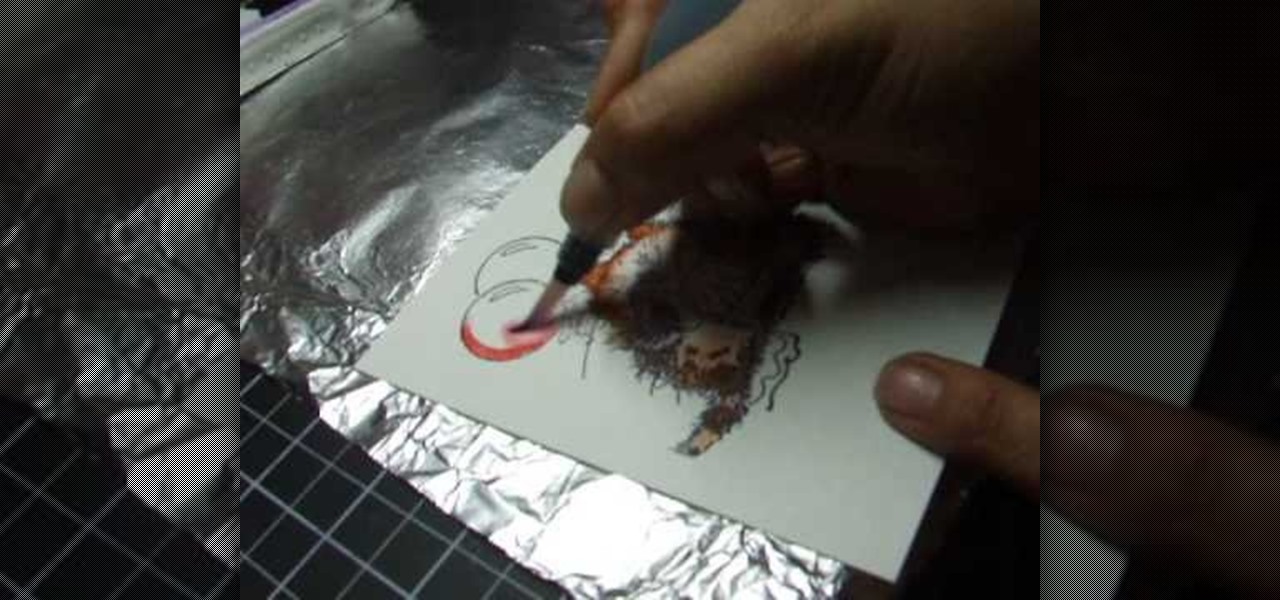
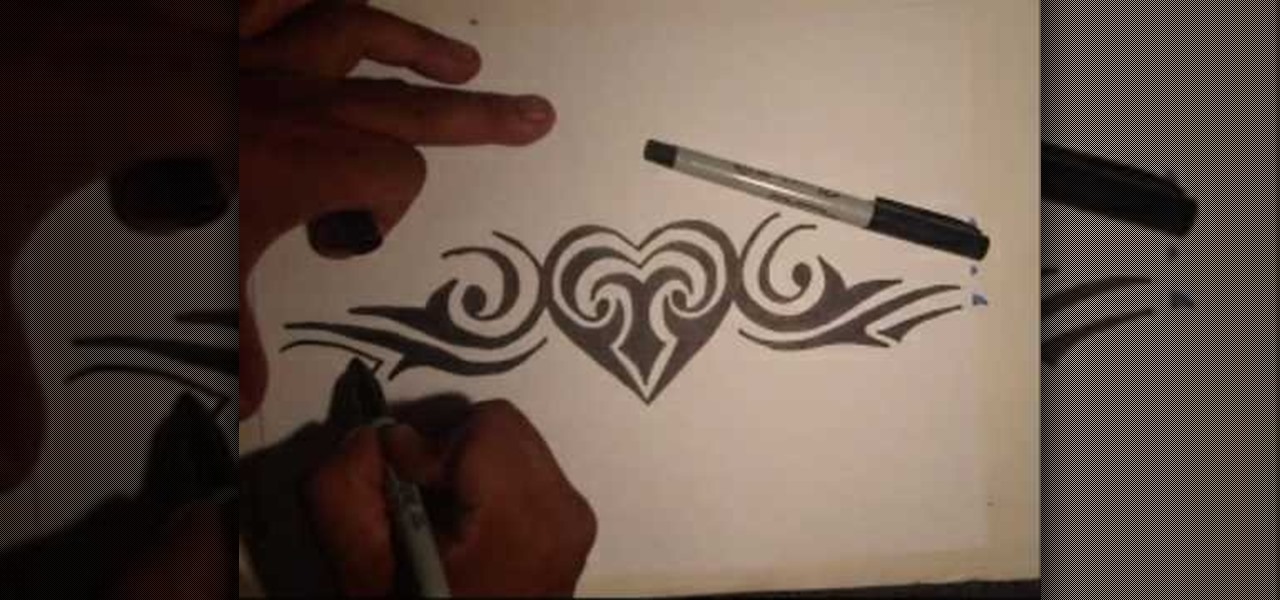
Tattooing is not a job for the weak, but it does take precision and a delicate touch. But you don't have to pierce skin with needles to enjoy the art of tattoos. Anybody with a few pencils and markers can design their own tattoo creations, but to help get you started, try out this tribal heart tattoo sketch. Watch the video to see the whole process of daring a tribe-style heart, and follow along to create your own. Perfect for beginning artists.
With Crayola Recoloritz markers you can color and recolor for endless coloring adventures! These unique wet-erase markers wipe clean quickly and completely. These markers are a great way to teach your children to color between the lines. With this how to video you and your children will learn to use Crayola Recoloritz markers.
The Crayola washable supertip markers are an ideal tool for any artist, young or old, who wants to bring sharply defined, bright color to their drawings. This video demonstrates how to color simple line drawings using these basic markers.
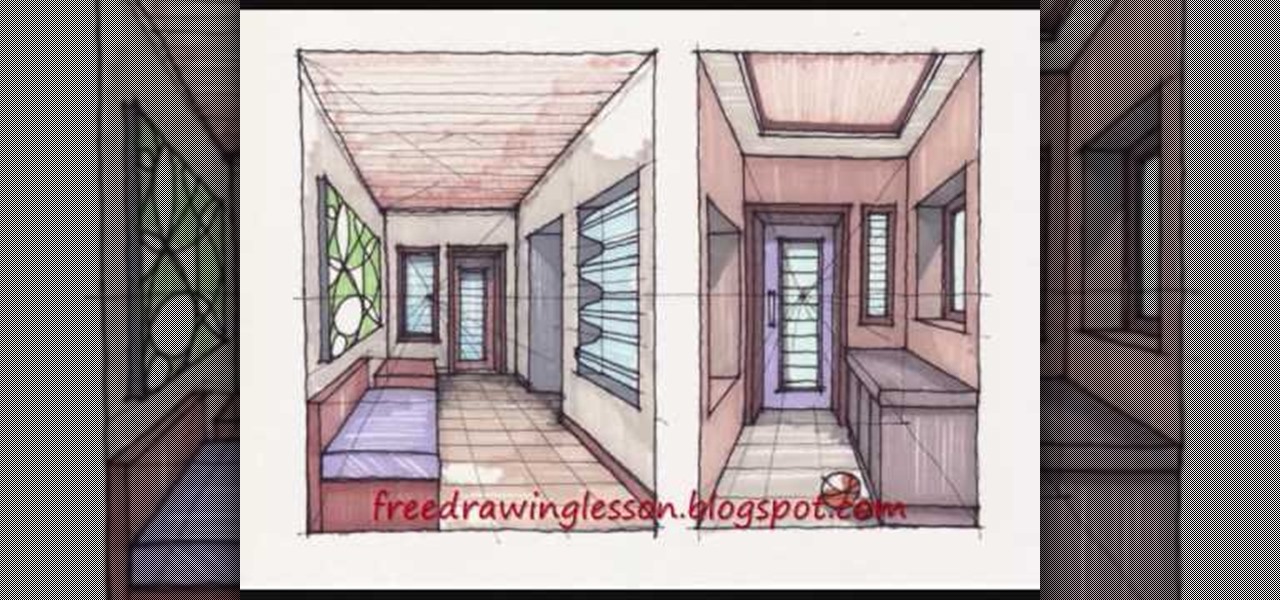
Free Drawing Lessons has this video on how to draw rooms using colored art markers. This is the process to draw rooms using imaginary box and art markers - interior perspective.
This video tutorial shows how to re-ink your Versamarkers and Stampin' Write markers. Avoid making a horrible mess and learn how to properly refill the ink well of stampbooking markers.
Learn to use letter markers - markers that can be identified alphabetically - to help you know exactly where you are in your knitting.
In order to color complex street drawings with markers, you will need the following: markers in assorted colors and a street sketch.
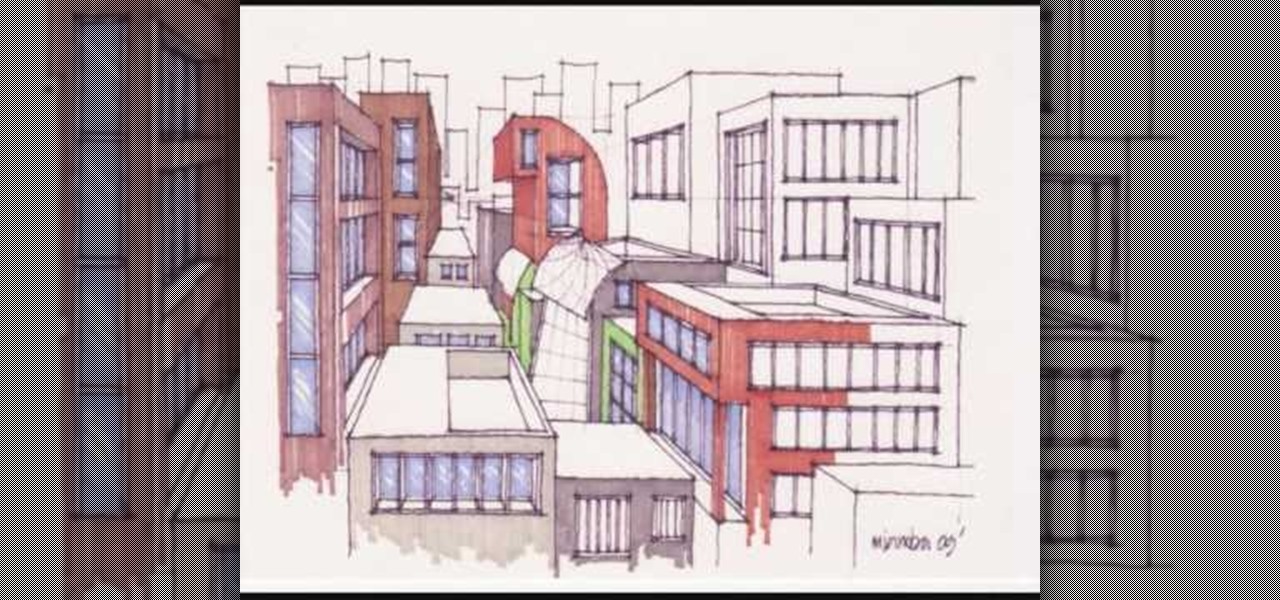
In this video, we learn how to draw and color a city with art markers. First, draw a horizontal line as your reference point to where the city buildings are going to go. Make a point in the middle as the background line. Now, start to draw in the buildings around the middle line, making diagonal straight lines, then drawing in the details of the buildings. Draw in taller buildings in the back, then start to draw the larger details in the front of the drawing. Add in shading and details as nee...
This video will help you decide which paintball marker (or paintball gun) is right for you. The low-end electronic marker or the mechanical paintball gun. Mechanical guns are extremely loud, and semi-automatic, but effective. It uses a CO2 tank. Electronic markers have a higher rate of fire (super fast), and aren't very loud.
This video tutorial shows a technique to mock watercolor with stamps and markers. Learn how to create the look of watercolor without the mess.
This stamping tutorial teaches how to ink craft stamps with markers. Learn how to use marker ink to color stamps instead of traditional stamp ink.
In this tutorial, we learn how to draw a plan view with art markers. First, you will draw a dot in the center of the paper and then draw lines out from here. After this, use the lines on the paper to create the proportions for the buildings. After this, draw in squares and lines to help create the ground and buildings. Then, you will add in details to the building and then draw in plants and grass around the edges. After this, erase any background lines from the drawing and then color it in. ...
In this tutorial, we learn how to draw and color a room with art markers. Start off by drawing a basic room, using a vertical vortex as your map of where everything goes. Draw in the stairs as you see them, then draw the hallways, windows, picture frames, and more. Draw in the carpet that is on the floor, then add in any other details you may have in the home. After this, start to add color to your picture as you prefer. Color the walls and the floors in different colors that blend together a...
This video explains how to draw a picture of a strip mall. It starts with squares and rectangles, and makes them three dimensional. As the video progresses, there is more and more detail added to the picture including color, using art markers. More detail is added such as windows in the buildings and people in the street. It is completely non verbal, so by taking it frame by frame it is a good tool to learn or improve your art style.
Start with some old spoons. Then, on a concrete surface, hammer them flat. Once they are sufficiently flattened, trace letters onto the spoon and then stamp them on using a steel stamper (which you can find at a hardware store). Then, all you have to do is plant them in your garden!
Watercolor looks beautiful, but can make a huge mess. The same effect can be created with both pencils and markers. Stamps can then be colored in with vibrant detail. Watch this video crafting tutorial and learn how to color in stamps using watercolor pencils and markers.