Here is a video guide to the color correction tools in Final Cut Pro X. Learn how to use the saturation sliders, color tabs, and more. If you are using this Apple video editing software, check out this guide to FCP X color correction.
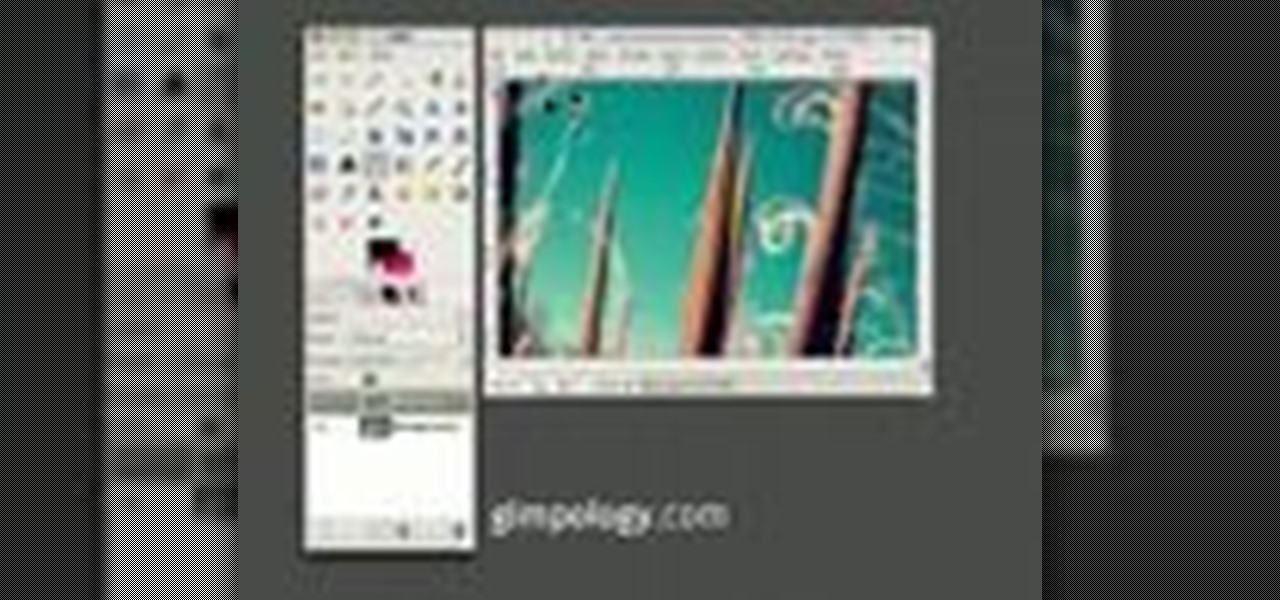
GIMP is an amazing, free image editing program that allows you to edit your photos just like in photoshop! And if you've been looking for how to create a more vintage look to your pictures take a look at this video! You'll see the different changes he makes to the color, opacity, saturation, brightness, and other settings to give it a truly vintage look and feel.
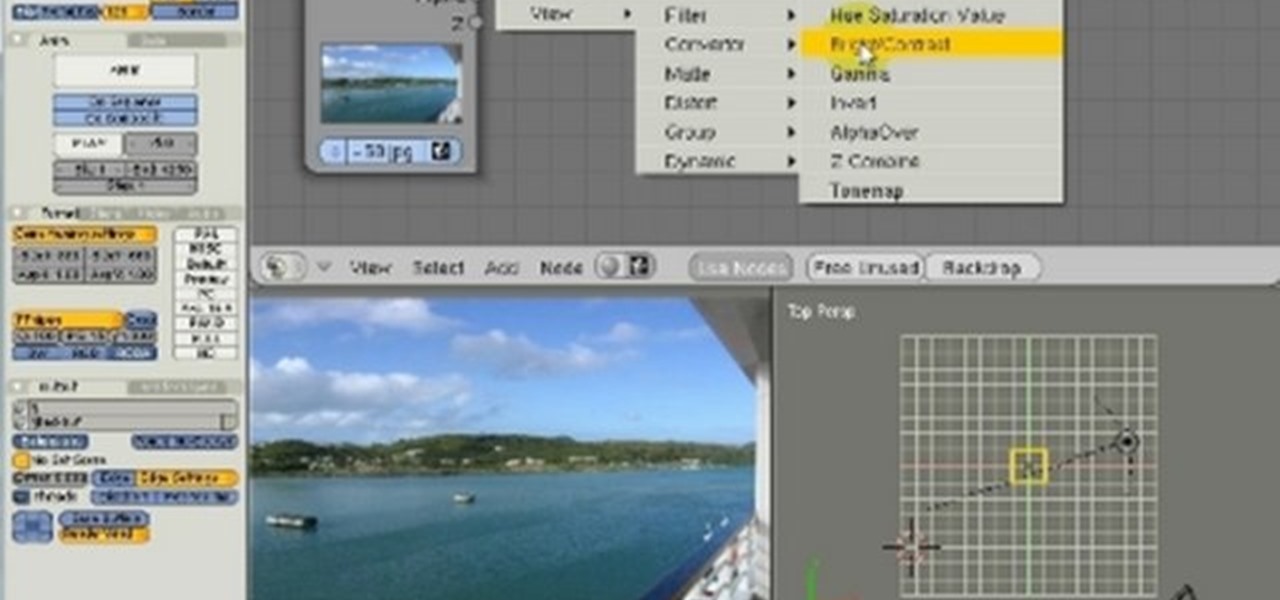
This tutorial shows how to adjust the Hue, Saturation and Value of an image to improve a photo and make it look like it was shot at a different time of the day. Whether you're new to the Blender Foundation's popular 3D modeling program or a seasoned graphic artist just interested in better acquainting yourself with the application, you're sure to be well served by this free video tutorial. For more information, including detailed instructions, take a look!
Cheap, giant croutons can make for painful eating. No one wants to interrupt a soft, fluffy salad with a giant, hard to chew chunk of stale bread. In this clip from CHOW, learn how to make perfect, bite sized mini-croutons that everyone will enjoy and add the exact right crunch to your veggies.
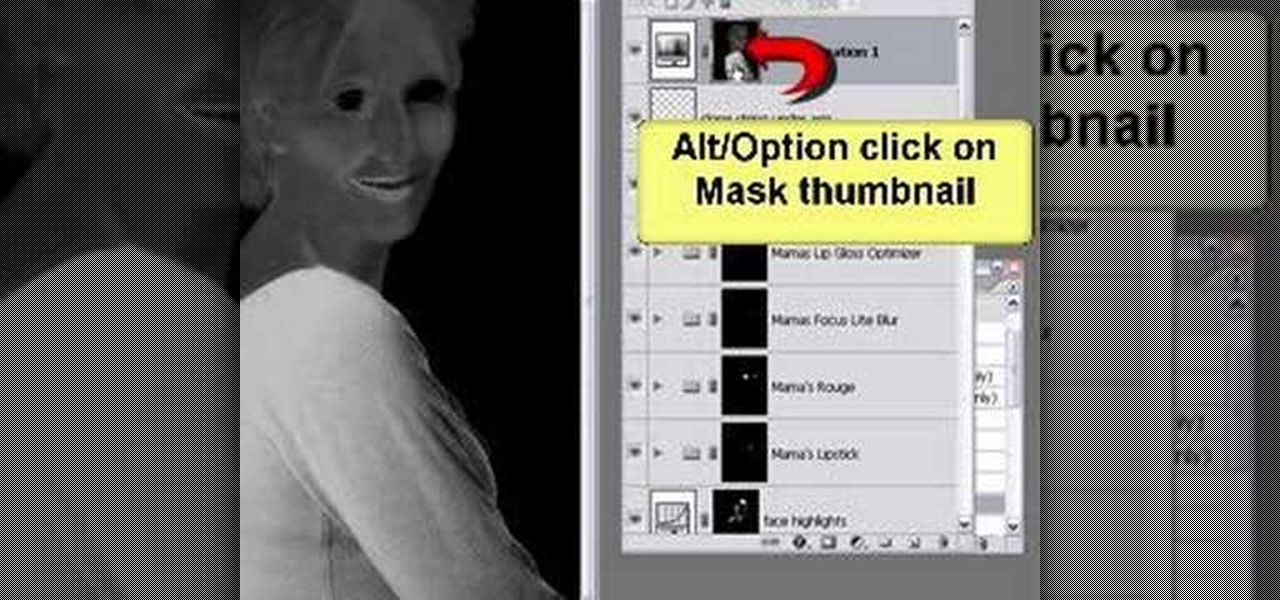
This seven minute and three second how-to YouTube video, uploaded by user ranash19195, instructs it's audience to 'Change eye color in Photoshop'. There are two methods that are taught: using a hue/saturation mask or a color change mask. The instructor uses clear and concise language to teach both methods. He takes you on a step by step visual and auditory journey and makes learning to change eye colors (retouching photos) both exciting and extremely easy to accomplish.

Here's how to make the new Krylon cans spray like the old cans did so that you can tag, spray graffiti and do space paintings. The can's new nozzle effects how the paint sprays and can interrupt your art.

This Photoshop tutorial will show you one method for changing clothing color utilizing the Select Color Range command and fine tuning techniques to use on the mask of the Hue and Saturation adjustment layer. Also shows how to clone.
This tutorial shows you tow ways to use Photoshop to remove red eye - the fast way using the red eye tool and a more accurate way using hue/saturation.
There are many ways to add or subtract saturation from images using Adobe Photoshop. This tutorial takes a look at how the Sponge Tool works, and how to get the best results when using it.
Imagine an Instagram feed filled with a wild array of vivid color. Beautiful right? But when you look at the photos in your iPhone or Android phone's albums, they're all just too dull to pull off that dynamic look. There's no doubt that colorful images are more eye-catching than dull ones, so how do you get your photos to overflow with vibrant color? The answer: Add it in post.
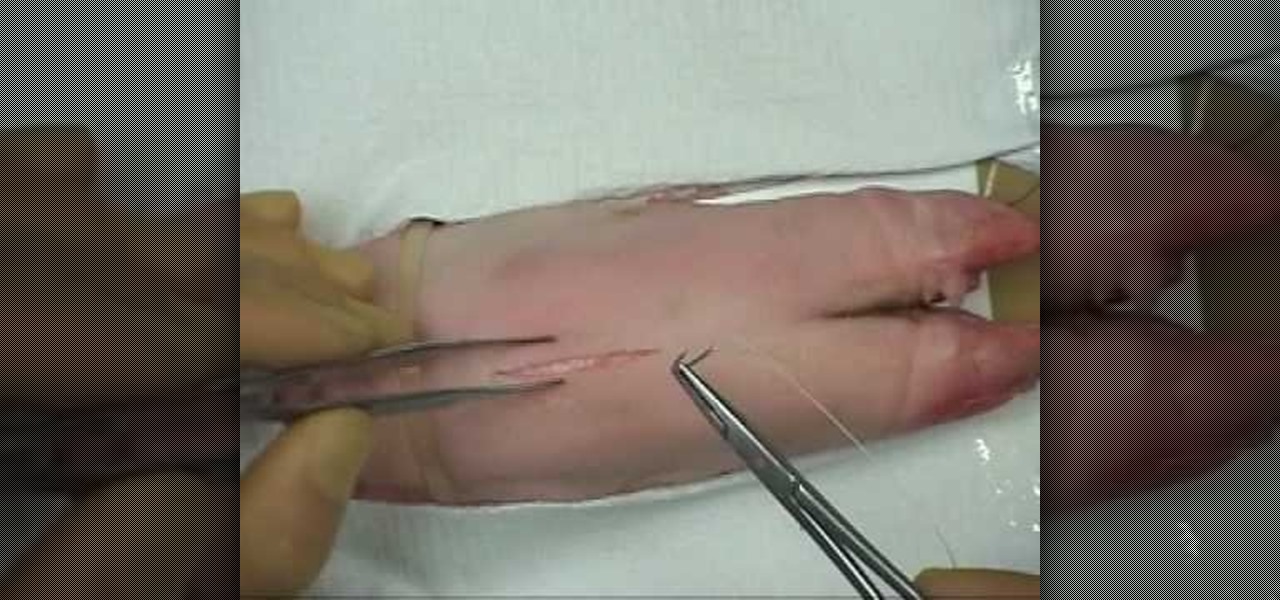
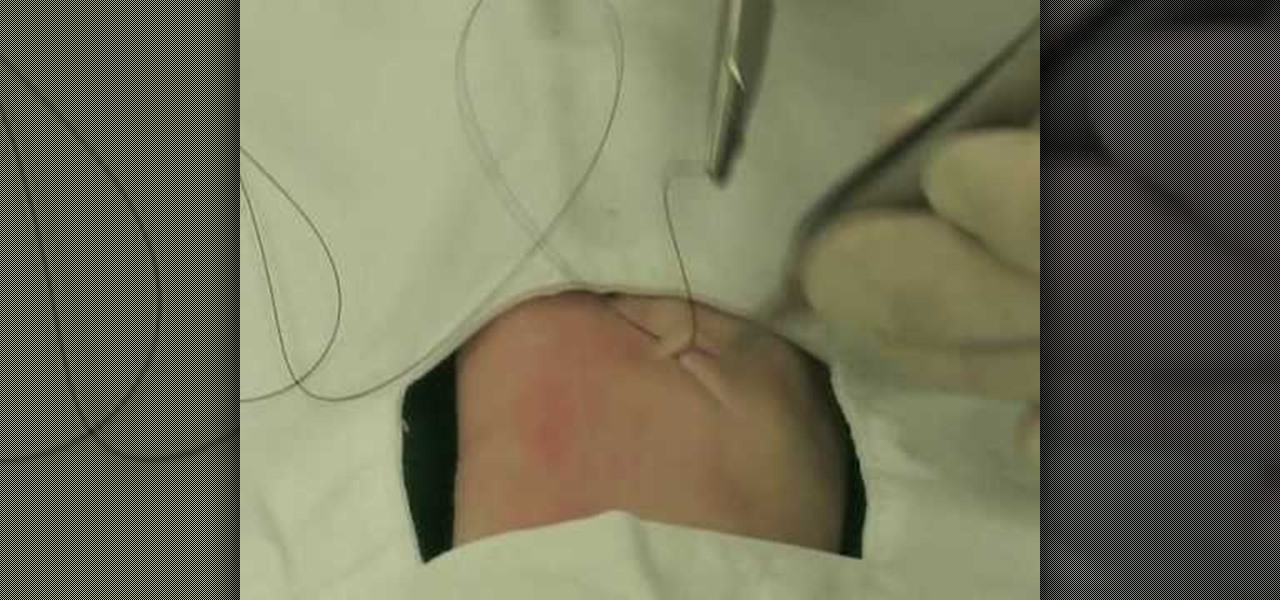
If you want to perform an interrupted and a subcuticular suture you should first make a bite through the skin. In order to make a bite through the skin you should put the needle point perpendicular to the surface, turn your wrist and make sure it arrives at an even point from the entry point. Grasp the needle as it comes from the tissue. Make sure you always keep the needle in view. Then ti e the suture with an instrument tie and form the knot on the side of the wound so it does not effect th...
This achievement is difficult, but it's not impossible! You get this achievement by interrupting the Stay of Execution power in Shadowfang Keep. Make sure you have plenty of healers on hand, because this leaves your whole party at ten percent health.
In this episode of Dogmantics, dog trainer Emily Larlham goes over how to stop a puppy from mouthing and biting and how to interrupt unwanted behavior from your unruly puppy.
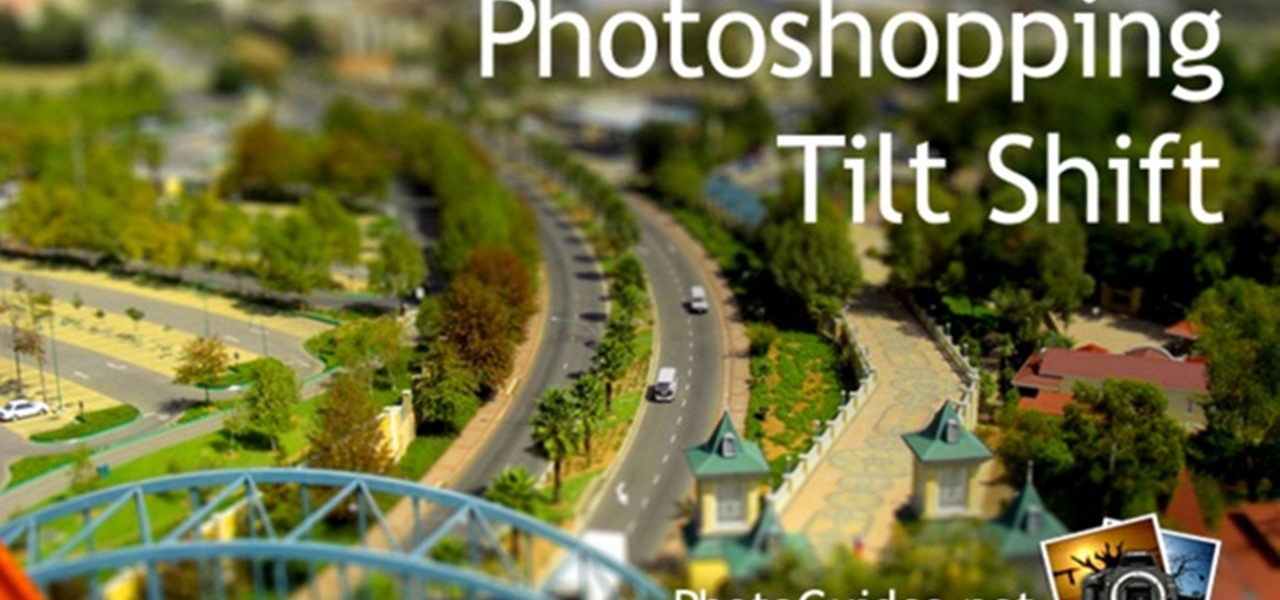
1. To make tilt shift take one picture which is taken from high angle with any content like car and buses. Now open the picture in Photoshop and change it to quick mask mode to create and edit the selection.
Learn how you can remove the blue haze from photos in Photoshop with this tutorial! 1. Select any image and right click on the menu click on Levels. 2. Select each and every channel and set input levels for red, blue and green and see the preview of the image. Set as RGB in Channels. 3. Now, click on "Sample in image to set gray points" and click on the area of the image which need to be set gray click on ok button. 4. From the picture icons select eye dropper and make sure it is set as 5 by ...
This tutorial shows you how to change selected colors using the hue/saturation tool in Photoshop.
In this video tutorial you will learn to use the lasso tool to create a non-uniform vignette on your images. Learn to set the feather radius and the Hue/Saturation tool. Knowledge of layers is essential to fully understand the tutorial.
In this video tutorial you will learn to improve the color of dull skies in your images. With a few tricks you could add depth to the overcast skies. Learn to use saturation to enhance the overall effect.
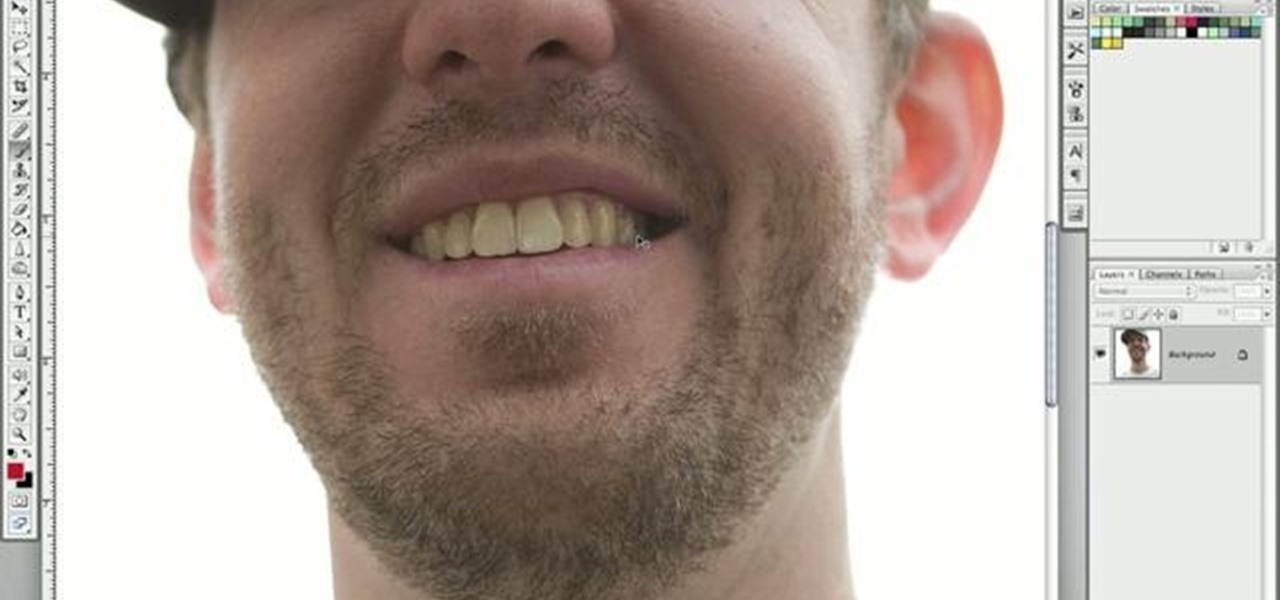
In this how to video, you will learn how to whiten teeth in Photoshop. First, open an image that you want to edit in Photoshop. Zoom in to the teeth as much as you can. Next, go to the brush tool and set the diameter to 21. Hold shift and q to put you into quick mask mode. Now paint over the teeth with your brush. Whatever is red will be your selection. Once you are done painting the teeth, select press shift and q again. Go to select and choose inverse. Next, go to image and adjustments and ...
Lee T. Dresang, MD of the University of Wisconsin School of Medicine and Public Health from the Deaprtment of Family Medicine give a discussion and demonstration of suturing techniques. Before beginning a procedure, you will need consent. One should irrigate lesion before beginning. A simple interrupted suture is easy to learn and fast, but unable to withstand stress. Vertical mattress sutures provide a good eversion of skin edges, closure of dead space, and strength, but also lead to scarrin...
Open the Adobe Photoshop program. Choose a picture with a head shot. This maybe something that is already in your pictures folder on your computer, downloaded from the internet or transferred from your flash drives, and those photos you may have scanned and saved in your computer.
In this video tutorial, viewers learn how to change the color of lips in Adobe Photoshop. Begin by importing the image into the program. Select the quick mask tool and then select the brush tool. Now color the part that you want to retouch. This will allow the mask to create a selection. No click on the masking tool to create a selection. Then select the marquee tool. Right-click the selection and click on Select Inverse. Right-click the selection again and select Feather. Make it 1 pixel and...
This how to video shows you how to create wallpaper for your computer desktop. Open Photoshop and create a new file. Change the dimensions to the size of your desktop. Click okay and go to edit and fill. Choose color and select black. Click okay to fill the screen with black. Duplicate the layer. Once this is done, go to filter, render, and lens flare. Make sure the lens flare is in the center. Edit the settings to your liking. Click okay to add the effect on to the image. Go to filter, disto...
In this how to video, you will learn how to make a reflection in water using Photoshop. First, open the image in Photoshop. Select the crop tool and select the whole photo. Click and drag the lower part down. Select the rectangular marquee tool and select the picture. Click on the selection and select layer via copy. Click the move tool and drag the upper point in the picture to the bottom of the document. Go to filter, blur, and select motion blur. Choose a -90 degree angle with a 35 pixel d...
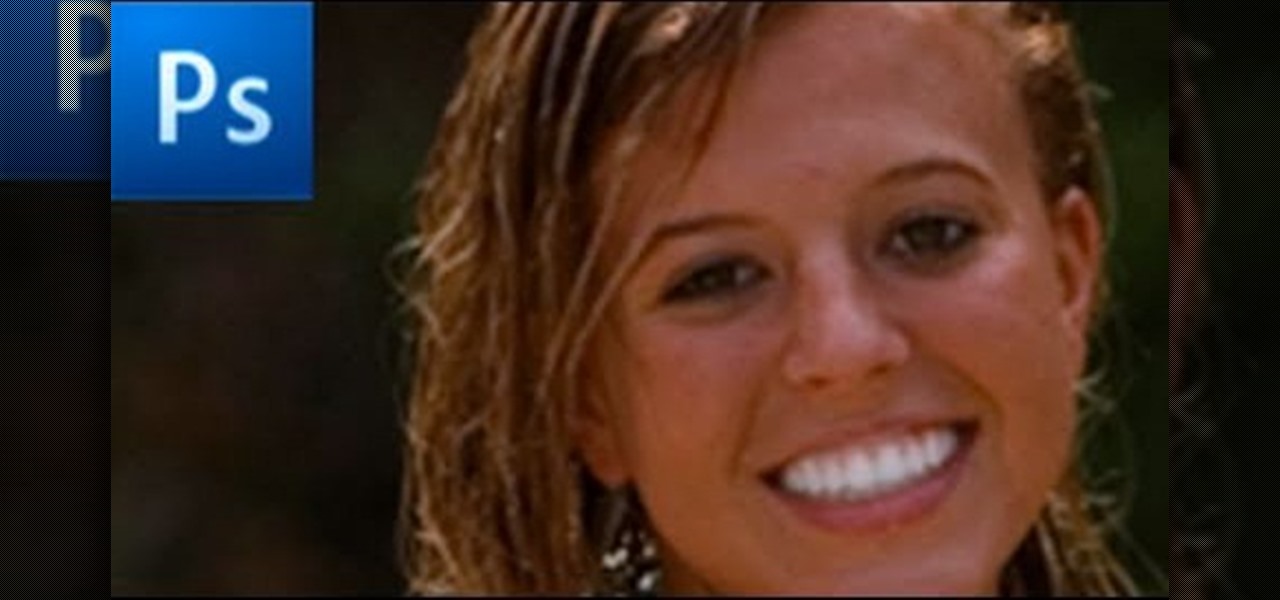
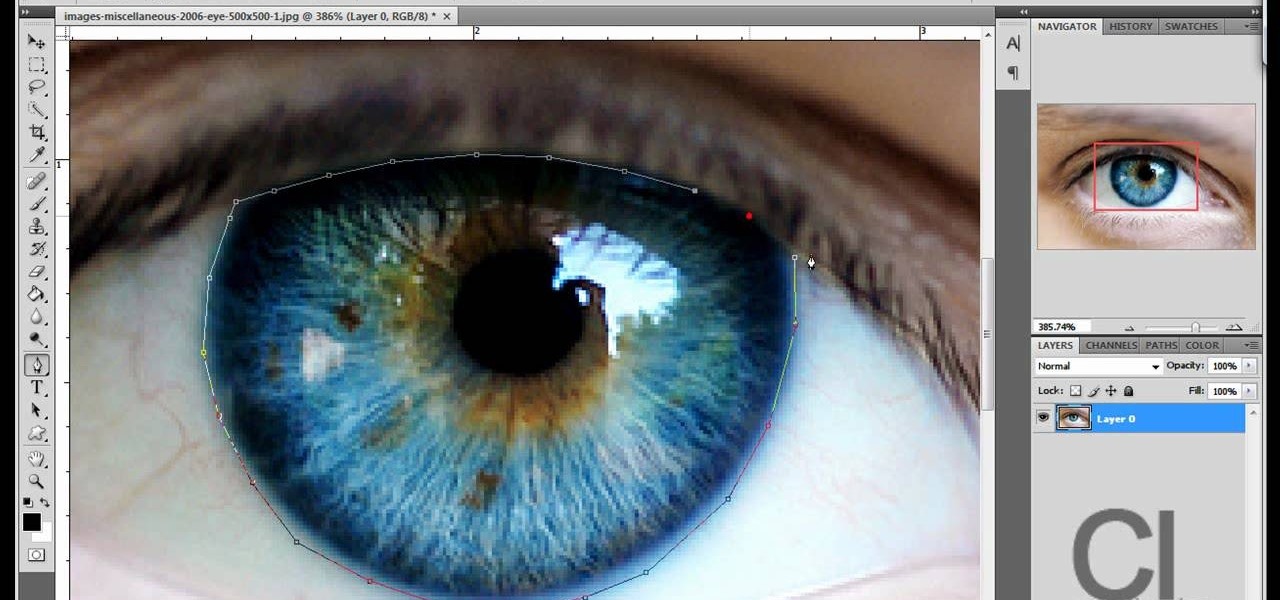
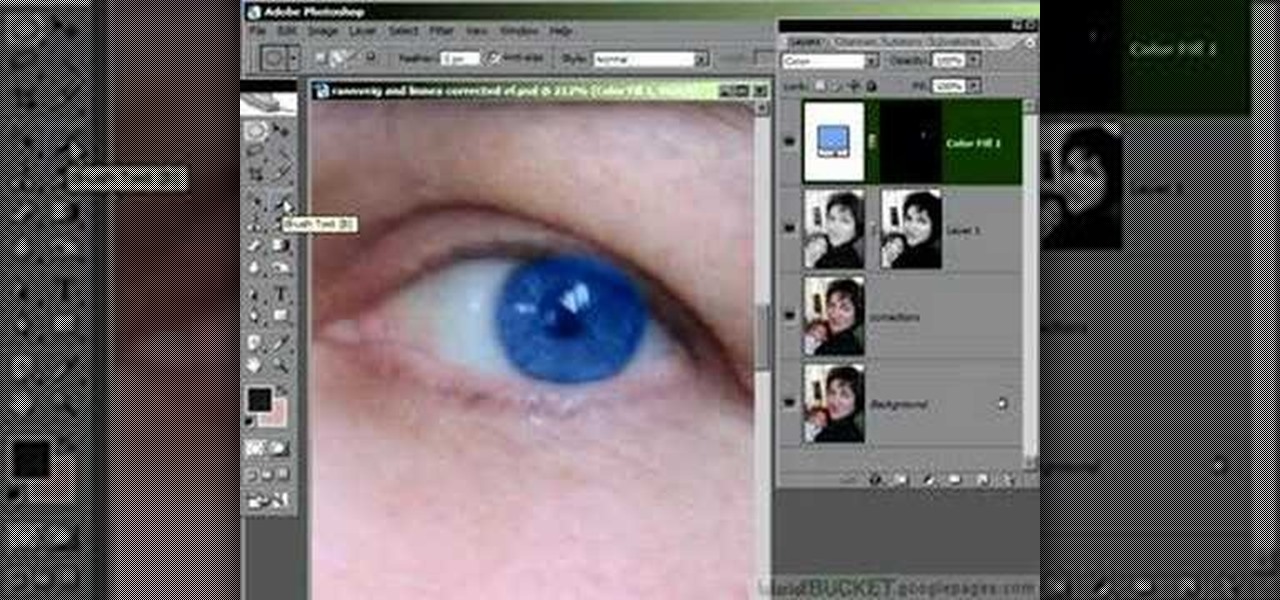
In this how-to video, you will learn how to change eye colors using Adobe Photoshop. First, open the image, Duplicate the background image. Zoom in to one of the eyes and select the pen tool. Set it to paths. Now, go around the iris of the eye. This does not have to be perfect. Click and drag to the other eye and select the other iris as well. Once these are both selected, right click into one of the selections and set the feather radius to about three pixels. Go to Image and Adjustments and ...
First of all open the image of Daniel Craig. Go to 'layer' and create a 'duplicate' the current layer. Then from top choose 'colors' then 'saturation'. Now click the 'r' from right side bar and also adjust up the 'hue' to 108 till he looks green. Now adjust the 'saturation' bar till 100 and then click 'ok'. Now go to 'filters' at top bar and then click 'distort' and then 'iwrap' filter. This shall open a new screen. Drag the image large. Now click 'move' and then 'deform radius’. This shall m...
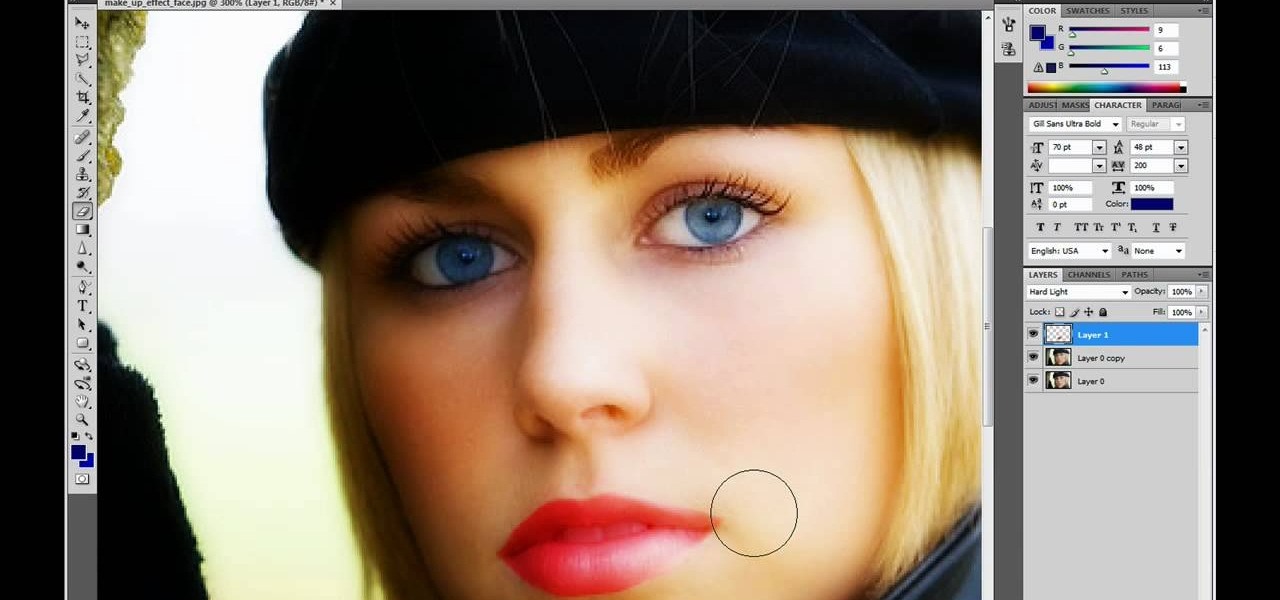
This video is describing how to retouch a photograph by using Photoshop CS4. The first step is to get a photo that you would like to edit, preferably of a person's face. Then make a new layer that duplicates the background, go to Gaussian blur, then go to hard light for your layer blending. Then draw lipstick on the model by using the polygon lasso tool and the hue/saturation tool. Then chase the hue and saturation to the correct color, then erase the edges that you accidently missed with you...
It's not brain surgery, but teeth whitening systems still hits the pocket books hard. However, there is a cheaper alternative to have the whitest teeth in the neighborhood, and it's called Photoshop. With Adobe Photoshop, you can have whiter teeth in seconds! Really. It's definitely the best tooth whitening remedy for those behind the camera lens. But remember… Photoshop is only a digital cure. You still might have to hide that smile in public… or consult a dentist.
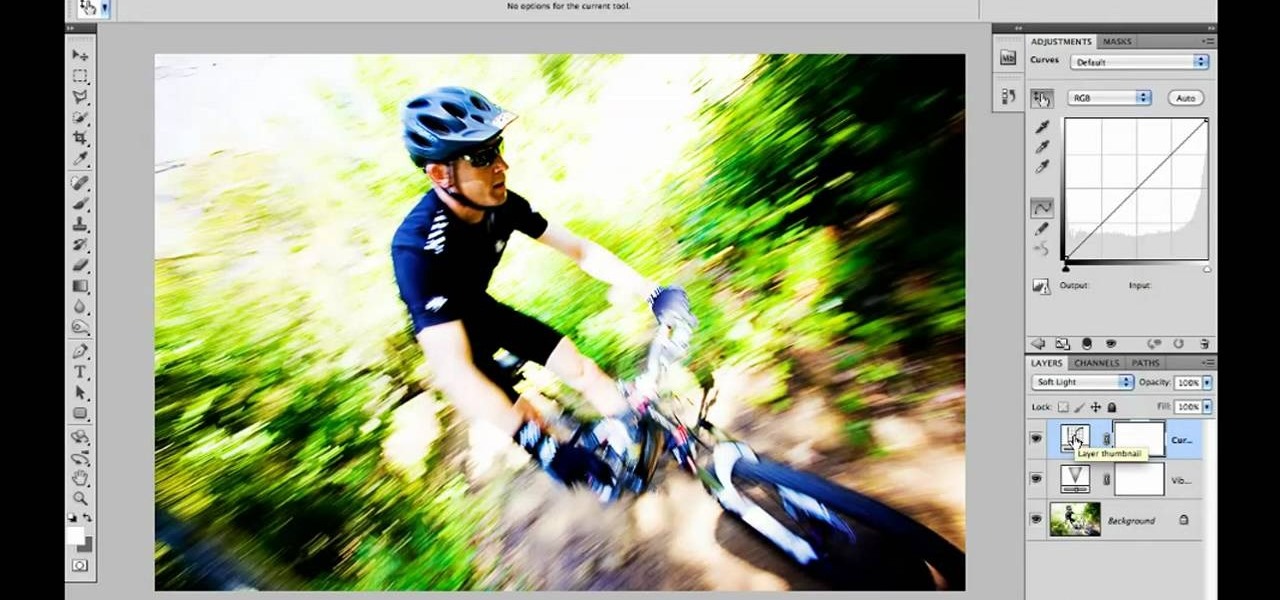
Want to increase the vividness of a photo without also adjusting its contrast? With Adobe Photoshop CS5, it's easy! And this clip will teach you what you need to know. Whether you're new to Adobe's popular raster graphics editing software or a seasoned professional just looking to better acquaint yourself with the program and its various features and filters, you're sure to be well served by this video tutorial. For more information, including detailed, step-by-step instructions, watch this f...
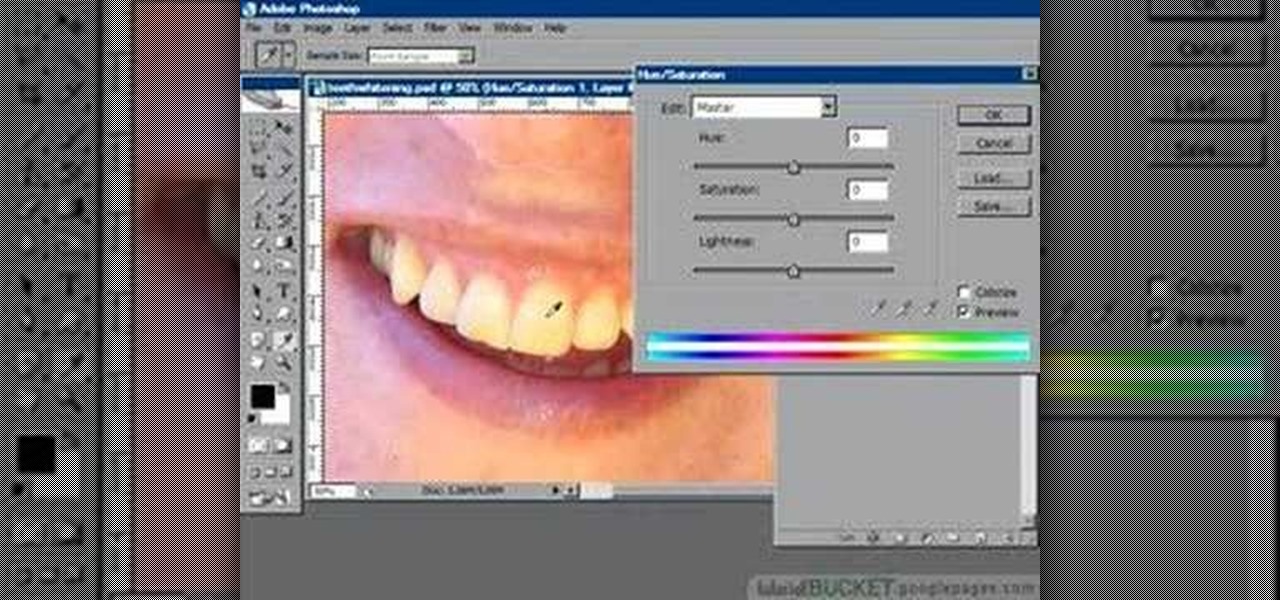
You know that you can edit almost anything in PhotoShop but did you know that you can make your teeth look dramatically whiter with just a few PhotoShop tweaks? Watch this video to learn how to select the teeth that you want to whiten and then how to adjust the hue and saturation of your teeth. Teeth tend to give off a yellow cast in photos even if they are not yellowish in person. You will need to leave a little bit of the yellow to keep your teeth natural looking.
This video by photoshopuniverse shows you how to make any photo seem as it was taken in a studio. Take the working photo and add a new layer over it and fill it in black as shown. Add a newer layer over that and add the filter> render> clouds effect. Increase the opacity of the cloud layer and merge it with the black layer as shown. Add the splatter effect and the sprayed stoke effect as shown onto the merged layer and add a hue and saturation adjustment layer and colorize it as desired. Go t...
This step-by-step instructional video shows how Photoshop can be used to purposely over-process a photo and give it a more gritty effect. First, a High Pass filter is applied to give the photo a gray buzz. Next, hard light blend layers are applied to give the photo more contrast. A few approaches for applying noise filters are described next. Finally, de-saturation is applied to produce an amazing finished product. A must-see video for anybody looking to add a fantastic grunge effect to a photo!
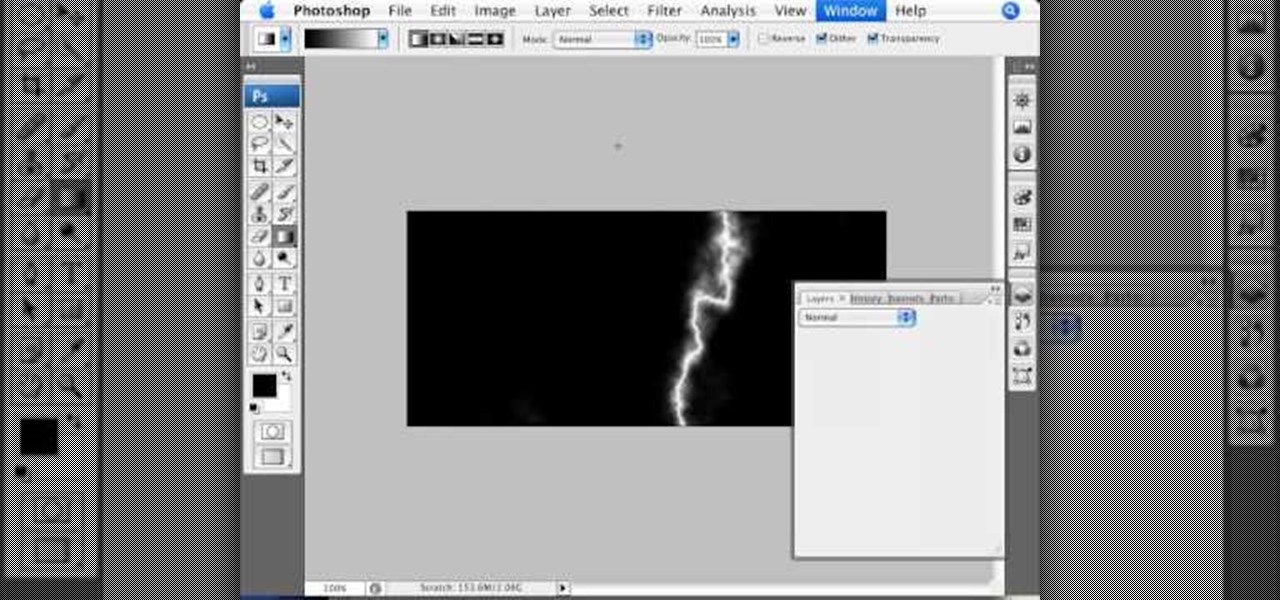
This video by photoshopuniverse shows you how to simulate lightning in a night time scenic photo. For this a night time scene is required. Open the image in Photoshop and create a new layer and with the gradient tool create a gradient as shown from the top left to the bottom right. Apply the filter, difference clouds on the layer and inverse the layer as shown. Exaggerate the lightening by using the adjust levels command. Change the layer mode to stream and tweak the hue and saturation so tha...
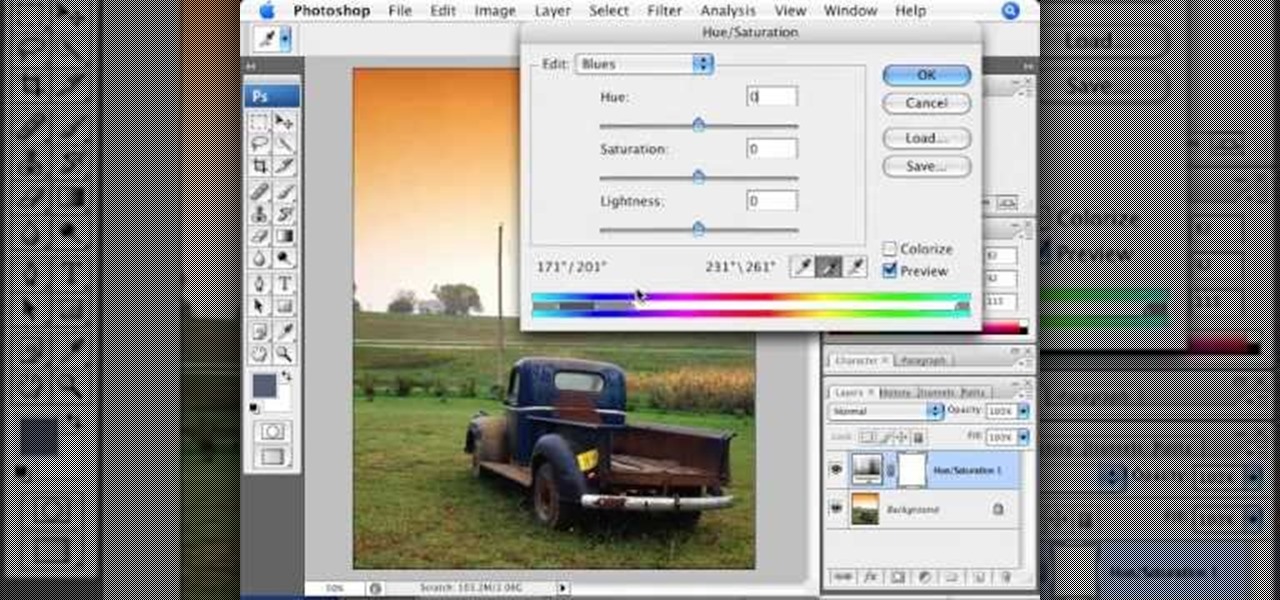
Adjusting the color of specific objects within your images in Photoshop is crucial. Sometimes fine tuning the color of just one component in an image is required. While an image may be adjusted globally at once, this approach lacks flexibility. This tutorial will show you the proper steps from the creation of an adjustment layer to the appropriate and functional calibration of the hue and saturation options. Get the most out of these tools and maximize your productivity in Photoshop.
Ah, falling leaves: They remind of the beauty of nature, fall, and the changing of seasons. And if you've ever walked alongside a row of oaks on the street it seems as if their leaves fall to some unknown, hidden perfect orchestration.
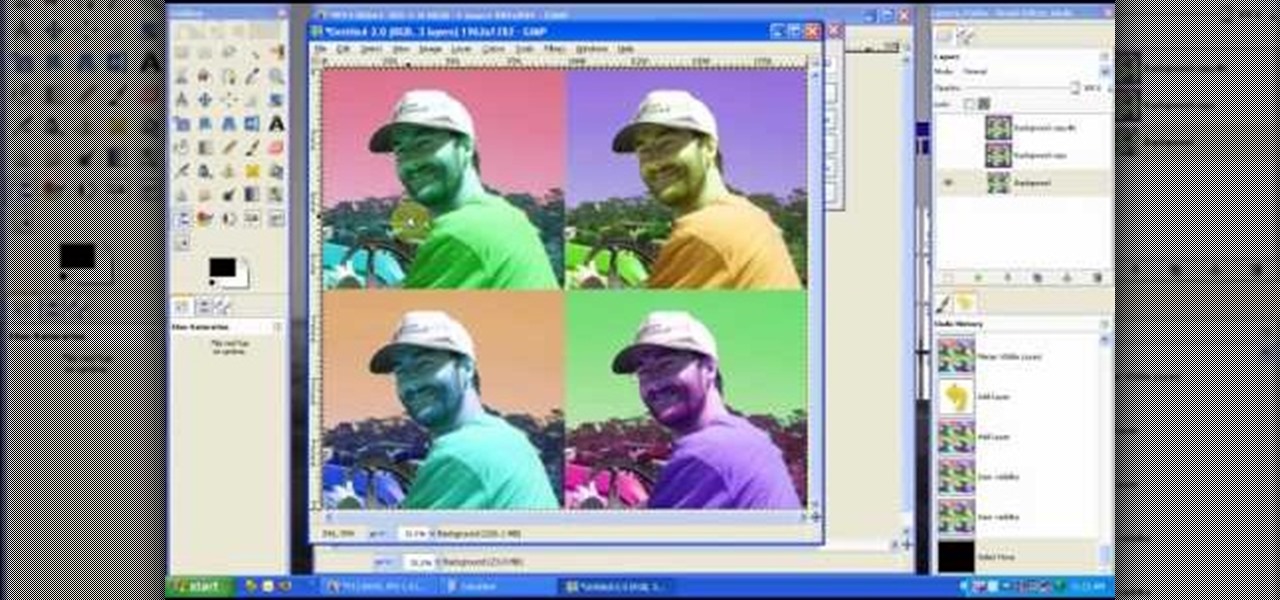
In this tutorial, we learn how to create a Warhol effect in GIMP. First, you will need to take your image and open it up in GIMP. After this, you will need to resize this so that four of these fit into one square next to each other. From here, create a new layer and then layer it to size. After this, change the hue and saturation of the photos. Then, change the lightness and make it any color you like. Then, do the same for the other photos in different layers. Save this when finished, then y...
An in-depth explanation of the structure of the hemoglobin molecule, the process by which it binds with the oxygen in the lungs, how it dumps the same oxygen molecule at the appropriate location in the body and how carbon-dioxide gets attached to the hemoglobin molecule are the topics which the narrator in this video explains with diagrams and a few equations.
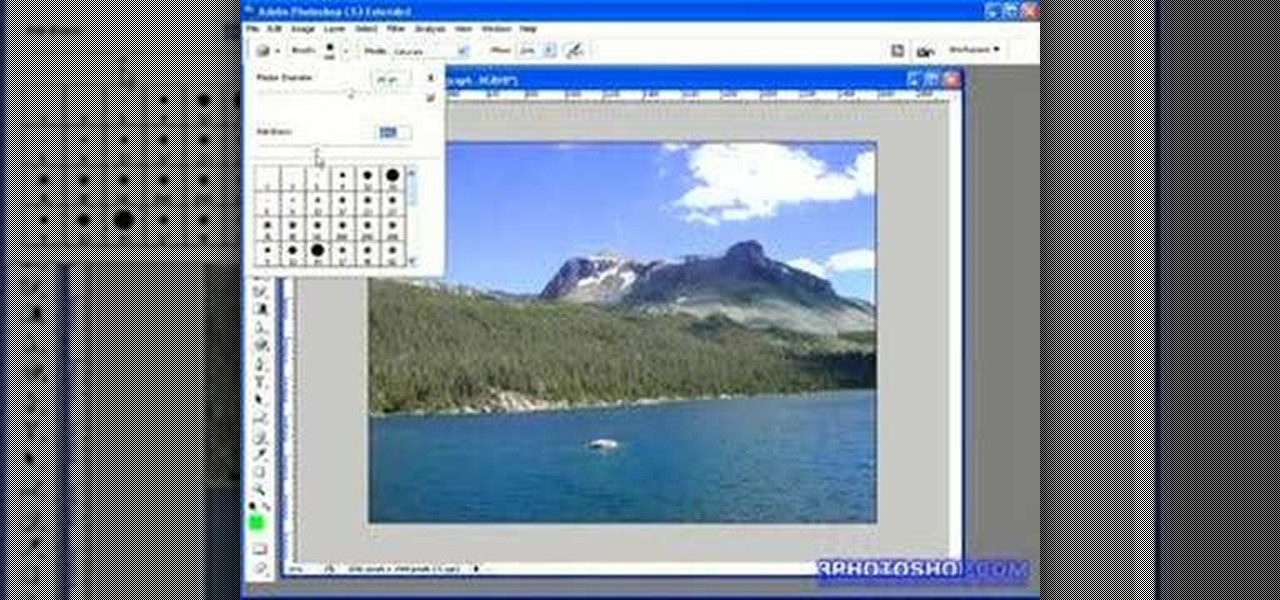
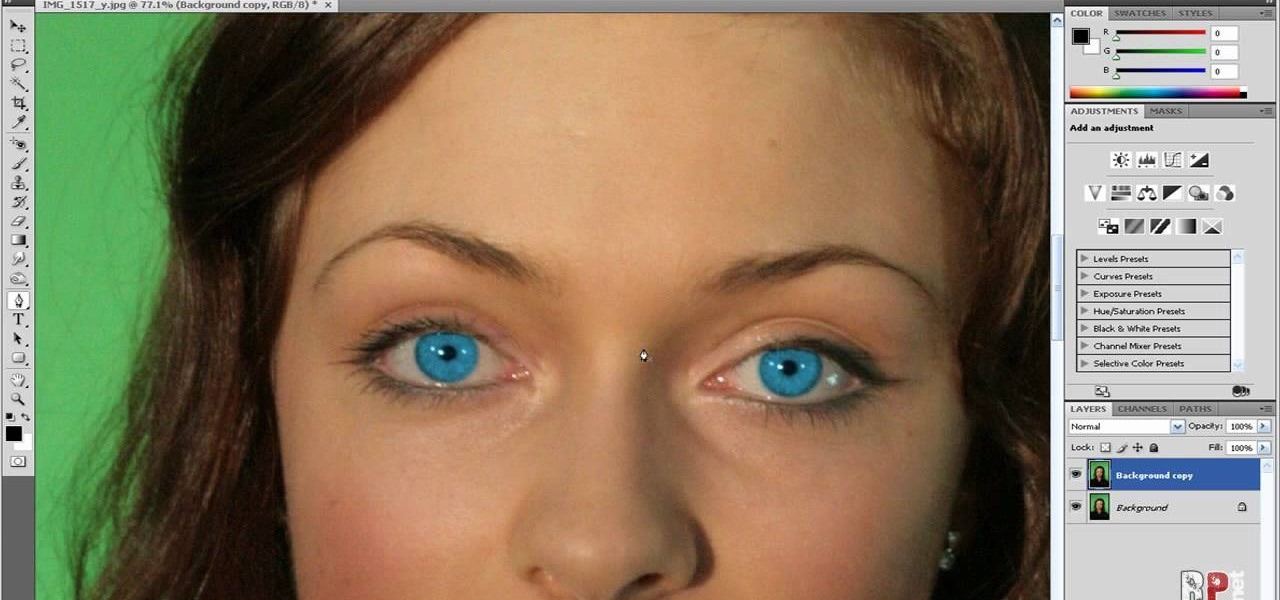
Changing the color of your eyes is very quick using Photoshop and this handy video. After using the selection tool of your choice to outline the eye (this video uses the pen tool) with a little bit of feathering, just change the hue of the eye. The video shows how to do this by pressing control + h, however it can also be selected by choosing the image menu, then adjustments, then hue/saturation. This great effect can be used as shown on close up eyes or on smaller eyes further away. Both way...
In this video, we are shown how to change the skin color of a person in Photoshop. He starts off by explaining that there are two different methods that you can use to change the skin color. The first method is through Hue and Saturation. With a couple of simple changes, you can change the tone and color of the skin. The second way is the more difficult method. You work through the color balance options in Photoshop. He explains that you will need to learn and play around with the color balan...
This Adobe Photoshop CS3 tutorial teaches you how perform slight photo retouching to supersaturate a photo without the distortion and bleeding. This adds a slight but noticeable saturated look of a photo which enhances the color quality. First the graphic artist adjusts the saturation. Then he creates a version copy using the lab mode versus the RGB mode. He then adjusts the contrast of the Lab mode image. Once you return the photo back to the RGB mode, you can continue altering the photo.