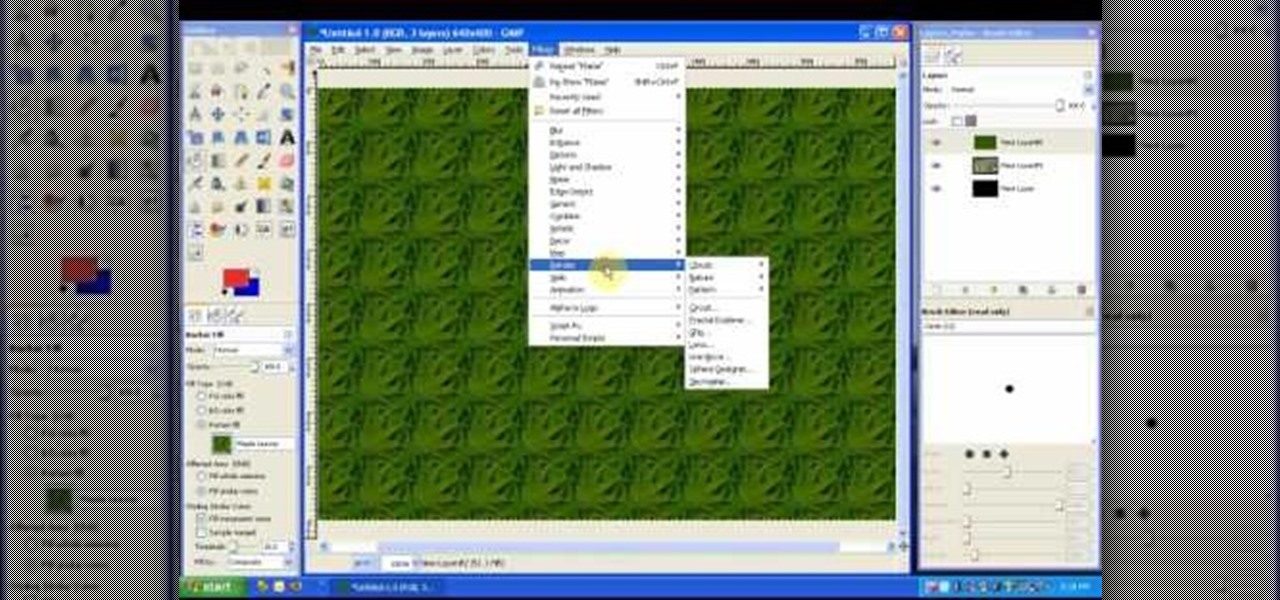
In this tutorial on GIMP, the render-flame tool is looked over in detail. GIMP (the GNU Image Manipulation Program) is a free software raster graphics editor. It is primarily employed as an image re-touch and edit tool. It not only offers freeform drawing, but can also accomplish essential image workflow steps such as resizing, editing, & cropping photos, combining multiple images, & converting between different image formats.
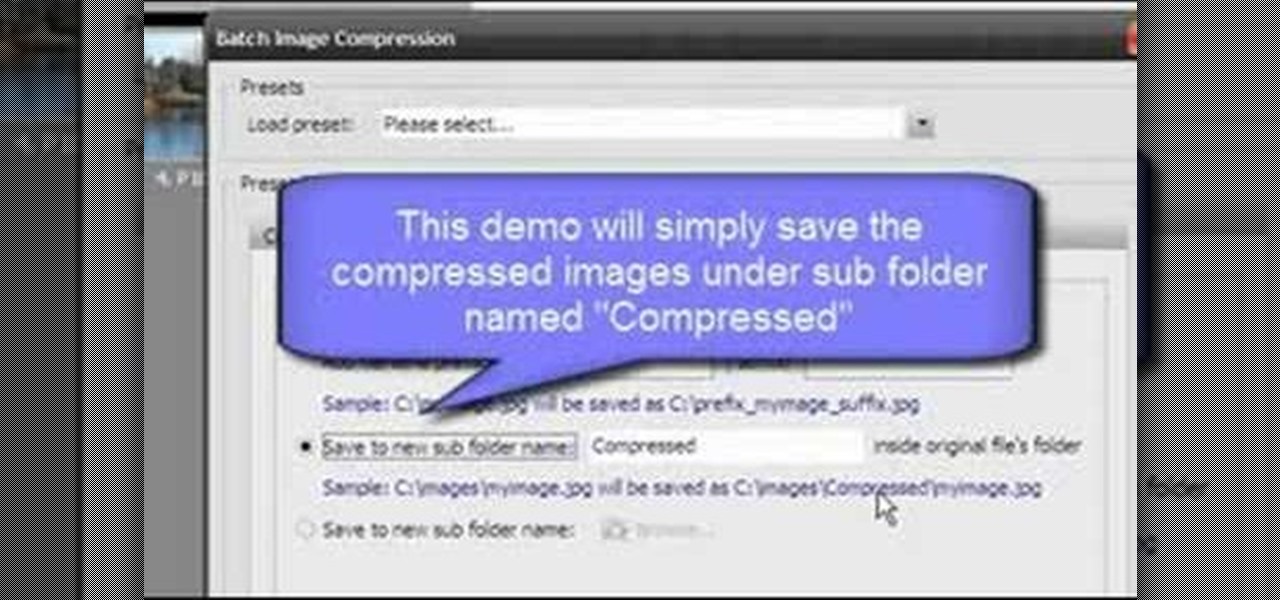
Open Image Compressor 2008 and go to the Image Tray. Pick the images you want with the image selector and click on them to add them to the Image Tray. If you want to add every photo in a certain folder, you just click on the Add All button. Once you have the photos you want, you can batch compress them. You can go to File>Batch Compress to start the process, or just click on the Batch Compress button in the toolbar. Then, pick the compression options you want, or edit the images. You can also...
Here is a simple technique to resize multiple pictures in Photoshop by creating an action, to adjust the image size. The only requirement is for the pictures to more or less the same size. First we go to windows and select action then we open up an image to determine the appropriate size that we require. Then click on the create new action and, give it a name then hit record now go to image the image size resize the image and then save and hit ok .You can see that its still recording your act...
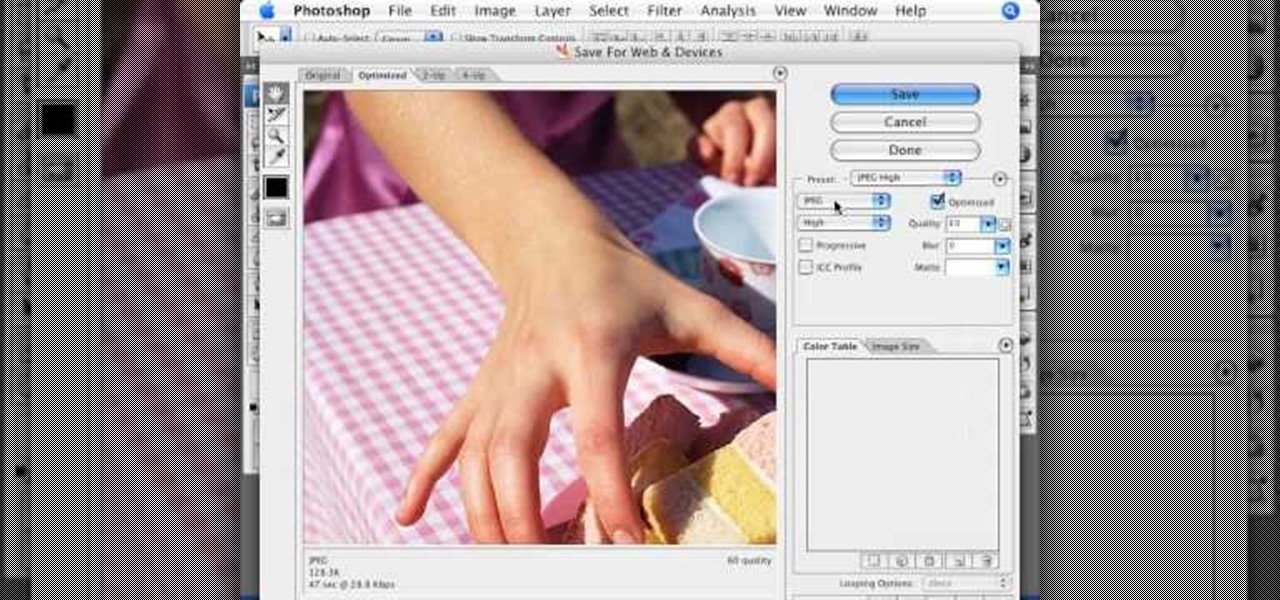
In this how to video, you will learn how to re-size any image in Photoshop to submit to Alamy. You will need the file to be 48 megabytes and uncompressed. First, open the image in Photoshop. At the bottom, you will see the current image's file size. Now go to image and image size. Increase the size by two or by five percent. Make sure re-sample image and constrain proportions are selected. Make sure bicubic smother is selected at the bottom of the window. At the top of this window, you will s...

In this video tutorial, viewers learn how to tan an image using Adobe Photoshop. Begin by opening the image in the program and create a new layer. Then select the brush tool and select the tan color. Click OK and apply the color over the areas that are wanted to be tan. Then apply another layer with the same color to darken the image. Finish by configuring the Opacity to a lighter color and blend it to the image, This video will benefit those viewers who enjoy editing images to enhance them a...
This tutorial will focus on how to use the fit image function within Adobe Photoshop. You will utilize this function when you want the pixel width to match between different sized photos in portrait and landscape. First you will select all the photos (you must create a batch action in Photoshop). Next select the fit image option in the file menu under automate. You will need to put the same number into length and width to constrain the proportions of your landscape and portrait photos have th...

Yanik Chauvin demonstrates how to create a batch using Photoshop and them Lightroom so you can decide which is faster and more convenient for you. In Photoshop, he first changes the color in the image, which he explains step by step the process, then saves the image as an action. He then shows you the process to batch the images so they will appear on your desktop. He also does the same thing with the image in Lightroom and shows you the process in which you would change the color and sync th...
There are many different approaches to sharpening images in Photoshop. This tutorial demonstrates multiple options in order to optimize the final presentation of your photographs.
First of all go to Google and then type in 'candy bar wrapper image' and then enter and go to image results. Select the 'crunch' image and right click and then 'copy' and then go to word document and paste it there. But if the image is big then right click and select 'hyperlink' and select 'remove hyperlink' to remove it. Now select the image again by clicking on to it and you can change the size of the image. Pick out the corner of the box that appears on the image and drag it inside to make...
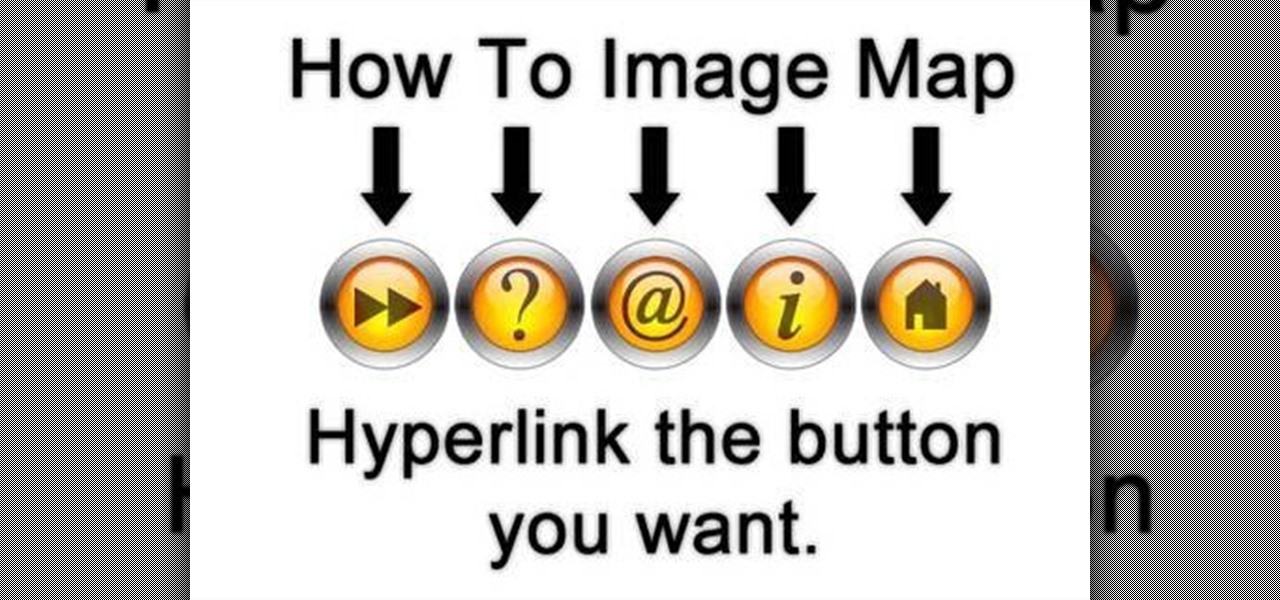
This video is a quick lesson on how to make an image map for free without the software. You use image mapping if you are creating a website or you are a partner with http://youtube.com. From your PC or Mac you go to http://www.image-maps.com and that is where most of the free image maps are available. Then you click on "start mapping my image" and you will see a preview, and then you follow the steps in the tutorial. The video was very informative and precise on a step-by-step process to do t...
You can convert any color photo to black and white photo. In Photoshop CS3, There are 4 ways to do it.
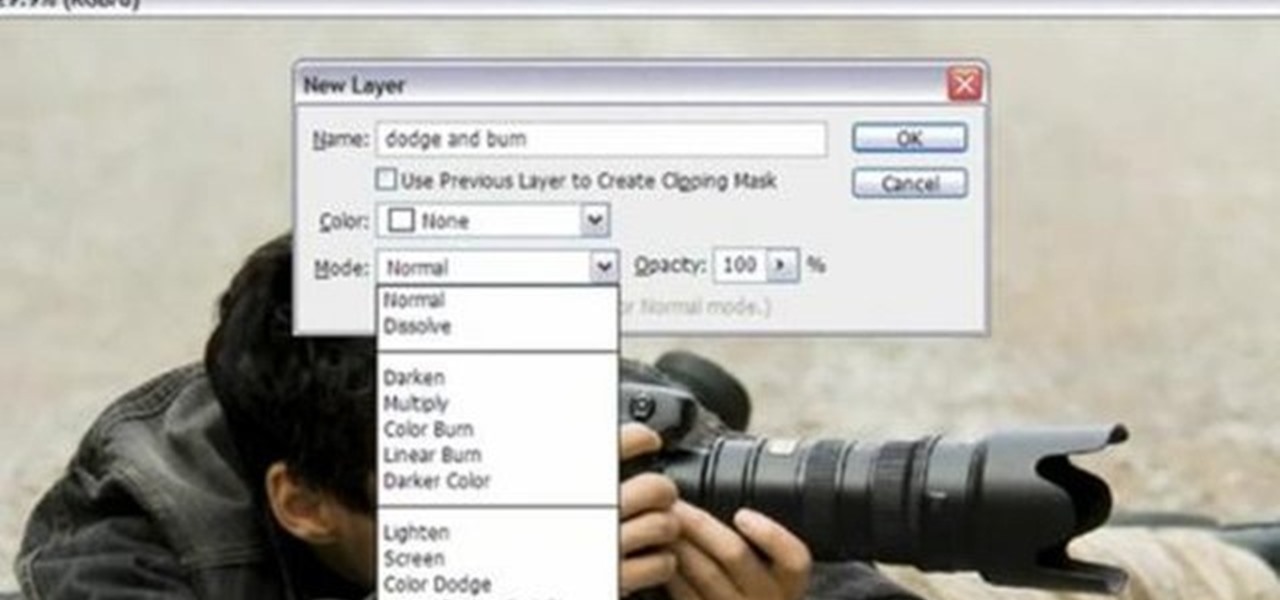
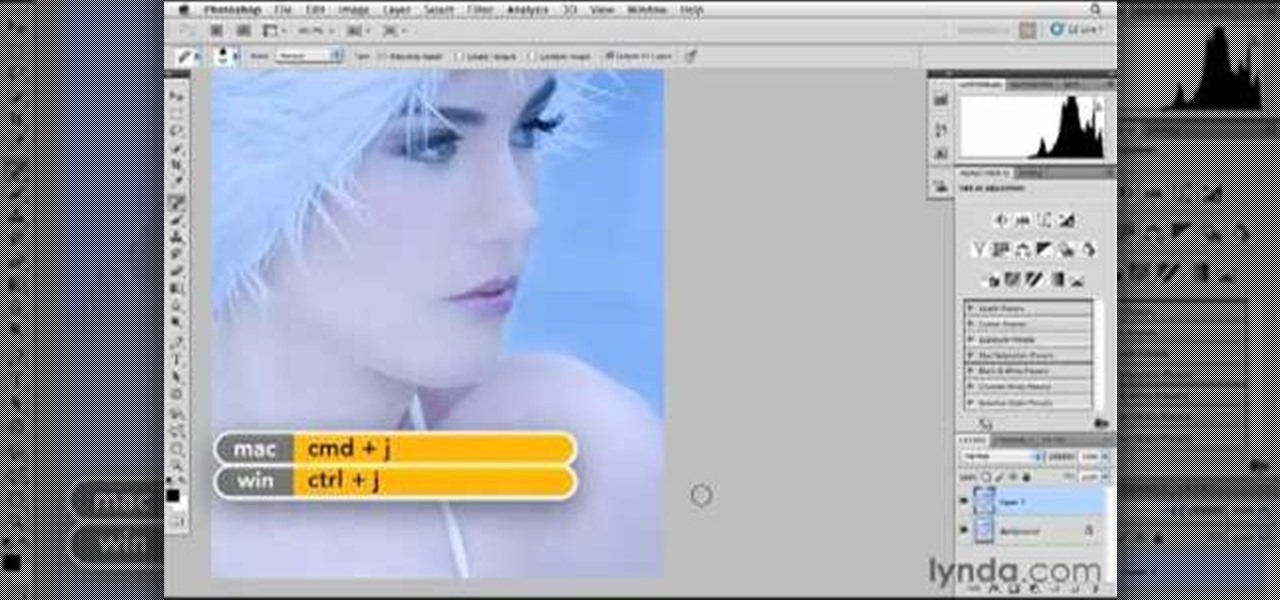
Yanik Chauvin demonstrates how to do Non Destructive Dodging (lighten) and burning (darken) of images using the tools in Photoshop. He shows the image of a man lying on earth with his camera. To start the work he wants to make a new layer which can be done in two ways either by clicking on the ‘layer’ button on top of menu or by pressing down the alt key and clicking on the new layer at button of the layer palette. It will bring up the dialogue box. He named it “dodge and burn” and from the l...
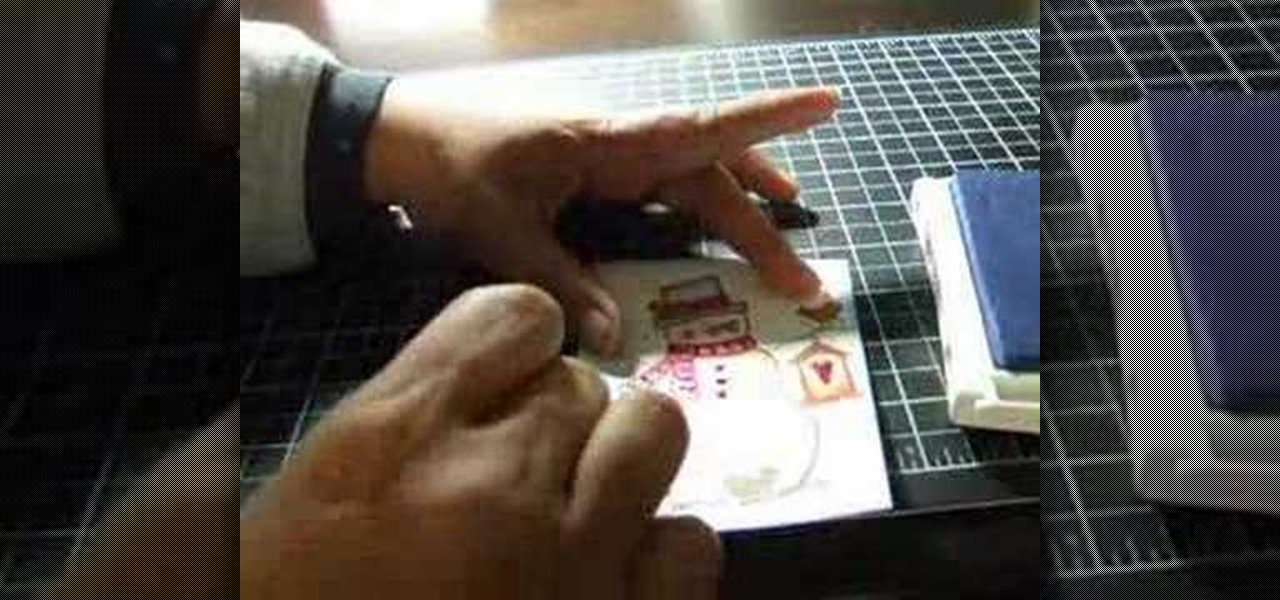
In this video tutorial, viewers learn how to shade and color the background of an image. This video explains all the materials required to shade and color the background of an image. The materials required are: a stamped image, a spoon dauber and an ink pad. Start by inking the sponge dauber and rub the edge of the cardstock. Continue to color the edge. Add more ink if you want the color to be darker. Color the background with the sponge dauber. Add link to the sponge dauber. Dab and rub the ...
Watch this video to learn how to download images from Yahoo using Firefox. 1. Click to open Firefox. 2. Surf or open the Yahoo main website by typing www.yahoo.com. 3. Click the Images tab. 4. Click the Search Box and type the word of the image that you are searching for. 5. Click Image Search tab. 6. Thumbnails of images will appear. 7. Note the name of the file, dimensions, file size and URL. 8. Choose a picture that you like and click on it. 9. The picture will become a bit bigger and will...
How to resize the background image in Xara3D6? First go to windows>frame size. Go in Sara and change the size of the image to the frame size. Make the image transparent. Then export the image as a PNG format. Now go back to Xara3D6 and go to view>background texture and open the previous image which was saved. That’s it; the image is resized to that particular document properly. It will help in resizing photos to be uploaded on the net.
This video shows you how to give your YouTube account a background image. Basically what you do is take any image that you would like to have as your background and upload it to a image uploader of your choice. Once the image is hosted it should show a url link to the file, copy this link. Then under your YouTube account settings scroll down to channel design. From here you should see a box that asks for a background image url, paste the url into this box click yes for background image and up...
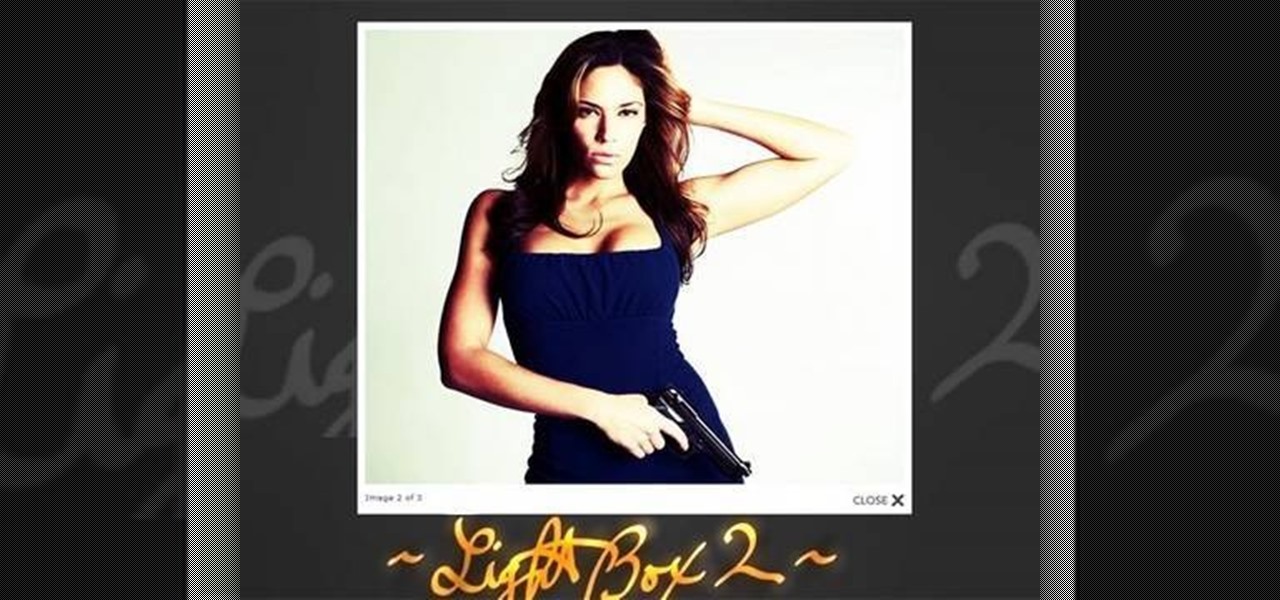
In this tutorial the author shows how to make a simple JavaScript image gallery. In this video the instructor shows how to set up a Lightbox tool. Lightbox is a simple image or photo gallery script which you can use on your website. It is a free tool and it is very easy to setup on your website. This tool has many features like when you click on an image the image enlarges and the rest of the background is darkened focusing your view on the image. Now the author shows the links to the Lightbo...
There are many instances when you may need to crop an image. Whether you need an avatar for a social networking site, or a specifically-sized image to insert into your website, Adobe Photoshop is an excellent tool to use. Learn how to bring an image into Photoshop and all the various tools one can use to crop the image in this video tutorial.
In this software tutorial you will learn how to manipulate images in Photoshop to remove the background and then bring that transparent background image into After Effects without loosing the transparency. The Photoshop section covers the use of the Magnetic Lasso tool and Quick Mask to remove a background. With the image adjusted, you will learn how to import your new image into After Effects with preserved transparency.
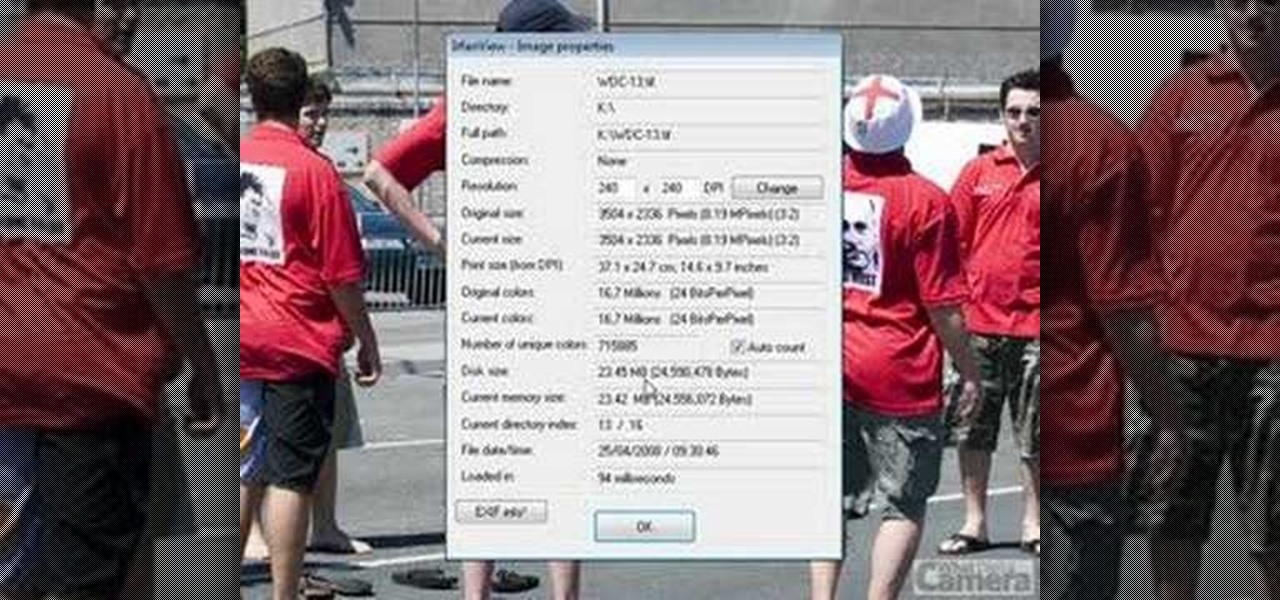
This software tutorial takes a look at some of the editing capabilities inside of the freeware image viewing application IrfanView. Learn how to use IrfanView to crop, resize and retouch images. If you can't get your hands on Photoshop or a professional image editing software, download and try IrfanView for your basic editing needs.
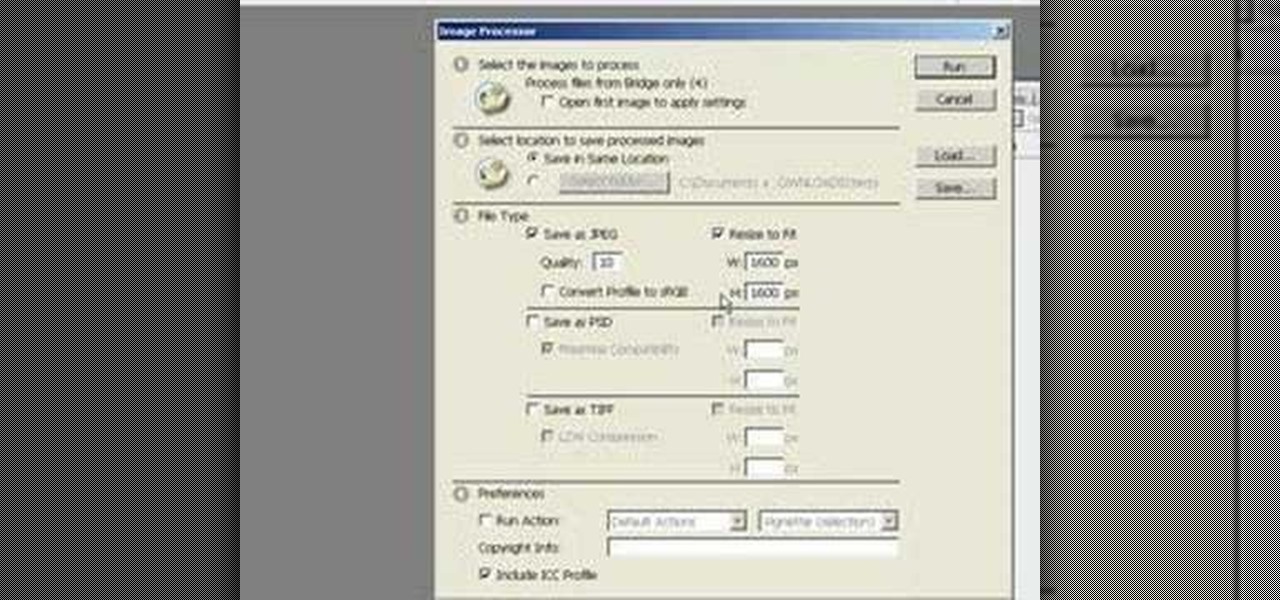
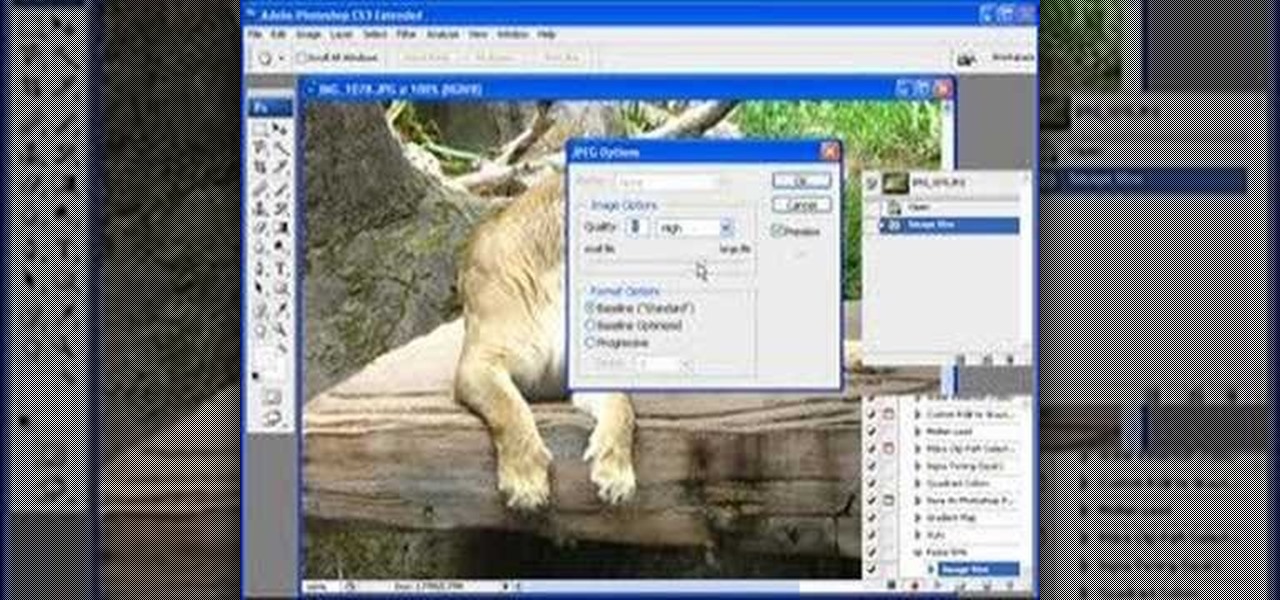
This image editing software tutorial shows you how to use the image processor tool in Photoshop CS3 to convert your corrected RAW files to a format more suited for printing or retouching; jpeg and Tiff. The image processor is can be used in the Bridge as well as in Photoshop and allows you to convert multiple files at once. See how in this Photoshop CS3 tutorial.
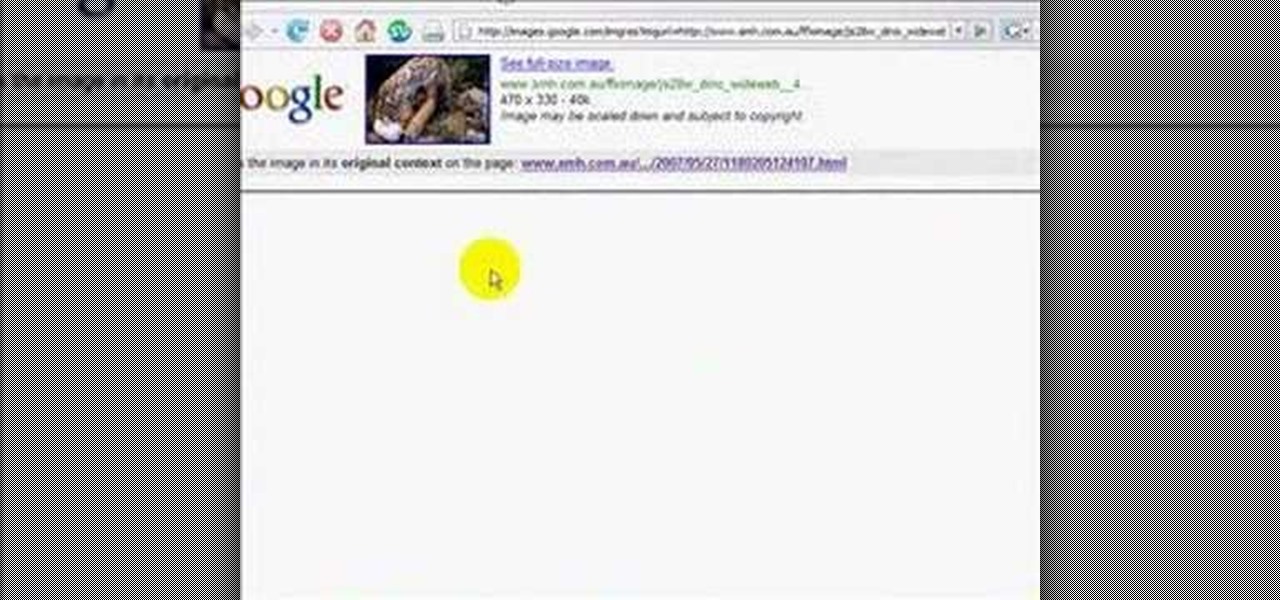
In this video tutorial, you'll learn how to use Google Image Search to find images much as you would use Google search to find webpages. For step-by-step instructions on using Google Image Search, as well a general overview of Google Images, take a look!
Looking for a free way to convert images you took with your digital camera? This tutorial shows you how to use IrfanView 4.10 for Windows to view, optimize and convert images. Learn the very basics of IrfanView 4.10 with this video and get ready to start editing your photos and images.
Do you need more space for your image? Do you want to put a border or text or additional information around your original image? You can do it all within Photoshop Elements with the help of this tutorial. Add your image to a larger canvas in Photoshop Elements and you can easily make a border.
Photoshop is a great computer software program designed to help people manipulate images and text. Learn a tips for erasing manipulating and erasing images from a Photoshop expert in this free video series.
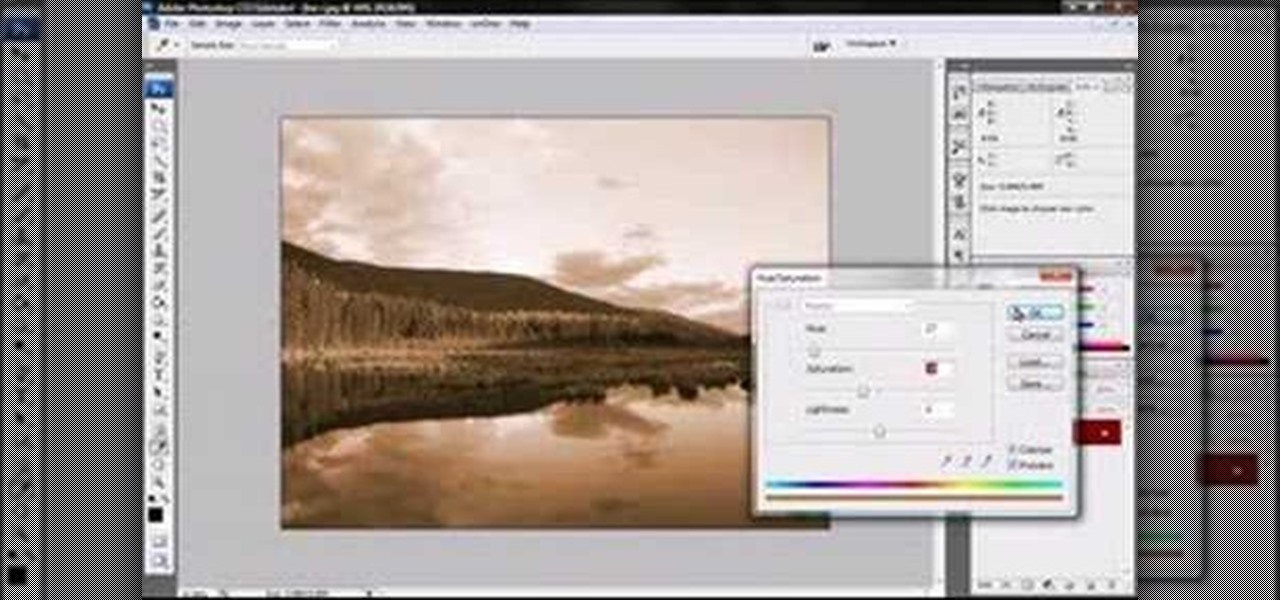
Jordan explains how to turn a photo to sepia toned colors using Photoshop. Sepia toned images are great for creating an old photo or monochromatic artistic look. Learn how to convert your images to sepia images in this Photoshop tutorial.
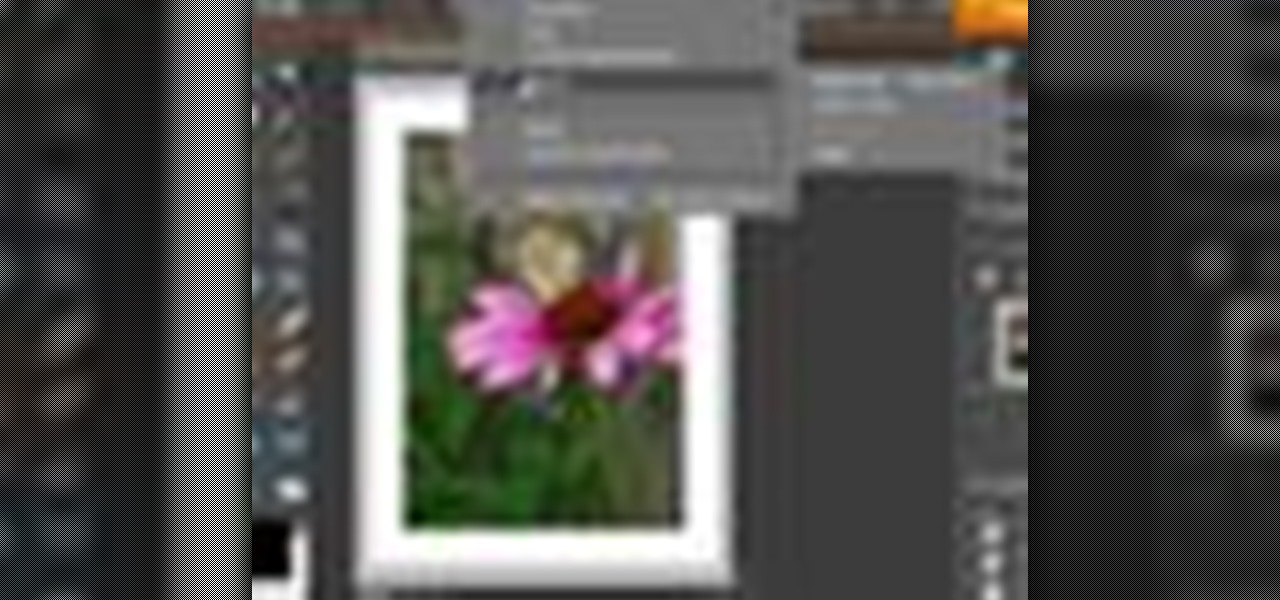
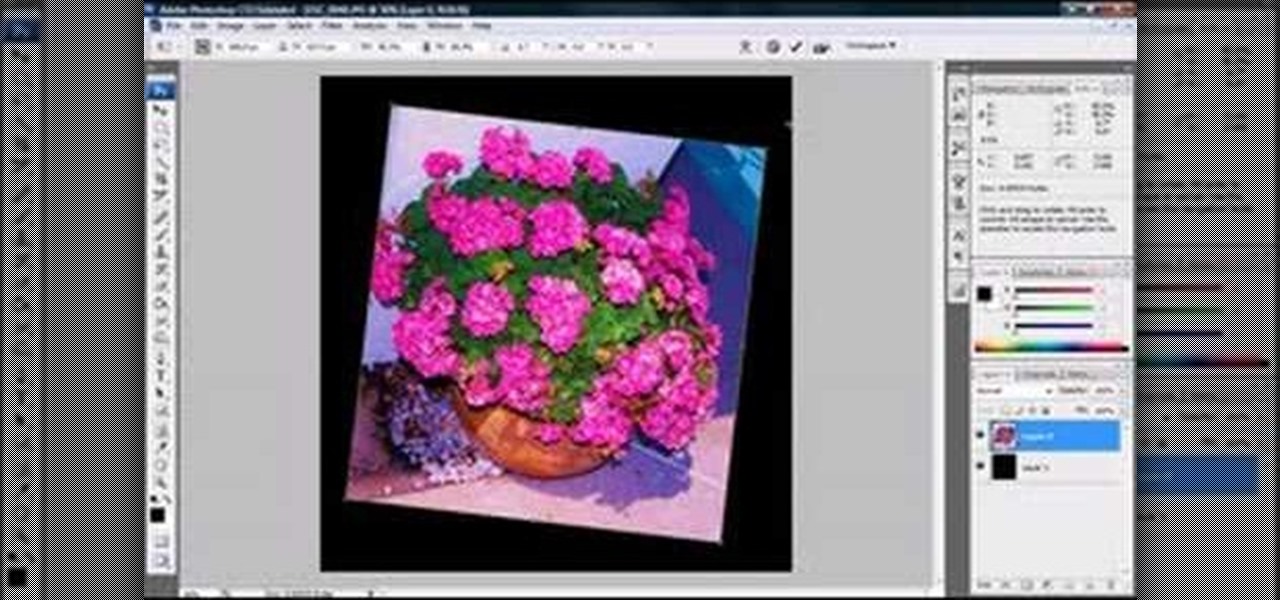
Jordan Explains how to rotate an image and even add a simple frame around the rotated image in Photoshop. This beginners Photoshop tutorial is cool for creating a photo scrapbook or anything creative where you need to move an image and give it a frame or border.
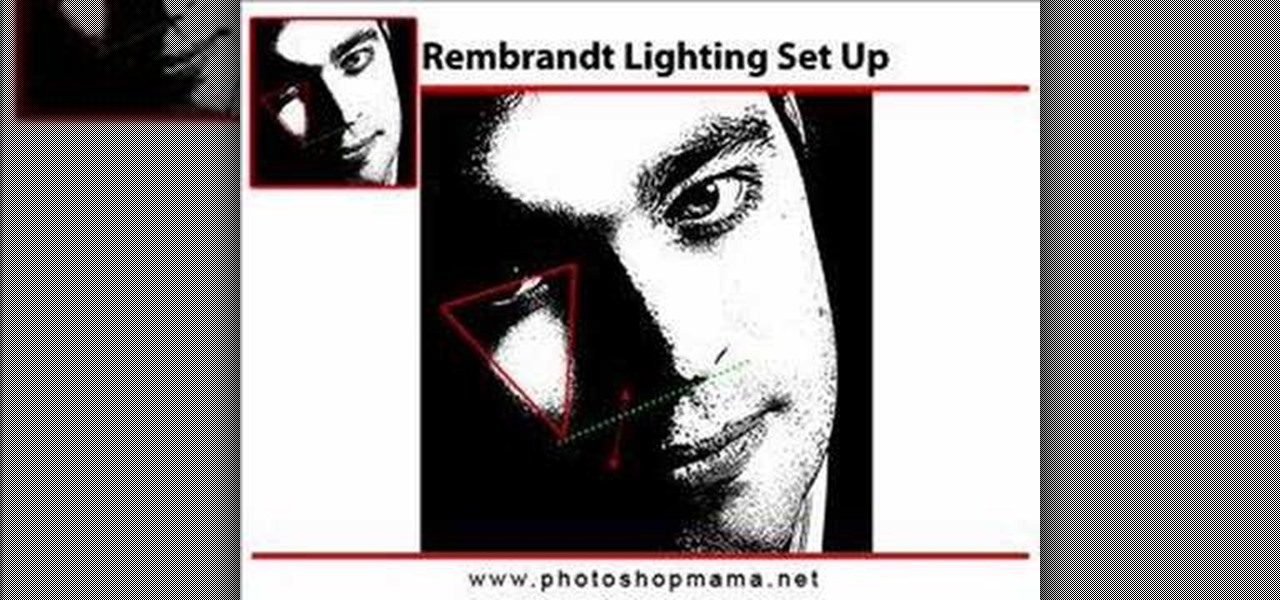
This Photoshop video series is going to explain how to create a chiaroscuro lighting effect on an image. This art form was made famous by the Italian artist Rembrandt. Part one covers the origin of terms and how to create chiaroscuro dramatic lighting. Part two has instructions for downloading the image, and some very basic workspace and preferences instructions for beginners. Part three covers Duplicate Image, File Info, File Size, Eyedropper Sample, Doc Status Bar, Panels/Palettes. Part fou...
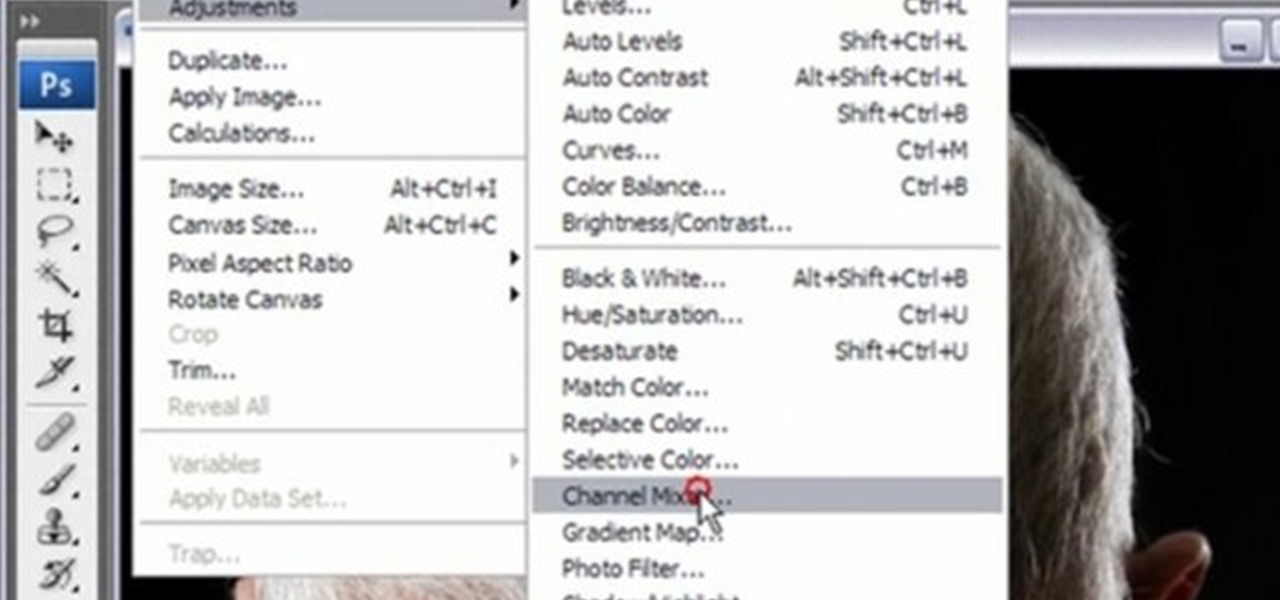
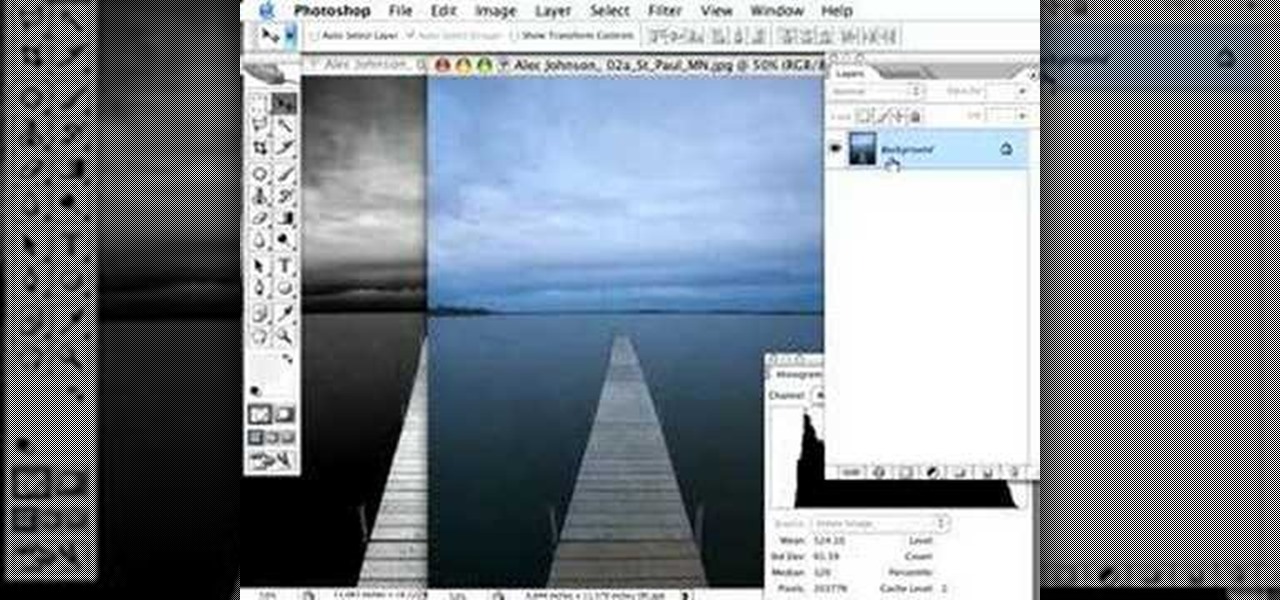
Using a series of submitted images as guides, this video tutorial looks at creating high contrast black & white images as a vehicle of communicating subject relationships. Technically, you will learn to create adjustment layers. Learn also how to use levels to adjust the tones of the image.
In this video tutorial you will learn to perform some basic image corrections on your photographic images. Learn how to improve the color and sharpness of your images. The video has some great tips on using Curves.
When you place an image in the same box as text, chances are you're going to want the text to wrap around the image just as you would in page layout. In this tutorial, Terry White will show you just how easy it is to not only wrap the text around, but to also give your image some extra white space around it. Watch this amazing video now!
Edit images directly from Google Chrome and see how they look directly on the page itself. GooEdit, a plugin for the Google Chrome browser, lets you rotate, flip, tweak the brightness, sepia, and more. You can then save the modified image to your local harddrive or upload to Twitter. Patrick from Tekzilla Daily explains the cool features.
Spot healing is a new feature of Adobe CS5 which can remove embedded features (like a misplaced clothing strap or a power cable). The content-aware feature will take contextual clues and help you retouch your images more effectively and spot-heal large areas of your image.
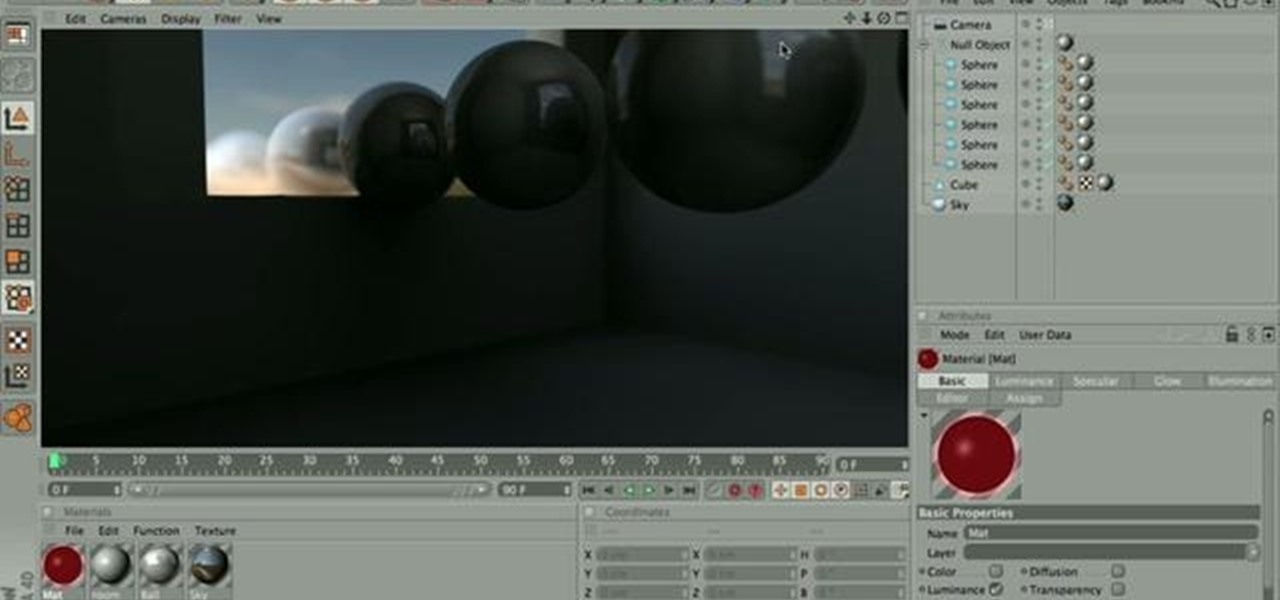
In this tripartite video tutorial, you'll learn how to create image-based lighting and depth-of-field effects within C4D. Whether you're new to MAXON's popular 3D modeling application or are just looking to get better acquainted with Cinema 4D and its various features and functions, you're sure to enjoy this free video software tutorial. For more information, including complete instructions, watch this 3D modeler's guide.
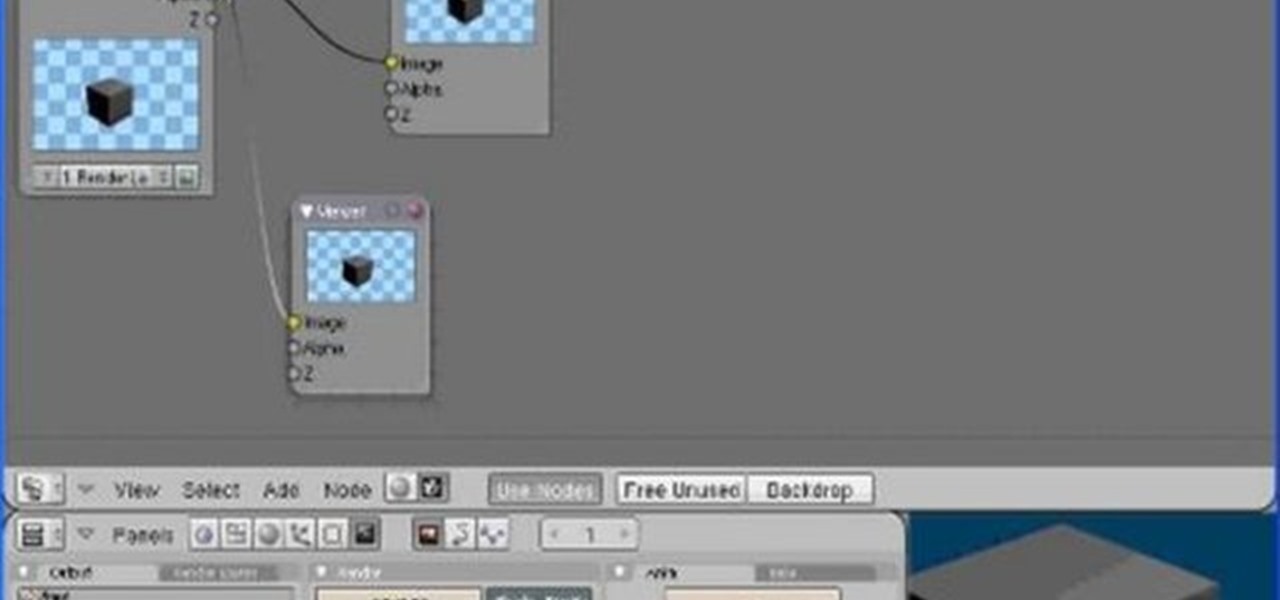
Conceptually, what is node-based compositing and what do nodes do? This clip uses the factory analogy to convey the concept. Blender can process video, images, sequences, and families of images in a directory. Then you'll fire up Blender and talk about threading nodes and how images are duplicated and routed through the compositing network ("noodle"), how threads are created between sockets. Creating threads, cut threads. The clip also points out common threading errors and misrouting threads...
Have you ever wanted to modify the 3D images from your favorite video games yourself? This video is here to help! It will teach you how to import and rig a 3D character (in this case a Bloodelf from World of Warcraft) in 3D Studio MAX. Now you can edit the character however you want and then stick them back in the game, playing with a custom-looking character! Don't look the same as everyone else on WOW anymore after watching this video.
Want to burn an ISO disc image from within Microsoft Windows 7? It's easy! So easy, in fact, that this free home computing how-to can present a complete (and somewhat talky) overview of the process in just over a minute's time. For specifics, and to start burning CDs from ISO image files yourself, watch this PC user's guide.
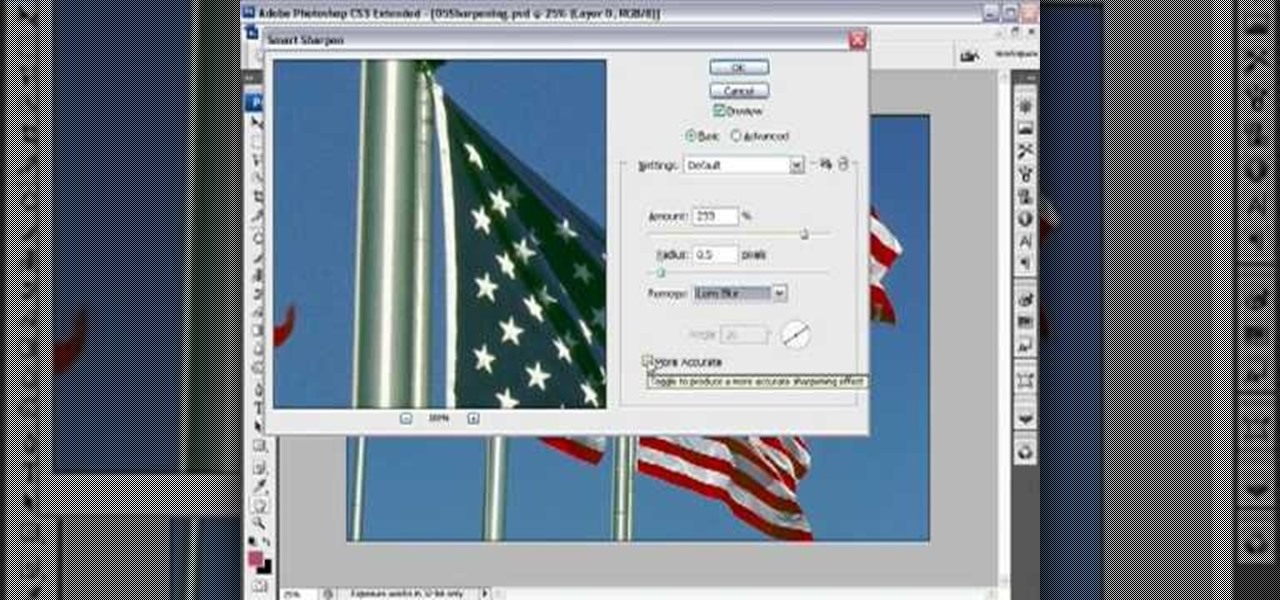
It's very easy to get a slightly blurry photograph due to a moving subject, camera shake, or just an incorrect auto-focus, but you don’t have to let that ruin an otherwise terrific picture. All it takes is a little finesse in Photoshop or another photo editing software. This guide covers sharpening a blurry image using Photoshop specifically.
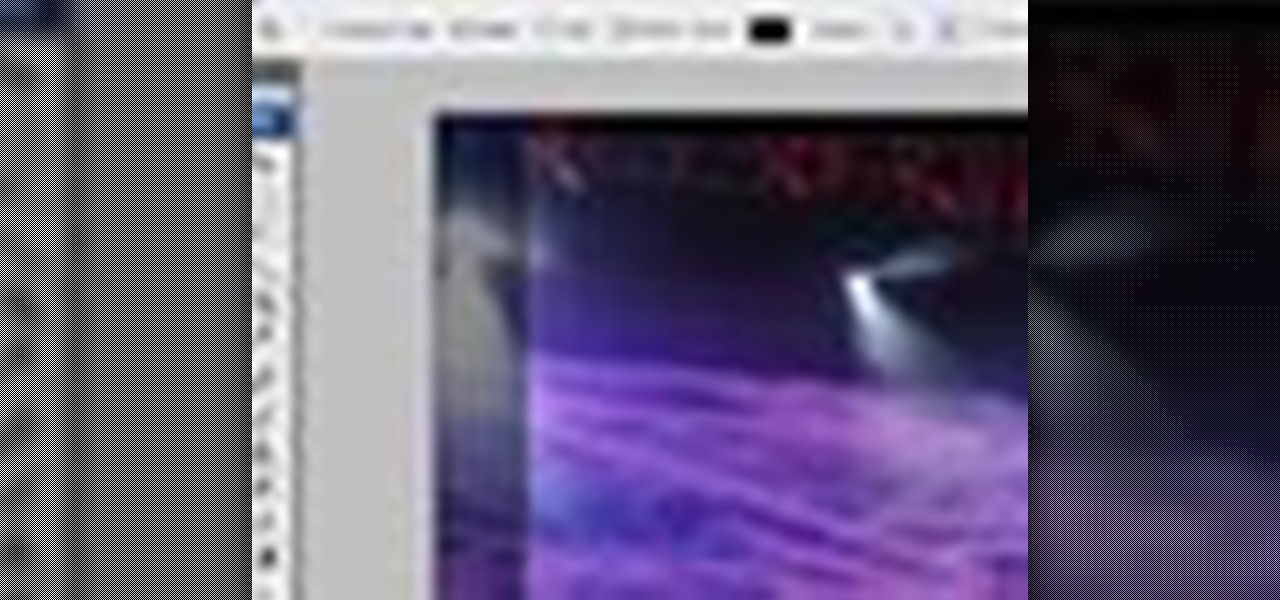
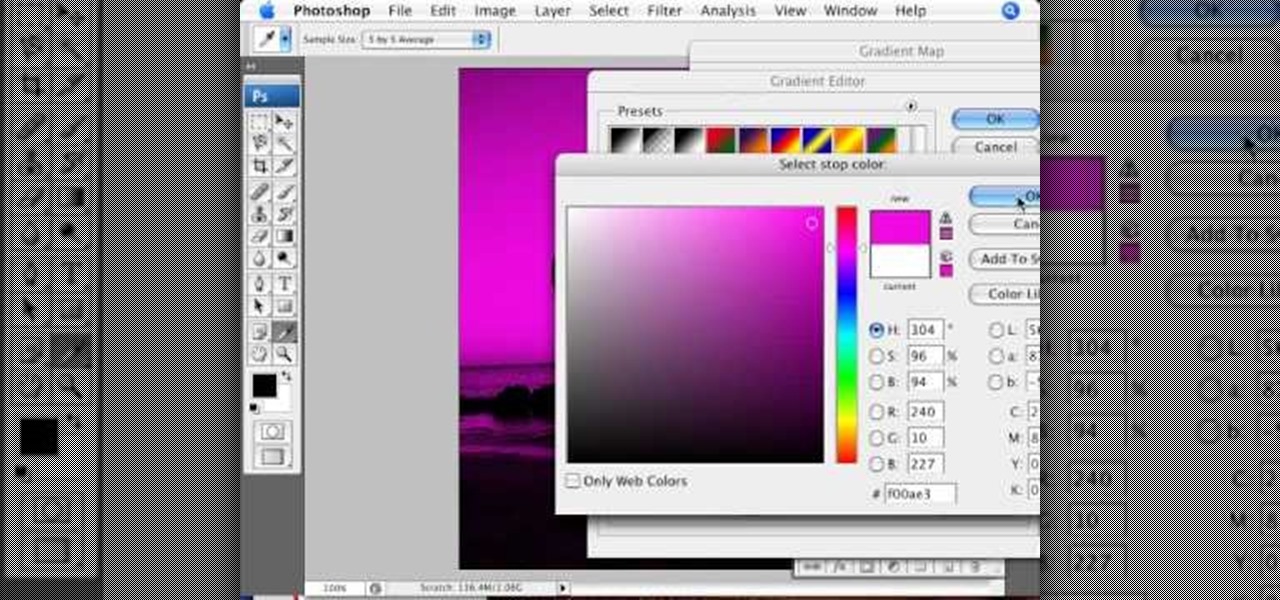
In this video tutorial brought to you by photoshopuniverse, you will learn how to apply mood lighting to images in Photoshop. This is achieved by applying an adjustment layer, called a gradient map, which allows you to adjust the color of the light in an image. You will learn how to access the gradient map from the adjustment layers menu, how to apply the gradient map, then overlay the new layer and fine tune the gradient to create more dramatic looking images.
In this video tutorial by photoshopuniverse, from Free Photoshop Video Tutorials, shows you how to automate the process of resizing images using Photoshop, primarily for sending over the internet. The guide takes you through the step by step process of creating a new action to record the process of resizing an image. Using this recorded action, you will learn how to go about applying that action to an entire folder, which will resize all the images contained in that folder.