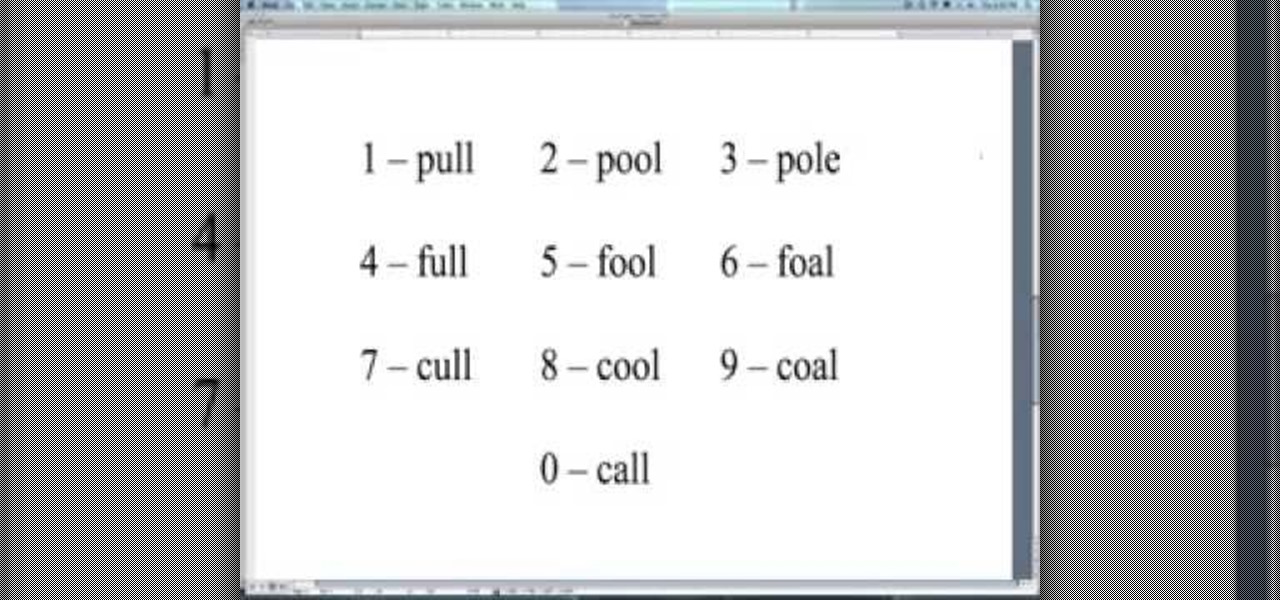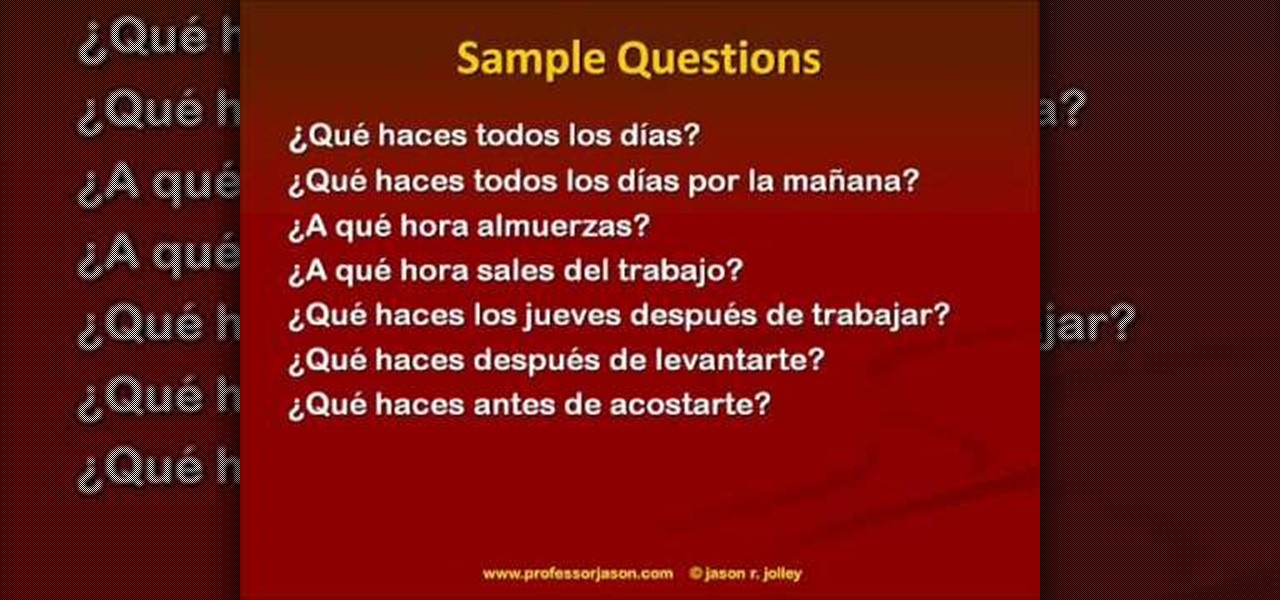
In this video, we learn how to talk about your daily routine in Spanish. First, you need to learn common expressions about doing things. The key verbs that talk about your typical routine include: "despertarse" (to wake up), "levantarse" (to get up), "banarse" (to bathe), and "ducharse" (to shower). These are just a few of the verbs you can use for your daily routine. Other activities include: "estudiar" (study), "cenar" (to have dinner), and "acostarse" (to go to bed). Make sure if you are u...
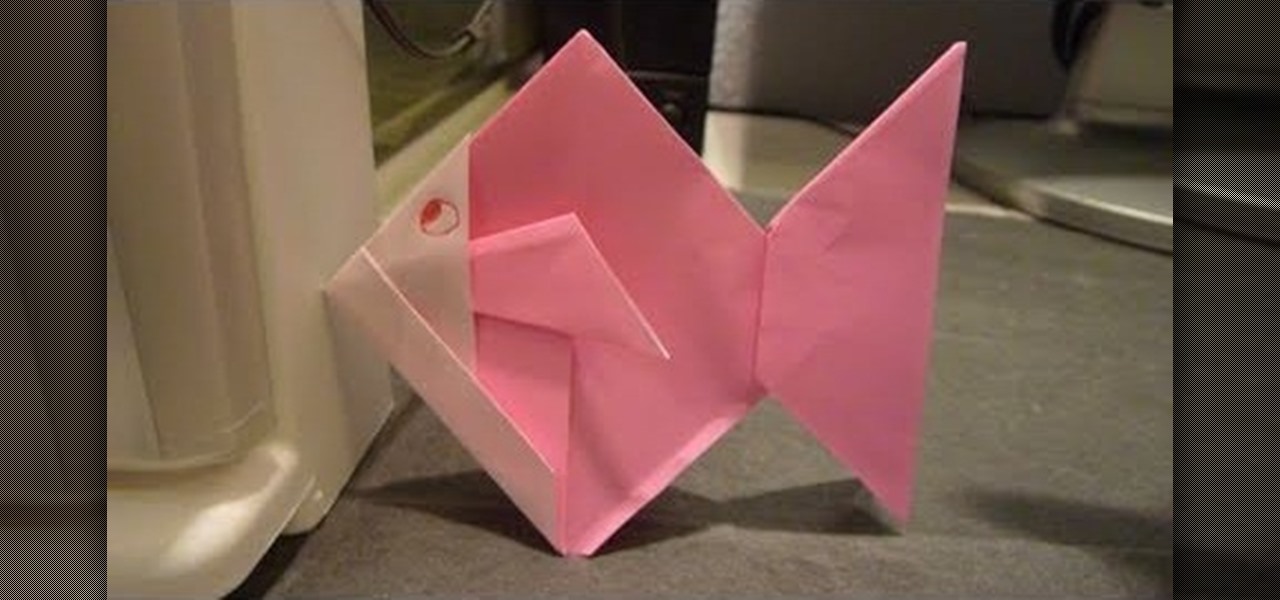
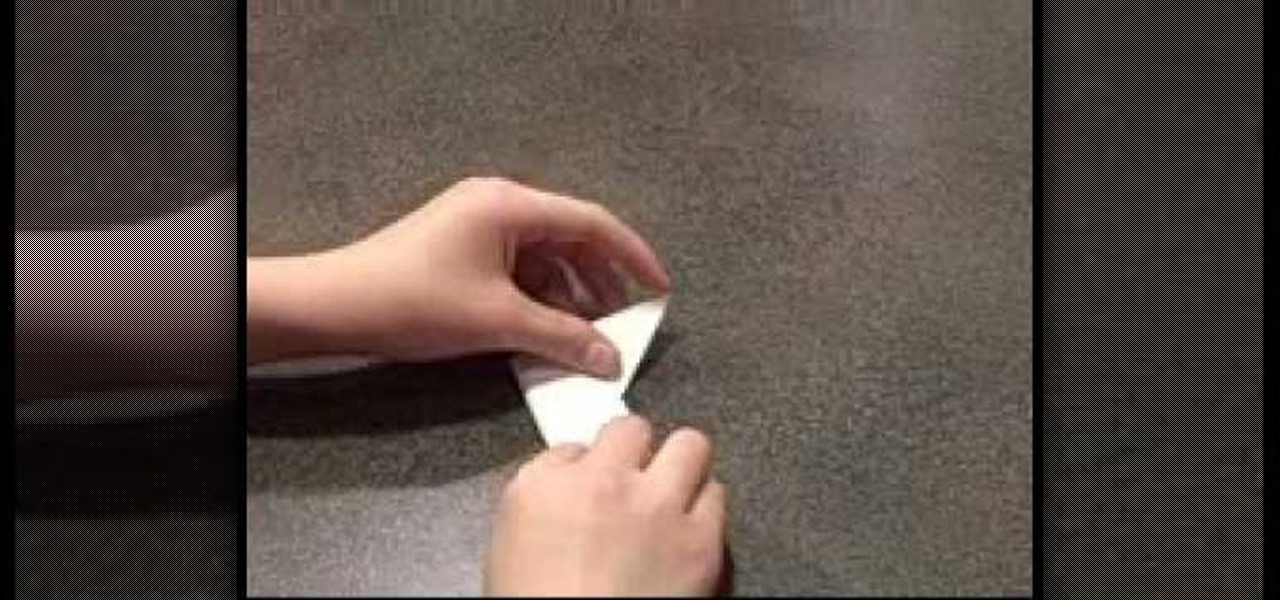
Okay, so we have to admit something to you: This isn't actually an origami craft in the strictest sense of the term. Origami dictates that an object be folded into being from a single sheet of paper, but for this goldfish we take a bit of a shortcut, literally. Instead of folding to get all the pieces in place, we make a few cuts to facilitate the fish-forming process.

This video tutorial belongs to the Arts & Crafts category in which Maricela is going to show you how to apply a crimp bead cover. First take a crimp bead cover. Now slide it over the crimp bead through the open jaw. Next take your crimp forming tool and applying a slight pressure to close the crimp bead cover around the crimp bead. If too much pressure is not applied, the crimp bead cover will close evenly around the crimp bead and the effect will be that of a seamless round bead. And that's ...
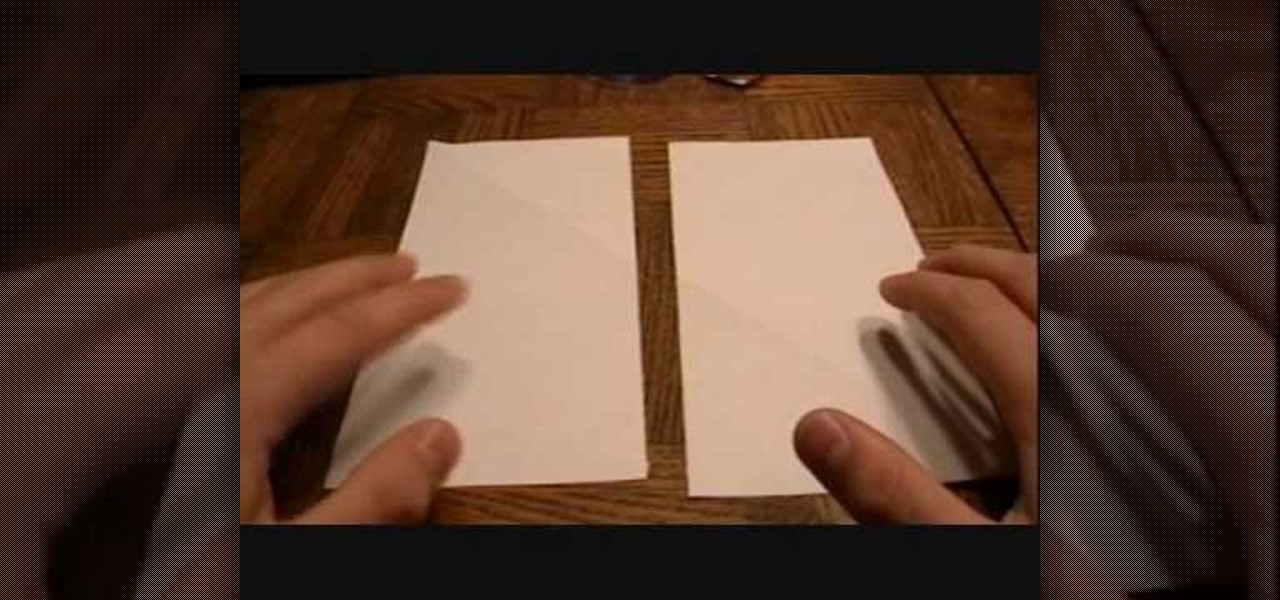
In this Arts & Crafts video tutorial you are going to learn how to fold an origami ninja star. Take a normal paper. Fold it diagonally from one corner and cut off the extra portion to make a square. Fold it in half and cut into 2 rectangles. Fold each piece in half along the length. Fold both ends of each piece in opposite directions to make a triangle. Now fold the ends again to make a bigger triangle at both ends of each piece of paper. Each sheet will form a 'Z' shape. Now place one sheet ...
In this tutorial, we learn how to do an arrowhead stitch when embroidering. Start off by pushing the thread through, then pulling it under, then back through at a diagonal angle. After this, thread it back through, making the same angle on the opposite end. As you continue to do this, you will start to see arrows forming after two stitches. Place the arrows one in front of the last to make the stitch complete. When you are done, you will thread the needle through the bottom and tie it. After ...
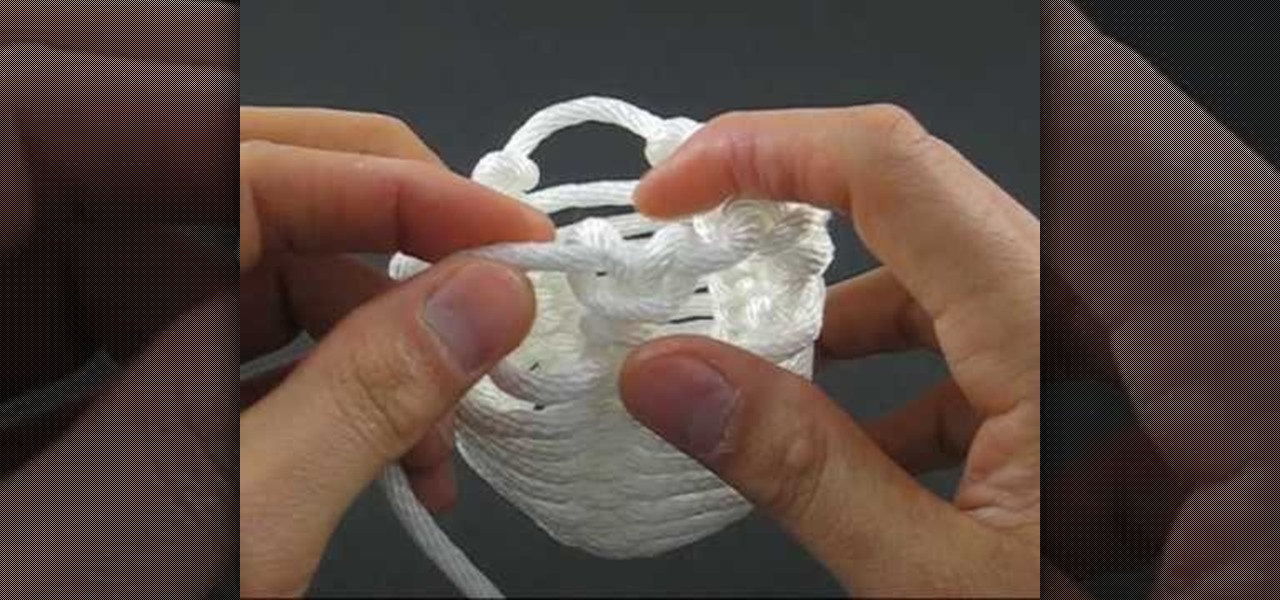
In this video, we learn how to tie a honey rope basket knot. To do this, you will need a 10ft of nylon rope. Start off by tying a counter-clockwise slipknot at one end of the rope. After this, pull the loop of the slipknot out four inches. Then, tie a second slip knot clockwise next to the first slipknot. Draw the loop length of the second so it's equal to the first. Next, continue to create slipknots next to each other until you've done five. No, hook your working end into the first loop and...

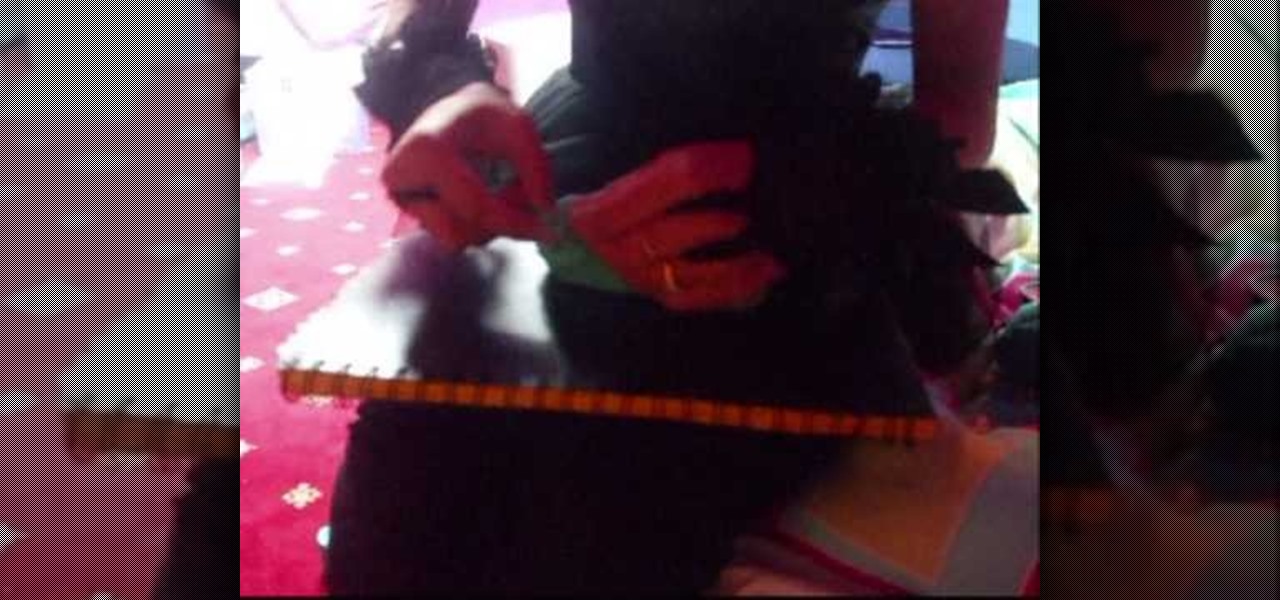
In this tutorial, we learn how to make a left-hand crochet Valentine's puffy heart. You will need: a size G crochet hook and yarn. Start by working a chain of three then forming a loop and doing a chain one. After this, work 9 single crochets through the center of the ring. Next, do 18 single crochets making the first stitch on a single crochet. Keep doing 18 single crochets around the circle you have created. After this, make one single crochet for a total of 18. The edges will start to curl...
We don't know why you wouldn't like to make a pom pom. After all, they're cute, chubby, and make anything they're attached to - keyrings, the tops of berets, air - look absolutely adorable. But then again, they do take a lot of patience to make.
Is your roommate's food always in the fridge longer than it should be? Is their meat rotting, forcing you to take care of it? Living with other people can be a pain, especially when it comes to the one place that you all share— the refrigerator. Keep your sanity and senses by transforming your funky smelling fridge into a pleasant aroma of charcoal...
You may have all the tools and people needed for putting up a fence, but something that should not be skipped is coding. Checking the coding and property lines to your place is important for making sure you don't cross into a place that you aren't supposed to be. This can result in bad blood forming and the removal of your hard work. So check out what you'll need to do in order to prevent that, in this tutorial. Enjoy!
This is a video produced by KazzieHeart on Youtube explaining how to make a puffy hairbow from a t-shirt. Choose a t-shirt and cut two equal-sized rectangles approximately 8"X4". Placing the two pieces facing inward, three sides are sewn together. It is then turned right side out and evenly stuffed with soft stuffing. The end of the remaining side is folded inward and sewn shut, forming a small pillow. A smaller rectangle approximately 5"X2" is cut from the same fabric. The pillow is sewn thr...
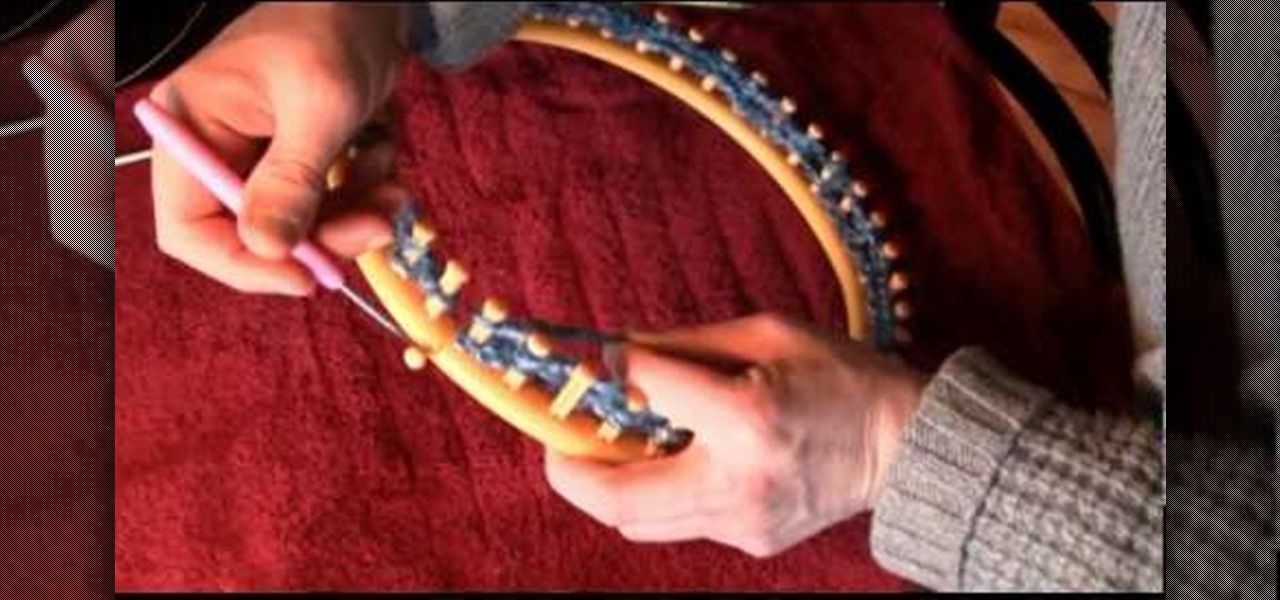
This video shows us how to make a shawl when knitting on a large knitting loom. Here are the following steps:
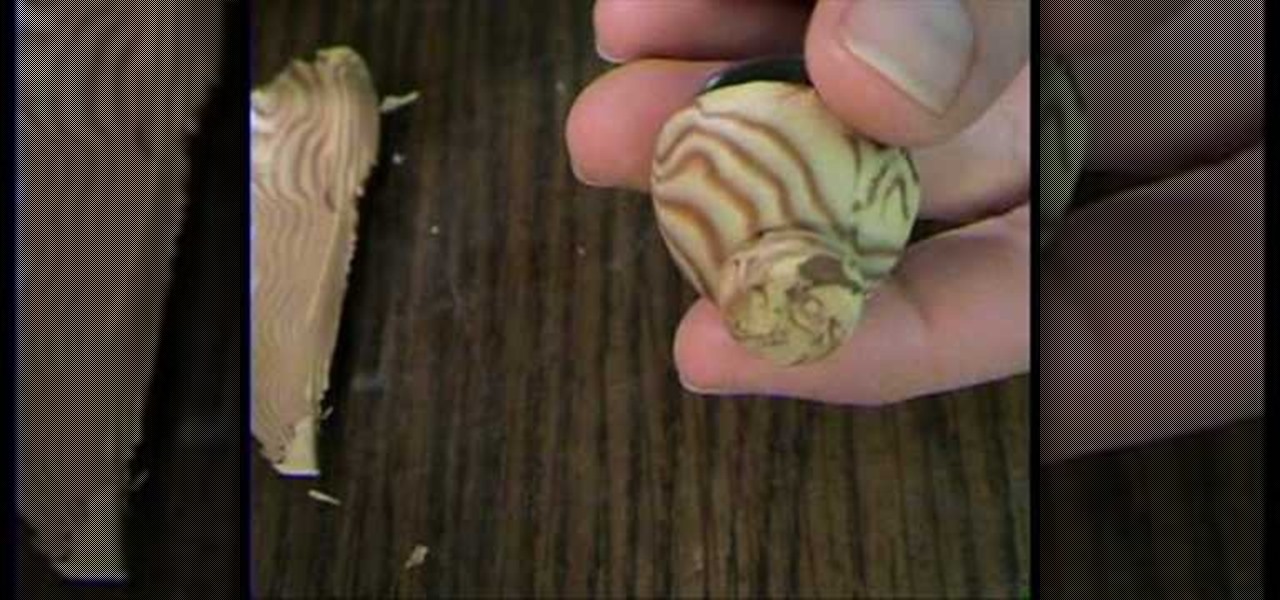
Following are the steps to describe how-to make small decorative bowls using polymer clay at your home:
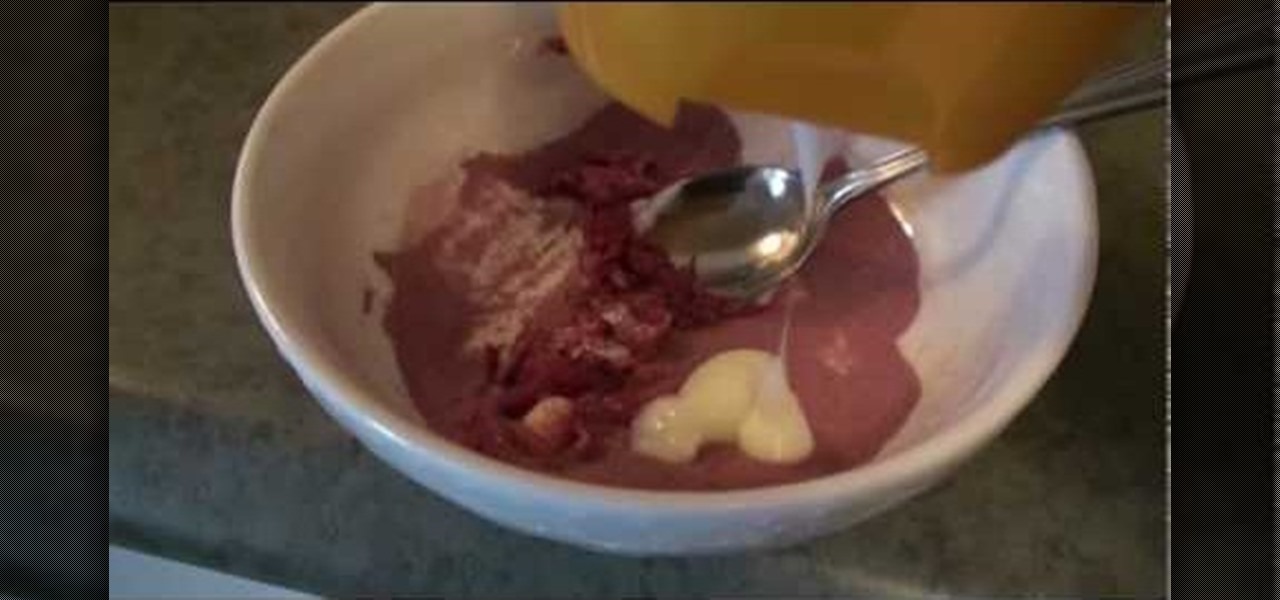
The video describes how to make a fake blood quickly by using kool-aid which takes atleast 2 to 3 minutes.For that we need at least five packets of kool-aid,sunsilk hair conditioner(any relevant conditioner),bowl and spoon.firstly,mix the kool-aid with hair conditioner in the bowl with spoon.Now the mixture is in the form of paste.But to make more fluid type add some more hair conditioner.Mix well to avoid the crystal forming of the kool-aid.It will really appear like blood and there is no st...
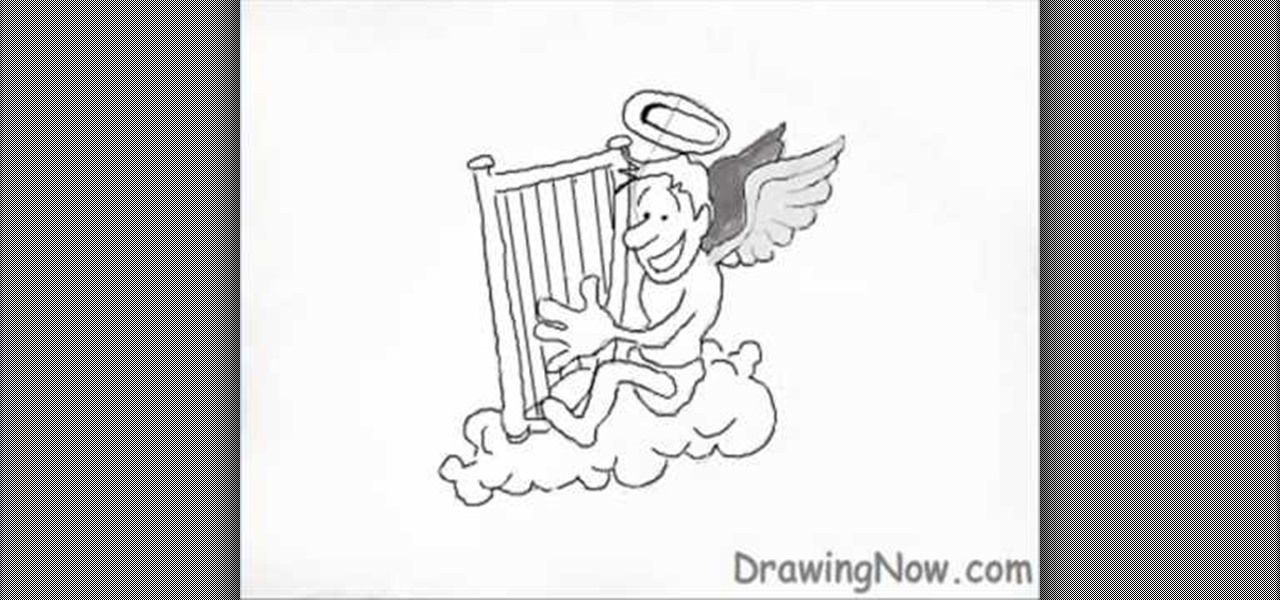
Three circles are drawn ontop of each other and a foot and a hand is added to the left side of the bottom and middle circles respectively; with the foot in a running motion. A rectangular shape is added in a way that the hand grasps it. A cloud is added below the forming person, so that he sits on it. Wings, a crown, a nose, an ear, hair, eyebrows, eye and a mouth with a smile are created in and above the first circle. The middle circle is traced onwards to the hand, to create the back,chest ...
In this Fitness video tutorial you will learn how to get ripped triceps and ripped abs at home by doing some really simple exercises. Start with push-ups. There will be two different hand positions for push-ups. First, keep the hands shoulder length apart, elbows in and basic push-up movements. Do as many as you can. Then rest for a minute and switch hands to triangle position. Elbows close the body, hands close to each other forming a triangle and basic push up movements. When you are doing ...
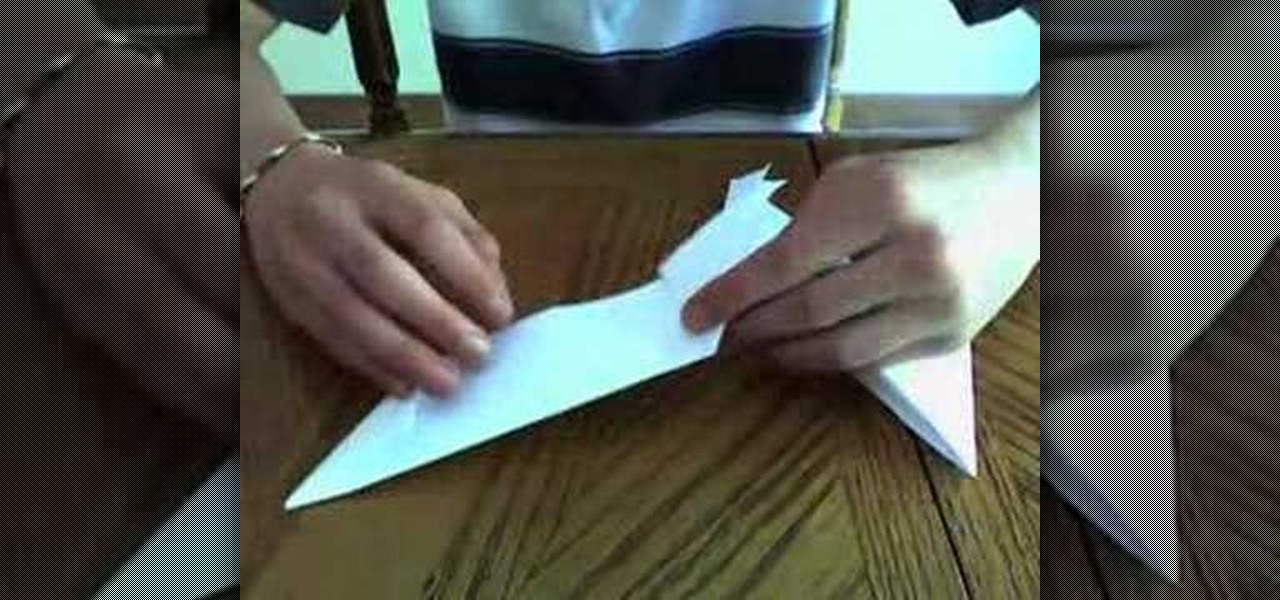
In this Weapons video tutorial you are going to learn how to make a paper shuriken (or ninja star). Take a square size paper and cut it into half. Then fold each piece in half lengthwise. Fold one end to make a triangle and fold the other end in the opposite direction to make a triangle. Now fold the ends again to make a bigger triangle. Then each sheet will form a ‘Z’ shape. Now place one sheet on top of the other forming a cross. Then fold in the protruding triangles of one over the other p...
Following are the steps to describe how-to prepare tasty Louisianan Roux for a perfect Gumbo:
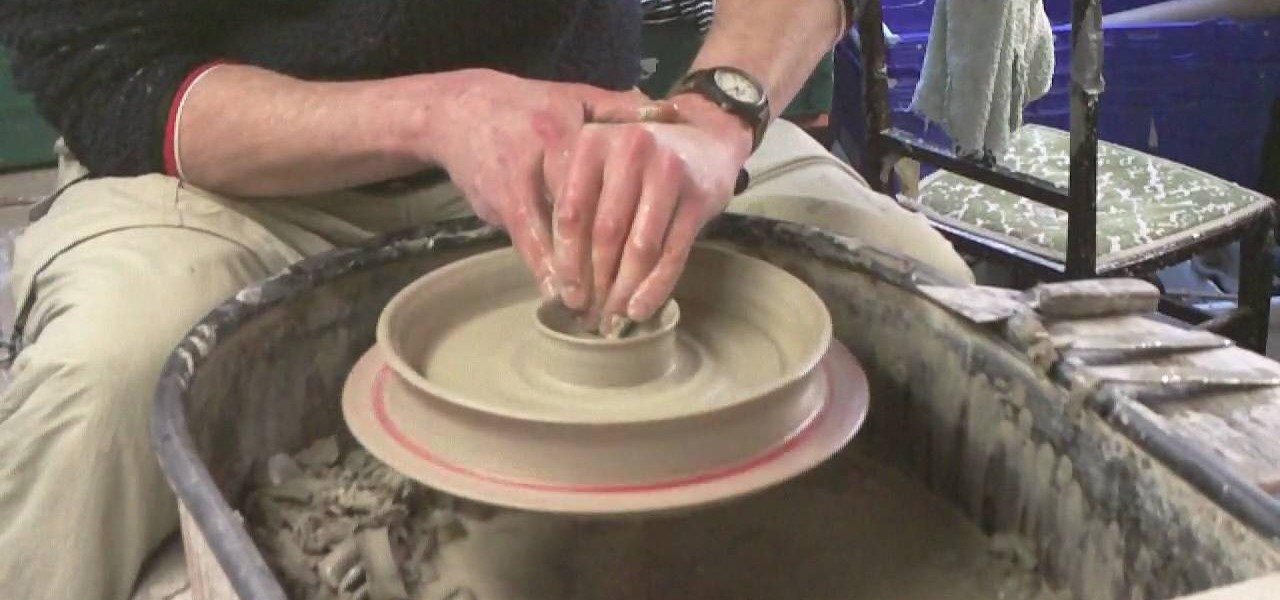
Ingelton Pottery demonstrates how to throw a chip and dip pottery plate. First, well a ball of clay and put it on a pottery wheel. Use your hands and ample amounts of water to depress the sides of the clay forming an indented rim with a raised center. Use your thumb to define the center hub. Create a thin side to the plate. Wet your hands and press down on the center hub, creating a depression. The plate should now have a two bowls with one sitting inside of the other one. Use a blade to scra...
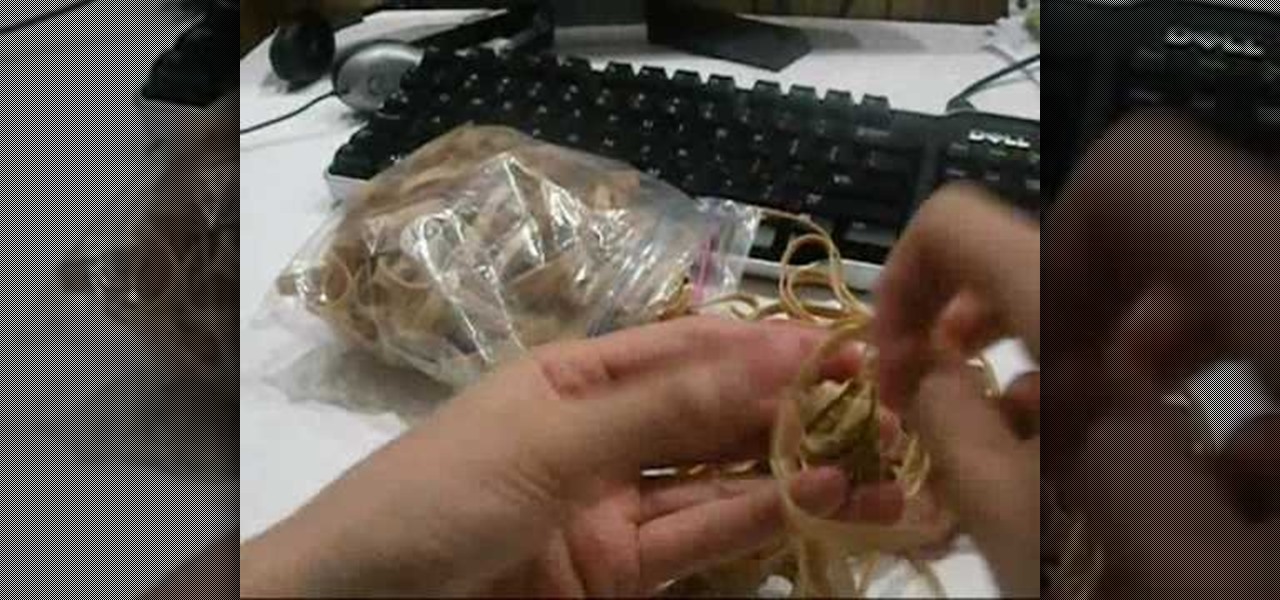
This video shows you, purely through demonstration, how to make a rubber band ball out of only rubber bands. It begins by showing how to create a small knot out of a few rubber bands, then wrap more rubber bands around it as one would with the small ball that is usually used as the core of a rubber band ball. The first few seconds are the most important, as forming the core of the ball out of rubber bands is the main trick to successfully creating the one hundred percent rubber band ball. Unf...
Megan aka Maybabytumbler, shows in this video how to braid bangs just like television celebrities have been seen sporting. She starts by showing us the right tools for the job: a flat, plastic bristled hairbrush and several bobby pins. Once we have the proper tools, Megan instructs us to brush all our bangs to one side and gather a small chunk of hair from the very top of the part. She separates the chunk into three sections and braids each piece under the last forming the braid knots. As she...
In this short video tutorial you'll be shown how to build or create a LEGO fire extinguisher/spray paint can. The process only requires two LEGO pieces to complete the item. The first piece required is a 1x1 studded can LEGO brick. The second piece is a 1x1 nozzle LEGO brick. Each piece is clearly shown and described in the video to make the process easier. Simply attach the two LEGO pieces together, forming an item which resembles either a fire extinguisher or a spray paint can. The last ste...
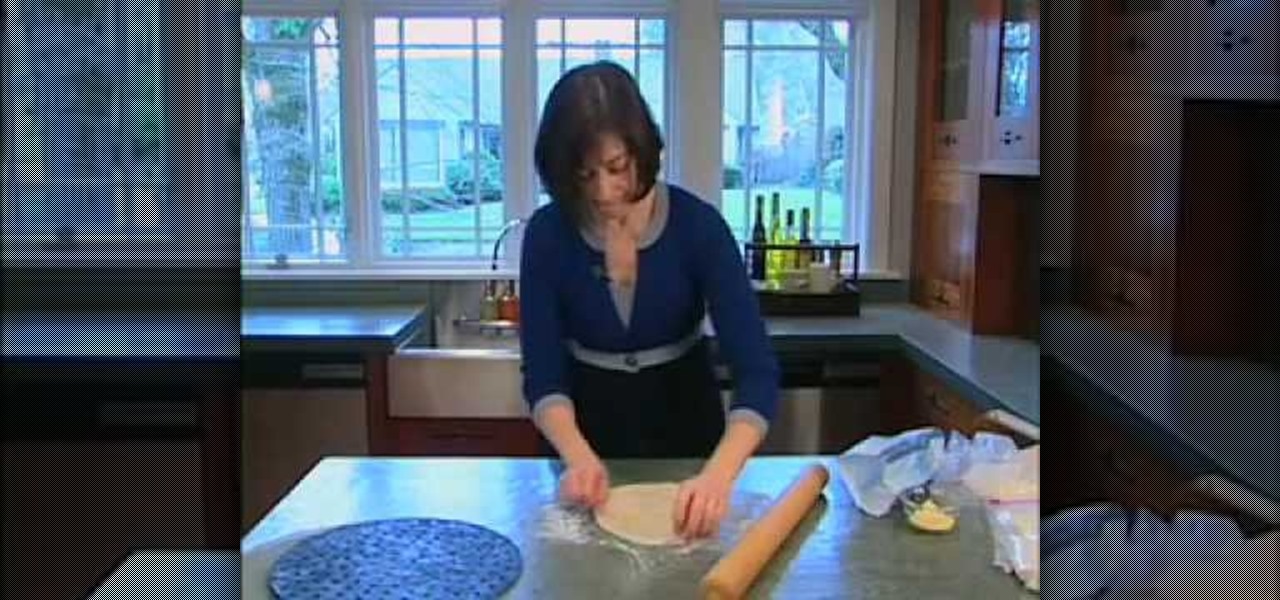
is a video presentation about "Shaping Pizza Dough" and to mastering great at home is shaping and stretching the dough. Put the dough in plastic cover for 6 to 8 hours in room temperature or 12 to 24 hours in refrigerator in an sticky form. Then, sprinkle little bit flour and peel the dough into small pieces. Then, take your fingers and punch down the dough and forming a round shape. By using the rolling pan, make smooth edge dough in round shape and then...
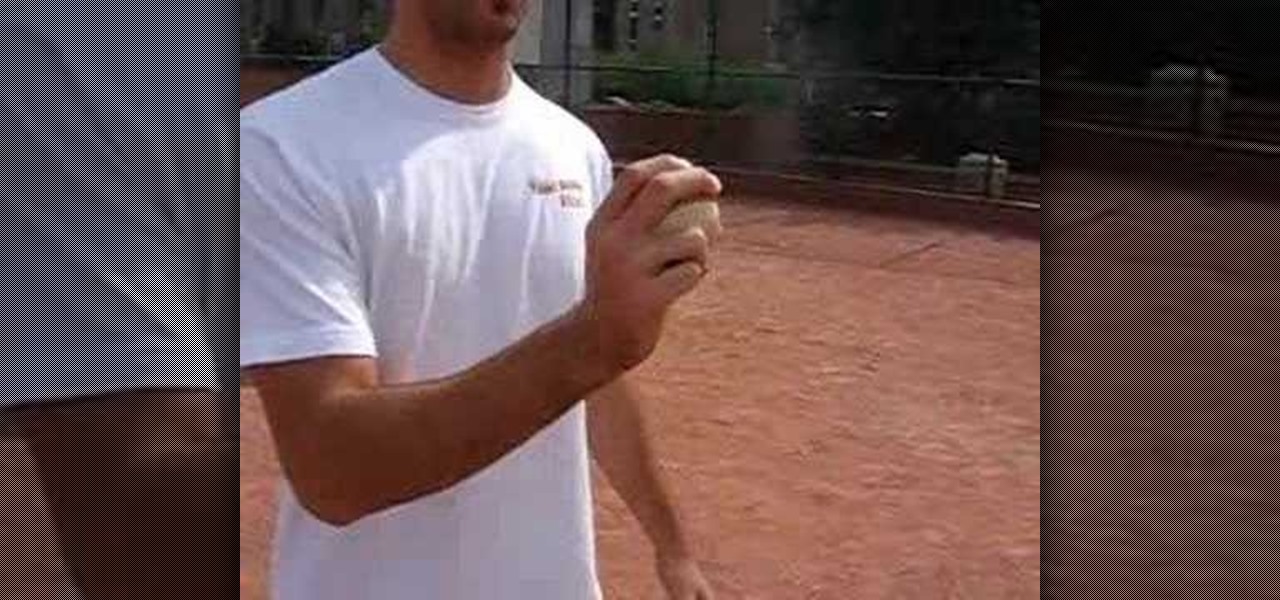
In this video, Mike shows us how to throw a curve ball with the right grip. The instructions to be followed are quite simple but also needs concentration on the gripping while throwing the ball. Playing of baseballs leads to a great practice but here you first need to focus on the gripping of the baseball. The ball is held on the inside seam with the first two fingers on the inside seam and thumb on the bottom forming a C. When you are about to throw a curve ball, instead of holding your ball...
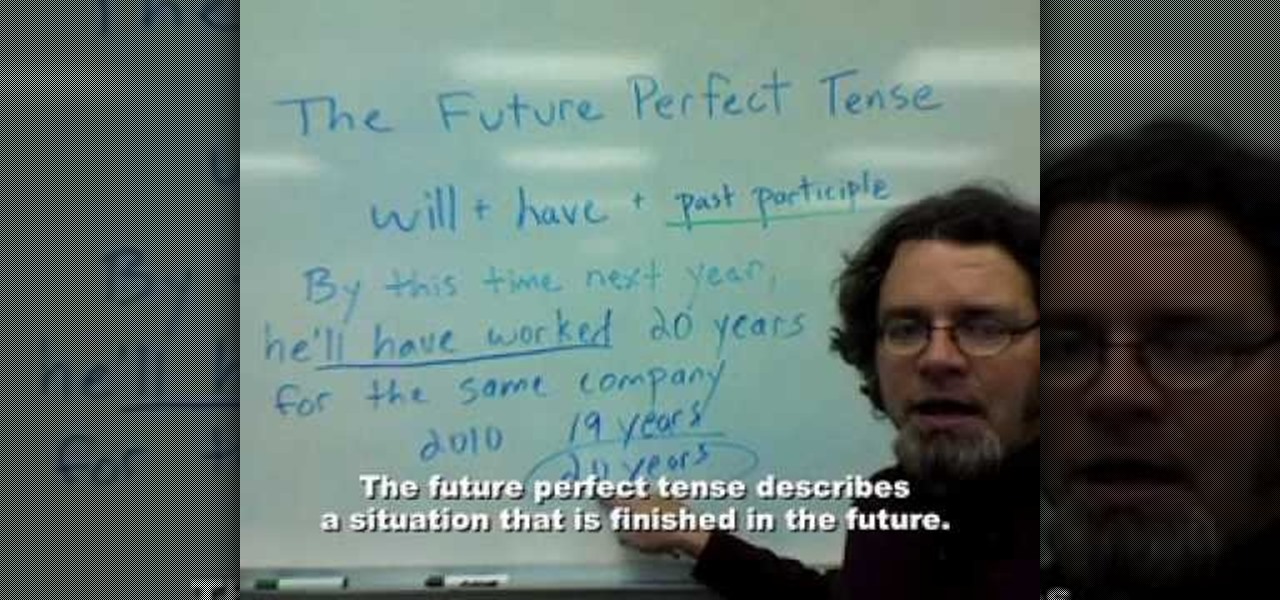
The future perfect tense describes a situation which is finished in the future. This video tells us how we can use future perfect tense easily. It gives us a deep insight through the grammatical aspect of future perfect tense. It shows us how to use the helping verb i.e "will" with the third form of verb to form a statement in future perfect tense. the basic formula for making a correct statement in future perfect tense is "subject + helping verb + past participle (v3). It's easy to remember ...
EnglishRyan shows you how to pronounce difficult sounds for IELTS. Using some pronunciation technique games you can learn to pronounce difficult words. The instructor says the words and tells you how to emphasis on your mouth and say the words. There is also a game you can play at the end guessing his number by listening to pronunciation techniques. Make learn these round sounds easier by playing this game and forming your mouth in the proper way to say the words.
Hair Tinsel Is Taking the Fashion World by Storm!
Apple pie is the classic dessert enjoyed anytime, breakfast, lunch or dinner! And granny smith apples make the best filling. This golden, crisp apple pie is delicious with cinnamon, whipped cream or à la mode. Watch the full video recipe for baking apple pie with Chef Hubert Keller.
This video tutorial demonstrates how to make an Origami necktie and a shirt card. Begin with a square two sided paper. Fold the paper in half, forming a triangle. Open it back up and use the center fold as a guide. Take one corner and fold it in toward the center fold. Repeat this on the other side. You end up with a kite shape. Turn your paper over. To make the front knot of the tie, fold down the smaller corner toward the center about a third of the way. Fold the point back up toward the to...
You will need a sketch book and various pens. Start by roughly sketching the head. Next draw a center line that will become the center of Xena's torso. Sketch the arms, legs, breasts, and the ring that she is holding. Remember, this is the first draft and it doesn't need to be perfect. Next, flip another page down on top of your first draft. On this draft begin to add more details and proportions. Start with the head forming the shape of the jaw and the size of the head. Work your way down to...
This video is a demonstration of how to make a winged heart design with folded paper. Start with a square piece of paper and fold it in half. Unfold it and fold it in half again, and unfold it. Using the creases as a guide, fold one edge up to the crease. Turn it over and fold the corners of the folded edge down toward the middle crease. Turn it over and fold the large edges inward toward the crease and unfold them. Lift that side up, forming a pocket underneath. Fold the sides inward inside ...
This video clip from The Crafts Channel shows how to make a bead cage. A bead cage is where a piece of wire is wrapped decoratively around a large bead. For the example bead cage .8 mm wire was used. If the wire is too thin it will not hold its shape, but if it is too thick it will be hard to bend into the desired shape. Take some needle nosed pliers and make a complete circle, and then use some flat nosed pliers to begin forming a spiral going outwards. Now do the same thing beginning at the...
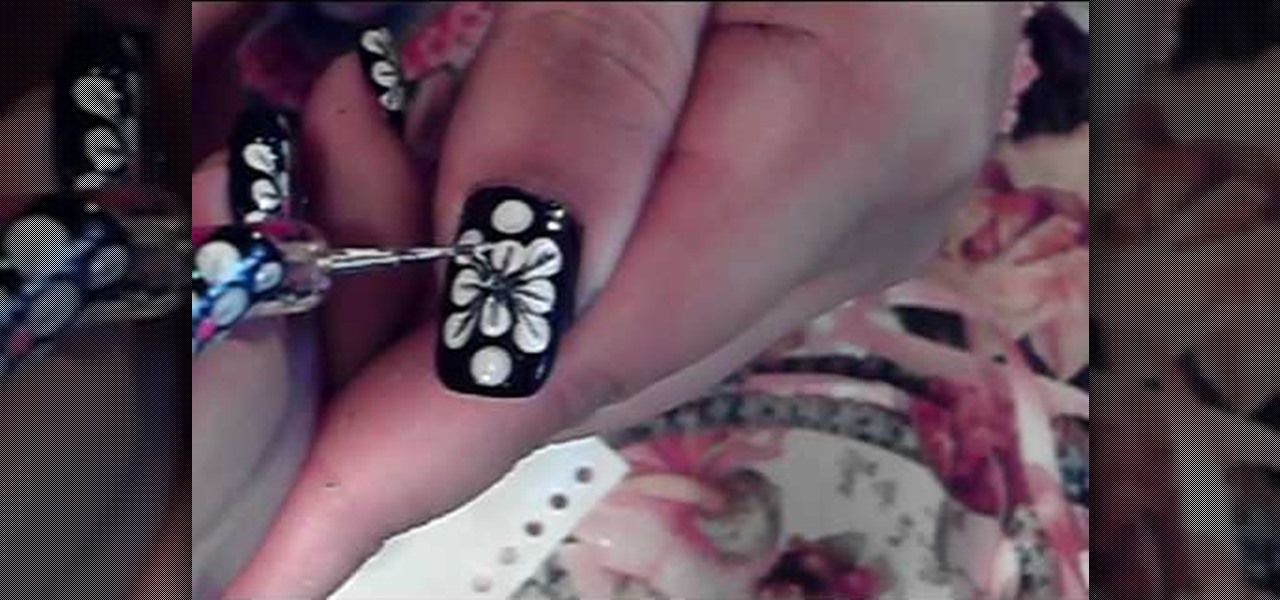
This video is about how to paint short nails with a white flower art design. The first step that you will have to do is to apply any background color on you nail. After applying the background nail polish, get a piece of paper and place the white nail polish on. After wards, use the dotting pen to start dotting the nail. Make four dots in the middle of the nail forming a flower. Then, just simply add another 3 more dots to both ends of the nail. After adding all the dots on the nail, the next...
This video demonstrates how to create an origami ninja star. Prepare a square shaped piece of paper. Lay it down on a table or on a flat surface. Fold the paper right across the middle in a vertical orientation. Fold it once more in the same manner as the first fold, now creating a more slender vertically standing rectangle. Fold the upper portion of the origami diagonally forming a small triangle on top of the rectangle. Do the same on the bottom portion of the origami. Fold the upper portio...
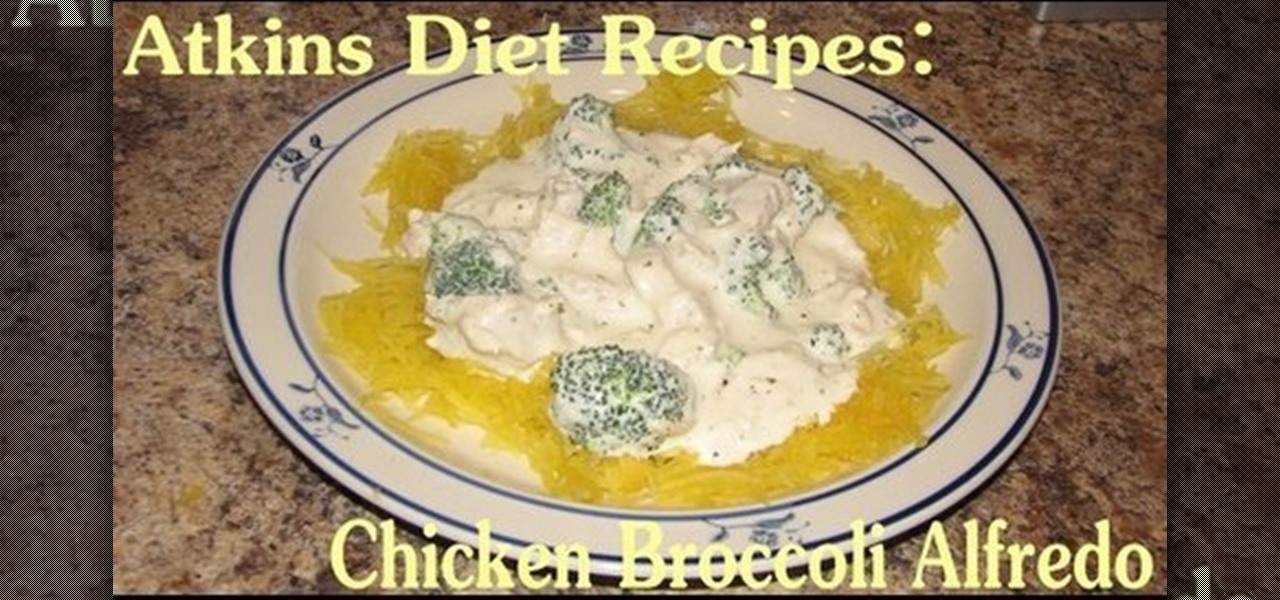
Here we prepare chicken broccoli alfredo. We cook it on spaghetti squash or green filled pasta. The chicken is cooking in the frying pan with olive oil, pepper and salted along with Italian seasoning. The spaghetti squash will be cooked in a frying pan too with the insides scooped out and cooked for 20 minutes. Chopped broccoli will be also used. Now make Alfredo sauce by melting 1 cup of butter in a pan and 8 ounces of cream cheese to it and 1 teaspoon of garlic powder alone with 1 clove of ...
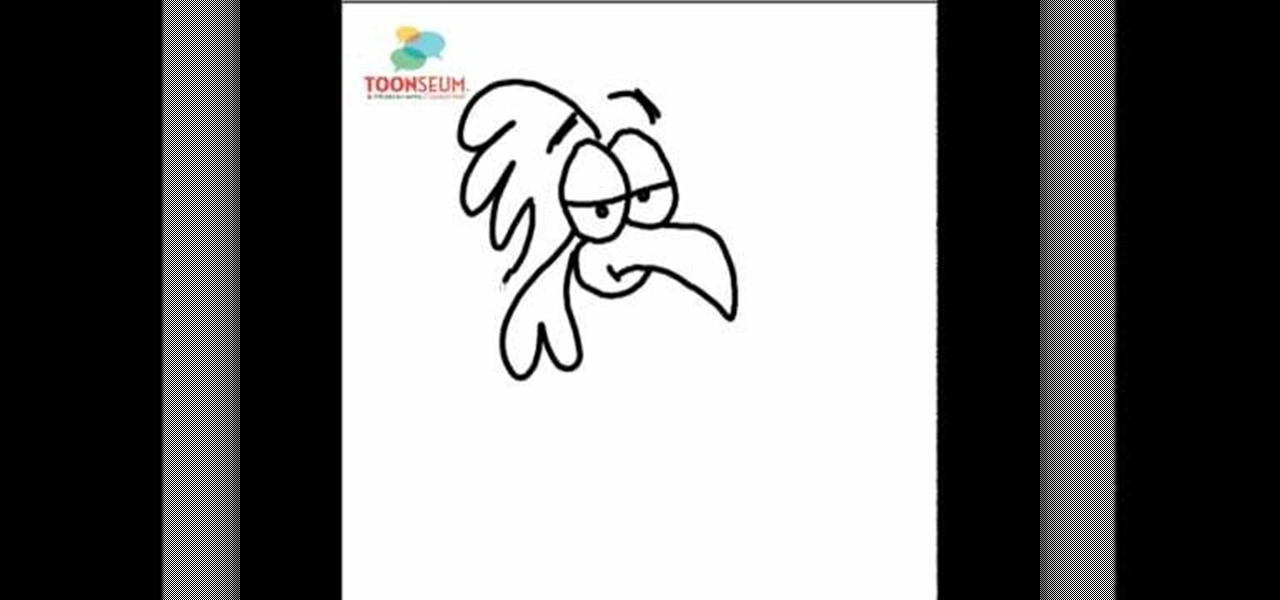
the video starts out with Joe talking you through the basic steps in how to draw or sketch a chicken. Starting with the eyes, shaped like to ovals, side-by-side, touching. Drawing a curved line all the way across each one to represent the eyelids and two small dots to form the eyes. Next draw a sharp curved line down from the eyes forming the beak, with a c like shape towards the back, connecting back to the eyes completing the formation of the beak. Draw an upside down, narrow heart at the b...
This origami box looks rather simple to make. You take a piece of paper and fold it into a triangle. Be sure to make the fold visible to see. Take the extra piece from the triangle and fold it up so as to form another crease. This extra piece will be removed in order to create the box. After you remove the extra piece refold the paper along existing fold to reform the triangle. Then fold the triangle in half, making sure that the edges meet perfectly. Then unfold the paper and take the corner...
This video teaches three different ways to fold a pocket square with a handkerchief. The three different folds are the straight fold, one point fold and puff fold. To make the Straight fold: Fold the kerchief into half from the side and fold the bottom to the top leaving some space at top . Now fold the left side a little, fold its other side over its top and fold the bottom till the center to finish. To make One point fold: Place the kerchief flat in a diamond shape, fold the bottom corner t...
This video shows a demonstration of how to make crepe paper rosettes. The materials used are four strips of paper, two small paper circles, and double sided tape. First put double sided tape on one of the circles and trim the edges. Put a corner of one strip of paper onto the sticky edge of the circle. Fold and crease the paper as you go around paper circle, forming fan-like folds in the crepe paper. Put a tiny piece of double sided tape to hold the end. Trim the edges with scissor to make a ...
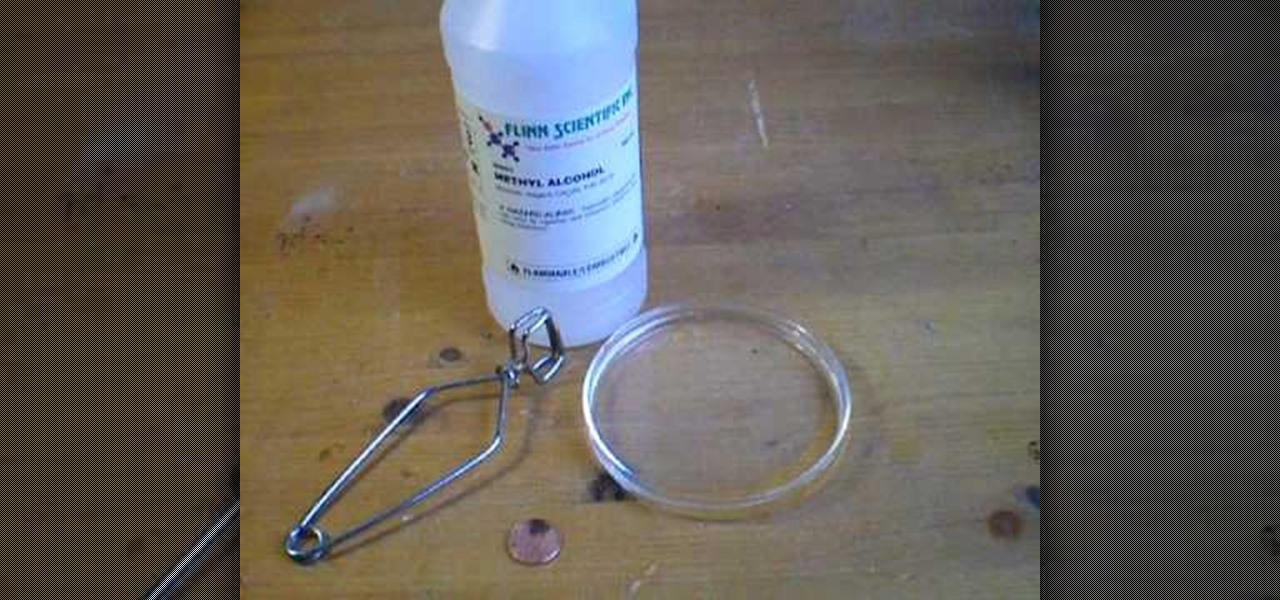
This how-to video is about demonstrating the Leidenfrost effect with methyl alcohol and a penny. To demonstrate the Leidenfrost effect the following items are required: