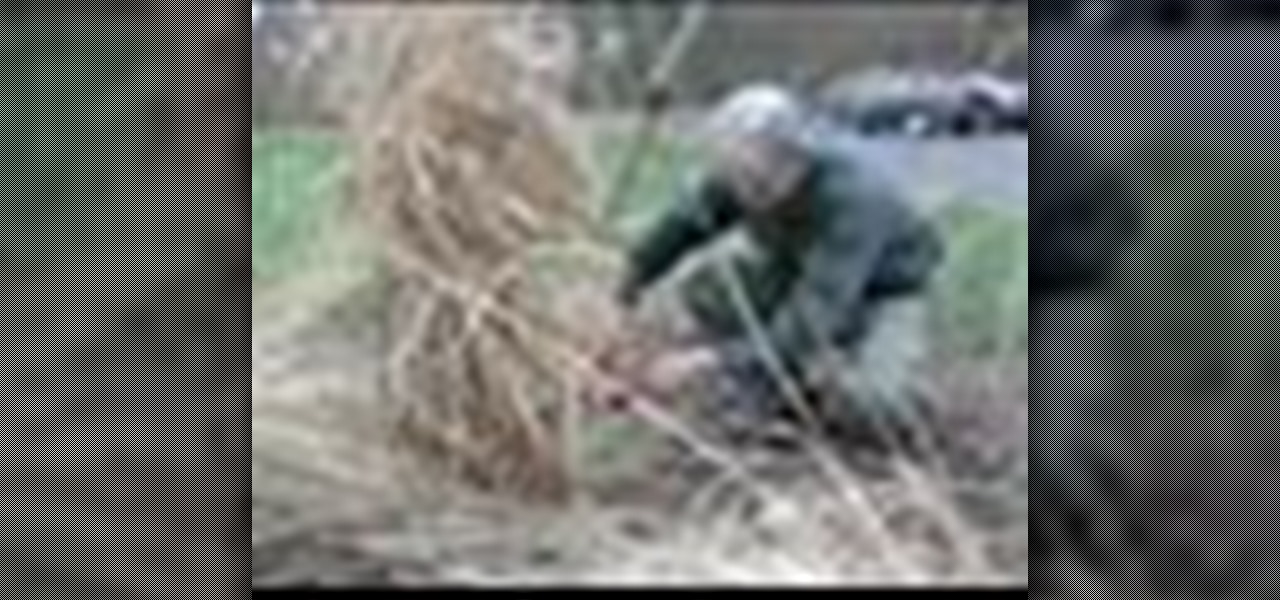
Adrian Higgins is the extraordinary garden writer for the Washington Post and shares with us his tip for cutting back ornamental grass. Spring is late in Washington this year which is good because we haven't gotten around to cutting back our grasses. This is a vital late winter chore because if it isn't done before new growth emerges, cutting could damage the new growth. Different people have different techniques depending on the grass and tool. Adrian doesn't like to use pruners for this tas...
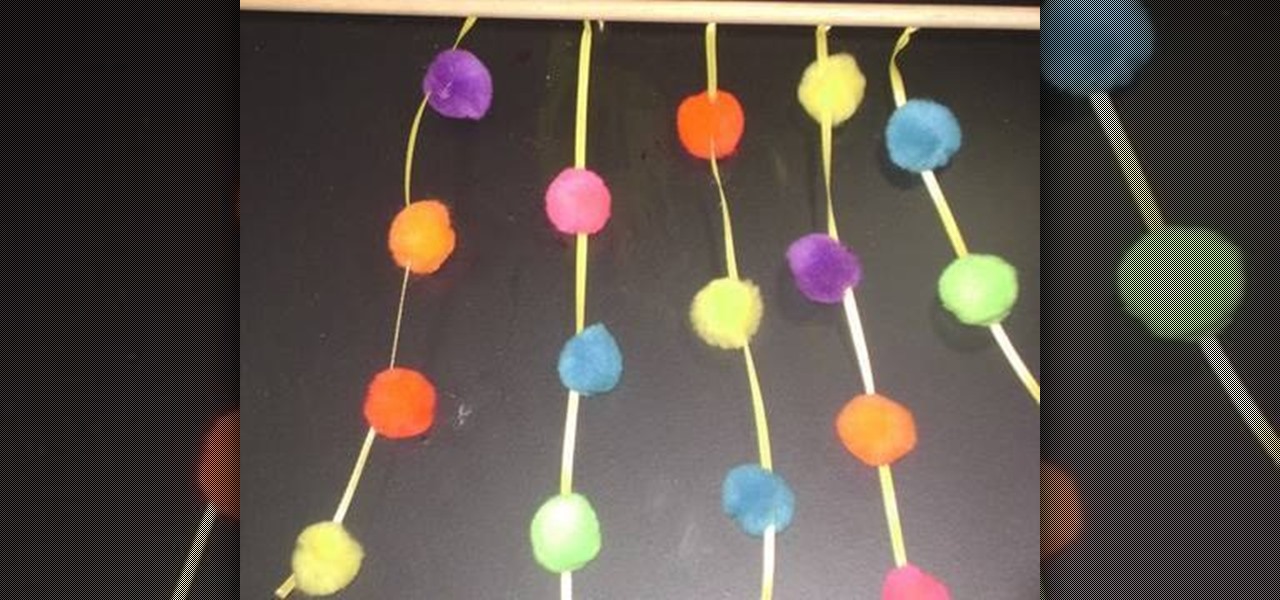
Children like to have fun things in their rooms. A pompom curtain is perfect for a little girl to have and pretend it is the entrance to her castle. A young boy might like a plain colored pompom curtain to pretend it is the entrance to the dungeon where he keeps his monsters!

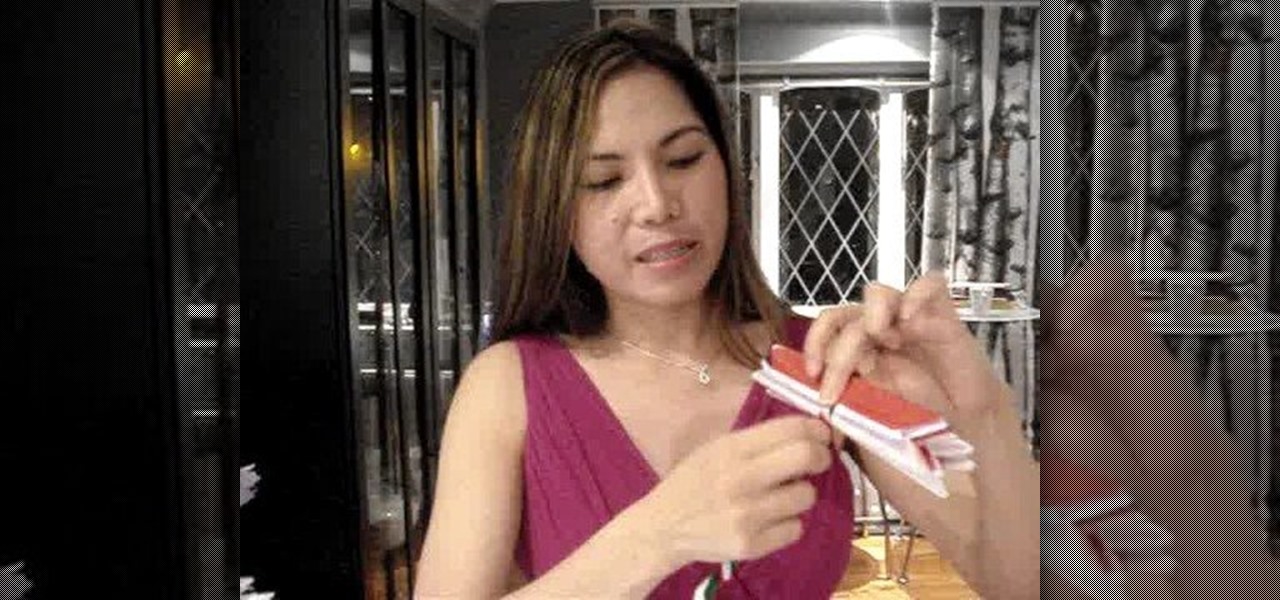
Maybe you're a big fan of duct tape. Maybe you're a big fan of ties. Maybe you're a big fan of duct tape ties. If any of these three things is true, maybe you should check out this guide to making a tie using only duct tape. You can even decorate and color your duct tape tie using more duct tape!
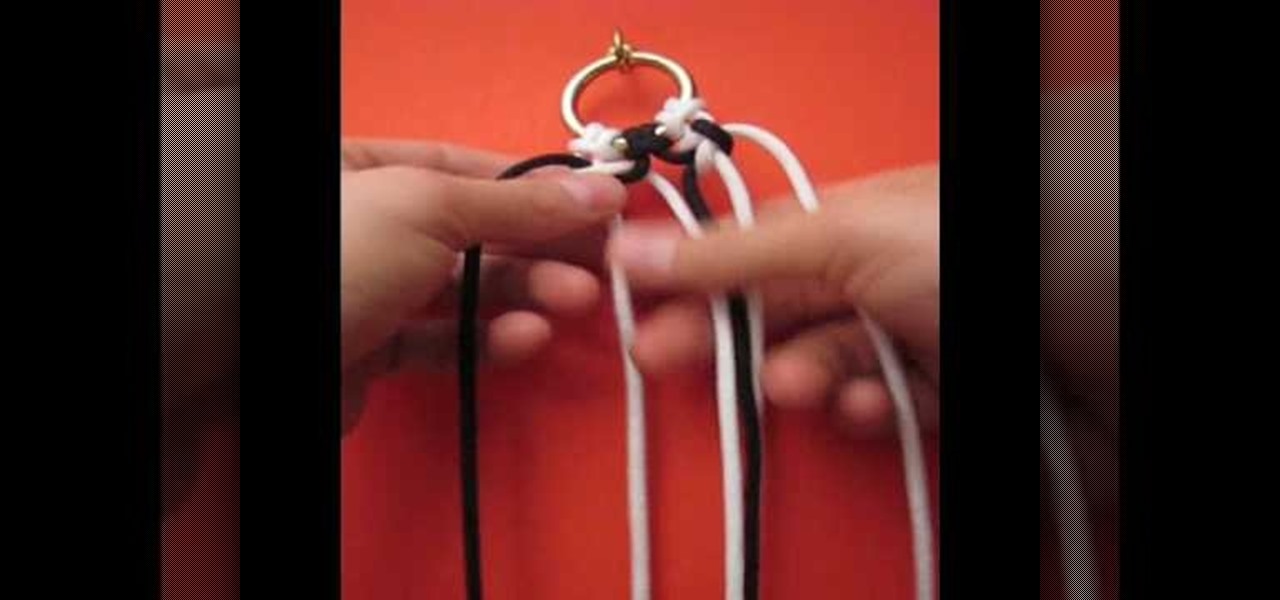
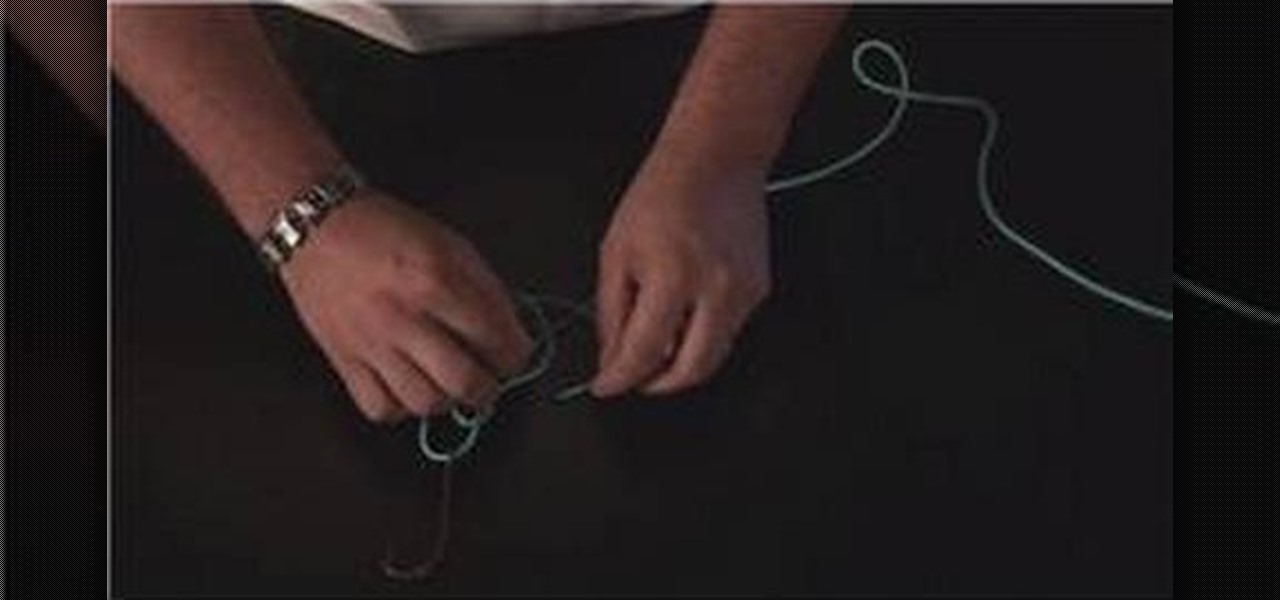
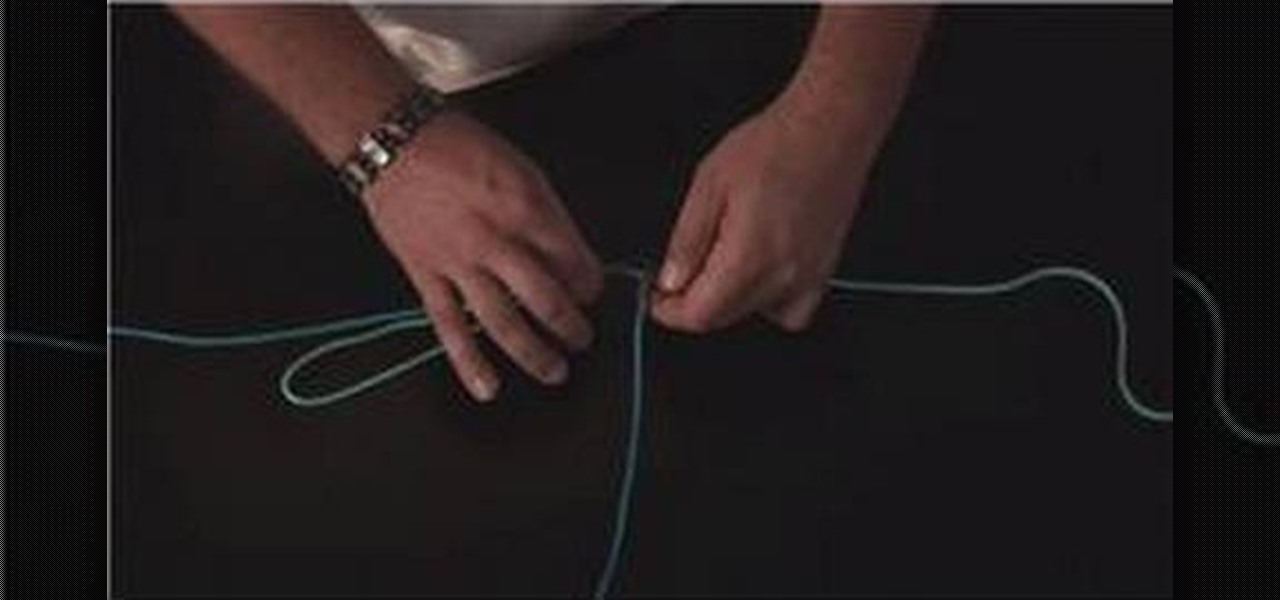
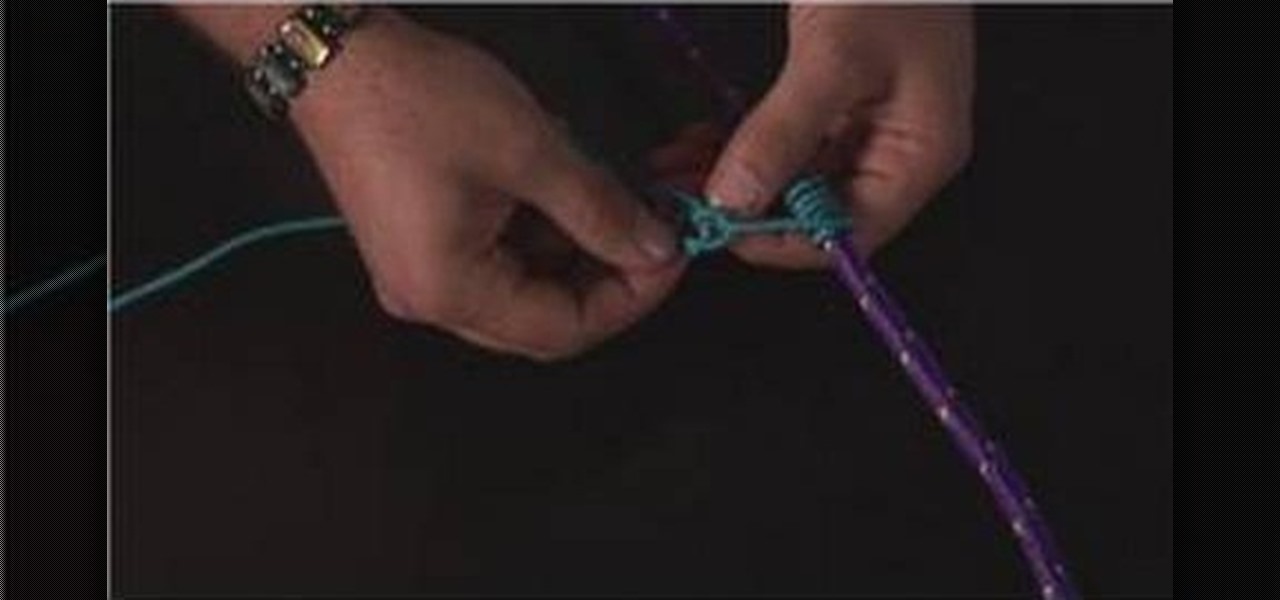
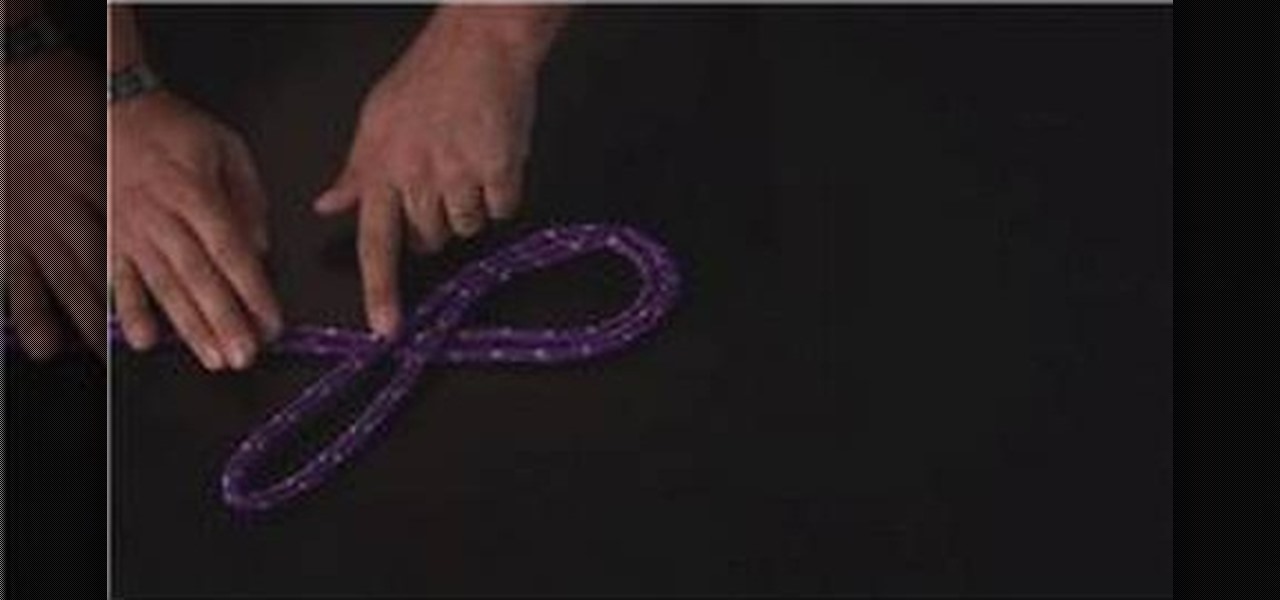
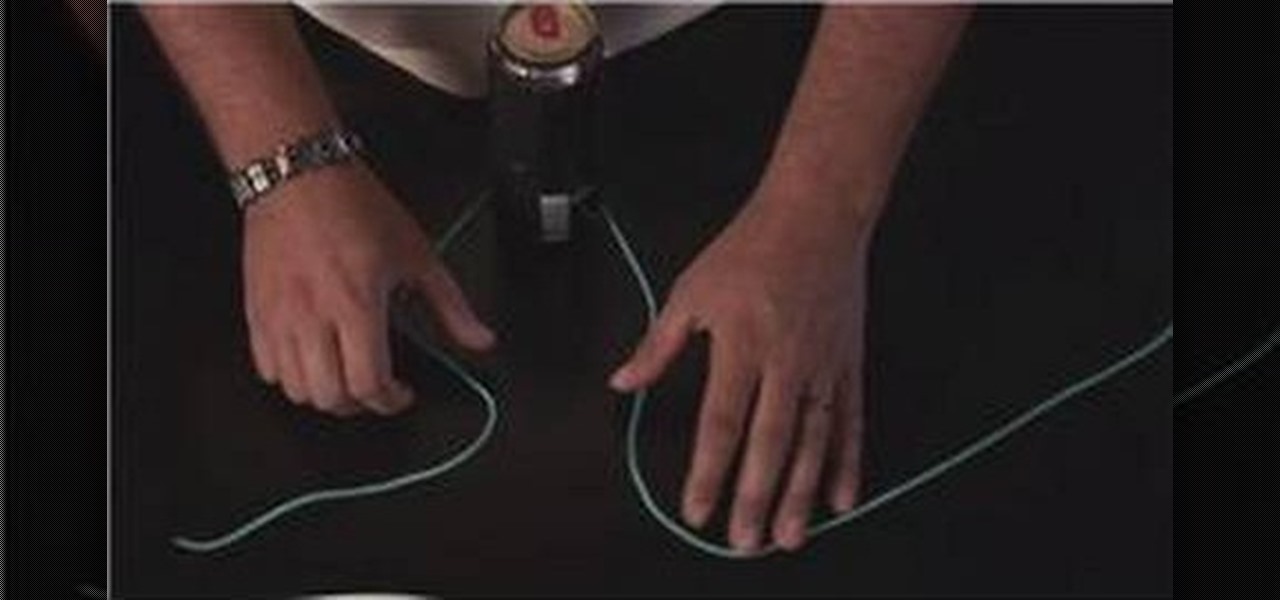
In this video by knot tying collective Tying it All Together, you'll learn how to create a wide Solomon bar knot, which is composed of two differently colored ropes that brush against each other in near parallel formation.
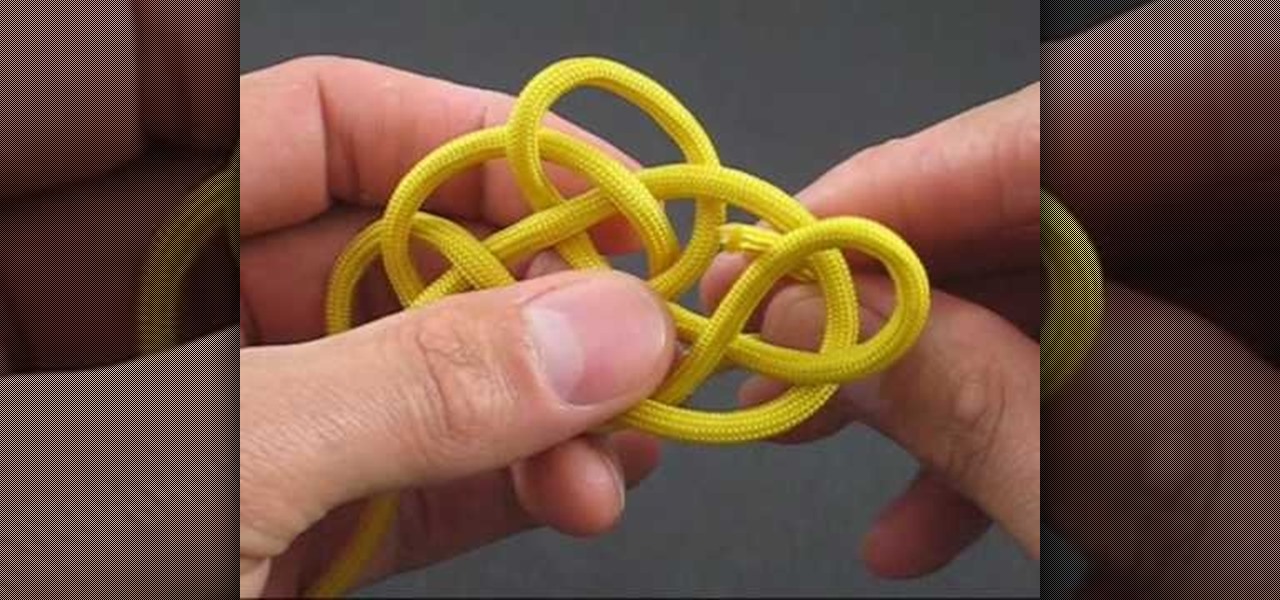
In this calming and useful video, JD of the Youtube knot-tying instructional channel Tying It All Together demonstrates the tying of an obscure knot called a Bumblebee knot, for which good instructions are apparently hard to come by. It is a pretty piece of knot-tying indeed.

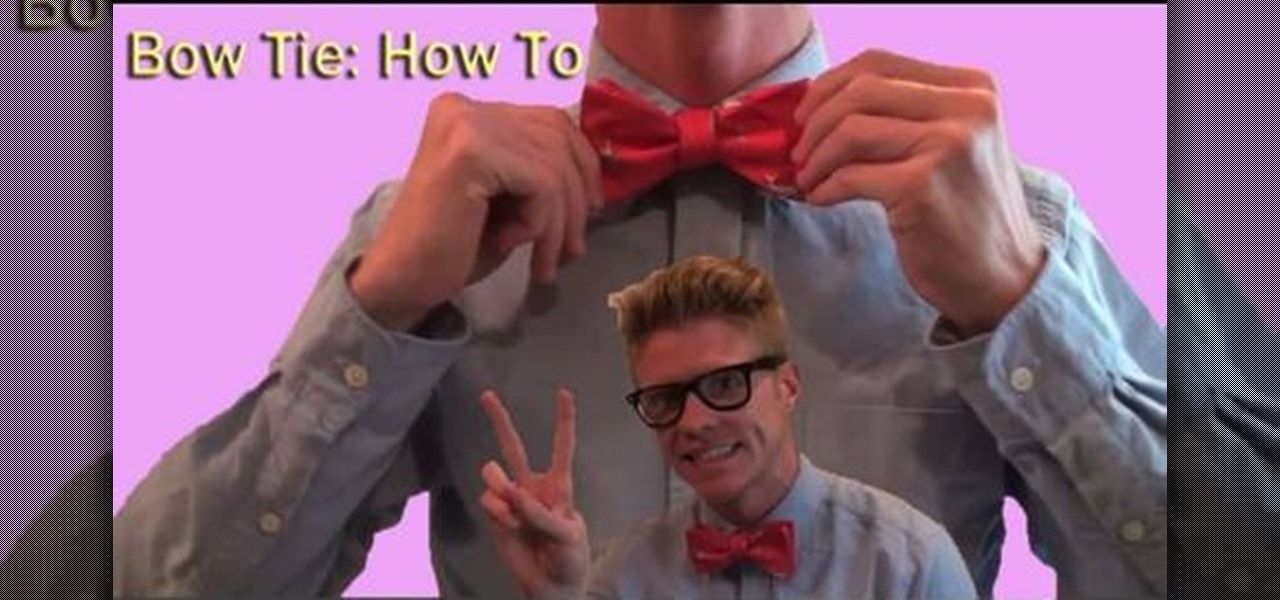
The Baltimore Sun's copy desk chief demonstrates the gentlemanly art of tying a bow tie. This step-by-step tutorial will guide you through the painstaking art of bow-tying.

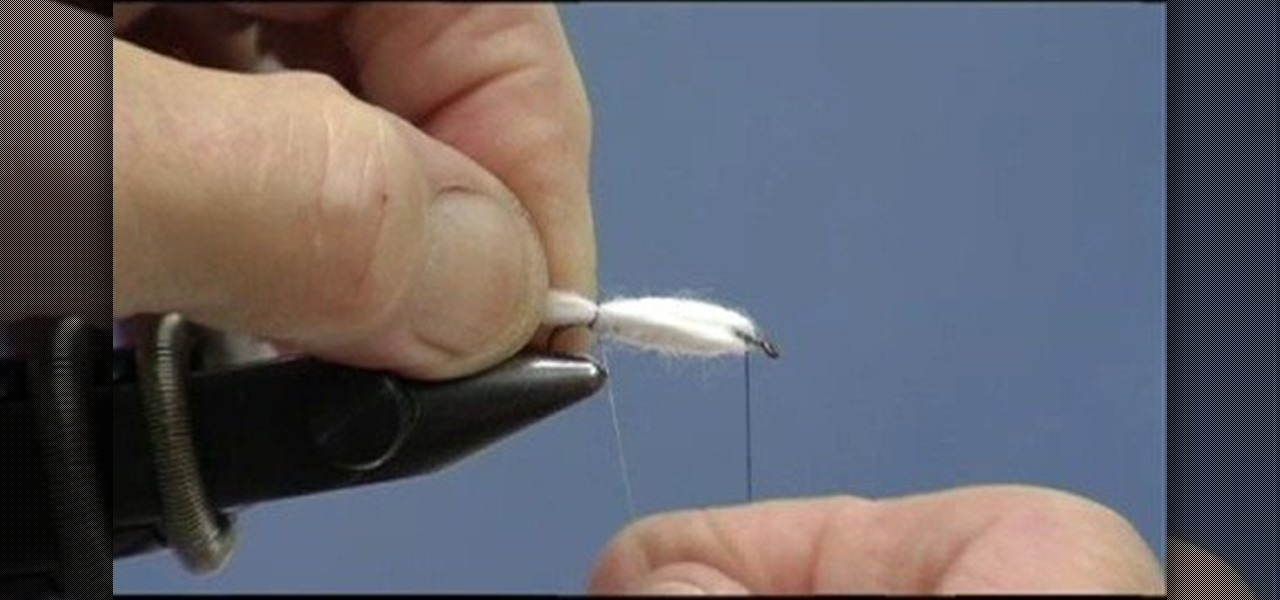
Check out this instructional fishing video that demonstrates how to fly tie for beginners. In this fly tying tutorial, Dave demonstrates the "Baby Doll". This is the pattern that goes back to the early 1970s that caused a minor revolution in its time. This is a very simple and popular fly to tie. Learn how to fly tie a Baby Doll with this fishing video!
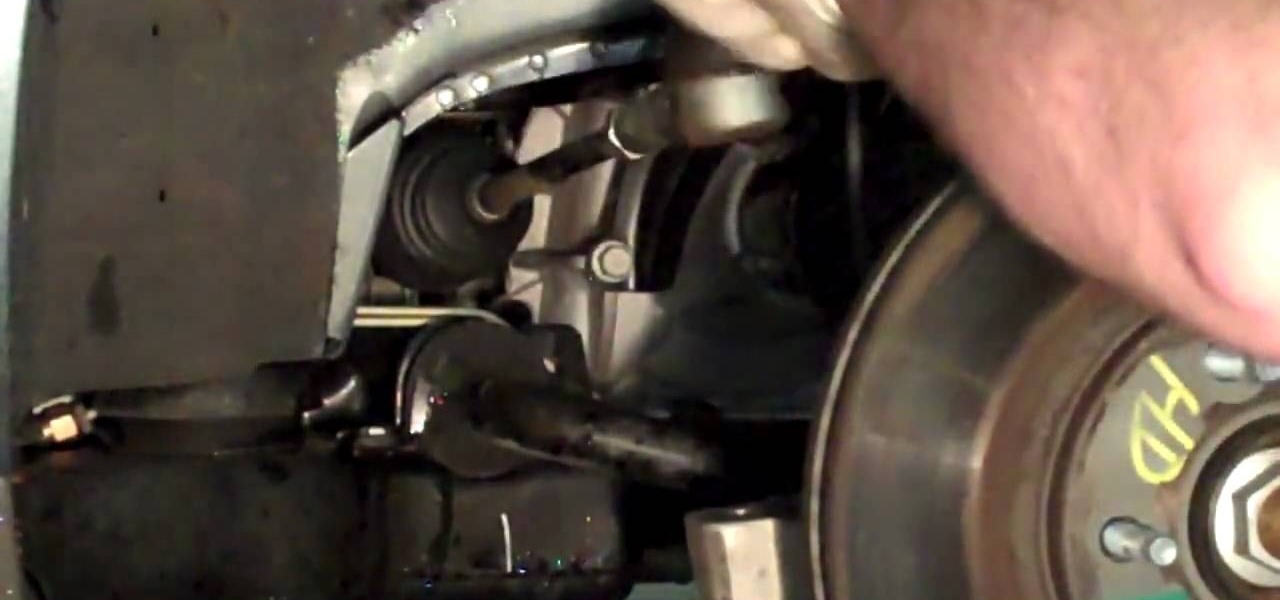
In this video tutorial, viewers learn how to replace the outer tie rod of a 200 Cadillac De Ville. Begin by unscrewing the 5 bolts on the wheel and remove it. Users are able to shake the out tie rod with the wheel on it, and feel the looseness. Now break lose the jam nut at the back of the tie rod with a wrench to be able to disconnect the supporting nut. Then hit the steering knuckle with a hammer to loosen the tie rod. Now rotate the outer tie rod off of the inner tie rod and place on the n...
Know your knots! With this free video tutorial, you'll learn how to tie a perfection loop fisherman's knot. To tie a perfection loop fishing knot, you're basically going to put an overhand knot into your fishing line. The knot is easy to tie provided, of course, you know how to go about making it. For an easy-to-follow, step-by-step overview of how to tie this useful fisherman's knot in a minute's time or less, watch this free video knot tyer's guide.
Know your knots! With this free video tutorial, you'll learn how to tie a twisted leader knot. When tying a twisted leader fishing knot, you'll probably use a small amount of filament and attach it to a larger braided fishing line. The knot is easy to tie provided, of course, you know how to go about making it. For an easy-to-follow, step-by-step overview of how to tie this useful fisherman's knot in a minute's time or less, watch this free video knot tyer's guide.
Know your knots! With this free video tutorial, you'll learn how to tie a an Albright fishing knot. An Albright fishing knot is a nice quick way to tie your leader onto your line. The knot is easy to tie provided, of course, you know how to go about making it. For an easy-to-follow, step-by-step overview of how to tie this useful fisherman's knot in a minute's time or less, watch this free video knot tyer's guide.
Know your knots! With this free video tutorial, you'll learn how to tie a simple cat's paw fishing knot. To tie a cat's paw, you need to make sure the lines are crossed. The knot is easy to tie provided, of course, you know how to go about making it. For an easy-to-follow, step-by-step overview of how to tie this useful fisherman's knot in a minute's time or less, watch this free video knot tyer's guide.
Know your knots! Learn to tie a Penborthy friction knot with this free video guide. Tying a penborthy knot will vary depending on how much weight the knot will support but this video should give you a good sense of what it is you'll need to do. The knot is easy to tie provided, of course, you know how to go about making it. For an easy-to-follow, step-by-step overview of how to tie this useful climber's knot in a minute's time or less, watch this free video knot tyer's guide.
Know your knots! With this free video tutorial, you'll learn how to tie a pole-lashing knot. Pole lashing knots are great for tying wood together and moving them from place to place. The knot is easy to tie provided, of course, you know how to go about making it. For an easy-to-follow, step-by-step overview of how to tie this useful fisherman's knot in a minute's time or less, watch this free video knot tyer's guide.
Know your knots! With this free video tutorial, you'll learn how to tie a figure-eight loop. The figure-eight loop knot starts with the figure-eight shape, yet as you tie it down it creates a bullet or barrel knot of sorts. The knot is easy to tie provided, of course, you know how to go about making it. For an easy-to-follow, step-by-step overview of how to tie this useful fisherman's knot in a minute's time or less, watch this free video knot tyer's guide.
Know your knots! With this free video tutorial, you'll learn how to tie a halter hitch knot. A halter hitch knot is great for tying stuff down or binding something, and any rope will work. The knot is easy to tie provided, of course, you know how to go about making it. For an easy-to-follow, step-by-step overview of how to tie this useful fisherman's knot in a minute's time or less, watch this free video knot tyer's guide.
This time Chet Cannon is going to teach you how you can make a perfect gentleman's impression by a properly tied bow tie. Learn step by step and with a little bit of practice you will be able to tie a bow tie in to time. Don't use an pre-tied bow, it's a cheap looking and can't ever beat the style of a genuine one. And it's also pretty neat to know how to do it.
One armed tie tying and collar buttoning is tough for most people, let alone an individual who has suffered an amputation. Here's a lesson from an amputee on tying a tie and other suit tricks all while using one hand and no prosthetics. A thicker tie is easier as it will not bunch up or tighten. Only tie a Half Windsor as a Full Windsor is way too tricky for one hand. This is a step by step tying video by an amputee with only one arm. If it cinches up too much wiggle it out and it will loosen...
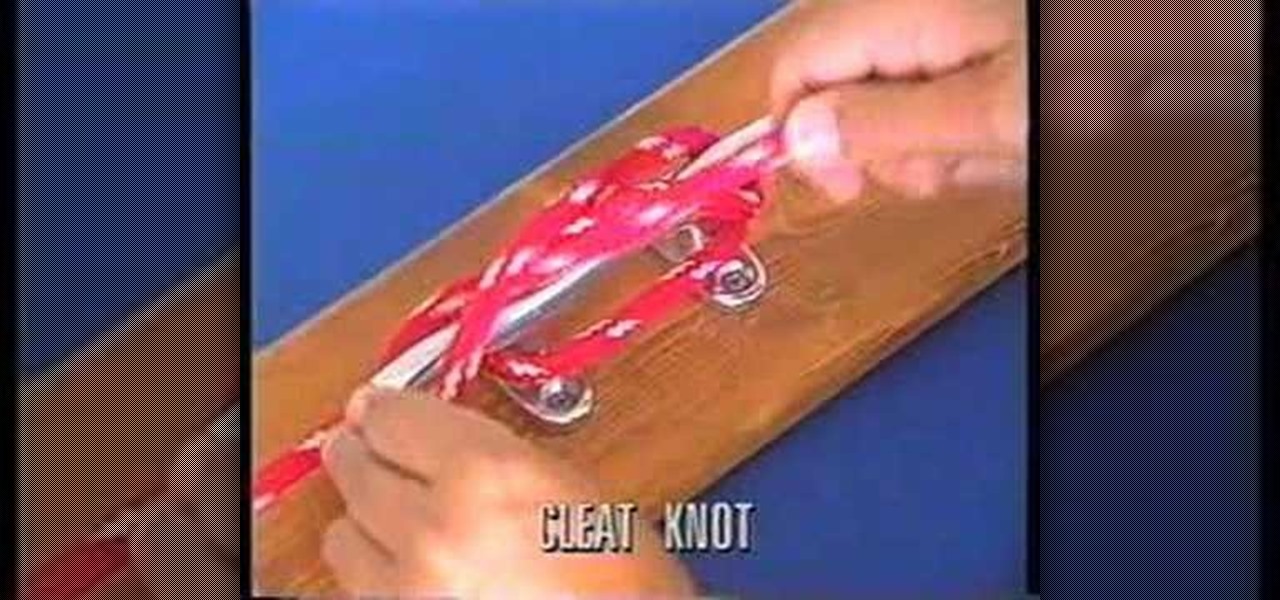
Check out this instructional knot tying video that demonstrates how to tie a cleat knot. Learn how to tie off your boat at the dock. Just follow the simple instructions outlined in this boating tutorial and learn how to tie a Cleat Knot. Knot tying is a breeze with this video. Start practicing and reel in the big fish!
Check out this instructional knot tying video that demonstrates how to tie a Clove Hitch knot. You can tie a clove hitch to a stanchion when you can't reach the top. Just follow the simple instructions outlined in this tutorial and learn how to tie a Clove Hitch knot. Knot tying is a breeze with this video. Start practicing and reel in the big fish!
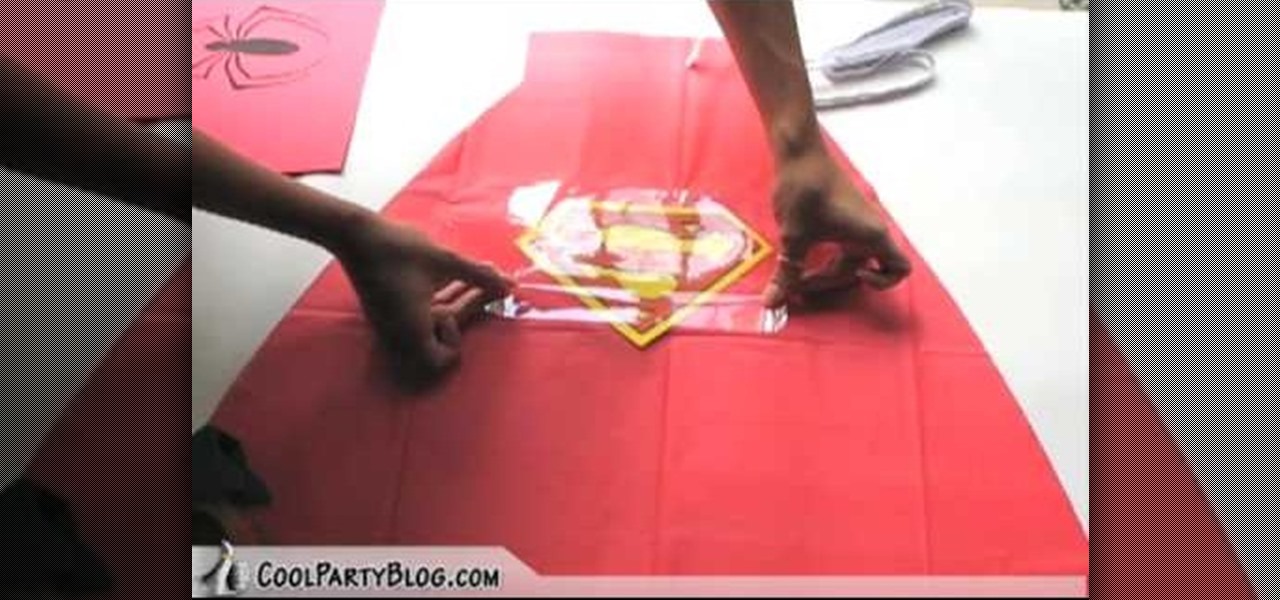
In this tutorial, we learn how to create super hero cape party favors. First, take a plastic red table cover and remove it from the package. Next, open it up and fold it in half twice, so you end up with a rectangle. Then, take scissors and cut a large triangle shape out of the material. When finished, open up the cover and it will be in the shape of a cape! Then, cut out some "s" for Superman signs and tape it on the back of the cape. Then, tie string around the top so it can be worn and you...
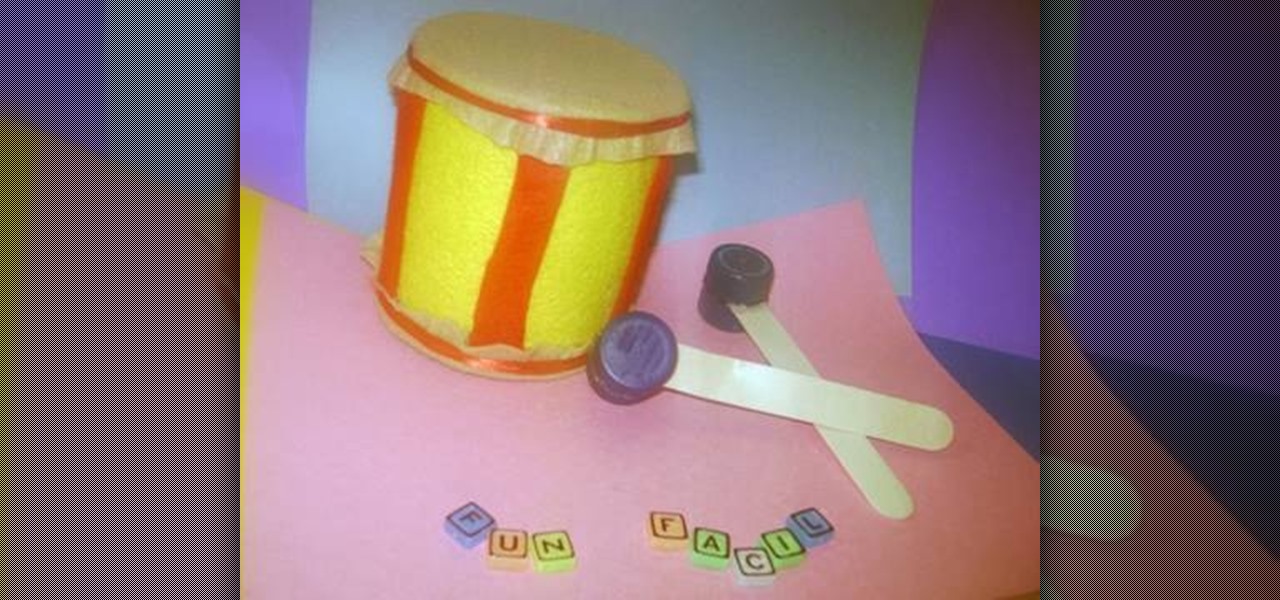
In this tutorial, we learn how to make a toy drum. You will need: felt, recycled tin can, 1 red lace, 4 soda caps, 2 popsicle sticks, glue, and scissors. Cit, cut the felt into a circle and glue it around the tin can. After this, take red felt and cut it into strips, then glue on the side of the tin can so it's striped. When finished, apply glue to the top of the can and then cover with additional pieces of felt. Tie a ribbon around the top and the bottom of the felt on the fan. To make the s...
In this video, we learn how to build parachutes with household materials. You will need: a long string, Mylar, mesh, plastic, scissors, tape, and a weight. To get started, you will first cut your plastic or mesh into a circle or octagon shape. Then, take your string and cut it into several pieces. Then, tape the strings onto your material all around. After this, tie your weight to the strings so it's fully secured. Now, go to somewhere high and throw down your item! The parachute will help ke...
In this tutorial, we learn how to make models and ornaments with salt dough. First, grab a baking sheet and place aluminum foil over it. Now, grab some gloss sealer, salt, food coloring, flour, ribbon, glitter, cookie cutters, and buttons. To make the dough, combine flour with water and salt. Mix this together until you get a dough shape, then roll out and cut into shapes with cookie cutters. Cut a small hole in the top of it, then bake until golden brown in the oven. Tie a string in the hole...
In this video, we learn how to make a tutu for Halloween. First, take your pink fabric and lay it out flat. Next, use your scissors to cut down a folded edge on the top of the fabric. Now you will have two pieces. Next you will roll the fabric down until you reach the end, then you will cut strips out of the fabric. Now, take your elastic piece and tie the strips of fabric onto it. You can use any colors you would like to make this. You can use pinks, oranges, blacks, whites, and any other co...
In this video, we learn how to easily make a tutu. First, you will need to gather all your materials, then cut the length of the ribbon or elastic you need. Then, grab your materials and cut out strips of it to place onto the elastic. After this, tie the tulle onto the elastic going from color to color as you continue. Once you reach the end of the skirt, you will have a cute tutu that is ready to wear. Making this yourself can save you a lot of money, and it can make several rather than just...
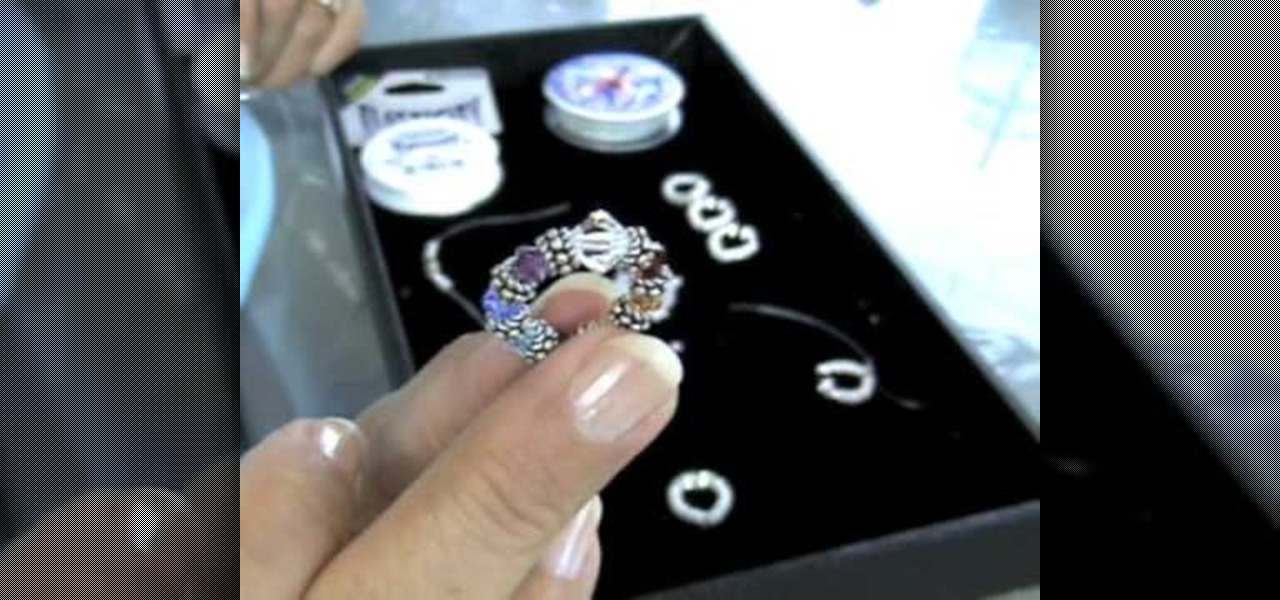
In this tutorial, we learn how to make an elastic Bali bead & crystal ring. First, you need to get all of your supplies together, which include: elastic cord, crystals, glue, beads, and scissors. Start by cutting a 6 inch piece of the elastic cord, then string a bead to the middle of it. Then take a crystal and string it onto one side along with another bead and a silver bead. After this, place more beads around the other side of the middle bead then put it around your finger to see if it's t...
In this video, we learn how to make a gift Christmas jar with Stampin' Up! First, take any type of jar you want to collect money in. After this, rinse out the inside and remove the labels off of the bottle and measure them. Now, take a piece of card stock and cut it out to make the length of the label from the bottle. Now, decorate the bottle with different Christmas decorations and then tape it onto the jar or bottle. Next, add on different types of felt cut outs to the jar as well. To finis...
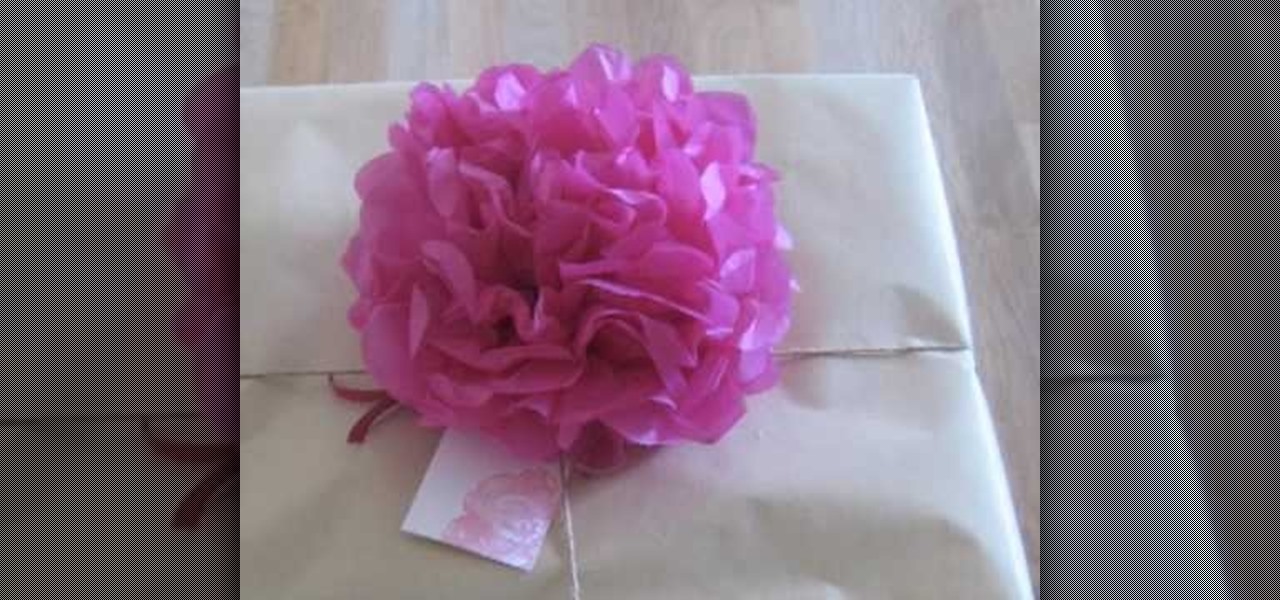
In this tutorial, we learn how to make a tissue paper flower. You will need: pipe cleaners, scissors, and tissue paper (three different colors). First, twist three pipe cleaners together to make a stem. Next, cut your tissue papers all into the same size, mix colors to get a prettier flower. Now, layer the sheet and fold the papers as many times as possible. Cut the ends in a triangle shape, then spread the papers again and fold up again in the alternate direction. Now using your papers and p...
In this tutorial, we learn how to make stacked hair bows. Start off with three separate bows: red, white, and blue. Make sure there is a string still hanging from the red one, but the strings on the white and blue are cut off. Now, put glue from a hot glue gun and place it on the middle/side of the blue ribbon, the glue the white one where the glue is and hold together. Next, take the red bow and glue it to the center of the blue and white bow. Hold the red bow in place until it's completely ...
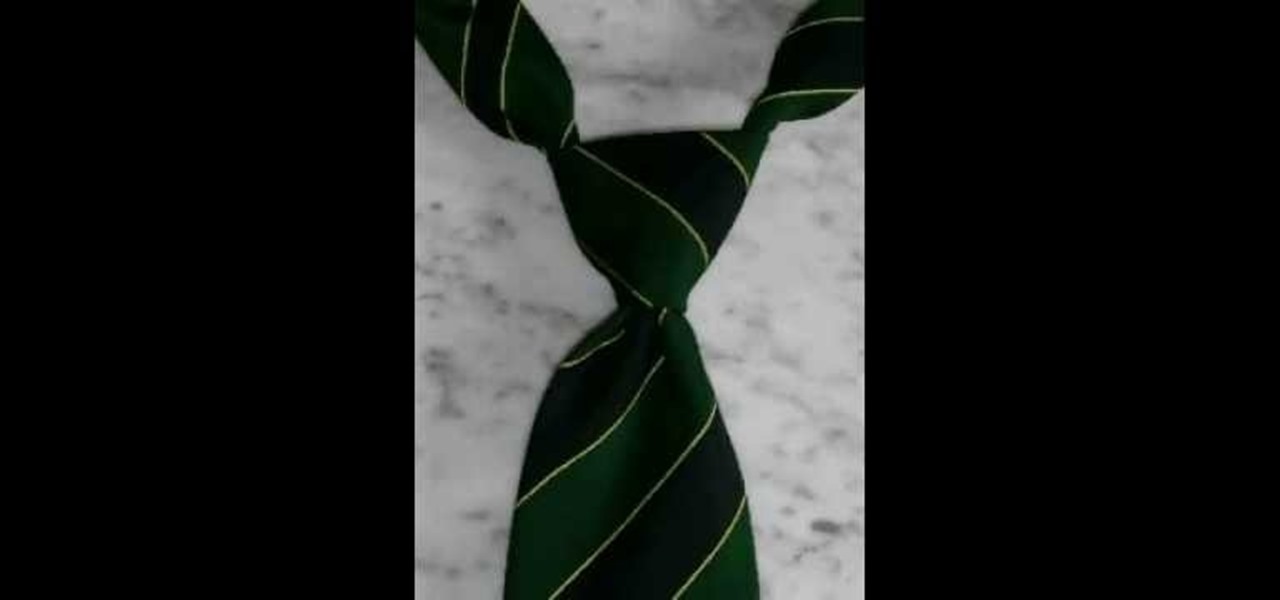
Not sure how to tie a tie? Not only will you learn to tie a tie in this video presented by Tie-a-Tie.net, but you will learn how to tie a Windsor knot! Follow these step-by-step instructions and complete real-life example to get your Windsor knot tight and neat looking.
This is a video produced by KazzieHeart on Youtube explaining how to make a puffy hairbow from a t-shirt. Choose a t-shirt and cut two equal-sized rectangles approximately 8"X4". Placing the two pieces facing inward, three sides are sewn together. It is then turned right side out and evenly stuffed with soft stuffing. The end of the remaining side is folded inward and sewn shut, forming a small pillow. A smaller rectangle approximately 5"X2" is cut from the same fabric. The pillow is sewn thr...
In this how to video, you will learn how to make bag tags. You will need a tape runner, embellishments, elastic, a plastic bag, letters, cloud 9 rain dot eyelets, a trimmer, bits of card stock, and hole punches. First, cut the card stock and make it a square shape. Next, decorate the card stock with embellishments and the name of the child it is for. You can use the adhesive to stick these on. Next, cut more card stock and wrap it the piece around the decorated card stock. From here, place th...
This is a tutorial that will show you how to create a powerful bow and for under $5. The material you'll need is 1 curved pipe, poly poli string, tape, scissors, and a knife. First you want to cut a slit and a hole on each end of the pipe and then add some tape underneath it to prevent it from splitting. Next, you want to line up the string with the pipe and cut it at that length. Also, you want to tie a knot at both ends of the strings and attach it by using the slits you made in the pipe. T...
In this video tutorial, viewers learn how to make a paper flower. This video provides all the materials that are required in order to make the paper flower. The materials required include: colored tissue paper, scissors, and 10 cm of colored string. Begin by cutting the tissue paper to preferred size. Fold 1cm on the tissue paper, flip it over and do the same on the other side. Continue this until you've reached the end. Tie one end of the string onto the middle of the tissue paper and fold t...
Knot tying is useful for a number of practical applications. Learn about tying knots in this free instructional video from an Eagle Scout.
Tying a necktie or bow tie doesn't have to be as hard as it looks. Learn how to tie neckties and bow ties in this free fashion video series from an expert on fine men's clothing.
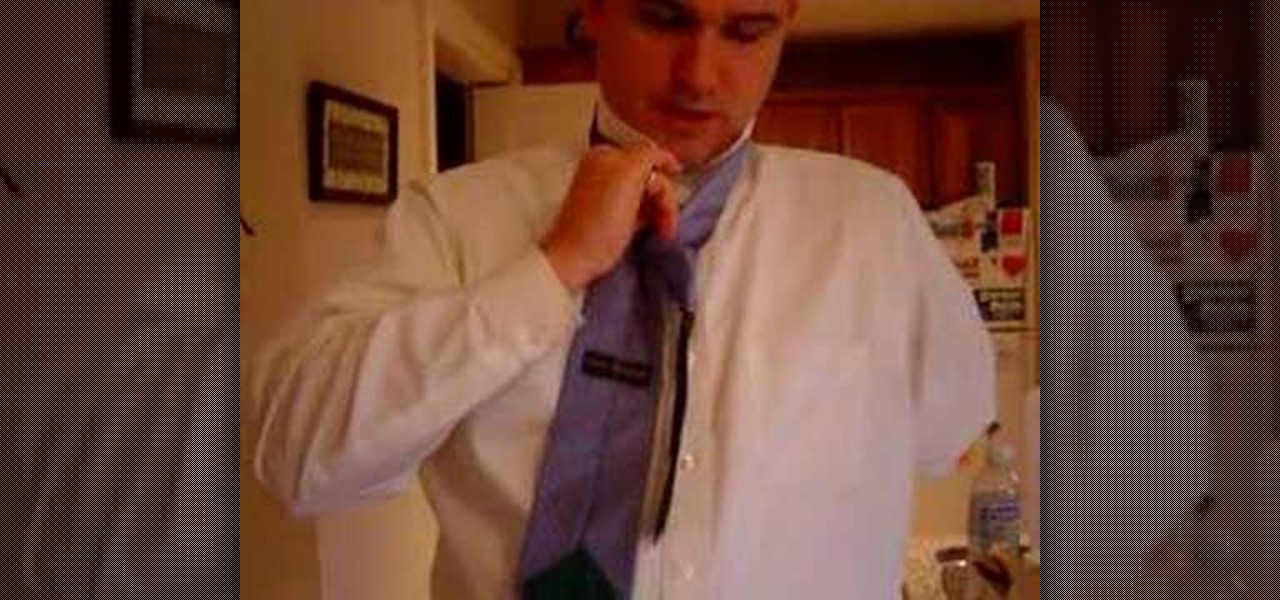
Ever see someone tie a tie so that it looked more like an art project? Check out this video tutorial from Gianny L to learn a new way to tie a tie, using a table as a flat surface. The sexy GiannyL demonstrates this tie tying several times.
This instructional knitting video demonstrates how to how to change to a different yarn on a circular knitting machine. Simply cut the yarn when you want to switch to a different color an tie a slipknot to the next type of yarn. It's easy!
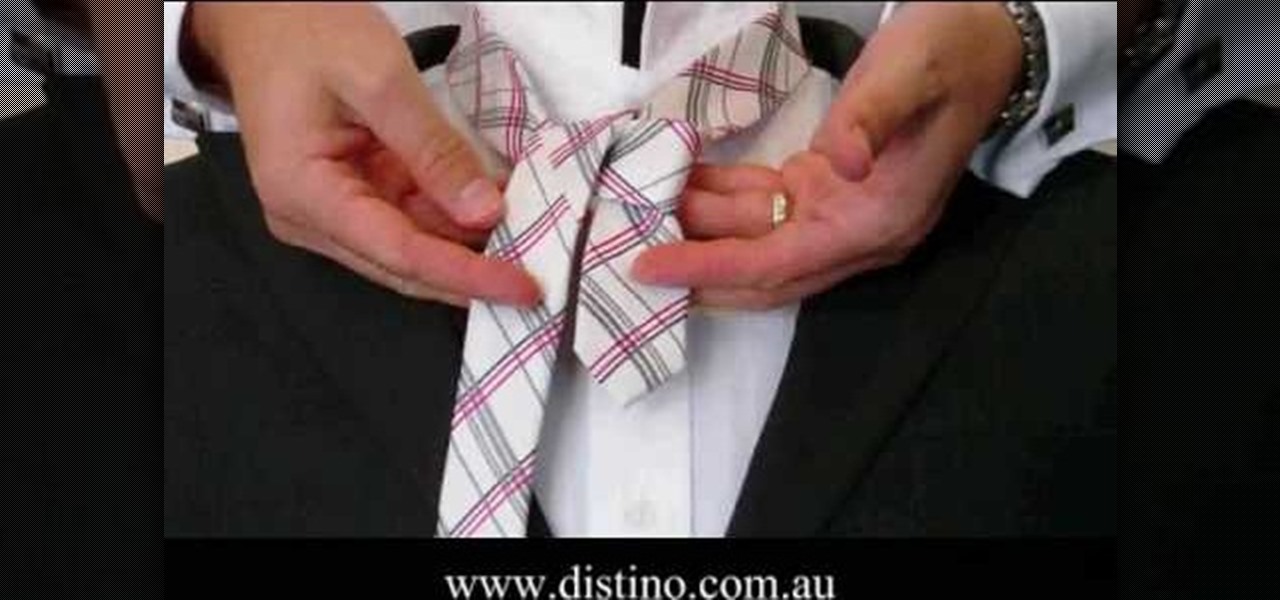
In this video we learn how to tie a necktie in a Full Windsor knot. First, take four inches on the skinny side and bring the long end over it. Then, bring the tie up back underneath and pull it through. Drop this down to the right hand side and then bring the long end back up underneath the other side. Bring the tie across the front of the knot towards your neck and pull it through the back of the tie. Next, bring the tie across the front of the knot and create a cross section. Bring it back ...