We thank and bow down to whoever invented gift cards. A great way to give your recipient what he/she wants without having to slave over whether the turquoise cashmere sweater or the navy blue cashmere sweater looks best, gift cards are the way to go for procrastinators.
Choosing the right gift for your friend or girlfriend is obviously the most important part of gifting, but you can make your gift extra special by wrapping it in a lovely package.
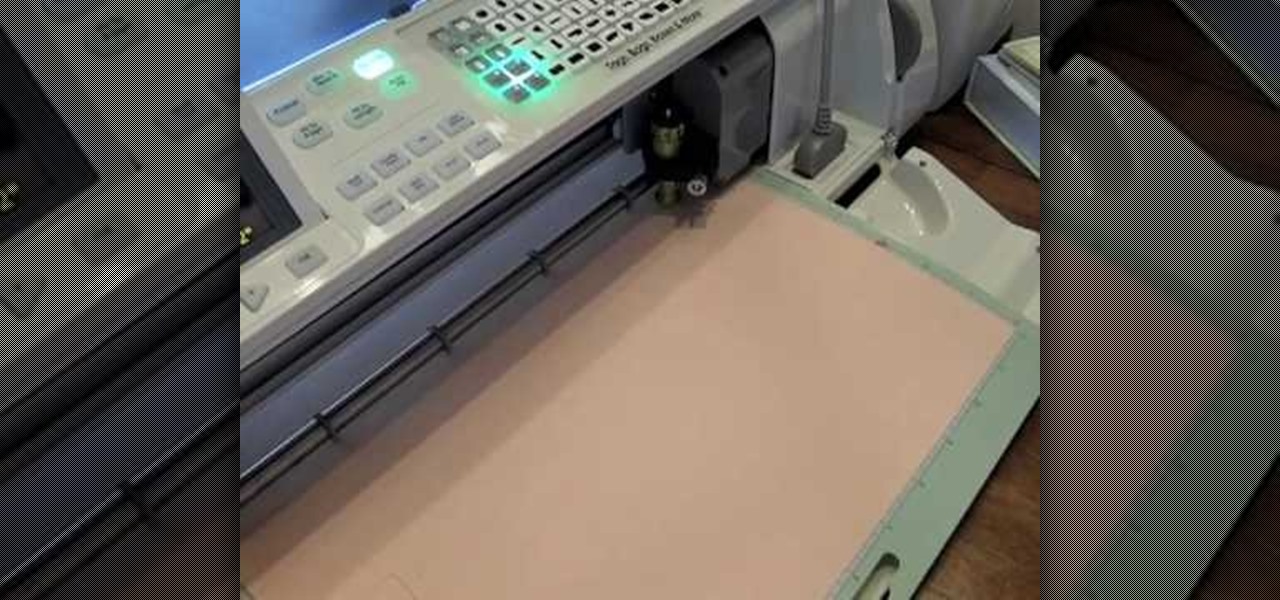
Mona from Cup Cakes Creations demonstrates the use of a Cricut Expression machine to make gift bags. She starts with the smaller gift bag found on page 115 of the instruction book. It gives the option of putting holes in the bag. She sets the machine to cut two 5-1/2" bags out of 12x12" paper, and cuts it. With the bag cut out, she explains how the bag is folded and taped with Terrifically Tacky Tape, and decorated with a 2" tag. The tag is attached with a cord, and decorated with a ribbon. T...
It's important that whatever wonderful gift you have to give is encased in an equally wonderful gift bag. This tutorial paper design video will teach you to make your very own super cute paper bags with various products.
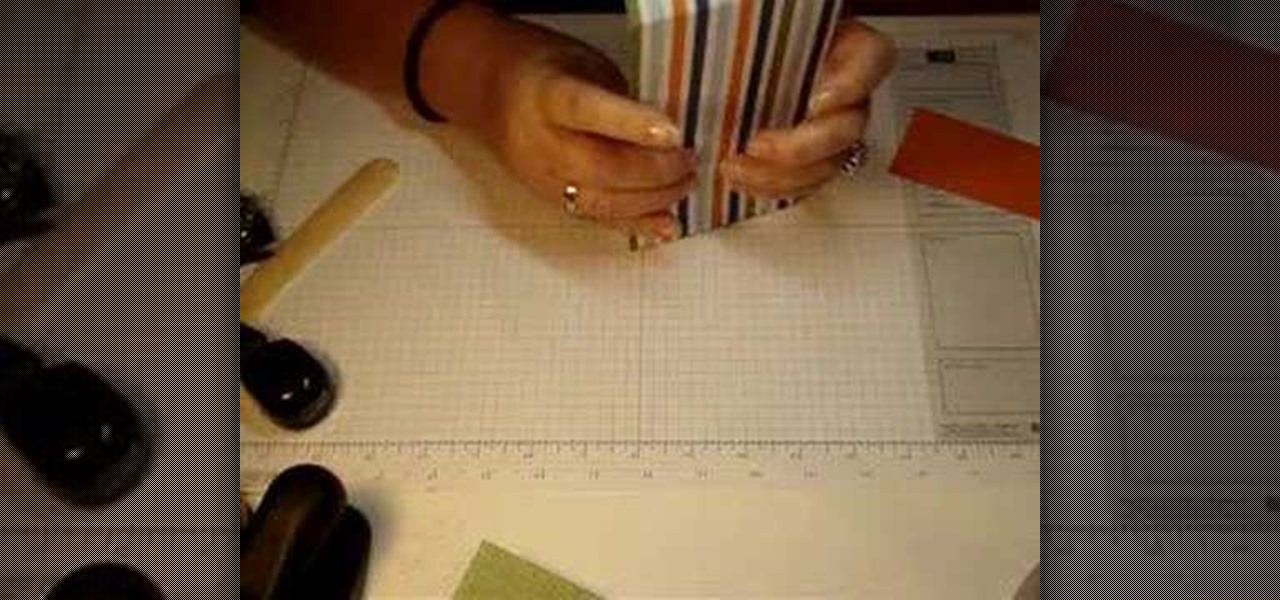
This cute project makes a great holiday gift - a tiny hand sewn book bound with buttons. You will need some pattern or designer paper (2 3/4 inches by 5 3/4 inches), about twenty pieces of smaller white paper (2 1/2 inches by 4 3/4 inches), and basic paper crafting tools.
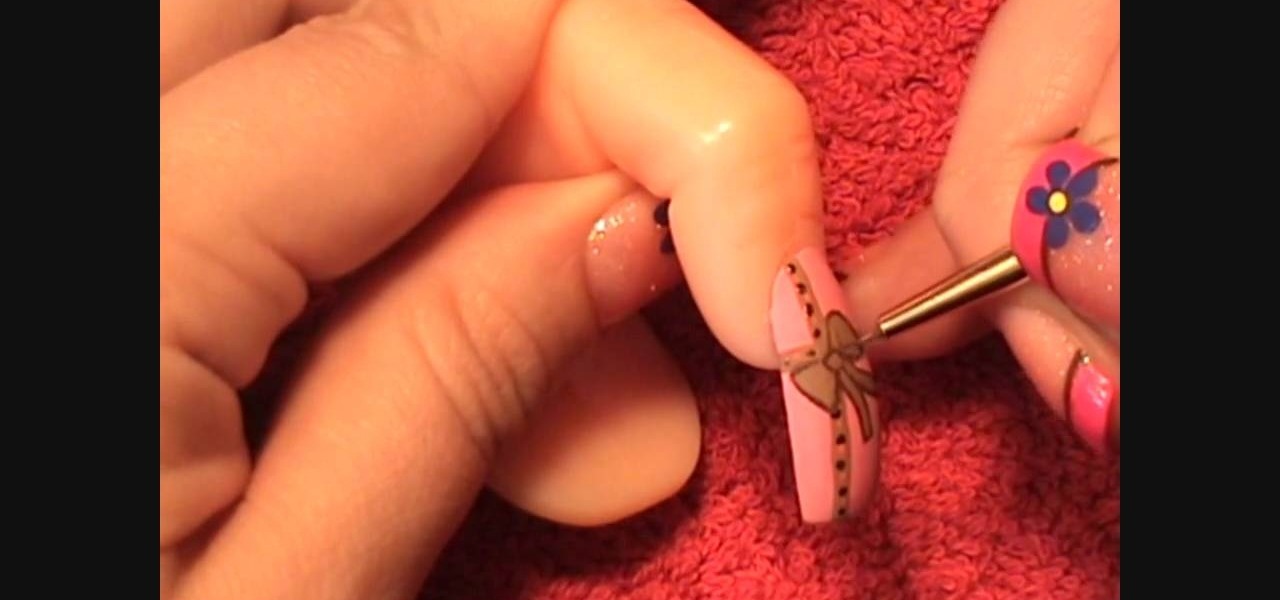
First, apply base coat to your nails. Then apply 2 coats of pink bubble gum acrylic paint to the nails. Then use a thin brush to draw an off centered cross on the nail with caramel candy acrylic paint. Using a dotting tool, apply hot pink and metallic antique copper acrylic paint in alternating dots along the cross. Then use the caramel candy color again and make a bow in the center of the cross and outline it with brown oxide paint. Let the paint dry and then apply a coat of base coat to sea...

Whether you're looking for something extra to hand out to your trick or treaters, or party favors for a Halloween party, this tutorial shows you how to make a cute treat bag. You can make this bag using just some mini paper lunch sacks at the grocery store, plus a few extra paper crafting supplies.
This video tutorial will show you how to create a very cute envelope holder. This envelope is great for holding cards and candy on special occasions. Your family and friends will surely enjoy this cute and manipulated piece of paper.
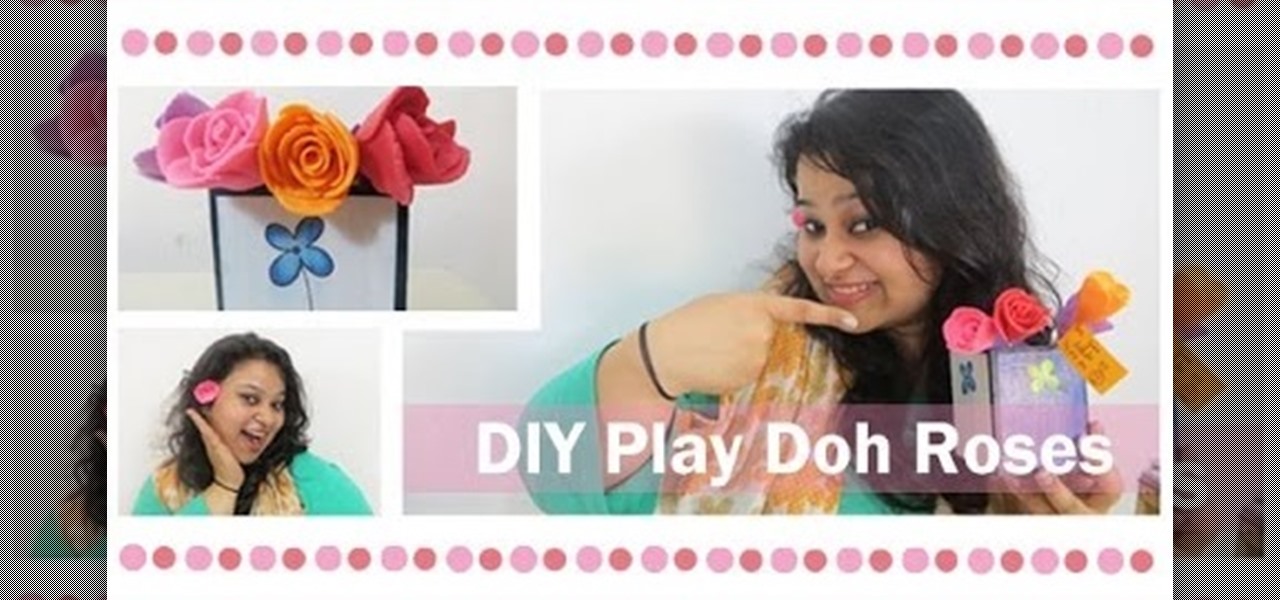
Love making gifts for your loved ones? Here is a tutorial that shows you how to make a play doh rose. It's really easy and fun to make.
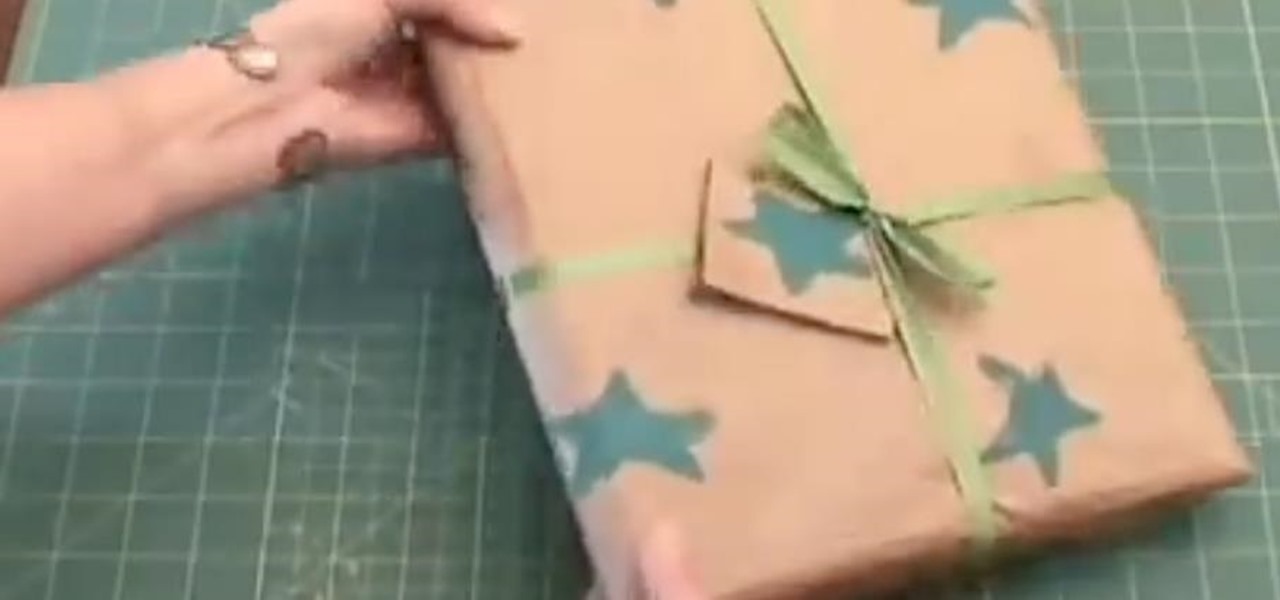
In this video tutorial, viewers learn how to gift wrap using recycled material. The materials need for this project are: a potato, large paper bag, tape, ribbon and paint. Begin by cutting the potato in half and draw a simple shape onto the sliced surface of the potato. Then cut out the negative part of the shape with a knife. Now open the bottom of the paper bag and cut down the side so that it lays flat. Then brush some paint onto the potato stamp and press it down along the paper to form a...
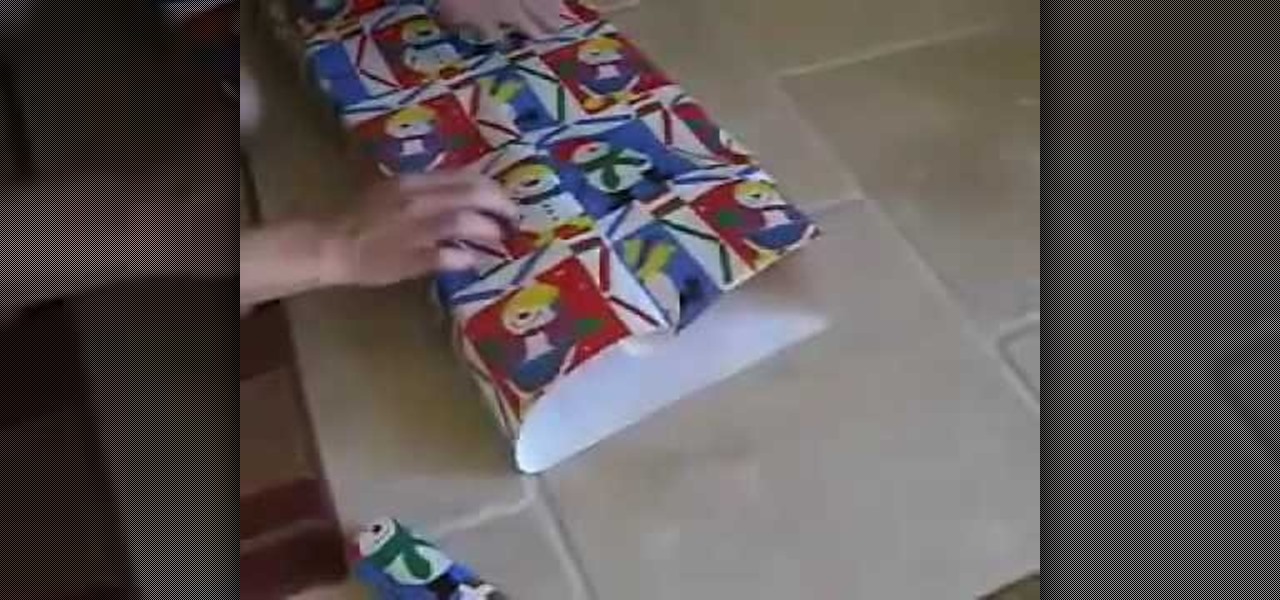
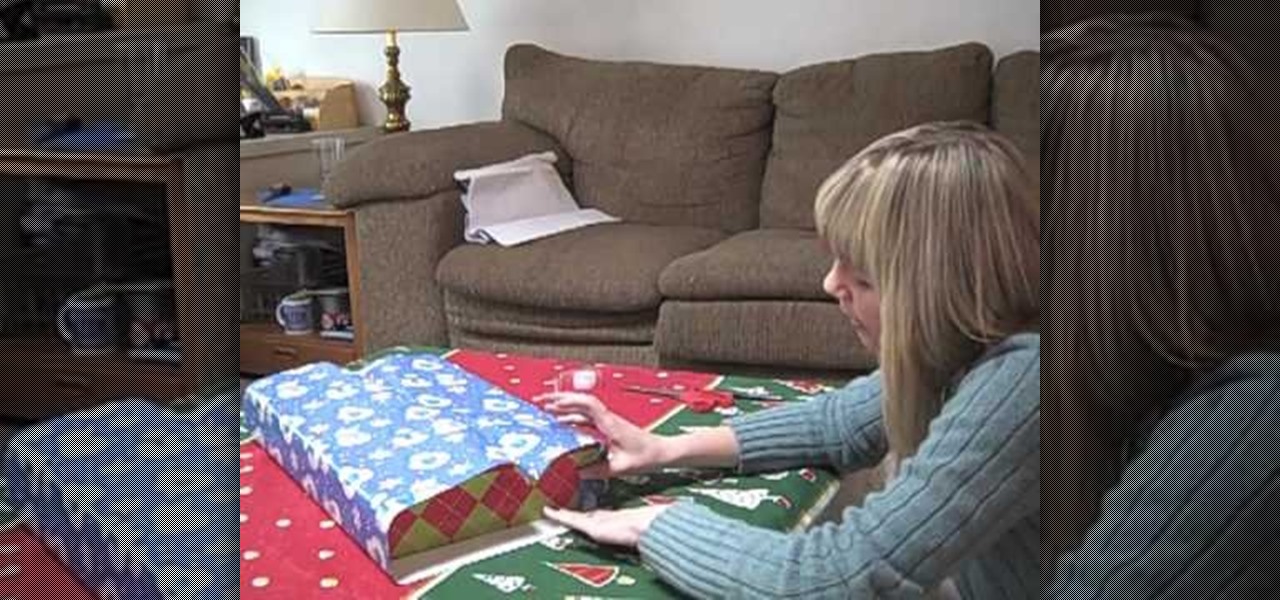
In this video, we learn how to wrap a gift. You will need: scissors, your gift, tape, and wrapping paper. First, place your gift down on the rolled out wrapping paper upside down. Measure out the paper so you have enough, then cut the paper from the roll. Next, you will fold the edges of the paper down, then center the gift on the paper. Bring the sides of the wrapping paper into the middle, then tape it. If you have too much paper on the edges, cut it carefully with the scissors. Now, push d...
In this video, we learn how to wrap a gift so it comes out perfect every time. Start off by unrolling the wrapping paper out on a flat surface and cutting out a large square. After this, place the box upside down onto the wrapping paper. After this, meet the two ends to the middle of the gift and tape it down. Next, start to crease the edges of the sides down and flip the gift over. After this, push the top of the sides down, then tape it. Push the sides and bottom up and then tape it togethe...
Unless you happen to be the real life version of Hayden Christensen's character from the movie "Jumper," who has the magical gift of teleportation, traveling from one place to another simply by will is a power restrained to science fiction novels and movies.
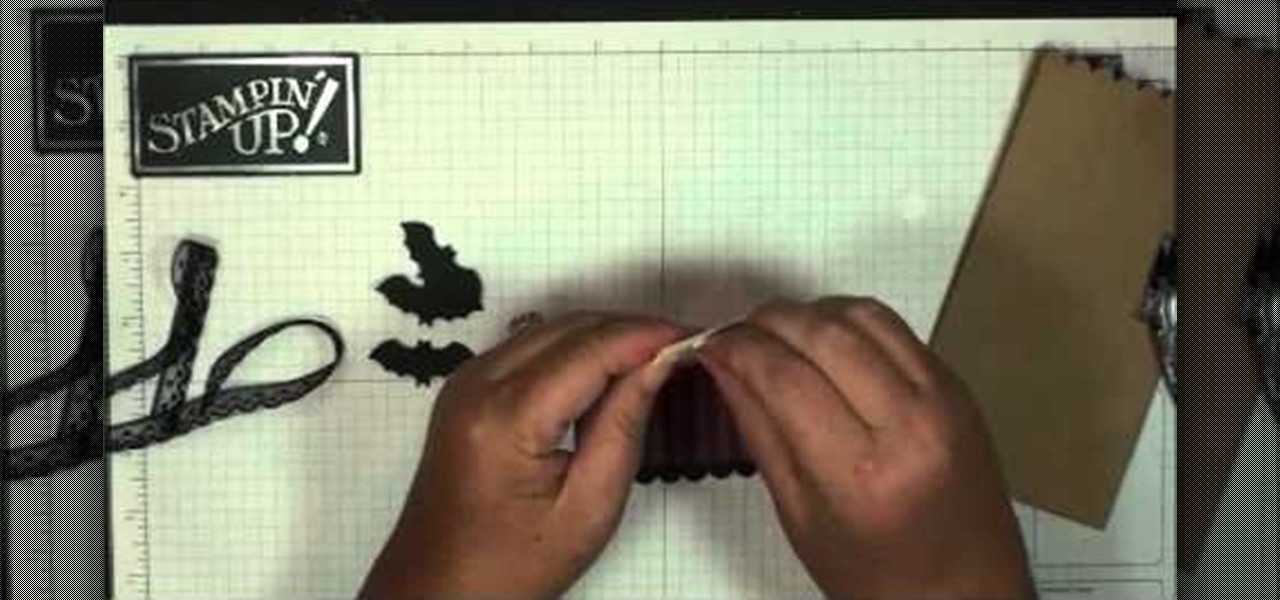
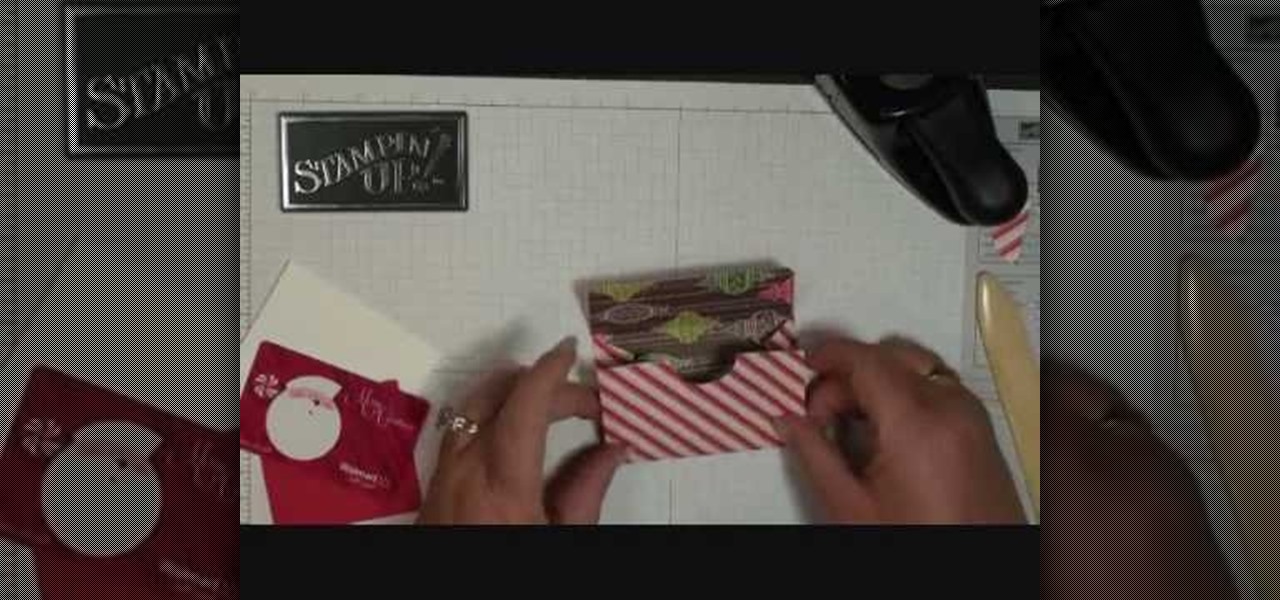
In this tutorial, we learn how to make a mini gift card envelope with Stampin' Up!. First, take a piece of card stock that is red and white. Score this 3/4" on both sides, then turn on the 6" side and score at 1 1/4" and 3 3/4". Once finished, fold this up and cut along the sides that you have scored. Put adhesive on the bottom of the gift card holder to seal up the bottoms so you can place the gift card in. Now, punch a hole in the bottom of the paper so you can see the gift card peak out of...
Make a Christmas Gift Card Holder Materials
Any old box can provide the template for making a gift box. Trace the pattern out onto the desired material, and then cut it out. Watch this video paper design tutorial and learn how to hand make a fancy gift box.
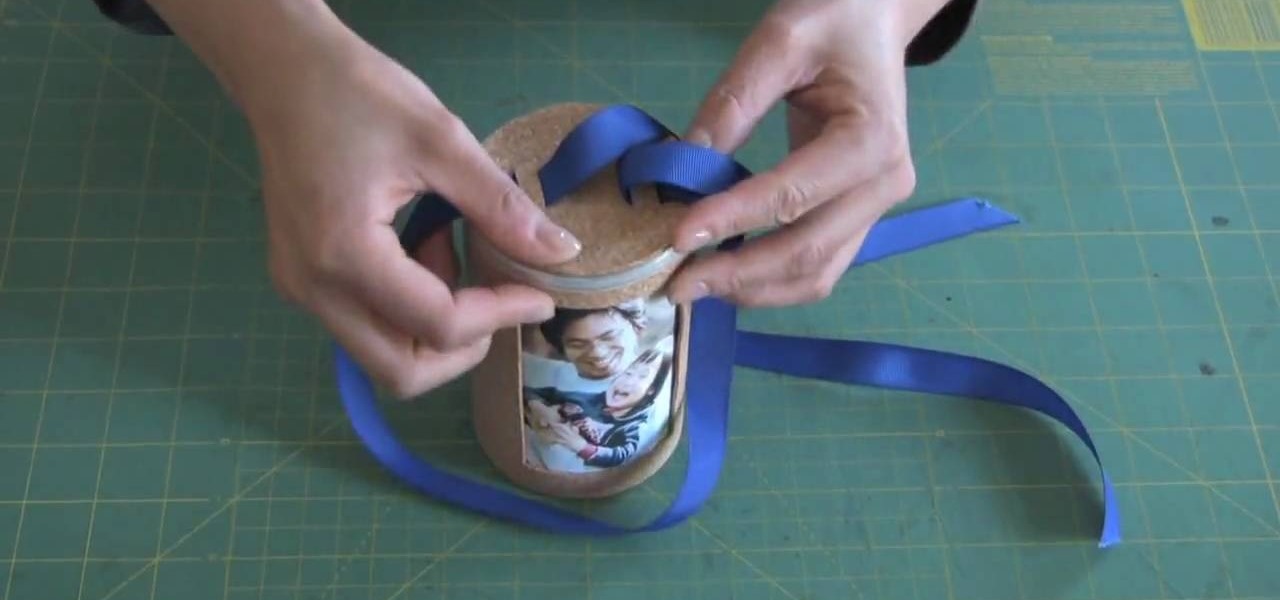
In this video, we learn how to make a gift Christmas jar with Stampin' Up! First, take any type of jar you want to collect money in. After this, rinse out the inside and remove the labels off of the bottle and measure them. Now, take a piece of card stock and cut it out to make the length of the label from the bottle. Now, decorate the bottle with different Christmas decorations and then tape it onto the jar or bottle. Next, add on different types of felt cut outs to the jar as well. To finis...
This watermelon baby carriage is just waiting to get rolled into a baby shower! When traditional gifts like baby bibs and ginormous baskets of diapers and pacifiers won't cut it, this stroller is all that and then some. Carved out of a single piece of watermelon, the stroller comes equipped with wheels, a sun shade, and a handle for pushing.
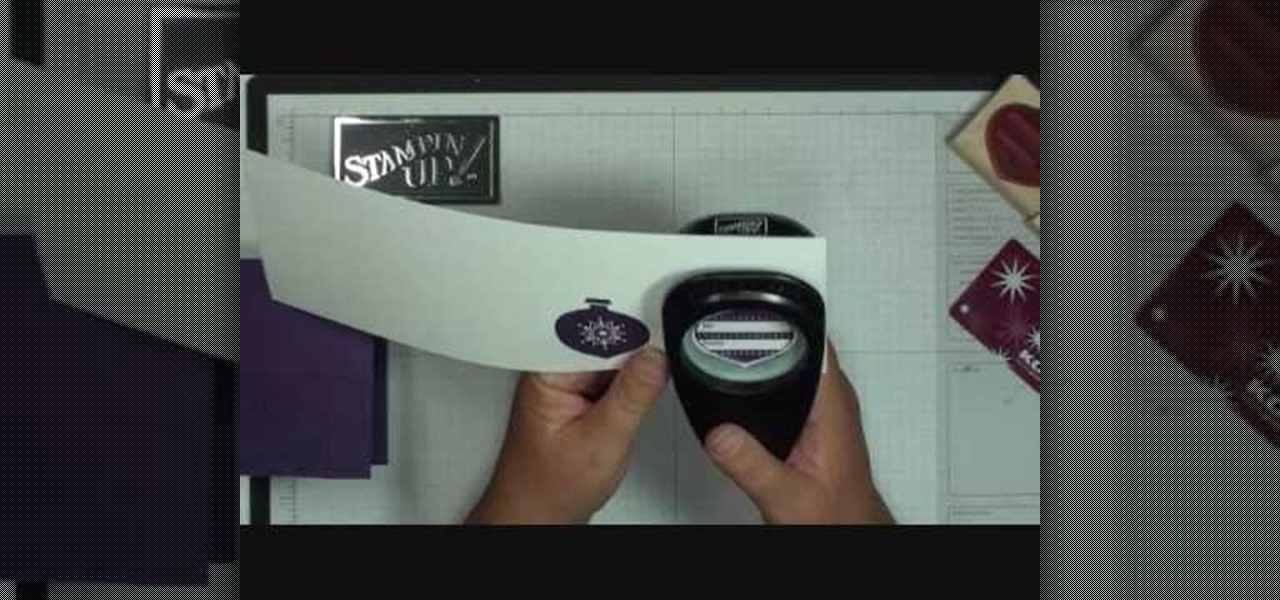
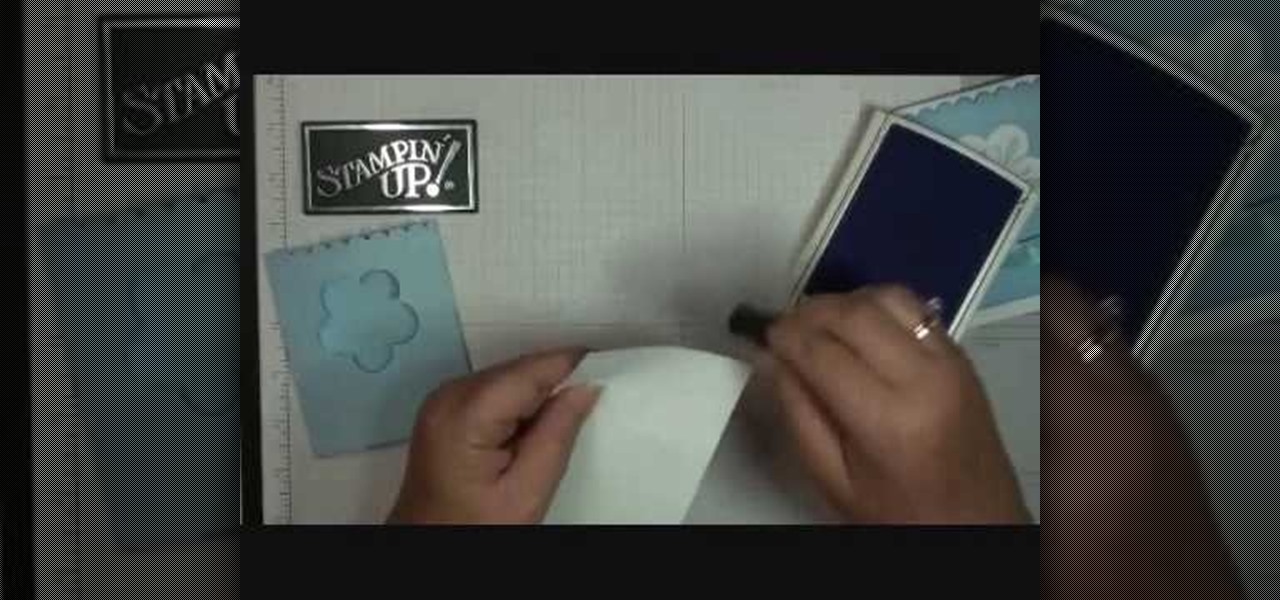
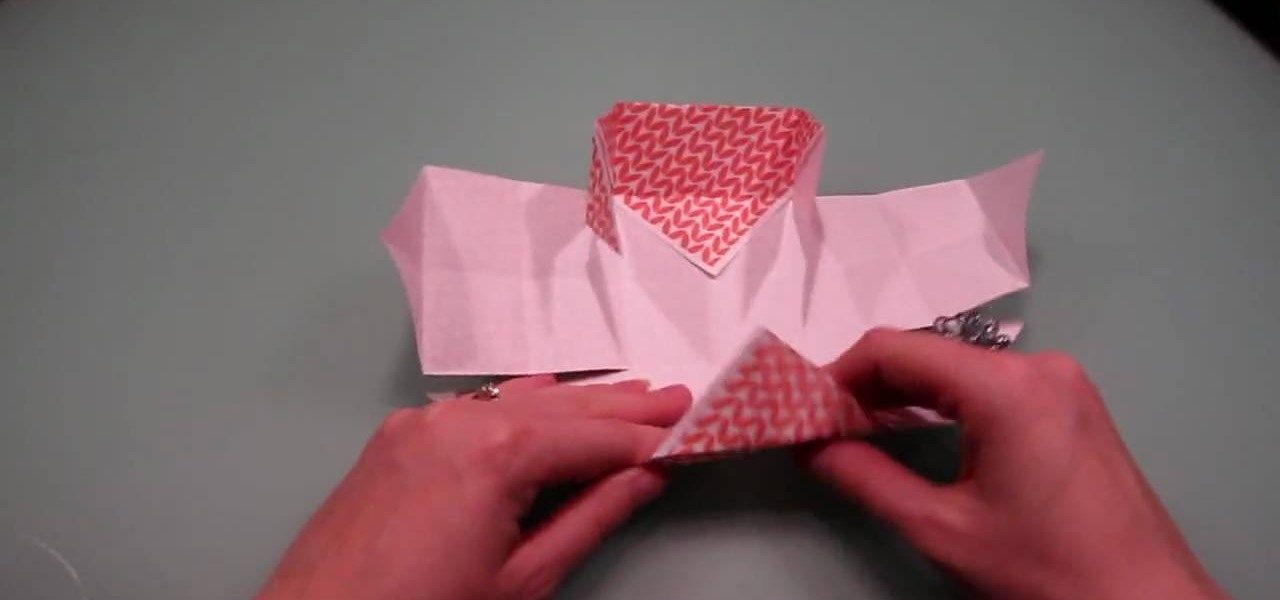
This video tutorial is in the Arts & Crafts category where you will learn how to make a multi-layered embossed floral gift card. Take a piece of 11 x 8 1/2 inch Stampin' Up card stock and fold it in half. Next you punch out layers of colored paper of rose red, very vanilla, regal rose and blush blossom colors of different sizes as stated in the video using the Boho Blossom Paper Punch. Now you take a Sizzix Big Shot Die and cut out a craft paper and set the cut outs aside. Now you got to stam...
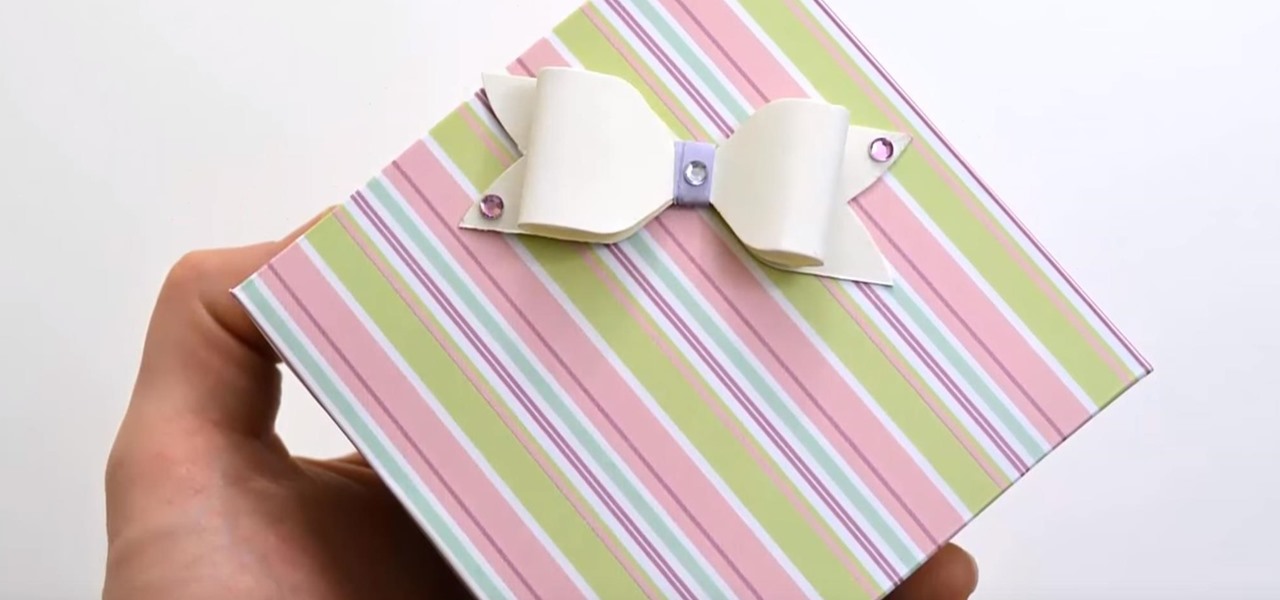
Dress up a plain white box with this fun and easy tutorial! All you need is the gift box, some festive felt, a length of grossgrain ribbon long enough to go around the box, and a few cutting and craft supplies.
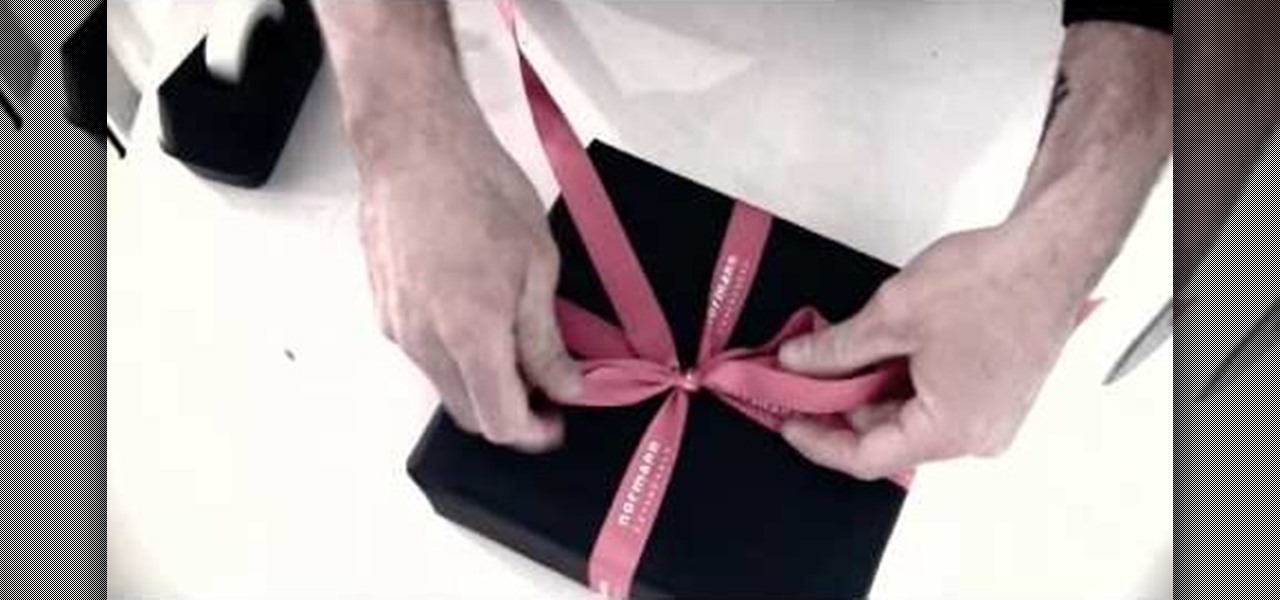
In order to decorate your presents during the holiday season, this quick tutorial will show you how to make a beautiful gift bow. Using a somewhat thick ribbon, determine the size of your bow and wind it around itself about 8-12 times, the more winds, the thicker your bow will be. Squeeze the loops of the ribbon together, making the ends overlap on the inside and fold it over. Then make two cuts on a diagonal through the center, making sure that you do not cut through. Unfold the loop and tie...
In this video, you will learn how to create a custom gift bag. Before you watch, you will want to download the pdf template for the bag, by visiting artycrafty.wordpress.com. First, you will print the template out onto decorative craft paper, which should be A4 letter-sized. Next, you will cut around the solid lines, as shown on the template, and cut out any additional decorative stencils, as you wish. While watching the video, you are free to decorate the pieces of paper any way you would li...
This video shows the method to make a gift card holder with "Stampin' Up." First, we use the Movers and Shapers to cut a heart shape on a paper. We use the add-ons cut by the Movers and Shapers to punch windows. Next, we use the Big Shot machine. Next, put a piece of Whisper White in the machine and cut at four and a quarter to eleven inches. Fold it into half and cut an inch and a half off the front top. Score the back panel at one and quarter inch. Take bags measuring 3 5/8 inch to 6 5/8 in...
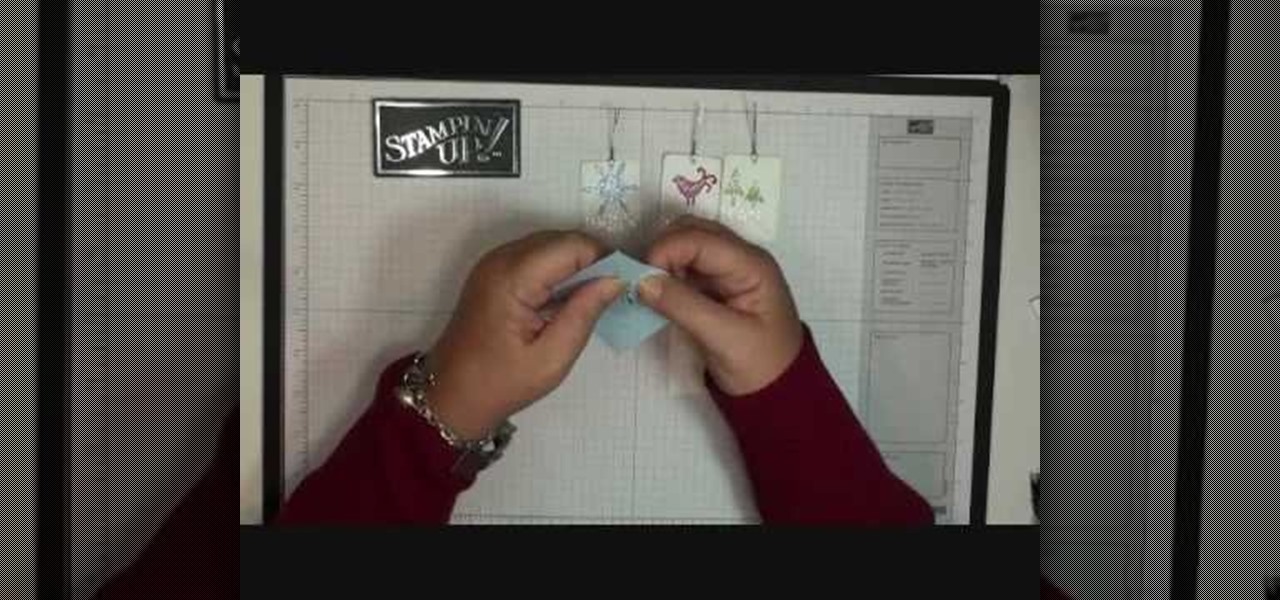
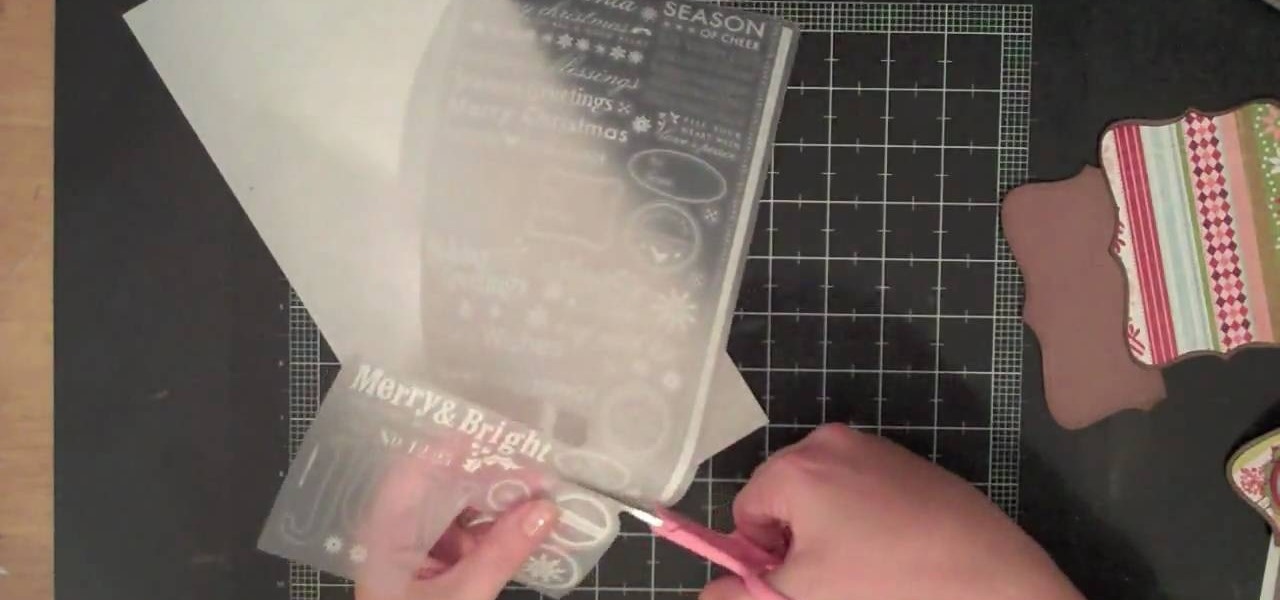
The video is very informative about the using of a Stampin' Up. The blogger explains the different parts of the system and how to use them. She first shows the finished product, in this case a label or gift tag. She then explains the process of how to die cut the various parts and how to use the dies and machine to cut out the shapes. She then explains how to put the Tags together. She then shows how to finish the product. All through the process the video also has pop ups with a brief write ...
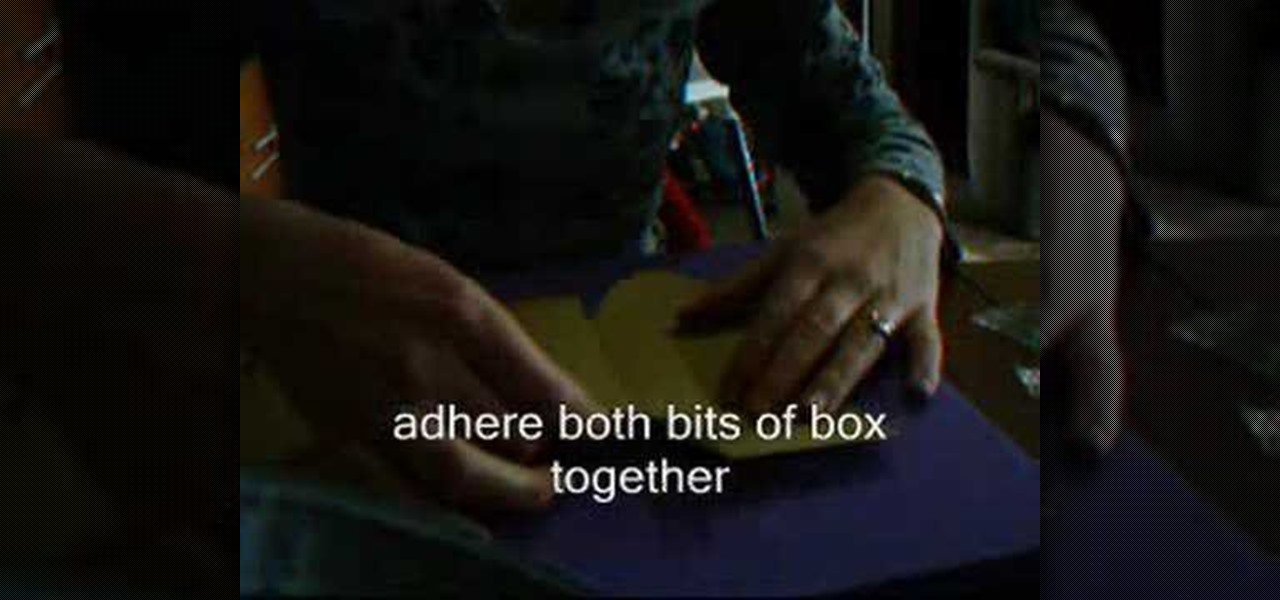
To make a paper gift box is one of the simplest projects that you can create on your own. In order to do this you need some materials: a Square of Paper, a Pencil, a Ruler & a Folding Bone. Take any size square of paper and draw two lines diagonally from corner to corner. This will form a large X, marking the center of the square. In turn, fold each corner into the center of the square. Firmly crease the fold. Fold the first corner to the line of the first fold made on the opposite side. Repe...
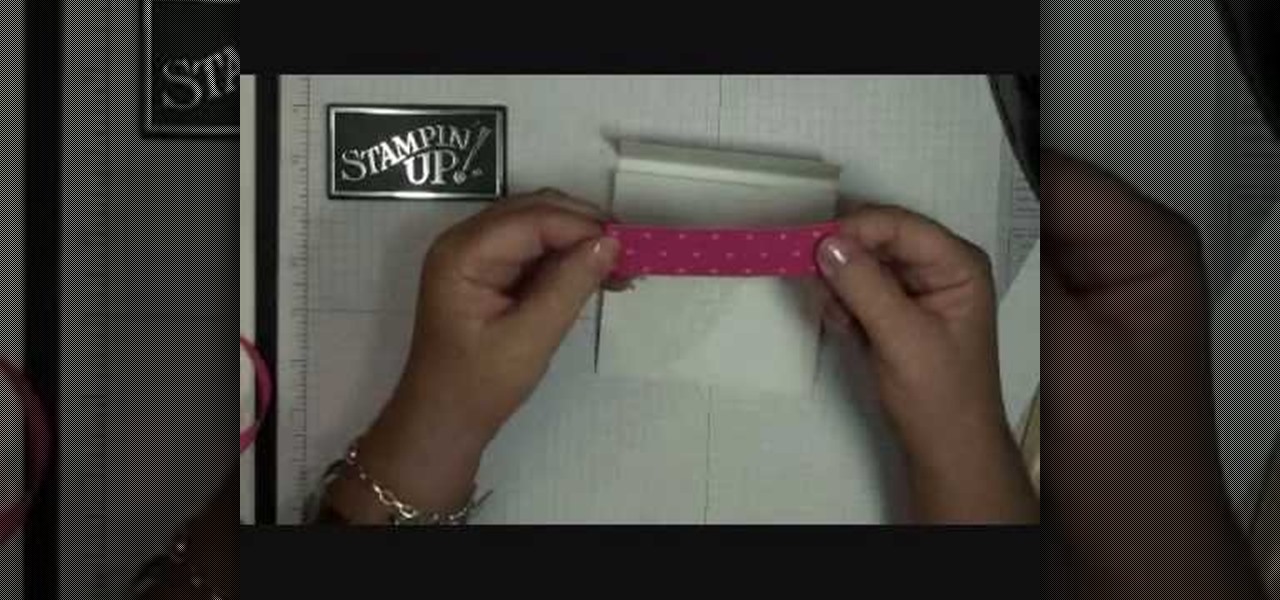
Stampin' Up Dawn shows how to use Stampin Up to create original gift card holders and sleeves in this craft tutorial. The tutorial shows how to create the Bashful Blue gift card holder. However, it should be noted that the Certainly Celery card does not utilize the scalloped edge design. The third style, Elegant Eggplant, uses ink #10510 and card stock #105126. You will need a strip of bashful blue card stock cut 4.5" by 7 3/4" scored at 3/4 and 4 1/4. Fold the score lines to create the sleev...
So many gift givers are mislead into believing that it's only the gift that matters, so the gift bag or wrap can be cheaply purchased at the gas station an hour beforehand and then thrown together in a slapdash manner.
This week, Etsy How-Tuesday presents Kari aka ikyoto and Stella aka lookcloselypress of The {NewNew} York Team. Today we're going to learn how to screenprint our own snowflake gift wrap for the holidays. Kari and Stella remind us that recycling paper bags is a great source for materials for this kind of project.
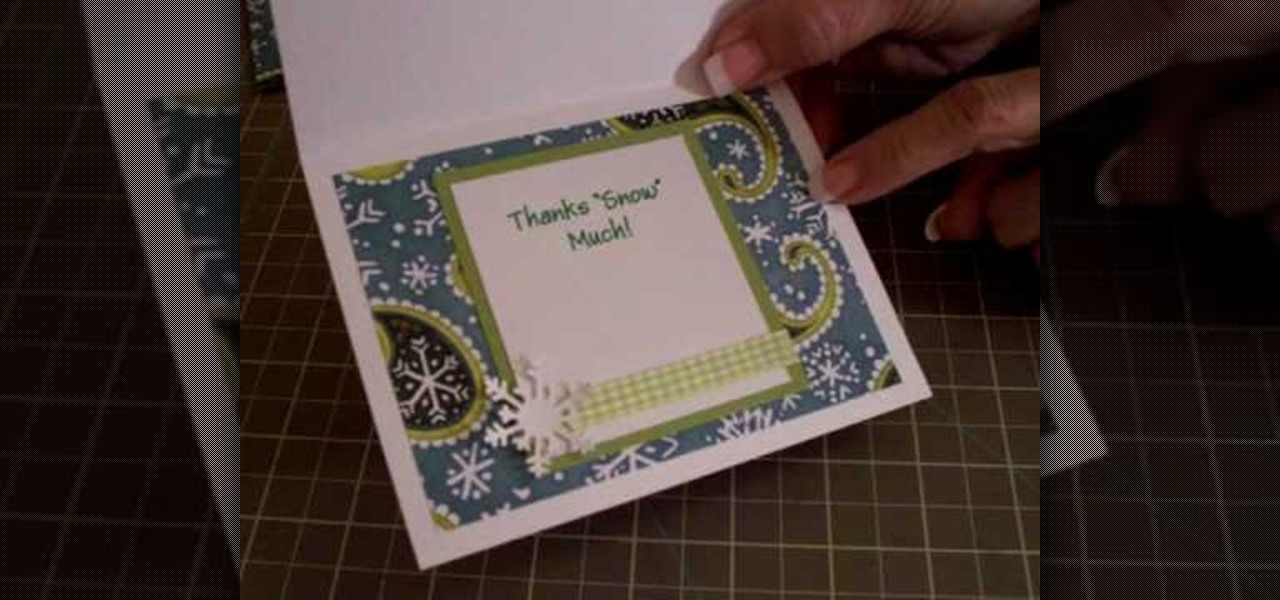
In order to make a thank you card for Christmas gifts, you will need the following: Winter Woodland cartridge, glimmer misty, pop dots, adhesive, gingham ribbon, and pattern paper.
While the holiday season offers a lot of festive joy in putting up holiday decor, shopping for Christmas presents, and baking cookies, it also offers up a lot of opportunites to spend money. So that means that by the time you've purchased the presents, wrapped them in tissue paper and wrapping paper, and send them off in a box, your wallet is probably shedding a tear.
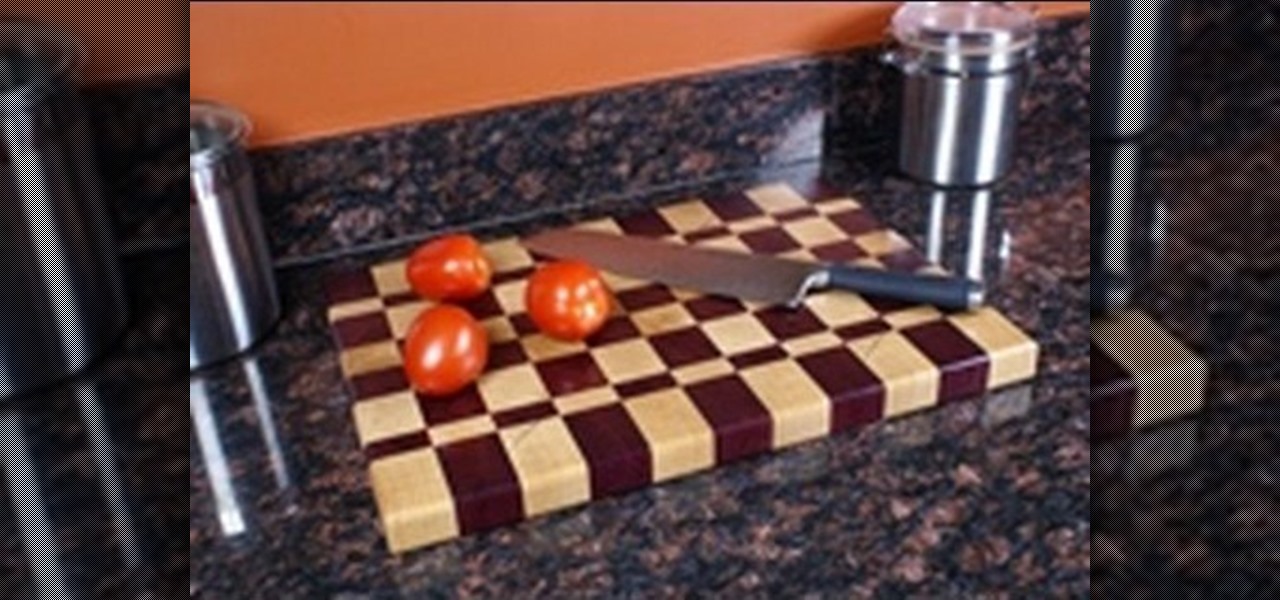
Make your own butcher block end-grain cutting board with this two part video series. Enjoy the "back to basics" simplicity of this useful project. A custom cutting board makes a great gift and many woodworkers make them in batches every holiday season. And if you are relatively new to woodworking, this is a great project to hone your milling, glue-up and tablesaw skills.
Jennifer Fesco teach you how to fold a beautiful Japanese cube from six pieces of paper. The cube can be used as a Christmas ornament or a gift box. You will need 6 pieces of origami paper, a pencil, a ruler, a paper knife, a protective surface to cut on. A glue stick is optional.
If you enjoy arts and crafts, pop-up, scrapbooking and origami, you will enjoy these craft projects too. Like origami, kirigami is the craft of paper, with the added technique of paper cutting. Kirigami will enhance any origami, pop-up and scrapbook projects and scrapbook and origami techniques will enhance kirigami. Kirigami pop-up blossoms, butterflies and puppets make unique gifts or cards for any occasion and the recipient will enjoy seeing their gift, card or pop-up take form before thei...
In this tutorial, we learn how to wrap a gift the easy way. To begin, lay the wrapping paper down on a flat surface. Next, lay your gift down upside down on the middle of the paper. Next, fold the paper over half the gift, then tape it. After this, measure the other side to meet in the middle, and make a crease. fold it over the middle and tap it. Now, fold in the sides. To do this, fold in the edges first, then push the top layer down, and bring the bottom layer up. Tape this. Now, turn the ...
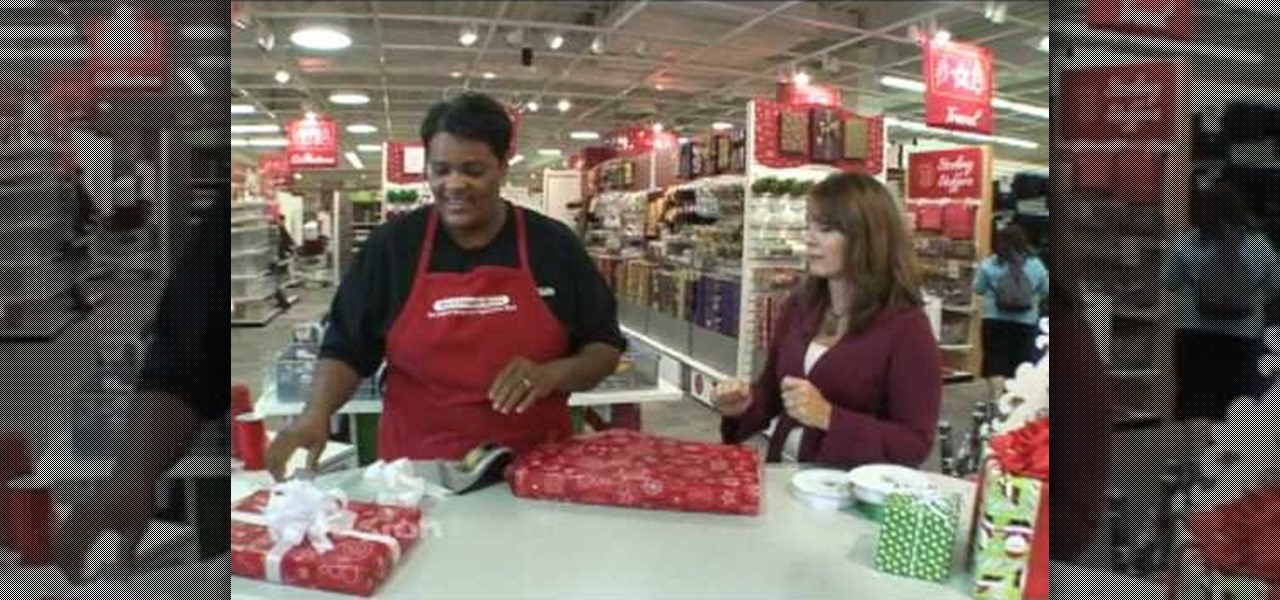
In this video from FusionNW, Paige Walker from The Container Store gives us some gift wrapping tips. A lot of people have trouble wrapping presents with wrapping paper. Here we learn how to make it simple, with your gift-wrapped presents looking like they were professionally wrapped. Remember: A gift that's wrapped in a very special way is just as special as the gift itself! One thing that's important is that you measure the wrapping paper right, and this is demonstrated for us. You'll want t...
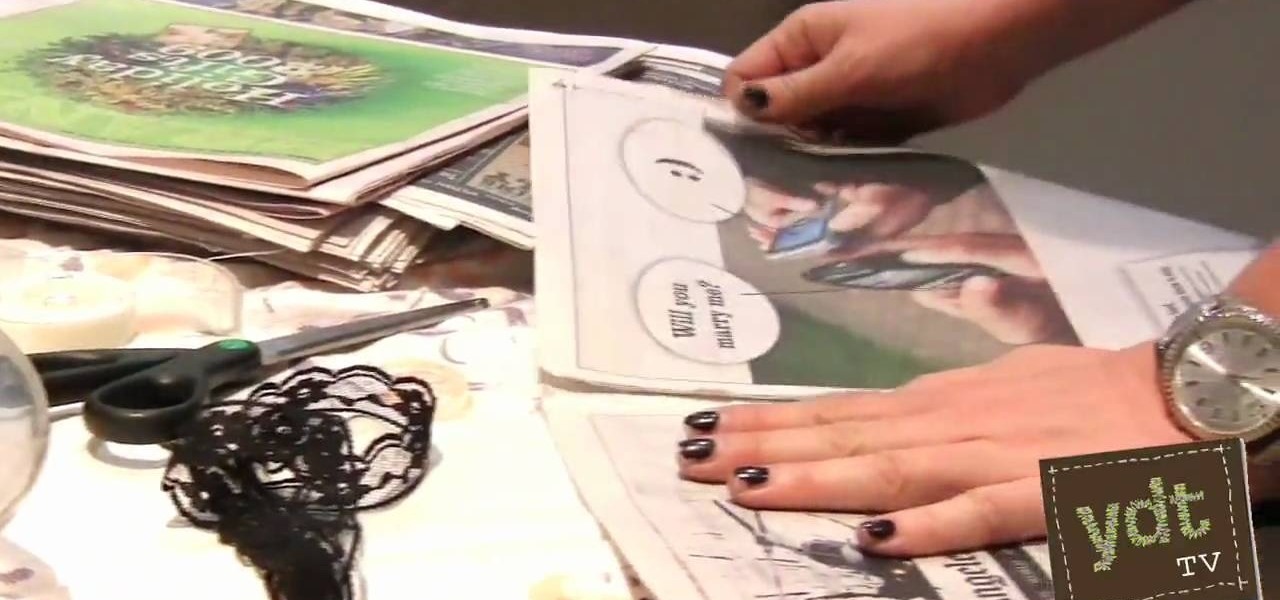
Tracy Hepler and Jaclyn Mullen of YDT TV demonstrate how to gift-wrap your presents in an environmentally conscious way. You will need: newspapers, scissors, tape, and lace or ribbon. Use a daily newspaper page instead of wrapping paper. A lot of paper is usually wasted around the holidays, and recycling newspapers is a great way to minimize this waste. Cut the newspaper to fit the size of your gift and place your gift in the middle of the sheet, as you normally would with ordinary wrapping p...
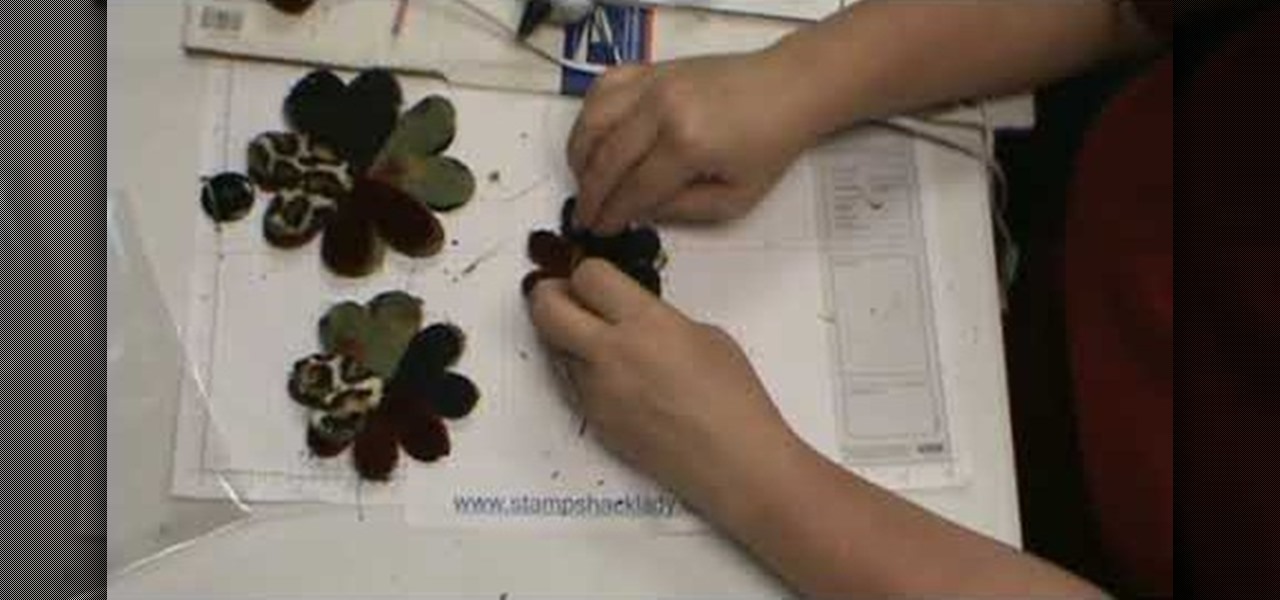
In this video, we learn how to assemble a flower-fold die-cut with a glue gun. First, cut out different fabrics in the flower shape. Put them all into different piles according to their sizes. After this, put hot glue into the middle of the fabric and fold the flowers in half. When finished, put the pieces together with hot glue going in a circle. Continue to do this with all the different sizes. When you are done, all the colors of fabrics should show, then place a button in the middle with ...
In this Fine Art video tutorial you will learn how to embellish a sweater by adding a bejeweled collar. This will be a great Christmas gift idea. Take a short sleeve sweater and cut out its neckline on a piece of paper. Take a piece of woolen cloth of matching color, pin the paper cut out to it and cut off the woolen piece. Place the woolen cut out on the neck of the sweater and arrange some jewels on it. Then with a hard glue gun apply hard glue to the back of each jewel and stick it. You ca...
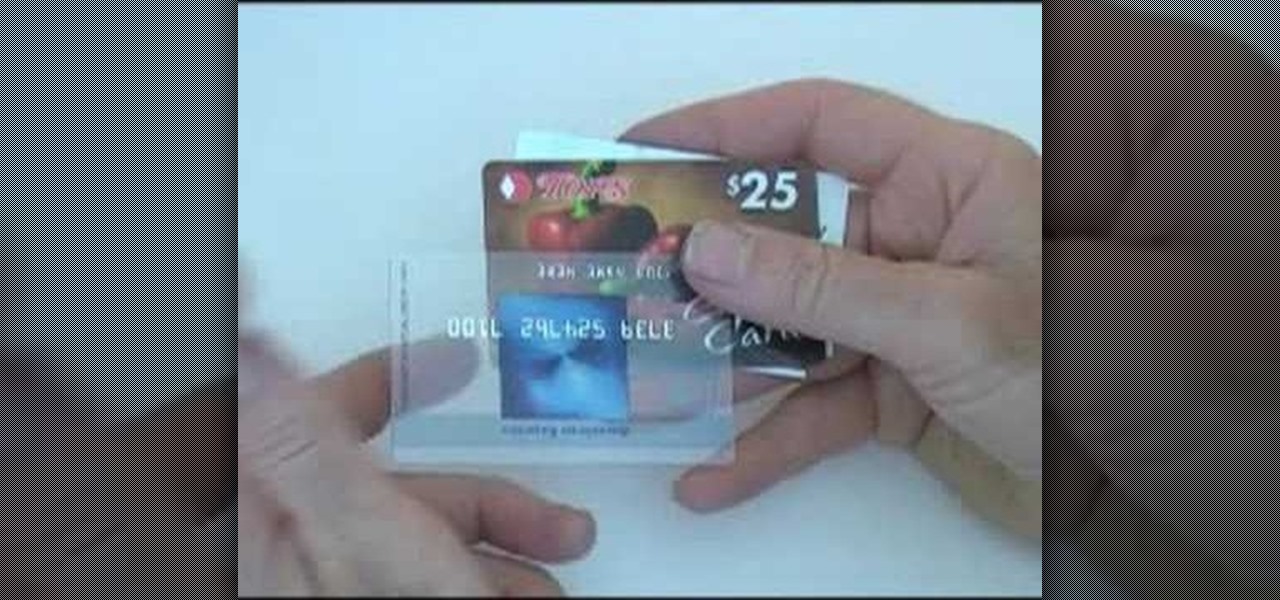
Reuse an expired credit or empty gift card to make a guitar pick instead of buying a brand new pick. You will need a pick, nail file (or sandpaper), card, and sharp scissors. Each card will probably yield about four or five picks. With a pen or Sharpie, outline your pick onto the card, centering it around whatever design or logo you want on the pick. Then, cut out this shape with your scissors. With the file, go back and file down the edges so that they are smooth, making sure that all sides ...
This tutorial it's step by step instructions, so it's very easy to understand it. Don't forget to like, comment and share this project :)