
How To: Always win a virtual version of Rock-Paper-Scissors
Without looking, peeking, or even cheating, you will be able to figure out who will win in a virtual game of rock-paper-scissors.

Without looking, peeking, or even cheating, you will be able to figure out who will win in a virtual game of rock-paper-scissors.
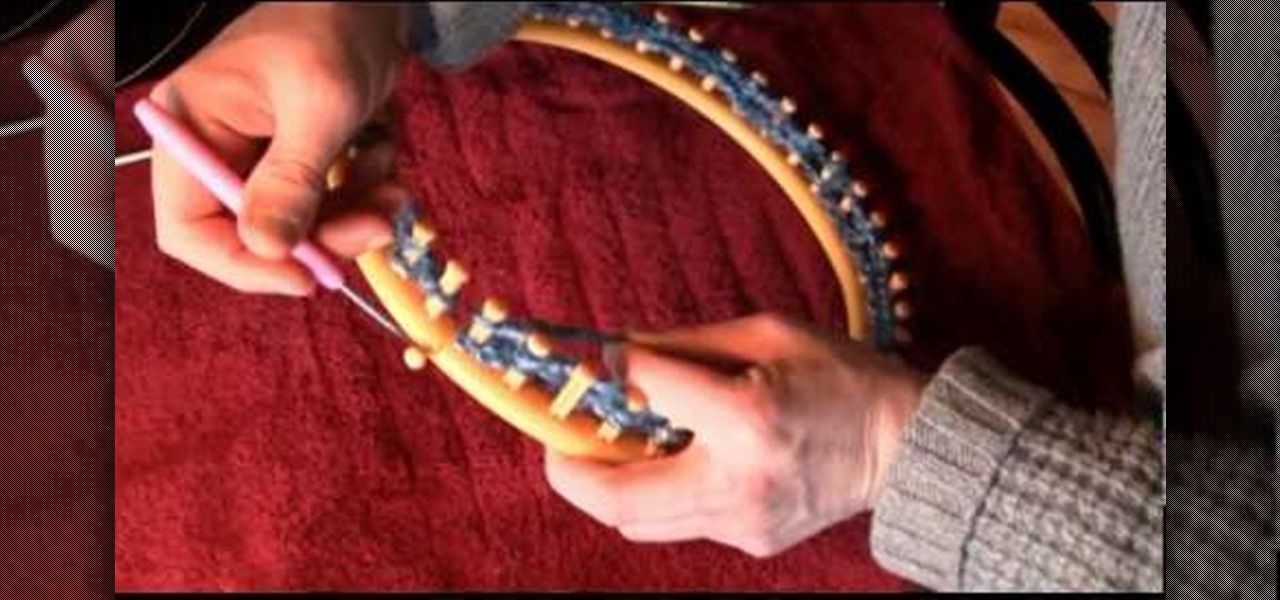
This video shows us how to make a shawl when knitting on a large knitting loom. Here are the following steps:
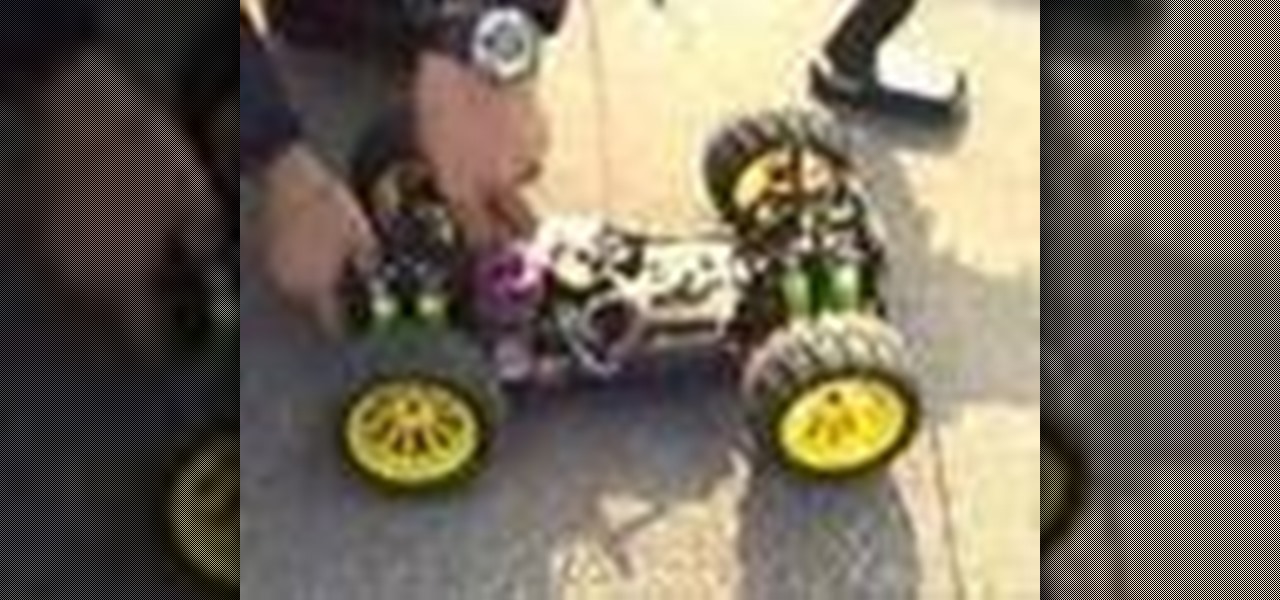
Do you want maximum performance for your TRex 4WD Nitro RC truck? This tutorial details the steps to tuning your Nitro engine, as well as the specific mechanics and inner workings of the Nitro Engine of Tyrannosaurus 4WD Nitro RC Truck.
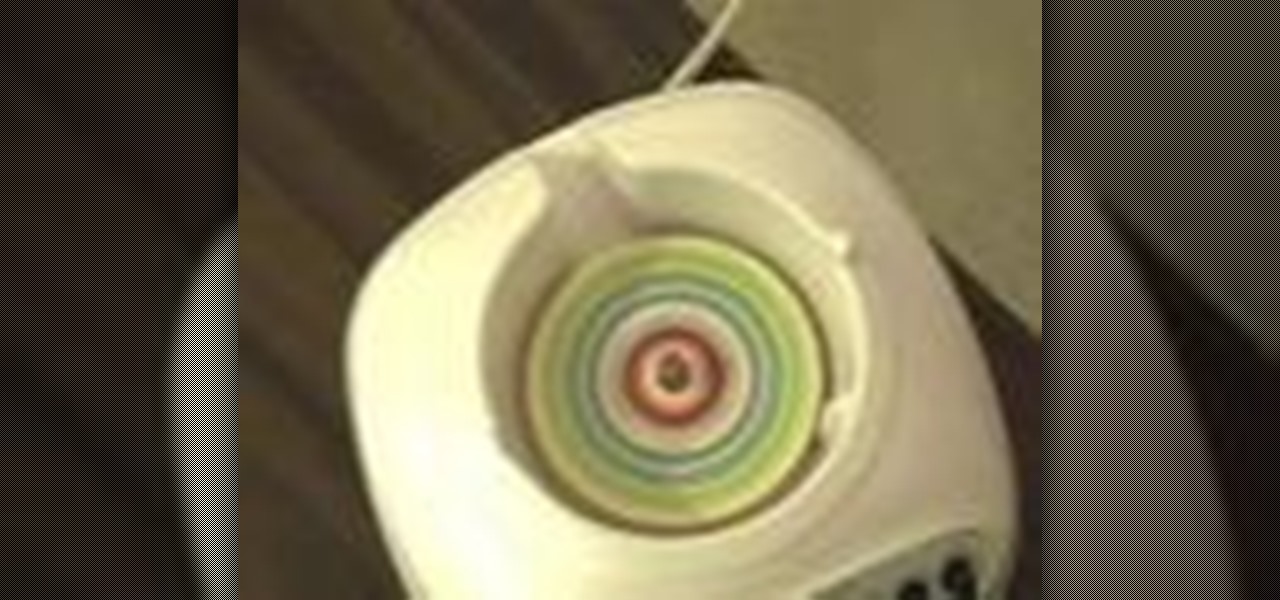
The phenakistoscope is a predecessor of the flip book, but don’t worry: it’s easier to make than pronounce.
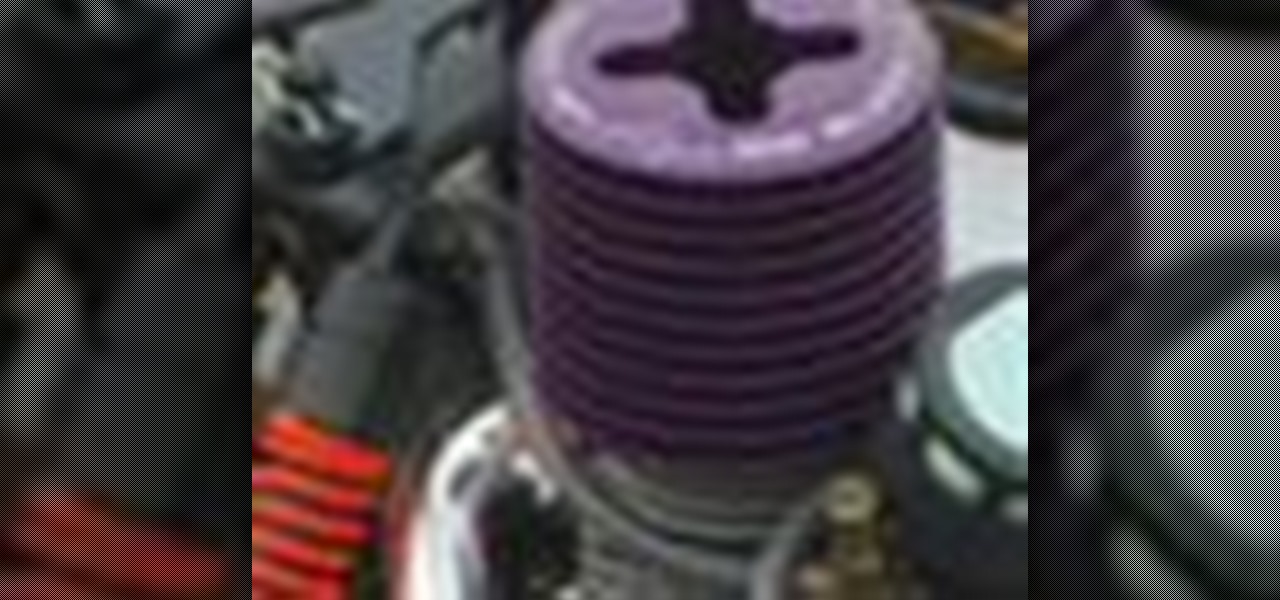
In this video tutorial, viewers learn how to return the base settings on a HPI 21BB engine. The engine has 3 needles carburetor: high speed, mid-range and low speed. Begin by turning the high speed needle clockwise until it is closed. Then turn it 3 1/2 turn counterclockwise. Then turn the mid-range needle clockwise until it is closed. Then turn it 3 1/4 turn counterclockwise. When adjusting the low range, make sure to hold the mid-rang with a screwdriver to prevent it from turning. Now turn ...
In this video TIAT shows you how to make a rescue belt. Begin by making a basic knot in the center, holding that knot on the top of your ring finger and between your thumb begin making loops. To create these loops extend the strand to the right side of the knot straight out parallel to your thumb, with your right hand curl the yarn first up, than forward, than back down forming a circle that you slid over your thumb. Take the tail of the cord and pull it snug. Repeat these circular loops unti...

This video shows you how to properly adjust the curb idle speed on your Holley carb. First find your idle RPM setting from under your hood or from a repair manual. Turning the screw clockwise will raise the RPM's and counter clockwise will lower the RPM's. Check and adjust until the proper setting is reached
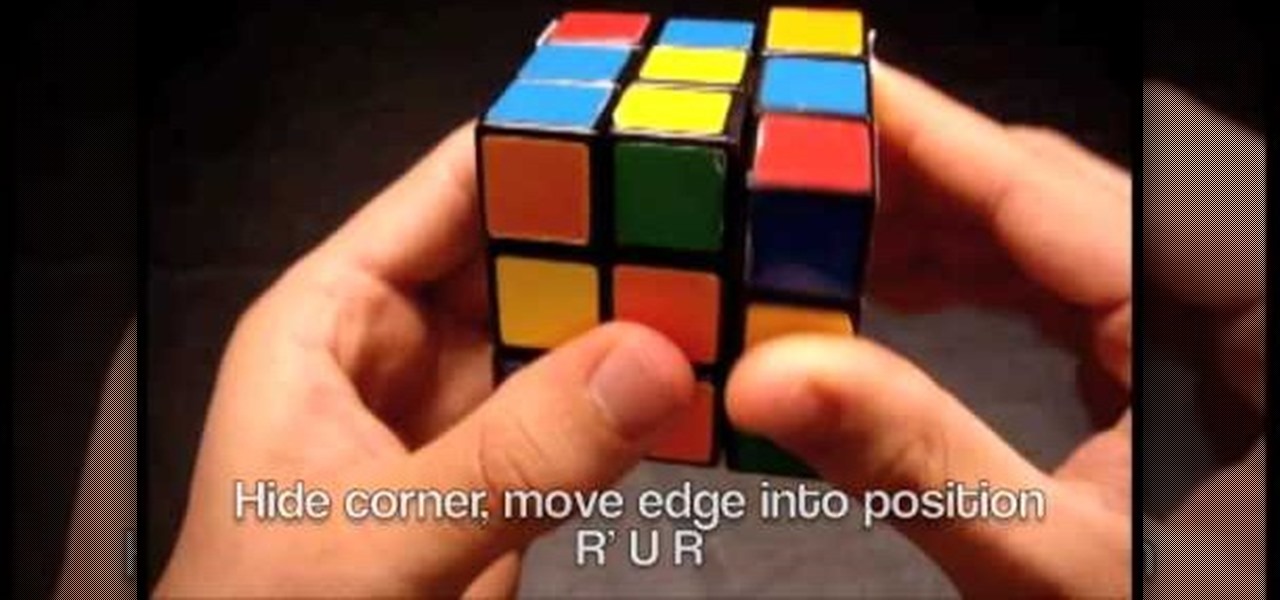
Solve a Rubik's Cube faster with F2L techniques
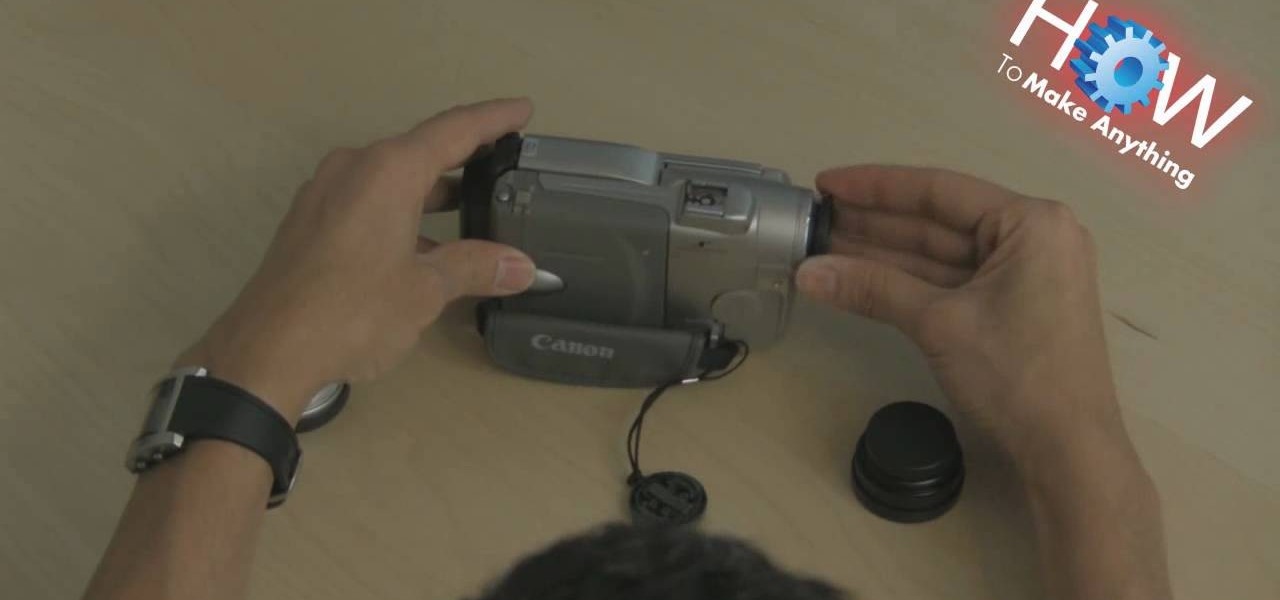
Make sure you have the appropriate lens for your digital camera. Look for markers on the lens that correspond with any mark on the camera body. Different brands have different markers. Some have square dots while some have red dots. Line these marks In one hand, hold your camera body firmly pointing to you. While holding it, push the lens button. Firmly hold the bottom of the lens (where the lens meets the camera body), and twist. Some cameras let you twist clockwise, others counterclockwise....
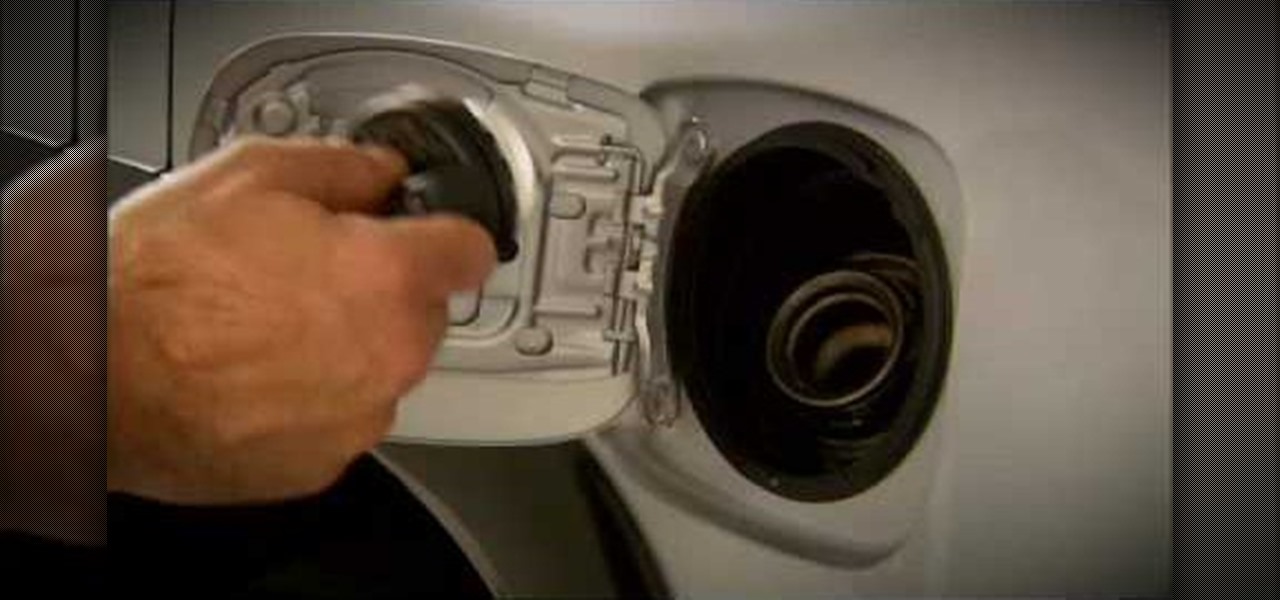
Learn how to open the gas door and cap in a 2010 Toyota Prius in simple steps. Locate the remote fuel filler door which can be found on the floor next to the driver seat. Pull the lever up to open the fuel filler door. Remove the cap by turning it slowly counter clockwise and hang it on the filler door. After filling the recommended fuel place the cap and turn clockwise till you hear a click sound. Finally lock the fuel filler door to finish.
In this video, we learn how to do an orbit at an orbit light show. The light should spin clockwise in one and and counter clockwise in the other. You must pay close attention to keep these spinning back and for. Start out by winding the lights up and mastering this so you can produce different shapes. After you learn the wind up, learn how to make the stars with it by winding it up one direction and let the orbit in the middle unwind itself in the opposite way. Once you're comfortable, you wi...
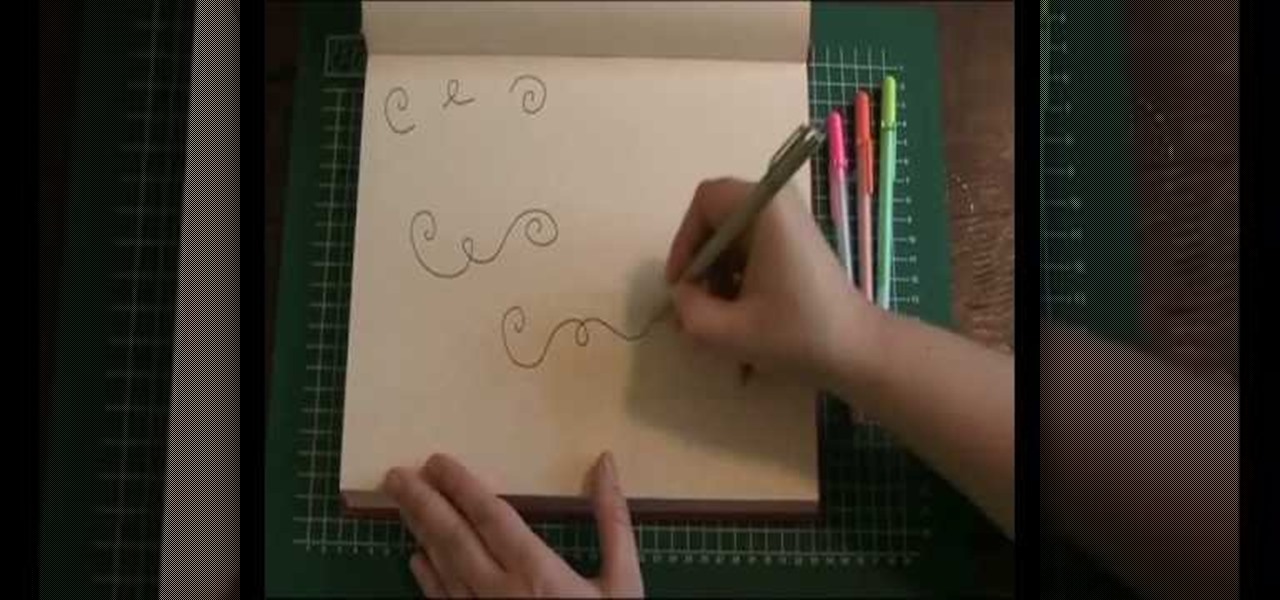
In this video, we learn how to draw a doodle with Marieke Blokland. Start off by writing the letter "e" in cursive, several times, making the letter larger as you go. Link the e's together, then when you get to the bottom of the paper it will be just a scribbled loop. Now, on the next page, draw more of these looped e's, dragging out the lines. On the next paper, draw spirals going from smaller to larger and going clockwise and counter-clockwise. Start to incorporate all of these shapes toget...
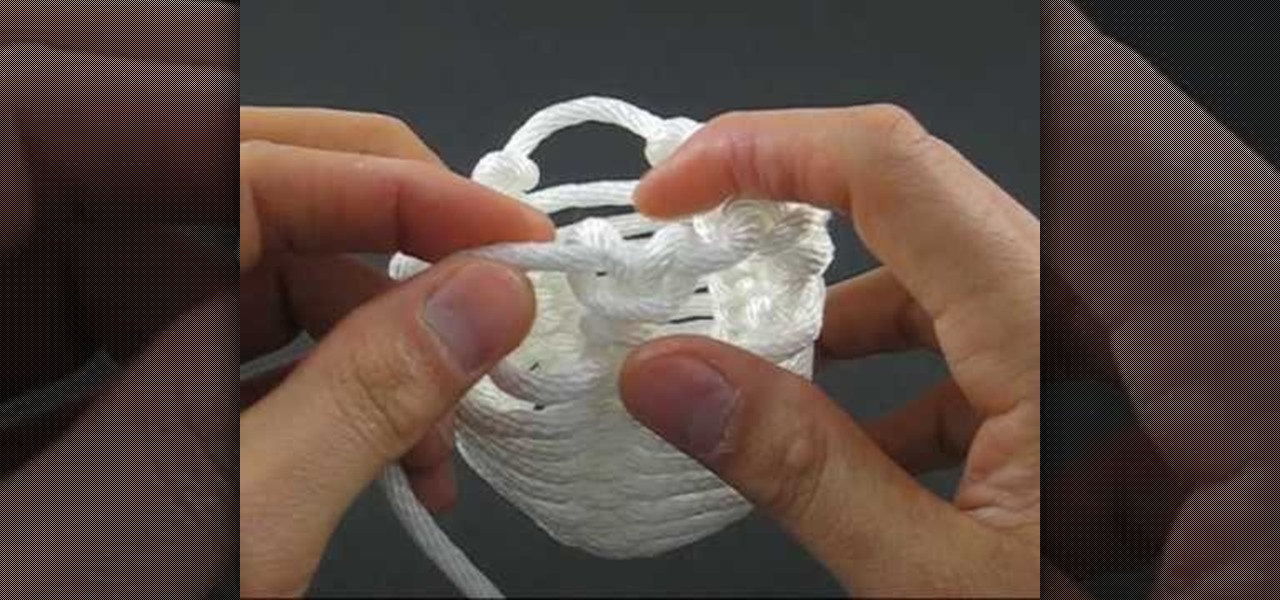
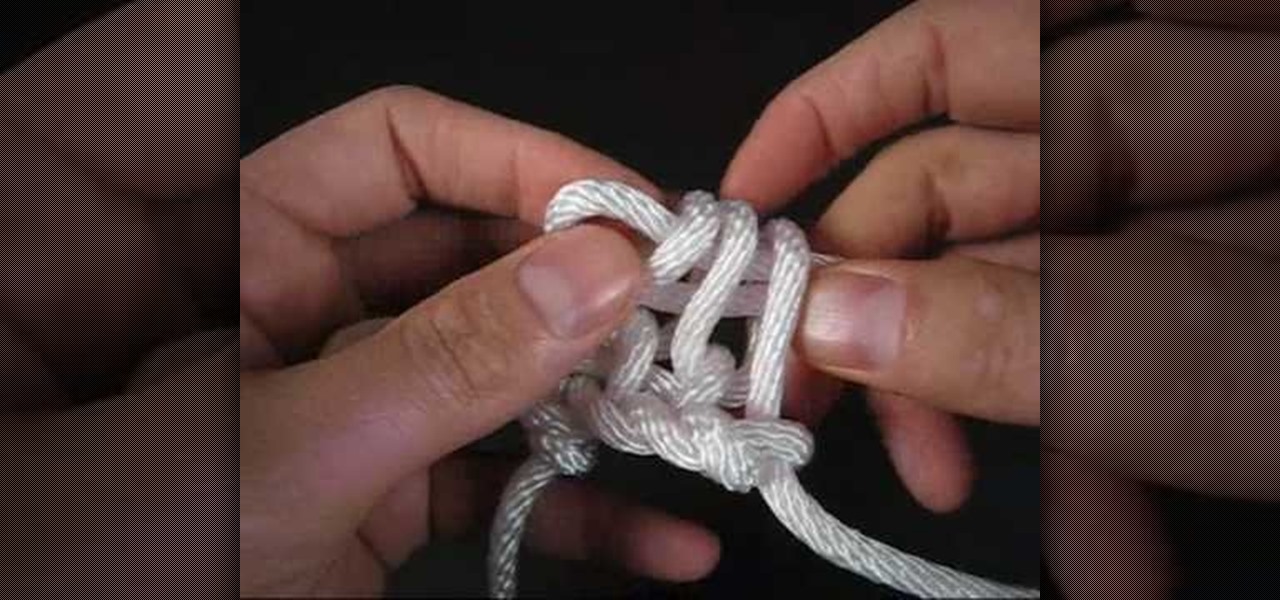
In this video, we learn how to tie a honey rope basket knot. To do this, you will need a 10ft of nylon rope. Start off by tying a counter-clockwise slipknot at one end of the rope. After this, pull the loop of the slipknot out four inches. Then, tie a second slip knot clockwise next to the first slipknot. Draw the loop length of the second so it's equal to the first. Next, continue to create slipknots next to each other until you've done five. No, hook your working end into the first loop and...
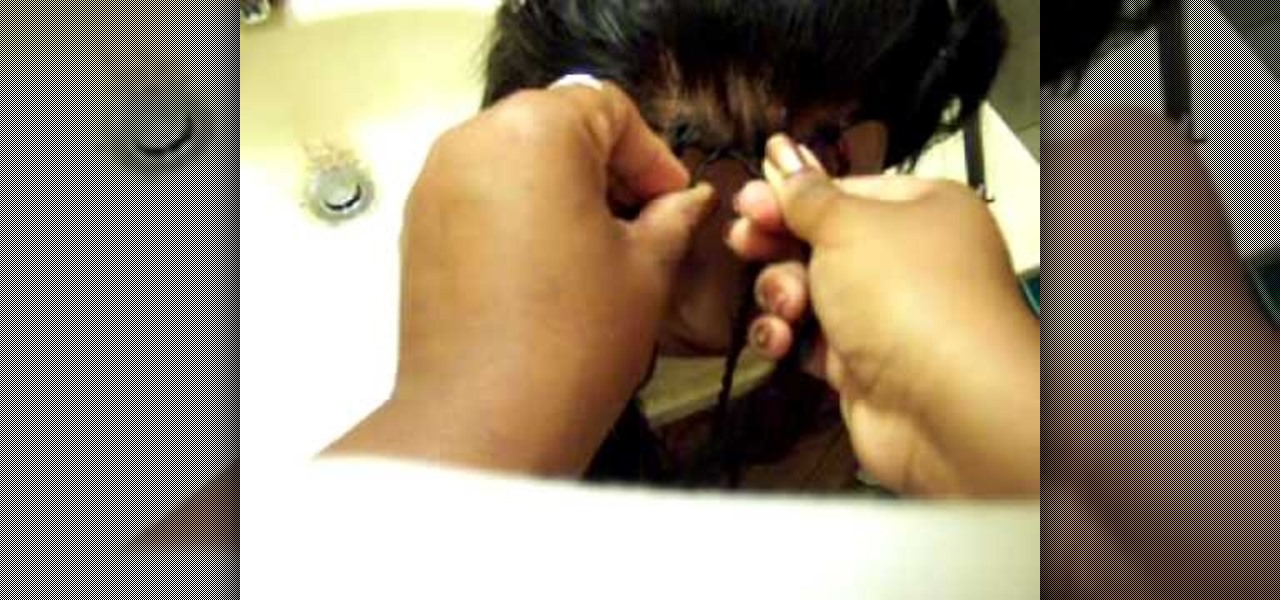
To start a kinky or Senegalese twist, create a one inch square section of hair and split it into two pieces. Drape a piece of weave over the strands. Twist the right piece of weave over the right strand with a clockwise motion. Twist the left piece of weave over the left strand also using a clockwise motion. Then twist the right strand over the left. Continue twisting each strand to the right before twisting the strands together as you go down the section. The twists can continue down to the ...
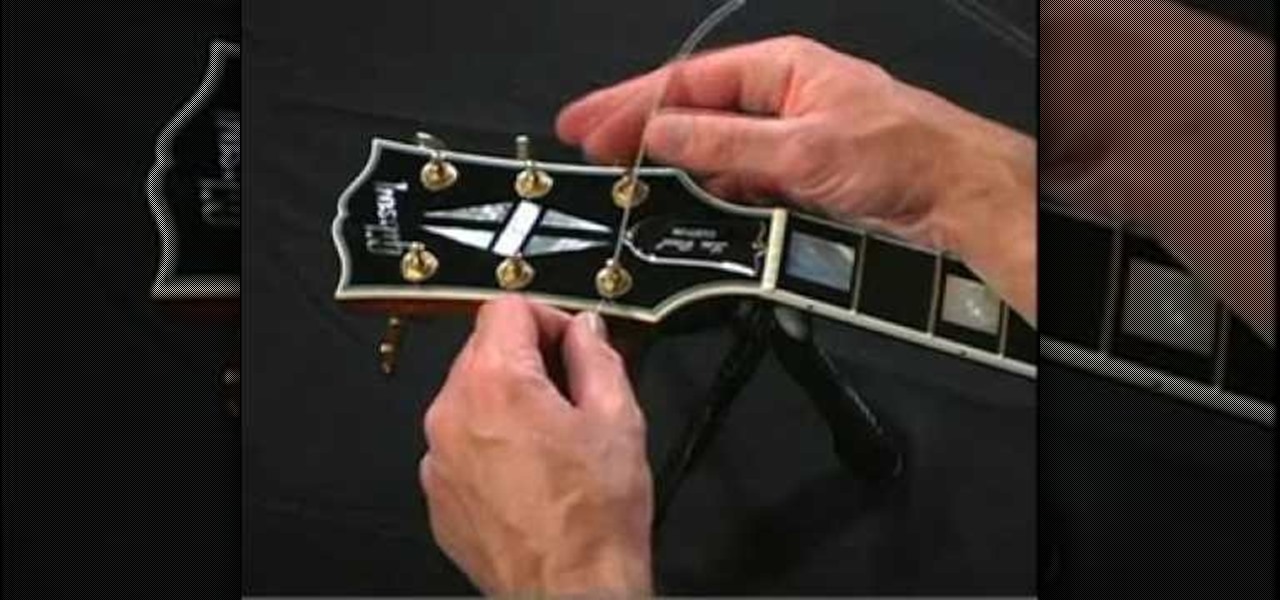
In this Music & Instruments video tutorial you will learn how to restring guitars with a stop-bar tailpiece. The video shows how to do this on a solid body electric guitar. First, with the Planet Waves pro winder rotate the tuning key button clockwise to release the tension on the string, then pull the string put. Now slide the new string through the back of the tail piece, place the tail piece back in to position, pass it through the tuning key post and pull it tight. Wrap it around behind t...
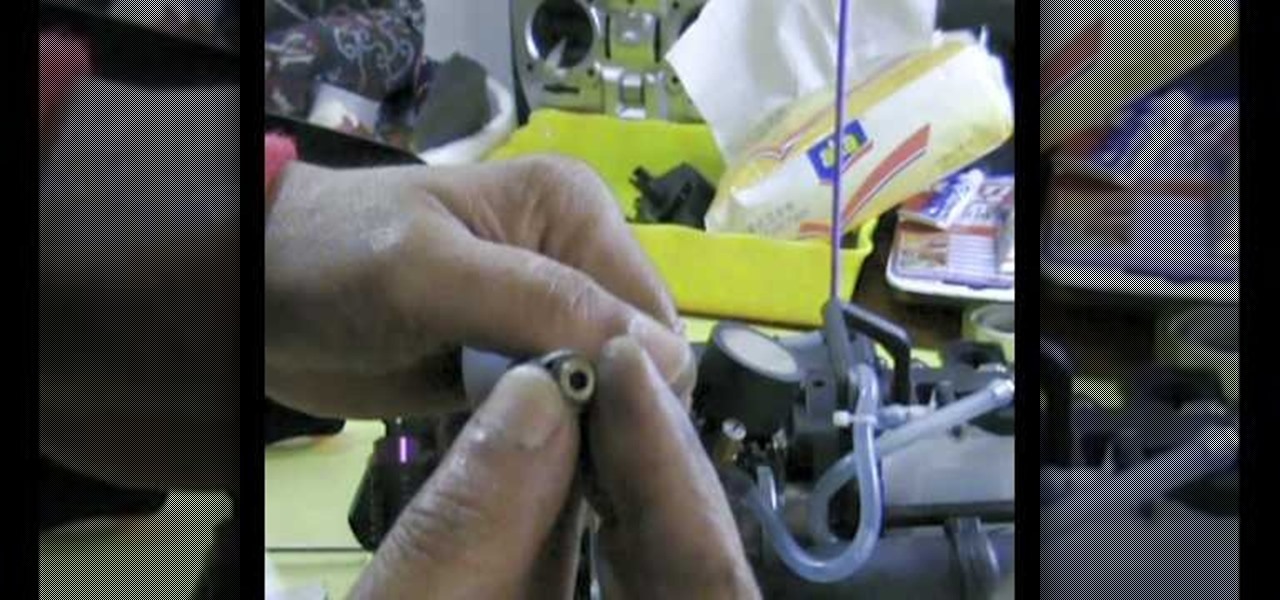
In this how to video, you will learn how to install and replace the glow plug in your RC car. Glow plugs are used to ignite the fuel in the engine. A glow ignition makes the filament in the plug red hot. To check if the glow plug works, place it on the ignition and check if the filament is bright red. This is very easy, as you just need a 4 way wrench. Slide it in the engine and take the glow plug out by spinning the wrench counter clockwise. Once this is done, place the new glow plug in and ...
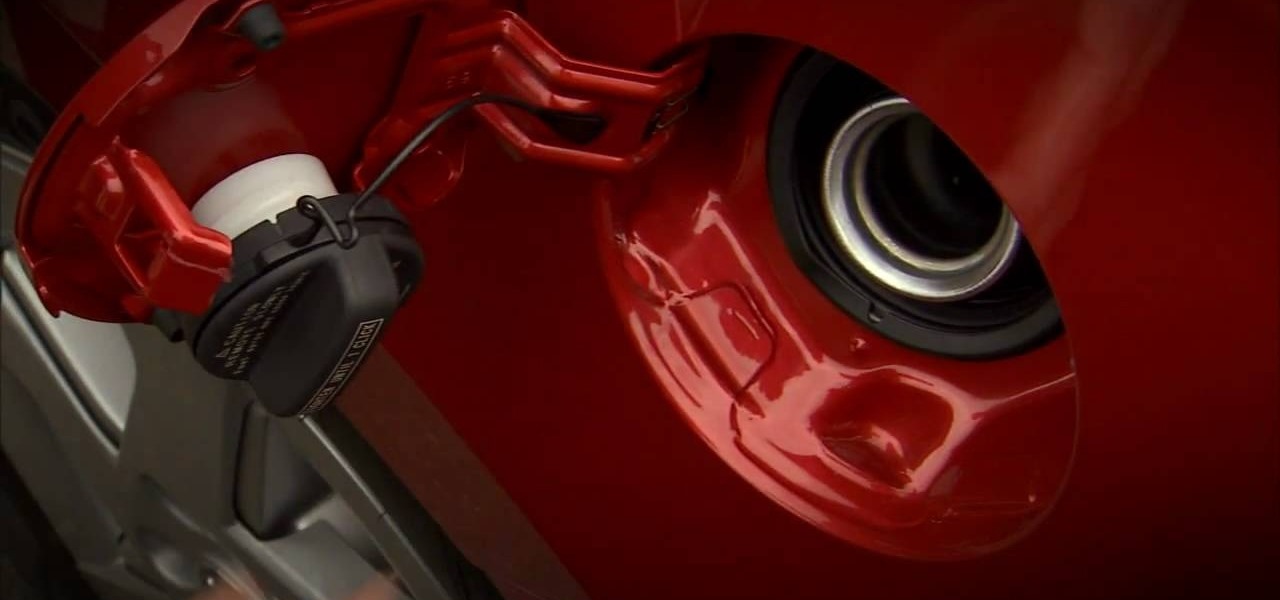
The Toyota 4Runner has a manual fuel filler door. To gain access the gas cap open the door. When open the gas cap, turn it counter clockwise slowly. Then pause a few second before remove the cap. You can hang the cap on the back of filler door. The video also advises that Toyota suggests to use regular unleaded 87-octane gasoline. After filling gasoline return the cap and turn clockwise until you hear one click. The 4Runner's closed fuel system will dramatically reduce fuel evaporation. If th...
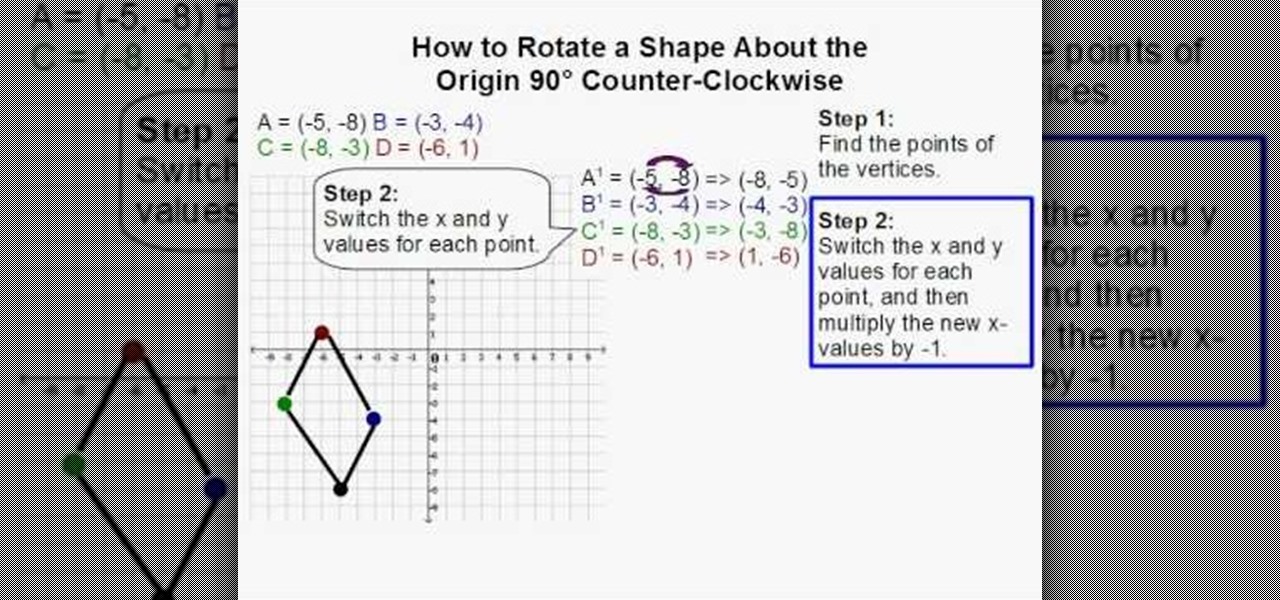
Davitily thinks that you can learn to rotate the images quite easily. In this video Davitily explains the process of rotating a geometrical shape about the origin. This rotation is counter-clockwise. Davitily explains the various steps involved in this process. Two steps are explained in this process. The explanation is very simple and done in a very interesting manner. This video is the perfect choice for people wanting to learn the rotation of shapes. This video is a must for people interes...
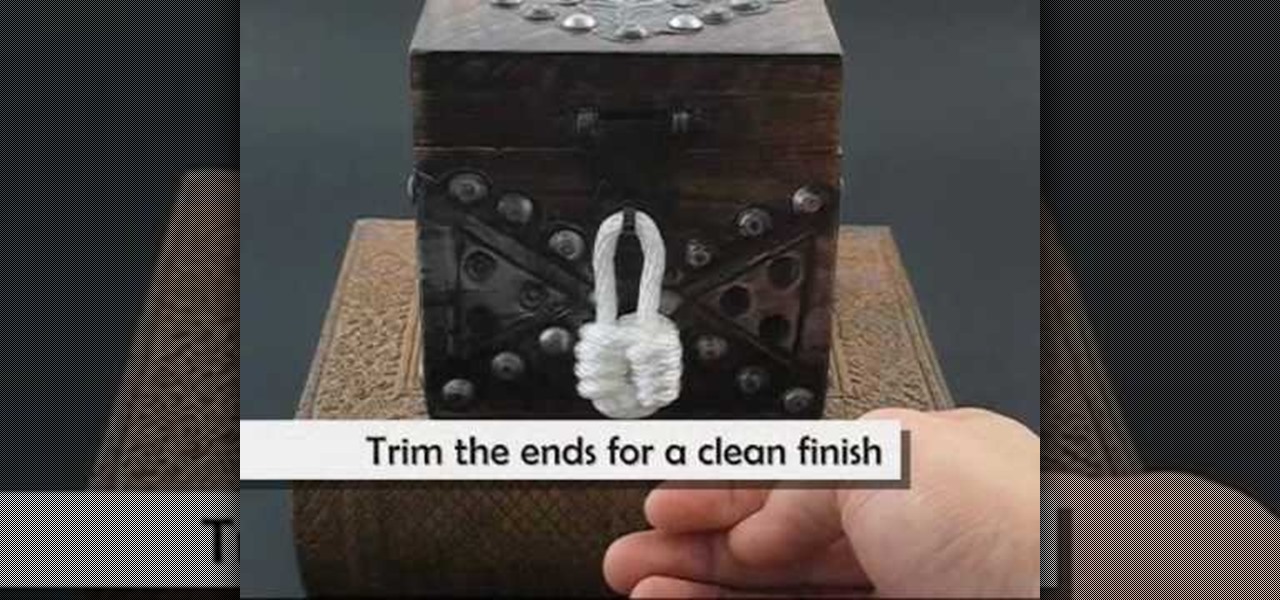
The padlock knot is designed to look like a padlock, but without the actual function of one. In order to tie this knot take your rope or string and fold it in half. After you have done that make a loop with both sides of the rope making sure you leave a loop at the top. Put the two loops together the one in the front turning clockwise and the one in the back counter-clockwise. Make sure to leave a hole in the center for the rope to pass through. Now wind each piece of rope through the hole in...
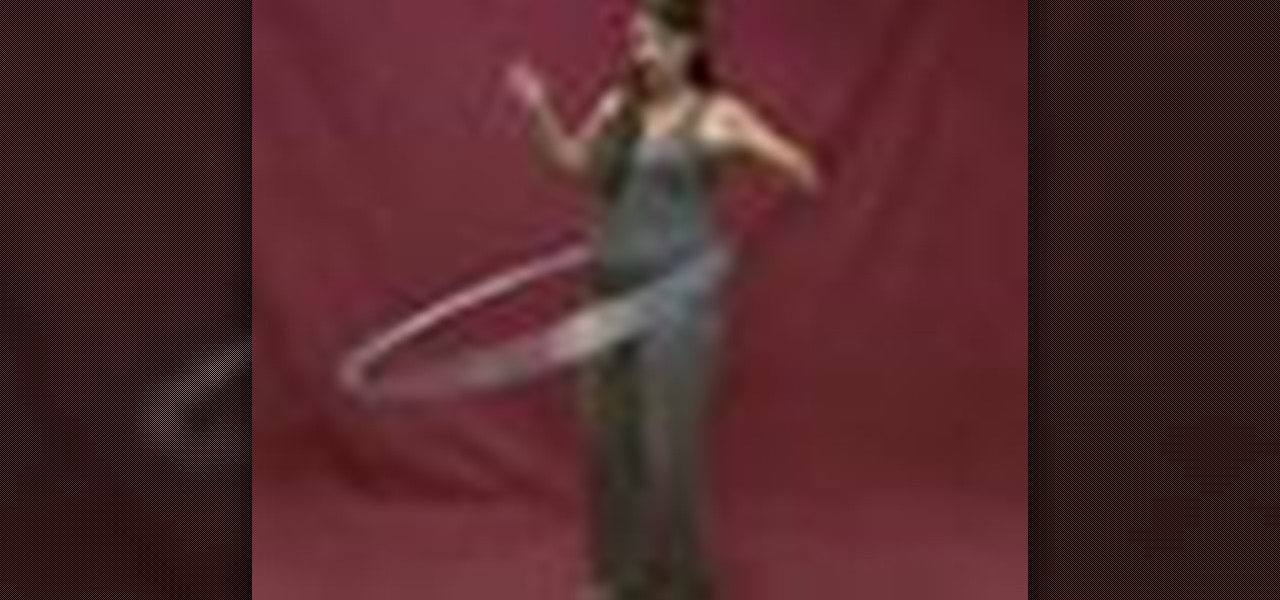
Hula-hooping isn't just for kids. It's a fun and exciting way to stay in shape. You Will Need
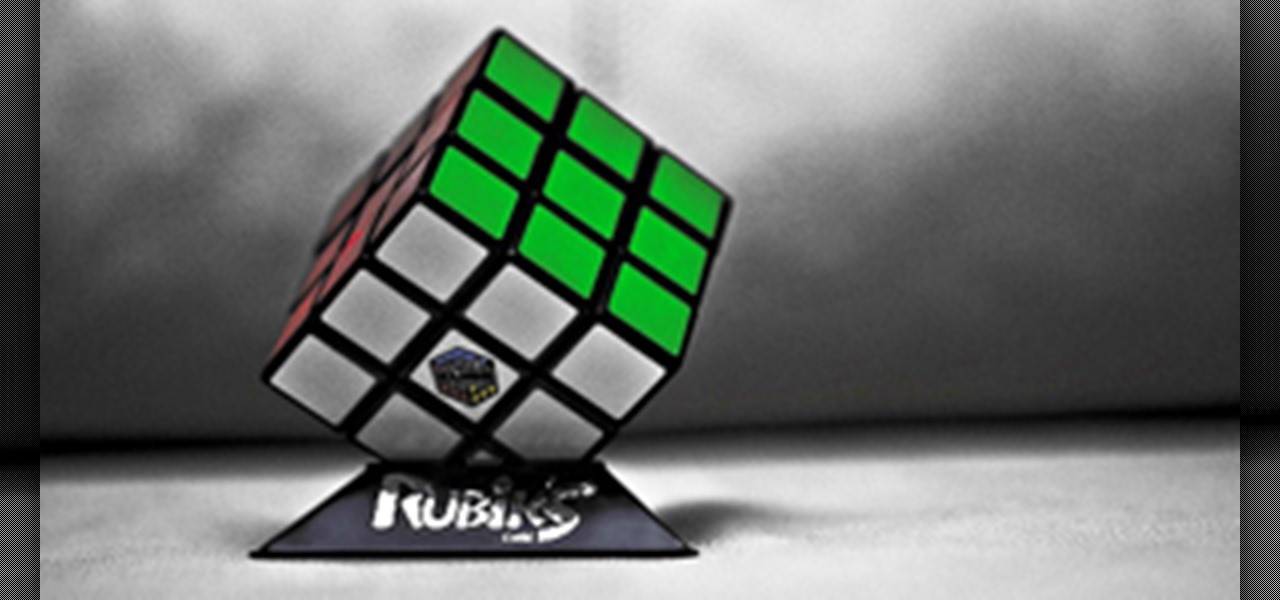
Tyson Mao is a renowned world competitor in solving the Rubik's Cube. Not only did this Californian become a world class solver, but he also formed the Rubik's Cube Association with fellow speed solver Ron van Bruchem, which holds competitive events for the Rubik's Cube. If you want to learn how to solve the colorful and mighty puzzle, then who better than to learn from then Tyson Mao?

If you don't want to use a preloader bar, you can use the circular animation instead. This tutorial shows you how to code a circular preloader and have the animation go either clockwise or counterclockwise using a mid-level masking technique in Action Script 3.0.

This is a video guide on how to do windmills in break dance. He's doing a counter-clockwise version. This is very difficult and involves balancing on your hand while twirling around. You must support your whole body weight with one arm. It is good to practice this breakdancing move on carpet so you don't smash your face up.

The tarbuck knot is a non-jamming knot, great for when the rope will be bearing a heavy load, and shocked with sudden weight. Form the loop around the winch then make a serises of turns around the standing part in a clockwise direction. Bring the running end down to the base of the runs and make another clockwise turn finishing off with a figure eight through the exiting strand from the top turn. Watch this video knot-tying tutorial and learn how to tie a tarbuck knot.
This is indeed a great instructional video on how to make a paper wind chime. The products you need to make paper wind chime are mixing grinder, scissors, paper, business card, pencils and a thread .First you draw a circle using the cup on a paper. Cut a few circles out of the paper. Draw x in the middle of all circles. Then make a hole in the middle of all circles. Now place the circle in side the grinder and let it rotate fast. now you can add colors as you like. Similarly you can make all ...
Follow the guidelines outlined in this video to learn how to draw a star well. The first step is to draw a letter V upside down. Secondly move the paper clockwise and draw another V upside down connected to the previous V. Keep repeating this process of turning the paper, until you draw five V shapes, each one connecting to the next one. Finally, you should have drawn your star accurately.

The bowline on the bight knot, demonstrated in this how-to video, is tied by doubling the line. Create a clockwise eye then thread the bight through the loop and bend the bight back over the loop. Work the knot by pulling the standing part. Watch this video knot-tying tutorial and learn how to tie a bowline on the bight knot.

This violin video tutorial provides a brief guide on how to replace a broken violin string. Follow these steps to repair your violin and start playing again: remove the broken string, replace it with a matching string (the beaded end fits into the adjustor), turn the peg in a clockwise direction, make sure the string is on the groove, and tighten. You are now ready to tune your violin.

In order to do the increase your strength, through the Pedestal Pose Routine, you should begin in a modified pushup position. Resting on your elbows and looking down at the ground/floor, while you rest on pointed toes. Hold each pose for 20 seconds. Next, rotate over to one side. Remain resting on one elbow. Next, roll over onto your back, resting on both elbows. Next, roll over onto your other elbow. Make sure that you keep your spine aligned in all poses.

Dark circles are a pain, they show lack of sleep or a night of crying all over your face the next morning. In this video, learn about undereye bags and just what causes them. Dr. Goldfaden will also teach you how to prevent and remedy those pesky circles. Check out this tutorial and look freshfaced and ready to conquer the world everyday.

This video illustrate us how to draw professor E. Gadd in Mario paint. Here are the following steps:Step 1: Draw a circle and within the circle draw another circle at the center.Step 2: Now from the periphery draw another circle so that half of the circle is in the circle and the other half on the outer part of the circle .Step 3: Now draw another circle another circle in similar manner on the opposite side.Step 4: Now draw three circles within the two circles drawn so that they form a hazel,...
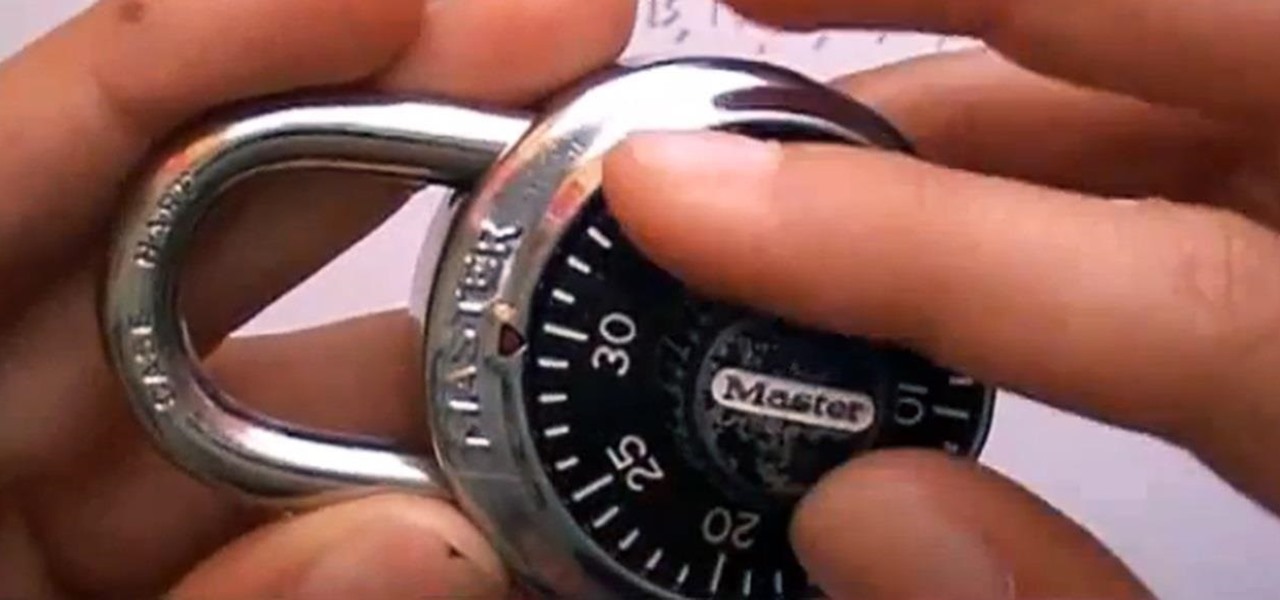
Lock picking is a great skill that takes lots of practice and patience to master, but some locks simply can't be picked, like a Master Lock combination padlock. With a combination lock, you'll have to do it the old-fashioned way—cracking combinations.

In this how to video, you will learn how to tell the difference between a tunable and non-tunable bodhran. A tunable bodhran has a tuning mechanism to allow you to adjust the skin tension. A non-tunable bodhran is actually tunable, but it just needs more time to do so. A tunable drum has the tuning mechanism in the inside. They are lugs pressing on an inner hoop. When the key is turned clockwise, this will make it tighter. Make sure to go crisscross rather than around the circle when tuning. ...

The first part of the dance routine to Every Little Step is to step to the right and bring your left foot to your right. Now do a step to the left and bring your right foot to your left. Repeat. The next step is to take your right foot and move put it in front of you. Now take the same foot and move it behind you. Next, make a circle going counter clockwise using only three steps. Repeat these moves from the time you stepped foward. Now repeat the four steps you made going from side to side t...
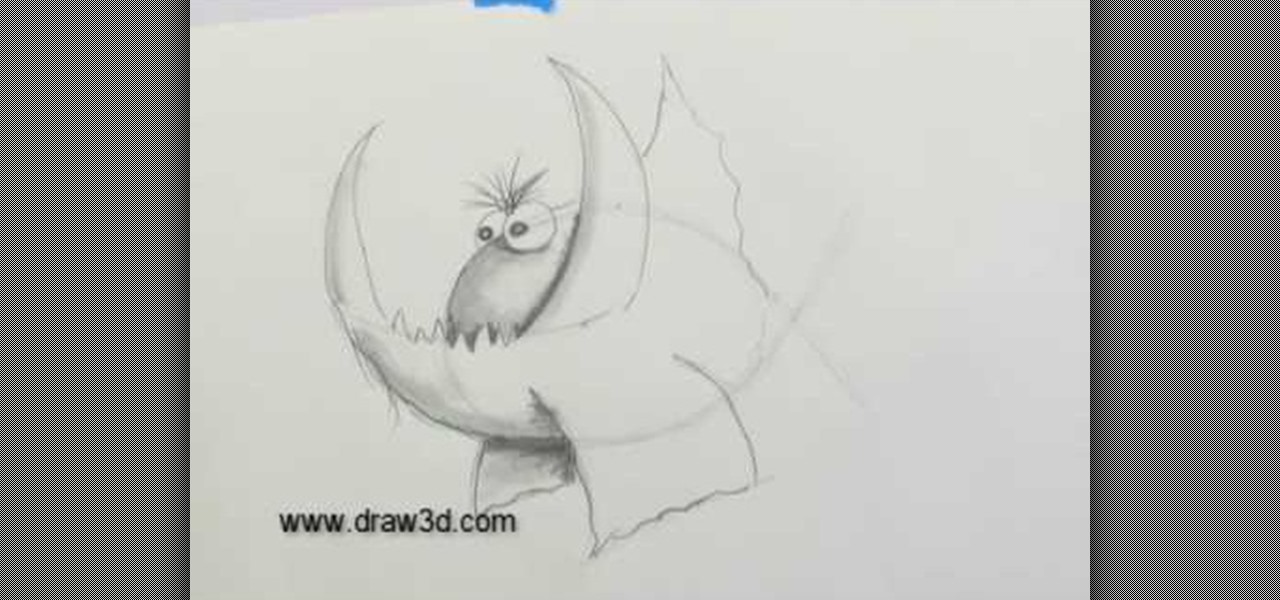
This video illustrate how to draw a 3D fanged fish. Here are the following steps.Step 1: Take a sheet of paper and pencil and start drawing a circle forming the face of the fish.Step 2: Now in the middle of the circle draw an wavy line showing the jaws of the fish.Step 3:Now draw two small circle on the boundary of the circle forming the eyes of the fish.Step 4: Now from the jaws draw two fins in opposite direction to each other.Step 5: Now draw Two fans beneath the face showing the back fins...
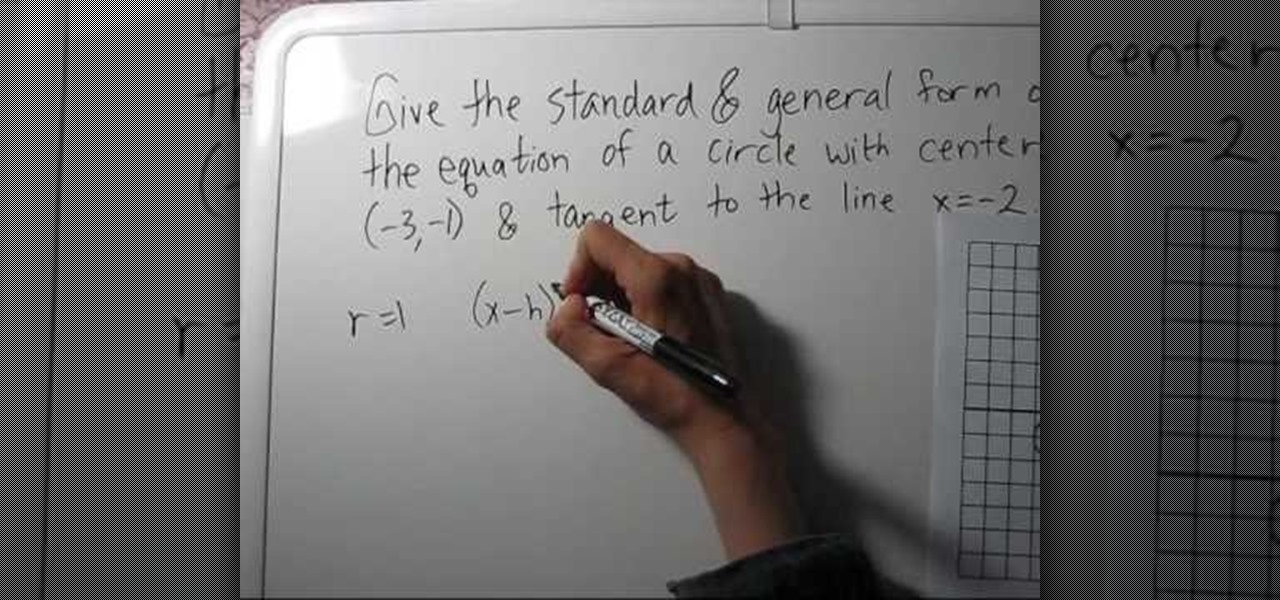
In this video, the instructor shows how to find the equation of a circle given its center point and a tangent line to it. To do this, take a graph and plot the given point and the tangent on that graph. Now, from the center of the circle, measure the perpendicular distance to the tangent line. This gives us the radius of the circle. Using the center point and the radius, you can find the equation of the circle using the general circle formula (x-h)*(x-h) + (y-k)*(y-k) = r*r, where (h,k) is th...

In this classic game of musical chairs, everyone gets a prize. You Will Need
Tired of losing your shirt playing poker? How about a fun game for couples instead? You Will Need

Take a look at this instructional video and learn how to draw a sphere in Google SketchUp. First you'll want to draw a circle, then orbit to a side view. Draw a second circle from the center and perpendicular to the first, then select the first circle. Pick the follow me tool and click on the second circle. Erase the first circle and you'll have your sphere!
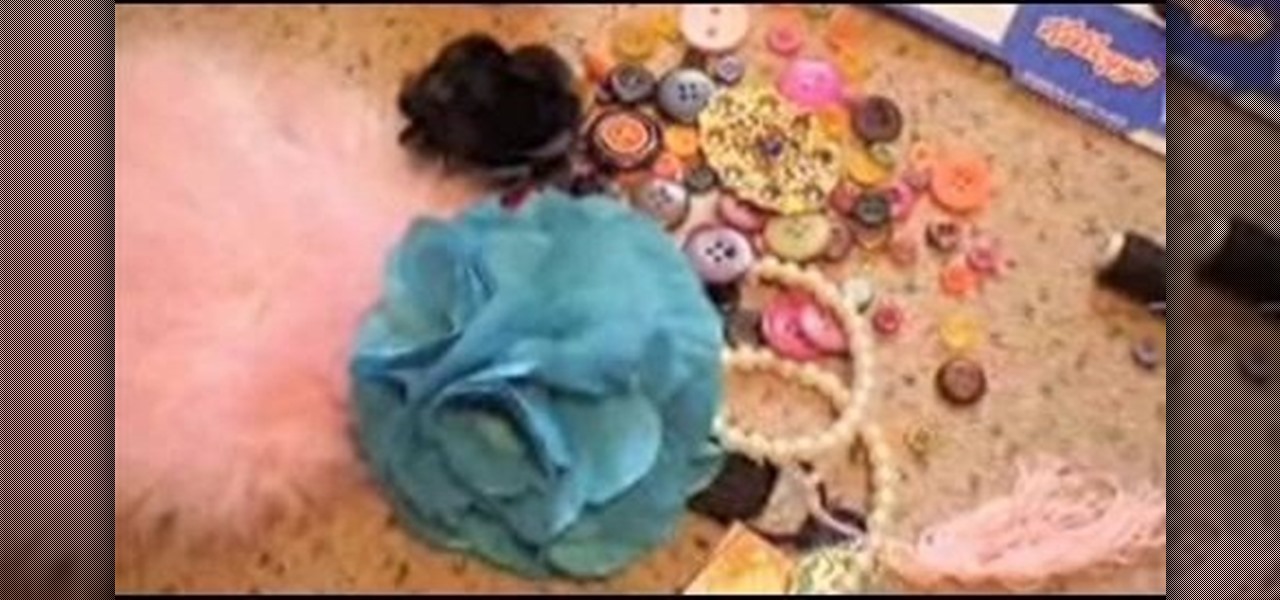
Materials: Scrap fabric, elastic thread, cardboard, scissors, cellophane tape, and other bits and bobs ie feathers, buttons