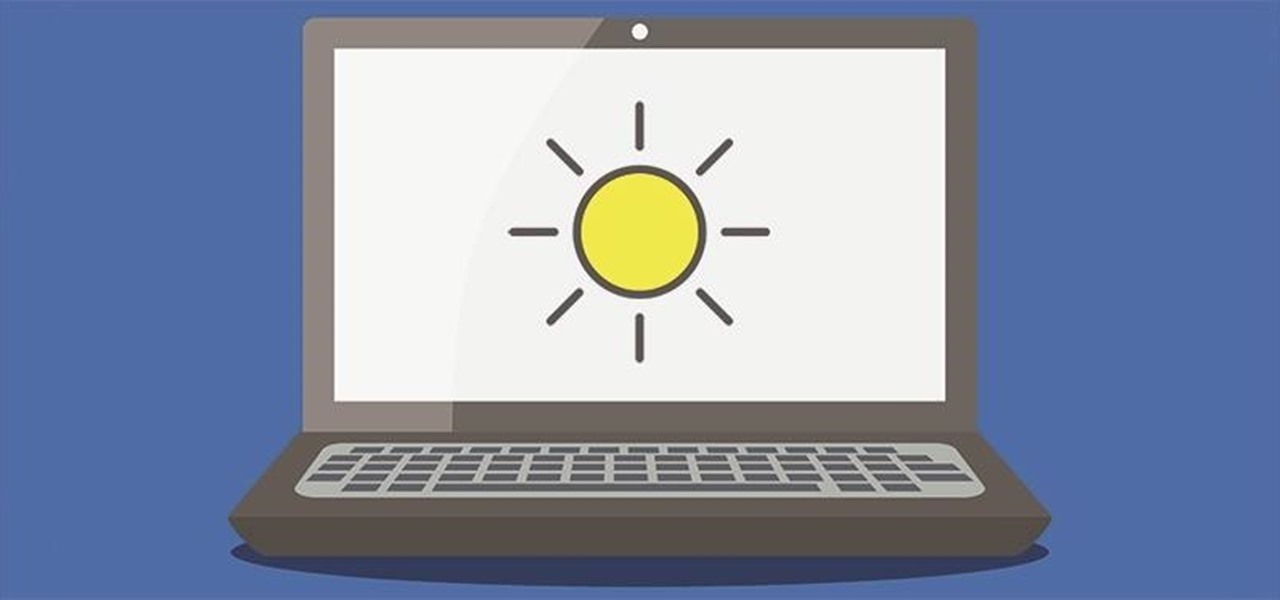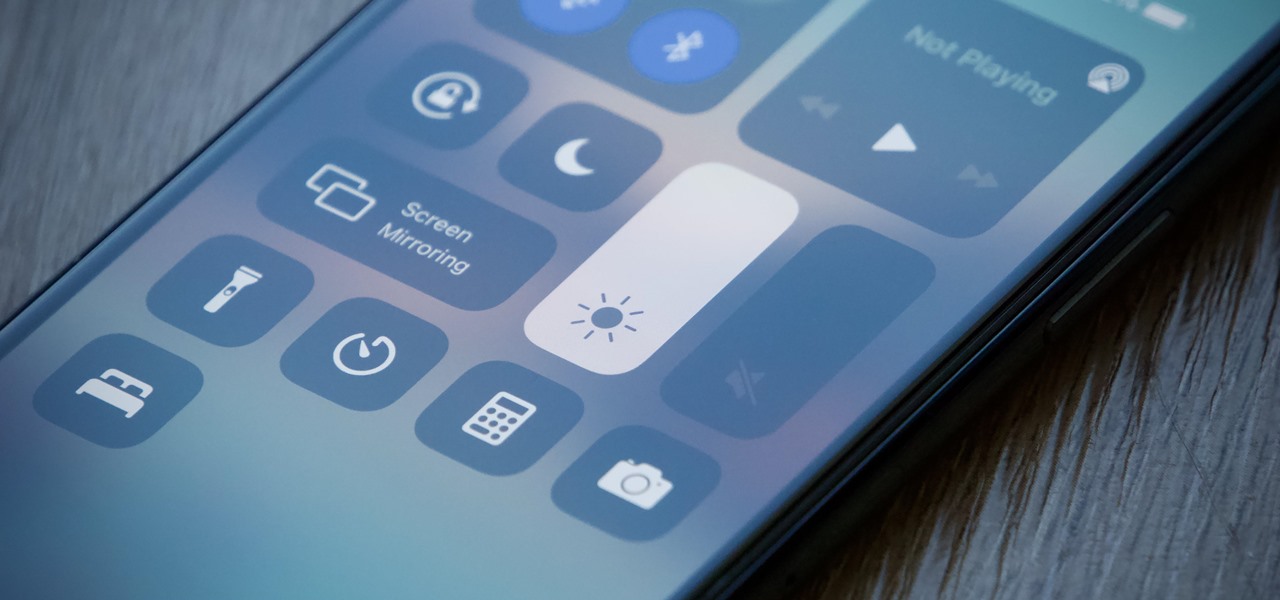
When you want to brighten up your iPhone's screen, you likely use Control Center's brightness slider to increase your nits (especially if you've disabled auto-brightness). But once you max it out, it doesn't seem like the display can get any brighter. However, depending on your iPhone model, your display may be capable of getting a lot brighter based on how you use it.
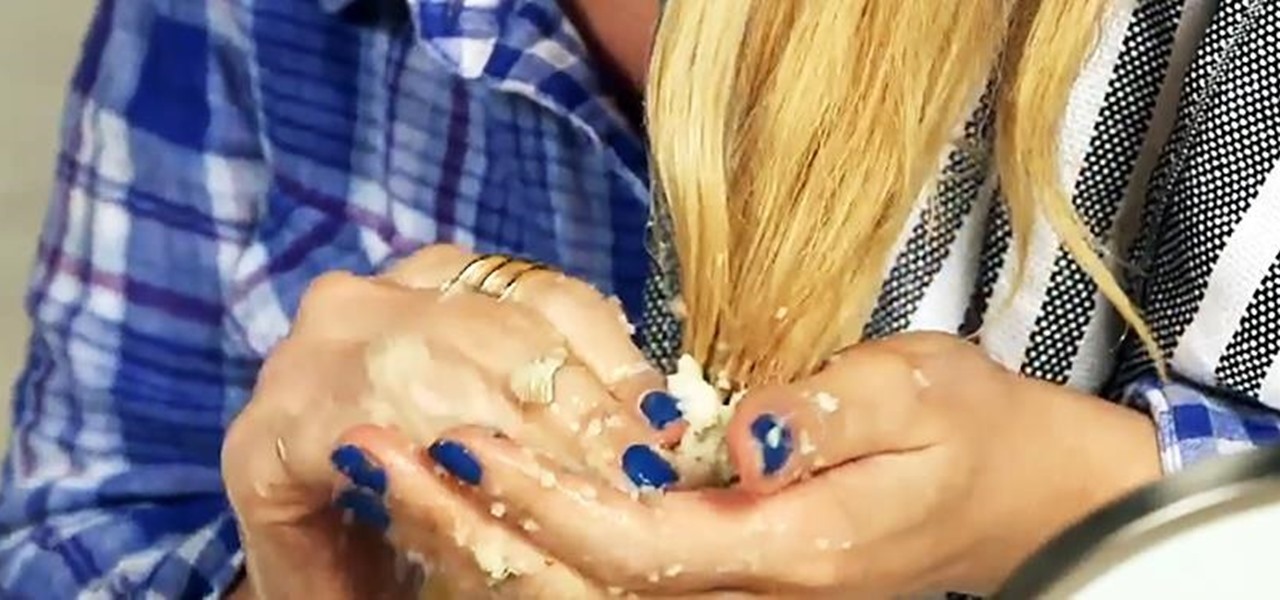
Whether you paid a few hundred bucks at the salon or just used the drugstore boxed stuff, it sucks when your hair color doesn't turn out the way you want. You can lighten the overall color with vitamin C, but if you're specifically looking to remove brassy tones from blonde hair, there's a better way to go.
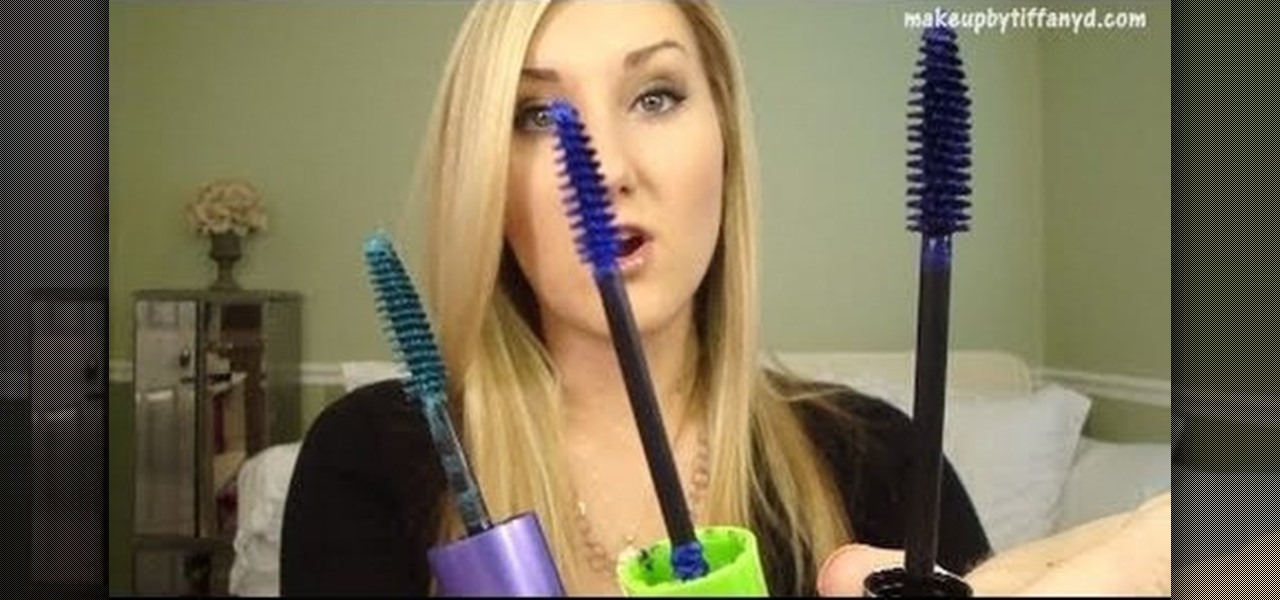
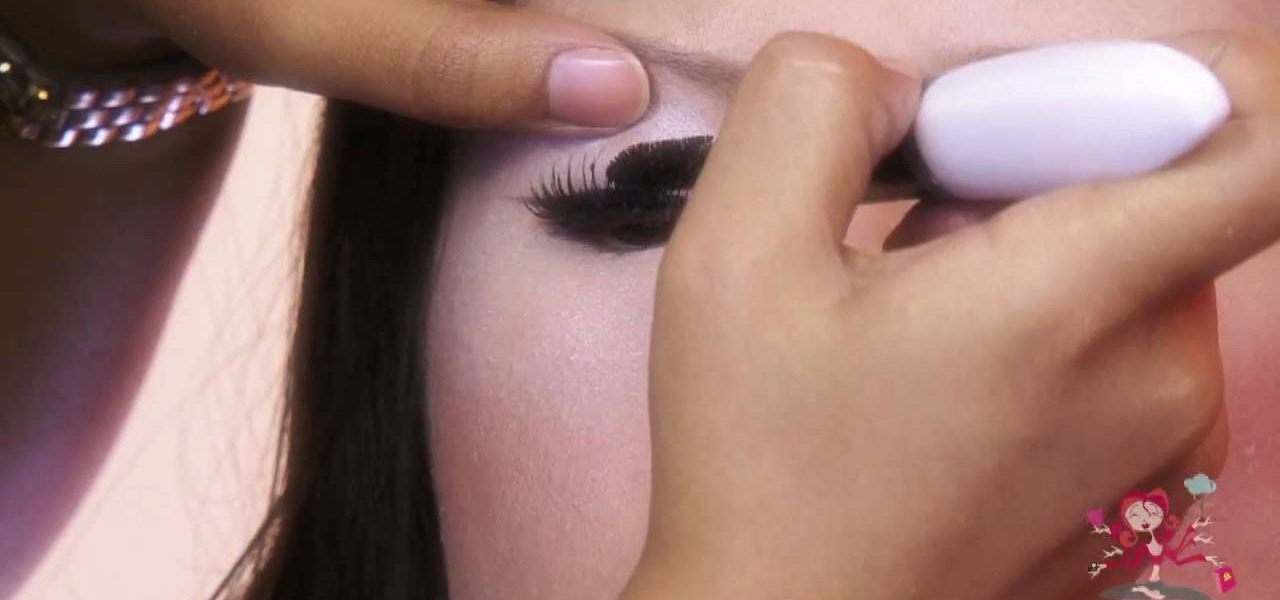
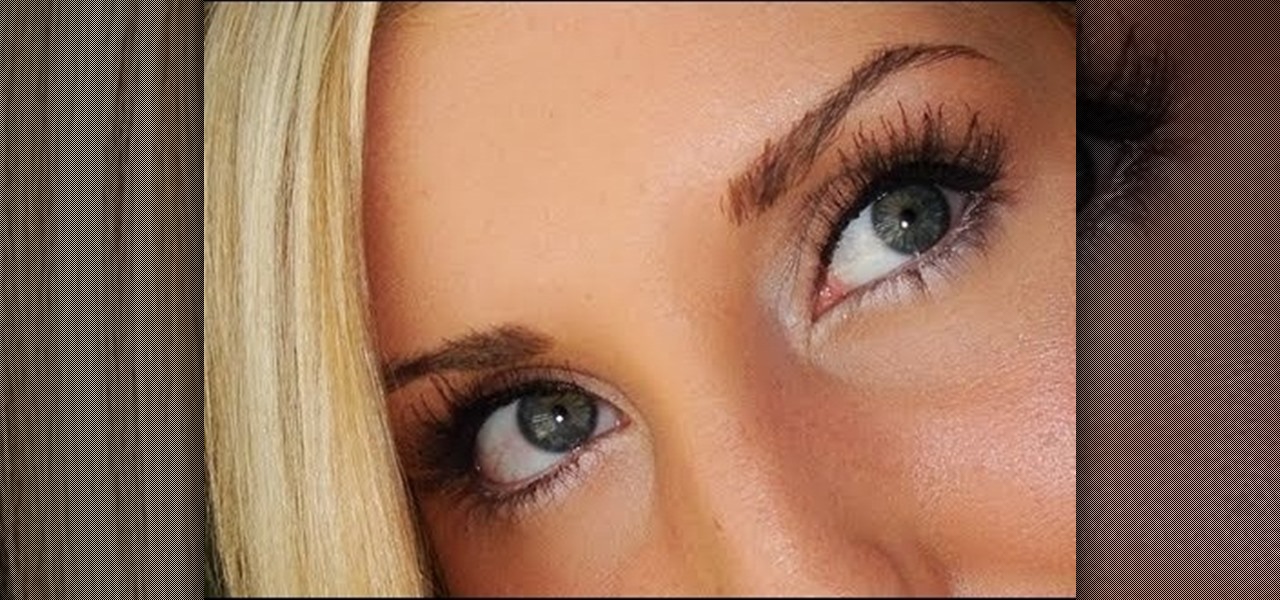
Don't worry, you won't look like a smurfette if you wear blue mascara instead of black. Blue mascara sounds kind of like something only teenage punks in art class wear, but in fact it's a great alternative for black for any girl.
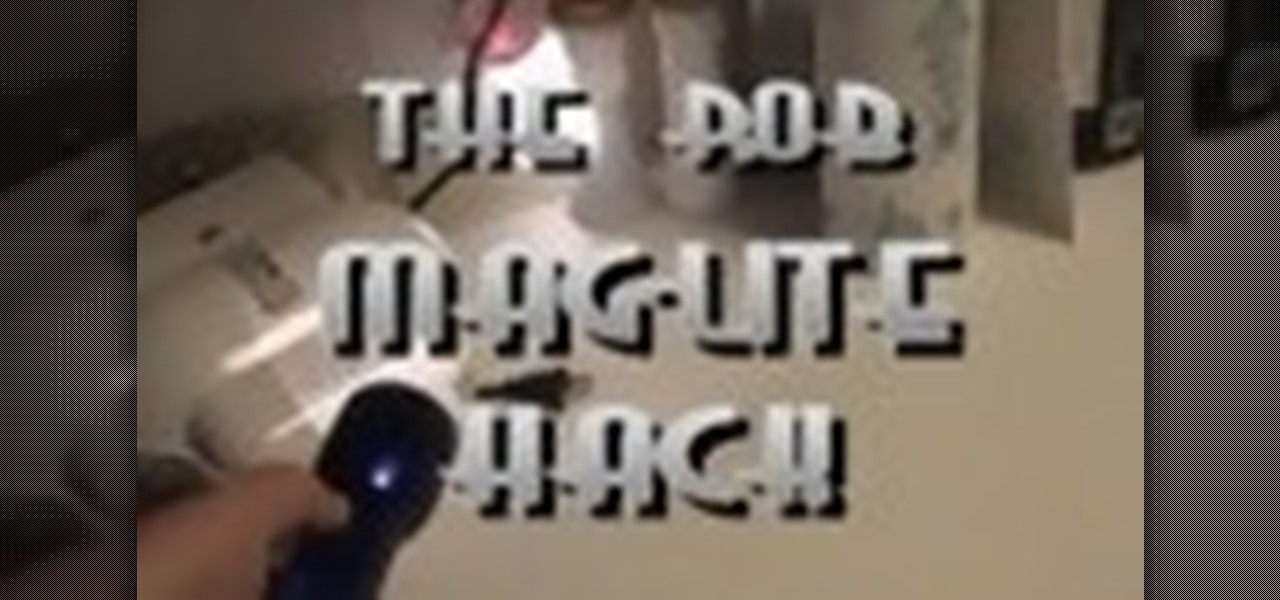
See how to hack a two "D" cell Maglite to make it much brighter. This is a cheap but very power light of 700-800+ lumens, brighter than other hacks.
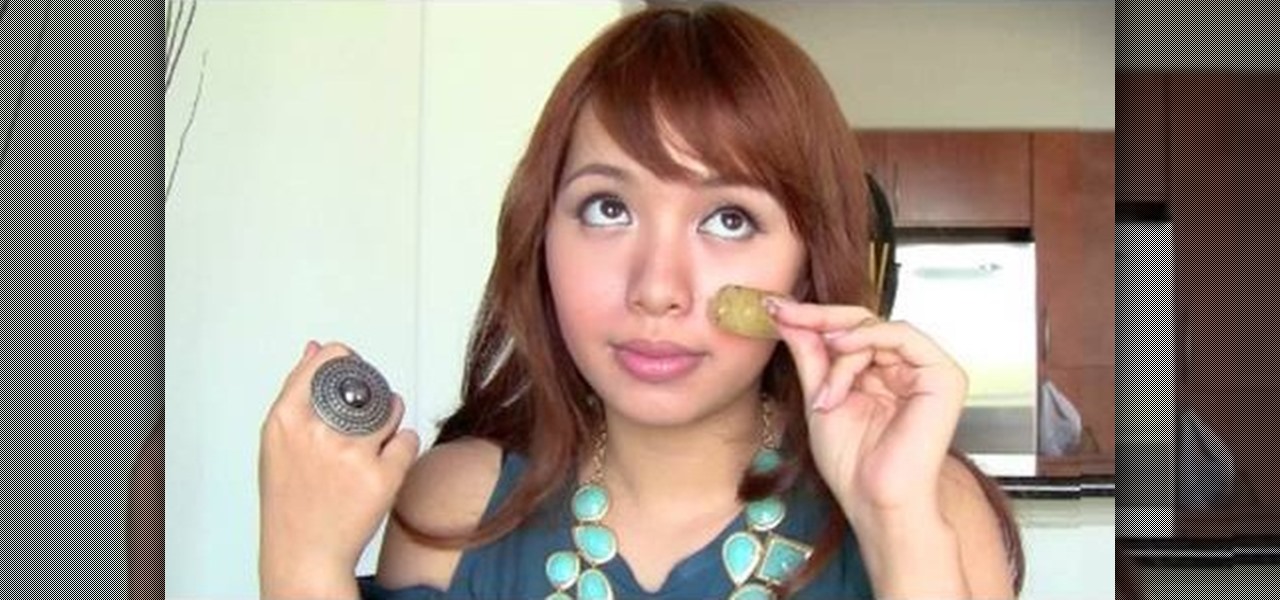
Dermatologists and aestheticians looking to make a quick buck (or several hundred of them) will tell you that the best facial exoliation and brightening treatments can only be done via the doctor's office with specialty (read: pricey) enzymes, but the truth is that for short term skin bliss, you already have all the tools you need in your kitchen.
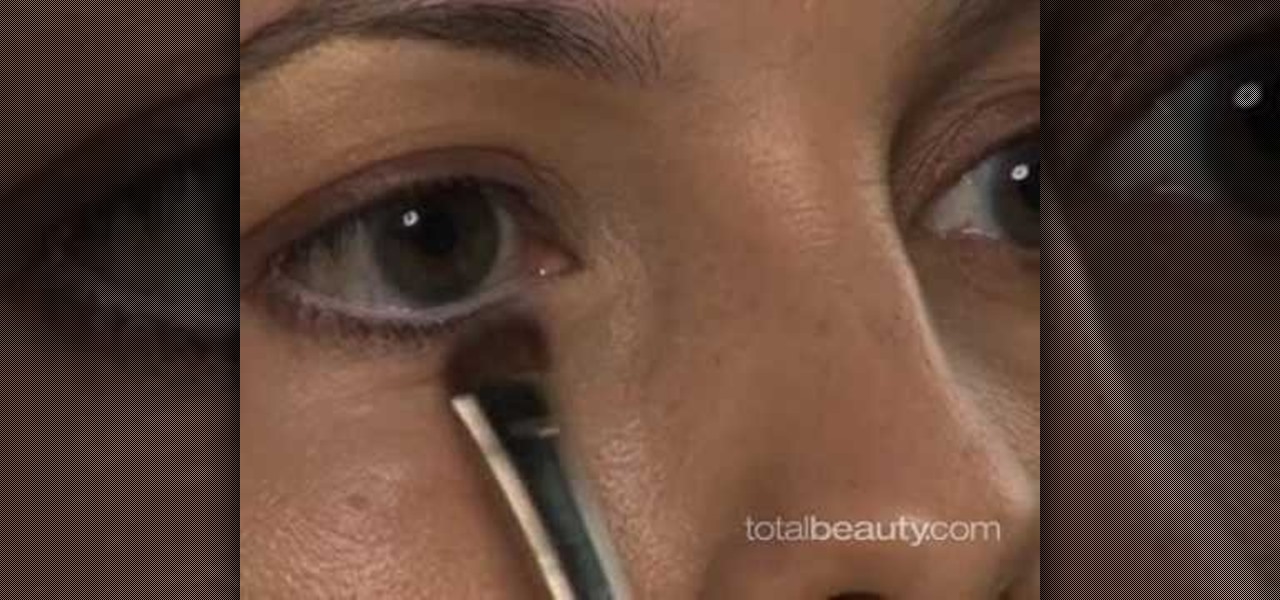
We all have those days when we wake up and we look, well, pretty darn terrible. Whether you had a late night doing overtime at work or are still getting over a hangover, every now and then a bad skin day will arise. Puffy bags and purple rings under our eyes don' help either.

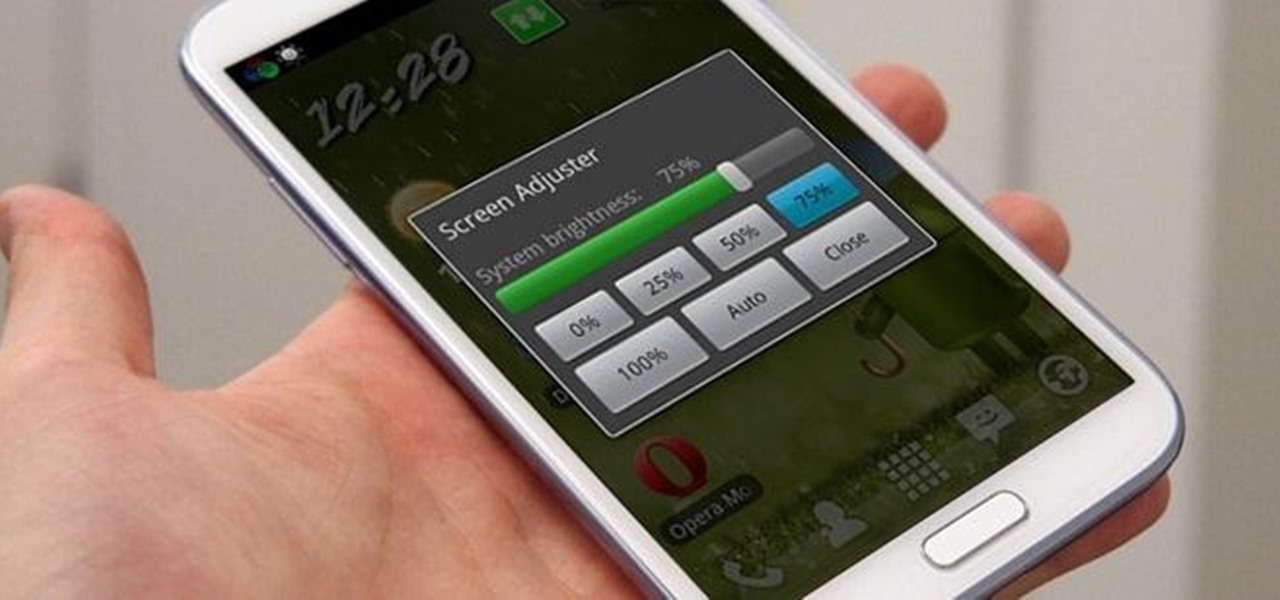
The new Android enabled phones can take up a bit of power, so knowing the best way to manage your power settings is crucial in having a fully-charged cell phone all the time. The biggest key is making sure your screen brightness isn't more than it should be. Best Buy has answers. The Best Buy Mobile team explains how simple it is to adjust screen brightness to save battery life on an Android cell phone.
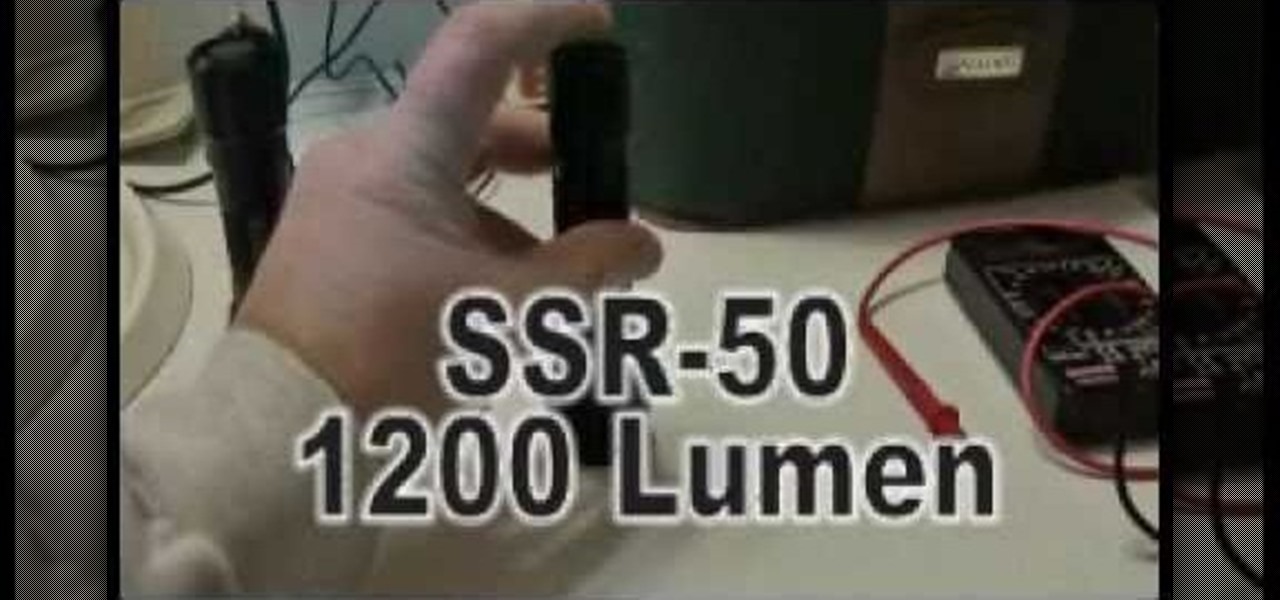
Make a $100 super bright cop flashlight for less than $10, as shown in the steps of this how-to video. This flashlight is brighter than a Surefire and is so easy to do. You will need a compact flashlight, a Krypton flashlight lamp, a file or drill bit, and 3 volt batteries. Watch this video circuitry tutorial and learn how to modify a cheap plastic flashlight into giving off a stronger, brighter light.
Hit the lightbulb with a rubber ball and it will magically become brighter. Anybody know how this works?
Begin with starting the program Picasa. If the program has been opened, choose an image for editing. Double click on one of the images and it will open. On the left of the screen there is an editing toolbar. The next option after this is to Crop the picture. Click "Crop Picture". Then choose the format you want the picture to be cropped to. Then hit Enter.The next option is "I'm Feeling Lucky". With this option you can give the picture the best color possible.Following with Redeye Repair. Cho...
The SSC P7 Flashlight is a tactical torch that's pretty bright at 900LM. But, it's totally possible to make it just a little brighter.
The Pixel XL reportedly uses the same exact display panel as the Galaxy S7 Edge, but according to third-party testing, Samsung's flagship gets at least ten percent brighter than Google's. The same can be said of the regular Pixel, which tops out just shy of its bigger brother's brightness rating.
You're smashing your keyboard to increase your screen brightness, yet it won't go any higher, but you know you've been able to set it higher before. Angered by this, you get up and move your laptop, only to suddenly notice that the display does in fact get a lot brighter.
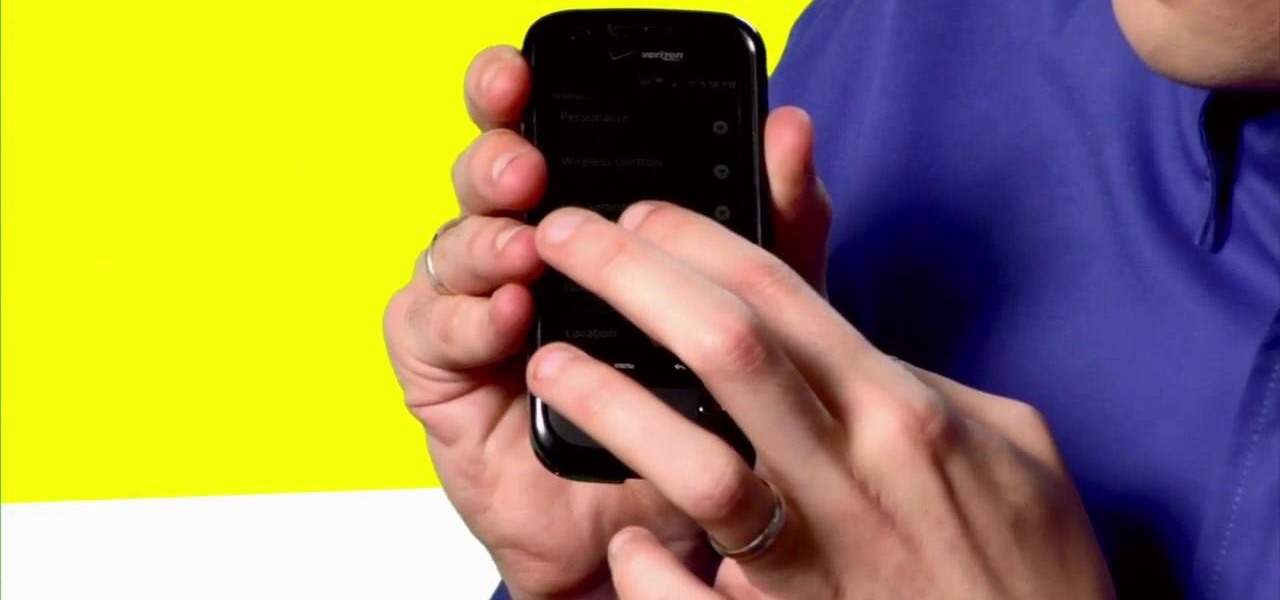
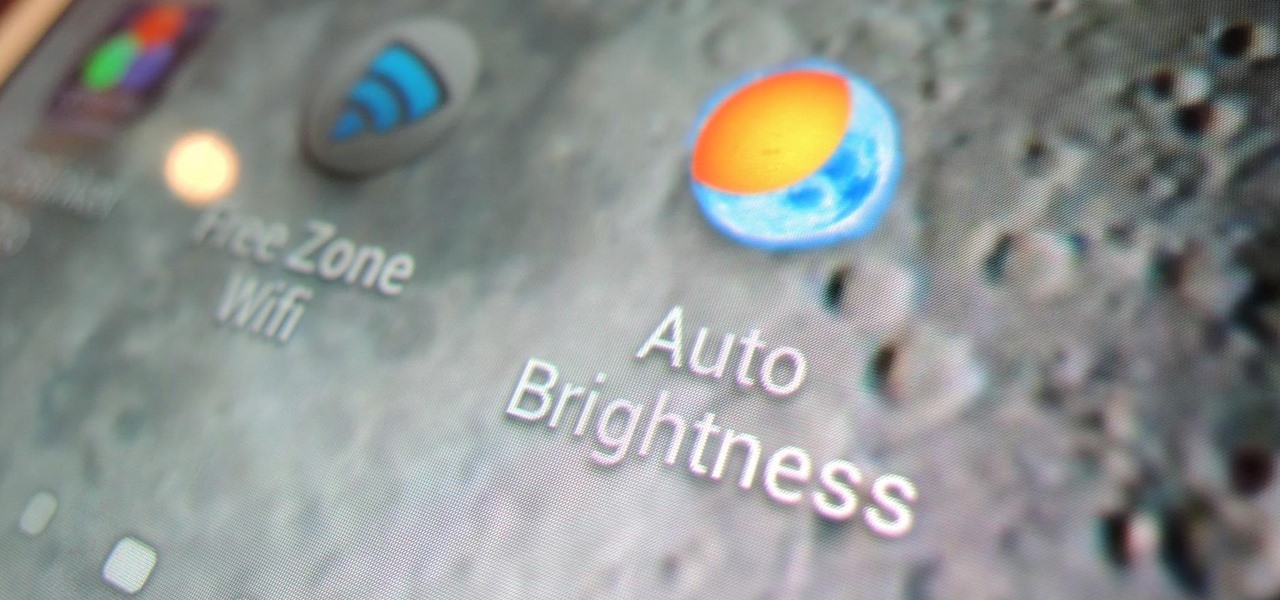
If you're constantly going from dark to brightly lit areas, you've probably noticed that the stock auto brightness feature on your Samsung Galaxy Note 2 doesn't work that well. Either the screen is really dim and unreadable, or it's just way too damn bright. Sure, you can disable auto brightness, but then you have to manually adjust the brightness all of the time for that perfect comfort level. This isn't really all that bad of an option, but don't be surprised when you see this: However, the...
Needing to use your device in bright or low lighting can require an adjustment in the phone's built-in brightness settings. However, there are times when those default settings just don't do the trick.
If you want to start the party out right, you have to impress the crowd with your awesome bartending skills. While lighting cocktails on fire is a nice way to warm up the crowd, it's been done by thousands of bartenders across the globe. Plus, if you're not careful, you could end up like this guy:
Whenever you need a flashlight, your iPhone's LED flash may be enough to break through the darkness, and you don't even need to unlock your screen to use it. But your LED flash's brightness level may be too strong or not powerful enough. It's not immediately obvious how one would change those lumens from the lock screen, but doing so is almost as fast as turning it on.
The LG G7 ThinQ will likely be lambasted for its notch and awkward name, but one thing they seem to have gotten right is the new display. The G7 ThinQ will give many a first look at a new type of panel with lots of promise. While it was previously limited to TVs, from what we know, it should really shine on a smaller screen.
This video demonstrates how to make the screen of your iPod brighter or darker. To do this, just go the settings menu, select the brightness option, and adjust the brightness to your liking. Adjust your iPod screen brightness.
Not all of us were born with Covergirl skin. In fact, we can bet that even most Covergirls (that's right Drew, even you) weren't born with perfect, front over skin. While we can use products that help exfoliate away dead skin cells and create a brighter glow, sometimes our skin just looks blah.
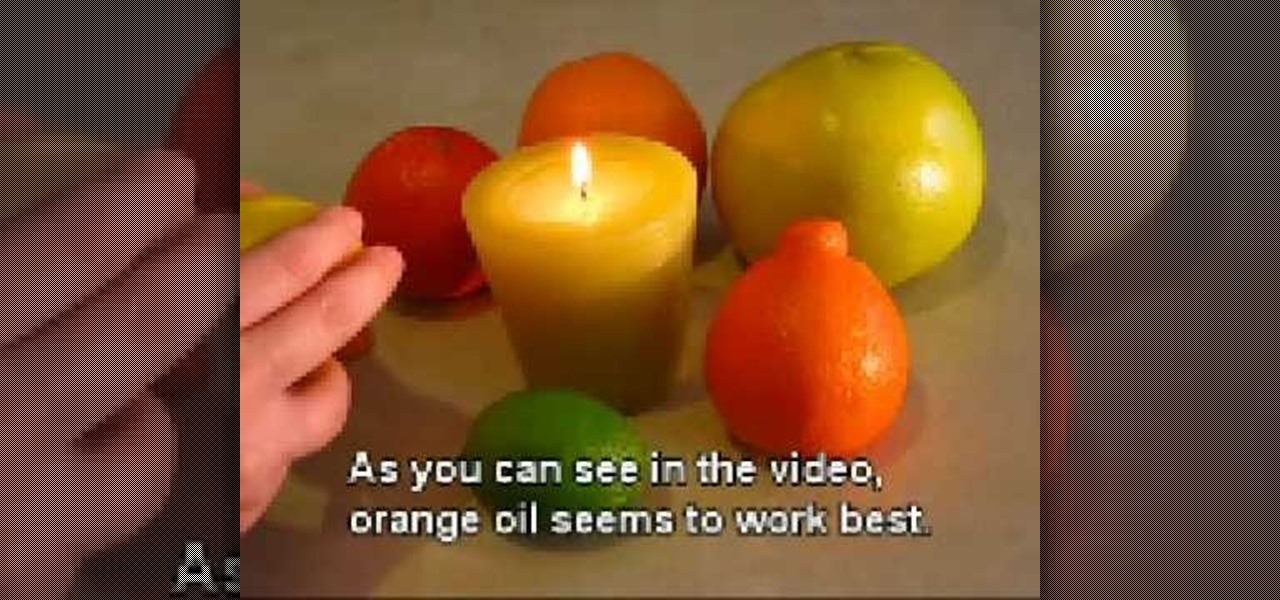
There are so many crazy fun things you can do with fire, this is probably one of the most tame. But it's got flame, so it's still cool. This video will show you how you can squeeze the peels of citrus fruits onto a candle (or large flame for increased fun) and the acid will cause the flame to burn larger and brighter for a flash. Experiment with different peels and flame sources for extended fun. Grapefruit work fantastically.
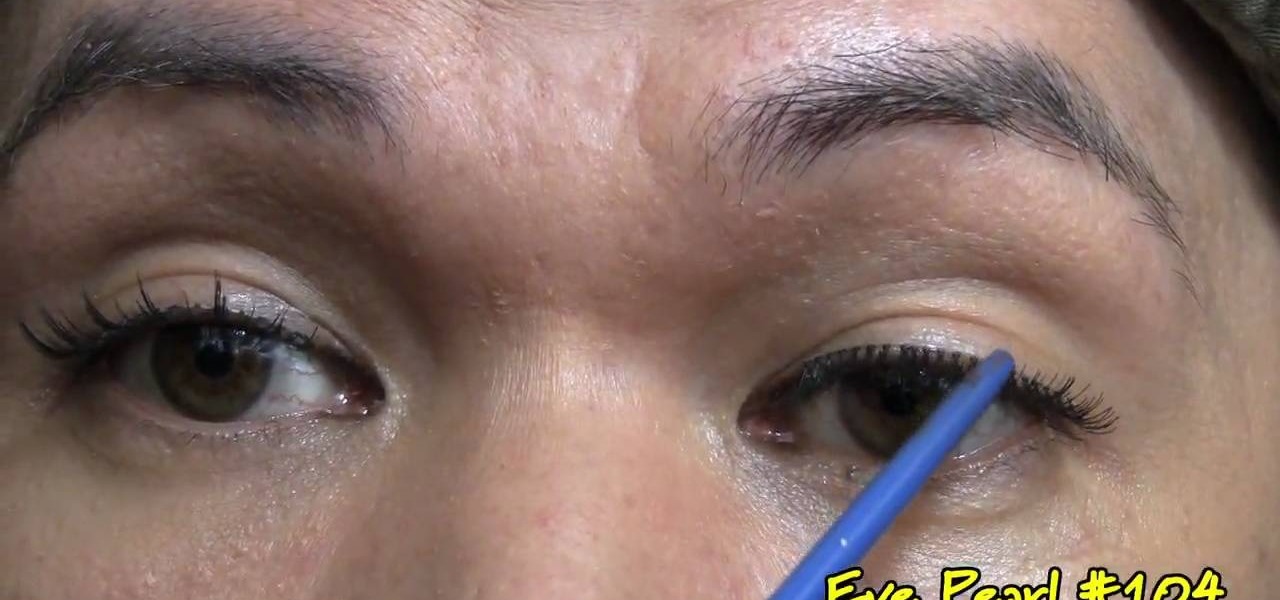
We couldn't live without false eyelashes, especially when we're going out. After all, nighttime soirees or clubbing requires a hefty additional dosage of glamour, meaning brighter lipstick, smokier eyes, and more luscious lashes.
Watch this science video tutorial from Nurd Rage on how to make a 100 foot glow stick with Dr. Lithium.
Videomaker Associate Editor Tom Skowronski explains how four basic steps can be used to improve the lighting effects for a video and give it a more professional look.
The video is basically about how to modify the focal point of the image. When the image has some stuff on the background and when you want the viewers to focus more on one particular area and making the rest of the image darker, you need to modify the light values of the image, which will be taught in this video. This can be done by just selecting the area, which you need to highlight on the image by giving some border and then add curves. In the curves the area is made darker than the rest b...
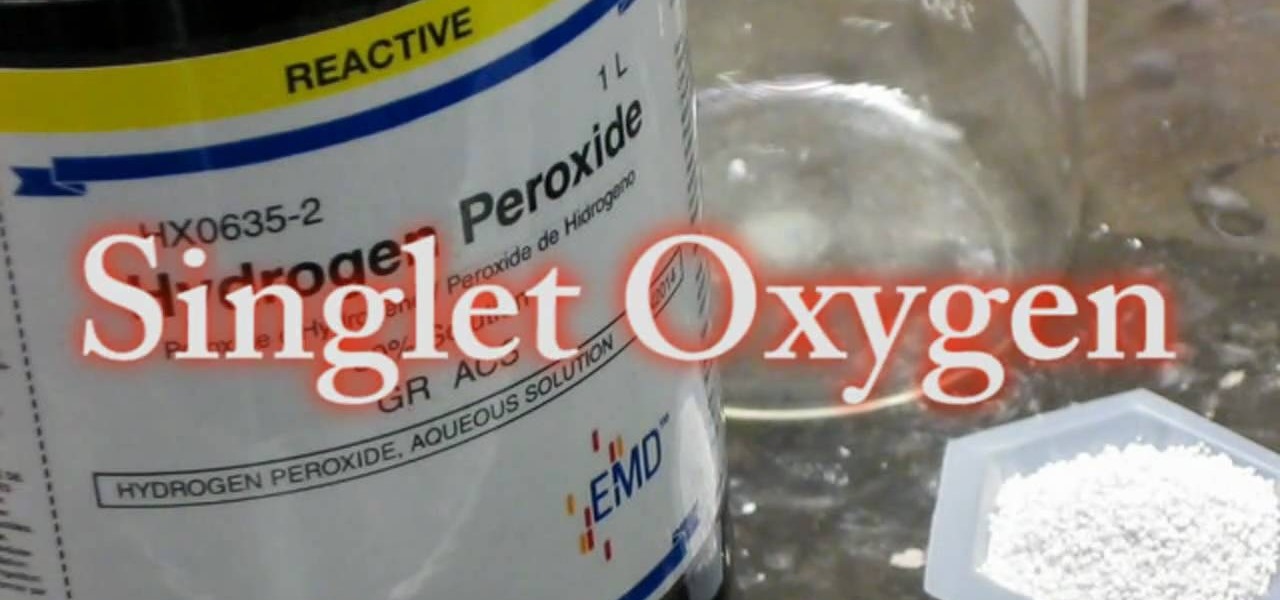
Watch this science video tutorial from Nurd Rage on how to make a chemiluminescent reaction with home chemicals. Make a chemiluminescent singlet oxygen red light pulse from two simple chemicals almost anyone can buy: pool chlorine and hydrogen peroxide.
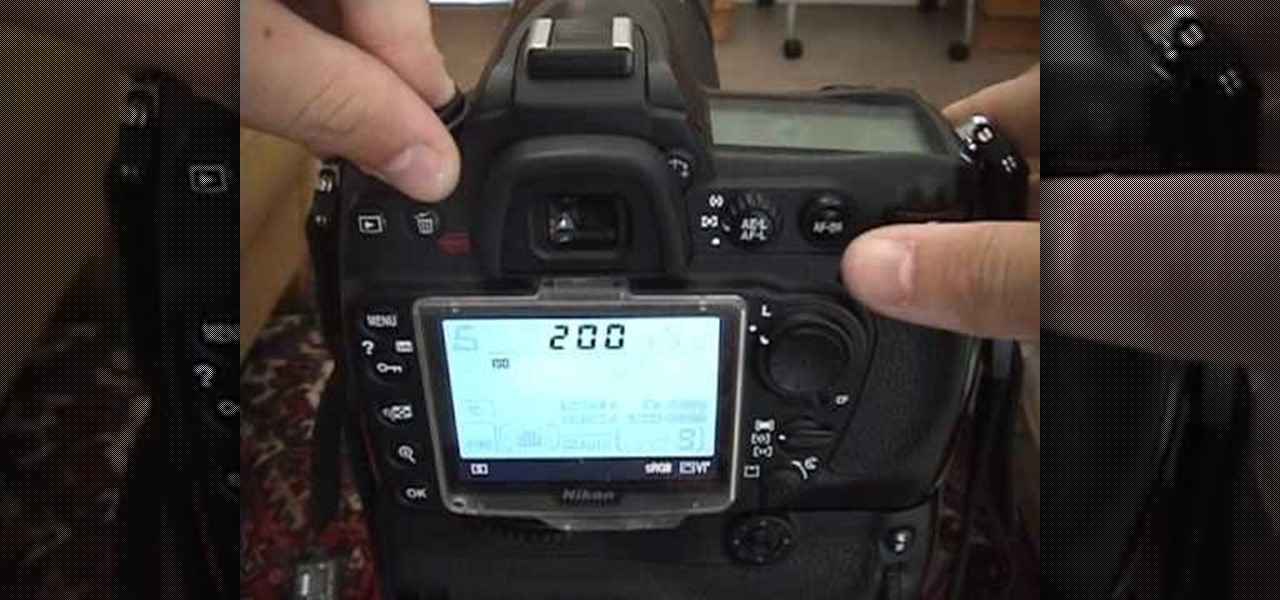
This video gives viewers an overview on how to use the manual settings of your DSLR camera. Aside from the Auto setting, your DSLR camera has the P-mode which is the program mode, S-mode which is the shutter priority mode, A-mode which is the aperture priority mode and finally the M-mode which is the complete manual mode. P-mode or program mode is more like the Auto-mode in your camera. You can't control your shutter speed and f-stops (aperture) however; you can manipulate the other settings ...
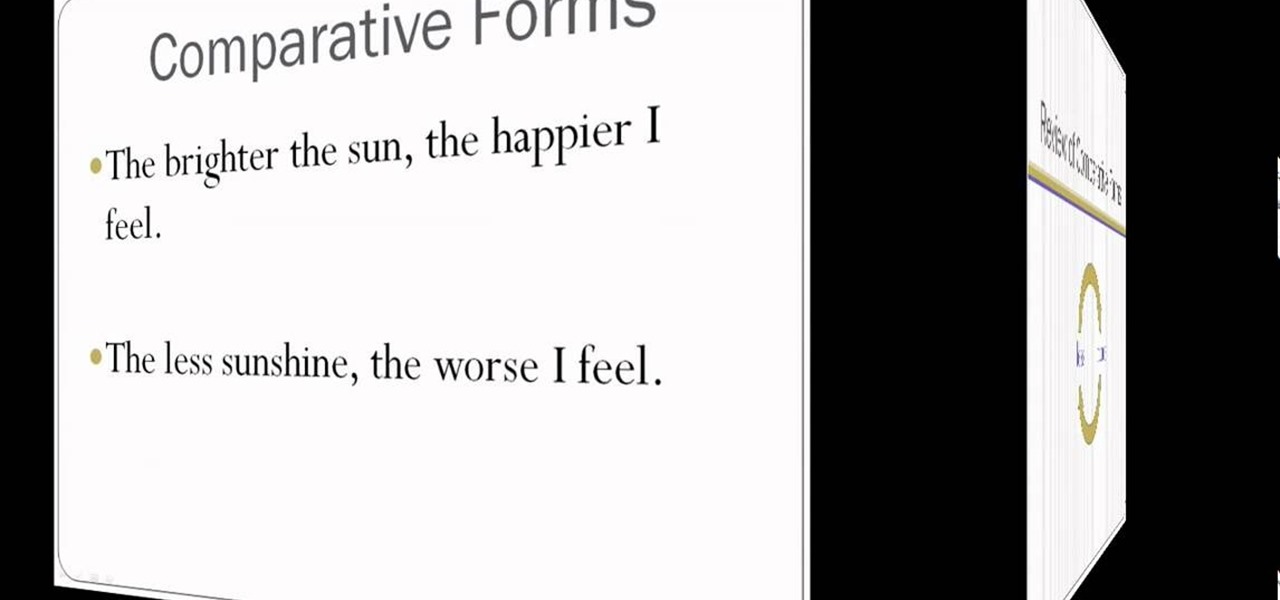
This is a tutorial segment of Double comparatives of English Grammar. In this lesson, the instructor is explaining about how to express a cause and an effect in a easier way with examples. She says that it’s the relationship where one thing makes a change on another or one factor say for example sunshine, produce a result in another by making us to feel happy. Comparative forms are used to express a cause and effect. Words like brighter, happier are examples for that. For example, in the sent...
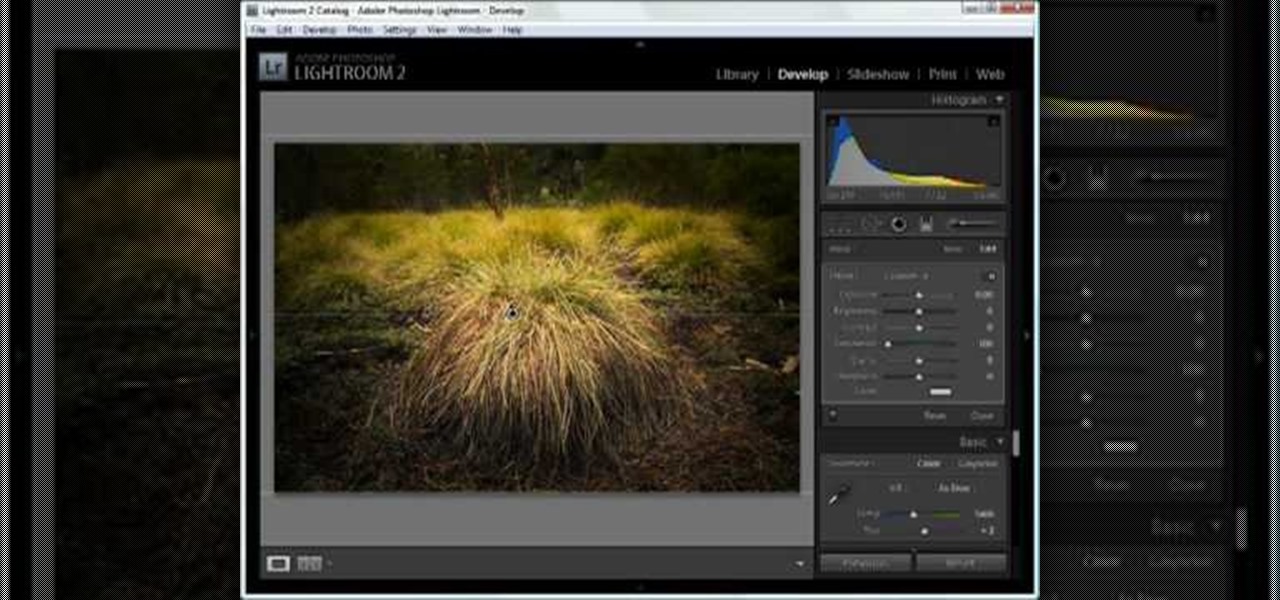
In this tutorial, we learn how to dodge and burn in Lightroom 2. First, open up your image in Lightroom 2 and use the brushes to change the saturation and the colors in the image. You can also use the graduated filter which you can use to apply effects across the image itself. Next, you can add a tint onto the picture and apply a second filter to make the top of the image darker, then make the middle of it brighter. Change the exposure and saturation to make the picture look more realistic. U...
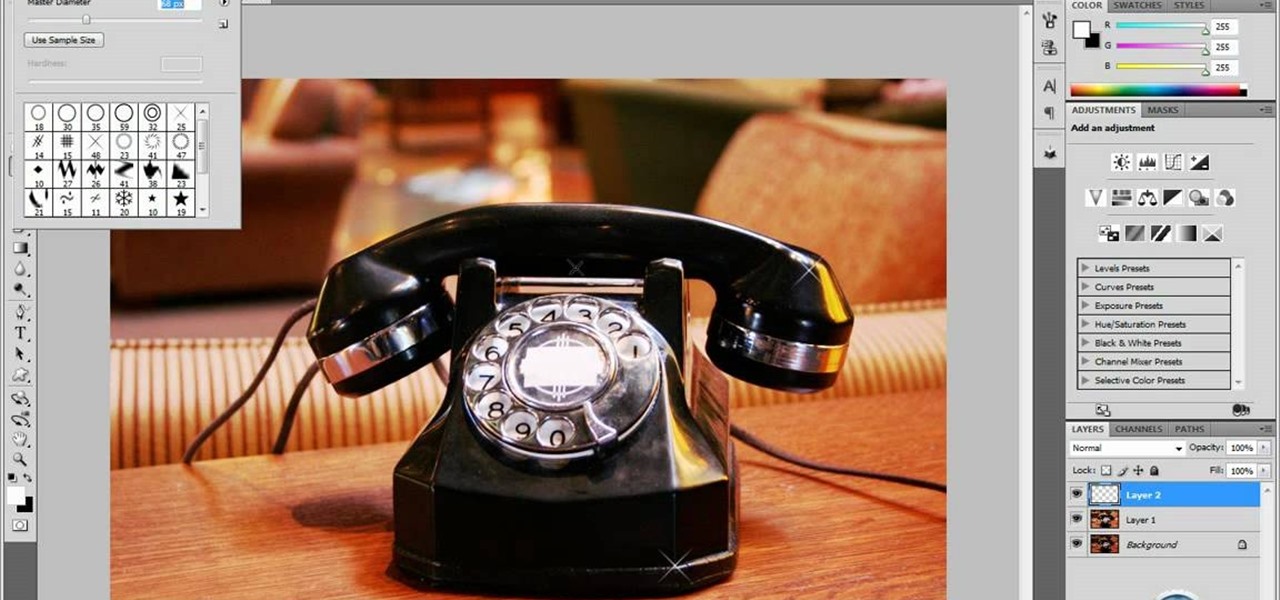
In this tutorial video, YouTube user "inteltuts" discusses ways to use Photoshop CS4 to help make better looking product pictures, as a way to attract costumers to your online products. Using a black telephone as an example, he first shows how the opacity, linear dodge, and brush tools can help make a product image look shiner, sleeker and brighter. He goes onto create what he calls "glints", which are subtle reflections and areas of sparkling light that he places across the image. Lastly, he...
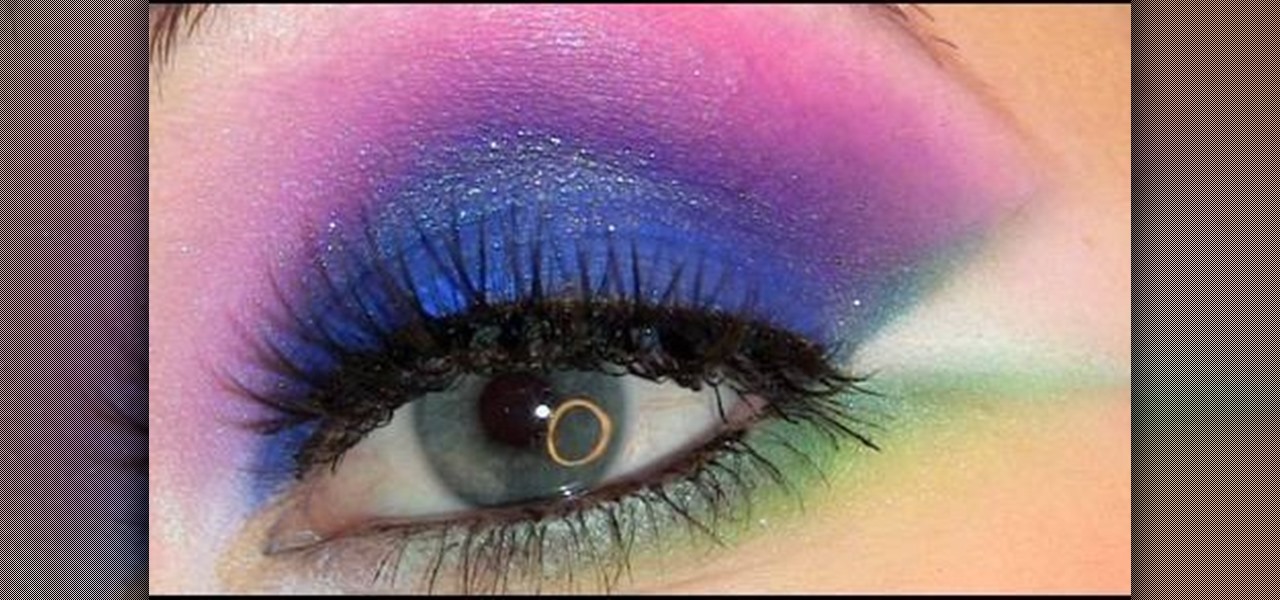
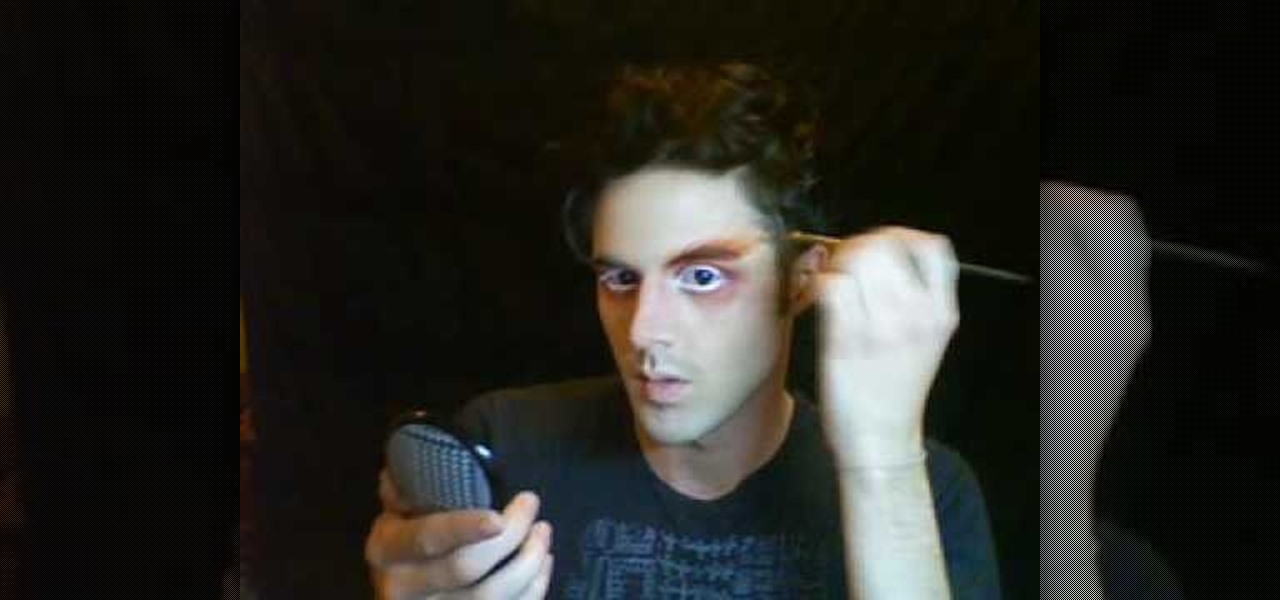
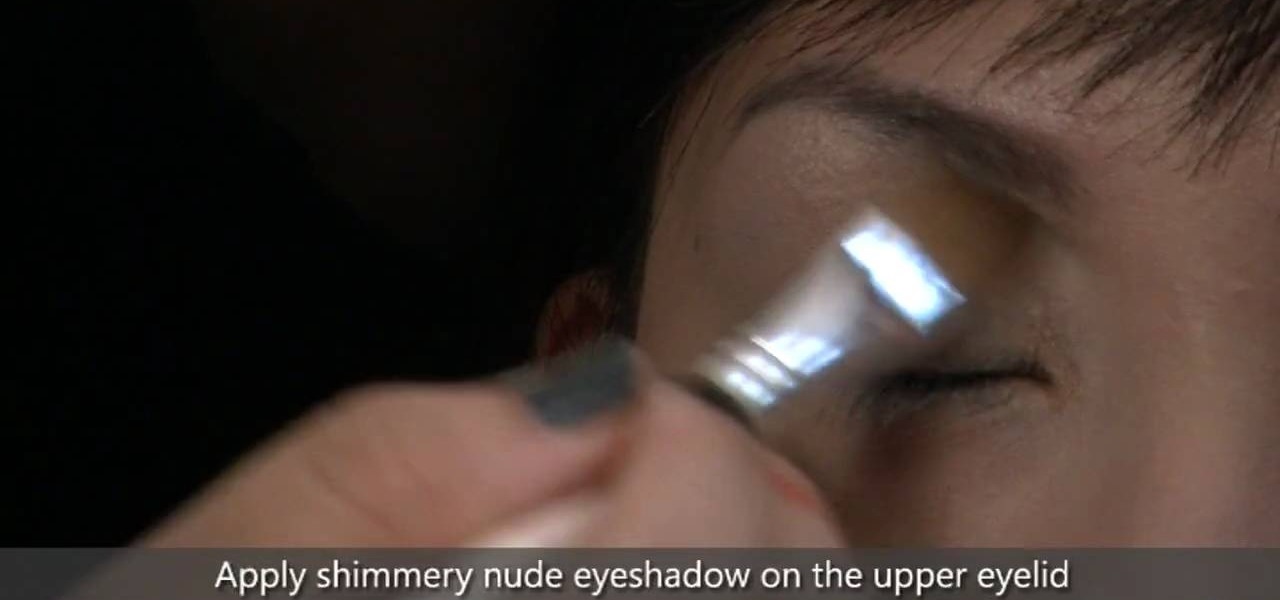
This video teaches the secrets of creating an Electro pop makeup style in simple steps. First wet a dark blue eyeshadow powder and apply to your eyelids. Now apply a pink eyeshadow using 222 brush and apply it over the blue. Now use white color and highlight under your eyebrows. Apply a green color using a flat brush under your lower lash and apply a brighter green over it. Apply a white eyeliner to the inner corner and make a triangle shape at the outer corner. Now apply some eyeliner, lashe...
For those of us who aren't morning people and need some help looking fresh and awake, this video provides some tips to help us achieve a better look throughout the day. You can dot concealer along your eyes to get rid of dark shadows and use white eyeliner along the insides of your eyes in order to get rid of the tired, red appearance of your eyes. Applying yellow or gold eyeshadow to your eyelids will give you a brighter look. Using these as well as more tips and tricks, viewers will be able...
Your hydrangea plant tag may say that it is blue but when it blooms it is more of a white color with a light blue tint. Learn how to deepen the blue color of your hydrangea flowers with this gardening tutorial. Get brighter, more intense blue hydrangeas with the tips from this how to video.
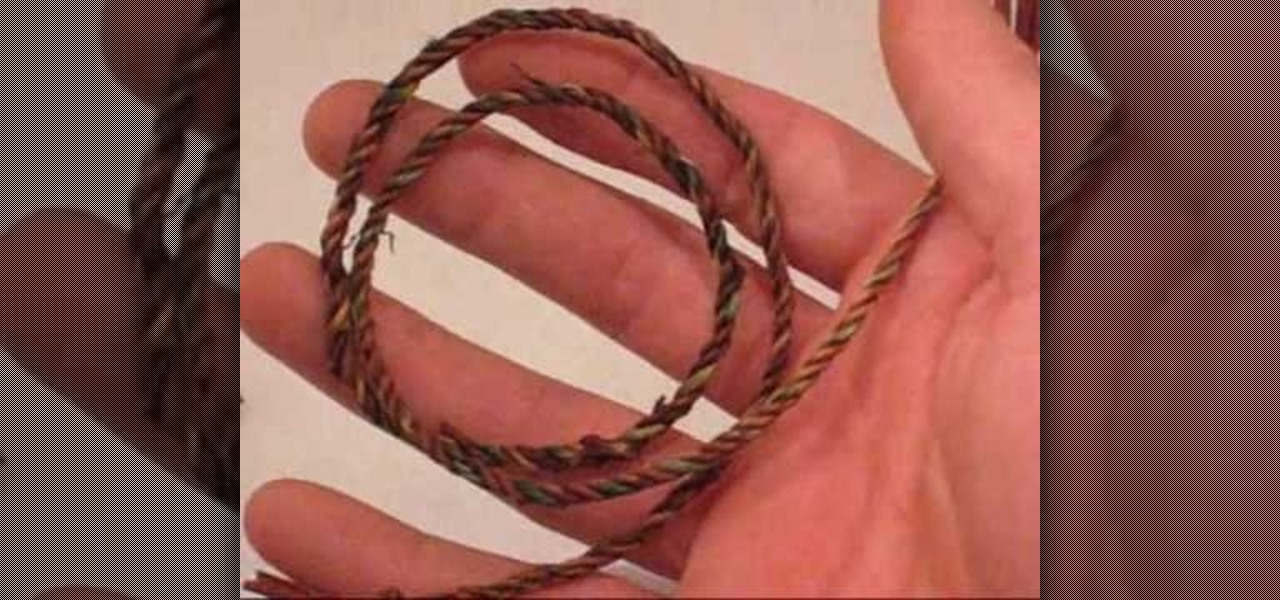
This video demonstrates how to make natural fiber rope using Douglas iris, a plant which is found along the Pacific coast from Santa Barbara from to Oregon. Before beginning, you should know that Douglas iris is poisonous when eaten, but it should be safe when you are handling it. The plant blooms every spring and dies every winter and has a brighter green color on top and a duller green towards the stalk, with a dark purple tint near the roots. You should collect plants which have died from ...
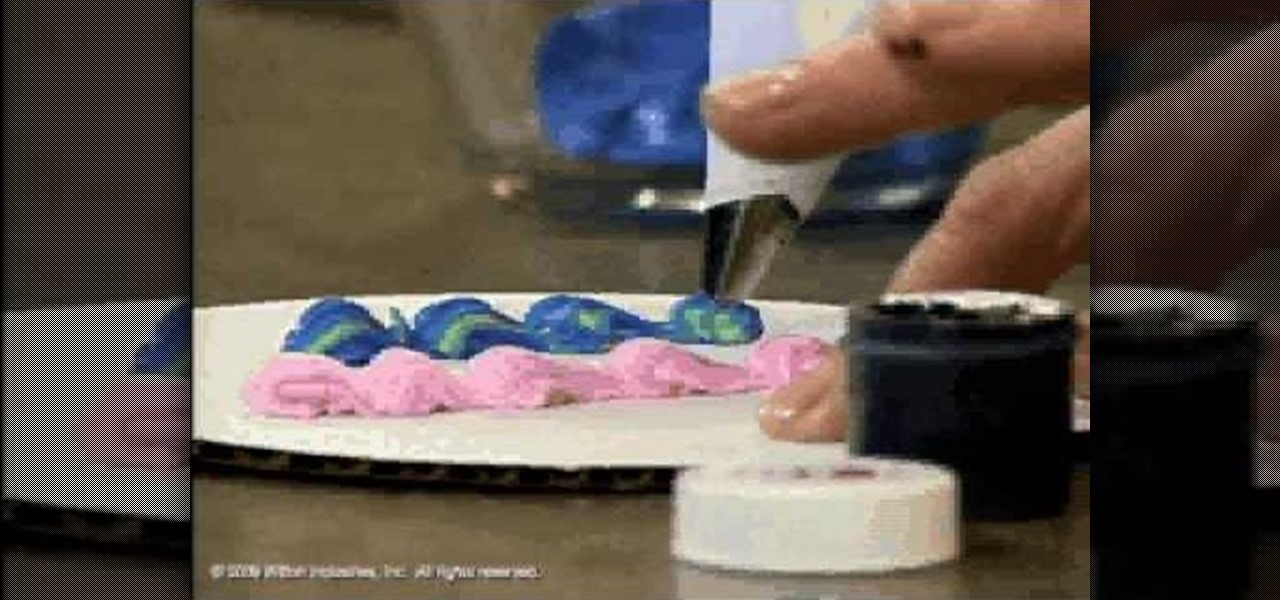
In this tutorial, we learn how to choose the appropriate color for cake decorating. First, spoon your icing into a bowl and then add in a small amount of food coloring. Start to mix this together, then add in additional icing if you want a darker or a brighter color to your icing. Experiment with different colors if you feel comfortable with using different ones. Take a parchment bag and roll it into a full, then stripe up the bag. Then, fill the parchment with some icing and this will create...
In this video, Logan Salter teaches us how to apply Mad Hatter makeup for Halloween. Start out by applying white eyeliner to the tops and bottoms of the eye, then apply it to your eyelashes until they are white. From here, apply orange eyeshadow underneath your eyes and to the tops of the lids. Blend this outward from your face and then add in a darker orange to create a contrast. Next, apply a pink shadow into the crease and under the eyes. Apply the orange shadow to the brows, then brush it...
We've all heard about applying false eyelashes to our upper lids to open up our eyes, make them look brighter, and create va va voom drama. But have you ever thought about applying false lashes to your lower lashes?
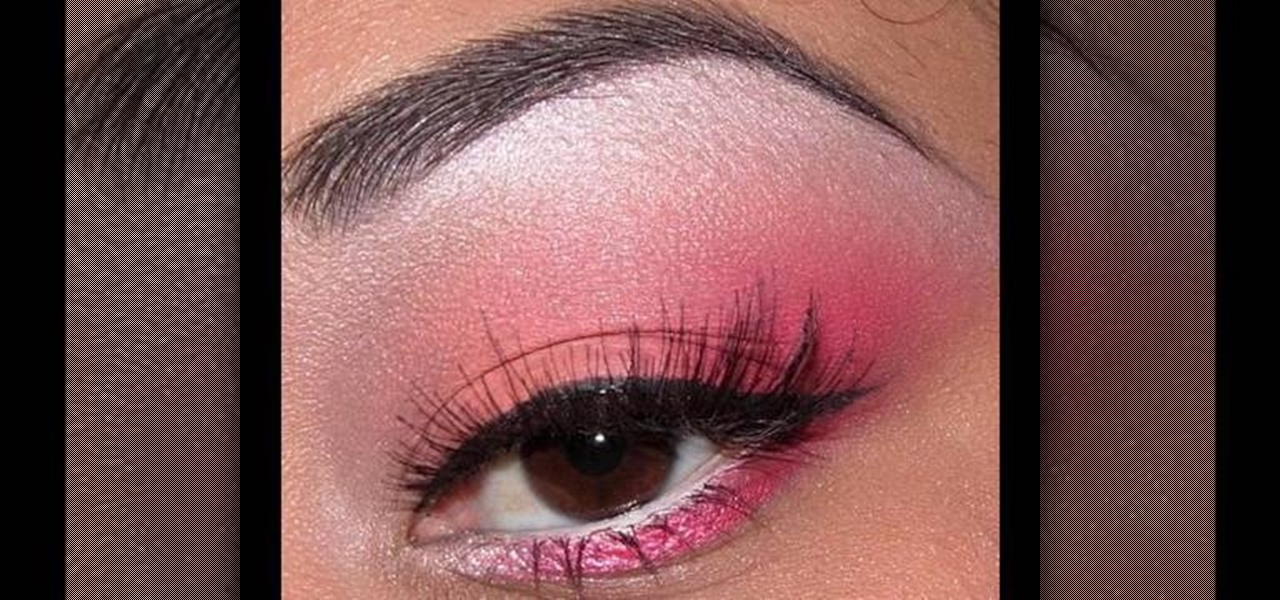
In this tutorial, we learn how to create a punk rock look with pink and coral eyeshadows. First, take a coral shadow and brush it over your entire eyelid. After this, brush a darker color on the corner of the eye and then use a white color underneath the brow bone. Now take a coral pigment and brush it over the first coral color to create a brighter shade. Blend the white in with the coral towards the crease of the eye. Add more color as you see fit until the color pops and is very bright. Af...
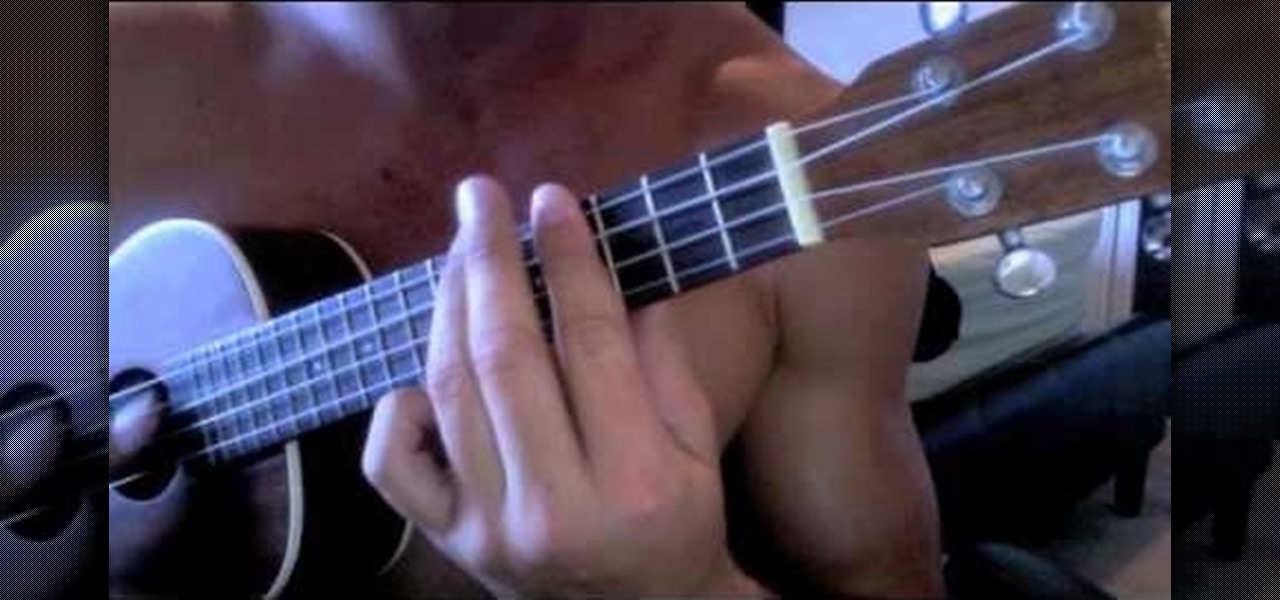
We love songs played on the ukelele because the instrument always makes the tunes sound lighter, brighter, and makes us feel like we're lounging around a beach in Maui with a margarita in hand. If you're a ukelele player looking for a fun new song to try, check out this ukelele tutorial for playing "Santeria" by Sublime.
So after much hard labor and patience, you've finally thrown your first vase, fired it carefully in the kiln, and let it harden to a fine finish. What to do next in your pottery making journey? While a beautiful vase is a beautiful vase no matter the finish or color, applying a glaze is like putting on makeup: sure, you don't NEED it, but having it on dramatically improves and accentuates your features, making cheekbones more sculpted, eyes wider and brighter, and lips more well defined. In t...