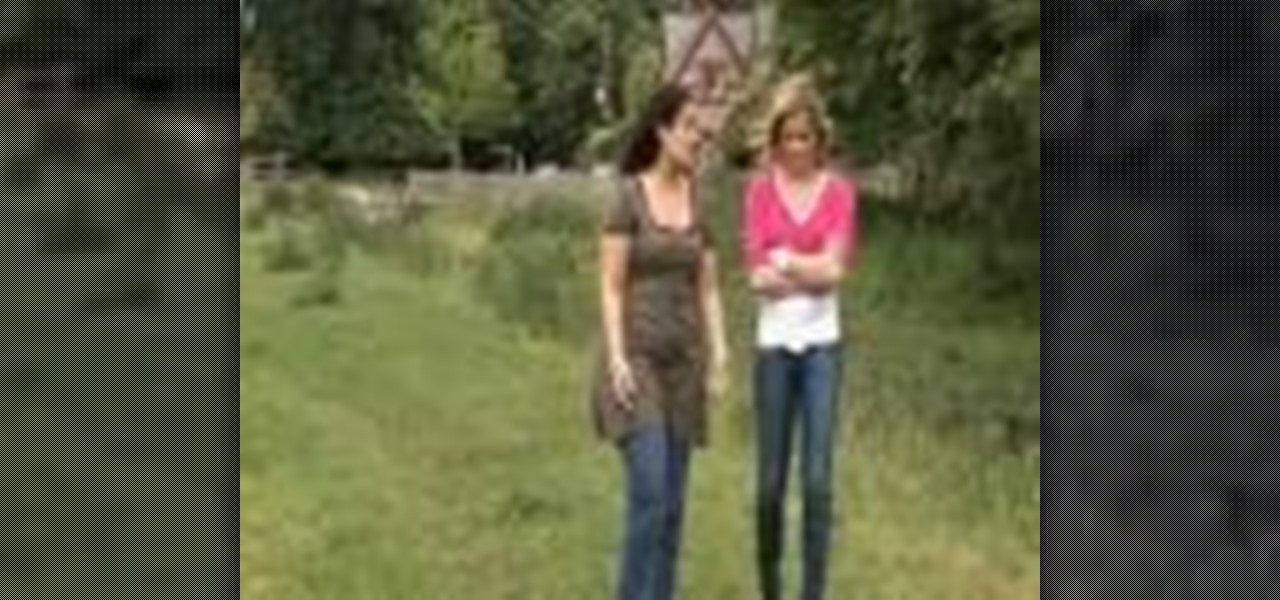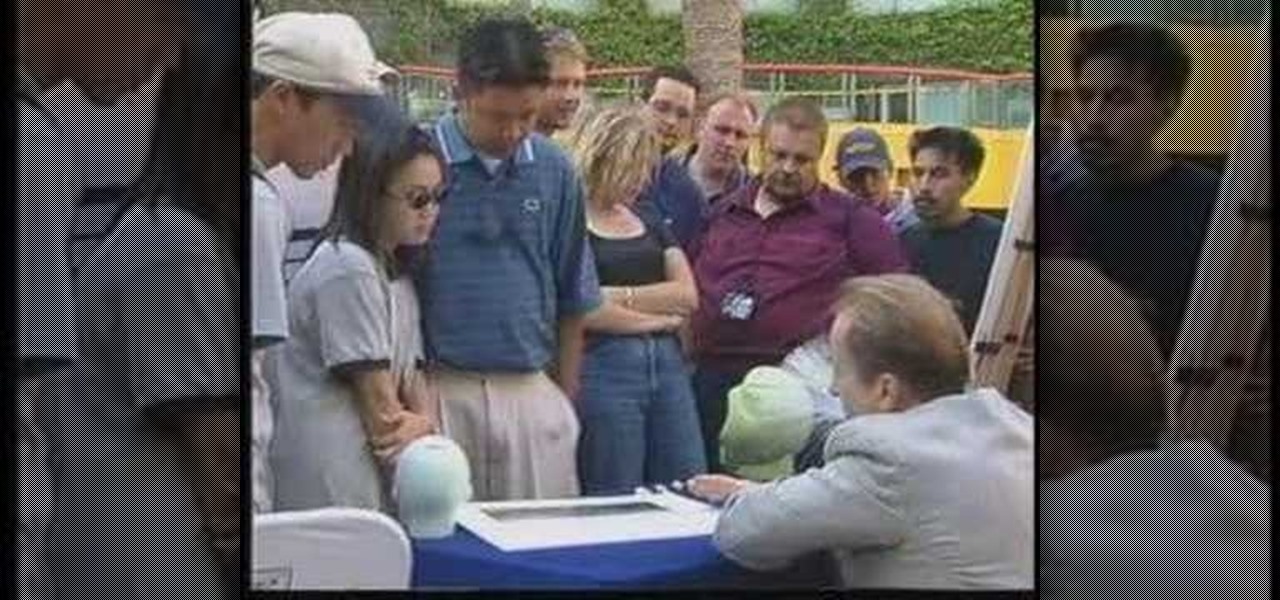
The best evidence that UFOs represent spacecraft from other worlds consists of grainy photographs, blurry videos, and anecdotes about things that go bump in the night. In this episode Michael Shermer shows how easy it is to fake UFO photographs, enlisting the help of children and disposable cameras to create convincing photographic evidence that even fooled experts!
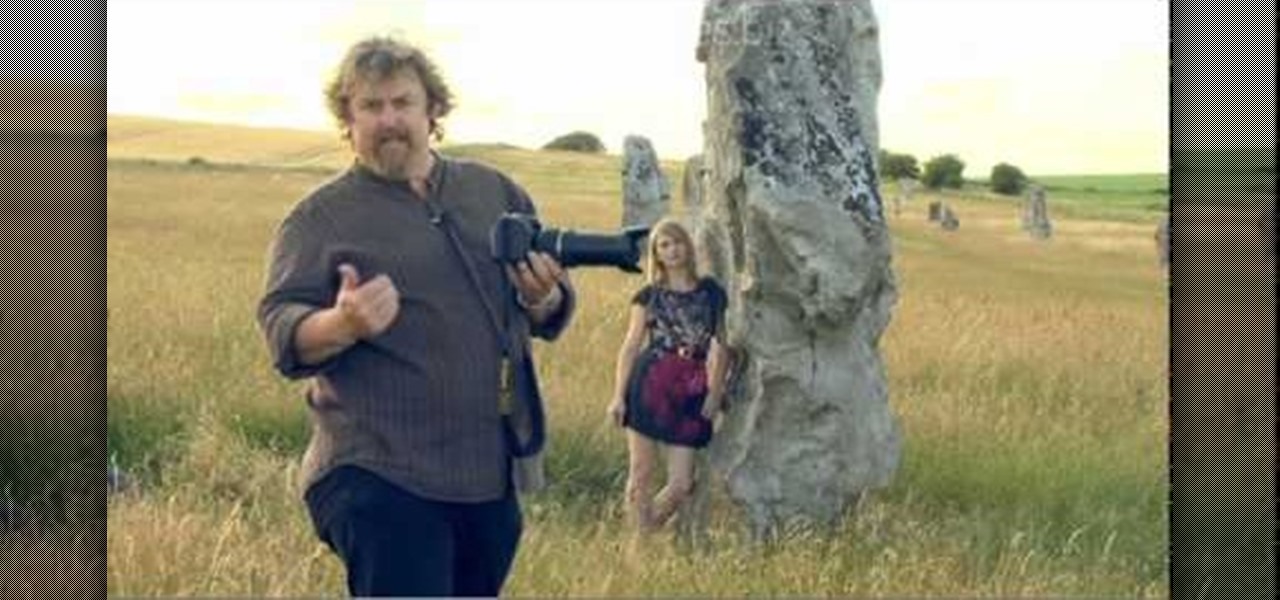
Anyone can snap a blurry picture of a friend standing in front of a tourist attraction, but with just a little more effort, you can take great shots. Learn how to take great photographs with this instructional video from Howcast. You will need a camera and a flash (flash optional). Tip: Natural light is always preferable, but if you're indoors or it's cloudy, use a flash to keep your subjects well lit.

In this tutorial, we learn how to photograph with a point and shoot camera. If you have dark light on the face, make sure you turn flash on your light and make sure it turns on to even out the lighting that's on the face. One of the easiest ways to shoot outside without using flash is to put someone in the shade. If the light source is coming from straight ahead, you will have the best lighting available. This will isolate where your light is coming from, and will work out better if it's not ...

Try "unfocusing" your photographs for some dreamy, evocative and somewhat abstract takes on life. Check out the two tutorials (here and here) from Michelle Geoga of Lights! Camera! Photoshop! for tips on unleashing the blur-power of your camera. You can see plenty of example images there to help you out.
There's a technique available for digital SLR cameras that most amateur photographers do not know about, or do not use correctly, and that's using a simple telephoto lens (long lens) to create blurry background, great portraits or awesome up-close macro shots. Without the telephoto lens, you lose a lot of the emphasis on your subject, because the background blends in, whereas telephoto lenses help create a degree of depth, blurring out the background, giving concentration on the foreground. I...
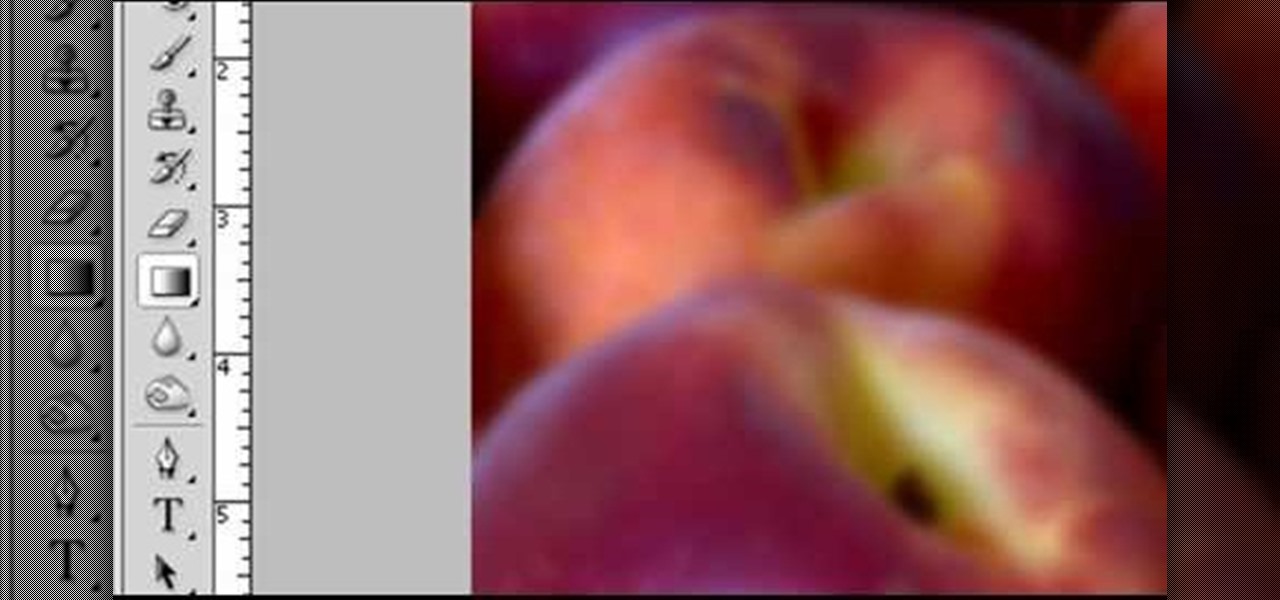
Robert with Roberts Productions demonstrates how to give your photos depth of field with Photoshop. You can create this effect by having a clear foreground and a gradually blurry background. First, duplicate the background layer. Then, go to filter and select Gaussian blur. Set it to a believable radius like 12 pixels. Create a mask by clicking on the mask icon. Then, make sure the foreground is set to black while the background is set to white. Next, go to the gradient tool and make sure tha...

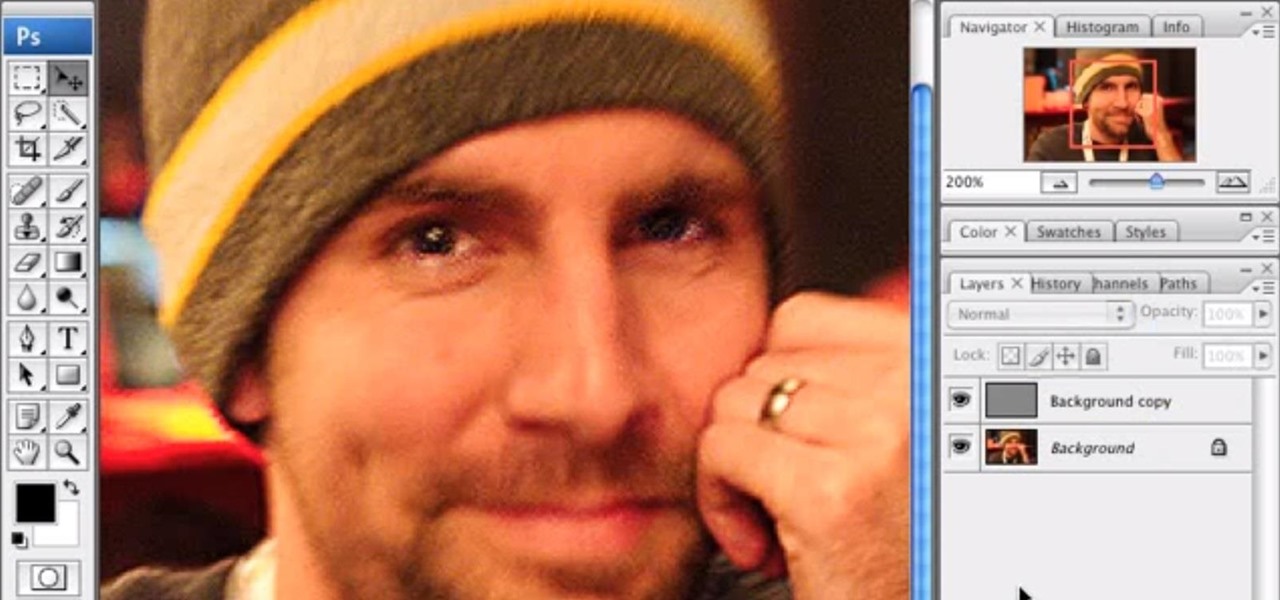
It's very easy to get a slightly blurry photograph due to a moving subject, camera shake, or just an incorrect auto-focus, but you don’t have to let that ruin an otherwise terrific picture. All it takes is a little finesse in Photoshop or another photo editing software. This guide covers sharpening a blurry image using Photoshop specifically.
You can improve the quality of the video you watch on YouTube. Sometimes when you watch the video in YouTube, probably you will have notice that the video is little blurry or text which is being shown in that video is blurry like low quality video. So you can improve it by just adding a little code in the url of that video. So put that code "&fmt=18" in the end of the url of that video and press the enter key and that's it. Now you can see the difference between before and now. The video qual...
In this Software video tutorial you will learn how to sharpen blurry images using Photoshop. Open the image and duplicate the original layer. Then go to filter > other > high pass. In the window that pops up, enter a value of 4 – 6 pixels. Now simply change the blending mode of that layer to overlay by clicking on ‘layers’ and selecting ‘overlay’ from the dropdown menu. You will notice that you have a much clearer picture. Then go to filters > sharpen > ‘unsharp mask’ to add som...
Depth of field is the term for how much of an area your camera keeps in focus. Moving your camera allows you to keep your subject clear, and make the background blurry. Use this video to get better control of your film making.
Thanks to the influx of purse-sized digital cameras and wads of blurry, hastily taken drunken photos posted on Facebook by partying college students, the quality of photography by the masses has gone down the deep end.
Get the Opazity plugin from www.opazity.com. Now you can make someon's PowerPoint presentation blurry.
If you're making tutorials or any full screen capture video and uploading it to YouTube and haven't quite figured out how to have it NOT be blurry, then PLEASE check out this video! It'll solve your problem and save your viewers' eyes!
A tutorial on how to download and install tortoise CVS. A very blurry screen but vocal instructions help to guide you through the process.
Photoshopuniverse shows you how to simulate a watercolor painting on Photoshop. With this you can take any photo and make it look like it was a water color painting. Take any photo and then duplicate the layer 3 times including original. Focus on the first layer go to cut out. You want a high edge fidelity, and add the number of levels no more than 5. Add some simplicity and the change mode too luminosity. Go to the second copy layer do a dry brush increase size to maximum. add just a little ...
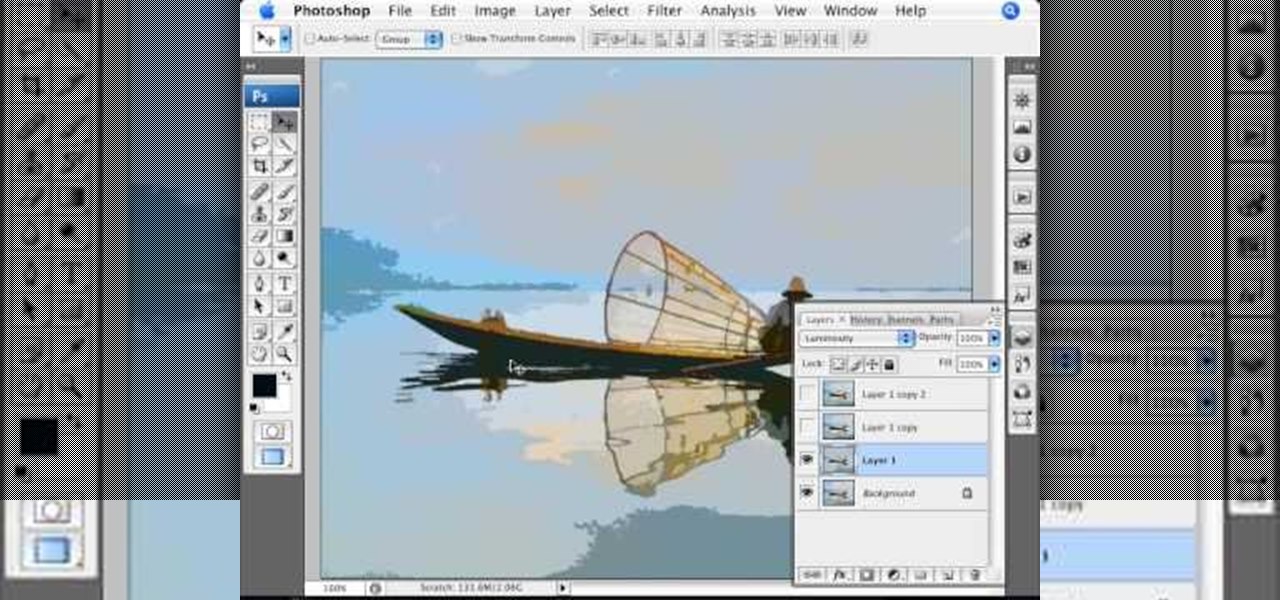
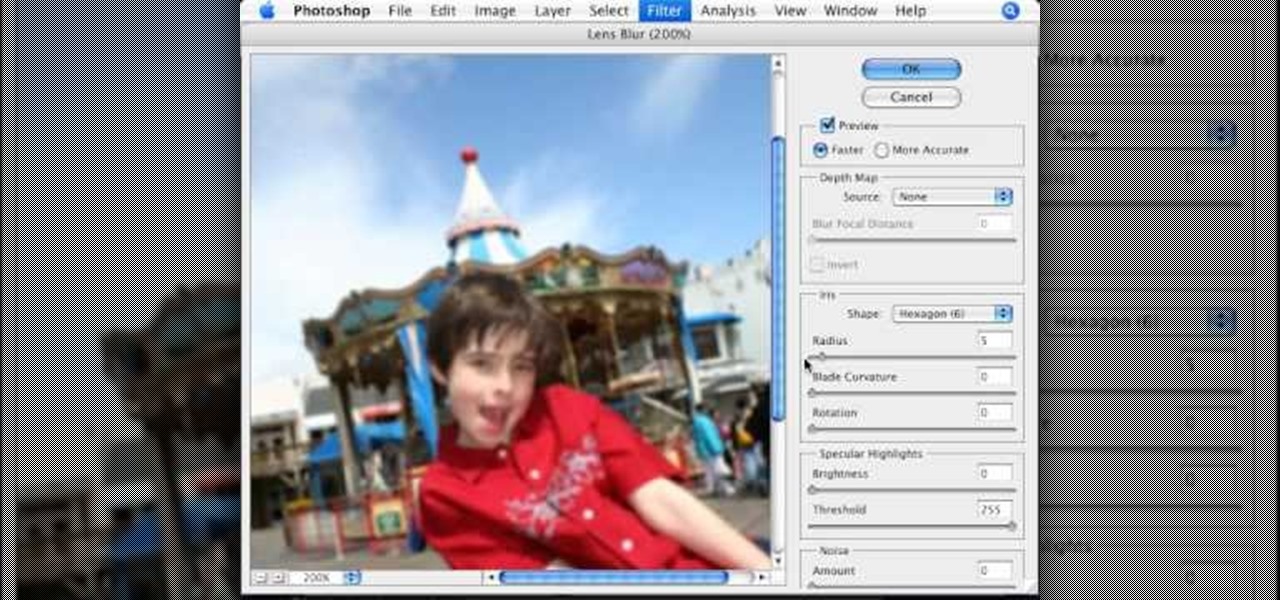
This video tutorial, by photoshopuniverse, shows you how to reduce the depth of field after a photo is taken using Photoshop. This enables you to ensure that your main subject is clearly in focus while the background is out of focus or blurry. First duplicate the layer using the short cut that was mentioned and apply the filter lens blur to the new layer and adjust the radius so that an adequate amount of blurring is achieved. Add a layer mask and bring the subject to focus by selecting the b...
One of the very first Photoshop skills we learned in my tenth grade photojournalism class was cropping the background out of images. I hated it. It was extremely time consuming, and the magnetic lasso tool never seemed to want to cooperate with me.
White balance is an important aspect of photography. Balance your camera correctly and you will take impressive pictures, balance it poorly and your photos will appear washed out or blurry.
This video provides tips to make great photo slideshows. Many people have found photo slideshows are a great way of celebrating memorable occasions, commemorate milestones or reminisce. First, choose your photo images carefully. Filter out irrelevant or blurry photos. Try using a photo editing program to improve your photos. Next, choose a theme for your slideshow. Then select transitions, being cautious to limit your use of transitions. Consider your use of intervals in the slideshow. Also, ...
In this video the tutor demonstrates the magnifier tool of Microsoft Windows 7. If the size of text is very small on your screen and you are facing difficulty reading it you can use the magnifier tool to resize the text to read it clearly. You can change the resolution but this makes the LCD screen look blurry. So to do this go to the Start Menu and select the Magnifier tool. Now there are two buttons with minus and plus symbol on them. Click the plus button to magnify the screen around that ...
Going towards the infinite white light means something totally different these days. When we talk about the infinite white light, we're thinking less spiritual and more aesthetically pleasing. That's because a background consisting of a blurry, infinite white light is one of the most flattering you can use for a human subject.
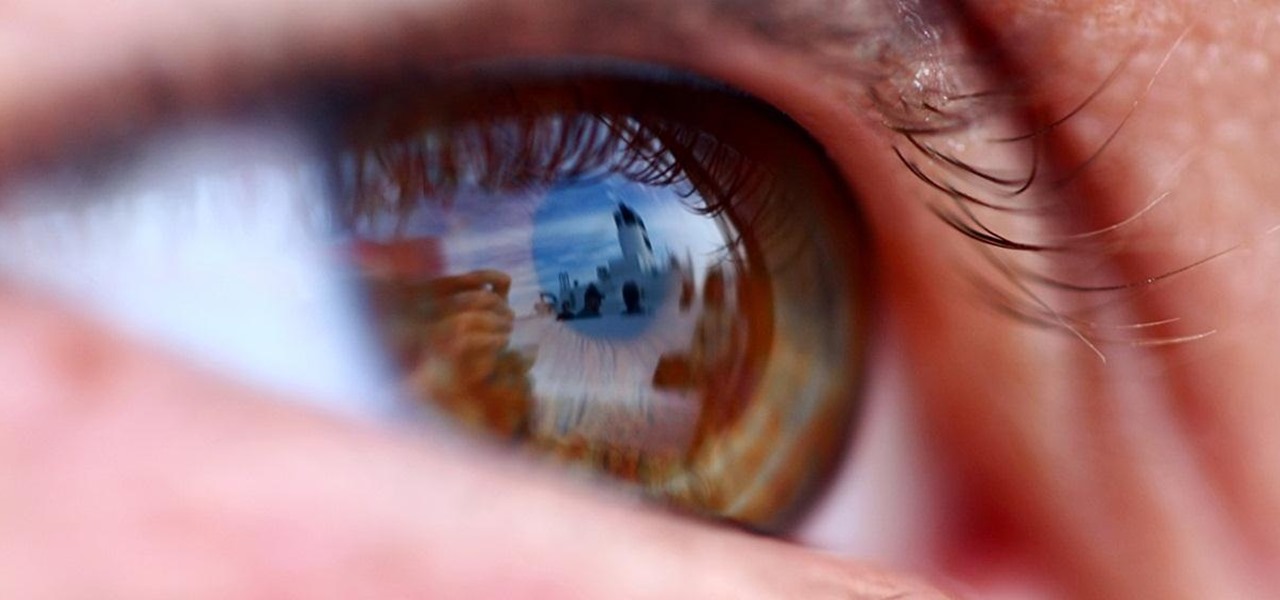
You can take some absolutely gorgeous photos using the natural reflection that appears in people's and animals' eyes. With the right angle and lighting, you can even see a detailed picture of what the subject was looking at when the photo was taken. Photo by Martin Cathrae
In this tutorial, we learn how to get a digital portrait backdrop in Photoshop. First, start by using the erase tool to remove the background from around the object completely. After this, fill in the background with the desired backdrop. Next, use the blending tool to blend the object's sides in with the backdrop, for a seamless look. Continue to do this for the entire object, cleaning up any blurry spots that you see as well. When you are finished, your object will have a new background and...
In this video, we learn how to lose weight using the liquify filter on PhotoShop. Before beginning, open up PhotoShop and the image you want to adjust. First, click on "filter" then "liquify". Next, use the forward warp tool and adjust the size of the brush to the body part you want to change. click on the body parts to make them smaller. Push in the body parts you want to be smaller, pushing in small parts one at a time. If you do too much, the picture will become blurry and it will not look...
You don't need a camera to take a screen shot of your computer. In fact, a camera would probably give you an extremely blurry picture! There is a special button on your keyboard called Prnt Scrn. All you need to do is press that button. The screen shot of your desktop is then stored onto your clipboard. To get it off the clipboard, you need to paste it in paint. Open it up, go to edit and click paste. Then go to file and click save as to save your file. Choose where you want it to be saved, n...
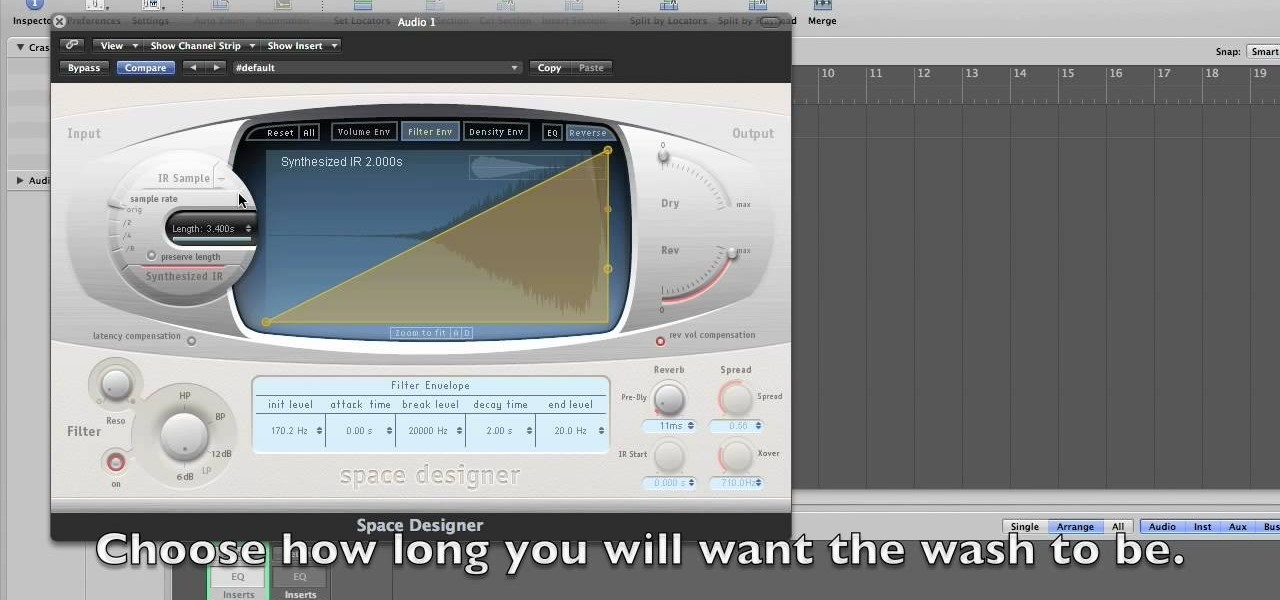
How to make cymbal washes is a tutorial on how to use Logic Studio to make the sound of a cymbal wash. The tutorial does not include any speaking. It is only a shot of the computer monitor of the instructor. The image from the instructor's monitor is very blurry, and the images on the monitor are very small. You'll have to watch this video closely to learn all about making cymbal wash sounds.
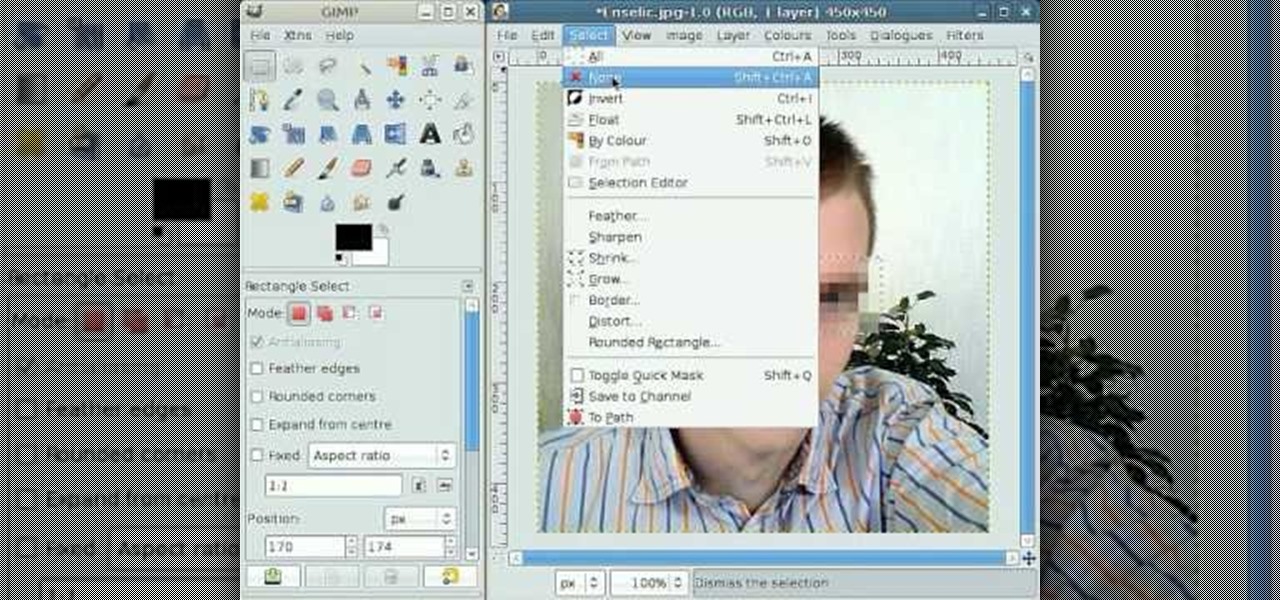
By following this tutorial you will learn the concept of selections in GIMP. Whenever he says "layer mask" he really meant "selection mask".
Frosted glass windows are meant for privacy, plain and simple. Sometimes you see it used for aesthetic effect, but primarily it's used to let a little light in while keeping wandering eyes out—unless those wandering eyes have some Scotch tape in their pocket.
Photograph the moon using only a camera with a telephoto zoom or prime lens, following the steps in this informative video tutorial. No tripod needed! The simple steps with simple information with this video shows you how to photograph the moon in all its forms, whether half, full, crescent or lunar eclipse.
Your childhood is arguably the stage of development where you look most cute and naturally perfect for photographs, so it makes sense that your parents compiled albums after neverending albums depicting several hundred different angles of your cute little tushy (grimace).
In this video, we learn how to photograph wildlife. When you go to take photos of wildlife, you have to be very careful and quiet so you can get up close to these animals. You don't want to disturb them or make them come charging at you. Use your camera to capture their true beauty in their own serene and peaceful environments. Don't yell out or chase the wildlife, or you will scare them away and you won't get any photos. There are hundreds of amazing photo opportunities out there, you just h...
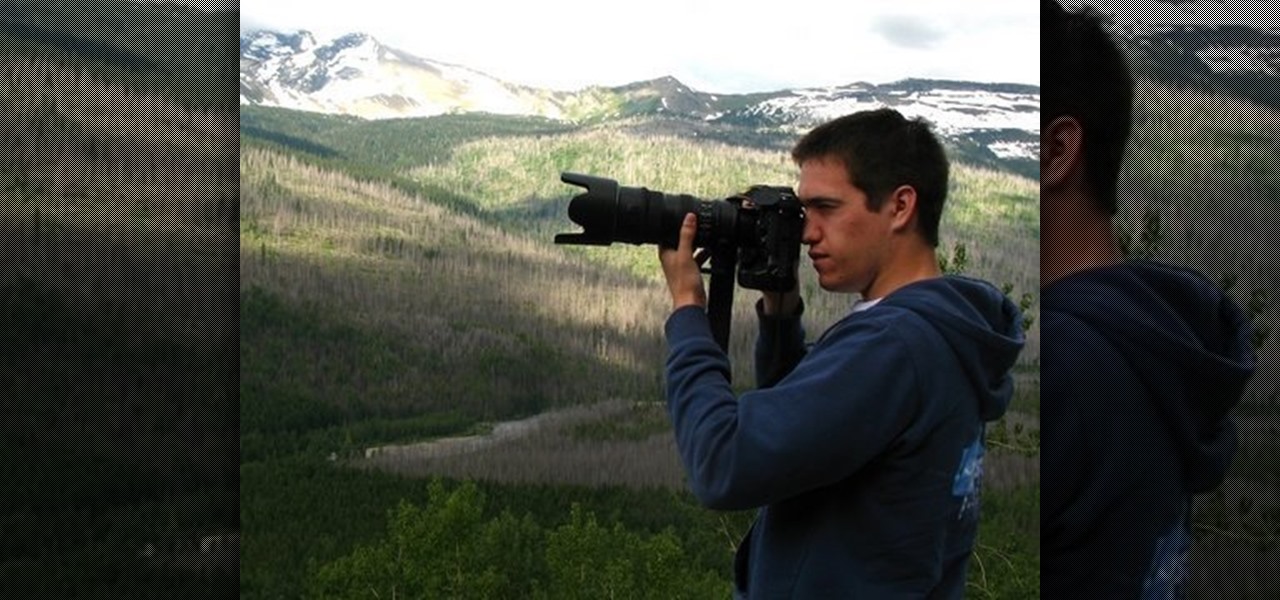
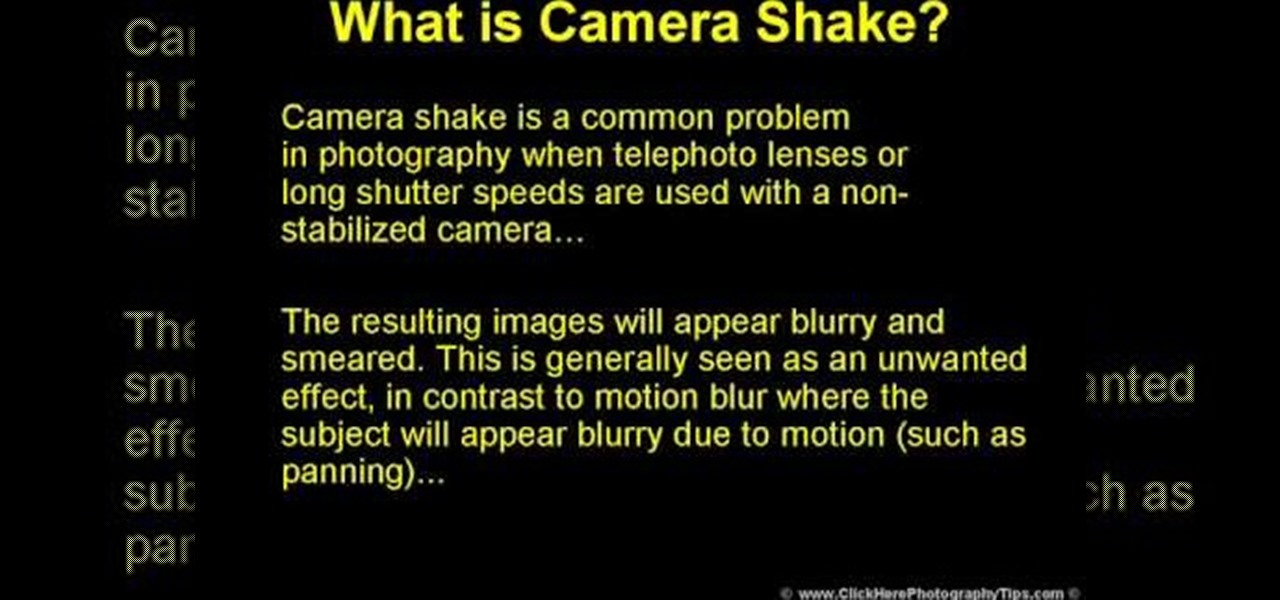
Camera shake is often an unwanted effect in photography, when a telephoto lens or long shutter speed has been used for a camera that hasn't been stabilized. The images subject to camera shake appear blurry and smeared, which is often considered an error - though some photographers find artistic value in camera shake and purposefully try to cause the effect in their art.
This is a great tutorial for photographing beautiful star trails on a 35mm SLR camera. Because only film has low enough ASA to shoot for such long exposures, this tutorial unfortunately apply to digital SLR's.
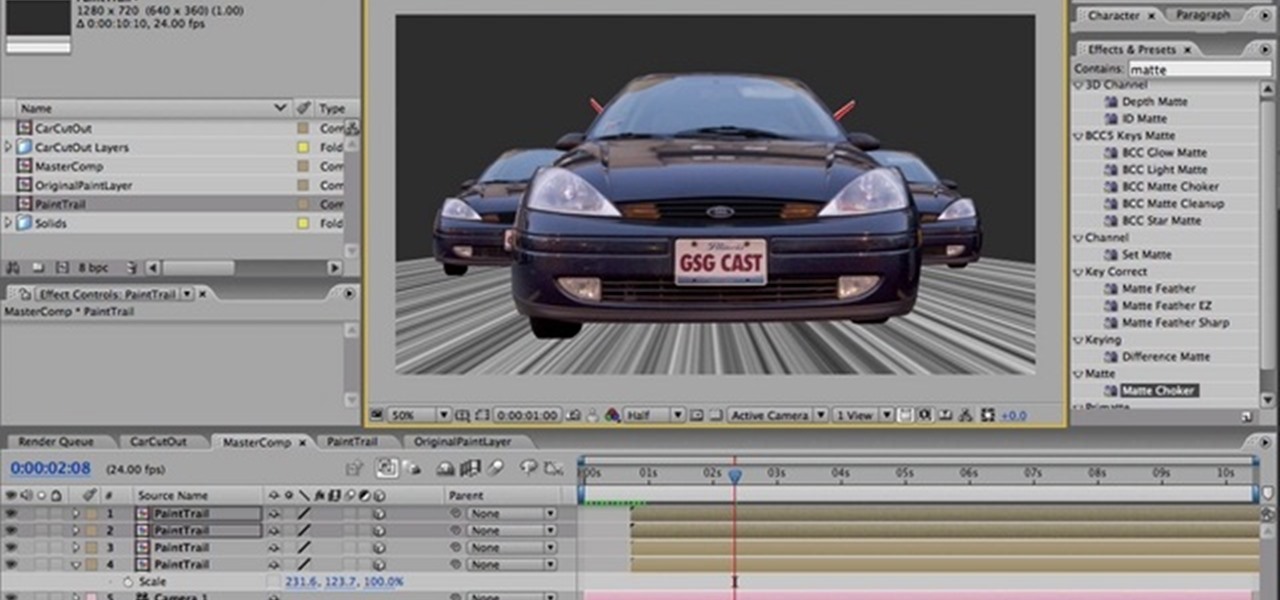
In this great, albeit long, tutorial Nick from Greyscale Gorilla shows you how to create a car racing scene from a series of photographs in After Effects. It's very kinetic and looks great.
Everyone should enjoy great memories from vacations for years to follow. Taking beautiful photographs is a wonderful way to document extraordinary experiences, other counties, different cultures, stunning landscapes, jaw-dropping architecture and more. Tap into your passion for photography on your next holiday vacation and capture a moment in time with help from this four-part photography tutorial on how to enhance your holiday photos. In this three-part video tutorial, take your photos from ...
Sepia toning can make your photos look like antiques. Learn more about sepia toning and toning photographs with coffee in this free black and white photography lesson from a professional photographer.
In this Genhead video tutorial, you'll see how to select the appropriate photograph and take photographs correctly with a digital camera so that they work well in Genhead.
This video series shows you everything you need to know about completing a model from photographs in SketchUp. It follows Chapter 7 of the book Google SketchUp for Dummies. PART 1 shows you how to add photos to faces. PART 2 explains how to move, scale, rotate, shear and distort your texture. PART 3 shows you how to stretch a photo over a face (of your object that is)! PART 4 shows you how to stretch or scale the model until the photo texture looks right. PART 5 covers how to map photos to fa...
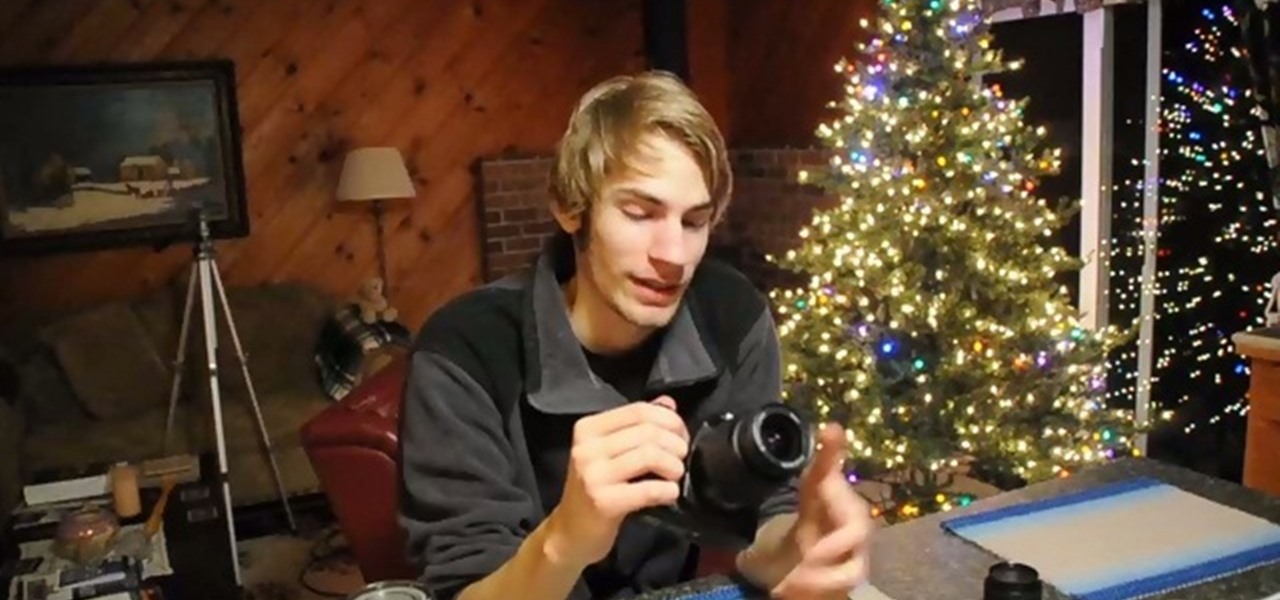
If you have a DSLR, you can take some interesting photographs of Christmas trees and holiday lights this year. Here are six different ways to achieve a special effects look for your Christmas photographs by adjusting the settings on your camera.
How does taking photographs outside differ from taking photos inside? Well, unlike indoor photography, which boast easily adjustable artificial lighting and lighting effects, with outdoor photography the light you get is the light you use.