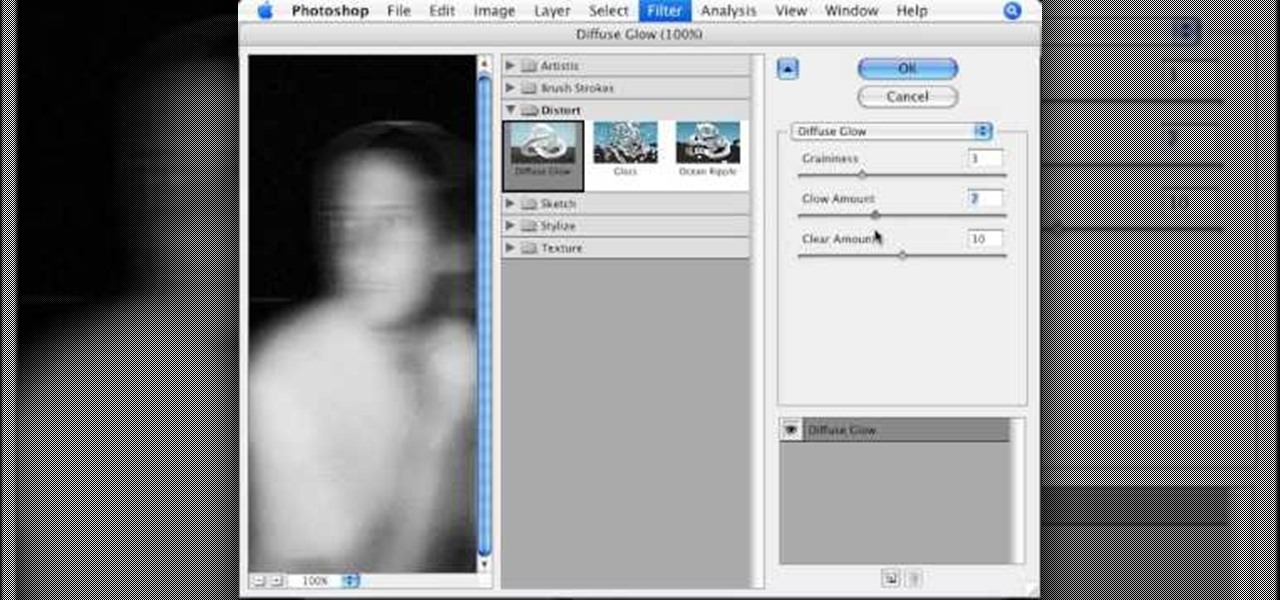
To manipulate photos and turn someone in a photo into a ghost, there are several filters that can be used in Photoshop. This video takes us through the steps of how to take an ordinary picture and turn the subject into a supernatural being using the motion blur technique and the diffuse glow filters among others to alter an image. The best types of pictures to use are ones where the background is relatively dark. By following these simple steps in Photoshop, you can turn anyone in an ordinary...

Altered chords are a great spice to add to any song, especially in Jazz and Fusion. But trying to improvise over them in a solo can be disastrous if you aren't playing on the key tones of the chord, you will just create a large amount of a-tonal and diminished notes that you might not want in your lines. In this great video you will learn one great technique to keep in mind when improvising a solo over an altered chord using melodic minor of the note a half step up from the root of the altere...

Simon Plant of ProPhotoInsights.com shows how to use Photoshop to blend colors in images. He uses a photo of his son standing in front of Stonehenge to take us through each layer of the photo to alter the levels of hues, saturation, and opacity. The key to blending colors is a matter of playing with different hues and saturation levels in Photoshop to get the subject in the foreground to match the background. Follow Plant's thorough tutorial to find out how to get professional looking photos ...
This video shows how to take an old book and alter it so you have a beautiful baby book. Using birth announcements, locks of hair and any other mementos you have you can create a beautiful book of memories. Watch this video scrapbooking tutorial and learn how to make an altered baby book.
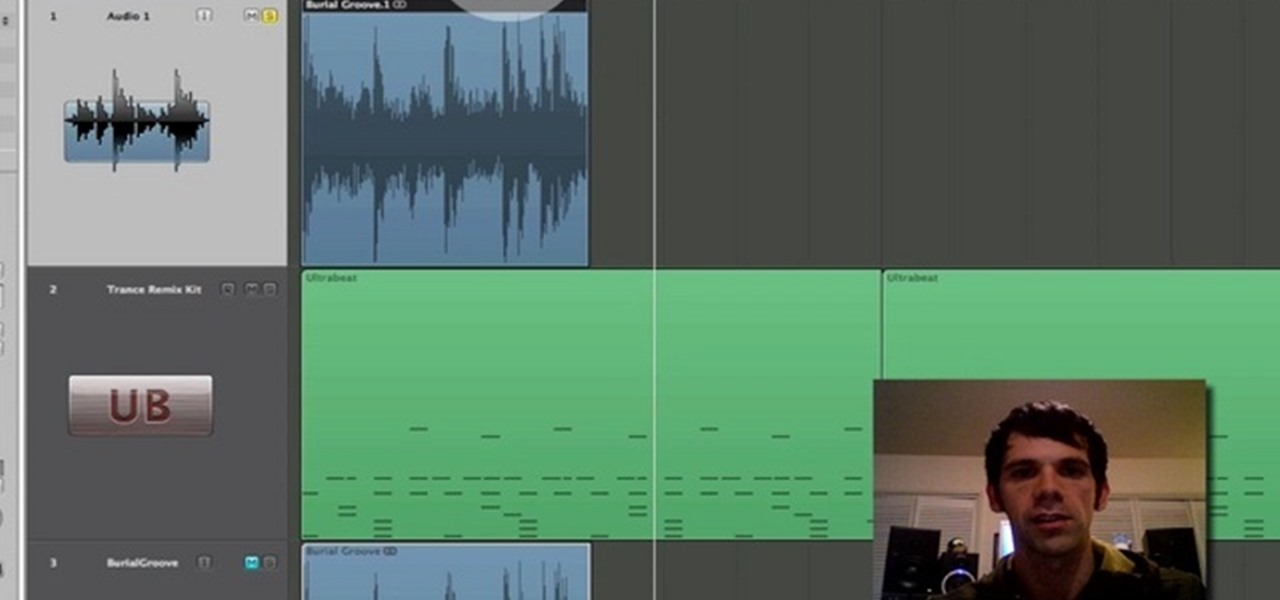
Learn how to use the Flex Time tool to alter the speed and timing of your tracks without altering their pitch or introducing nasty artifacts. This clip presents an overview of how to use it. Whether you're new to computer recording, new to the Apple Logic DAW (digital audio workstation) or just looking to pick up a few new tricks, you're sure to benefit from this free video software tutorial.

This tutorial shows you how to determine what kind of skirt you have - straight or tapered . Then, depending on the type of skirt you have, you're shown how to alter the hem or shorten the length of your skirt.

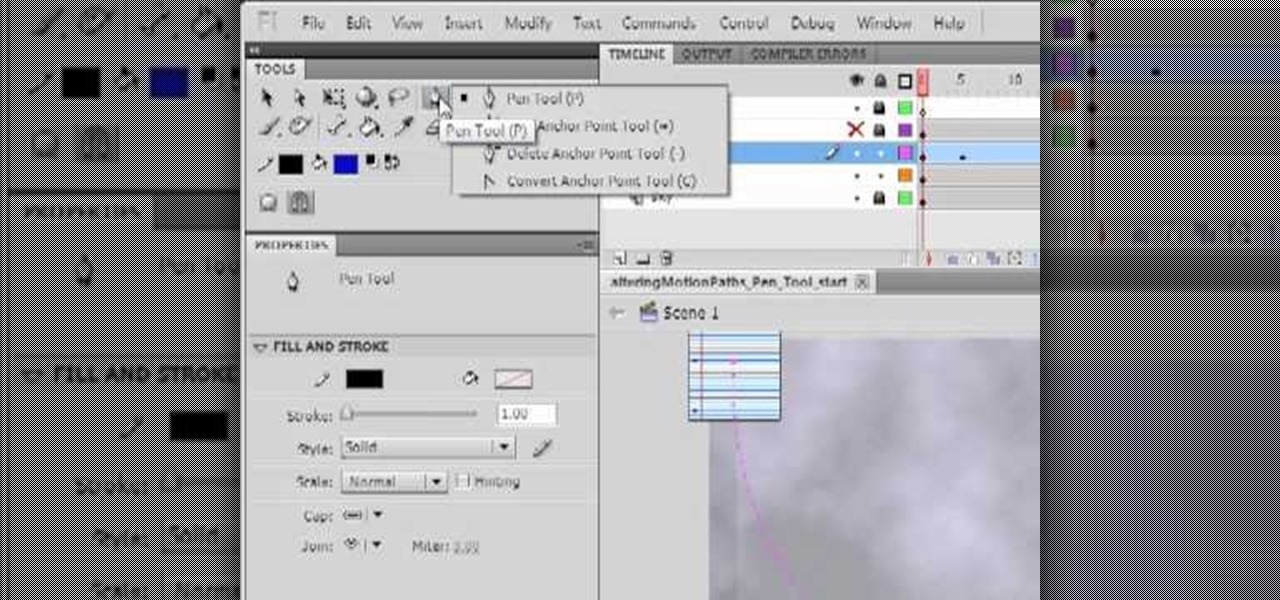
Here's a quick tutorial on how to alter your Flash animations. You can use the pen tool in Adobe Flash CS5, and its companion tools, to change the curve of motion in your animation and edit the Bezier curves which define the path.
This tutorial goes over the various methods and techiques you can use to alter images using Adobe Flash CS3, such as extending the edges, trace bitmapping, patterning your images or shapes, and even set your bitmap as it's own fill color.
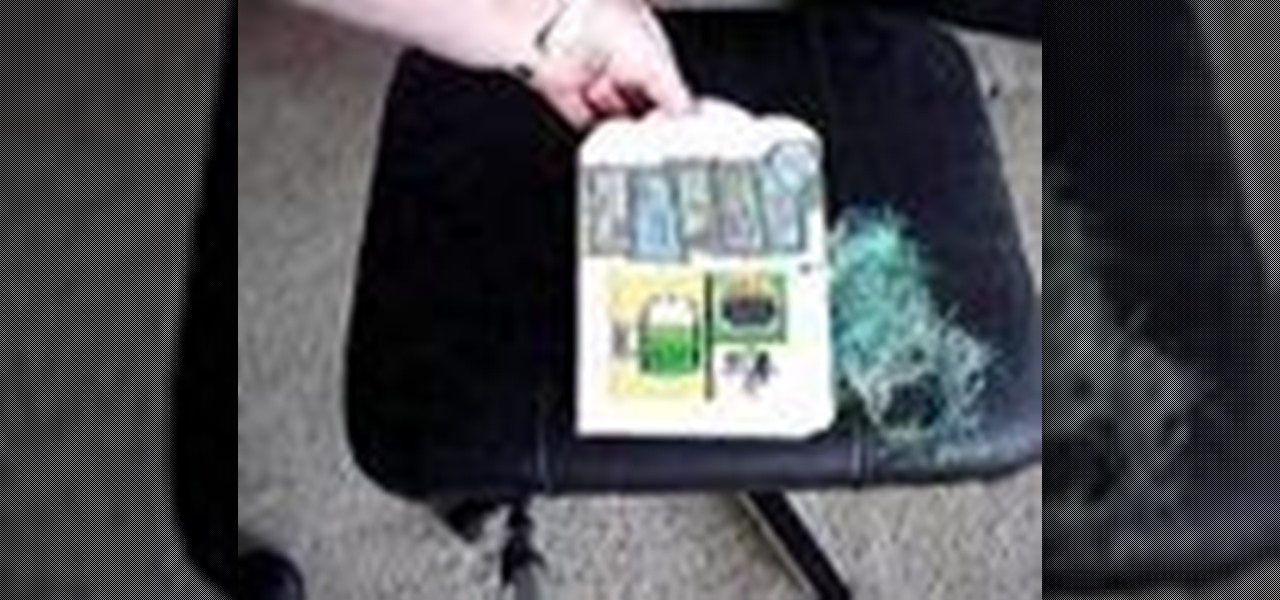
Bottle caps can be used for so many different reasons. They can be used as cheap weapons, fake money in card games, and even decorations for arts and craft pieces. This tutorial will focus on the arts and crafts aspect and will show you how to alter a bottle cap for a scrapbook project. It's simple, easy, and fun to do. Enjoy!
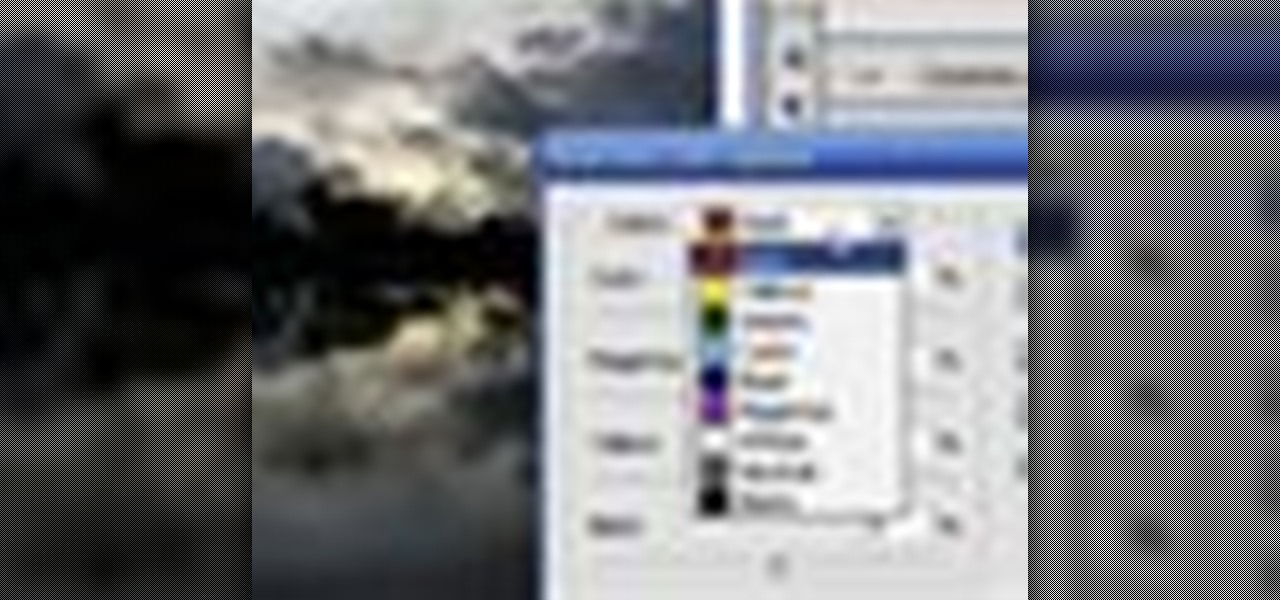
Learn how to edit a picture to alter the color of the sky using Photoshop's selective color adjustment layer. This tool allows you to change a color in a photo. A good example of what this tool can do is to change a sunset to a sunrise in a photo. To begin with, you will need to open the selective color adjustment layer under the layer tab. Under the color menu, select the color that you want to alter. The tutorial goes over how much of each color to add or remove to get the desired effect. W...
This video scrapbooking tutorial shows how to make an altered book using a children's board book. This craft project is simple, as there's no need to build a book from scratch; all you need to do is decorate. Learn how to make a scrapbook from a kids' board book by watching this instructional video.
Check out this video to make a--yeah! This is a fun, altered book board that you will be sure to love.
This video shows you a mind-reading card trick. This particular trick requires 8 cards: 4 kings and 4 queens. First, the subject is asked to memorize one of the 8 cards as they are laid out before the subject, face-side up. The cards are picked up and sorted in various ways and the subject is asked a series of questions. The questions are always asking whether the card the subject memorized is in a certain group that the trick performer presents. The card in question always is in the group th...
This week, the thread heads teach us how to take-in/alter our own clothing. This is totally useful, and not nearly as complicated as it looks. Who needs tailors?
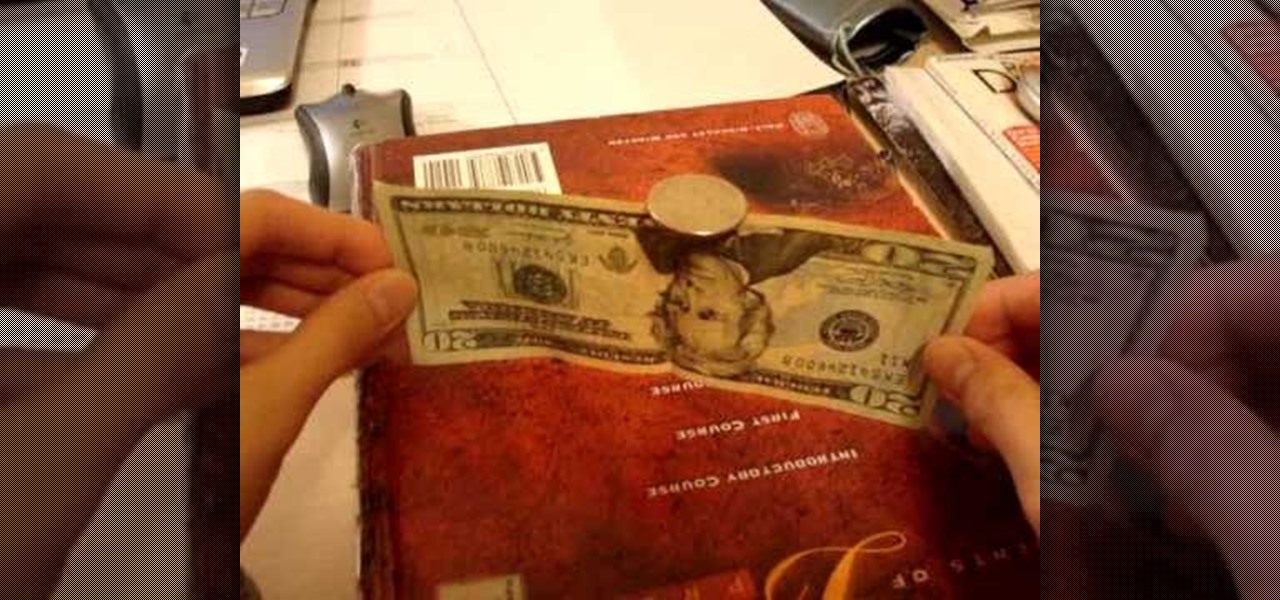
In this video, learn how to alter the center of gravity within a coke can so that it leans on its side like the Leaning Tower of Pisa. Later, learn how to balance a coin on a dollar bill. Take a look at how this is done and learn a little bit about how gravity functions in the process
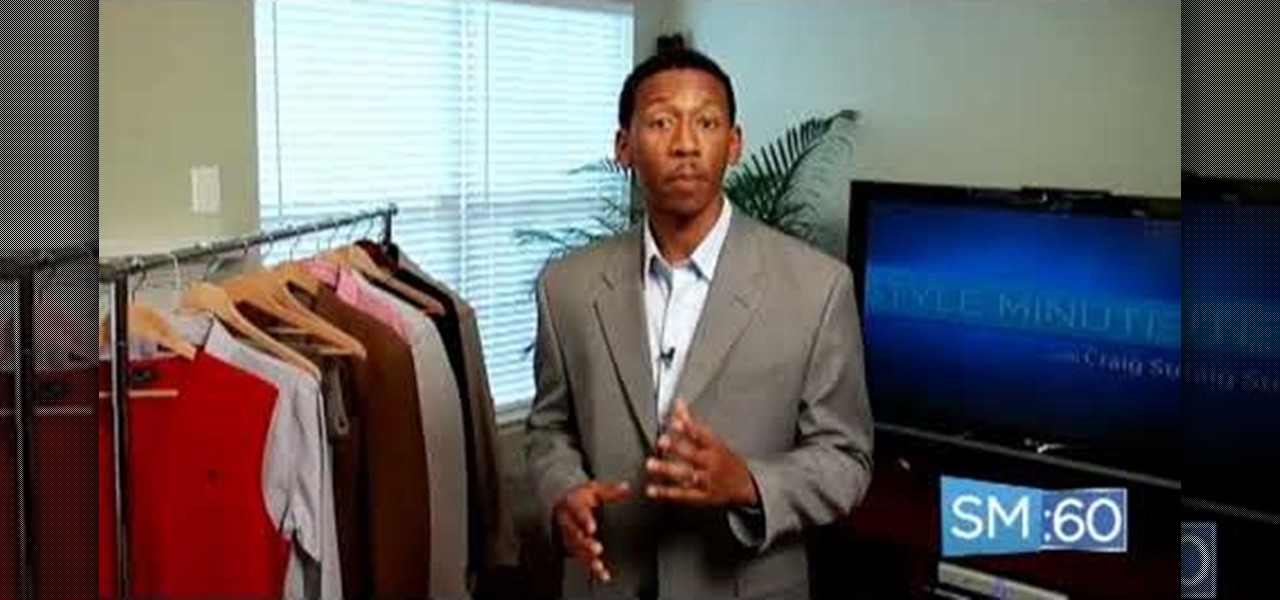
In this tutorial, we learn how to properly fit a blazer or suit jacket. First, try the blazer on and make sure it is not too baggy or too tight. You want the buttons to be able to close and you want the sleeves to be long enough to reach your wrists. If you need to get it altered to be shorter, mark where it should be, then bring it to a tailor to get altered. You wan to make sure the inside lining of the jacket is sewed on properly and that the shoulders are not too pointy or high. Once you ...
The drawing tools in flash aren't always the most intuitive to newcomers. In this tutorial, Ralf will show you how to use the basic drawing tools in flash. You learn the difference between Merge Shapes and Drawn Objects, which are all shapes of the same look and feel with the exception that one can be more easily manipulated and the other. You'll learn how to use this selection and sub selection tools to select various objects on the flash stage. You also see how to use the oval and rectangle...
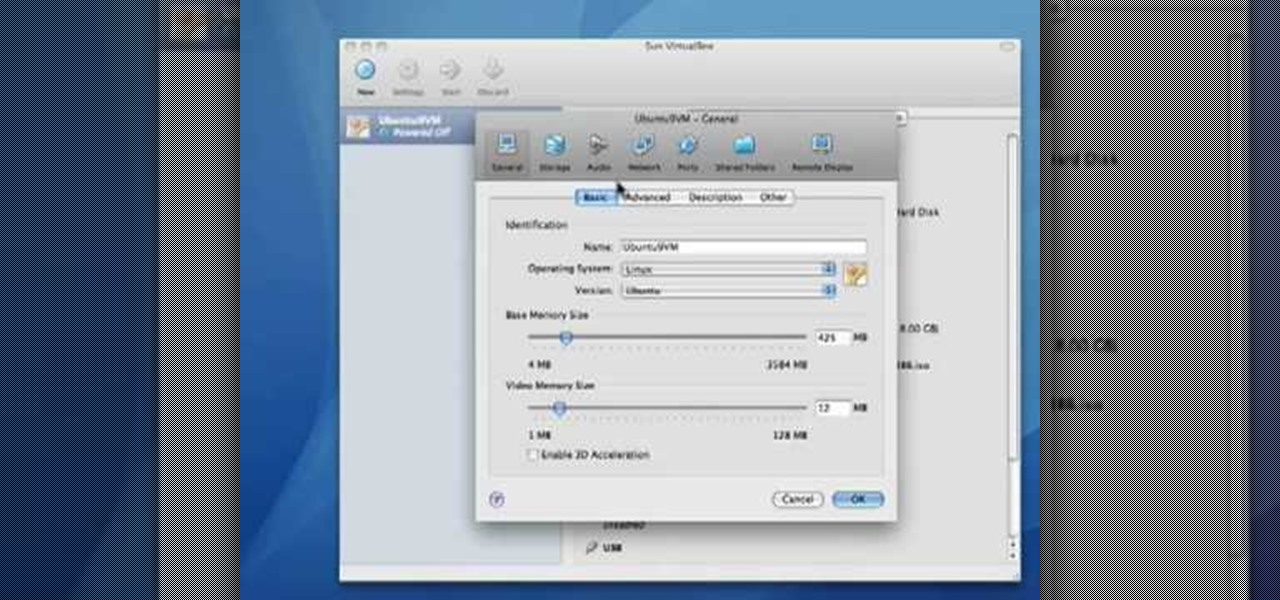
Before you can alter the settings of a virtual machine, you must first have the machine powered off. Load VirtualBox on your Mac desktop and make sure it is powered off on the left hand panel. Double-click General and a window should pop up allowing the changing of several settings. For example, you can include a description to keep many virtual machines separate, or adjust the size of the drive. You can even add virtual devices through ports if they are connected to the physical machine. The...
Watch this video to learn how to alter your pitch and tone while singing!
In this video tutorial, viewers learn how to altering clip speeds in Adobe Final Cut Pro. This will allow users to speed up, slow down or reverse a video clip. To slow down or speed up a clip, click on the clip in the time line and hold down the Control key. In the pop up menu, click on Speed. Users will be able to change the percentage of the speed or duration time. Users can also check Reverse to reverse the clip. This video will benefit those viewers who enjoy creating videos with Adobe Fi...
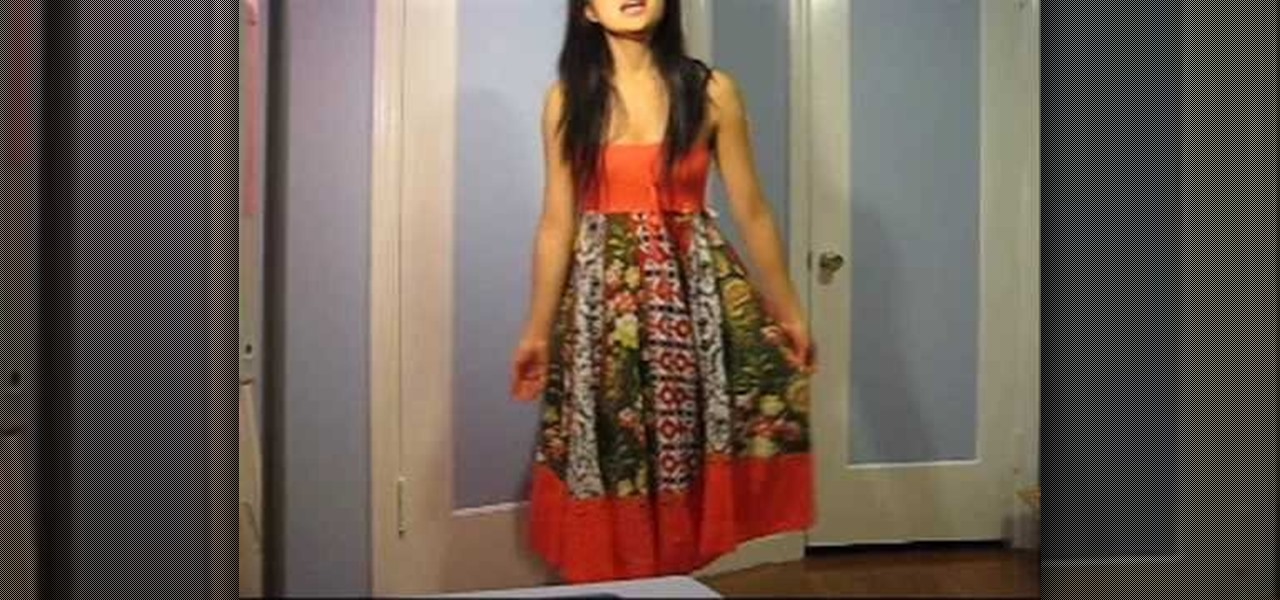
This video shows how to alter an oversized dress into a summer dress and a scarf. Do you have a dress that is an awkward length? Depending on how tall you are an otherwise cute dress might need some alterations to look best on you. The dress used in this video has a strip of fabric going from the knee almost all the way down to mid-calf. Removing this strip of fabric was easy to do by simply pulling out the stitches. This simple move turned a frumpy gown into a cute sun dress. The leftover st...
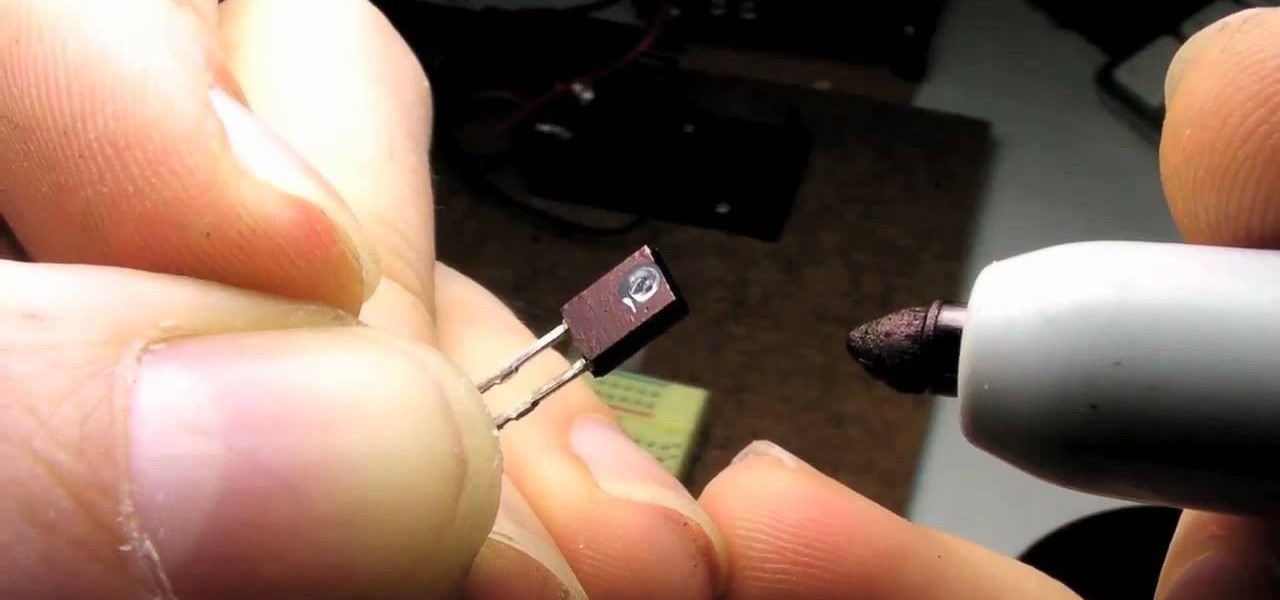
This video shows how to create an infrared heart sensor using an Arduino controller, a couple of resistors, and an infrared light emitter and detector. This device will be used on the subject's finger, detecting the amount of blood which is flowing through the subject's finger. The amount of oxygenation of the blood is shown in the finger, which will cause the infrared light to reflect off the skin and to the transmitter which is close by. The fluctuations of oxygenation are picked up by the ...
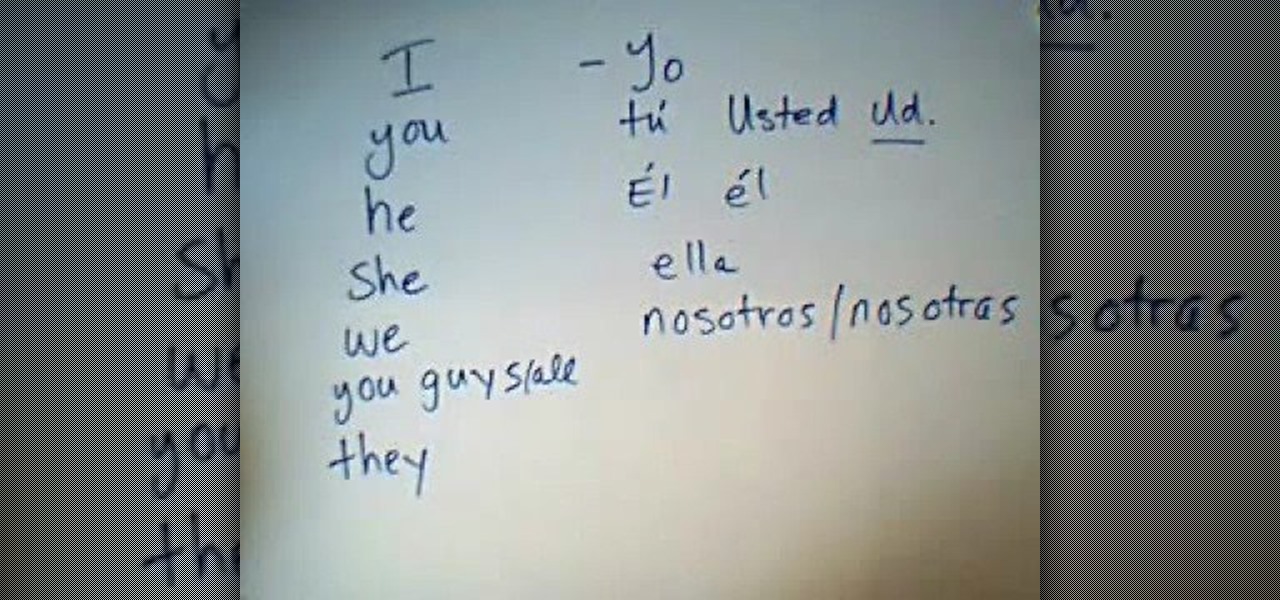
In this video, we learn how to understand subject pronouns in Spanish. Subject pronouns are pronouns that stand in for the person that is going to carry out the action in the sentence. In English, sentence pronouns are things like "I", "you", "he", "she", "we", and "you guys". In Spanish, pronouns change to "yo", "tu", "usted", "el", "ella", "nosotros", and more. Whenever you talk about a verb in a sentence, it will change what the subject pronoun is and how it's said in the sentence. Make su...
If you're trying to unlock the orange portals in Dark Souls, this guide should help you out. You'll need to complete Anor Londo first, but after you do, you can jump down a hole and access an alter to remove the fog barriers in front of the gateways.
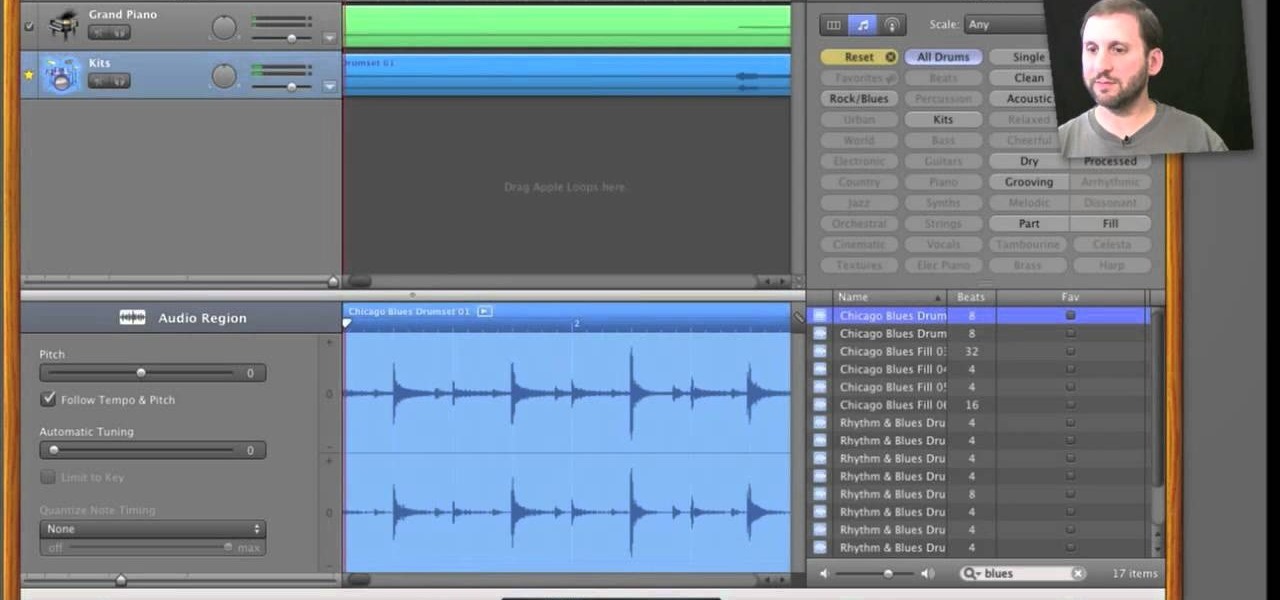
Included in GarageBand 11 are a number of powerful time-altering tools, tools that were previously only available in Apple's deluxe DAW, Logic. In this video tutorial, we learn how to use GarageBand 11's Groove Matching and Flex Time features.
This Halloween makeup tutorial is great because it can be easily altered to fit the costume you're wearing. While the original look is intended for a sultry mermaid or a sexy swamp girl (yes, swamp girls can be sexy), you can wear this look with a bit of glitter for a forest nymph or fairy look.
This may not work for everyone, since each person has a different pH balance. Or you may need to alter the recipe a bit. What you need is: shea butter, baking soda, corn starch, cocoa butter, Vitamin E gel caps and your favorite essential oil.
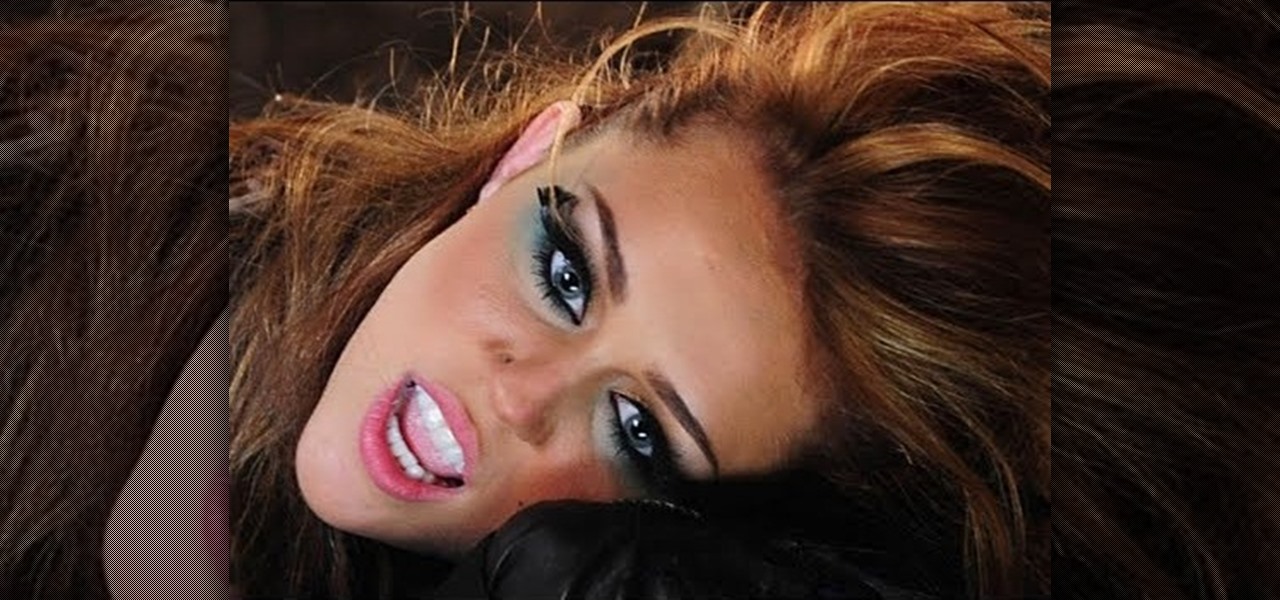
Not since Lady Gaga's "Telephone" Coke Cans and Madge brow'n'lips has a music video makeup look been so universally dissected and copied by YouTube makeup savant.
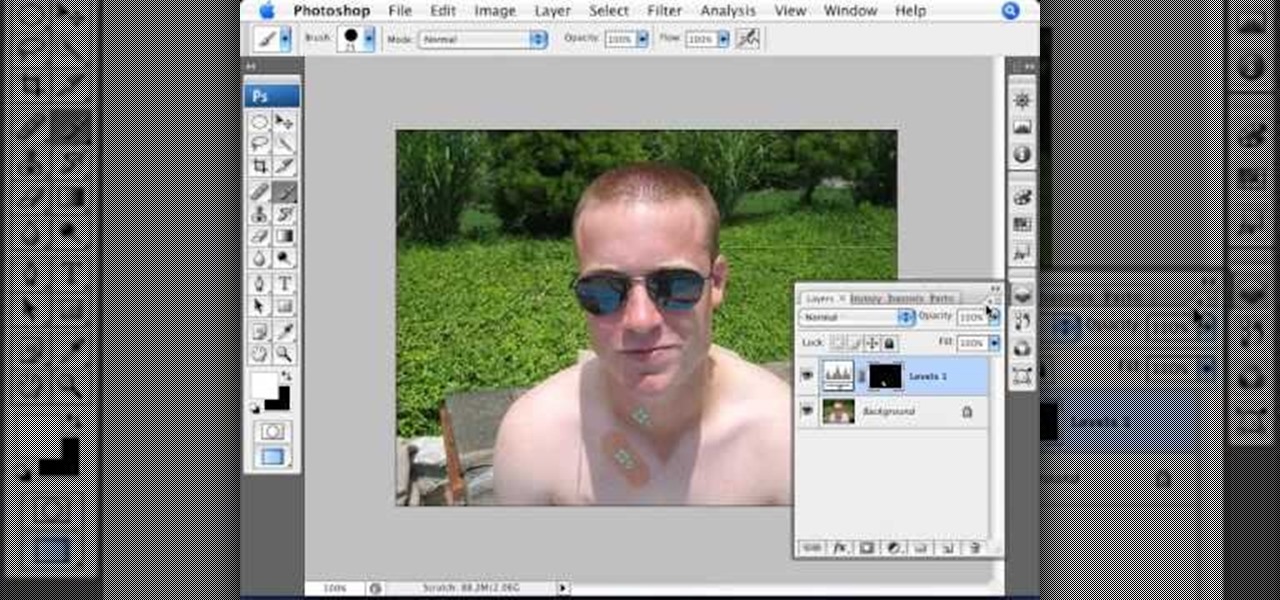
In this Photoshop tutorial, learn how to use the software program to remove tan lines from a photo subject. To complete this editing process in Photoshop, follow the steps in this tutorial to learn how to utilize a layer mask, eye dropper tool, and adjust colors. By following the steps in this Photoshop tutorial, you can tan the parts of a subject's skin by learning how to blend colors within the software program so that someone comes out with a more even skin tone.
Make-up artist, Kandee Johnson transforms herself into the King of Pop, Michael Jackson! With just some shading and contouring, watch as Kandee remarkably alters the shape of her face with the illusion of makeup!
You can use Picasa to put some effects on your photos. Also, Picasa provides some simple tuning options for your digital photos.
When you listen to a software instrument track that you've recorded in GarageBand, you might decide you want to alter the sound of your track. For example, you can change your track to sound like a different instrument. You can use the miniature keyboard to audition different instruments.
What if you've recorded a great jam that feels right but doesn't sound quite right? With GarageBand, it's easy to change real instrument tracks to alter the pitch or timing of the track.
When it comes to working with people, the photographer can face quite a challenge. Everyone has a mind of their own, and with these few tips you will know how to advise your subject so they look fantastic in a picture. Join Erin Manning, professional photographer, as she shows us 5 handy tips for working with people.
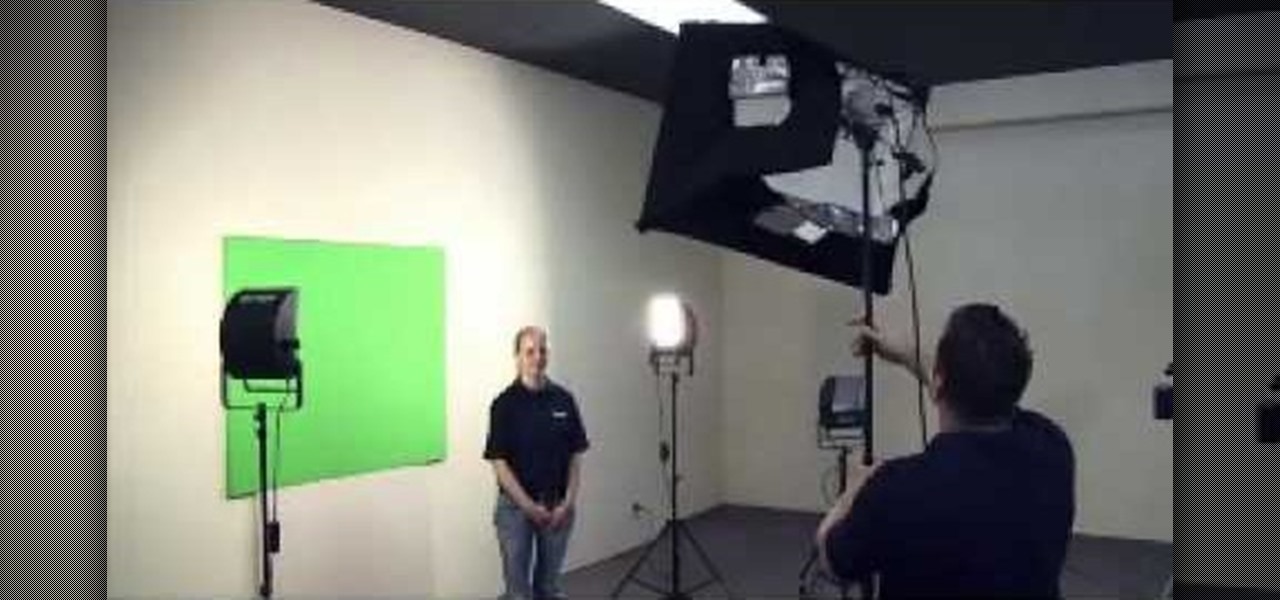
Ever wonder how to create movie magic right in your own home? This video shows you step by step everything you need to know and do to create the green screen effect, from properly setting up your green screen, to lighting it, as well as your subjects for a successful effect. Filled with tips and instructions this is a great video to watch for filmmakers, and special effects artist of all kinds.
Depth of Field (DoF) is easy to understand, but it is often extremely poorly explained. It's all about selective focus. For consumers with conveniently small camcorders, you only have two options: get your subject away from the background and then (1) zoom in or (2) get the subject close to the camera. No 35mm lens adapters, no secret techniques, no complex math: That's it!
James Barry teaches us how to take better indoor portraits. When you are taking these, you want to make sure you have the lighting that is directly onto the subject and the subject's face can be seen. You will have to work with the light and often you will have to add in several lights to get the facial features to all show. Work with your camera to see what it sees and how the light looks through the camera. It will take several minutes to get the portrait to come out correctly. Place the li...
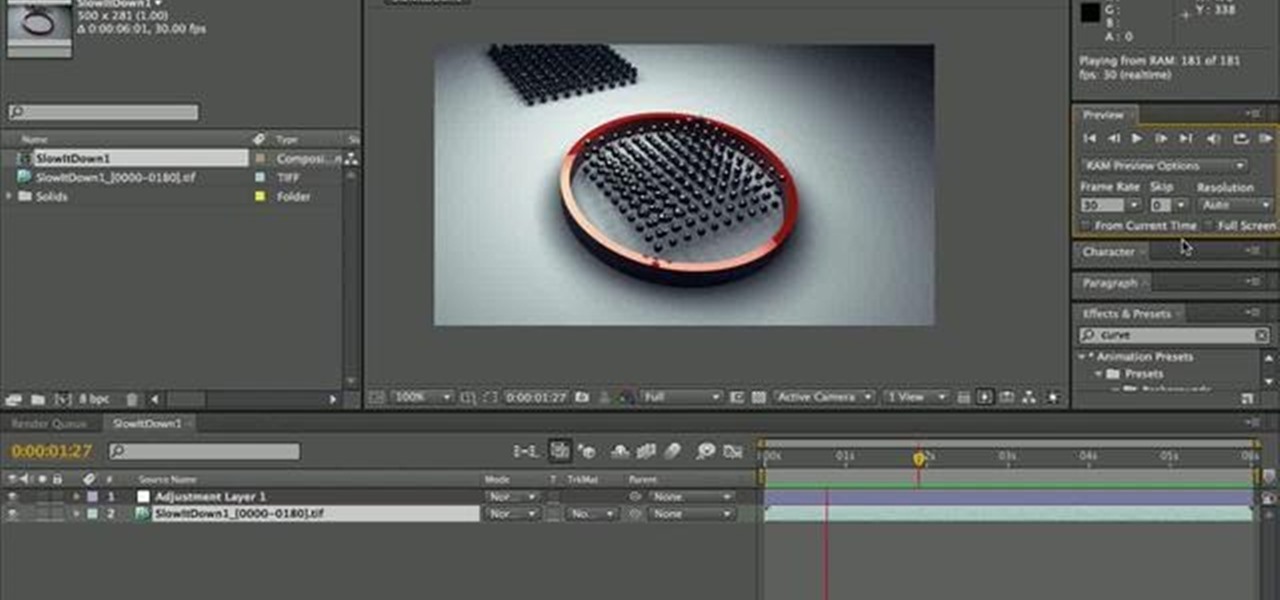
There are three different ways to either speed up or slow down the rate of your animations in Cinema 4D. This tutorial shows you how to use keyframes, time scales or the remapping feature in After Effects to change your speed of render.
The CS4 version of Adobe Flash has altered the appearance and layout of your screen. If you draw often in Flash, this tutorial shows you how find and use the Smooth and Straighten functions efficiently and add them to a menu using the history and saving as a command.
In this clip, learn how to alter your vinnegarette so that it is not as greasy and heavy. Average dressings contain a lot of excess oil and in this quick tip from CHOW you will learn how to be healthier by cutting some out.