In this cardmaking tutorial I make a glorious card from the DCWV Hello Darling cardstock stack. It is a easy to make card but it looks so impressive, ideal for anyone that likes a little bit of fussy cutting and decoupage, all from the stack.. Step 1: Now Watch the Tutorial
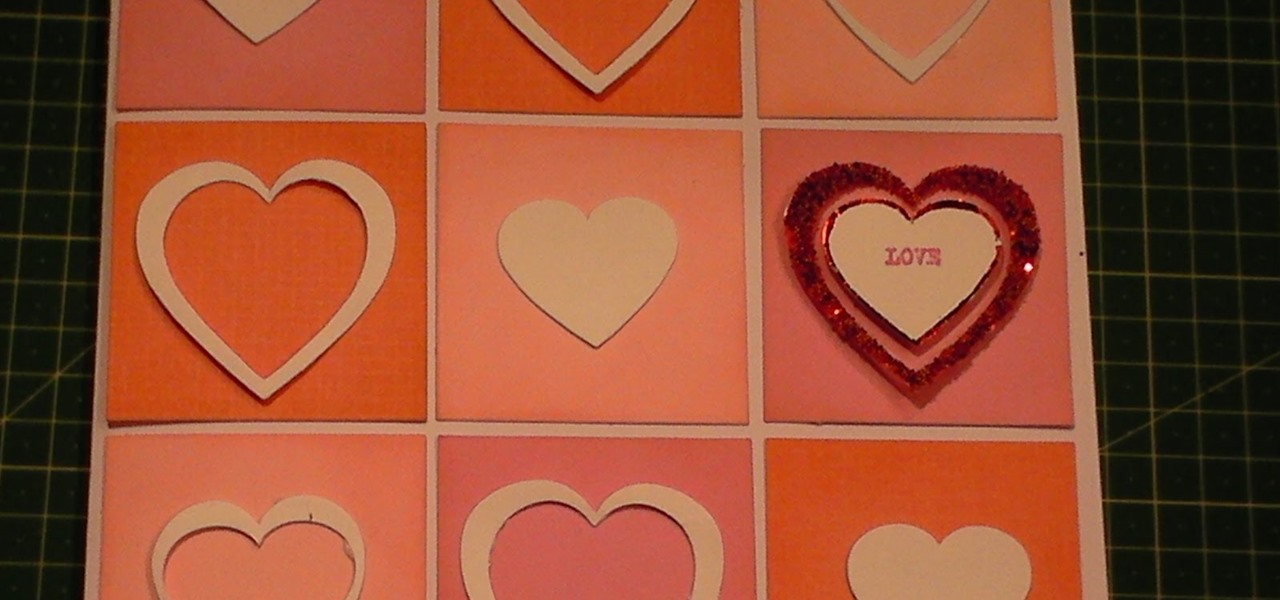
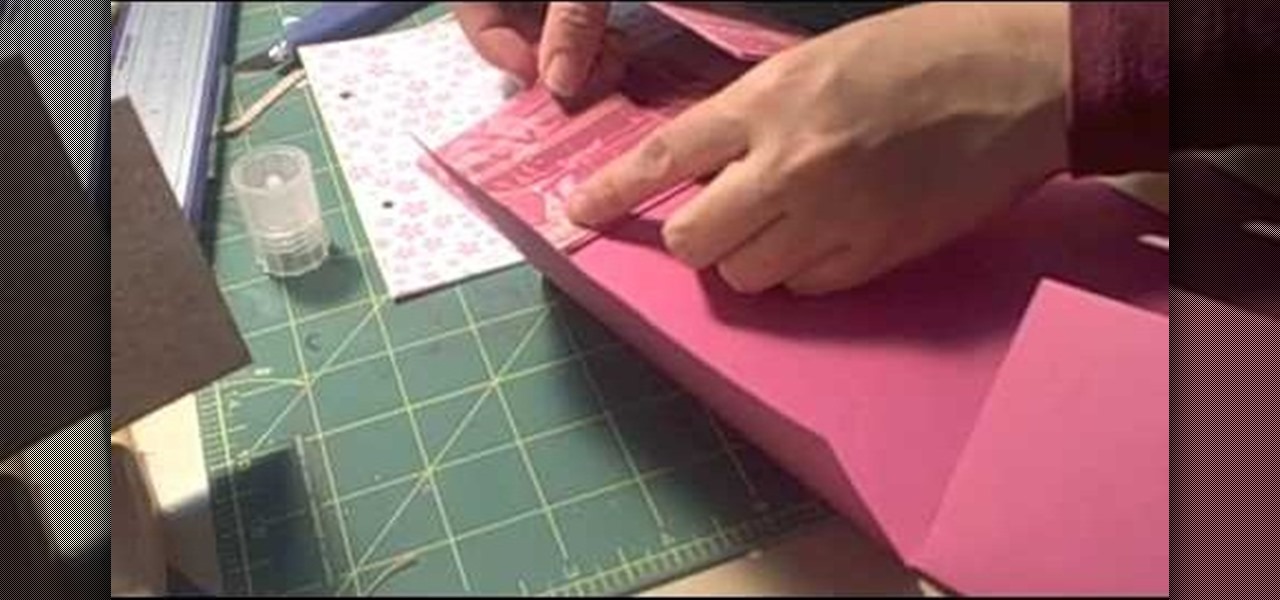
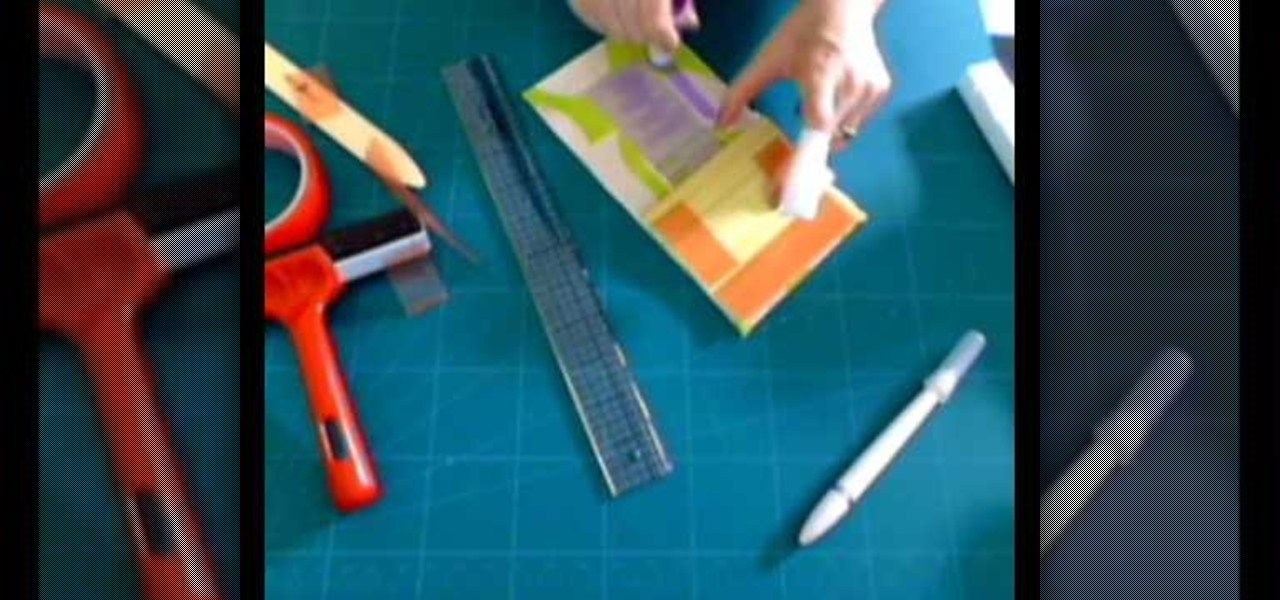
This card tutorial make a very modern style of card that is out of the ordinary for me.. However this is an easy and quick card, ideal for Valentines Day or a Love card or even a Wedding Card Step 1: Items Used

You have many great memories to share. Why not collect them all in one book? Learn the fun and meaningful craft of scrapbooking. In this video how-to, learn how to get started on your scrapbooking adventure.
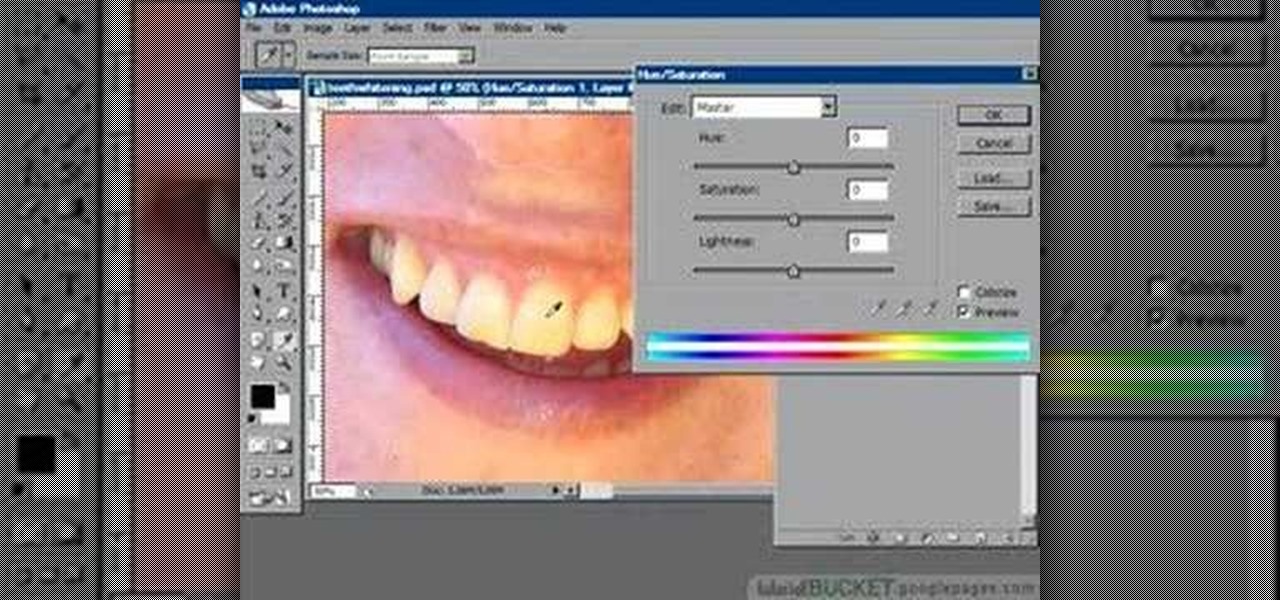
You know that you can edit almost anything in PhotoShop but did you know that you can make your teeth look dramatically whiter with just a few PhotoShop tweaks? Watch this video to learn how to select the teeth that you want to whiten and then how to adjust the hue and saturation of your teeth. Teeth tend to give off a yellow cast in photos even if they are not yellowish in person. You will need to leave a little bit of the yellow to keep your teeth natural looking.
Post-it notes are definitely not the chicest of accessories. After all, they spend 99% of the time grazing our office cube walls and computers and organizers. But they can be turned into a hefty decorative item when you slip one of the pads into this scalloped bright post-it note holder.
Video: . Today I bring you my first Christmas themed video!Here there are some DIY ideas to decorate your room for the holiday season. They are really easy and affordable so I hope you like them!

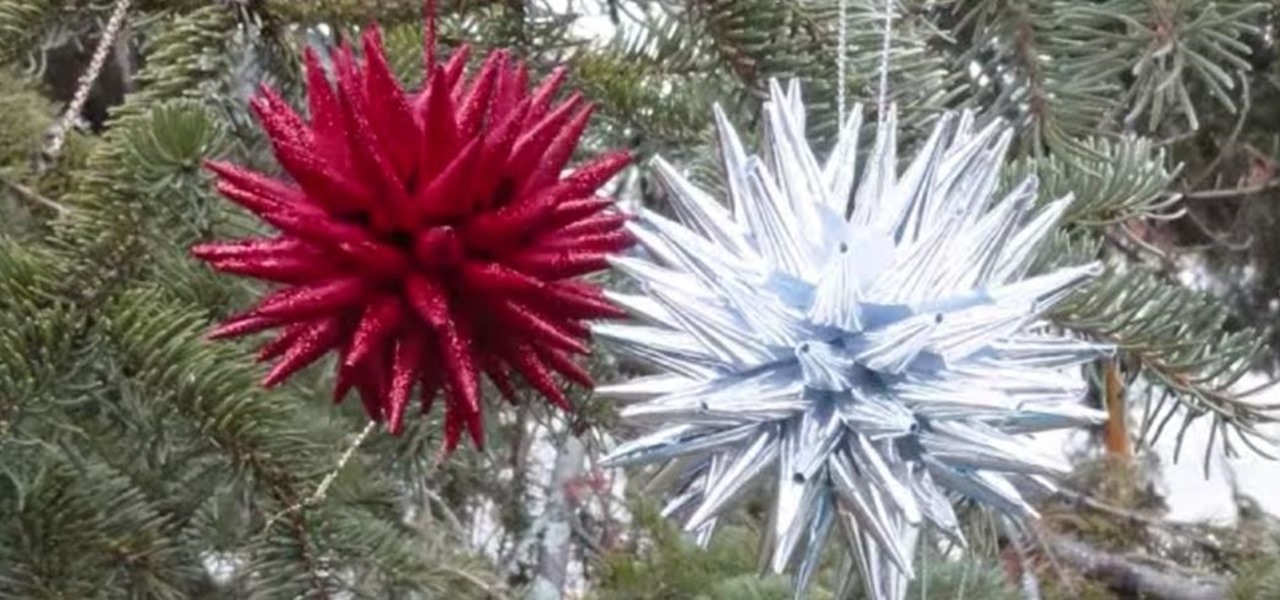
To be honest, these Christmas ornaments look more like sea urchins than stars to us. Either way, these festive ornaments are beautiful and cheap alternatives to purchasing standard ornaments at the store. Give each ornament character by using a different color or pattern paper.
Got lots to do on Halloween and have little time to spare for throwing on a costume or putting on fierce makeup? Then you've hit the right makeup video. Whether you're simply in a pinch for time or you don't feel like going with the whole shebang for Halloween, this zombie makeup look is totally festive and creepy but so easy and quick to do.
In this video, we learn how to get white teeth using PhotoShop. Before you begin, open up PhotoShop and open the picture you want to change. Make sure you zoom in on the teeth so you have a good view and it's easier to paint. First, select the dodge tool, the choose midtones. Now, select the brush that is "round-soft" and brush the brush over the teeth that you want whitened. If you make any mistakes, you can use the eraser tool to clean up what you changed. Once you are done, save your photo...
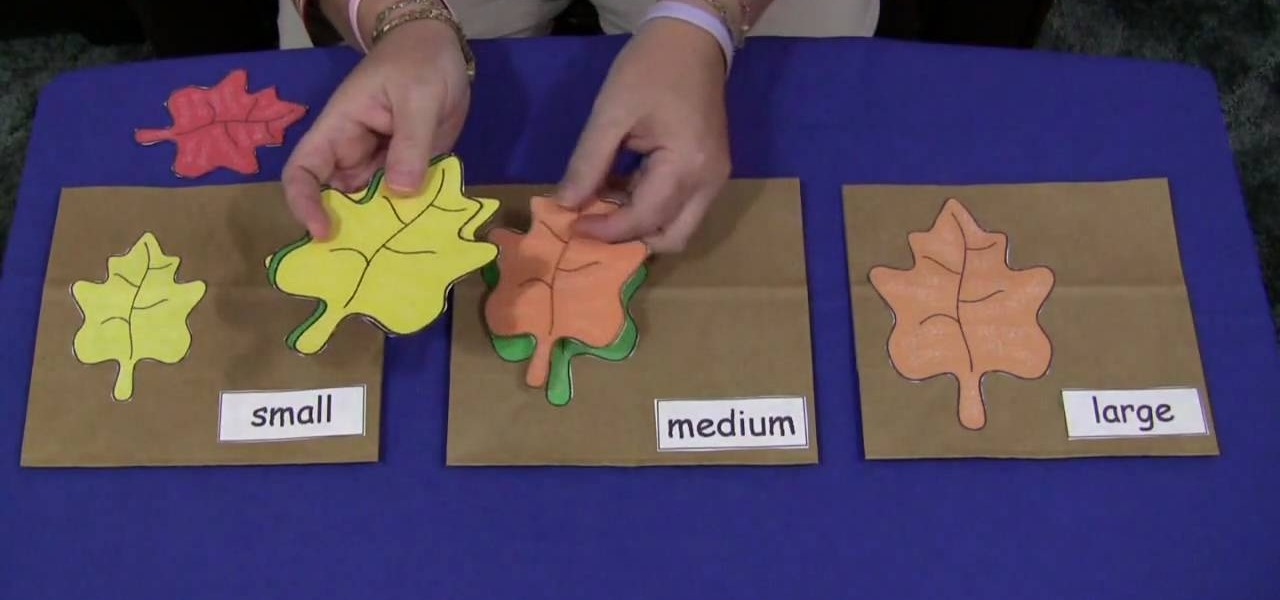
Shelley Lovett shares a great children's fall activity to help develop math skills - leaf size sorting bags. All that is required is three paper bags and some construction paper. Use the construction paper to cut out three different-sized leaves, and to make three labels saying 'small', 'medium', and 'large'. Then simply glue the small leaf and small label on one bag, medium leaf and label on the next bag, etc. To make the loose leaves of the three different sizes they place into the bags, si...
This video explains how to paint nails with a cobalt blue and flower dot design. The first step taken before applying the paint is to do a white wash manicure. The instructor begins by covering her makeup sponge in a dark blue color and then makes many small dots along the whitened part of the nail. The instructor then makes many more small blue dots along all of the boarders of her nails. After the blue dots have dried a white coloring is used to make flower pedal like designs within the blu...
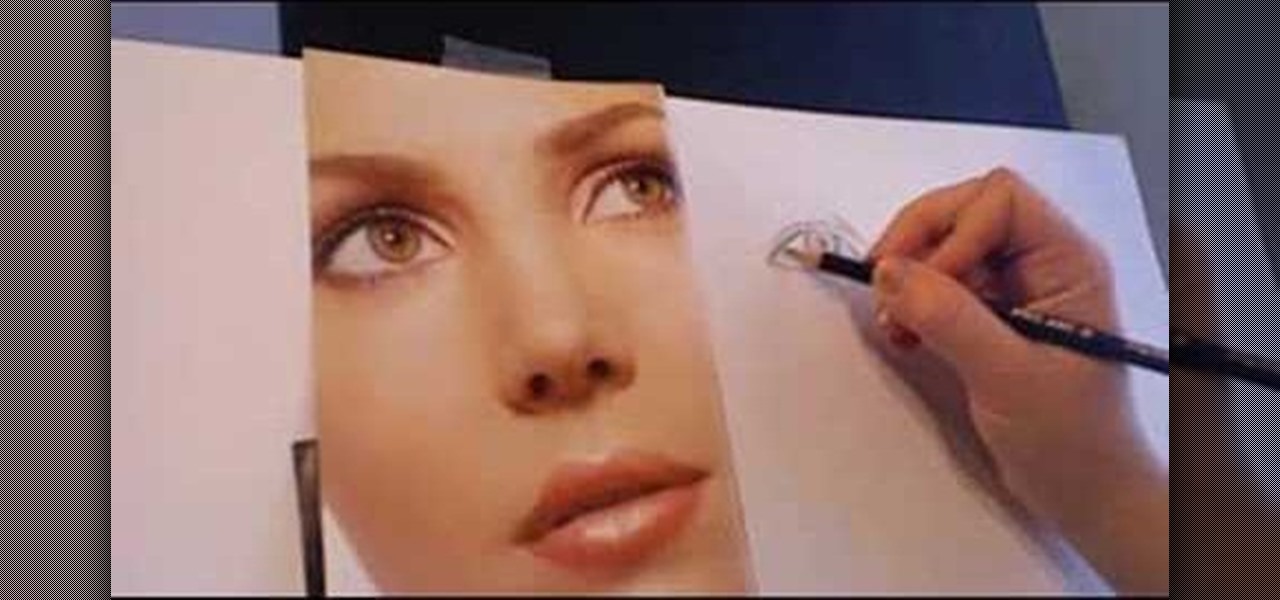
An unknown artist demonstrates step by step how to draw a realistic eye in this video. She first begins with lightly drawing the eyes shape, starting with the upper lid and gradually beginning to darken the line once she is satisfied with the shape an contour. She then draws the upper lid and continues on to the iris, pupil, and cornea. Then she works on shading the eye, drawing the lashes, and then using the eraser to remove any stray lines and whiten certain areas. Then, she begins drawing ...
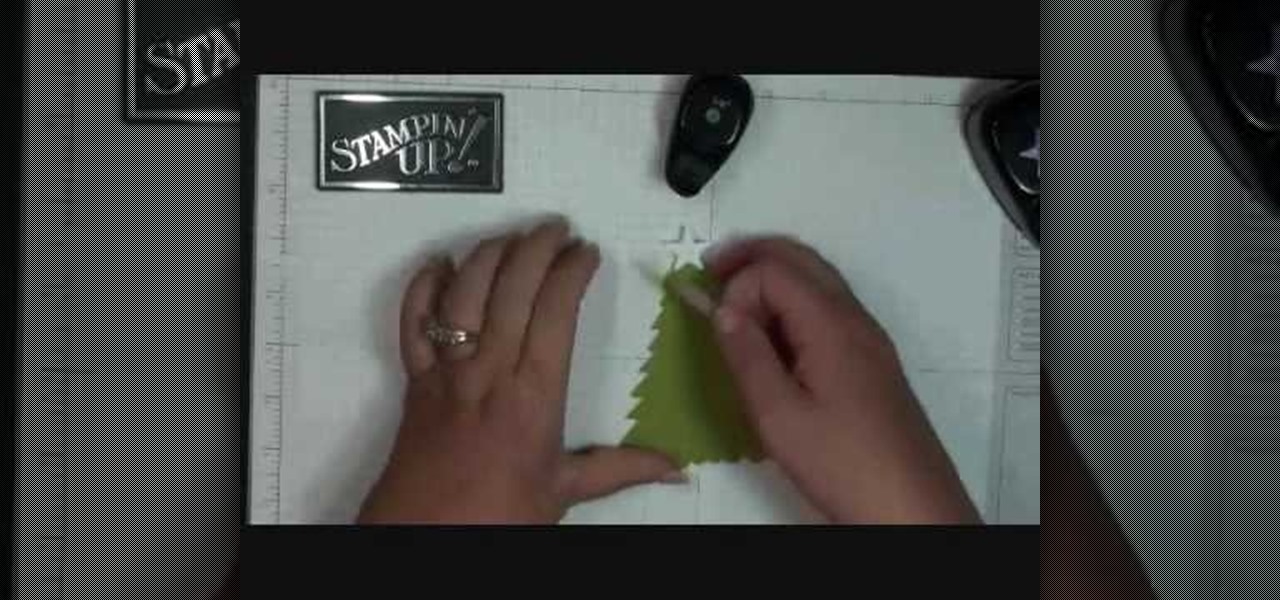
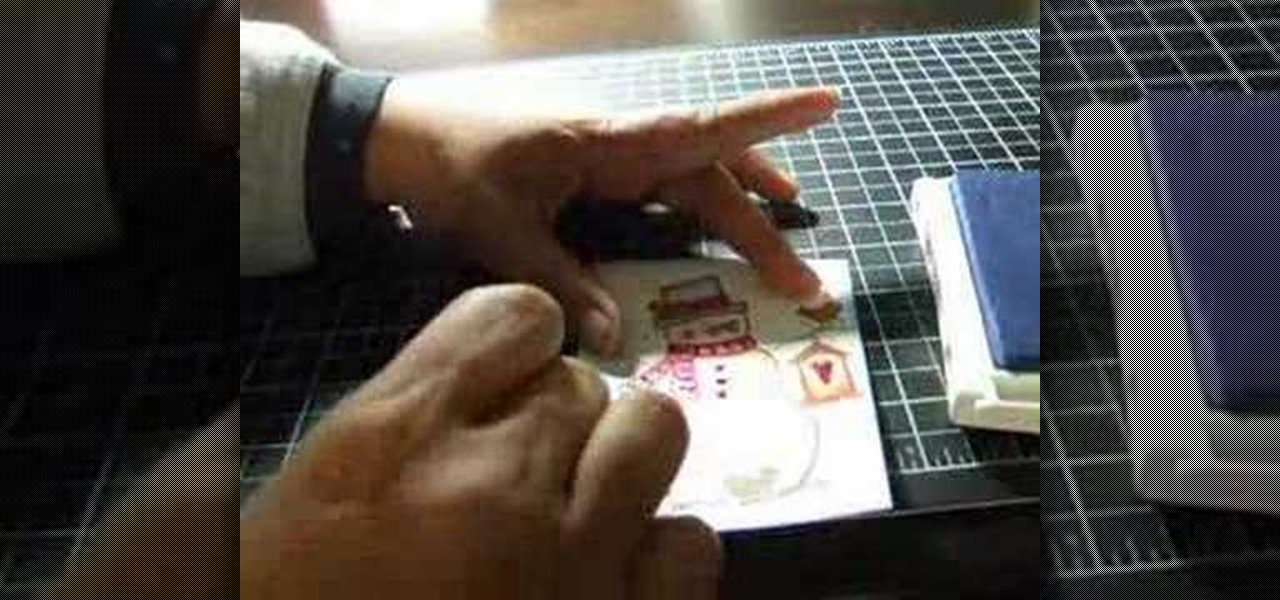
Dawn from "Stampin' Up" shows how to make an adorable Christmas card. She uses cardstock and several shapes to create this cute Christmas tree. A scallop circle hole-punch makes this craft a breeze - you could easily make enough of these cards for everyone on your list. A triangular base and six or seven scallop punches cut into quarters are all that is needed for the body of the tree. A star punch and some small circle punches bring this little tree to life. Your friends and family will want...
Looking to stick your winning game on your wall? In this two part tutorial, learn how to deflesh the skull and antlers of a deer and make it into what is commonly known as a Dry Skull, Desert, European, Texas, or Western Mount. Part one covers starting with the harvested animal, a typical plaque, discussing set-up and basic methods, the bone overview and the processes' start. Part two continues the defleshing of the skull base, tightening of the nasal bones, whitening, detailing, antler base ...
Because who wants to mess with all those wires, programming and power sources? You can make your own origami robot out of paper or cardboard! Though it probably won't do as much as a real robot would, it's nevertheless a fun project to do! All you need are a few sheets of paper (you can also used cardstock or a thin cardboard, depending on how sturdy you want your robot to be). Then just follow the steps in this tutorial!
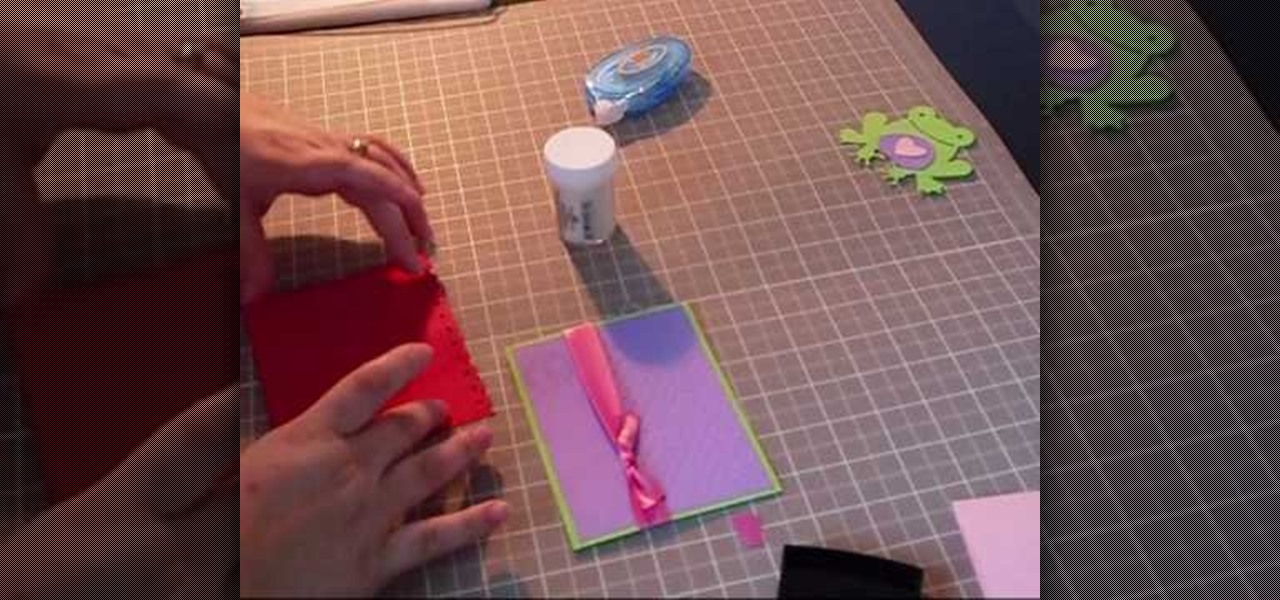
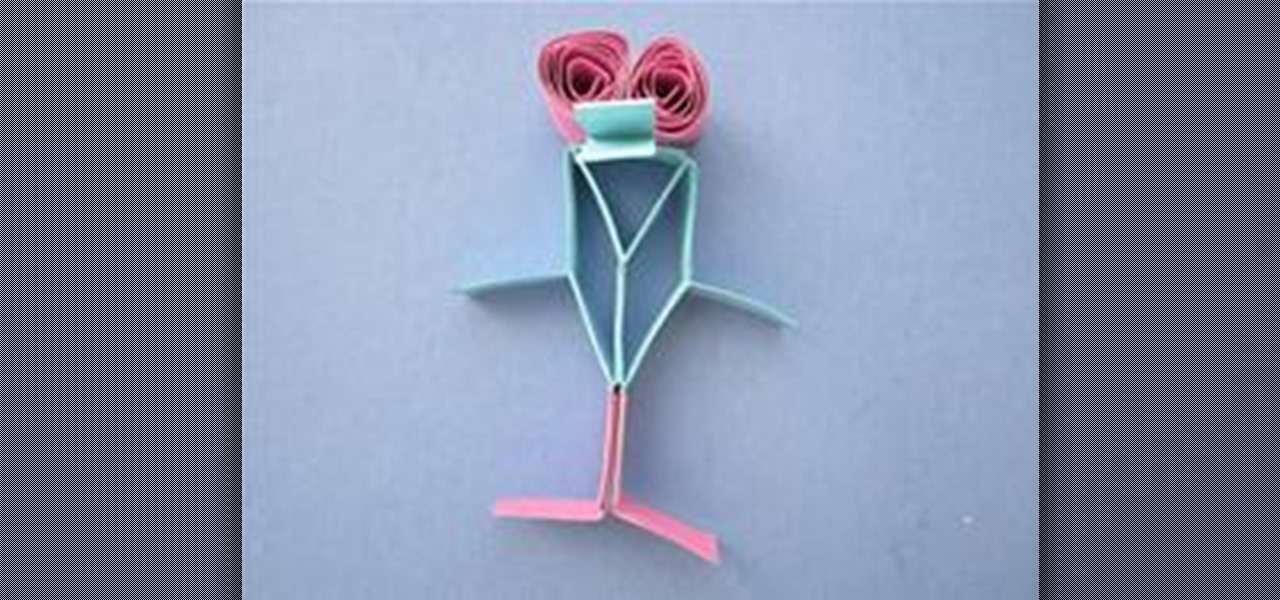
This adorable "smile frog" greeting card is a wonderful craft because it can be given out to loved ones year round. The cardstock frog has googly eyes and a teeny pink heart inside his stomach.
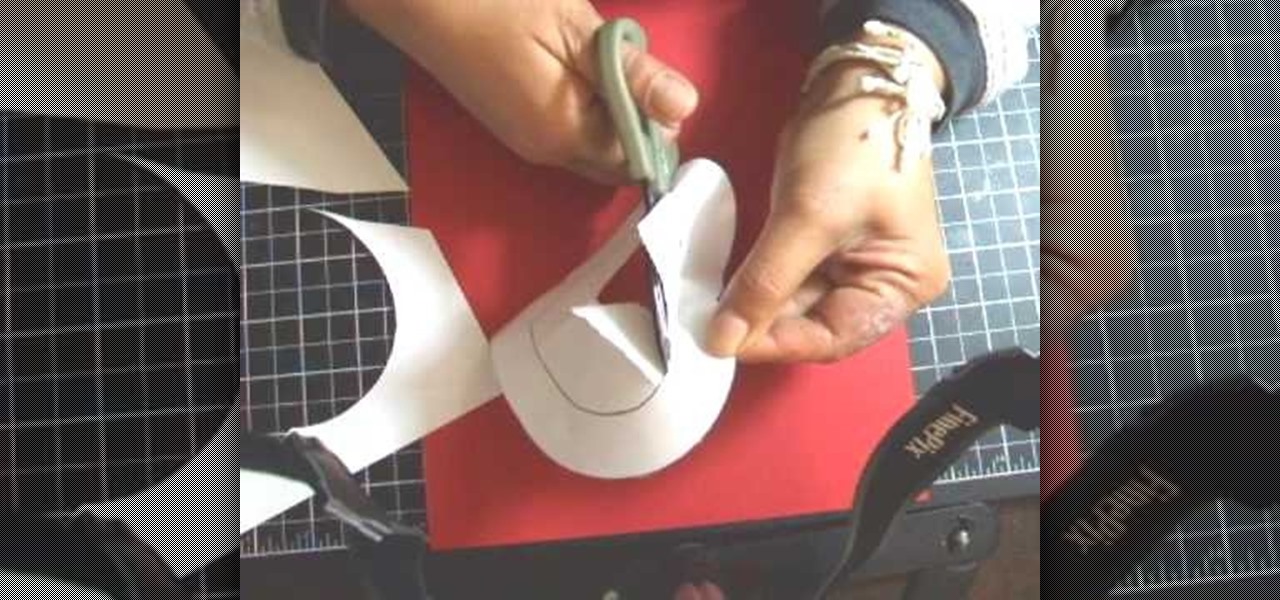
In this tutorial, we learn how to make a slit flower frame card. First, gather all your cardstock together in the colors that you would like. Then, take the first one and cut a circle window in it using a blade and a template. Then, punch slits on the outer frame of the window. From here, shade the petals and pull them out from the card to stick out. Then, place a rubber stamp with hearts on the other place of card stock. Then, turn the flower frame over and apply foam tape to the back. From ...
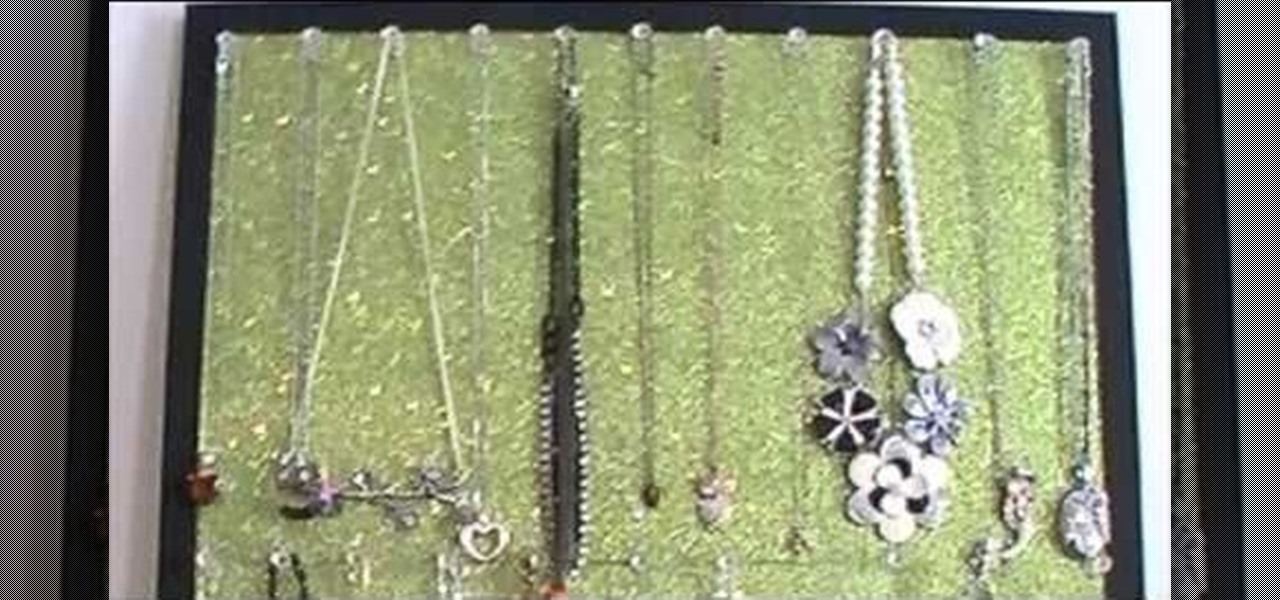
If you're anything like us, then it takes you forever and a day to find that perfect earring and necklace you want to go out, not because it's hard to decide which one, but because everything's so tangled up together you can't make out one necklace from another.
This video tutorial is in the Arts & Crafts category which will show you how to make a flip square album. Take a 12 x 12 inches square cardstock and make a score line at 3 inches on all 4 sides of the paper. Now cut along the score line at the top and bottom of the paper up to the 3 inch line. Next you fold along all the score lines inwards and you have all the flaps ready. Then mark along the edge of the center part of the sheet and punch two holes for tying the album as shown in the video. ...
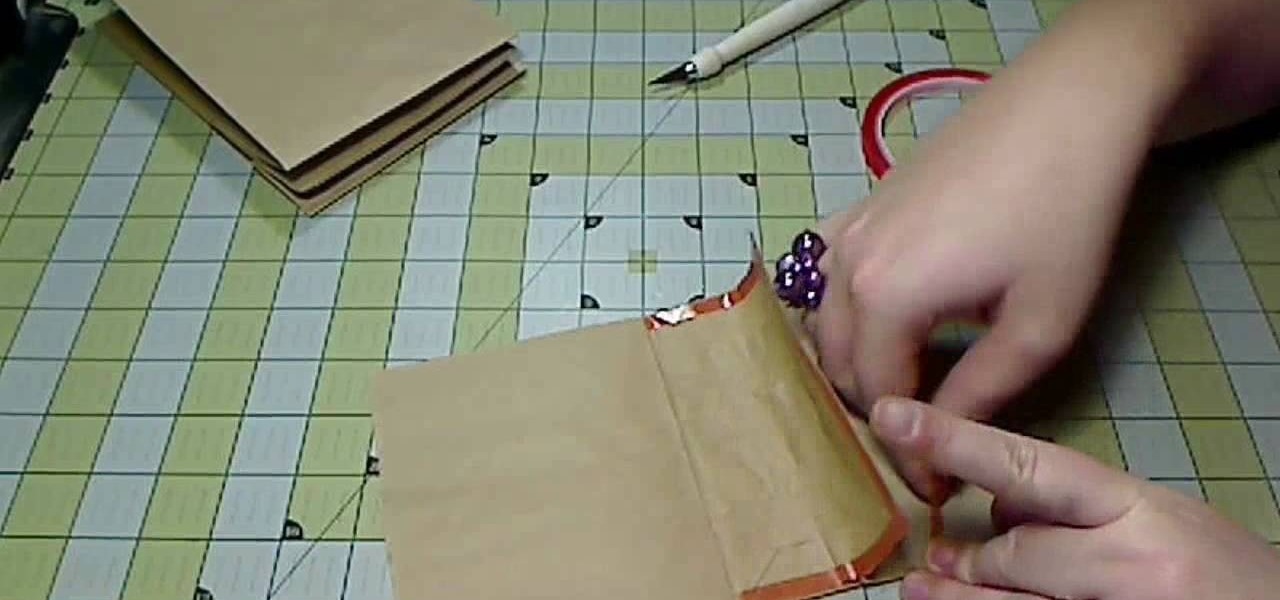
Brown paper bags aren't only for storing your PB&J sandwich for lunch. In fact, in the craft world they're heralded and used frequently because they're cheap and give projects a whimsical homespun feel. Just take this kraft paper bag album, for instance.
In this Arts & Crafts video tutorial you will learn how to make a vertical Easter greeting card. Take a 6x6 yellow card and fold it in half. Using the Valentrio Fiskars corner punch, you can punch one corner. Cut a 2 1/2” wide metallic cardstock, a 1” wide paper strip, stamp a picture or a design and punch it with Fiskars punch. Punch the 1” wide strip with the Fiskars border punch and glue both the pieces above and below the metallic card stock. Glue the metallic card stock and the pic...
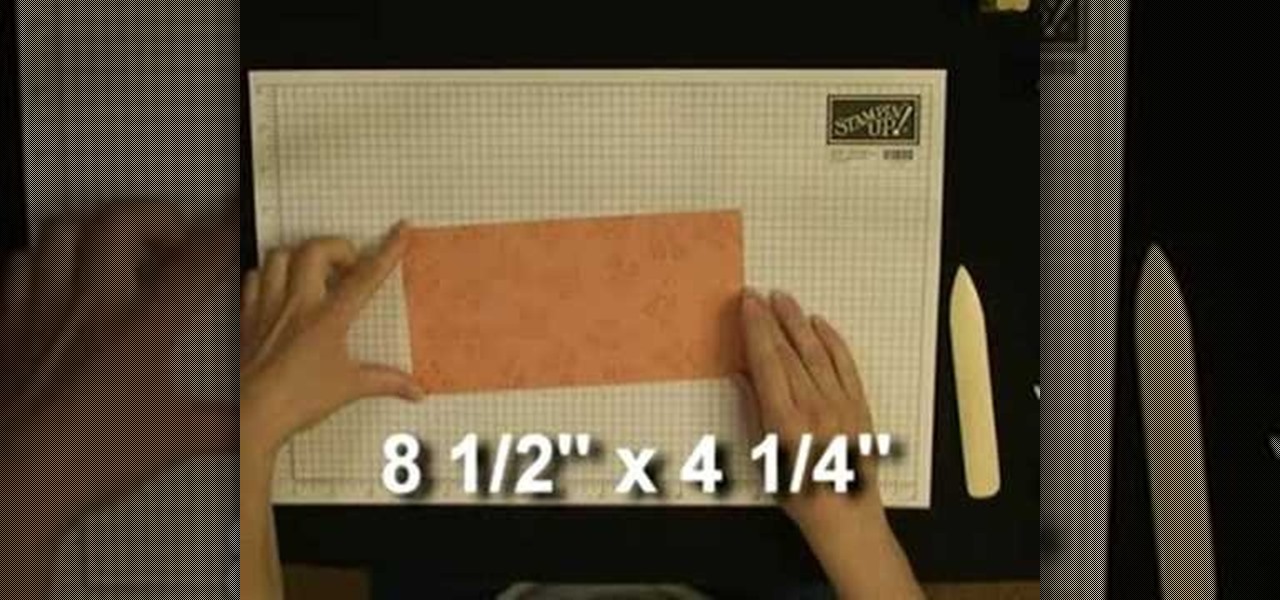
In order to make an accordian- fold style greeting card, you will need a piece of card stock, glue or adhesive, scissors, markers, and stencils/stamps. Cut the cardstock in a diagonal. Fold the card into 3rds, lengthwise. Cut a 5 x 3 ¼” panel at an angle. Use Masking Magic and stamp the excess card stock. Cut out your stamp designs. Color in your designs with Sharpie brand permanent marker pens. Glue the 5 x 3 ¼” cut piece to the card, or you could use 2 sided tape. If you have addition...
For anyone looking to dress up a card, learn how to make a paper pumpkin using punches in this video tutorial. Take a white piece of paper and distress it with Memory Mist (with the pale ale color). Use a box to distress the paper, while avoiding getting the mist all over your work space. To actually make the pumpkin use a store-bought punch (either round or oval). Make the punches with orange cardstock. For each pumpkin, you will need either three ovals or circles. Using a chalk ink to distr...
In this video tutorial, viewers will learn how to color with SU pastels and SU markers with Aquapainter and water. With a cotton swab, rub the pastel directly on the image. In this video, it is demonstrated on a glossy cardstock. Continue to add different pastel colors with your cotton swab. The colors will be subtle. Blow off excess chalk as needed while coloring. With an Aquapainter filled with water, pick up color from the markers and shade your image. This video will benefit those viewers...
In this video tutorial, viewers learn how to shade and color the background of an image. This video explains all the materials required to shade and color the background of an image. The materials required are: a stamped image, a spoon dauber and an ink pad. Start by inking the sponge dauber and rub the edge of the cardstock. Continue to color the edge. Add more ink if you want the color to be darker. Color the background with the sponge dauber. Add link to the sponge dauber. Dab and rub the ...
The template for this heart-shaped window card can be found at [www.stampininspirations.blogspot.com stampininspirations.blogspot.com]. You will need the template and cardstock and the other usual materials needed to make a card. You can re-size the template to about 5 1/2 inches across by about 5 1/2 inches high. Cut out the heart and remove the center heart as well. Take an 8 1/2 by 11 inch piece of red card stock and fold it in half, then trace the inside and outside of the heart-shaped te...
Joann of "Paper Crafting" shows you how to create a CD mini album. What it is, is actually a pop up photo album that you create using a CD case. The materials needed are 1) a CD case. 2) various decorations to put on the outside/inside depending on your taste. 3) cardstock type paper that can be folded around 8 times: on each "fold" you will put a photo- preferably the album will have a theme. Then you fold it up and put it in the Cd Case and embellish the front however you like.
Show someone you care about them by spending a little extra time on their Christmas card... and in the process, save some money. In this tutorial, learn how to make a pop-up three-dimensional Christmas card for your loved one.
This is two part instructional videos demonstrates how to make a stationery box. This box holds standard size cards, 3x3 cards, gift tags, and more. You need to start with a 12" by 12" sqaure of cardstock. Use double stick tape for the key joints. You can decorate your box with store bought cutouts or use recycled paper and ribbons. Good luck!
You share your innermost feelings with it on a daily basis. Why, then, settle for something drab, prefab and impersonal? With this handy how-to, you'll learn how make a custom fabric-covered hardbound journal.
Researchers have found that there are simple things anyone can do to appear more appealing. You Will Need
When it comes to household versatility, baking soda is king. Here are just some of the many cleaning uses for baking soda. Cleaning tips:
Always wanted a smile that will light up a room? Learn about teeth whitening from a dentist in this free dental video series.
Don't want a root canal? Learn about alternatives to root canals, such as fillings, in this free dental care video from an experienced dentist.
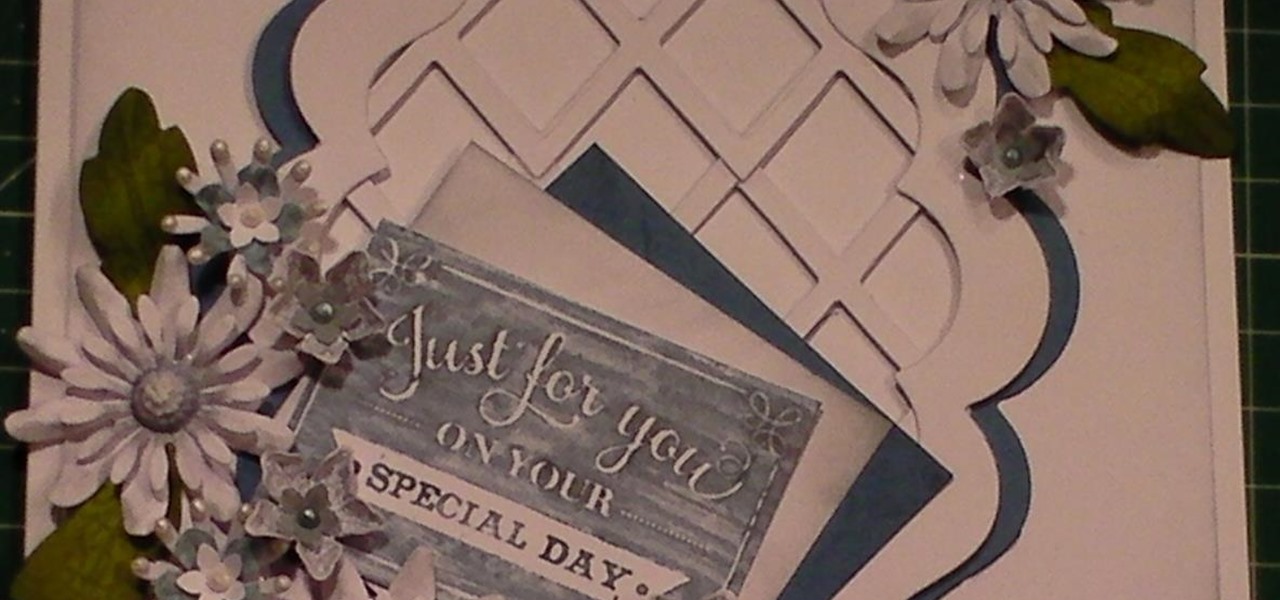
In this cardmaking demonstration I make a very unusual but beautiful card using a paper technique from the Anna Griffin Paper Tricks 2 Kit and with papers from the Anna Griffin Madison Paper kit. The card is 3D is style and very easy to make even though it looks complicated, when you see the steps to make it, I am sure you will agree its easy.. Step 1: Items Used
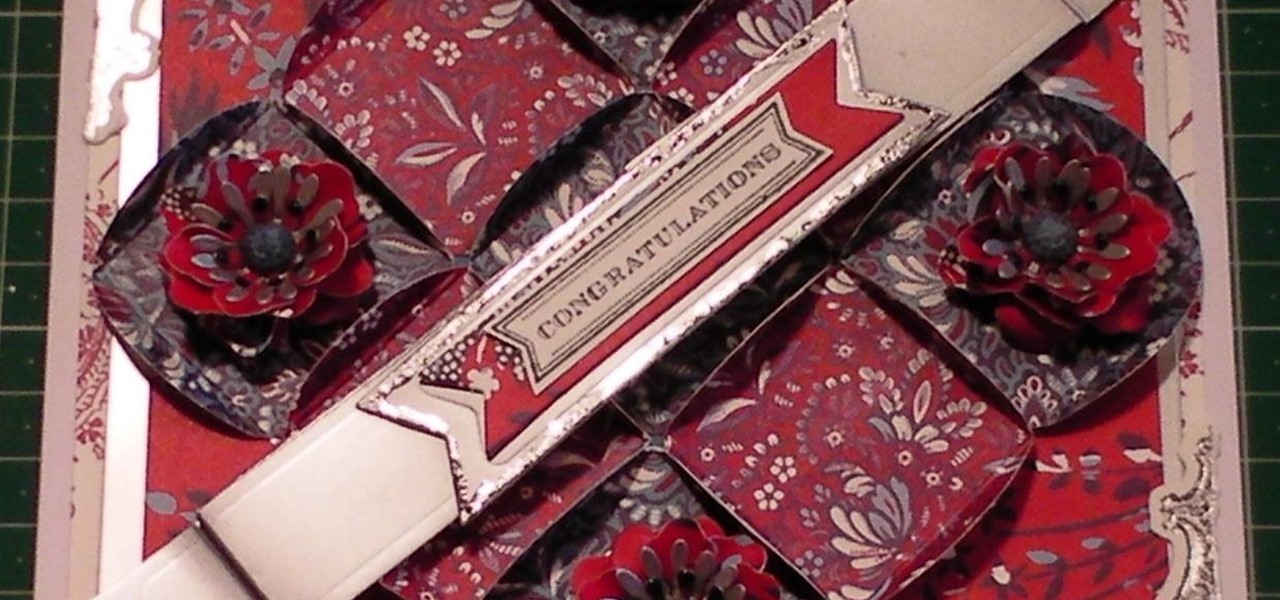
This card tutorial shows you how to make a floral lattice card that is based on a previous lattice card that was made with Poinsettias. This demonstration shows you how to use lattice die cuts with frames and making it a gorgeous floral delight. Step 1: Items Used
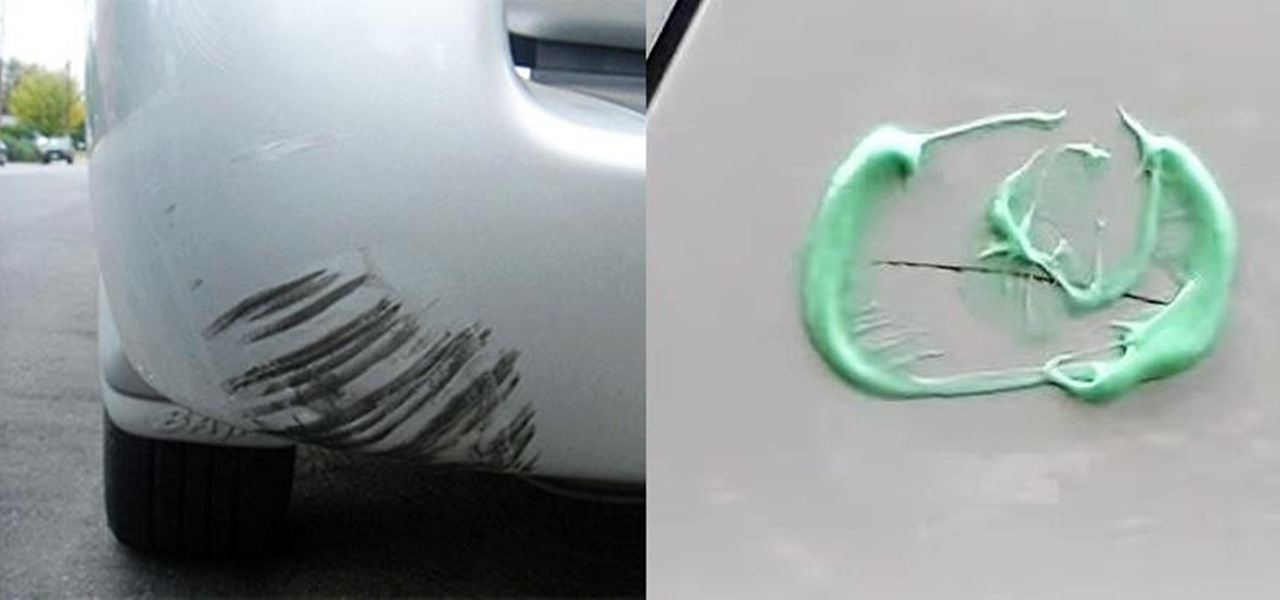
Whether you drive a new or used car, discovering a new dent, scratch, or scuff mark can send you into a frustration spiral. While there are many DIY ways to deal with dents, scratches and scuff marks are trickier because using the wrong stuff could make your car's paint job look even worse.
Whiten your teeth today! Get tips for brushing, using toothpaste, and other products to whiten your teeth in this free dental video series.
Interested in teeth whitening products? Learn how to keep your teeth bright and white with expert tips from a dentist on instant and prescription teeth whiteners in this free oral health video series.
Use geometry to make an adorable and fun heel klickin' friend using McCormick vertex elements! You will need: