If you're into making clothes from scratch and need help with sewing a flat-felled seam, then this video is for you. In the tutorial, you'll get an in-depth explanation for how to sew one using your machine. This seam s generally used on jeans and it's usually not visible on the clothing. It's a very strong seam and requires some work in completing. So check out the video above and good luck!
In this Magic & Parlor Tricks video tutorial you will learn how to do the gimmicked card color change trick. For this you will need two cards of different colors; a red card and a black card. Fold each of the cards right in the middle. Then glue the top half of the two cards at the back. The bottom halves of both cards should be free. Now take a third card and attach its face to the bottom halves of the two cards on the outer side. So, when you move the middle flap up or down, the card is goi...

This video demonstrates how to make a broken mirror effect using Photoshop.

In this video tutorial, viewers learn how to view hidden files and folders in Windows Vista. Begin by clicking on the Start menu and select Control Panel. Click on Appearance and Personalization, and select Folder Options. In the Folder Options window, click on the View tab. Under Hidden files and folders, check the option, Show Hidden files and folders. Now click Apply and OK. This video also provides a demonstration of hiding and revealing a hidden file. This video will benefit those viewer...

In this video, we learn how to turn a photo partially black and white using PhotoShop. First, open up the program and open up the picture you'd like to change. Now, click with the right key above the layer and choose duplicate "layer". Now click above the eye icon to hide the layer, then select the layer. Now you can go to image, adjustments, then black and white. Now make the second layer visible and select the eraser tool. Wave your brush over everything but what you want to keep colorful. ...
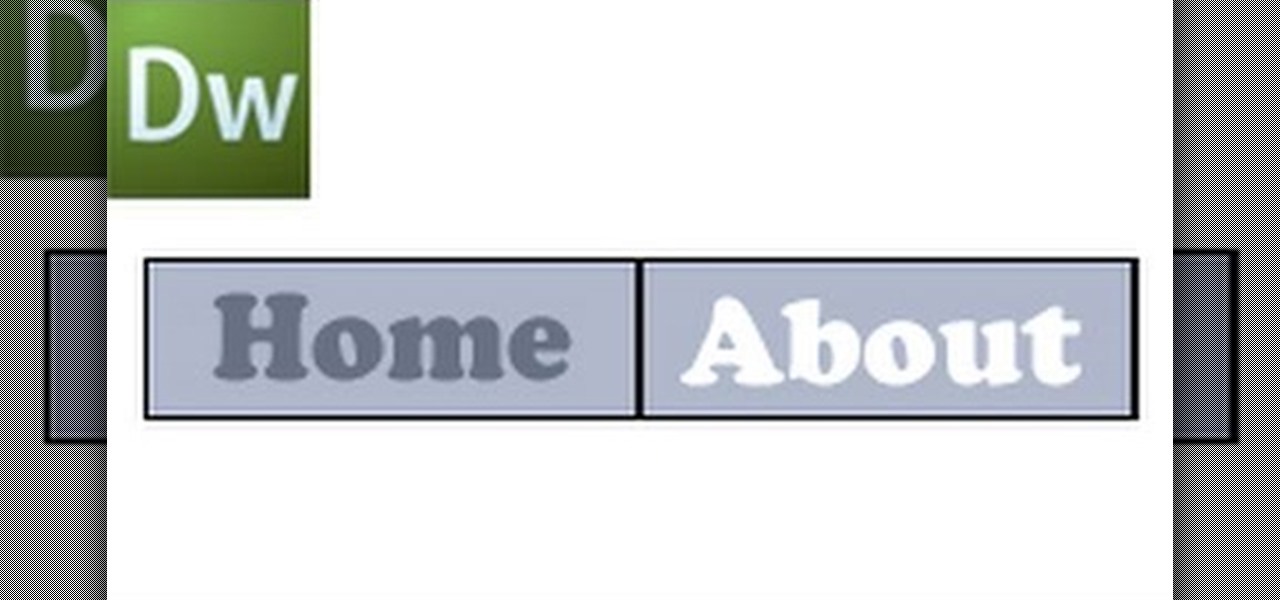
This video shows how to create a menu with rollover images in Dreamweaver. Open a new document and create a table with one row and one column. To add your rollover images, go to the "Image" tab and select “Rollover Image”. In the “Insert Rollover Image” box, give the image a name, then click “Browse” under “Original Image” to find your images. You can select your rollover images in the same window. Then enter your alternate text and click OK.

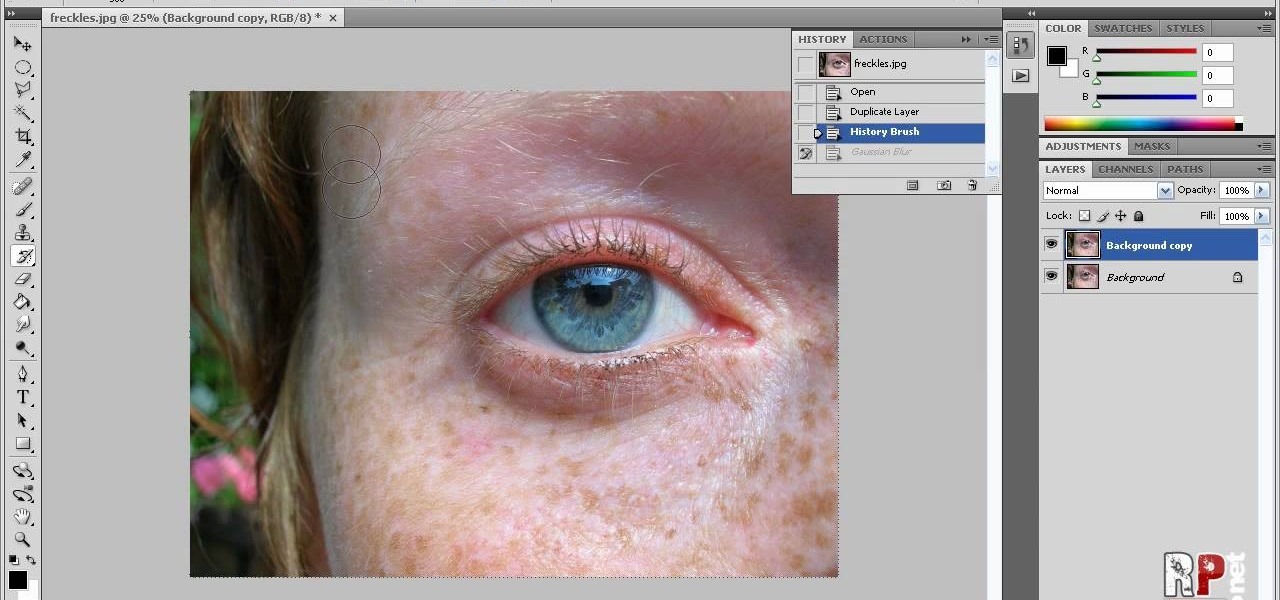
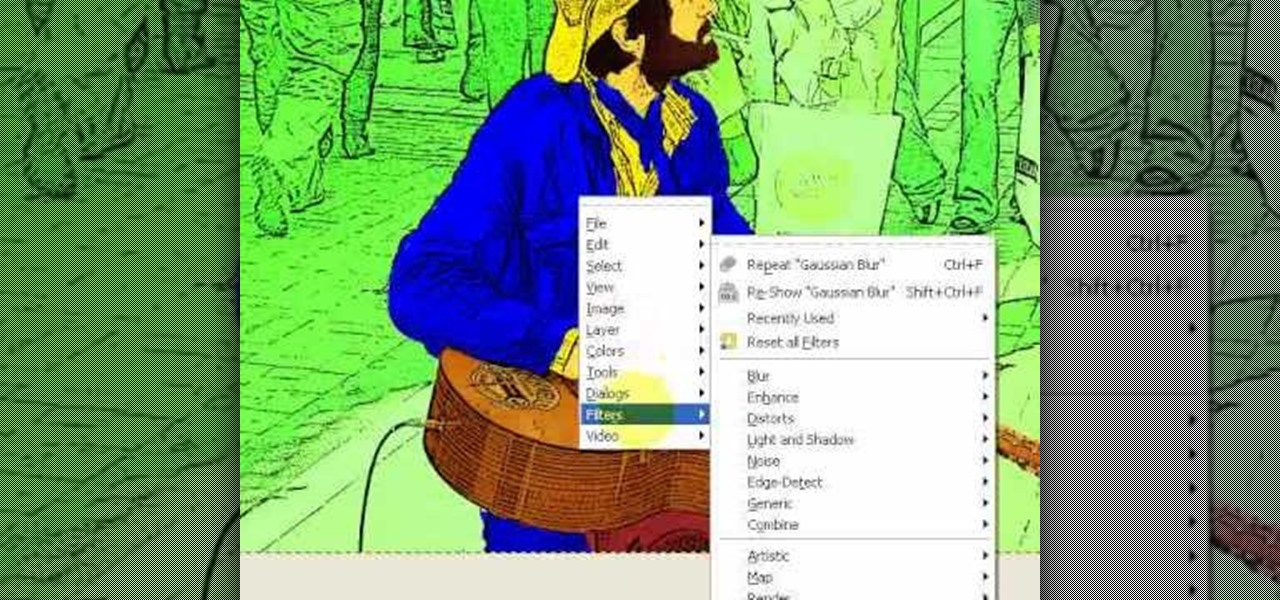
In this how-to video, you will learn how to reduce freckles in Photoshop. This is useful for editing people who have a lot of freckles. First, open the file in Photoshop and copy the background layer. Apply a Gaussian blur to the layer. Adjust it so that the freckles are no longer visible. Click okay and then open up the history palette. Click on the duplicate layer in the history window. Set the source for the history brush. Set the mode to light. Next, paint over the freckles. Now the freck...
In this video tutorial, viewers learn how to use the Tile Visuals tool with the Voice Over application on a Mac OS X computer. This feature will dim the screen so that the user will be able to go over the Voice Over commands. To enable Voice Over, press the Command and F5 key. To tile the visuals, press the Command, Option and F10 key. Now when users navigate through the screen, only the contents over the Voice Over cursor can be visible. To return to the normal view, press the Control, Optio...
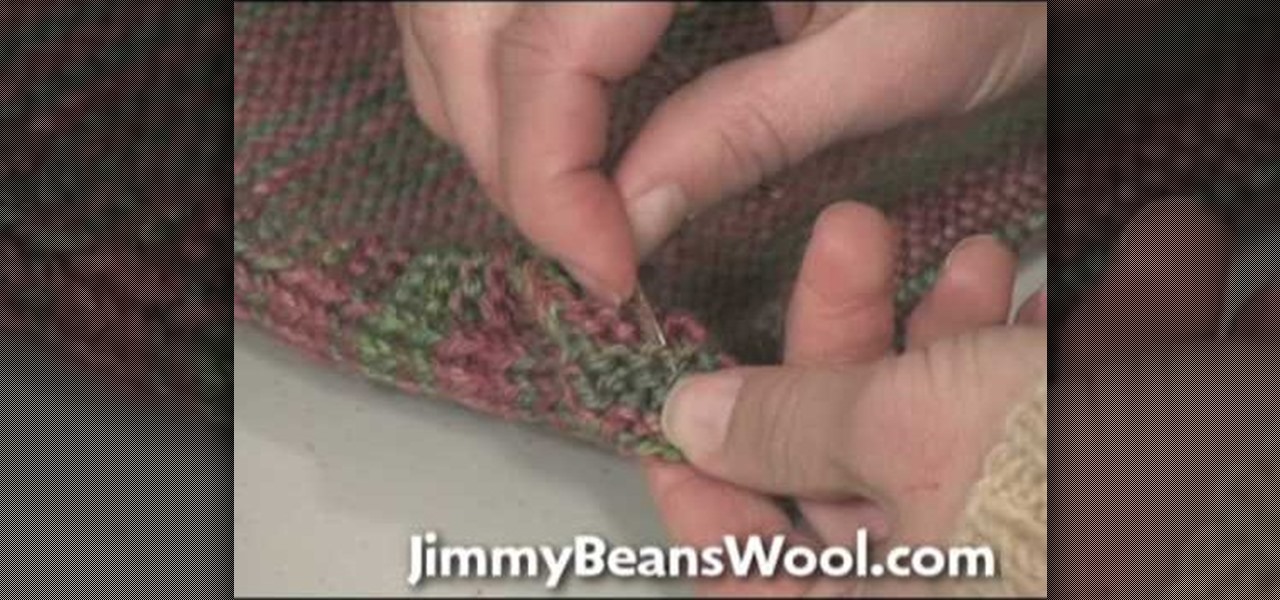
This video shows us how to weave in ends when knitting. Here are the following steps: Step 1: Take a needle specially meant for wool thread and scissor.
Chad from California Waterscapes takes you through the steps of installing a backyard pond. He begins by marking the location for the pond and stream using spray paint on the ground and by laying out the necessary equipment: the skimmer box and the waterfall unit. After digging out the pond Chad uses a laser level to determine the water level and place the skimmer box at this level. After all debris has been removed from the pond the underlayment and liner is placed in the pond followed by ro...
This video, which was made at Peopleprint Community Media in Rochdale, teaches how to easily silk screen print a t-shirt in only four minutes! First, design the artwork to be used for the print, then print it on acetate. Next find a clean screen. Put some emulsion in a coating trough and slowly and steadily coat the screen in emulsion. Then dry the emulsion in a dark room and expose the screen to light. Next wash the screen with water and the artwork should become visible. Mask the exposed ar...
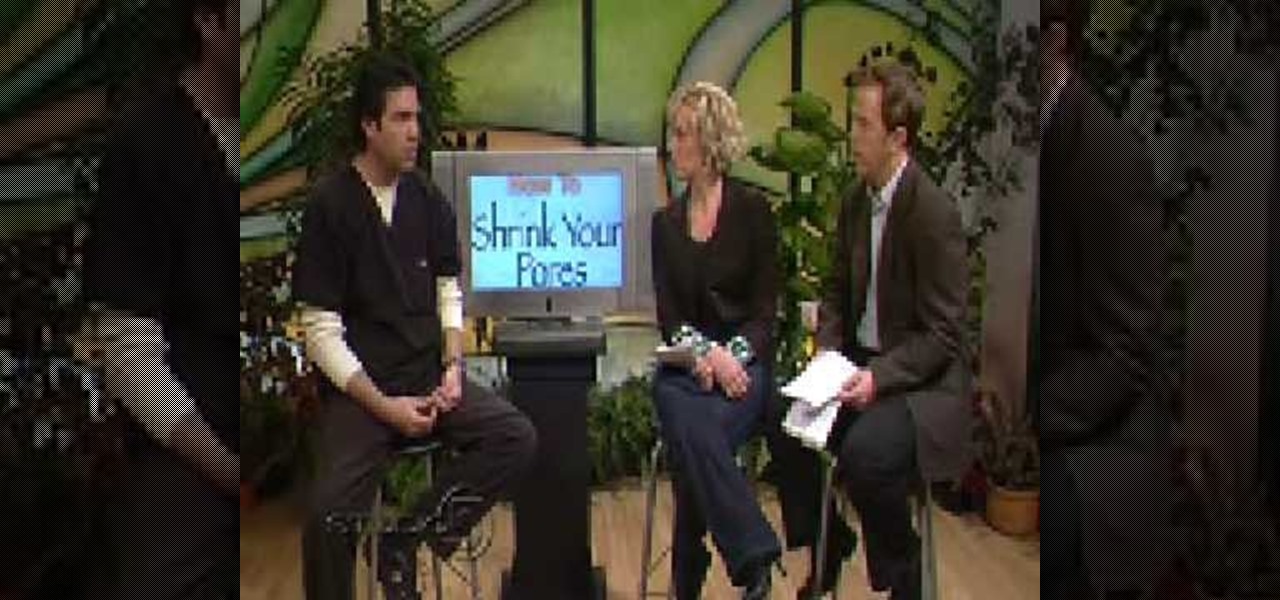
Dr. Steven Jepson explains what you can do to shrink your pores. Pores are small openings in your skin that can become infected or get clogged with makeup or dirt if they are too large. In order to shrink the visible appearance of skin pores you need to clean the dirt and gunk out of the pore. First you need to cleans and exfoliate your face twice a day using a cleanser designed for the face. Exfoliators are mildly acidic and help to dissolve the dirt so that it can be removed. Dr. Jepson war...
Watch this video and teach yourself how to make an easy and cheap clutch wallet using duct tape. The materials required for this are a pair of scissors, a rod, Velcro sticky tacks and duct tapes of different colors and you can use as many colors as you want. Cut out 12 inch strips of duct tape and stick five of them slightly overlapping one over the other. Then stick five more of the duct tape strips as in the above procedure so that the sticky sides of the two layers will be stuck together. ...
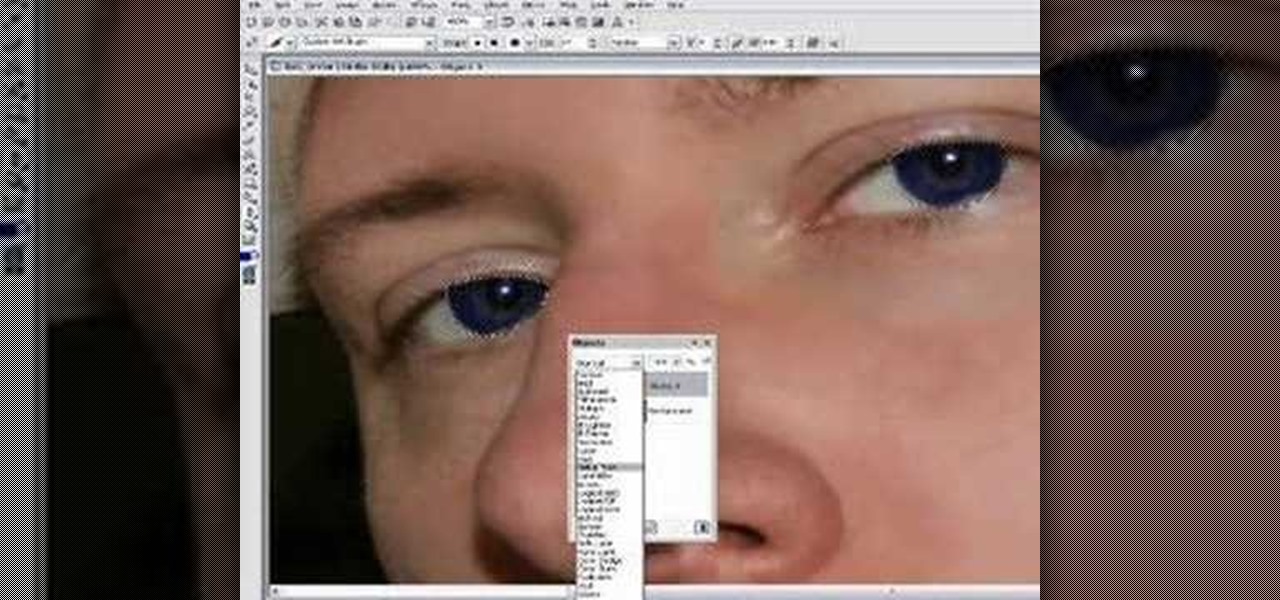
In this Software video tutorial you are going to learn how to change eye color in Corel Photo Paint X3 with masking. Select your picture and the 1st thing you will do is to create a mask around the eyes. Select the standard paint brush tool. Adjust the picture so that it is large enough and both the eyes are visible. Now press Alt and hold down to select the entire eye. Do the same for the other eye also. Then go to subtractive mode and fix the outer edges of the iris of the eyes. Now select ...
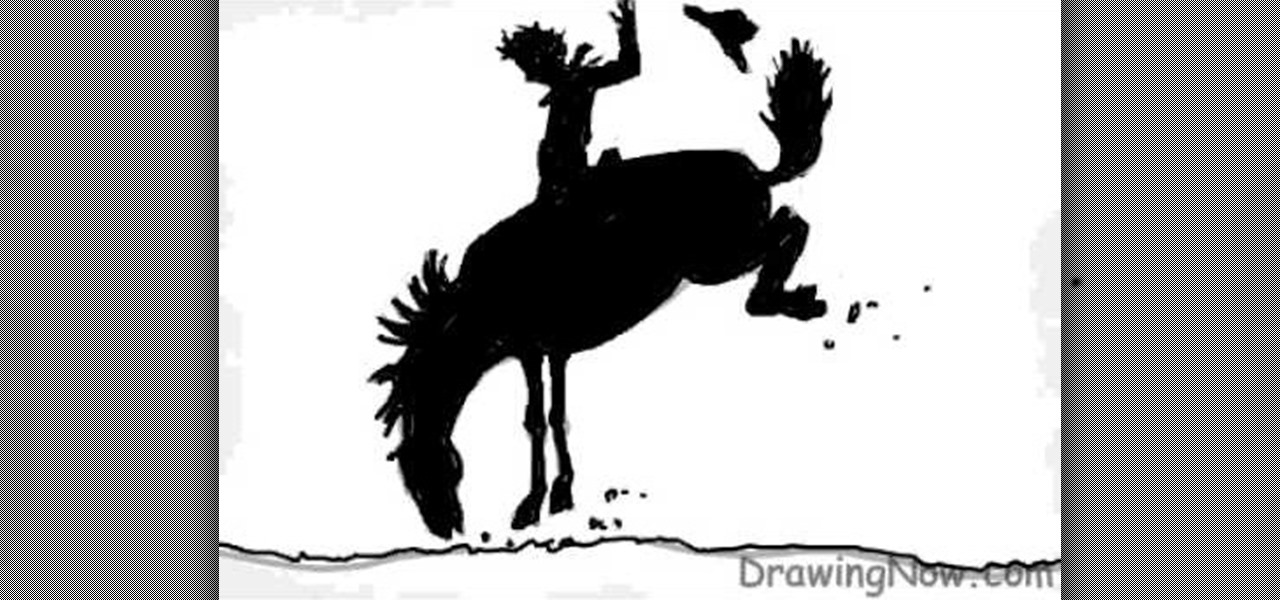
In this video user DrawingNow teaches you how to draw a rodeo cowboy and horse. You draw a large oval which will be the horse's body. Then attach another one as the horse's head. Next, draw the legs and the ground using simple lines.
In this video molly1216 explains her method of repairing a hardcover book hinge. She mentions that this method should be used for inexpensive books that are not worth being sent to professionals.
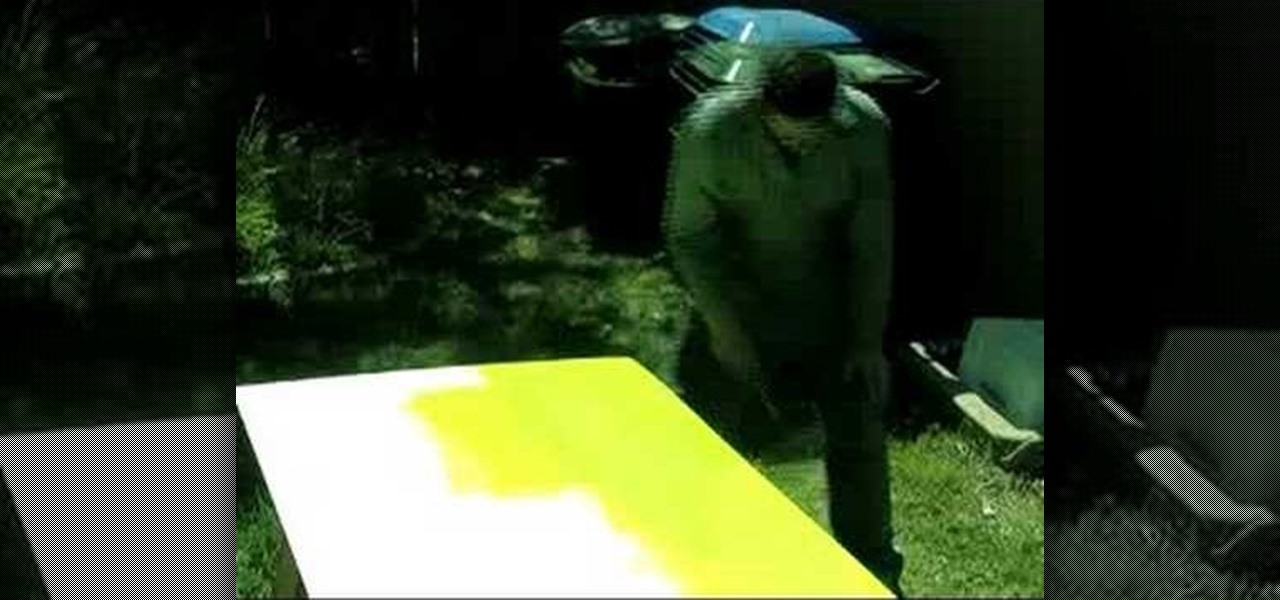
This video tutorial show you how to make your own functional green screen to create special effects. If you try to isolate a subject on a film with a dynamic background there is a good chance to loose parts of the subjects during the process. By using a monochromatic background this can be prevented. For this you'll need large foam boards, bright green paint and a roller made for smooth surfaces. Spray painting doesn't work and results in a blotchy finish. Paint the boards evenly with the gre...
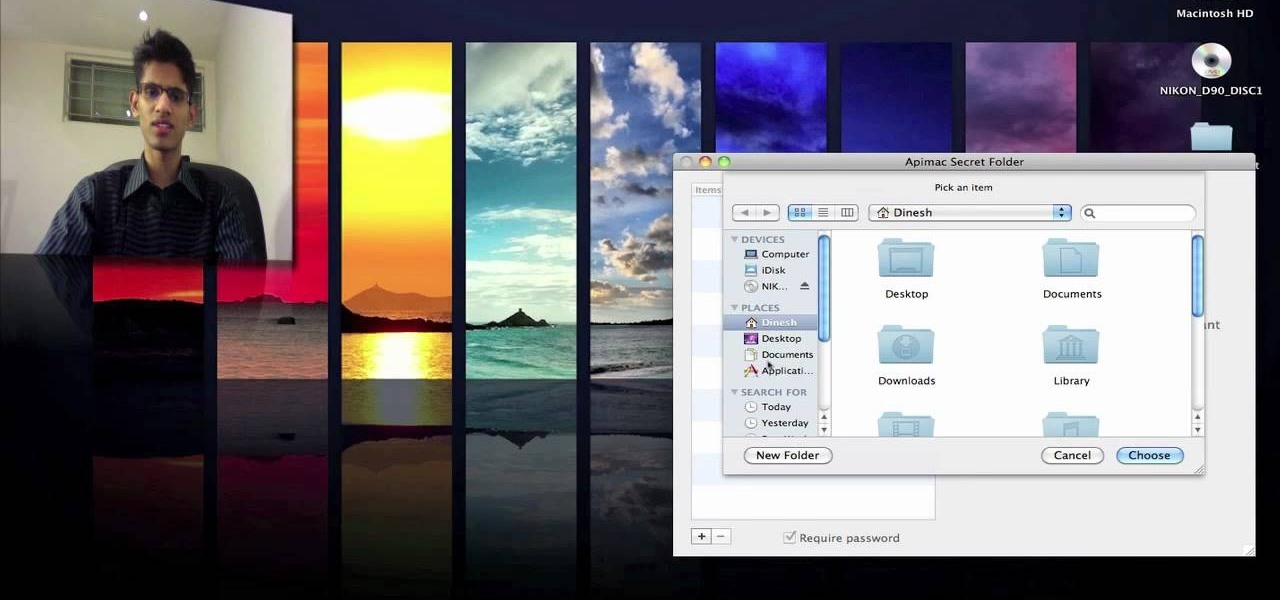
Watch this video for a helpful tip on how to use secret folder application and protect folders in your MAC PC by hiding it. you could download secret folder application from version tracker.com for free go to the Website and click download button to download the application on your Mac PC open the secret folder application. click on the required password button, put your desired password and re enter to confirm. to access your file, click the plus button at the lower left. choose the desired ...
EggBram walks you though changing background colors in Xara3D and shows where to find the transparency setting. This is a simple walk through in high detail, very visible. Xara has been a part of internet development from the very beginning. Xara one of the original Internet service providers when it came about in the 1990s. Xara does most of its work online and has millions of customers online around the world. Xara Online is a leading edge online web service that gives you solutions for a m...
Rowland from Windows Performance teaches how to clean up your Windows Vista desktop & icons. Start by right-clicking the task bar and select Properties. Now click the 'Toolbar' tab, check the 'Desktop' option and click 'OK'. Now right-click anywhere in the desktop, go to view and click the last option. All icons in the desktop would not be visible now. Now go to the notification area, in the 'Desktop' option you can find all the items to use.
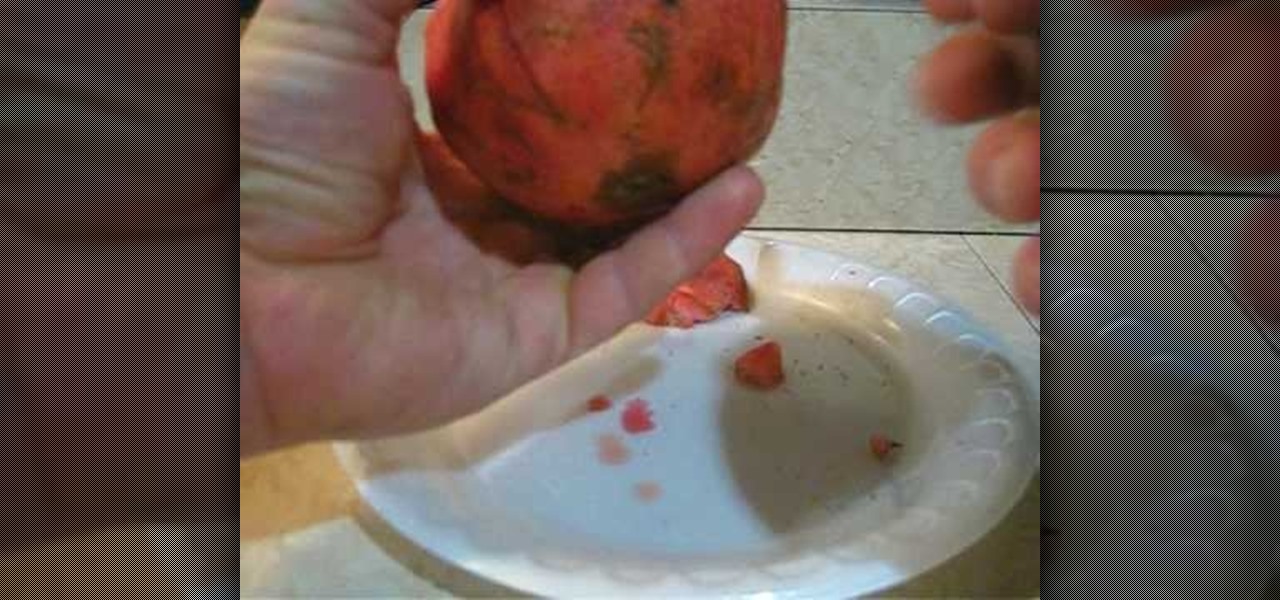
Ever wanted to enjoy the sweet taste of pomegranate but were confused about how to actually get to the fruit? Use this simple method to cut open your fruit. Take a small, sharp knife such as a paring knife or pocketknife. Slice a thin round off the top, stem end. This will leave several tops of fruit sections visible. Cut a small cone shape out of the center about 3/4 of an inch deep. Use the knife to slice from one end of the fruit to the other along the white pith dividing the segments of t...
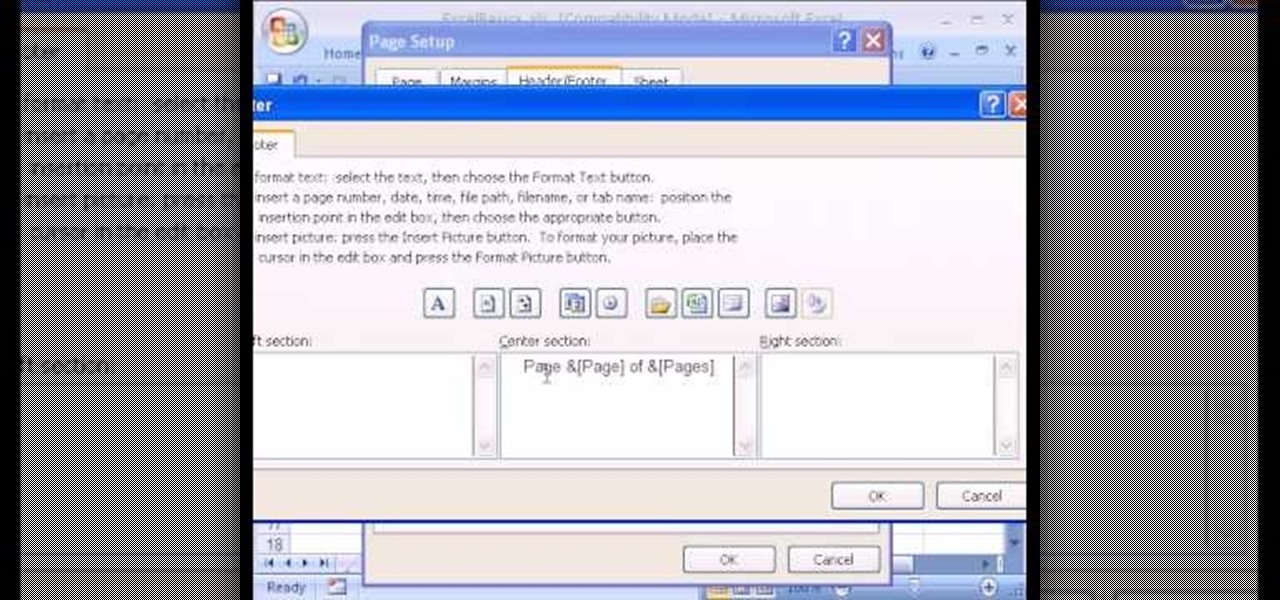
In this Excel basic video the instructor show how to setup a page in Microsoft Excel. Now you before go to a page setup, first you have to make sure that all the cells are visible in a spreadsheet by extending or contracting the size of different columns. You can also select all columns and make their column width a constant. Now go to the orb and select a print preview to get a preview of how the print out is going to be. Now after checking it out you can make necessary changes in the origin...
In this Adobe Photoshop tutorial the instructor shows how to make a torn image effect. He shows you a sample image of what it is going to look like after producing that effect. It basically looks like as if the photograph was torn to pieces and then put back together with the cracks visible. To do this first open the image in Photoshop. Now make a rough outline of the tear with the polygonal lasso. After generating the tear go to filter and in the distort sub menu choose the ripple. Now it ap...
This clip was filmed as part of a One to One training day with Mike Browne. Focus the camera on a bunch of window panes. There is a row of window panes which cuts across the bottom left hand side corner. There's actually nothing right or wrong with it, only thing that matters is whether or not it works for you. Mike Browne believes that because it is strong and dominant you should crop the image so that it will no longer be visible. You can always remove that in a computer later, thanks to di...
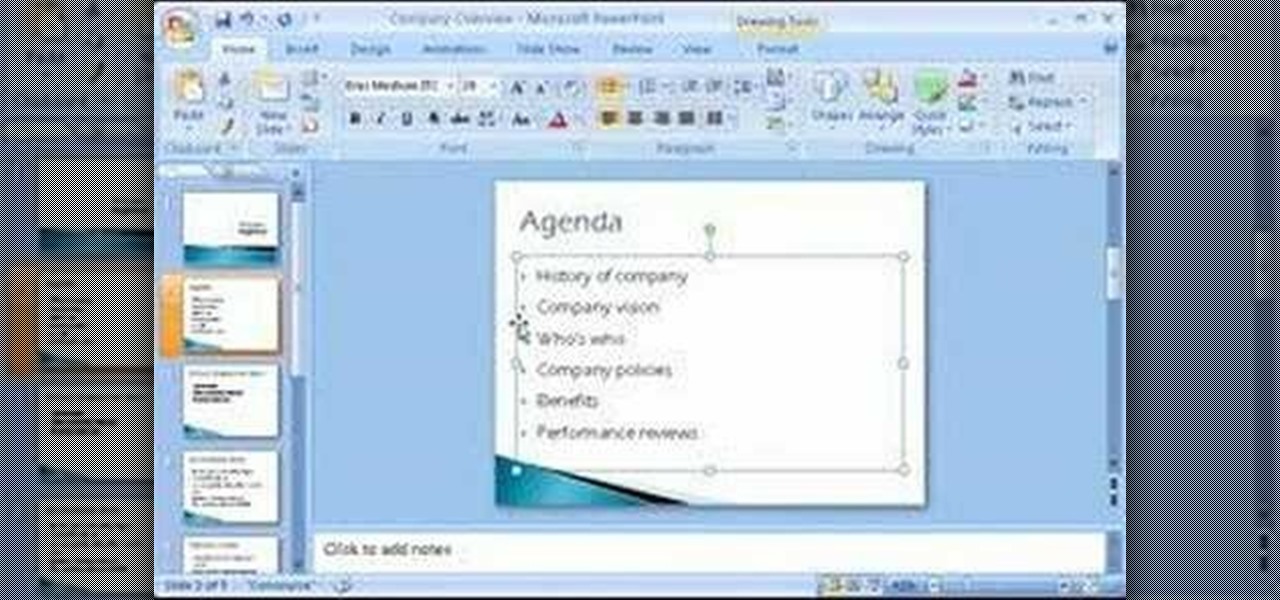
Microsoft Office PowerPoint 2007 has a new design. The new Ribbon keeps the commands that you use most often visible while you're working instead of hiding under menus or toolbars that you have to hunt for. Also, commands that you may not have known about before are now very easy to discover. When it comes to designing your slides, live preview of style galleries lets you see how things such as backgrounds and shape formatting will look before you apply them. A new SmartArt graphics feature o...
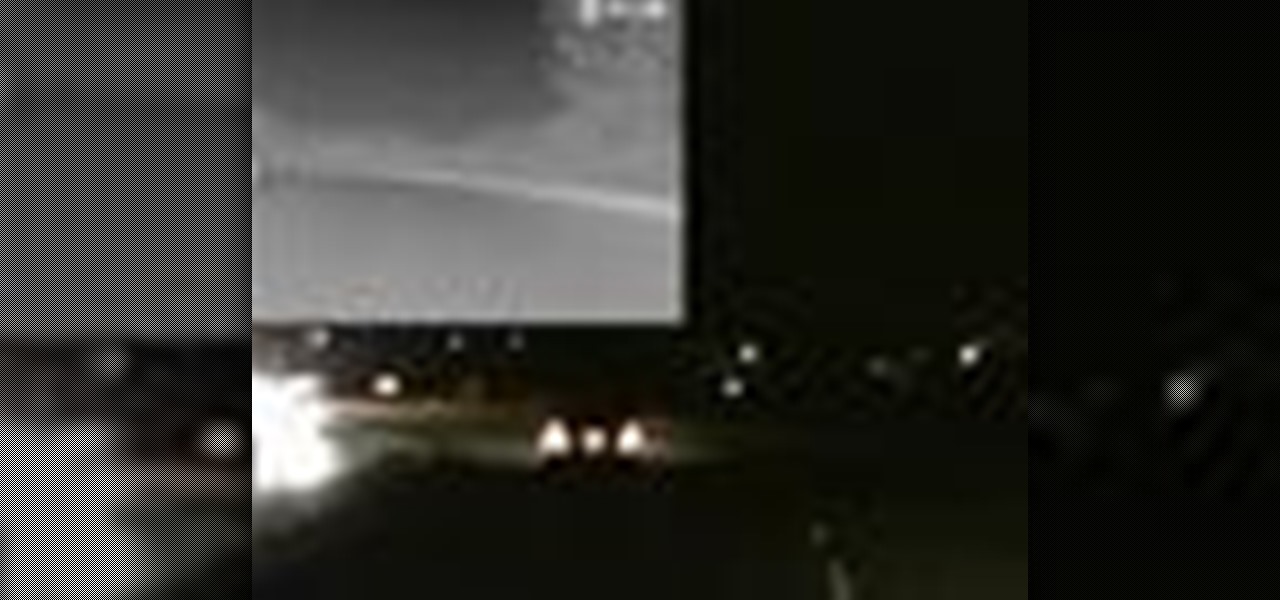
Would you like to see well beyond your high beams at night? Or see thru dust and light fog when you're behind the wheel and there's no where to pull off? We found an easy way to do it: FLIR's PathfindIR.
Learn how to produce Roy Lichenstein style Pop Art from your photographs using GIMP image editing software.
Cars are expensive to buy, replace or repair. Check out this video and learn how to avoid the most statistically dangerous parking areas. There is no guarantee that no one will touch your vehicle, but by take precautions you are much less likely to be targeted.
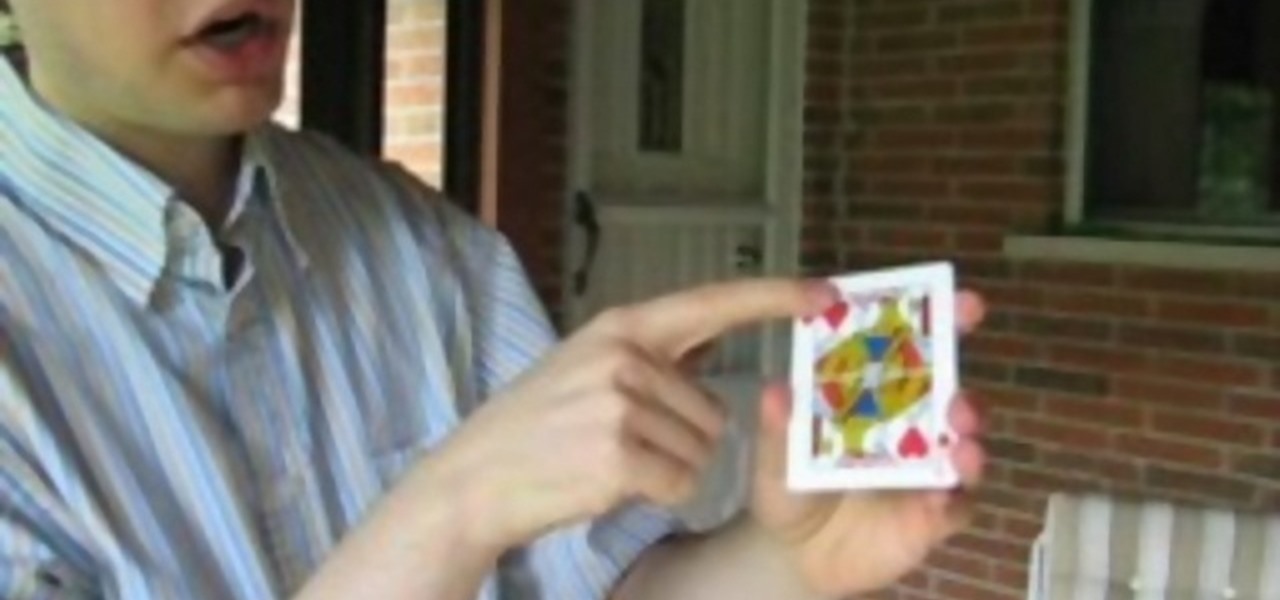
A very simple and easy trick is involved in levitating a card. The following are the steps to be followed:
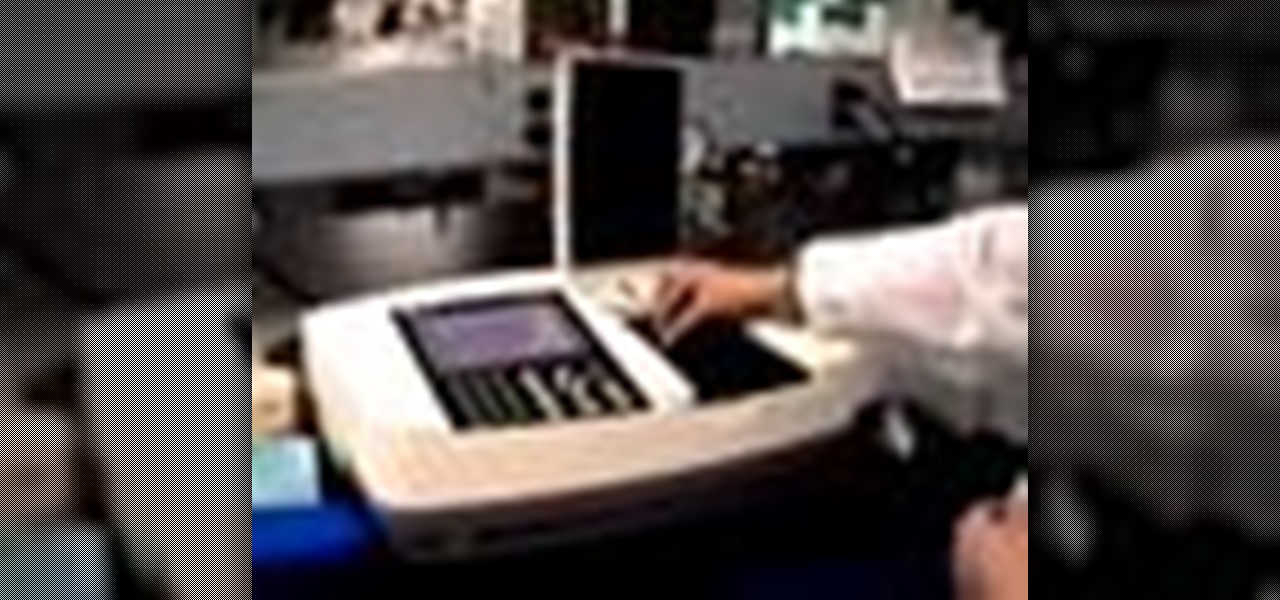
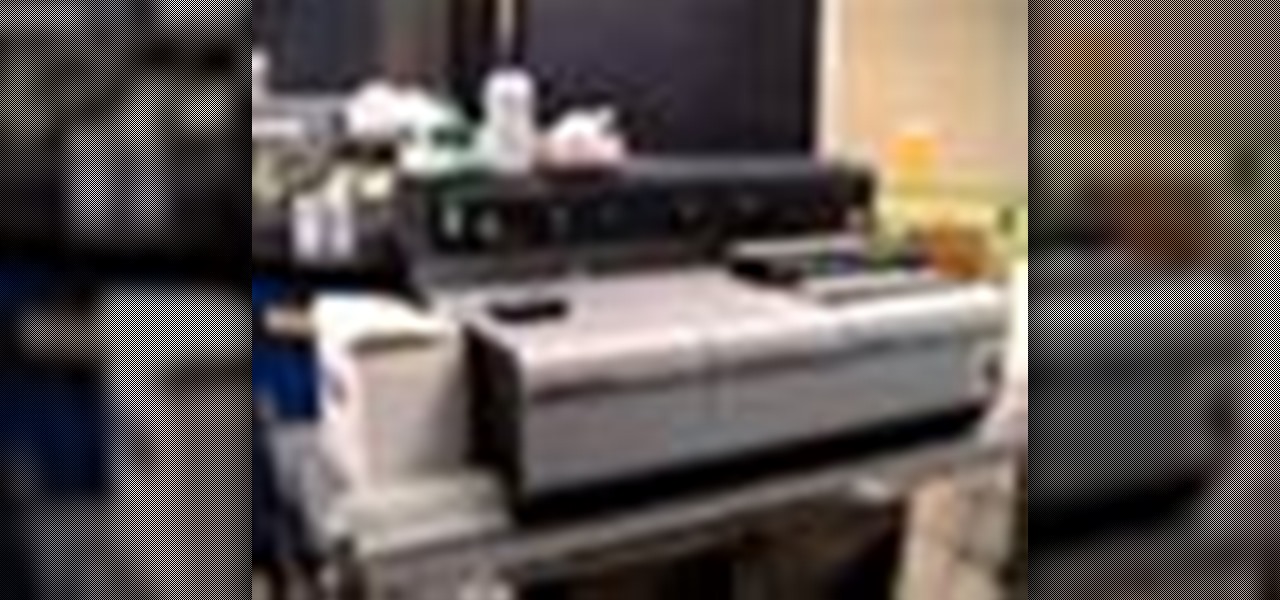
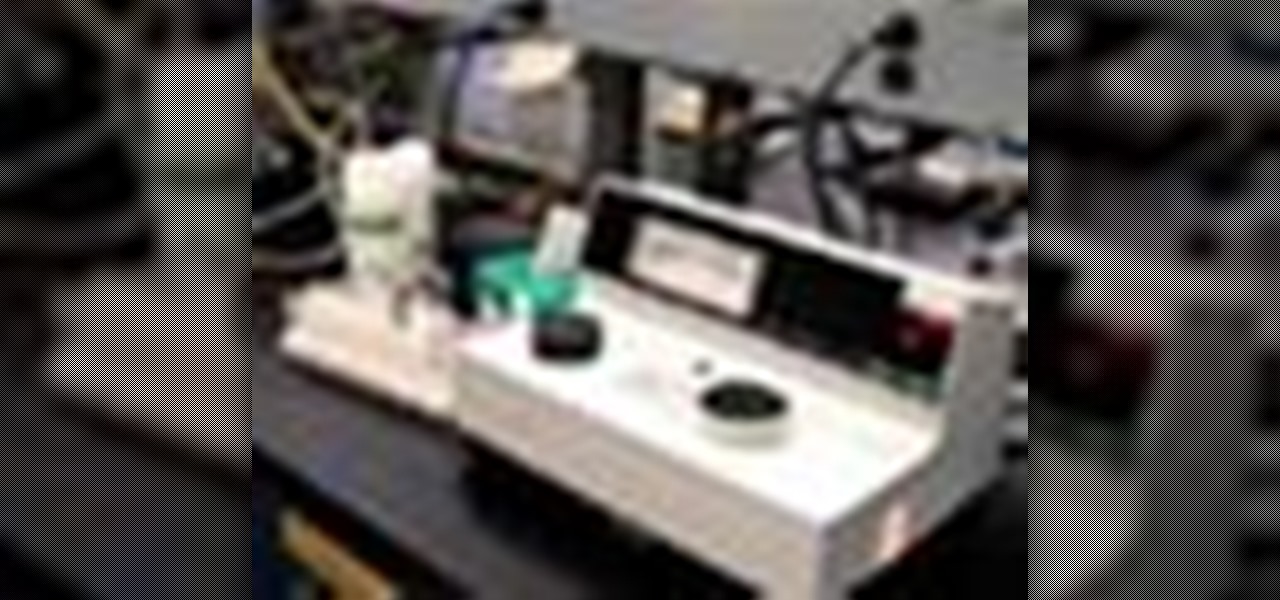
The Department of Biological Sciences at the University of Alberta brings you this video tutorial specifically relevant to your student laboratory courses, specifically microbiology. If you're a student at any school of biology, this information will be helpful for learning how to use the Ultrospec UV-visible spectrometer and HP printer in the lab.
The Department of Biological Sciences at the University of Alberta brings you this video tutorial specifically relevant to your student laboratory courses, specifically microbiology. If you're a student at any school of biology, this information will be helpful for learning how to use the Unicam UV-visible spectrometer, split beam and internal printer in the lab.
The Department of Biological Sciences at the University of Alberta brings you this video tutorial specifically relevant to your student laboratory courses, specifically microbiology. If you're a student at any school of biology, this information will be helpful for learning how to use the Spectronic 21 visible spectrometer in the lab.
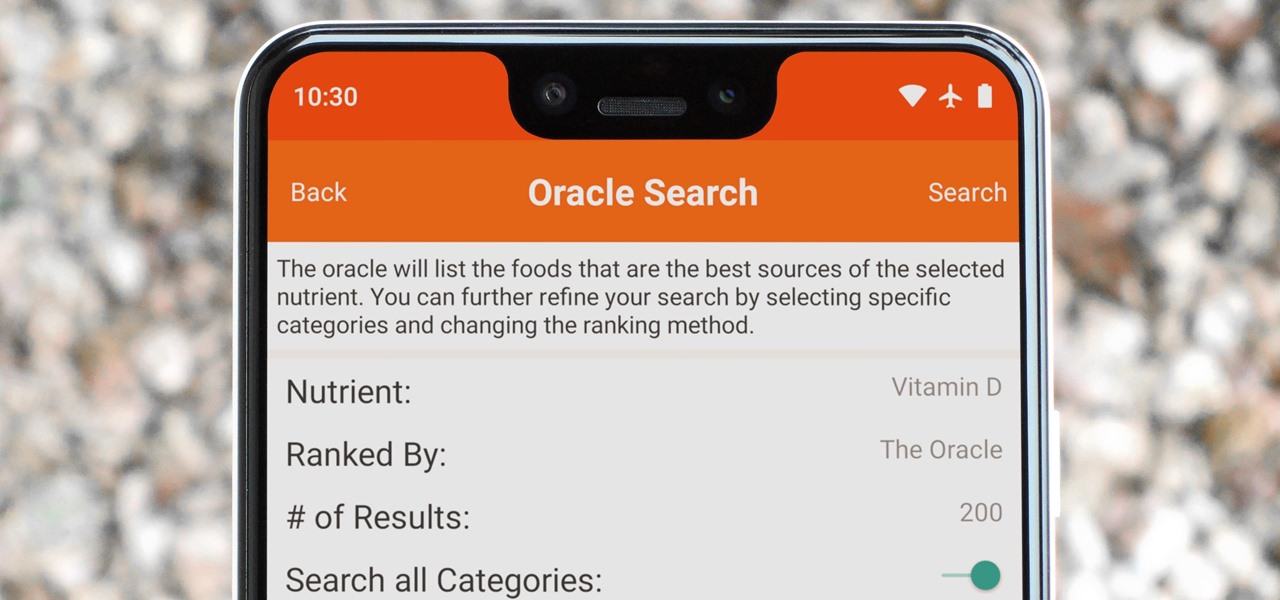
Micronutrients are essential to our health. Unfortunately, many of us aren't getting enough of each nutrient from our diets. It isn't that the food we're eating is bad, but rather we are not eating enough of the right food to get our recommended daily allowance. But with the help of a micronutrient tracker, we can change this.
We knew it was coming eventually, but this is a bit out of left field—early builds of the next version of Android have been released almost two months ahead of schedule. Android N, as it's being called for now, is already available for the last two generations of Nexus devices, though it's just an early preview build for now.
In addition to the fingerprint scanner, the Samsung Galaxy S6 has all of the basic lock screen options that other Android phones have: swipe, pattern, PIN, and password. There also just happens to be a secret sixth option called "Direction lock" that protects the device with a series of customizable directional swipes—only it's hidden in an unsuspecting settings menu.
Adjusting the brightness on your Android device is a simple but highly utilized action. For the most part, aside from the Sprint LG G3 variant, the brightness slider can be conveniently found nestled in your notification panel. And though it is easy to access, there is a small drawback to this feature.
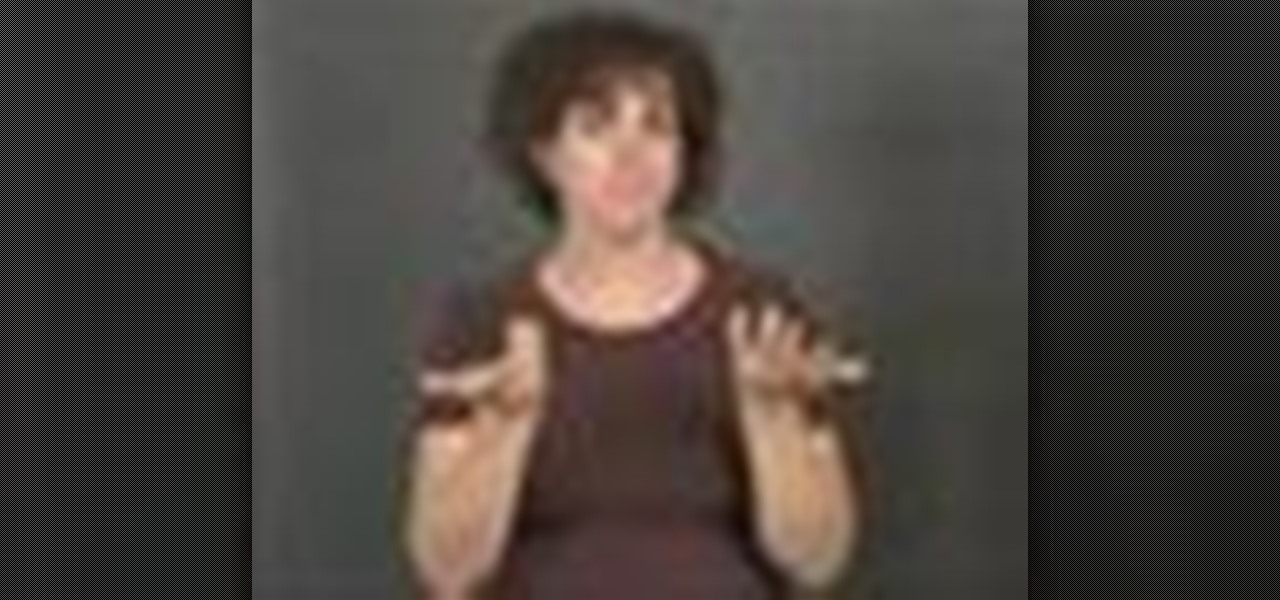
Learning American sign language is valuable for anyone who is deaf or has dead friends and family. Learn how to sign words for emotions in American sign language with tips from an audiology expert in this free sign language video series.
Learning American Sign Language is a great way to communicate with deaf people and the hearing impaired. Learn the signs for several foods with tips from a deaf signing expert in this free sign language video series.
Would you like to know the basics of American Sign Language? Learn how to do sign language related to letters, number, greetings and essential expressions in this free education video series.
Would you like to know common sign language for discussing your favorite team or game? Learn how to do sign language related to sports and recreation in this free education video series.