The sound I get when receiving a new text message is the camel from that Geico commercial yelling "Hump Day!" Sure, I could find a less obnoxious notification sound, but it makes me laugh every time, and that's important.
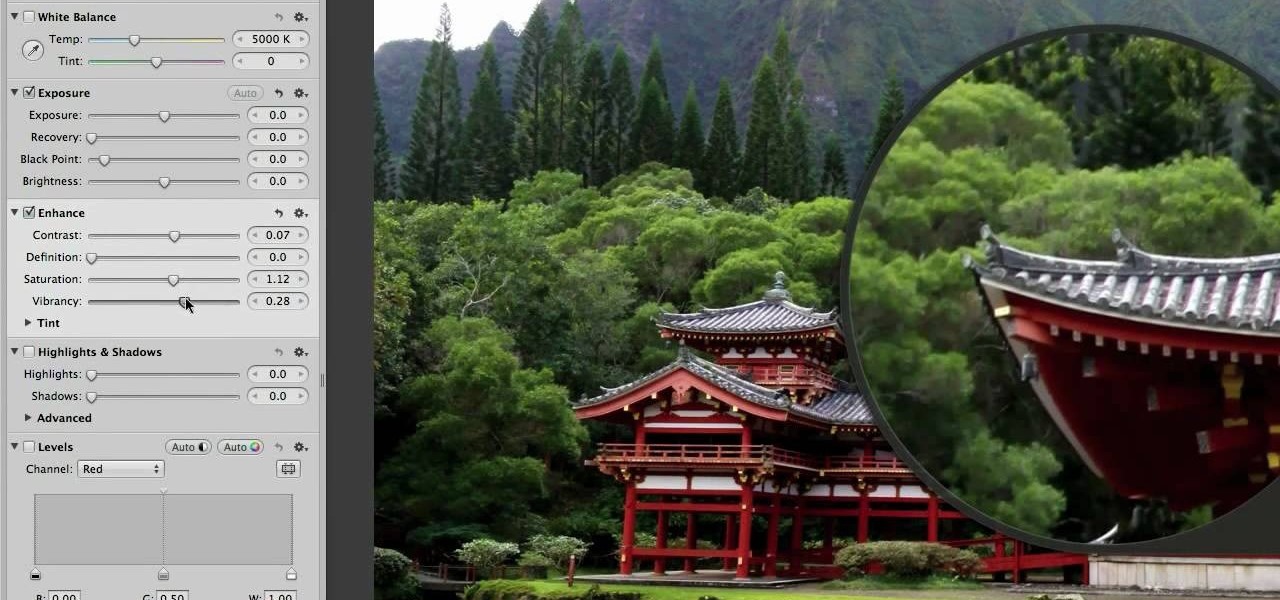
In this clip, we learn a basic digital photography workflow, one which will enable you to enhance your favorite digital photos with both ease and speed. (Note: To follow along, you will need to have the application installed. Learn how to download and install the Mac App Store here.)

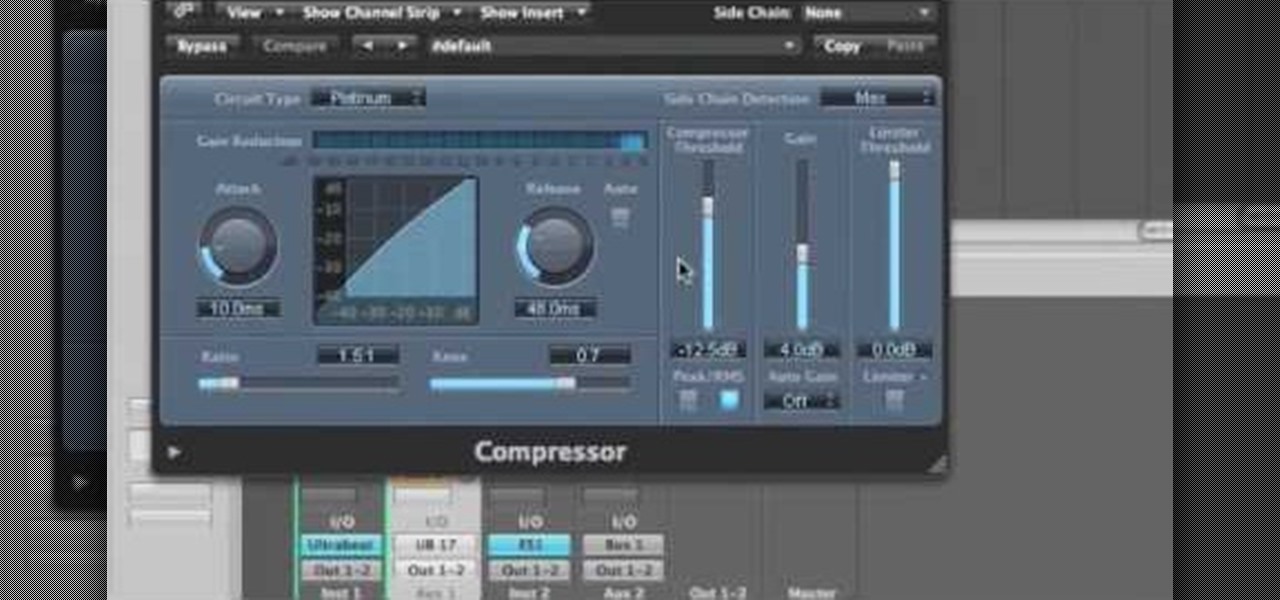
Learn how to add a parallel compression preset to the mastering suite instrument in Reason 5. This official video guide from James Bernard of Propellerhead will teach you everything you'll need to know. Whether you're new to Propellerhead's virtual music studio application, Reason, or their newer DAW app, Record, you're sure to find much to take away from this brief video software tutorial.
This tutorial covers the guitar amp feature in Pro Tools. You can distort the sound, change the tone of your guitar sound or even shape the track to your liking after it's been laid down. It also coveres how you can save guitar amp presets.
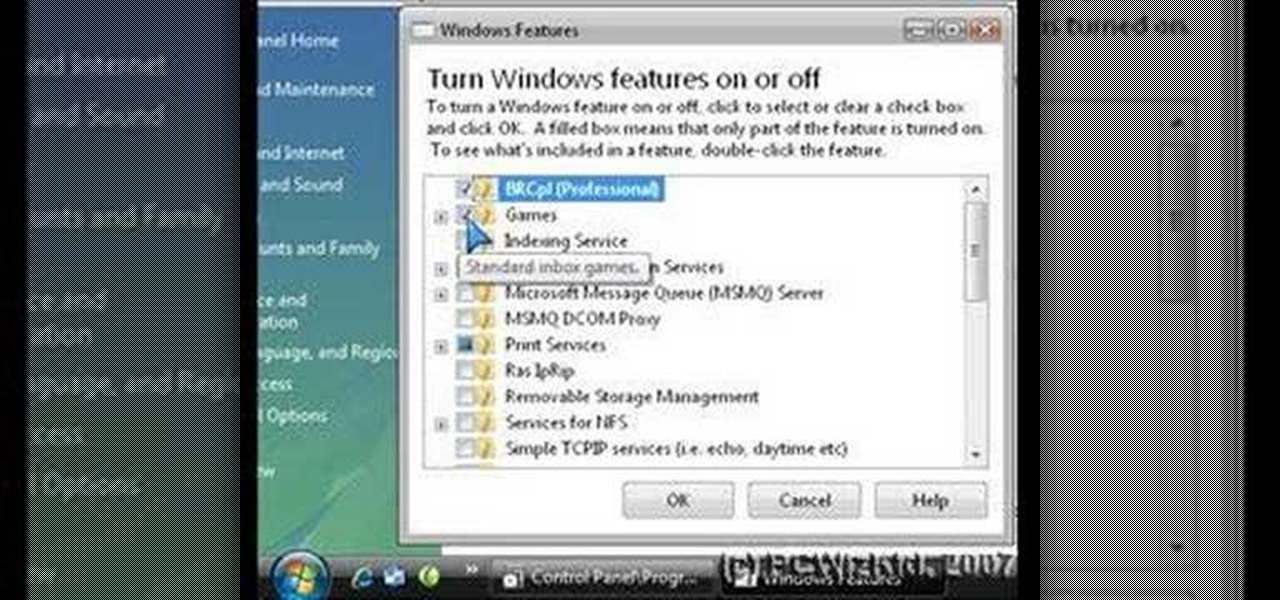
Is your Windows Vista PC running kind of slow? Well, the easiest thing you can do to speed up Vista's performance is by simply disabling some of the standard, preset features built-in to Windows. This video will walk you through the process of turning these unneeded features off, which is as easy as unchecking a box.
This software tutorial is for setting up Compressor for use with vimeo compression settings. Learn how to export footage from Final Cut Pro and use this new preset in Compressor to export video to vimeo.

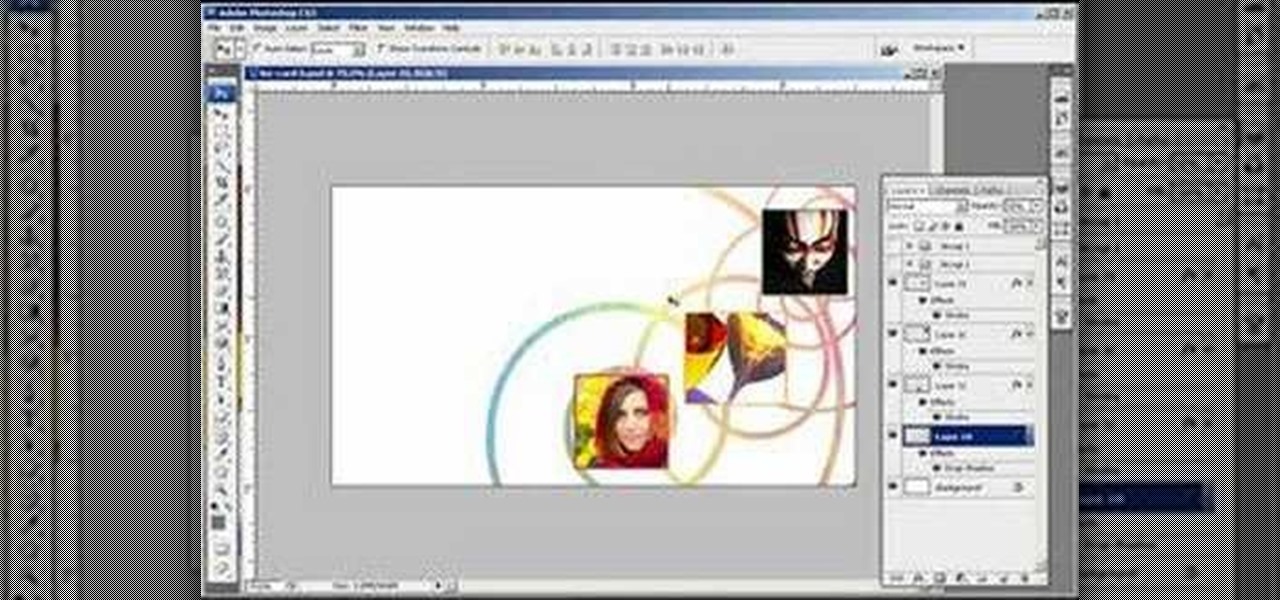
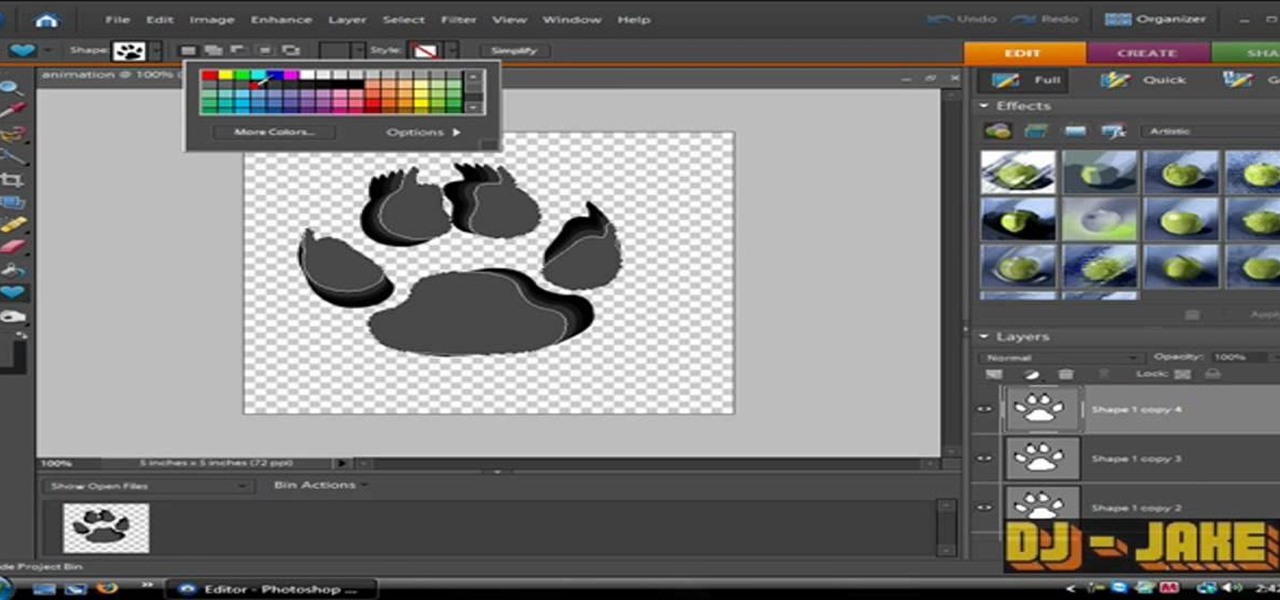
This image editing software tutorial shows you how to create a simple business card using an abstract background in Photoshop CS3. Using preset Adobe custom shapes, a background image and a clipping mask, you will learn how to create an interesting background for a business card without needing to leave Photoshop. The tutorial is designed for people that already know how to use Photoshop and are looking for creative ideas.
With Leopard, several preset folders are in the Finder sidebar. In this video tutorial, you'll find a cool way to create your own custom smart folder. For more, or to learn how to create your own smart folders in Mac OS X Leopard, watch this video lesson from Apple.
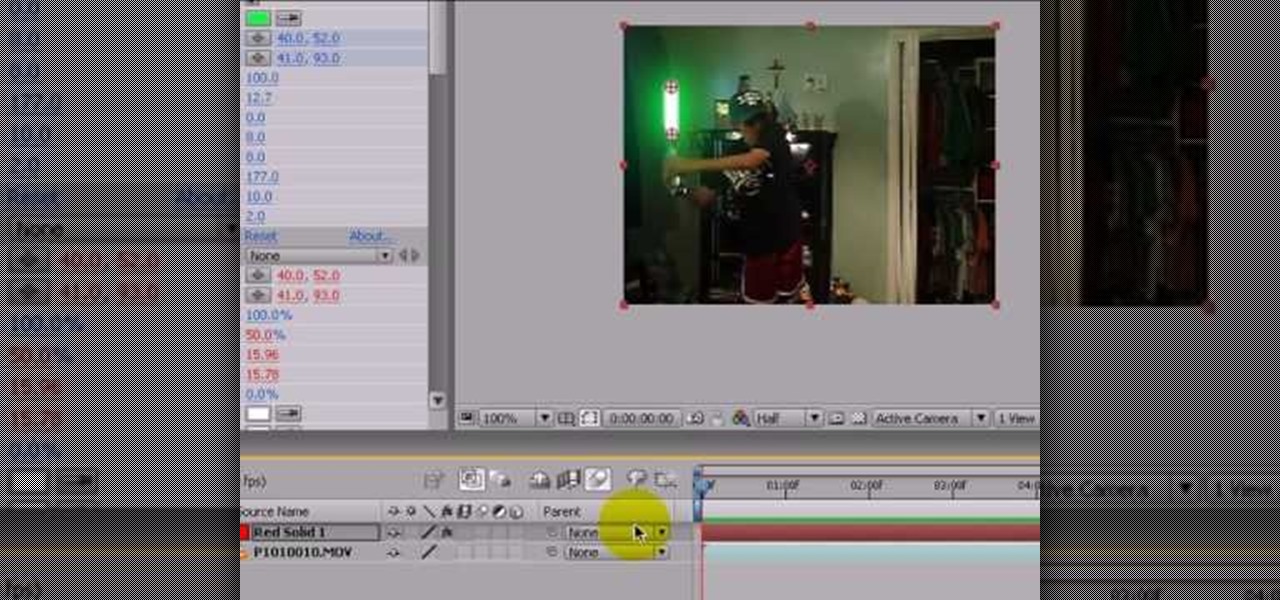
Did you ever want to know how to create Star Wars style lightsaber effects for your own home videos? Youtube user Comphelper225 has a way make this little bit of movie magic come to life using Adobe After Effects. Once you have a video of yourself or a friend swinging a base for your sword, the next step is to download Andrew Kramer's lightsaber presets from the Video Copilot website. Once it's installed, open up your video in After Effects to begin. Within the program, click Layer, New, and ...
Need to import your videos into Flash CS3? Look no further, this tutorial is for you. In the following video, learn how to import and compress your video files and convert them to flash video! Matters covered in this tutorial include: Importing flash video, compressing the video using presets, compressing just the video or just the audio, adding cue points and using cue points, and cropping, trimming, and resizing your video. Also learn how to use the basic skins provided by Adobe in Flash to...
Call of Duty? Nope. SOCOM: U.S. Navy SEALs? Nah. Battlefield: Bad Company? Think again. This isn't any video game on the market, this is your own video game, well… your own video game logo - military-style.
Learn how to create 2 different star fields in 3D Studio Max. This tutorial is especially helpful if you are having problems with the star field preset in Max.
Isn't it annoying when you want to check your Facebook or MySpace but you are at school and hit a big giant Websense blocker? Well, if you are stuck in a library or somewhere else where there are filters on your surf-ability, check out this tutorial for a useful hack.
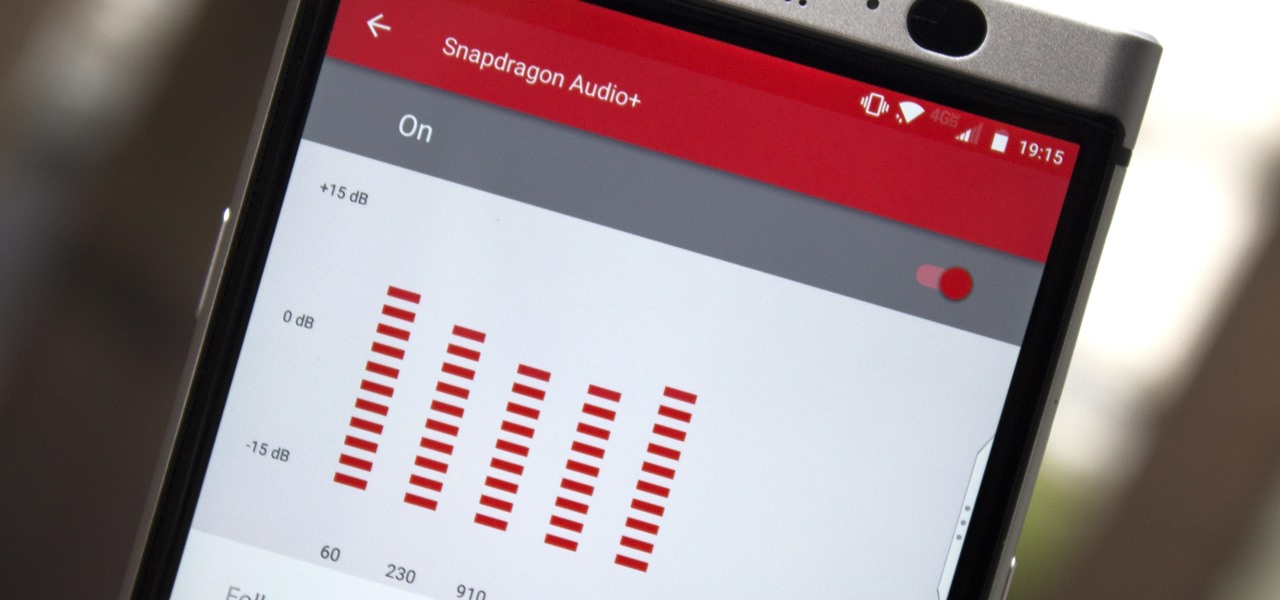
You may not know this, but the Spotify app will let you add a bit of personal touch to all the music you stream. Unlike many other music streaming services, Spotify actually has fantastic equalizer support on both iOS and Android.
In this video, we learn how to use sidechaining in Logic Pro. The idea is that one sound will cancel out another. For example, when the kick comes then the bass will disappear. To do this, first set up an ultra beat using a multiple out with the preset kit. From here, you can send this to it's own channel on the mixing base. If you go back to the mixer, you will see the ultrabeat and can create a new channel that links directly from this. Do this by clicking the "+" symbol. After this, conver...
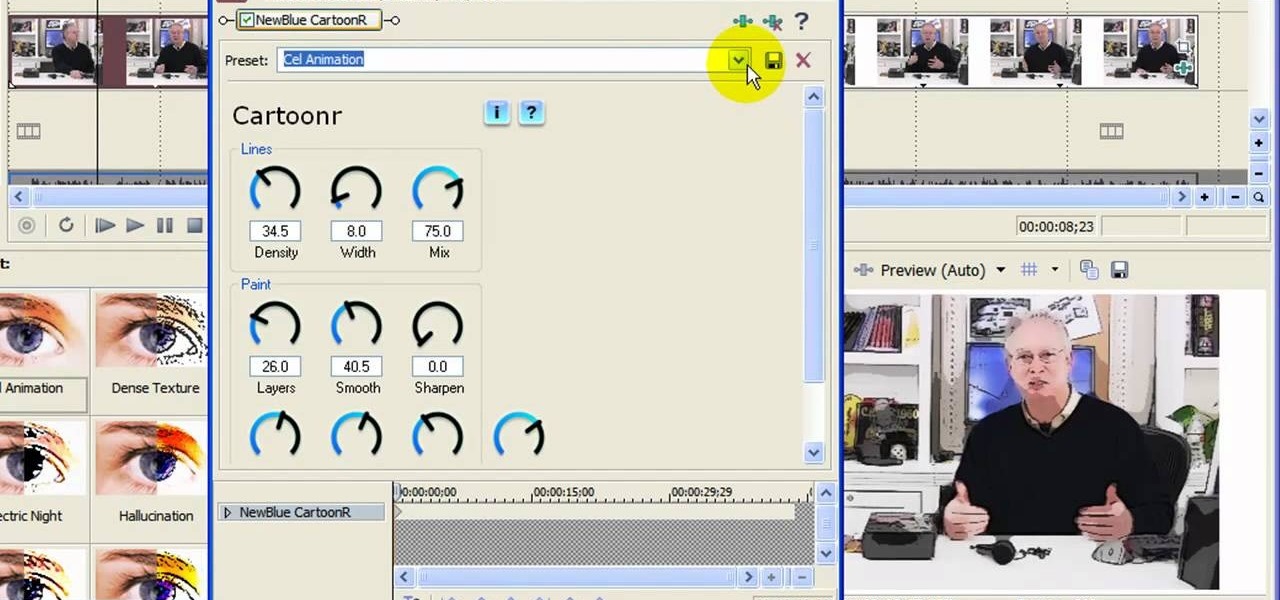
In this video tutorial, viewers learn how to create a cartoon effect from video in Sony Movie Studio. Begin by importing the video clip(s) into the time line. Then click on the Video Effects tab and select New Blue Cartoon R. This is a plug in that needs to be downloaded. Users are able to select various different cartoon styles from the Preset drop-down menu. Users are also able to configure the lines and paint of the cartoon effect. This video will benefit those viewers who enjoy create and...
This video shows you how to draw peter pan step by step. The instructor begins the video by having a preset outline to follow that must be copied to understand how the character will be formed correctly. The face is the first object placed on the outline followed by the shoulders and then legs. After this step the picture will appear completed and colored in leaving the student to have to pause the video and follow the lines carefully with much reflection and reviewing. The coloring for this ...
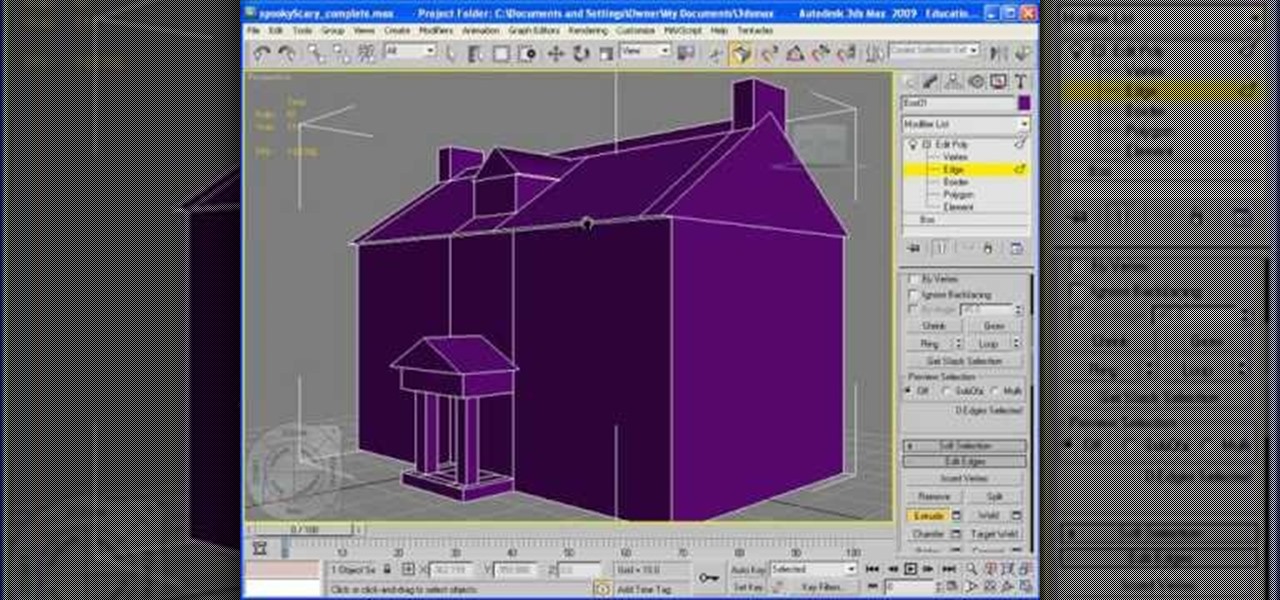
In this video, we learn how to add texture to a model house in 3D Studio Max. After you have created the model, press 7 on your keyboard. This will activate a new menu telling you how many polygons are in your model. Then, edit the edges and remove them so you have less polygons. After this, save the model under a name you want, then select everything on the model. Go to the parameters and click "edit". Now, go to mapping, then flatten mapping. The presets should be fine, then click "ok" and ...
This clip covers the confusing array of buttons and controls in Blender that are used for the different functions. Specifically, it talks about context and sub-context buttons, presets for TV broadcast (and the different standards for those) in HD or high-definition broadcast. Whether you're new to the Blender Foundation's popular 3D modeling program or a seasoned graphic artist just interested in better acquainting yourself with the application, you're sure to be well served by this free vid...
This clip explores the use of presets in After Effects CS4 and CS5 to make an interesting element that can be used in a variety of situations. Besides, it’s just cool looking! Whether you're new to Adobe's popular motion graphics and compositing software or a seasoned video professional just looking to better acquaint yourself with the program and its various features and filters, you're sure to be well served by this video tutorial. For more information, including detailed, step-by-step inst...
This video is part of the HelpVids.com series of technology videos. The video describes the process of adding headers and footers in Microsoft Word 2007. The easiest way to edit headers and footers is to double click in the header or foot section of the document. Once you double click it will allow you to edit the text that appears in the header and/or footer. You can also go to the Insert Ribbon and then click Header. This will display many preset styles that will apply to your header. Choos...
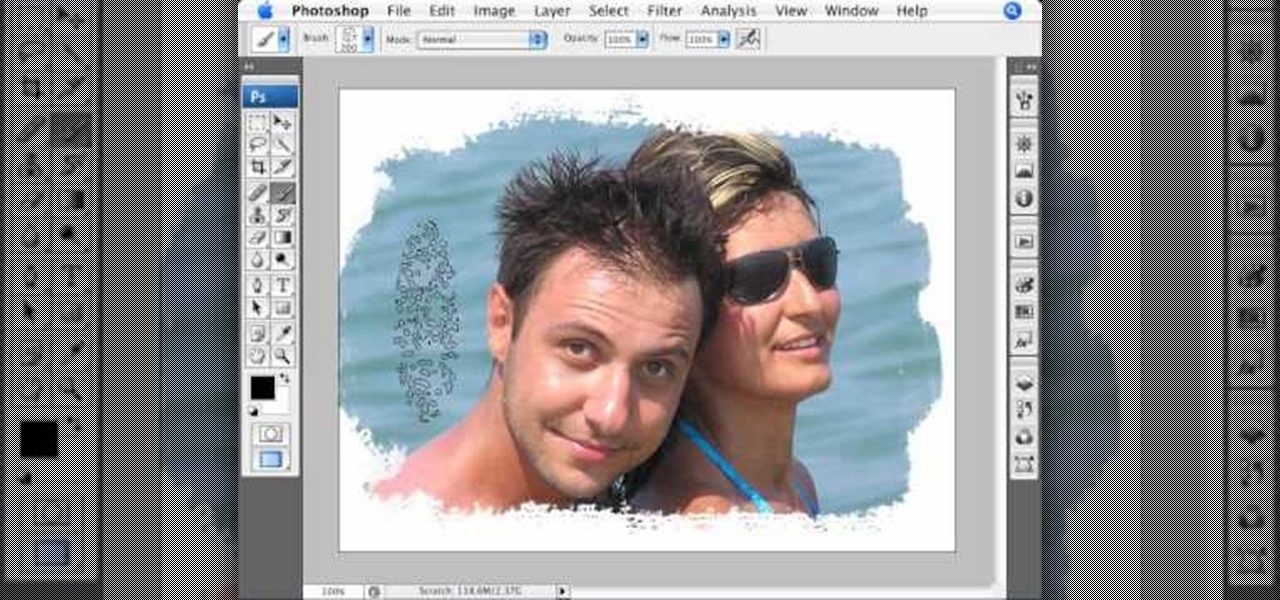
In this Photoshop tutorial, learn how to convert regular photos into works of art that create a painted on effect. By using the right brush tool, a regular picture can be made to look as though it was painted onto a canvas with real brush strokes. This tutorial shows us how to use different types of brush presets loaded in Photoshop in conjunction with a new layer to create a canvas effect. The result is photo converted into a painting.
Don't know how to create the night vision effect using Photoshop? Well, this video is the solution for you. First of all, select the image that you want to create the effect on. Then you need to open up a new black and white adjustment layer. In the setting box that pops up, go under the preset drop down box and select red filter. Next, go down and check the tint box. After wards, the viewers can set their own photo and saturation base on their own preference.
This simple video tutorial teaches you how to change the pivot point position when using Flash. The tutorial handles drawing basic shapes, such as squares and rectangles and converting them to movie clips.
Check out Houdini's new pyro effects! Watch this video tutorial to learn how to use Pyro FX n Houdini 10.
Boris Title Toolkit gives Adobe After Effects users advanced titling capabilities for maximum quality, speed, and creativity. Using Title Toolkit, graphic artists can import ASCII or RTF files for fast, easy credit rolls, take advantage of rich text style options such as bevel borders, gradient fills, simulated extrusion, and embossing, and save or apply custom or preset text styles, gradients, and colors, all of which can be applied on a per character basis.
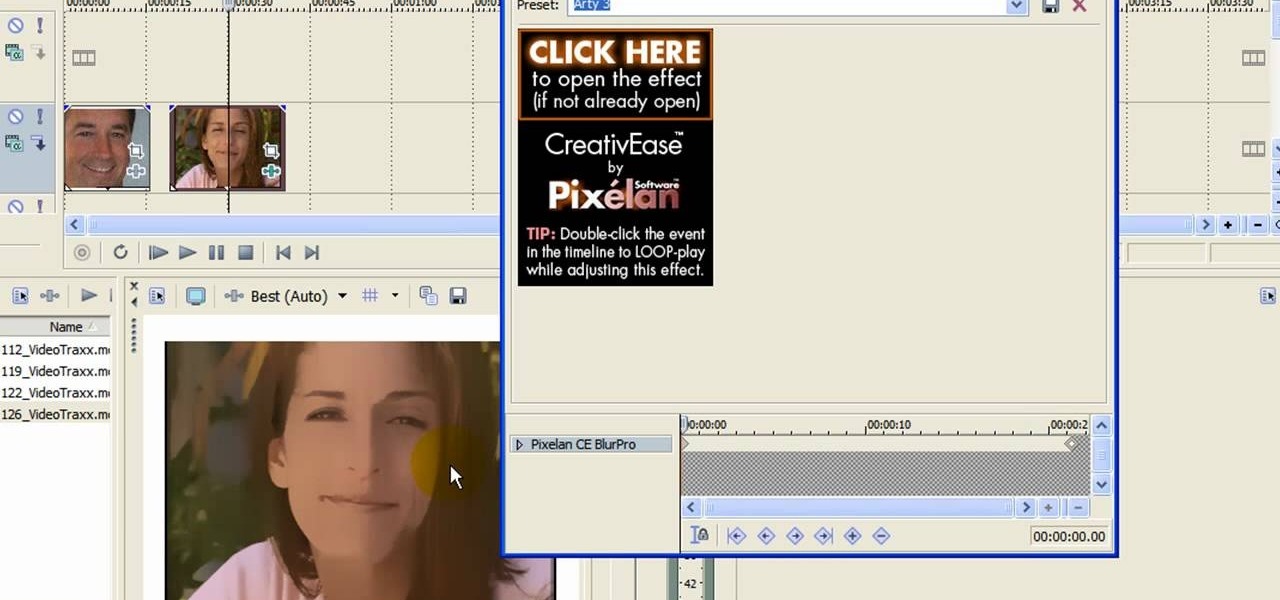
First click on Video Event Fx, it will let you select the plug-ins that you have. Now select pixelan CE blurpro and click on OK. Now select remove blemishes 1 in preset menu. It will remove the first set of blemishes from the video now go for the blemishes 2 and then go for the blemishes 3. Now you can see the difference by playing that video. If you choose arty 3, it will make the pictures of the video as cartoony. Now go again for the blemishes 3, it will make the video even more better. Yo...
In this tutorial, we learn how to rip a DVD to a computer using Handbrake. First, go online and download Handbrake, then install it. Once you've done this, open up the program and then go online and download/install http://www.dvd43.com/. Now, place your DVD into your computer. After this, go to Handbrake, and open up the DVD into the software. Wait for this to load, then change your presets if you prefer. When you are ready, rip this onto your computer and wait a couple of hours for it to fi...
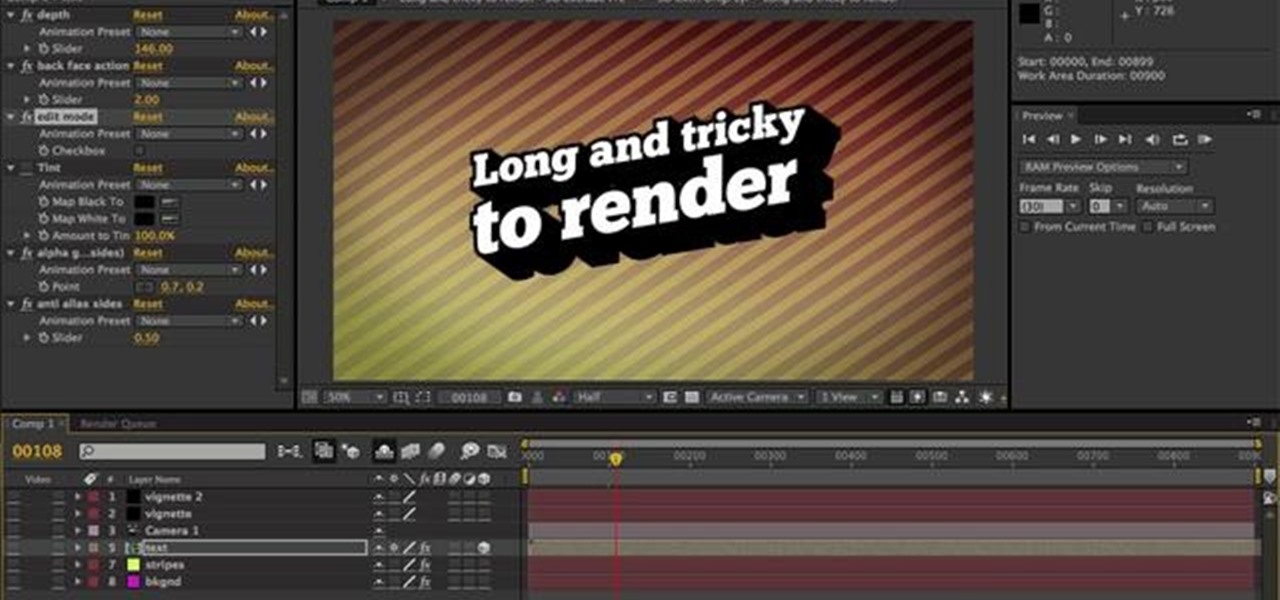
Learn how to render projects in Adobe After Effects CS4 or CS5. This guide also covers the use of background renderer, creation of output modules and render settings templates, memory, multi-processing and disk-cache preferences, as well as showing a basic preset for rendering FLVs and Quicktime H.264 out of After Effects. The tutorial is aimed at users at a basic to intermediate level. Whether you're new to Adobe's popular vector editor or a seasoned graphic arts professional just looking to...
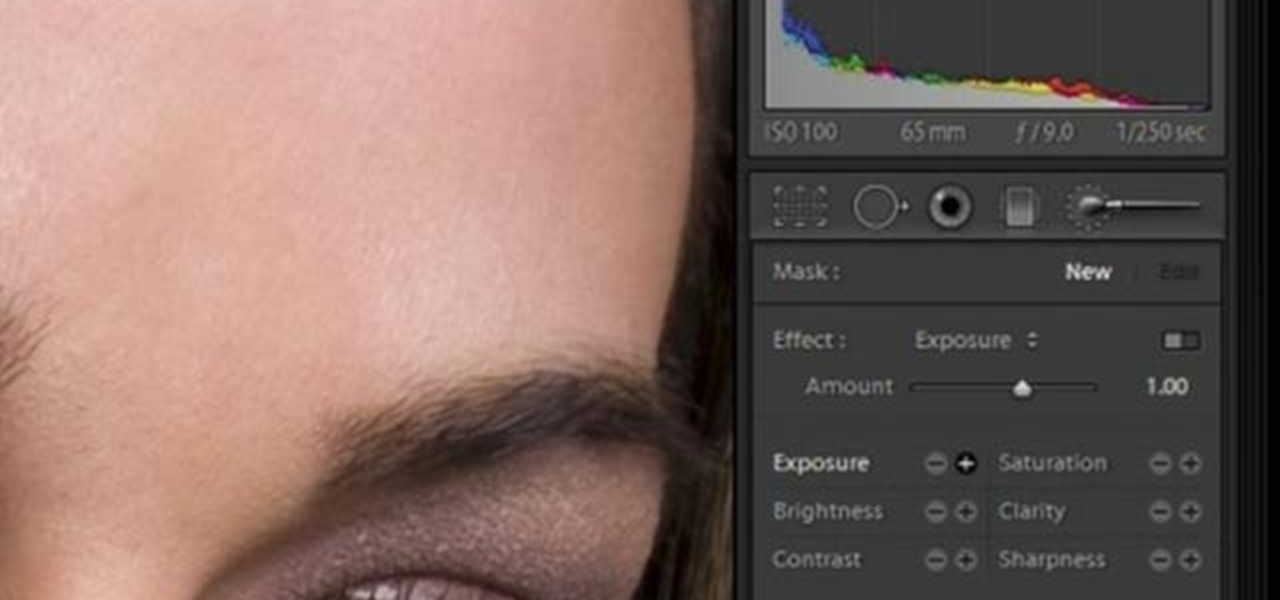
In this software video tutorial you will learn how to soften skin feature in Lightroom 2 in Yanik's Photo School. Select a photo and zoom in to the skin area. Click on the adjustment brush, or ctrl K. Here you can adjust 7 features; exposure, brightness, contrast, saturation, clarity, sharpness and color. But, if you click on the other 'exposure' dropdown menu, you will get these 7 options and additionally a 'soften skin' option. Click on 'soften skin' and it gives you the options to add nega...
An animated GIF is a great addition to any website. By animating your image, you will draw someone's eye to it almost immediately. This is especially useful if you are creating an advertisement or a logo.
In this Software video tutorial you will learn how to make a copyright brush using Photoshop. Open up Photoshop and open a new document by clicking ctrl+N. Create a new text layer on the right side and type in your text. Right click on the text layer > rasterize type. On the left side select the ‘rectangular marqee tool’ and draw a rectangle around the text. Go to edit > define brush preset. In the next box, give it a name and click OK. Then go to file > open and select a picture on which...
Movie DVD that you buy are large in size. So you may need to convert the movie to other smaller formats to store them in your computer or other back up disks. This process of extraction the movie from the DVD into another format is called as ripping. To do this you can use one of the various DVD ripping software available. HandBrake is one of such software which can be used to rip and encode DVD movies into other formats. Its supports a large number of formats which are compatible with iPod, ...
In this how-to video, you will learn how to get the T-Pain effect with Fruity Loops Studio 8. First, open the program. Insert the sound by clicking on the sampler and opening a recording. Next, click the arrow and select assign a mixer track. Select GSnap for the T-Pain effect. Change the settings, which will allow you to get this particular effect. You can also choose the Autotune effect to get this sound as well. Select this effect and set the effect up. You can save the settings with a pre...
David Shrein provides a video recording with step-by-step instructions on how to utilize the DVD ripping software 'Handbrake' on a computer running Mac OS X. He shows how to deal with an initial error message, and then moves onto selecting the DVD. You have to be careful as to what you choose, as different DVDs will have different numbers of chapters and features, which use different settings in Handbrake. He shows how to select the right settings for a movie, and preview a chapter using pict...
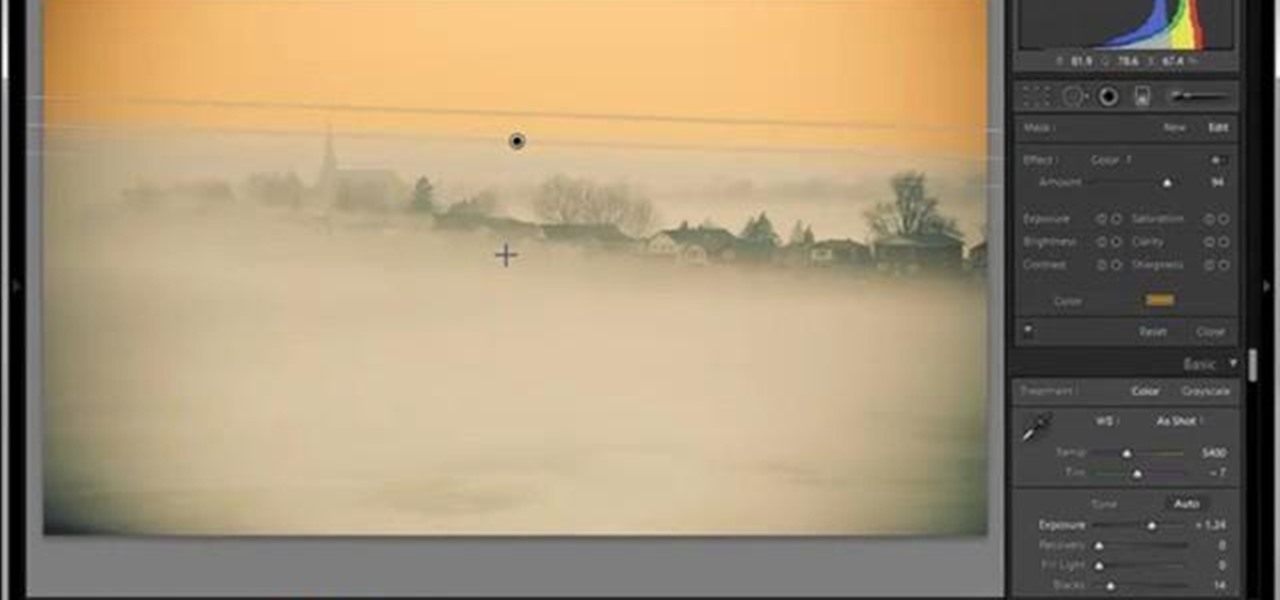
In this tutorial, Yanik Chauvin teaches us how to create an old-style looking photo starting from a grayish, underexposed one, using the software "Lightroom". He starts by creating a virtual copy of it, and then he adds a Camera Calibration preset named Camera Landscape and increases the exposure. After that, he crops the image removing the blank parts of the photo, and adjusts Contrast, Blacks and Clarity to strength the image borders.
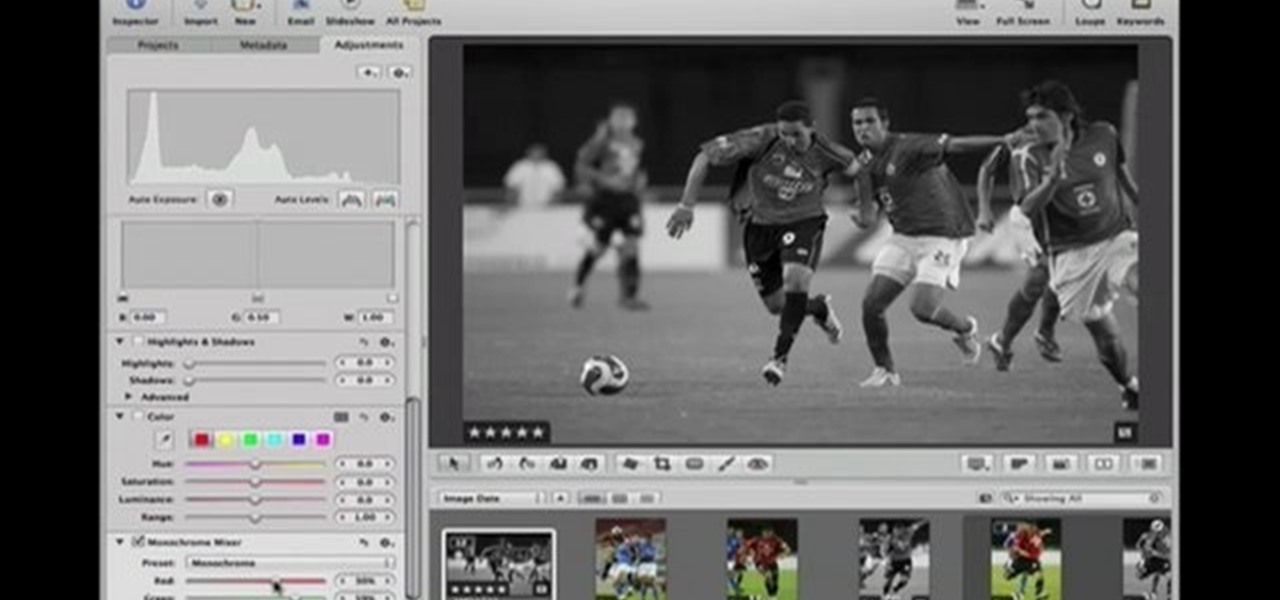
This Software video tutorial shows how to convert color images to black and white in Aperture. Scott Bourne presents this video. Open up ‘aperture’ program and select a color photo that you want to convert to black and white. Now move from the ‘projects’ page to the ‘adjustments’ page by clicking on it. Then click on the ‘+’ sign and select ‘Monochrome Mixer’. When you do this, the picture instantly turns to black and white. It’s as simple and easy as that. For editing the picture further, on...
HelpTube1 teaches you how to make HD videos using Camtasia Studio. You need to have Camtasia Studio, QuickTime installed and an AVI file. In Camtasia Studio click Batch Processing, choose MOV, then 30 frames per second, the encoder should be h.264. Quality set to best and key frames Automatic. Size - Dimensions should be 1280x720 HD. For audio you should have mpeg audio, stereo and 48 kHz rate. Click ok and next. You can also include a picture watermark in the next window. Finish this and cho...
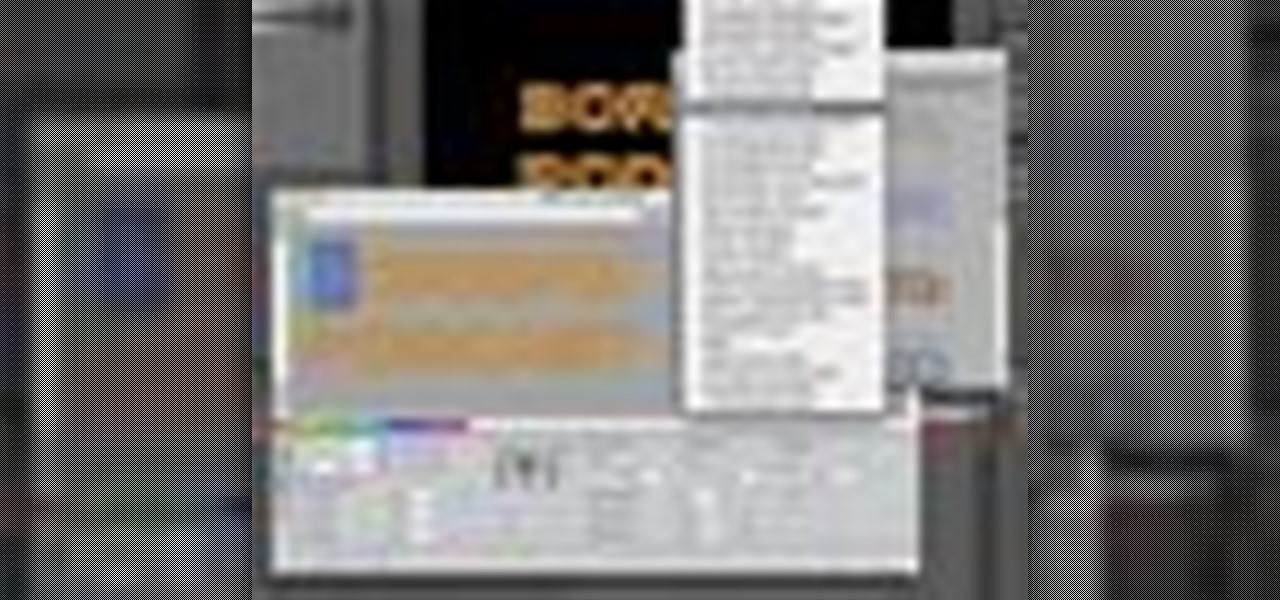
This tutorial shows you how to use Pinnacle Studio to add a menu screen to your video for a DVD. They have a list of preset menus you can use, which each have different appearances. First you select the menu you would like, and drag it to the start of the "video line" which is where the movie you want to add a title screen to sit. After you have selected a menu, the how-to show you how you can edit the menu items and change the titles of the chapters. It then shows you how to write your disk ...
First add video to the video section. Then take what we want to add and place it just below the video in the video section. Now look at the bar just over the video section. There will be a video camera sign. Click on it. There will be many tabs. Click on the "overlay feature tab" then click on the "Enable picture in picture" option. Now choose "Full Screen" in the drop down menu in the preset options. Now set the Video Transparency option to whatever you want.