In this tutorial, you will learn how to utilise UV maps for both root colour and hair length. This guide also offers a quick look at polygon selection tags and organising a scene with hair objects as well. Whether you're new to MAXON's popular 3D modeling application or are just looking to get better acquainted with Cinema 4D and its various features and functions, you're sure to enjoy this free video software tutorial. For more information, and to get started using this trick in your own Cin...
She begins by taking something she has molded with Amazing Mold Putty. She uses Magic Gloss resin which cures with UV light to fill the silicon mold and sprinkles some glitter onto the resin. She emphasizes that she's doing this indoors, because the resin will harden when exposed to light. She takes it outside to cure in the sunshine and says it will take about 15 minutes to cure. When it's done, she rolls a ball of Pardo clay. She pops the molded piece out. She presses the molded resin piece...
Creating good UVs with Maya can be tough, and get tougher depending on what type of object you are trying to unwrap. This short video tutorial covers how to create accurate UVs for long objects like rope or, in this case, shoelaces. This is a simple technique, but one that should enable you to model much more smoothly and accurately in the future, especially if you often find yourself creating 3D models of shoes.
Using morphs to pre-process UVs is a great trick for any version of modo. You can leverage the embedded morph data to massage a model in 3D prior to UV projection. If that doesn't make sense, watch the video and learn how to pre-process UVs using morphs in modo.
Learn how to use the UV texture editor in Maya to create tileable textures.
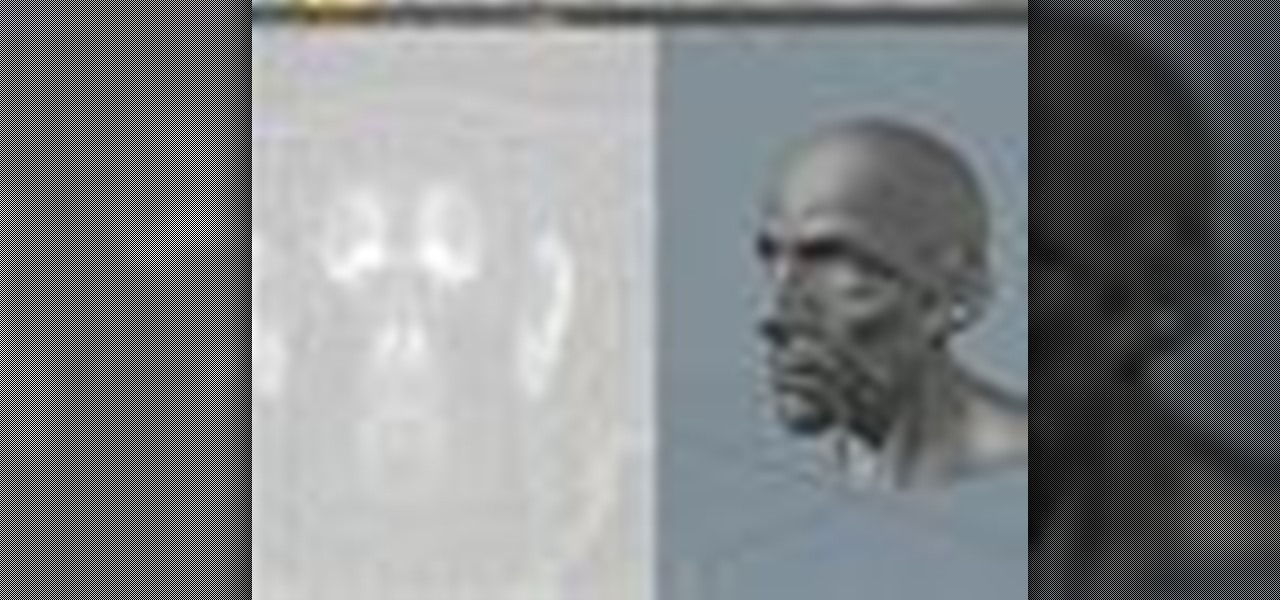
Learn how to make UVs in Blender and import the new UVs to Zbrush's High res model. This is important since Zbrush uses AUV's which are not recognizable by other packages or game engines. Once you have proper UV's, you will learn how to create the clothes (superhero costume) for a character.

This clip presents a general introduction into UV unwrapping within most versions of Blender. Whether you're new to the Blender Foundation's popular 3D modeling program or a seasoned graphic artist just interested in better acquainting yourself with the application, you're sure to be well served by this free video tutorial. For more information, including detailed instructions, take a look.
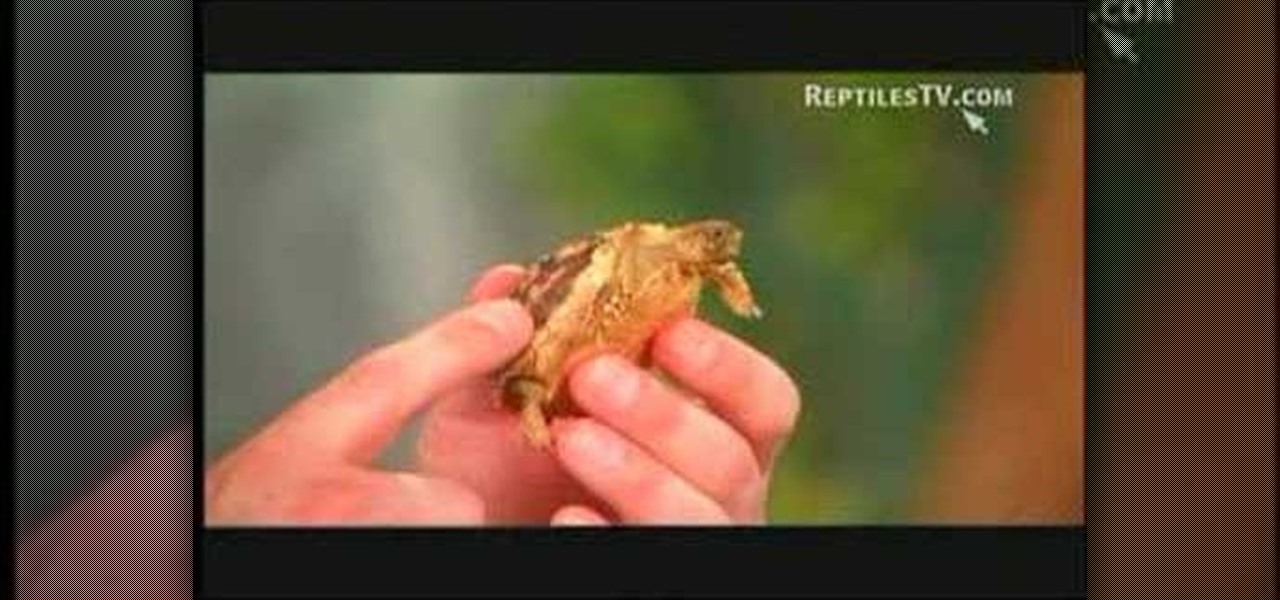
How do you examine a tortoise to determine its level of health? Does the tortoise need real sunlight or is a UV lamp alone adequate? Is dog food okay as a diet item? What about mites? How can you determine the sex of the tortoise? All this and more is answered by Herpetologist Hillary Dupont, with the help of Host Israel Dupont.
It is a scary time to be alive. As states start to ease back shelter-in-place restrictions, the new world you're entering is still unsafe. With a vaccine months away, your best bet is to follow CDC guidelines and use the tools at your disposal.
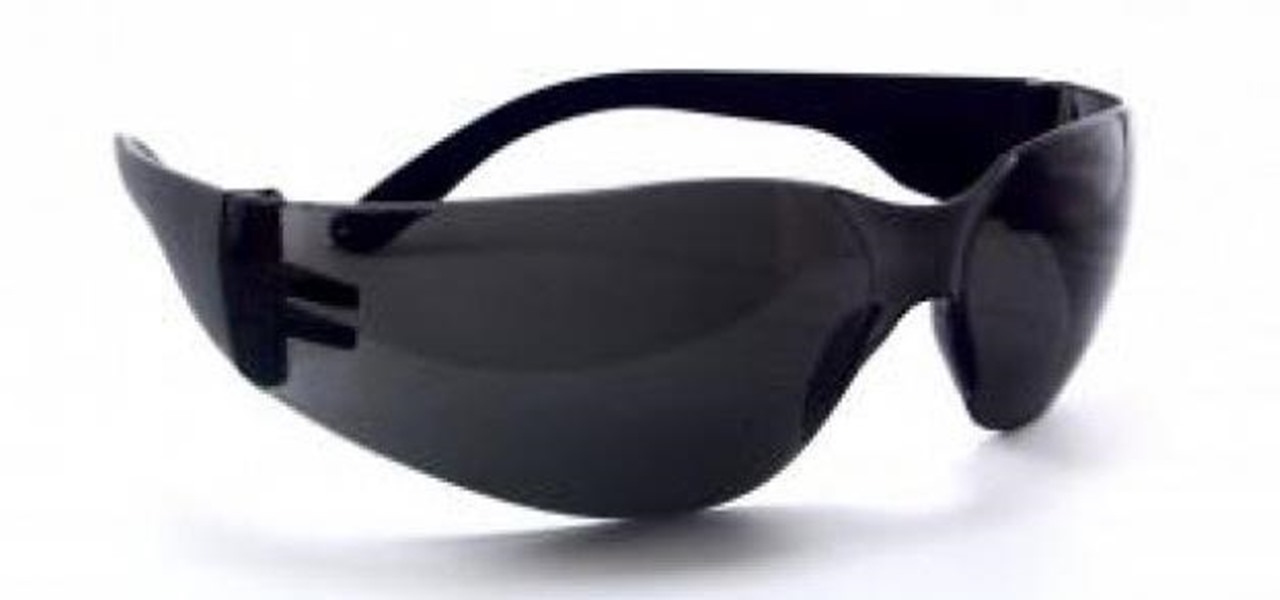
One of the vital fashion accessories is sunglasses. Sunglasses assist in creating a sort of unique identity for you. Your age, the shape of your face and of course your personal taste influences the precise style you decide on. There are some basic factors that must be put into consideration when you are thinking of buying your pair of sunglasses. It is important to be educated about what makes a quality pair of sunglasses. So when you want to choose your next pair of sunglasses, keep the fol...
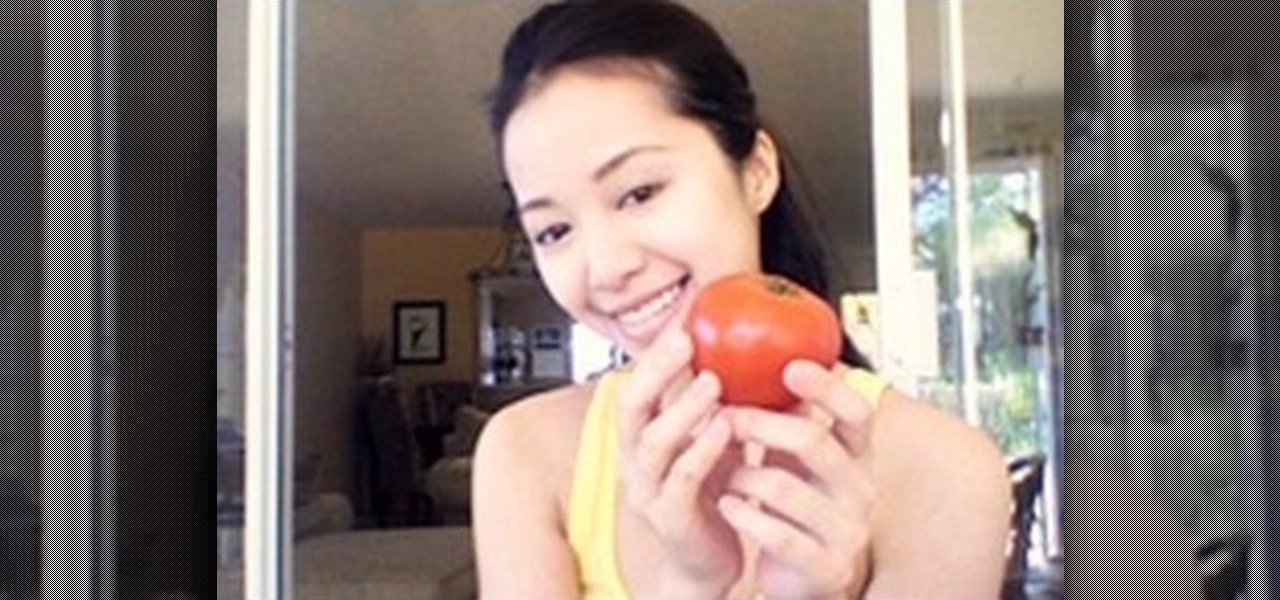
Michelle Phan presents this tutorial on how to take a tomato and turn it into an invigorating scrub.
Hello! This tutorial is made for all who like to sunbath, but also do not want to get those tiny first wrinkles too soon. Or even skin cancer.
This 3D software tutorial shows you how to use the airbrush tool in modo 201. The Airbrush allows a smooth brush effect when painting in 3D directly on your model or in 2D over a UV map. If you have not done any 3D painting with the airbrush tool in modo, you really should. It is actually quite a zen experience as you will see in this modo tutorial.
This tutorial explains how to use the Maya uv editor to set up an object to be imported into the Unreal Engine so you can shoot at the object.
Before Apple jumped into the phablet game with their iPhone 6 Plus, there was the Samsung Galaxy Note series. Initially knocked for their size, the Notes slowly but surely gained popularity, thanks to powerful hardware, incredible displays, extensive features, great battery life, and a surprisingly-useful stylus.
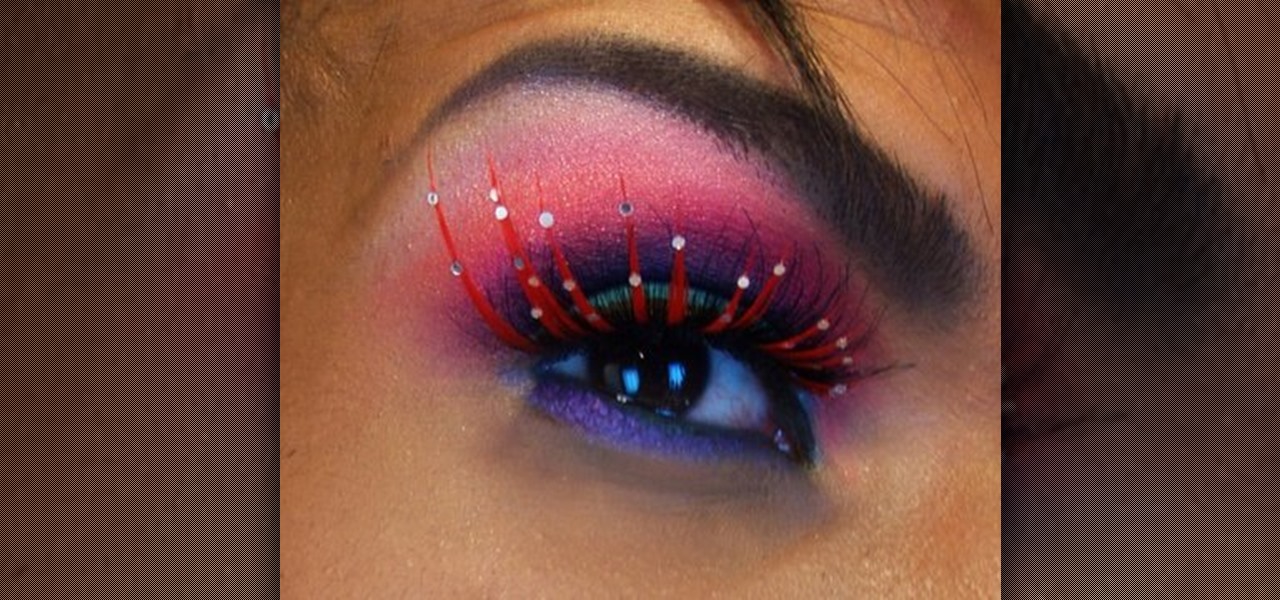
This video shows you how to get a jeweltone rhinestone look with your makeup. First, you take "Kryolan aqua color" and mix it with water, and apply the mixture to your eyelid. Next, you use "Jewel Blue" to cover your eyelid. It should look turquoise now, because of the base you applied. Next use the UV pink from the Kryolan UV Palette and apply that to your crease. Now blend the edges. Now you use fuchsia pigment and set it on the base of your crease. Next use a jewel tone purple eye shadow a...
Find out how everything in a chemistry lab works, from pipettes to burners to recrystallization to storage. You'll get precise instructions on how to work and perform certain scientific duties in the chem lab, whether it's chemical or just ordinary high school science.
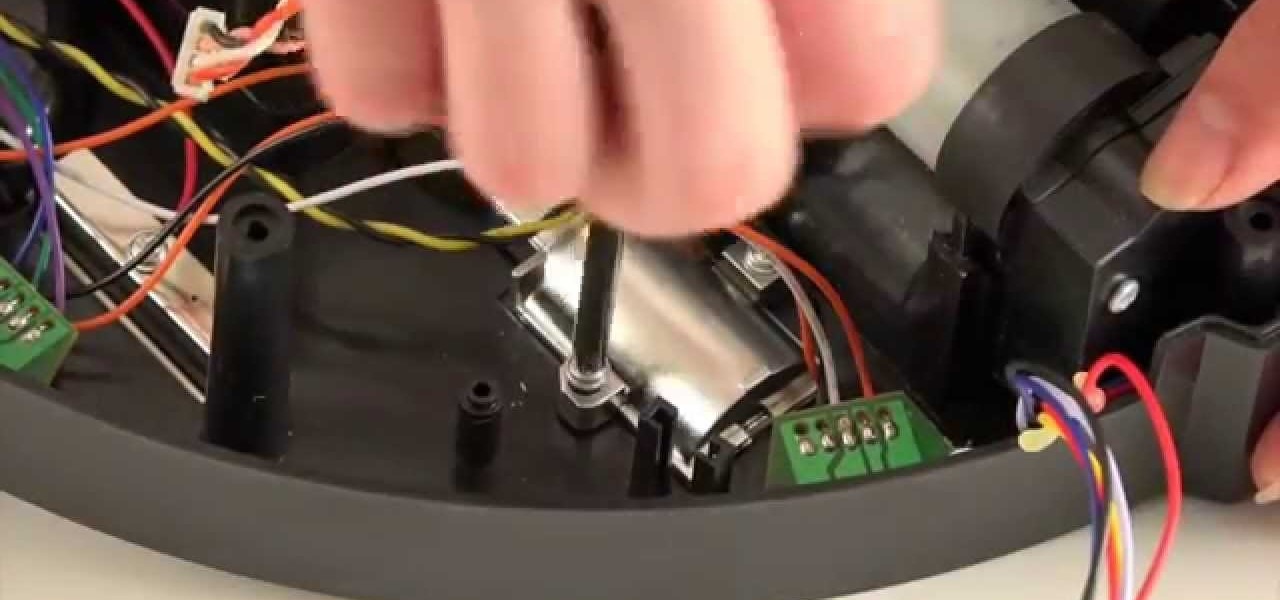
These instructions are applicable to both bObsweep models. Follow the video or text descriptions to replace the disinfecting UV lamp on your automatic vacuum.
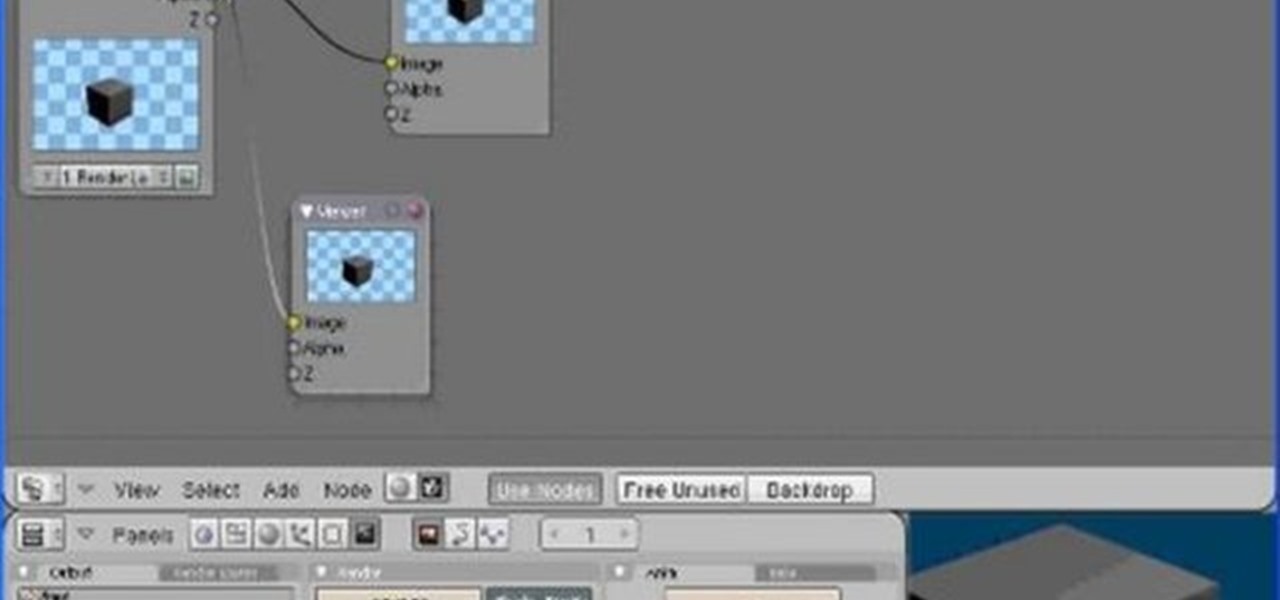
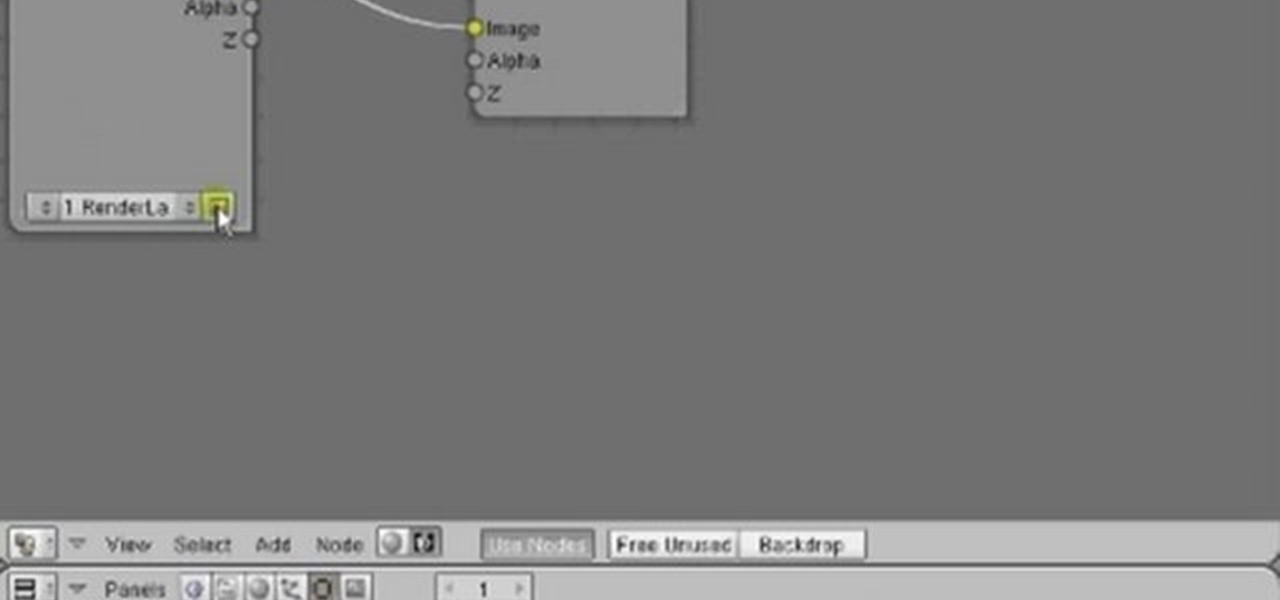
Conceptually, what is node-based compositing and what do nodes do? This clip uses the factory analogy to convey the concept. Blender can process video, images, sequences, and families of images in a directory. Then you'll fire up Blender and talk about threading nodes and how images are duplicated and routed through the compositing network ("noodle"), how threads are created between sockets. Creating threads, cut threads. The clip also points out common threading errors and misrouting threads...
In this clip, you'll see how to create a new Screen Layout (workspace, desktop) to use when Compositing: 8-Nodes. and initialize this new default User setup used in all future tutorials. This clip will also teach how to move the window around, what the starting nodes are and do (RenderLayer, Composite, Viewer) Backdrop, , how threads work in the noodle, rendering the composite and discusses basic window management and splitting, and using the UV/Image Editor to view images/results. Whether yo...
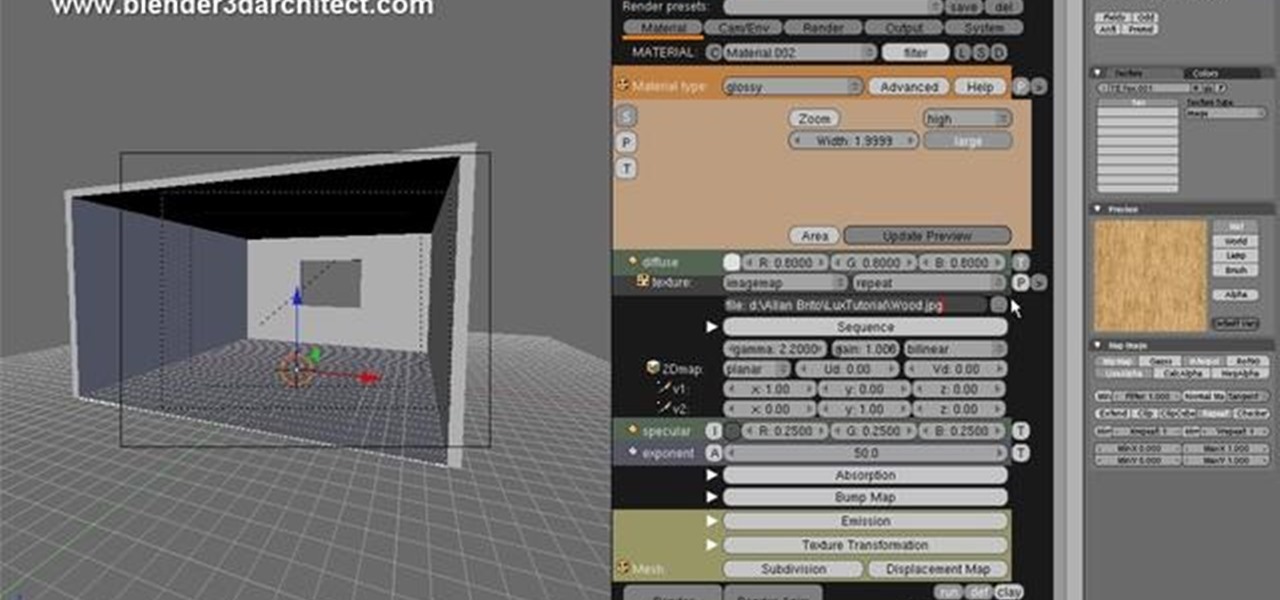
This timelapse video shows how to start a simple model in Blender 3D and set up a render in LuxRender. The video also demonstrates how to create a daylight simulation and set up UV Maps in LuxRender. Whether you're new to the Blender Foundation's popular open-source 3D computer graphics application or are a seasoned digital artist merely on the lookout for new tips and tricks, you're sure to be well served by this free video software tutorial. For more information, including step-by-step inst...
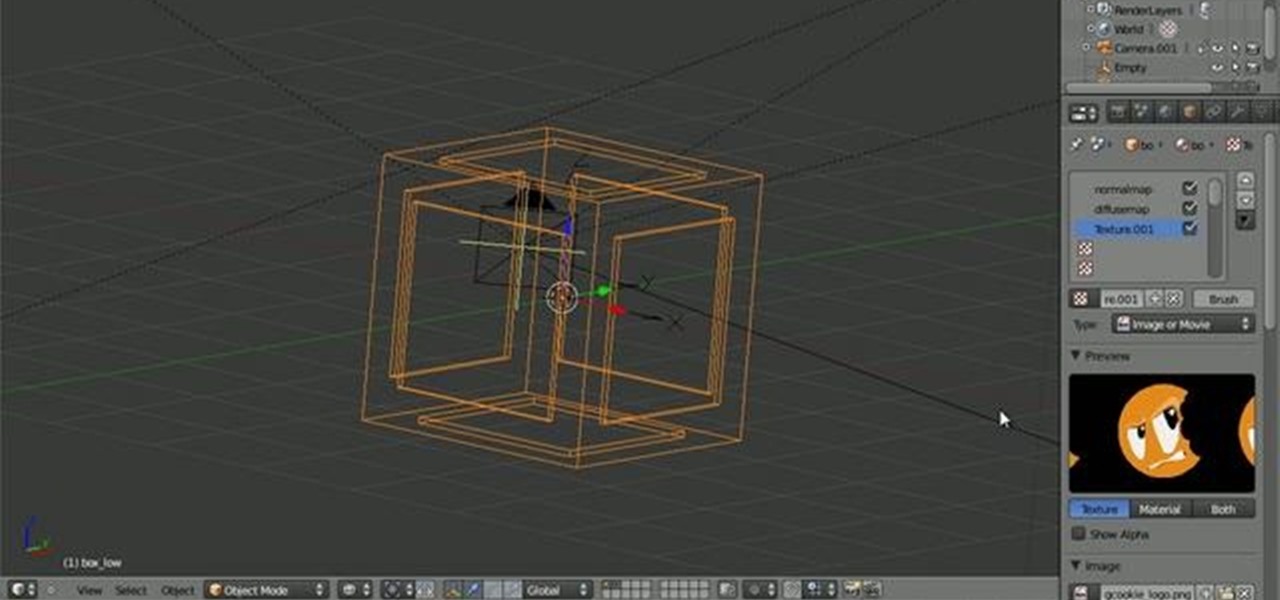
This Blender 2.5 quick video tip demonstrates how to easily place decals onto your model with empties. This technique provides you complete control over the location, rotation and scale of your decal without the need for UV maps. Whether you're new to the Blender Foundation's popular open-source 3D computer graphics application or are a seasoned digital artist merely on the lookout for new tips and tricks, you're sure to be well served by this free video software tutorial from the folks at CG...
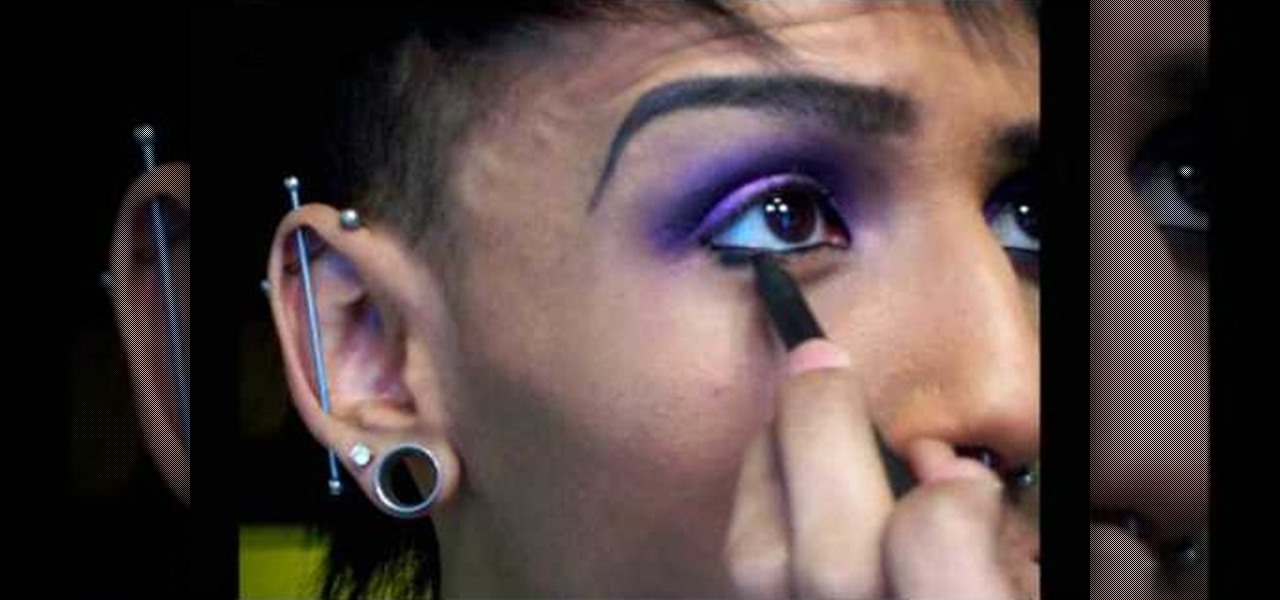
Watch this makeup video tutorial from Petrilude on how to create a carbon copy "smoky purple eyes" makeup look. What does carbon copy mean? Well, Xsparkage was inspired by Petrilude's "Jeweltone UV Neon" look and did her own version (which was beyond amazing), now Petrilude is copying and bettering one of her styles, the "smoky purple eyes" look. See how to do this new version of the smokey purple eyes.
This 31 minutes blender tutorial will show you the steps to texture a head using the new GLSL preview features of the Apricot blender versions. You will see how to interactively blend together 3 projections of reference photographies into a final texture. This assumes you already are comfortable with Blender, mostly in UV mapping, material and textures. Whether you're new to the Blender Foundation's popular 3D modeling program or a seasoned graphic artist just interested in better acquainting...
In this video, we learn how to use the UVW unwrap function in 3D Studio Max. First, go to the UV modifier wrap and select all the faces. Once here, edit the parameters and then go to the mapping menu. After this, you will be able to change the object as you would like. After you are finished with this, save your object to your computer in a spot you won't forget it. You can create several different layers and change the colors as you prefer. You can completely customize your experience on thi...
See how to spin images using Blender. First, you'll see how to use the UV-Textured plane rig and physically rotate the mesh. Next, you'll see how to use Nodes, and then the Sequencer. This clip discusses Orthographic camera scaling, animation, and considerations about clipping. Whether you're new to the Blender Foundation's popular 3D modeling program or a seasoned graphic artist just interested in better acquainting yourself with the application, you're sure to be well served by this free vi...
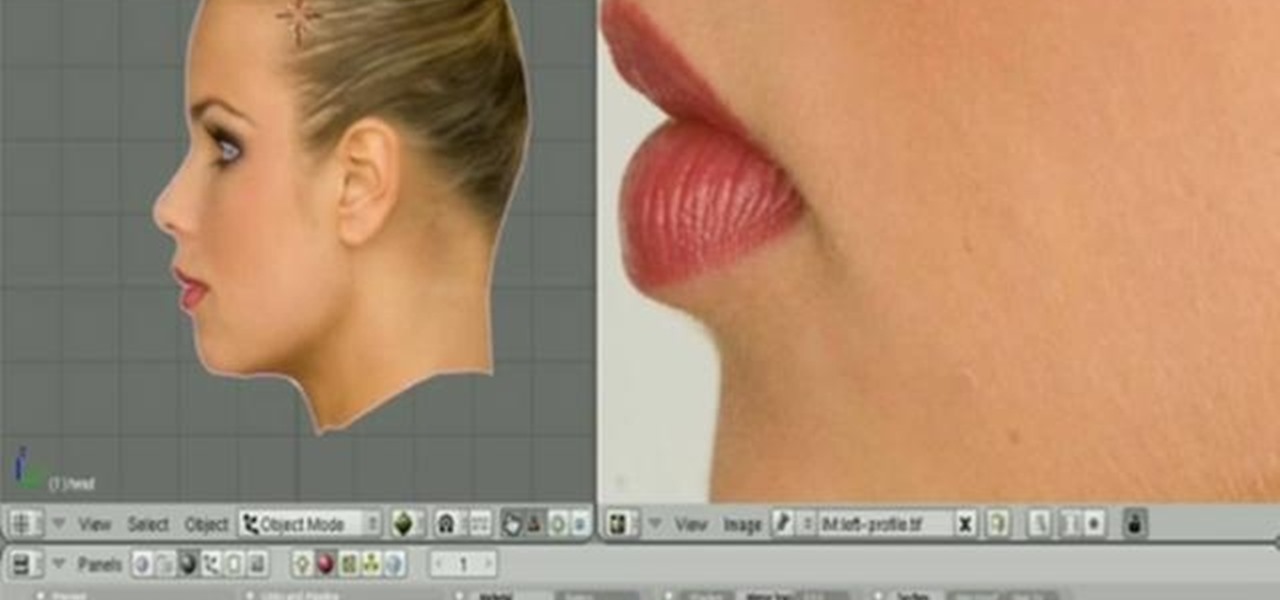
See how to do localized image distortion using Blender. The rig is a simple UV-textured plane filmed using an orthographic camera. You then subdivide the plane, add some curve guides, and use proportional editing to alter an image. The above before-after shot shows a nose job (rhinoplasty), teeth filing, raise cheekbones, enlarged eyes, and a lengthened face. Whether you're new to the Blender Foundation's popular 3D modeling program or a seasoned graphic artist just interested in better acqua...
This tutorial is about how to fix your nails after artificial nails have fallen off. When acrylic nails eventually come off they leave the nail uneven and soft. This video also explains what acrylic actually is and what happens to them when put under a UV lamp. The woman speaking is a nail technician and is able to give the viewer the tips and tools she will need to fix the nail problem. With the use of a nail file the nails will once again be one smooth even layer. When satisfied apply nail ...
This lesson is the second of a series exploring alternative process photography. In this lesson, learn how to create a Cyanotype using a digital negative. Step by step instructions are included with samples and illustrations. Follow along with this photo lesson and learn how to recreate this old-fashioned print technique. You'll need a cyanotype kit, a fine bristled paint brush, a watercolor rag, a contact printer, a pair of clamps, a large tray, a UV light source, and a digital negative.
Take a break from watching your lava lamp, and have some freaky fun with phosphorescence. Inspired by the Instructables project: http://www.instructables.com/id/UV-Fun/
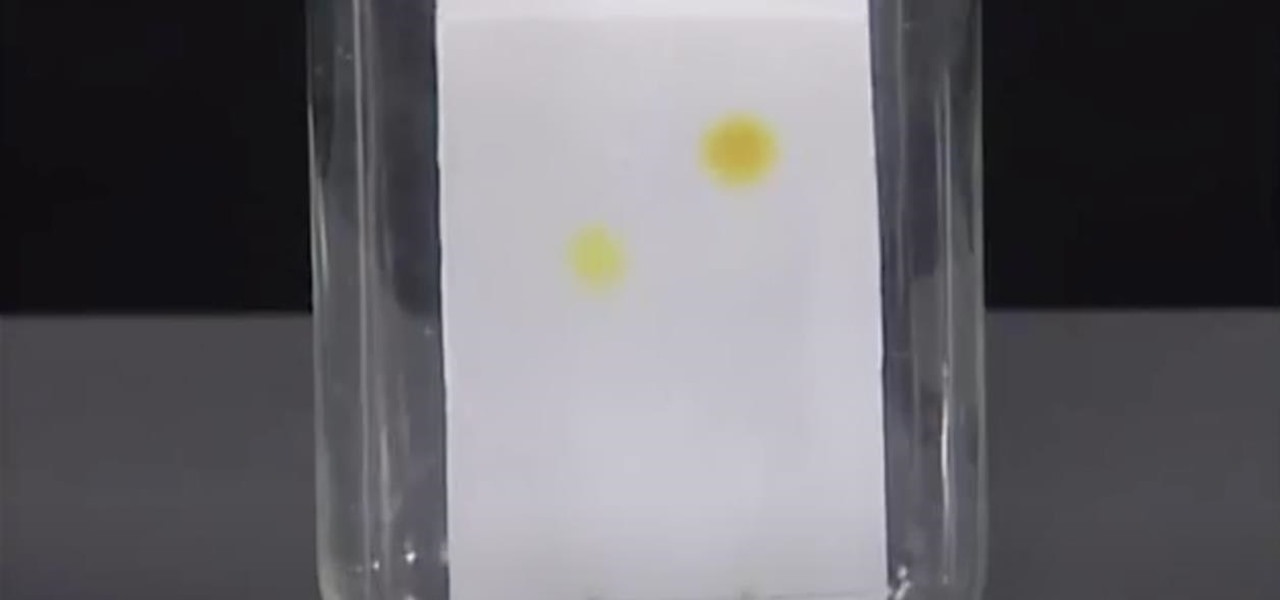
The Department of Biological Sciences at the University of Alberta brings you this video tutorial specifically relevant to your student laboratory courses, specifically microbiology. If you're a student at any school of biology, this information will be helpful for learning how to use the Ultrospec UV-visible spectrometer and HP printer in the lab.
The Department of Biological Sciences at the University of Alberta brings you this video tutorial specifically relevant to your student laboratory courses, specifically microbiology. If you're a student at any school of biology, this information will be helpful for learning how to use the Unicam UV-visible spectrometer, split beam and internal printer in the lab.
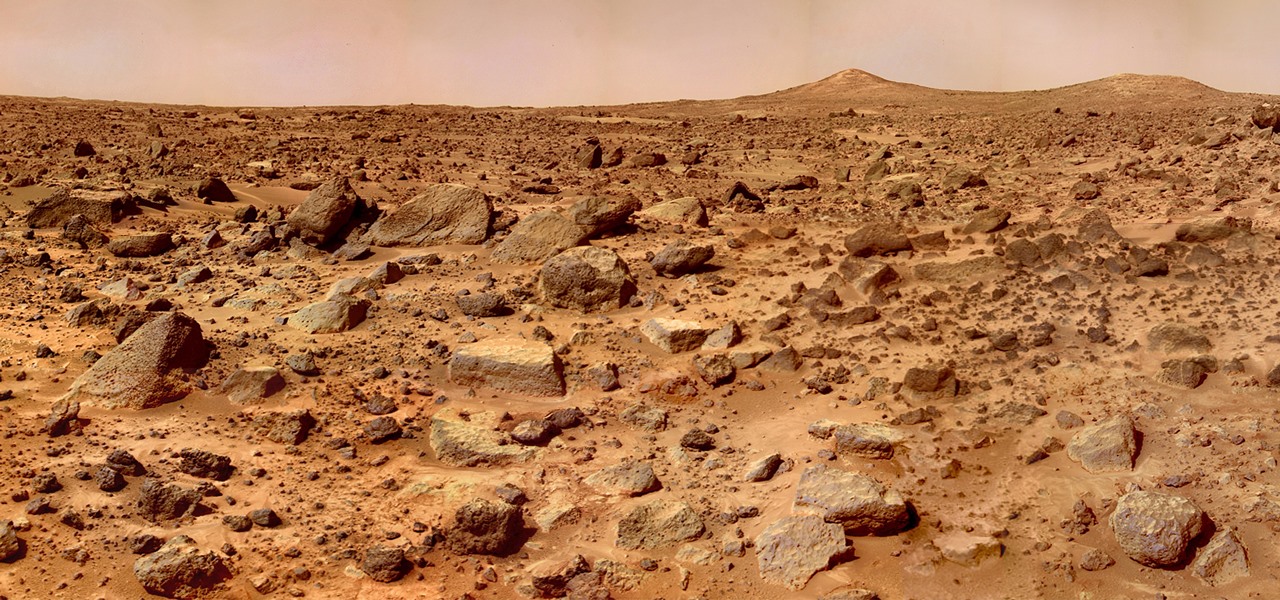
A new study casts real suspicion on the possibility of life on Mars. Why? It seems the surface of the planet may be downright uninhabitable for microbial life as we know it.
The shrink ray as always been one of the oddest and least-useful sci-fi guns, but alien invaders seem to love them and so we'll keep seeing them. If you want to use a shrink ray in a film you're working on, watch this video. It will teach you how to first make a generic ray / laser gun, and then how to make an object shrink in After Effects.
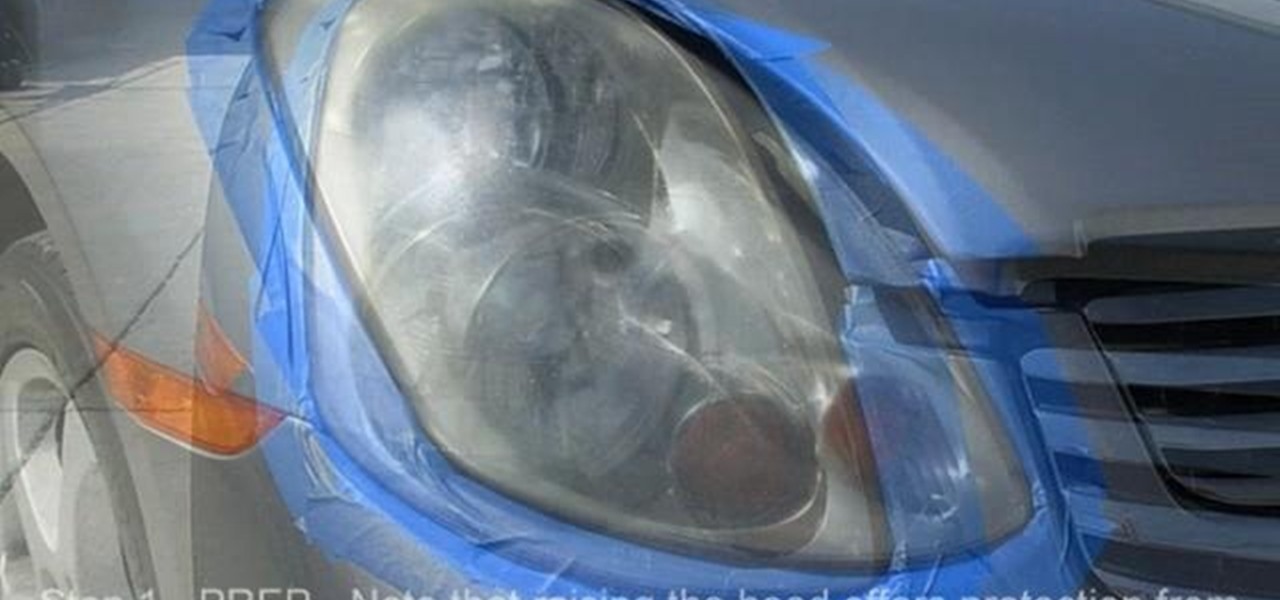
Wipe headlights clean. Double tape around the headlights. Use two layers of tape around the headlight lens to protect the paint. Insert the backing plate into the drill. Attach the foam interface pad. Use a spray bottle of water to lubricate and keep headlights clean while sanding. Completely remove the old UV coating. You'll see heavy sanding marks in the headlight lens. With the 500 grit sandpaper, remove oxidation and pitting. Use uniform movements of up and down and side to side with mode...
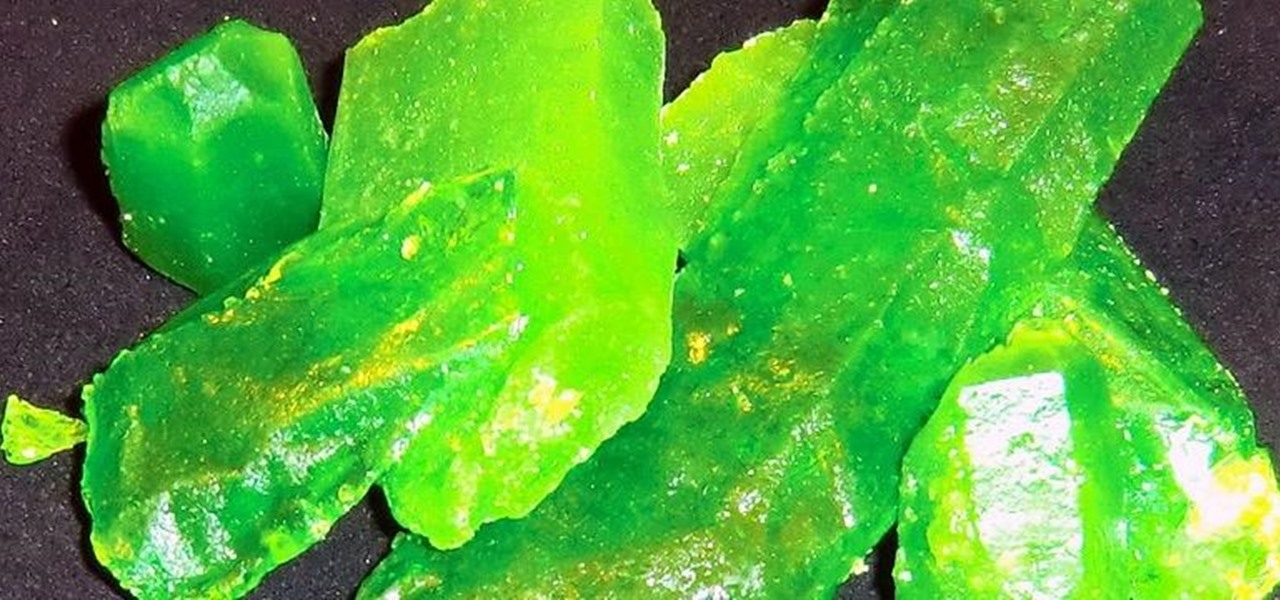
If there ever was a day to eat green candy, St. Patrick's Day would be it. But is there something better than the banality of green candy swarming the streets on St. Patty's Day? Yes—glowing green candy, and Instructables user BrittLiv wants us to show you how it's done.
X-Ray vision is one of the most memorable of Superman's many distinctive powers (he was so unfairly strong wasn't he?) and one that would be very useful to modern spies and voyeurs. This video will show you how to create an X-Ray vision special effect for your movie using After Effects. Whether your characters are looking into a girls' locker room or a secret Soviet meeting, the effect at least will be very cool.
Every state has begun reopening in some capacity. While there are important steps for everyone to get back to work and begin socializing, precautions will be in place for some time, especially with an expected second wave coming this fall. The virus is not over.
Ever wanted to create your own X-ray without a doctor's visit? Learn how to create your own X-ray in Photoshop by compositing two separate images to make it appear as if you are holding your own X-ray. You will use different layers, layer masks, and levels to make a believable self X-ray image - and you don't even have to get it approved through your insurance!
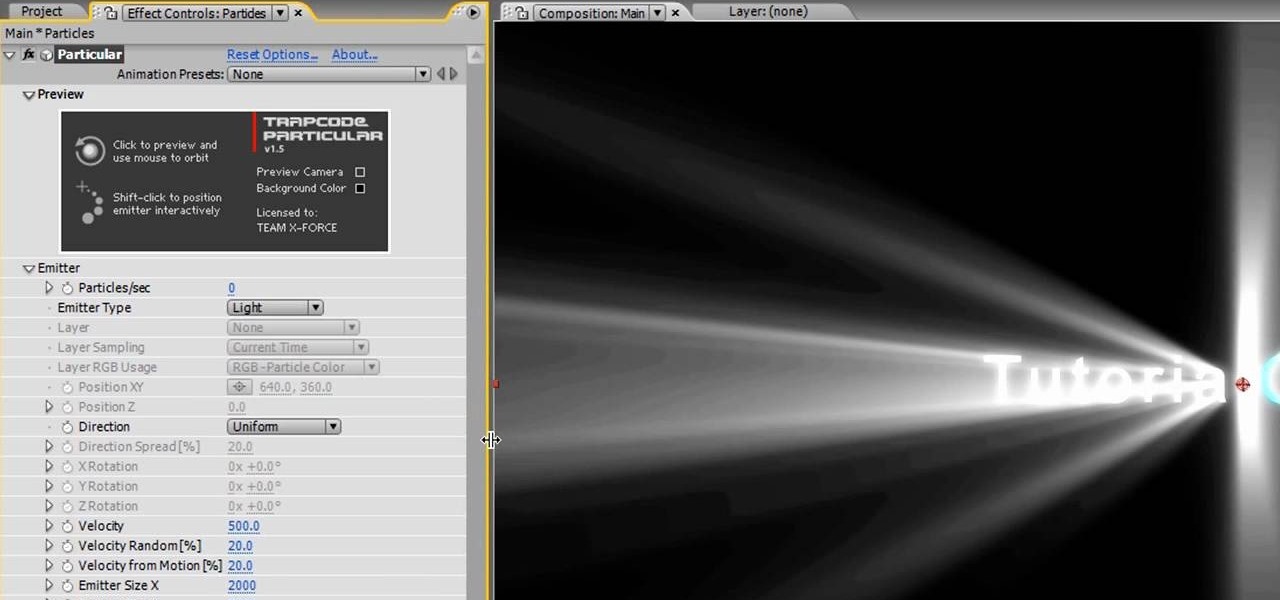
Making titles in After Effects is fun, relatively easy, and sure to make your film make a better first impression. This video will show you how to make a cool light ray text swipe effect with particles, like the one in the thumbnail. This isn't too hard as far as our After Effects titles tutorials, so try it out!