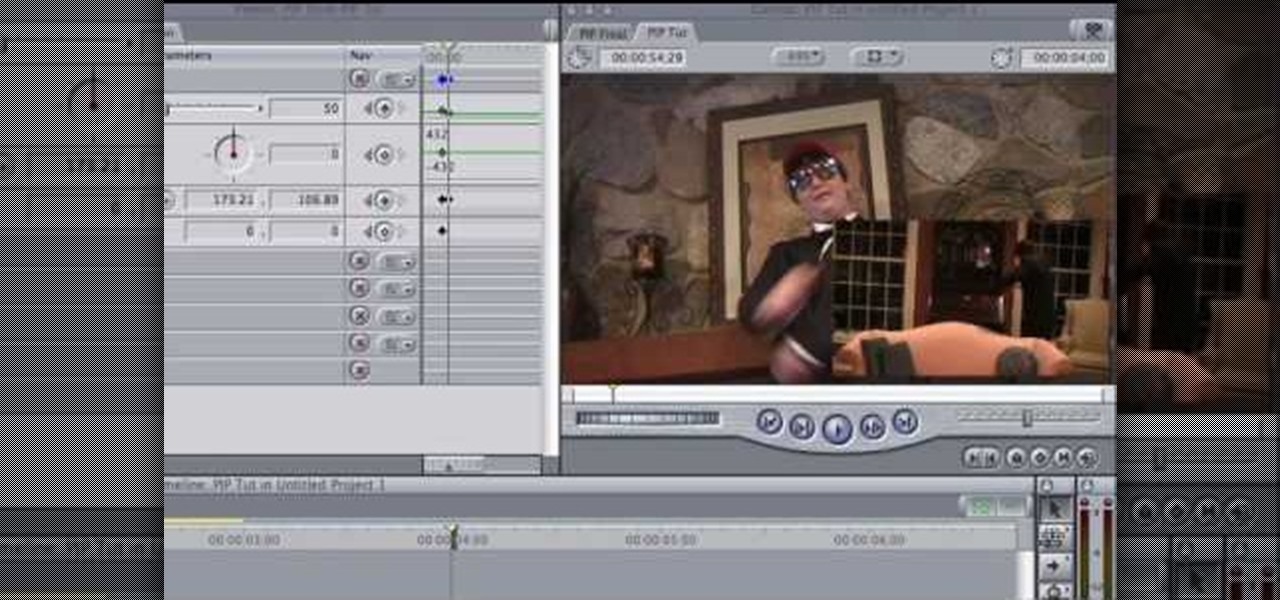
In this FCP-user's guide, you'll learn how to create a picture-in-picture in Final Cut Pro or Express. Whether you're new to Apple's Final Cut Pro non-linear video editor or just want to better acquaint yourself with the popular video editing program, you're sure to benefit from this video tutorial. For more information, including detailed, step-by-step instructions, watch this tutorial.

This clip provides instructions on how to create a picture-in-picture or PIP effect in Sony Vegas Pro. Whether you're completely new to Sony's popular nonlinear editor (NLE) or are a seasoned digital video professional simply looking to pick up a few new tips and tricks, you're sure to be well served by this free video software tutorial. For more information, including detailed, step-by-step instructions, take a look.
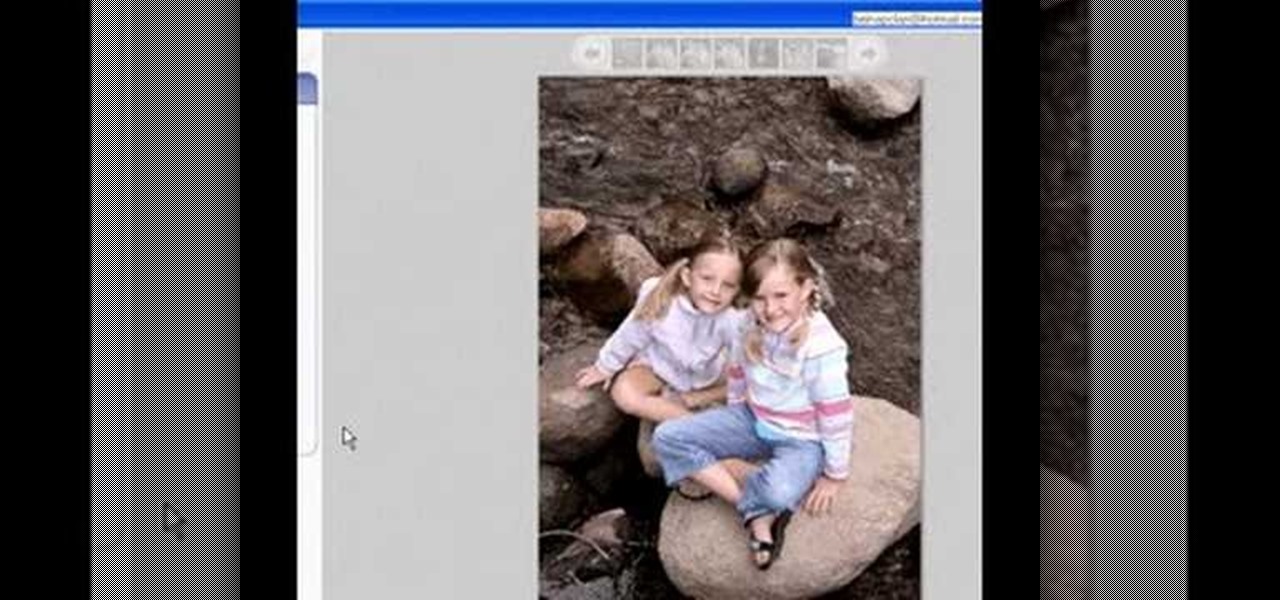
Begin with starting the program Picasa. If the program has been opened, choose an image for editing. Double click on one of the images and it will open. On the left of the screen there is an editing toolbar. The next option after this is to Crop the picture. Click "Crop Picture". Then choose the format you want the picture to be cropped to. Then hit Enter.The next option is "I'm Feeling Lucky". With this option you can give the picture the best color possible.Following with Redeye Repair. Cho...
In this video, you will learn exactly how to take pictures with your Apple iPad! Wifi or 3g model is fine, 16GB, 32GB, or 64GB models are all fine also! What you need for this to work:

Danny Lipford shows us how to create a simple jig to hang picture frames. He believes that all the complicated gadgets many people use-including lasers and special levels-are unnecessary for successfully hanging a picture frame. All you really need is a strip of wood and a single nail. He shows us a single lath with a roofing nail in it, which he prefers for its broad head. Simply slip the nail onto the wire on the picture's backside. Then set the picture wherever you would like it to be. Sim...
In this video from DontPokeMeSoHard he shows how to take a picture of your iPod Touch's screen. If you hold the home button and press the power button, it will take a picture of whatever is on your screen at that moment. It will save the picture in your photos under Saved Pictures. If you're trying to remember a page on the Internet, it's a great tool for that. Just take a picture of it and it will save on your photos forever. You can view web pages now without being connected to the internet...

Learn tips and advice for framing your picture in this free video series about the best kind of picture frames for various pictures and artwork.
Creativity and well thought-out planning are qualities to be admired when choosing a costume for Halloween. Going out in hordes to purchase the same 'ol outfits from a local costume warehouse means you're probably wearing the same thing as thousands of other people.
If you're playing Gears of War 3 and happen to visit the Mercy map, be sure to listen in for the bells. When you hear them, you'll be able to see a picture of Dom appear. But the easter egg doesn't end there. If you shoot the picture you'll hear a soundbyte of Dom crying.
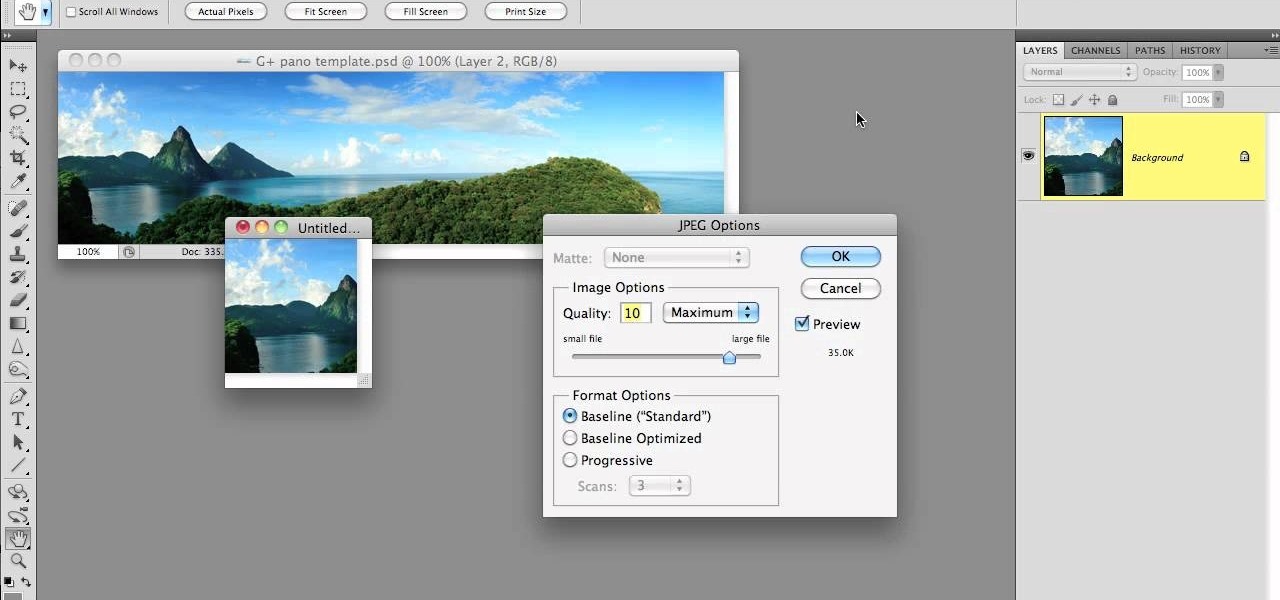
Much like Facebook, the five picture frames located at the top of each Google+ profile can be repurposed to display a panoramic picture or pano. This tutorial will show you how to break up a single image in Adobe Photoshop that combines at the top of your Google+ page to show a single image.
Is something interesting happening on your Mac computer that you need a picture of? This guide will walk you through the process of taking a picture or capture of your Mac screen and saving it as a screenshot. Remember that hotkey and it will help you out in the future!
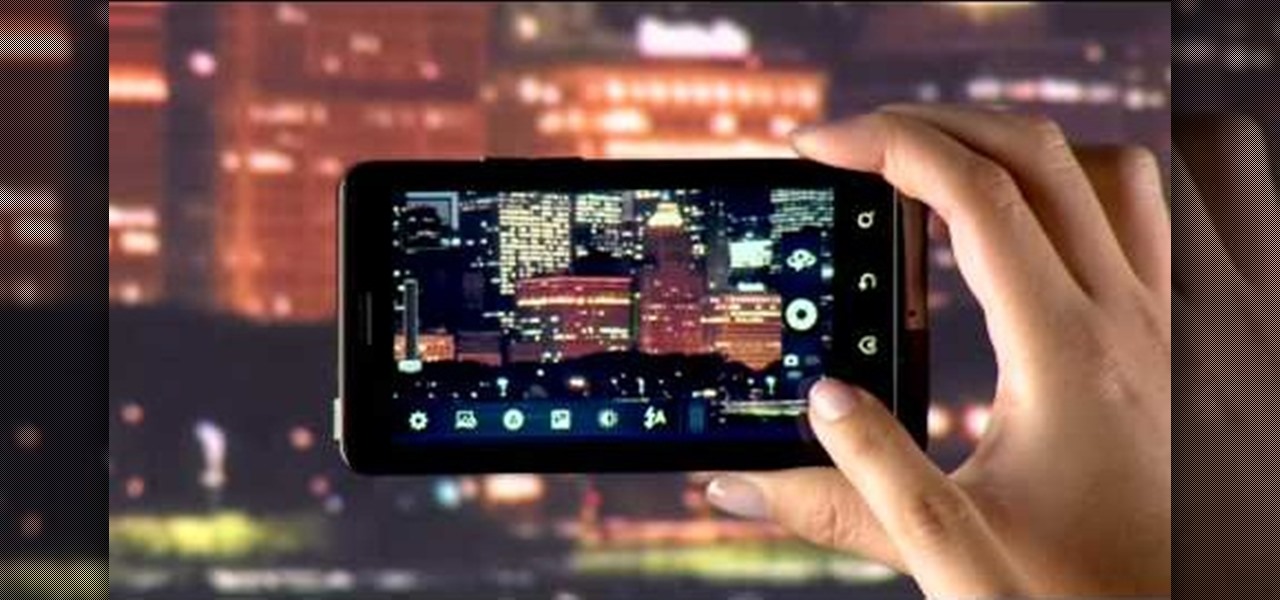
Verizon Wireless's latest Android smartphone the Motorola Droid Bionic, has an 8 MP built-in camera that takes great pictures with the built in Camera app on the Android Gingerbread OS. This Motorola guide will walk you through the process of taking pictures, as well as sharing them to Facebook, Twitter, Picasa, or via text message.
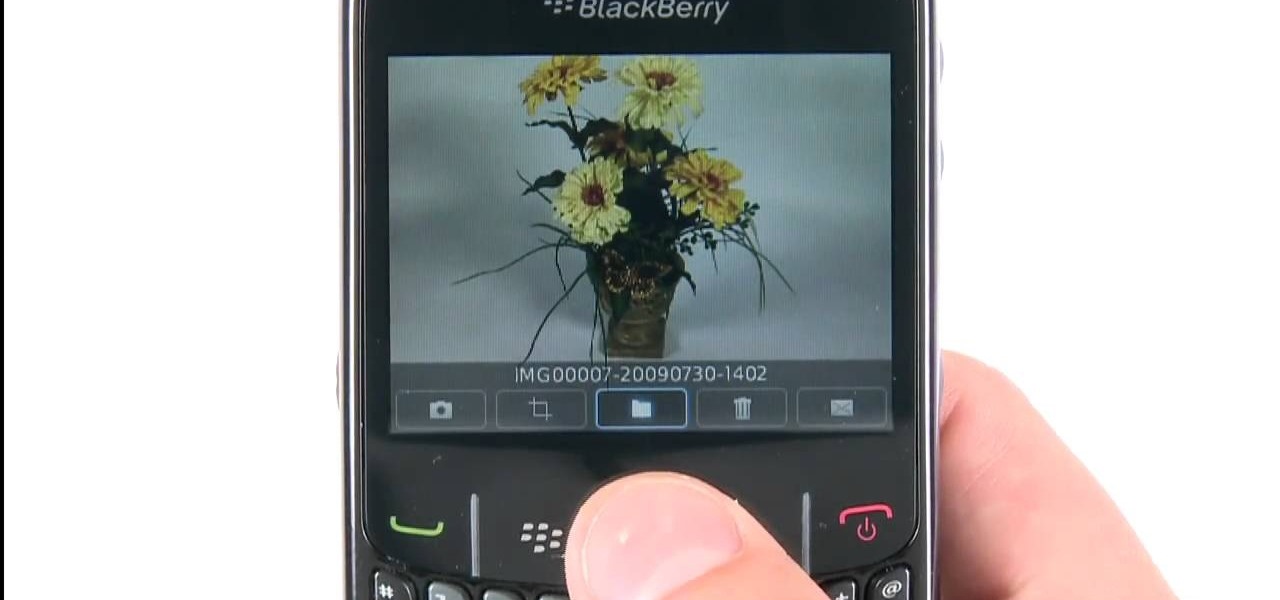
Learn how to use the digital camera in your BlackBerry Curve 8520 phone to take pictures. This clip will show you how it's done. Whether you're the proud owner of a BlackBerry smartphone or are merely considering picking one up, you're sure to be well served by this video guide. For detailed information, including step-by-step instructions, take a look.
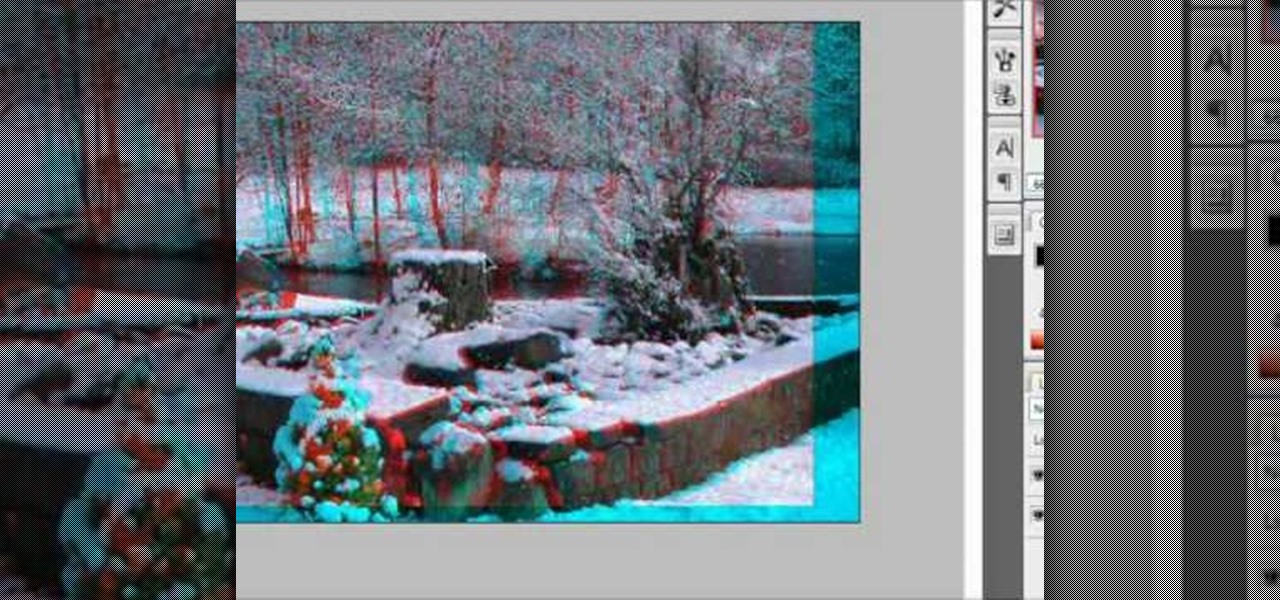
3D glasses are enjoying a renaissance right now, but the new ones are a far-cry from the red-and-blue affairs of your youth. Old-fashioned 2-color 3D pictures are called anaglyphs, and still have a very nostalgic appeal to many people. This video will show you how to make stereoscopic anaglyphs using Photoshop, allowing you to create all sorts of cool images to use that old pair of 3D glasses on.
Check out this informative video tutorial from Apple on how to create picture-in-picture effects in iMovie '09.
Watch this video to learn how to use silicone putty to repair a broken or damaged antique picture frame. Make a mold with the putty and make a reproduction. Great visual demonstration and detailed instructions!
This tutorial shows you how to make a picture frame using a Mattel Juicebox media player.
Want to upload a profile picture to your Facebook account? This clip will show you what to do. Whether you're completely new to the Facebook's popular social networking site or simply require a small amount of clarification on how to perform a particular task on Facebook, you're sure to benefit from this helpful video guide. For more information, including detailed, step-by-step instructions, and to get started uploading your own pictures to Facebook, take a look.
In this tutorial, we learn how to design custom flyers using Easy Flyer Creator. First, start a new deign in the software, then delete all graphics so the page is blank. Next, add in a background to the flyer and resize it to fit onto the entire page. Now, right click on the picture and choose 'set as background'. Now, add another picture on the page, then move it to your desired location to fit on the bottom of the page. After this, you can edit the picture further, if needed. When you are d...
In this clip, learn how to control your Facebook fan page by changing your profile picture. You may need to change your picture from time to time as your business or cause changes. Follow this clip and make a perfect Facebook Fan page to promote yourself or your business.
In this how to video, you will learn how to create an animation with pictures using Photoshop. First, open an image in Photoshop. Double click the layer to unlock it. Next, open another picture in the program. Select and copy the first image, then paste it into the second image as a new layer. Close the original picture. Next, open another picture and copy it. Paste it into the other picture and close the latest picture. Open yet another image and copy and paste it into the previous picture. ...
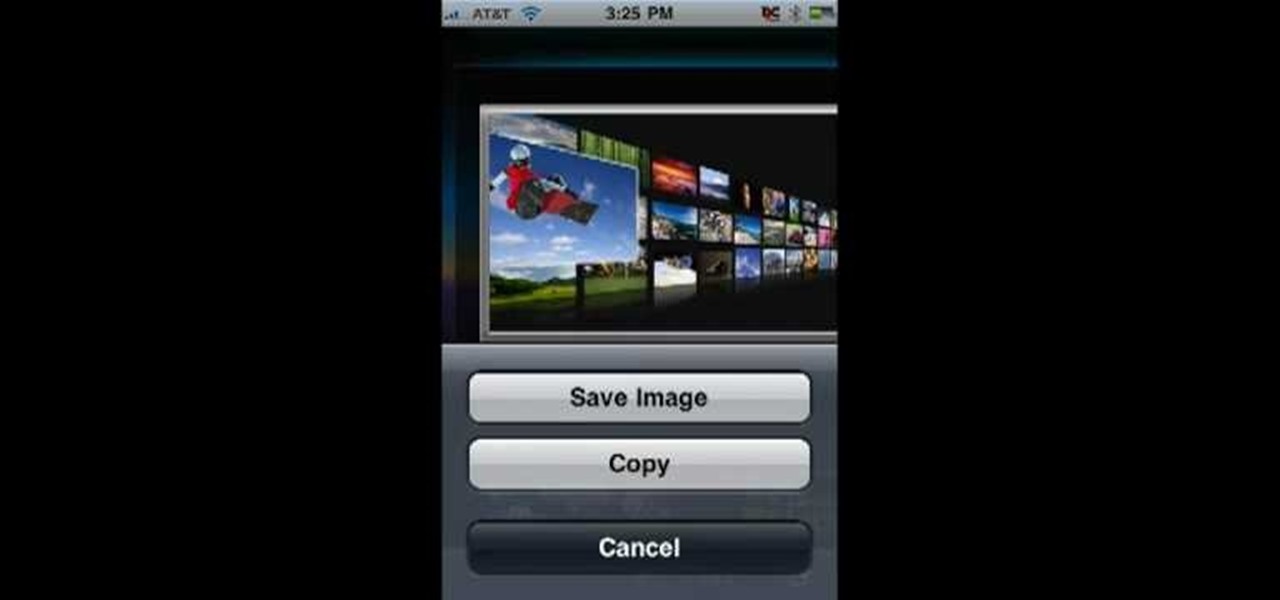
In this Computers & Programming video tutorial you will learn how to save an image from Safari on your iPhone. Tap on safari on your springboard. Go to Cool Iris/ page. You will find a lot of beautiful pictures on this page. Enlarge the pictures and choose a picture that you want to save on your iPhone. Then hold your finger on the picture and a dialog box will open up with the options save image, copy or cancel. Tap on save image and when you back out of safari and go to the camera dialog, a...
Tutvid shows you how to add flare and dramatic color to your raw camera images (usually the format of a DSLR). In a step-by-step guide with narration, Tutvid takes you through the process of using CameraRaw (used as an extension of Photoshop but never really brings it in photoshop) to add desired colors to your picture. Pull up your raw file in CameraRaw, and press "Command" or "Ctrl + R" to open up the editing panel. With an example, he shows you how to bring out lights in underexposed (dark...
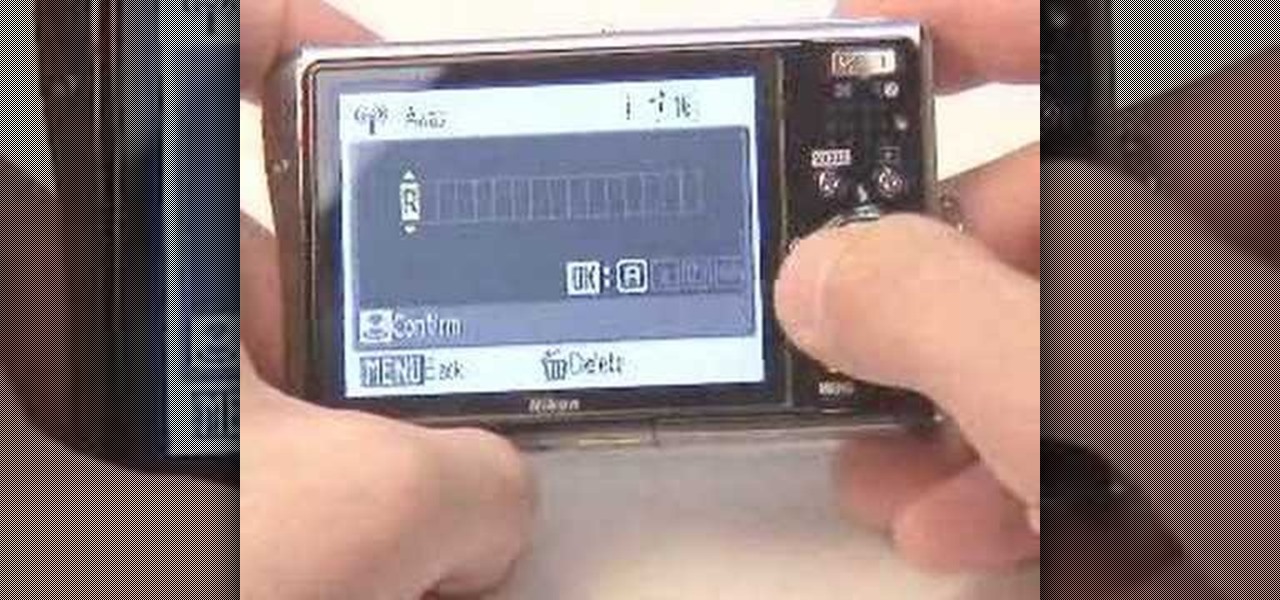
To help familiarize yourself with the Nikon COOLPIX S700 camera, here's a short video tutorial which offers descriptions of a few of the camera's coolest features, as well as tips for taking great pictures. Watch this helpful camera video to see how to take great pictures with a Nikon COOLPIX S700 camera.
To help familiarize yourself with the Nikon COOLPIX S51 or S51c camera, here's a short video tutorial which offers descriptions of a few of these camera's coolest features, tips for taking great pictures and an explanation of how to use the incredibly cool wireless feature of the S51c camera. You'll see how to take great pictures with a Nikon Coolpix S51 digital camera.
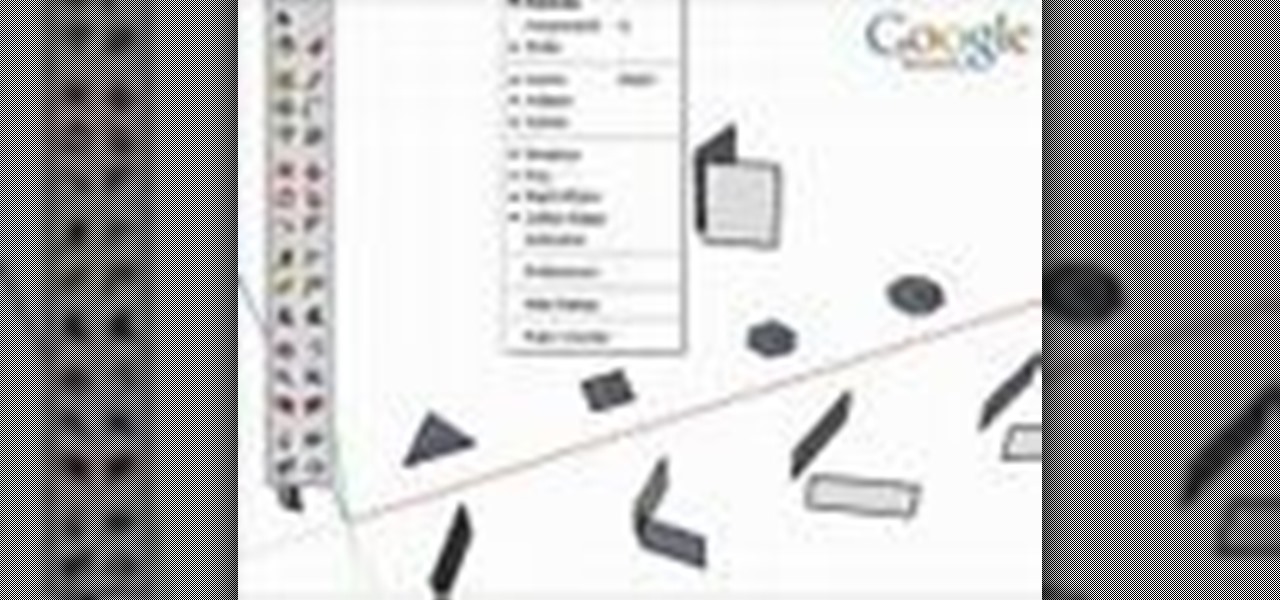
This 3D modeling software tutorial shows one approach to breaking a picture frame created through the follow-me tool into the actual pieces that would be used to build it in Google SketchUp.
Check out this Korean language tutorial video to practice your vocabulary skills. This instructional video is a part of the picture/vocabulary series to help learners practice their Korean skills. This video is a great lesson for advanced learners who want to listen to native speakers, but it is also helpful for advanced beginners to build up their vocabulary skills. Watch as this instructional language video provides pictures supplemented by voice over with thorough explanations of each Kore...
This cameo style necklace pendant is made out of little picture frames, scrapbooking paper, vintage photographs, magazine cut outs, or whatever you want. These charms have a great antique feel. Learn how to craft a picture perfect frame cameo-style necklace pendant by watching this video jewelry-making tutorial.
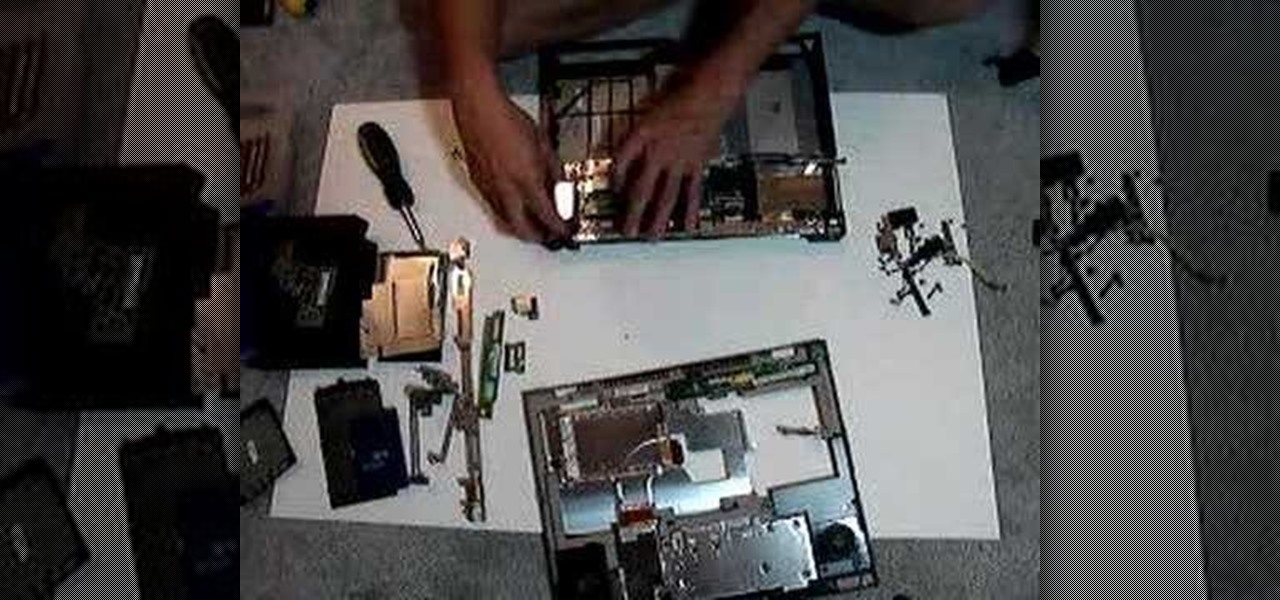
This is a laptop disassembly of a Dell Inspirion 7000, for the making of a digital picture frame. Watch this three-part video to make you the coolest kid on the block. See the disassembly in part one, the LCD retainer in part two, and the system board back panel in part three.
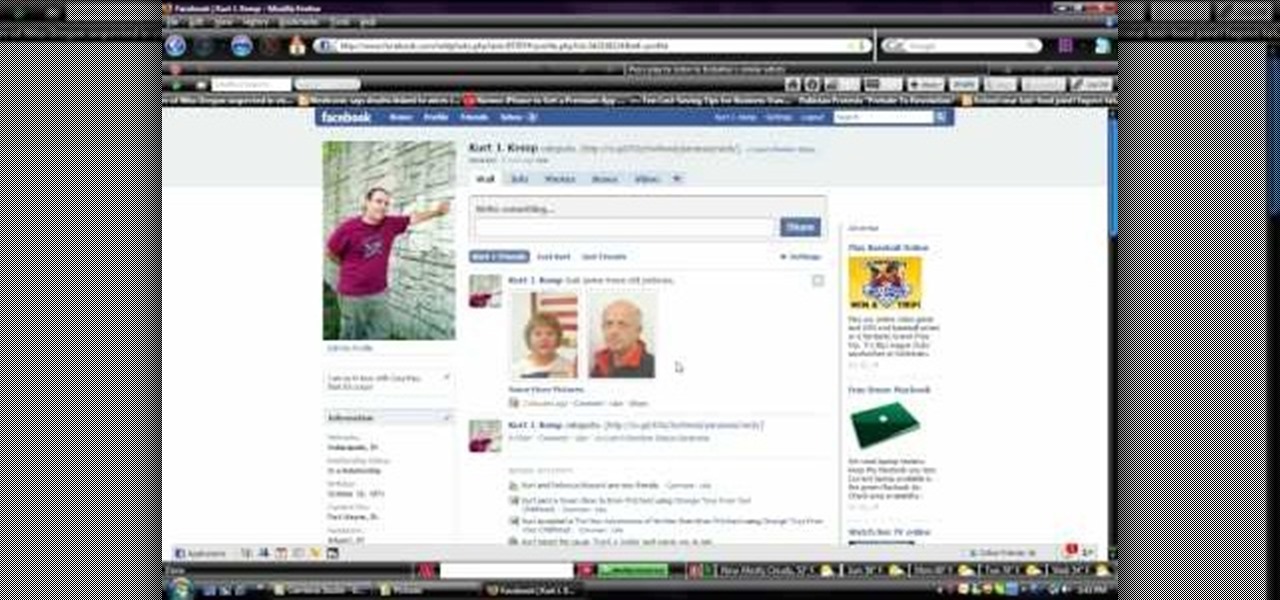
In this video, we learn how to upload pictures and set a profile picture onto Facebook. First, you will need to locate the pictures you want to use on your computer. After this, log into your Facebook account and click on your profile, then the tab that says photos. Now you will be on a new screen where you can browse your computer to find the photos you want to upload. After you click on all these, click the "upload" link and then wait for the photos to load. After this, you will be able to ...
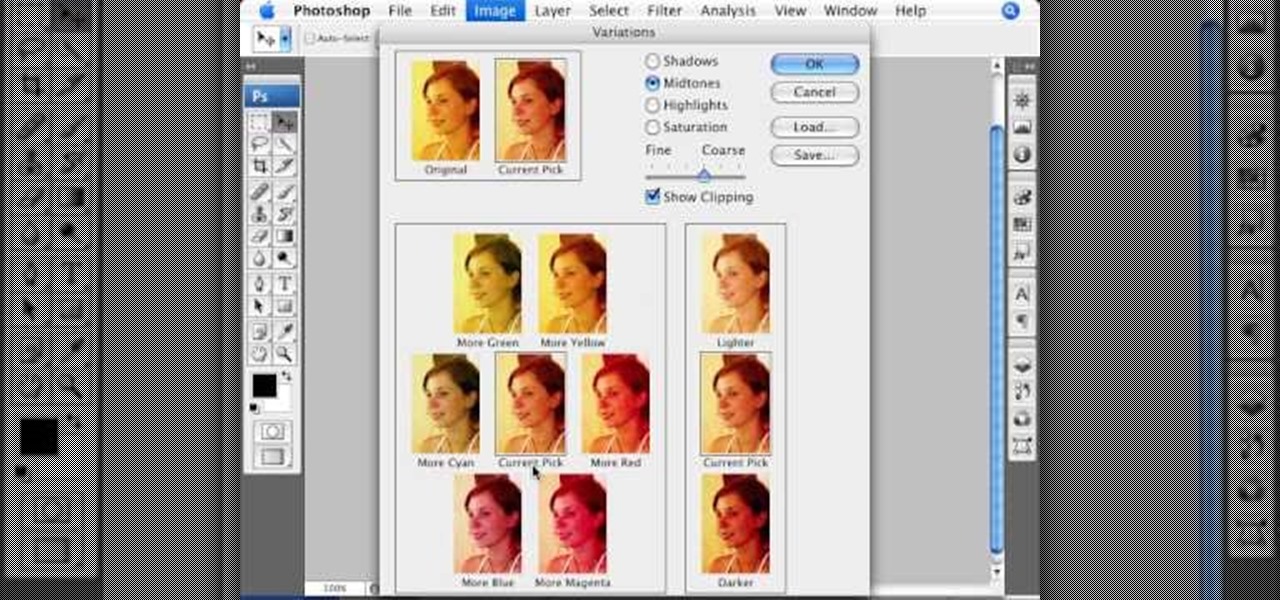
This informative video tells you how to use the variations panel in Adobe Photoshop to correct color issues in your photo. Too much yellow in your picture? Learn how to use the variations setting to instantly fix this with the corresponding opposite color. With simple clicks and easy preview-able pictures, you can correct color over-exposures with a click of the mouse. First go to the Images drop down and select the variations option. The original photo on the top can be clicked to revert you...
This video describes how to import pictures from a digital camera onto your computer and use them in various ways. Simply plug in a flash drive with your stored pictures and they will immediately load onto your computer. Once this is done, you can share your pictures on Snapfish by opening the program and using its various programs. Within the program you can print your images, share, or even create gifts such as posters and mugs with your uploaded pictures. If you would like any more informa...
Photoshop is a great computer software program designed to help people manipulate images and text. Learn how to create a clown picture from an ordinary photo from a Photoshop expert in this free video series.
Hanging pictures on your walls adds style and elegance to your rooms. Meghan Carter shows you the right way to hang pictures so you don't damage your pictures or your walls. With her simple tips, you'll be hanging pictures in no time, and you'll avoid common mistakes that can not only look bad, but also damage your home and pictures.
So you have a picture you're dying to get up on the wall, but don't want to risk hanging it crooked. This video is your answer! Learn a few tips and tricks to make sure that every picture you hang is perfectly straight and level.
Learn how to set your camera to automatically record the location to the pictures you take. Also learn how to edit the pictures you have just taken. It's easy and this clip will teach you everything you need to know. For all of the details, including complete, step-by-step instructions, watch this brief, official C6-01 owner's guide from the folks at Nokia!
In this clip, we learn how to make a wood picture easel using only hand tools. It's easy! So easy, in fact, that this video woodworking lesson can present a complete overview of the build in just over eight minutes. For all of the details, and to get started making your own wooden picture easels, take a a look!
In this video, we learn how to make a stop motion video with your American Girl Dolls. First, you will need to get a tripod to place your camera on and move it around. After this, put your doll out and then take a quick picture. Then, move her arm a little bit taking pictures one by one. You will be moving her, going out of frame, then coming back into the frame. When you're finished, load the pictures onto your computer and then choose all the pictures that you want to use. From here, you wi...
In this tutorial, we learn how to take pictures right after sunset. To get the optimal setting for pictures after sunset, you will first want to place your camera on a tripod. You want to get a view of both the sky and the tops of buildings that have just turned their lights on. After sunset, set your flash to a setting for outside and then take a picture of the sky with the clouds showing lightly in the air. Make sure to take a wide angled shot so you can see a clear view of the surrounding ...
In this tutorial, we learn how to clone yourself in GIMP. First, open up GIMP on your computer and then open the picture where you want to clone yourself. After this, open the other picture where you want to copy yourself and right click to copy it. Now, create a new background layer for your main picture. Use the lasso tool to cut out one of yourself inside of a picture, then transition it into the main picture. Exit out of the other image, then start to edit the colors and opacity in the fr...