First of all you have to draw the two big eyes and a curved line supporting them. Now draw and darken the two eyeballs. Draw the top portion of the head and make some curves of hair at the top. Draw the round cheeks on both sides. Now you have to draw the round beak and the mouth as shown. Then draw the narrow neck and then draw two lines around it. Draw two nostrils over the beak and then also draw the two eyebrows. Now color the drawing as shown. Fill in black color in the face and neck. Le...
In this Magic & Parlor Tricks video tutorial you will see the "dyslexic queens" card trick. The 4 queens are laid out on the table face down; three in one line and the 4th below the top line. To each queen 3 red cards are added. These cards are between 1 to 10; no jacks or kings. Now the top 3 stacks are picked up one by one shuffled and when turned over, the queen has vanished. All the 4 queens are found in the 4th stack. Then the 4 stacks are put face down with 4 queens in the 4th stack. On...

Watch this tutorial to learn how to draw Beyoncé Knowles. Make sure to pause the video after each step and look at the screen every few seconds while you are drawing.
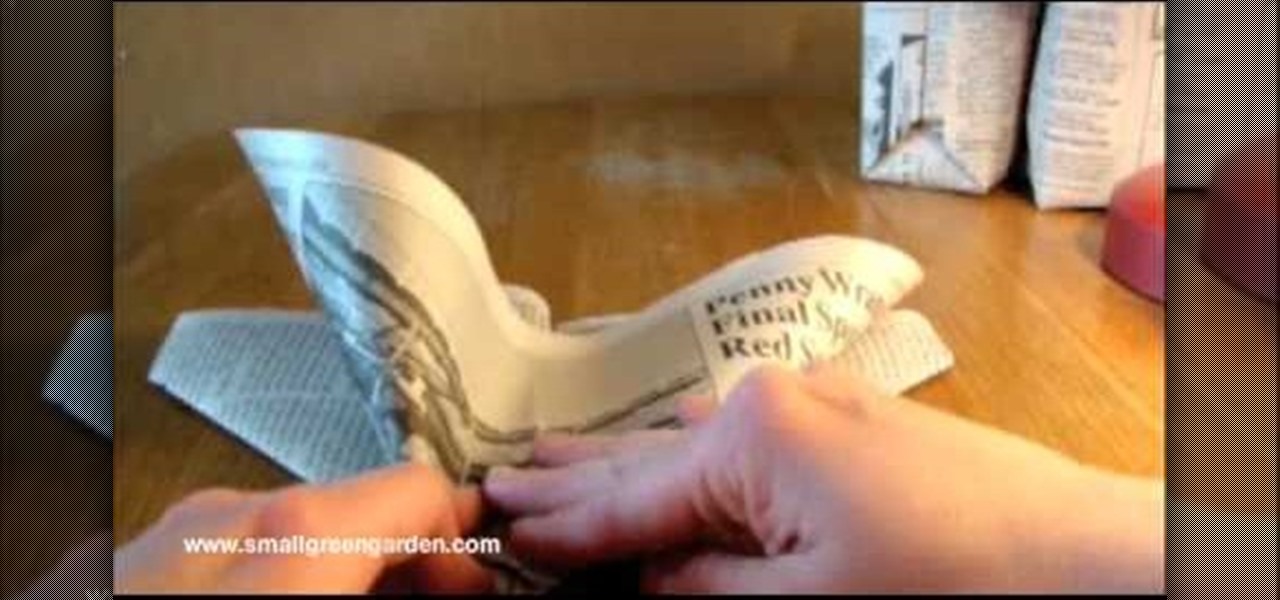
This video demonstrates how to fold a newspaper seedling container using a simple origami method. This is a free idea that incorporates recycling. Not only do these paper containers stand up well to moisture, they also will break down in the soil if you place it directly into your garden. Begin by using one half sheet of black and white newspaper. Lay it out length wise and fold it in half from top to bottom. Then fold it left to right. Next turn the paper so it is horizontal with the open si...
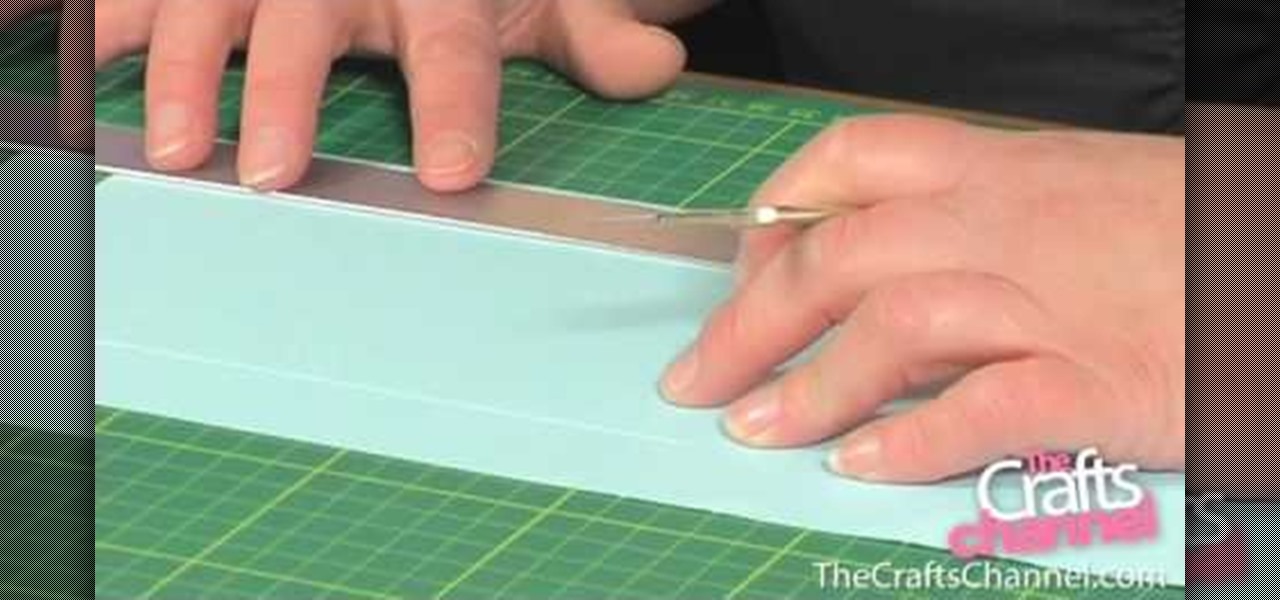
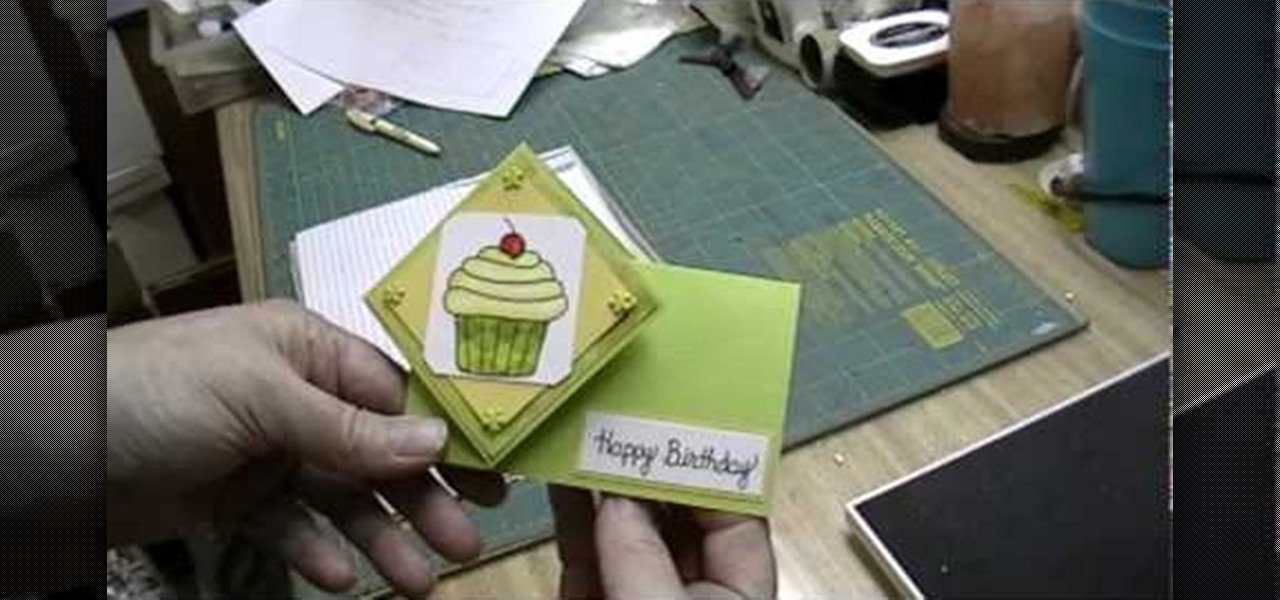
Connie Brad teaches us how to make a pop-up box card in this tutorial. First, you need to take a scoring board and draw 1 cm increments down the center of it. Now, take a sheet of card stock and score the sheet 2 cm from one end, then continue down until you reach the bottom 3/4's of the paper. Now, fold your card along all of the score lines up until the last line. Next, line this up on a cutting mat and cut 3 cm on each side until the end of each score line. Now when you set this up, it wil...

He explains how to tie a "blood knot" and what the blood knot is used for, which is joining two separated rope/string ends. He demonstrates the knot, which starts by taking the two lines and lining them up one on top of the other, so they are parallel to each other. Then, start winding one end around the other, at least 3 or 4 times. Do the same with the other loose end as well. Then, place the first end through the wound part of the two ropes where you started. You pass the other end through...

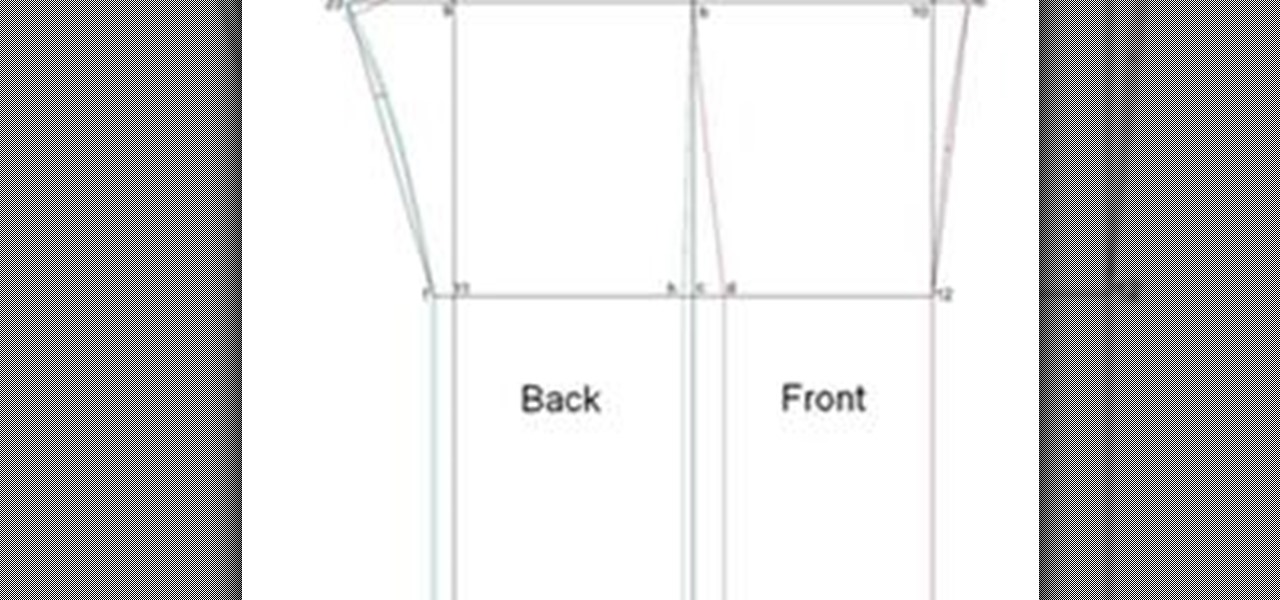
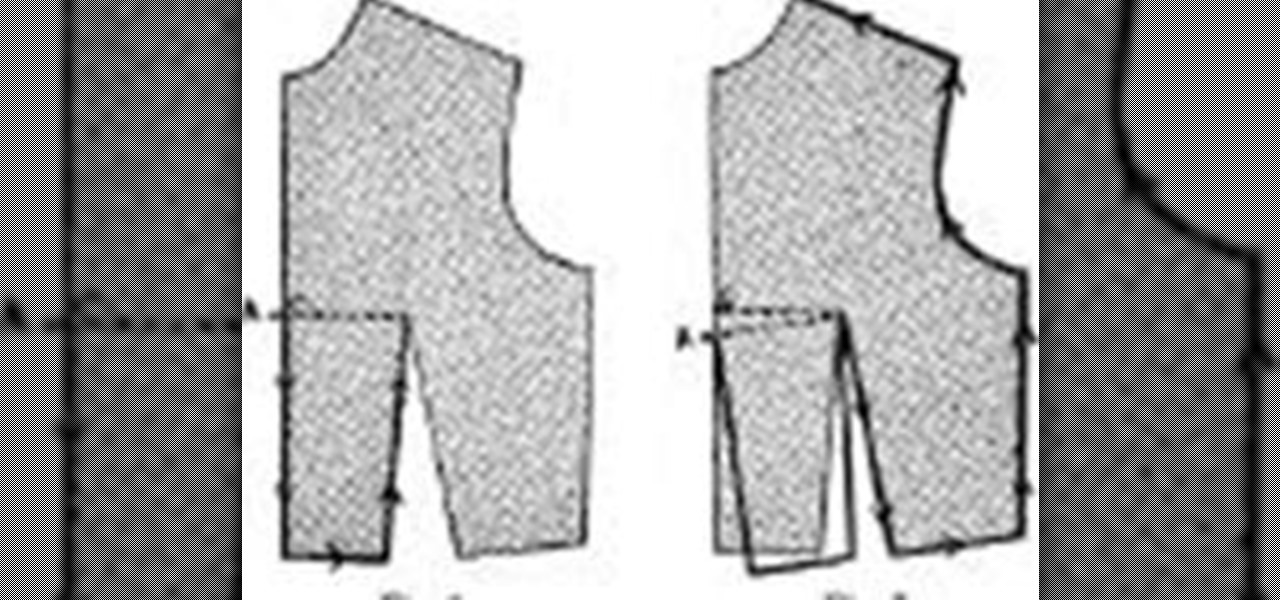
Written Instructions with accompanying video for anyone who wants to make a basic pant exactly to your measurements! Please get your correct measurements before you begin from How to Take Your Measurements.
This square dance video teaches the following square dance calls on the mainstream list: Spin the Top, Alamo Style Wave, Wave Balance, Circulates (Column, Box, Split, 1 1/2), Chain Down the Line, Sweep a Quarter
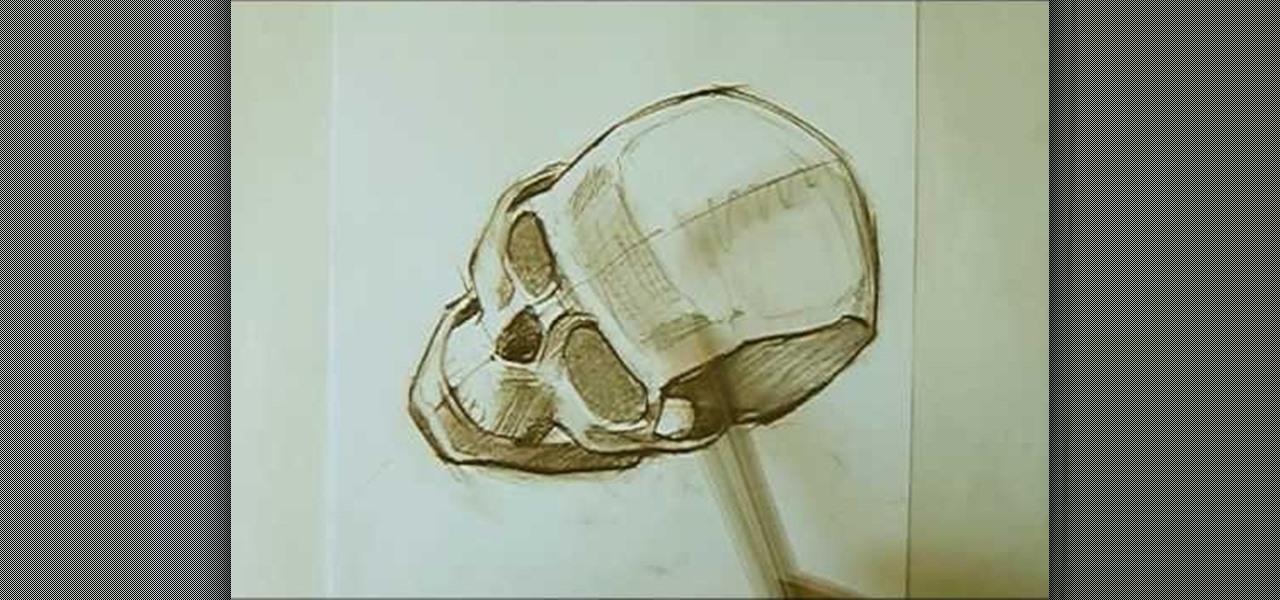
In this tutorial, we learn how to draw a skull with proper proportions. First, draw the outline of the skull with the light touch of a pencil. After this, use the pencil to draw two crossing lines that are the same length. Next, draw in the features of the face and head using the lines on the drawing. From here, you will start to add in the details to the features of the face and erase any background lines. Use the side of your pencil and the top of it to shade in the sockets and lines. To fi...
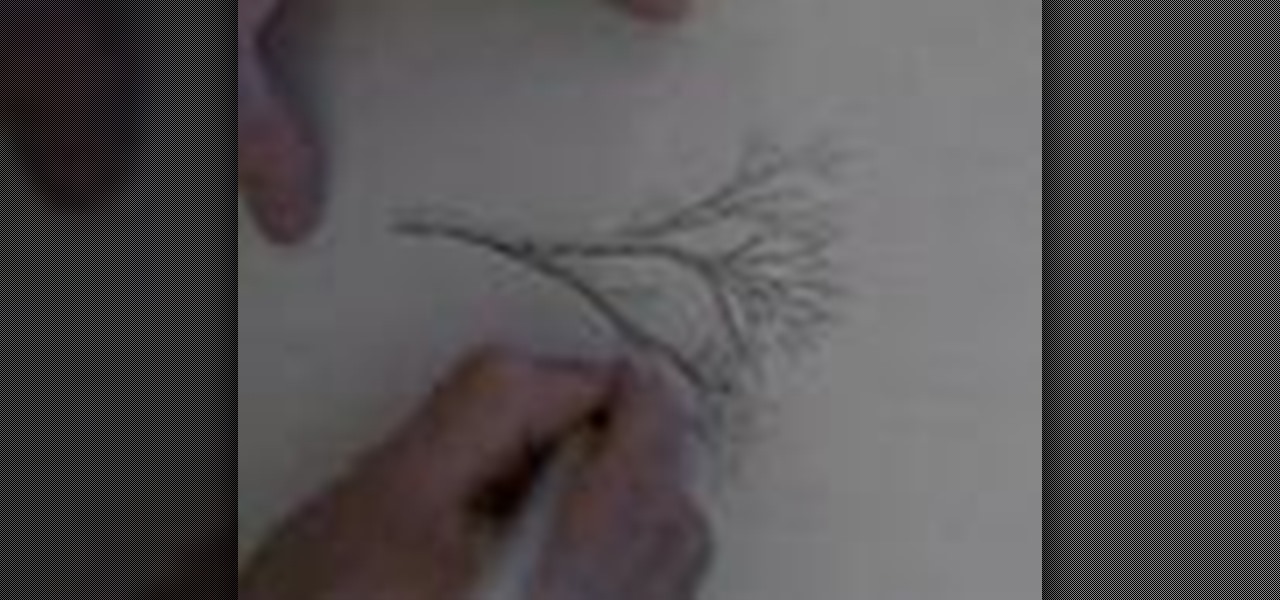
In this tutorial, we learn how to draw a tree branch. Start out drawing two lines for the trunk of the tree. Work these lines up until you reach the top where the branches are located. Then, draw outward lines that will be the branches. Do not make all of them the same size. You want this to look realistic, so make them all vary in size. Draw small lines at the tip of every branch to make it look like wood coming off of them. When finished, add in lines along the branches to show bark on them...
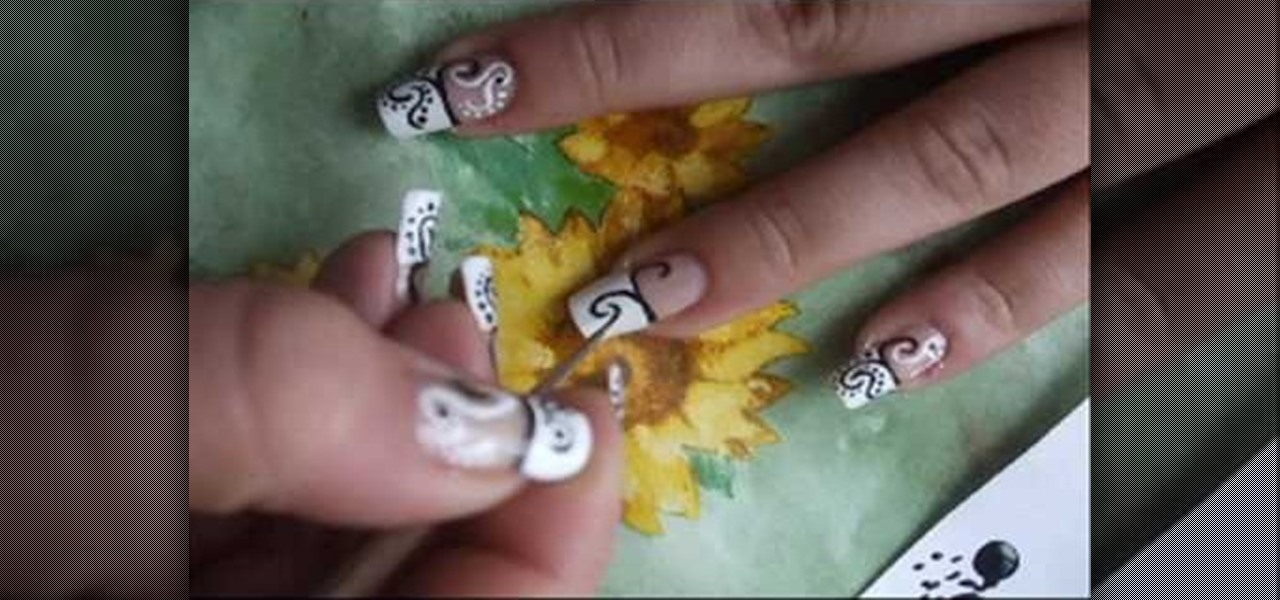
Create swirly black & white nail art Use base and top coat, black and white nail polish and paint brush nr 2/0.
In this video, we learn how to write the letter "b" in calligraphy copperplate. Start off with a piece of lined paper and your calligraphy pen. Create a smooth curved line going down, with a dot that is at the end of the line. After this, create a swirl on the left hand side of the line, then curve it out to make the top of the letter of the humps on the "b". Make sure you grab ink often, especially when you want to make a bolder line. Continue down to make the humps of the letter, then when ...
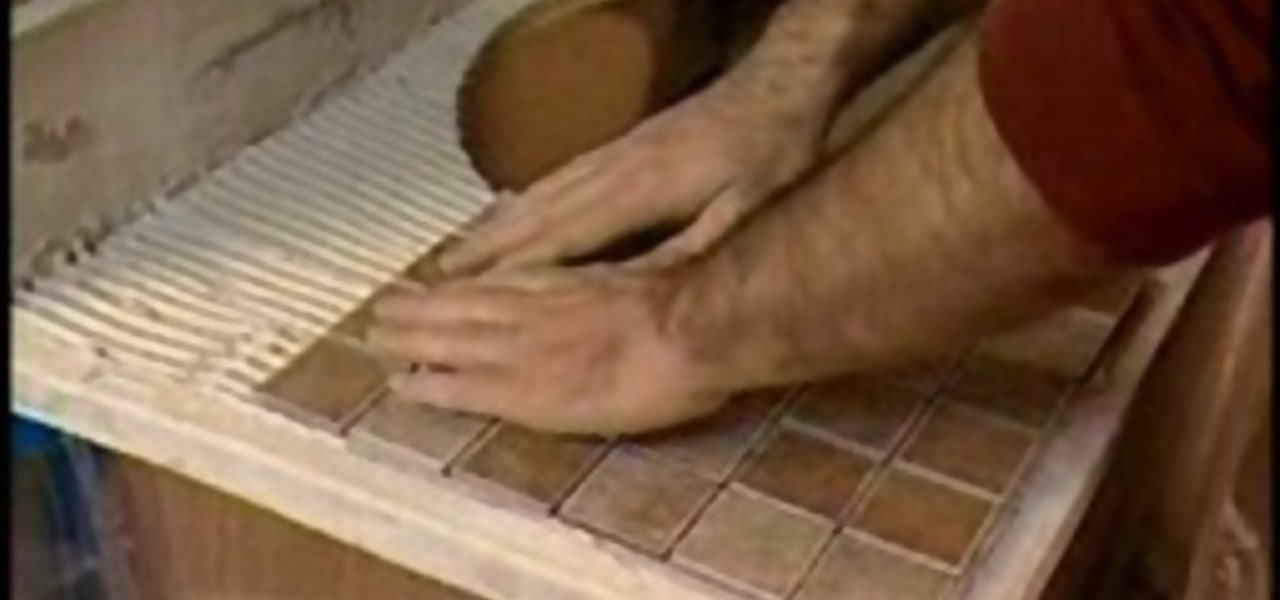
In this Home and Garden video you will see how to install mosaic tiles in your bathroom vanity using mesh pack sheets of 1 inch mosaic tiles and cap edge tiles. Hold a cap tile against the edge of the vanity and draw a line along the edge of the vanity. This will be the first joint line. Lay off the mesh pack mosaic sheets over the vanity top. The edges should be aligned with the line you drew. Mark the line near the joint on the last full sheet near the back splash. Also draw reference lines...
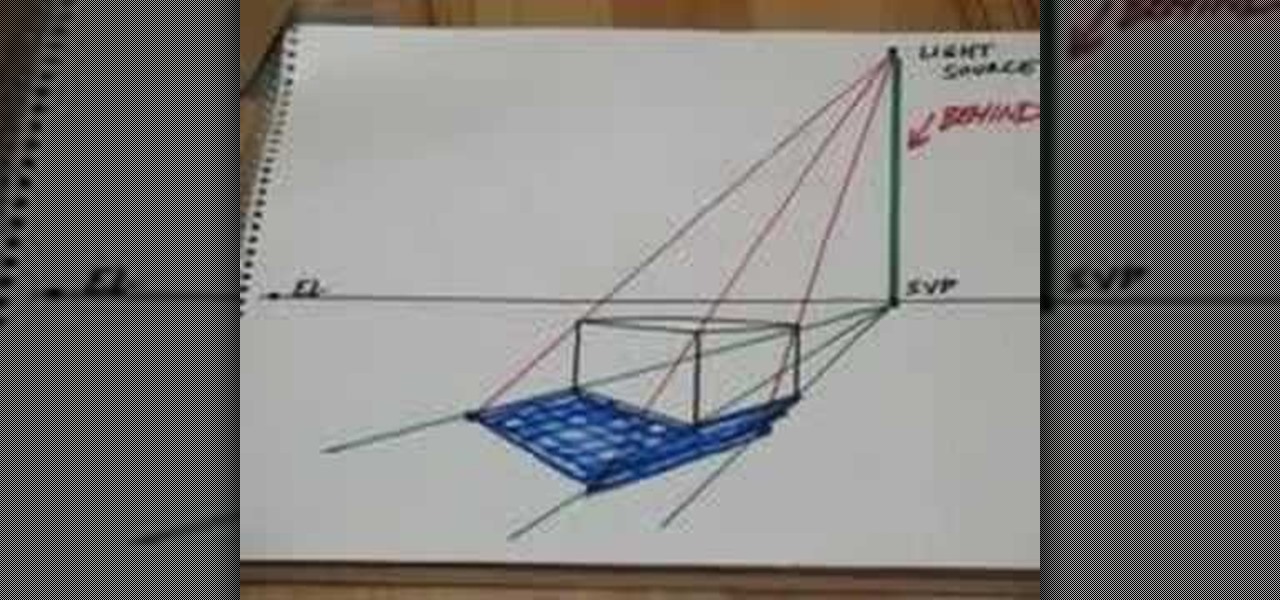
This video demonstrates the process for drawing prospective shadows using a light source. Start with the shadow vanishing point which is directly below the light source on the horizon line. Draw lines from the shadow vanishing point to the front three corners of your box. Next draw lines from your light source to the top three corners of your box. Where the shadow lines intersect, that area defines the shadow area and can be filled in for shadows. The shadows, of course, will line up with you...
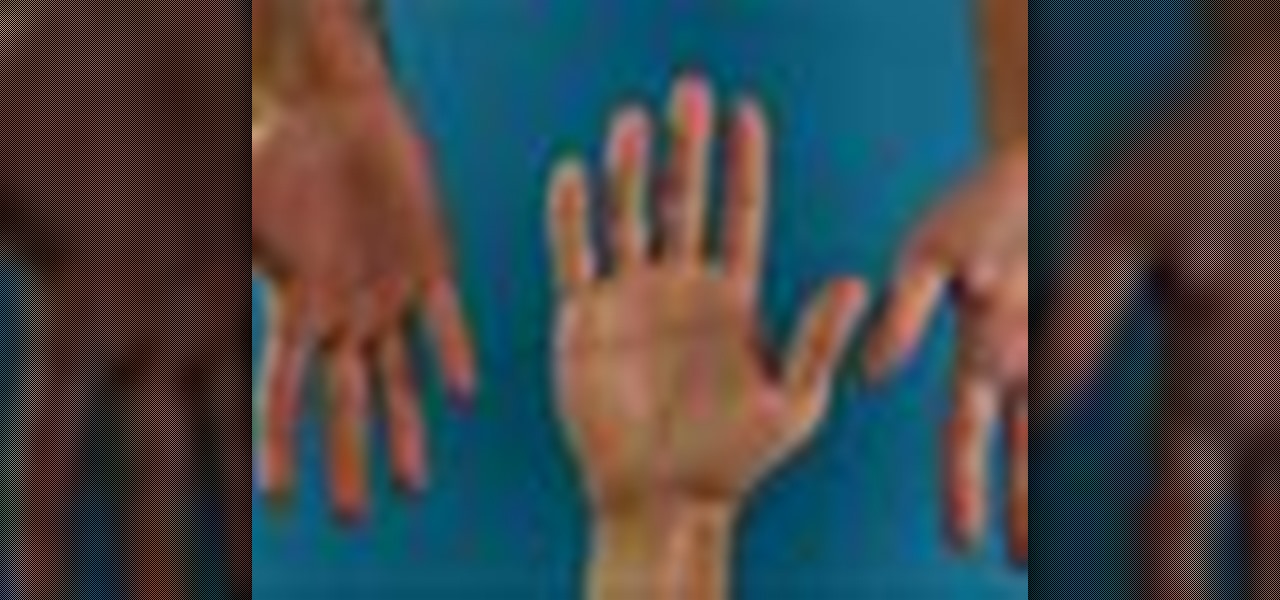
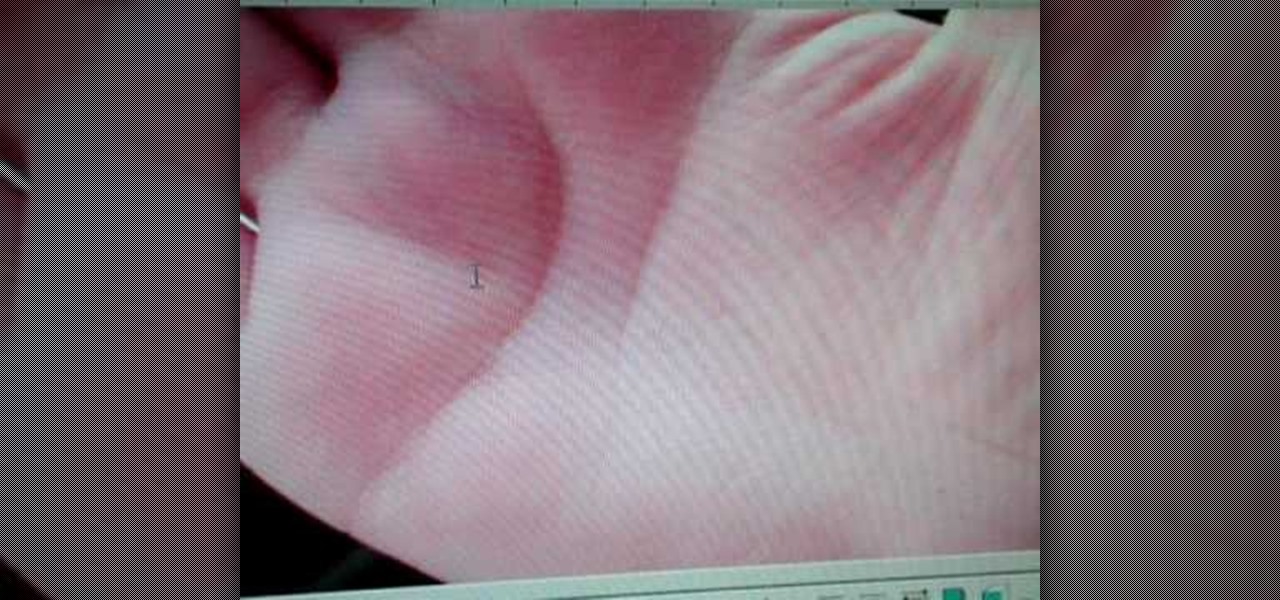
Learn how to read a person just by looking at their hand using the ancient art of palmistry. Step 1
In this tutorial, we learn how to do an Evan Rachel Wood True Blood inspired makeup look. First, apply white shadow onto the lid on the inner corner and on the lower lash line. Next, apply a light pale color to the rest of the lid, then apply a brown shadow onto the eye in the crease. Brush a light white color underneath the brow to create a highlight, then line the eyes with a brown pencil on the lower lash line. Liquid eyeliner will now be applied to the top of the eyes, making it wing out ...
In this tutorial, we learn how to draw a fun bunny doodle. To begin, draw an upside down triangle with two straight lines coming out of the top middle. Next, draw a half circle over the eyes, then draw two large bunny ears on top of the half circle. Then, connect the curls on the end of the ear to the bottom of the head. Now, do an additional line to make the inside of the ear. After this, draw another circle around the bottom of the face, then draw a line with two humps at the bottom of the ...
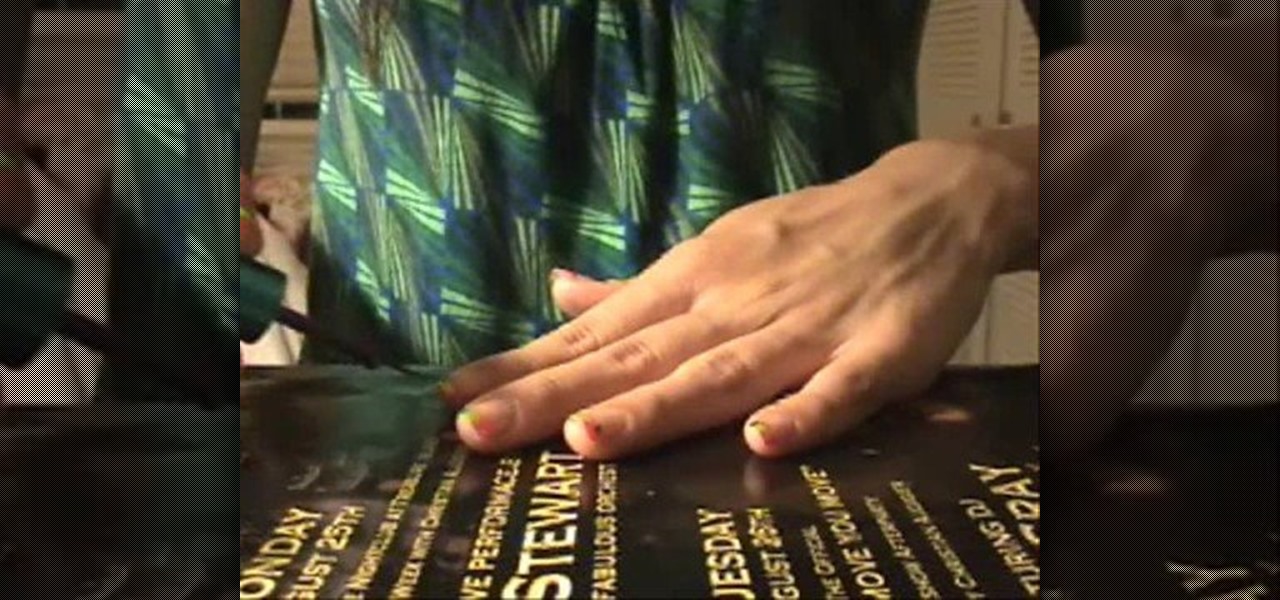
She shows us how to apply the rainbow brite french tip by first applying a white tip. You should let the paint dry. Next you should do you first thin stripe in pink. After you finish pink you should do orange and then yellow. The last thin lines of color to apply is green, blue, and purple. She recomends doing two coats of paint for brighter result. After all the polish has dried you should apply a top coat. When it has dried get your silver polish and draw a thin line under the color lines. ...
This is a demonstration of how to make a harrier paper airplane. First fold the paper in half lengthwise, making sure the corners line up. Unfold it and fold the corner toward the center line. Fold the top triangle down almost to the bottom of the paper. Fold the top corner in to the center line again. Fold in the first point. Fold the plane in half lengthwise. He demonstrates how to fold the wings in the right place so that the plane looks like a harrier. The plane can be customized and deco...
In this video, we learn how to write numbers in calligraphy copperplate. To write the number five, you will simply make the shape of the number, but add in a thick edge to the bump and curved edges to the end. To write the six, use a thick line on the side of the number and a thin line for the circle in the middle. To make the seven, the top should be curved and thick, and the lower line should be very thick with a straight edge. To make the eight, draw the number so that the left edge is thi...
In this video, we learn how to make a twist turn style card. The card will open with a neat pop out image on the front of the card! First, get an 8 1/2 x 5 1/2 piece of card stock and then score it 2 and 3/4 inches from the left edge and 4 inches over from the left edge. Then, turn the card the other way and find the center, then score from the right end to the very first score line. Then flip the card over and score the rest of the center line up to the first line. Now, make a score line fro...
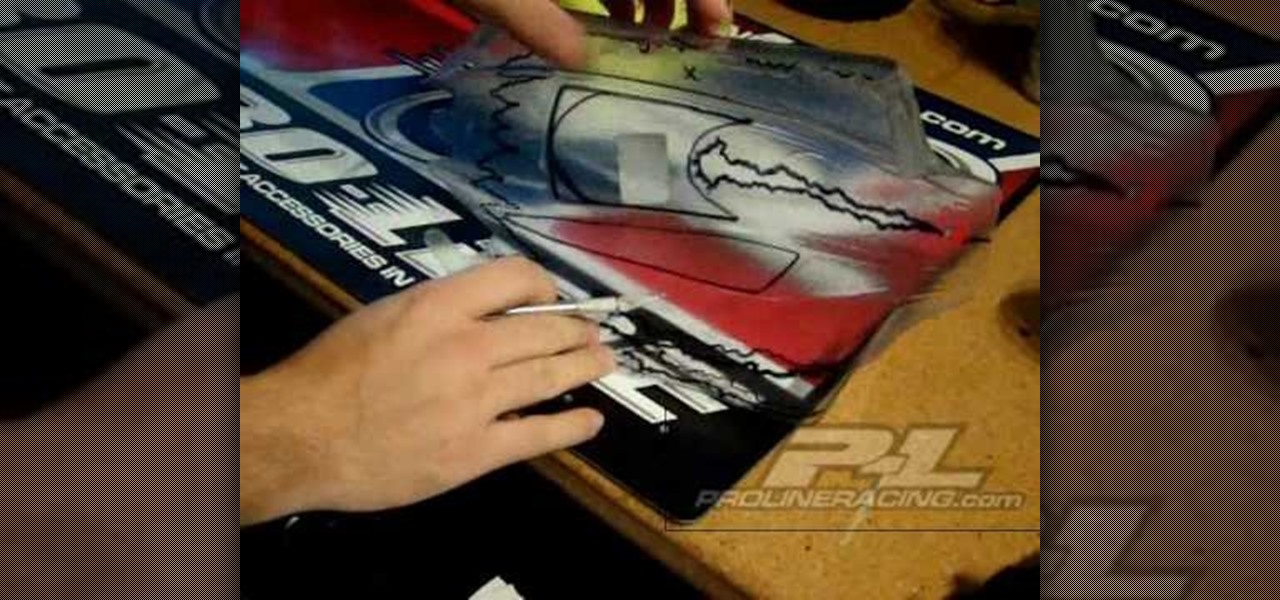
If you want to paint shadow lines on a model care you should first realize that you can pair this technique up with any other technique you want to for different effects. Shadow lines occur when the out lines get thick and it provides a contrast to make something pop out. Shadow lines will focus on the light source. You want your shadow to be realistic so you want to think about where you light source will be. To paint on shadows lines, focus on where the light source is coming from and darke...
This video shows how to a draw a boy wearing glasses using the letters b, o and y. First, write the three letters in the middle of your page, in lowercase, leaving about a letter space between each. Write the letters so they form the word boy. Next, take the tail of the y and drag it all the way over to the beginning of the b. Do this in a curve shape, it will create the bottom of the face. Next, from the top of the b draw another curved line back to the far edge of the top of the y. Draw ano...
Unlock the secret to clothing design. If you can draft and sew a basic bodice you can design virtually any kind of t-shirt, blouse or other top! Attach a skirt and you now have a dress! Take your measurements by using the guide in the " How to Take Your Measurements" section and let´s get started! If you would rather just whip up an easier beginners t-shirt go to How to Design a Quick T-Shirt.
Peggy Erbison shares her knowledge of palmistry in this video. The heart line starts under the pinky and moves across and up towards the middle and index finger. The next line she talks about is the head line. This line is the center line that explains how your thinking is. The line that rounds out and wraps around the base of the thumb is the life line. This line connects to the head line at the beginning. These are the 3 main lines on the palm. Contrary to popular belief, the life line does...
In this video, we learn how to draw Ino from Naruto. Start off by drawing a circle for the head, then drawing lines in the middle to create reference for where the facial features will go. After this, draw in the hair on the top of the head along with the eyes, eyebrows, and creases of the eye. Then, draw the jaw line around the face and erase the lines you used for reference. After this, add in additional lines and hair to make it look more realistic. Use shading around the face to show ligh...
In this tutorial, we learn how to draw eyes with a pencil. First, draw the outline of the eye, giving it an almond type of shape. From here, you will add in the lines to the eyes and shade it in to make it look more realistic. Add in the crease above and below the eye, then draw another line on the bottom for the lash line. Then, darken in the areas around the eyes, then add in the lashes to the top and the bottom of the eyes. Shade in the pupil, then use lines to create a more realistic insi...
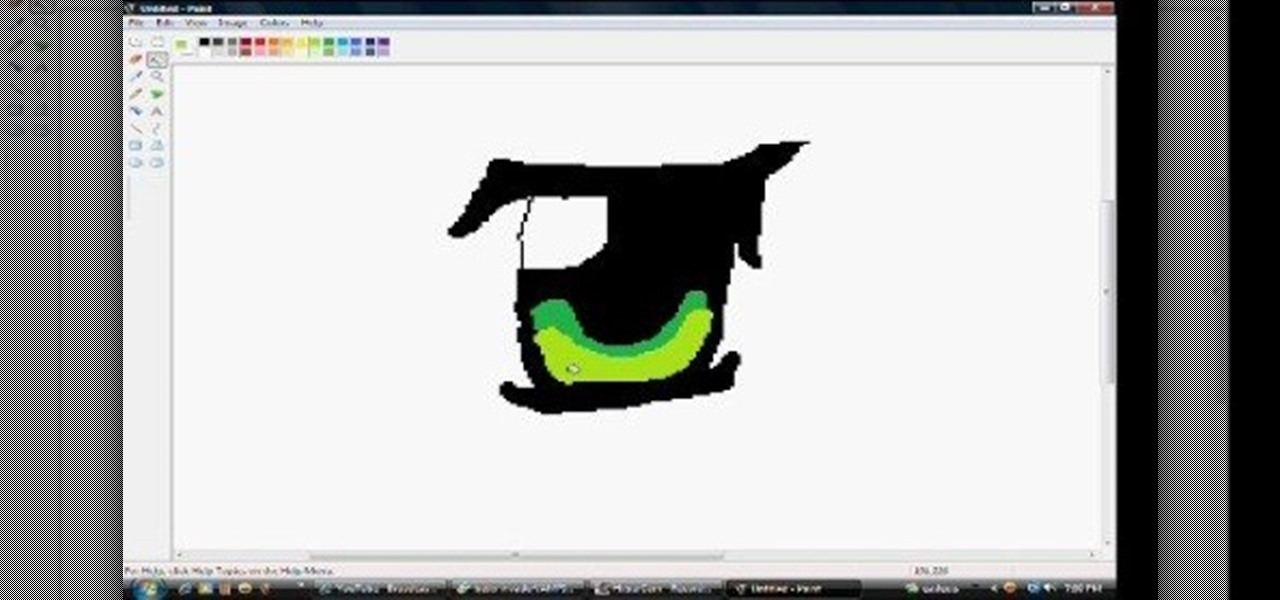
In this tutorial, we learn how to draw anime eyes in MS Paint. First, open up MS Paint and then grab a marker that is thick. From here, draw in a thick line that will be the top of the eye. Then, draw in the round area underneath the eye and the pupil inside of this. Draw in the bottom lash line of the eye, then start to add detail to the middle of the eye. Use the dark line to create a thicker line around the pupil, then fill the eye in with black. Leave a white part to make the eye look glo...
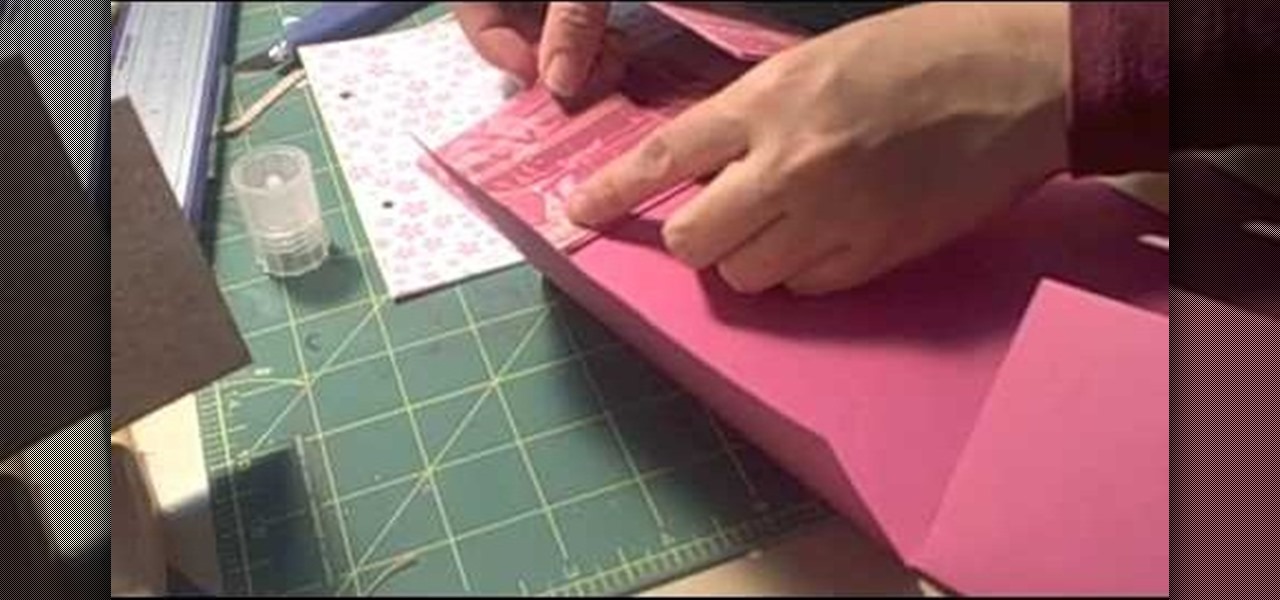
This video tutorial is in the Arts & Crafts category which will show you how to make a flip square album. Take a 12 x 12 inches square cardstock and make a score line at 3 inches on all 4 sides of the paper. Now cut along the score line at the top and bottom of the paper up to the 3 inch line. Next you fold along all the score lines inwards and you have all the flaps ready. Then mark along the edge of the center part of the sheet and punch two holes for tying the album as shown in the video. ...
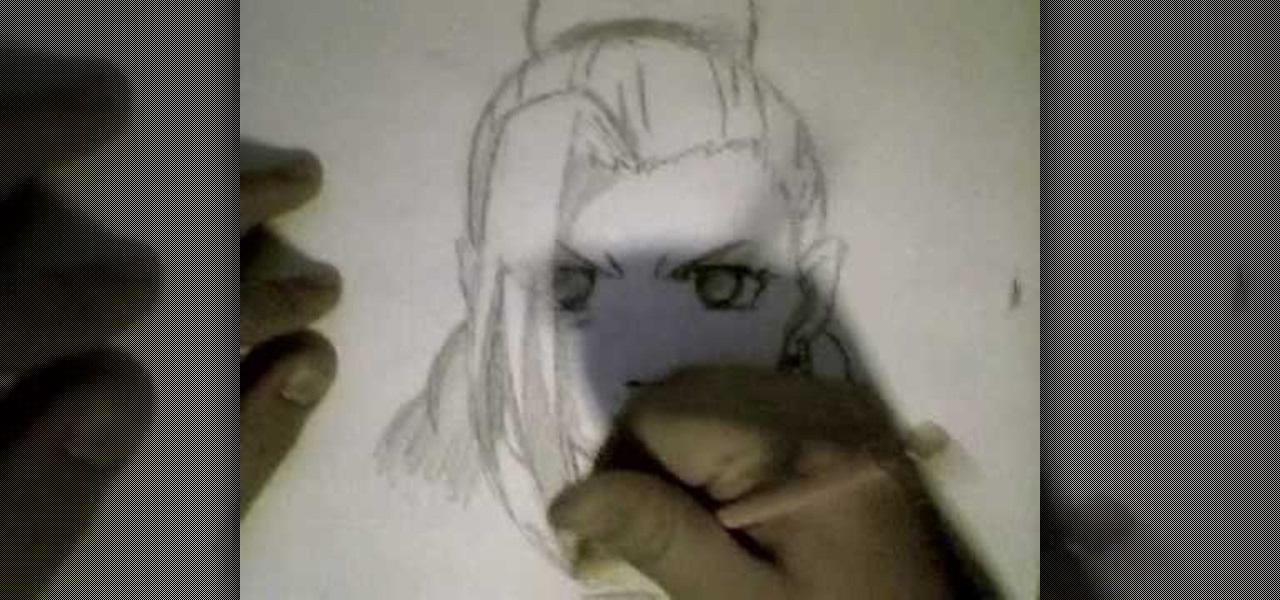
In this tutorial, we learn how to draw Tenten. To start this character, draw a light circle along with lines in the middle for reference points. Use a bolder line to draw the chin and then the eyes, nose, and mouth. also make sure to draw in slight eyelashes and eyebrows above the eyes. After this, draw a line around the head and erase the background lines. Draw ears on the top and then start to fill in the hair for the bangs on the front of the face. Finish this off with a headbands, then dr...
In this video, we learn how to get a bronze smoky eye inspired by Ashley Tisdale. First, prime your eyes and then apply a dark gold color to the eyelid. After this, apply a brown color to the crease of your eye and blend it outward with the gold. Next, apply a white color underneath your eyebrow as a highlight. Grab a black eyeliner next and apply it in a thin line on the upper lash line. Now, dip the pencil brush into black eyeliner and smudge it out onto your upper lash line. To finish, app...
In this Spirituality video tutorial you will learn how to palm read with Peter John. If the heart line, the first line on top of the palm, is well formed and curves around towards the center of the first finger, the person is quite good and balanced. If the head line is quite long along the palm and bends towards the lower part of the palm, the person is more practical and mathematical. When you see more than one line on the mount of Apollo or the mount of Sun, the person could take more than...
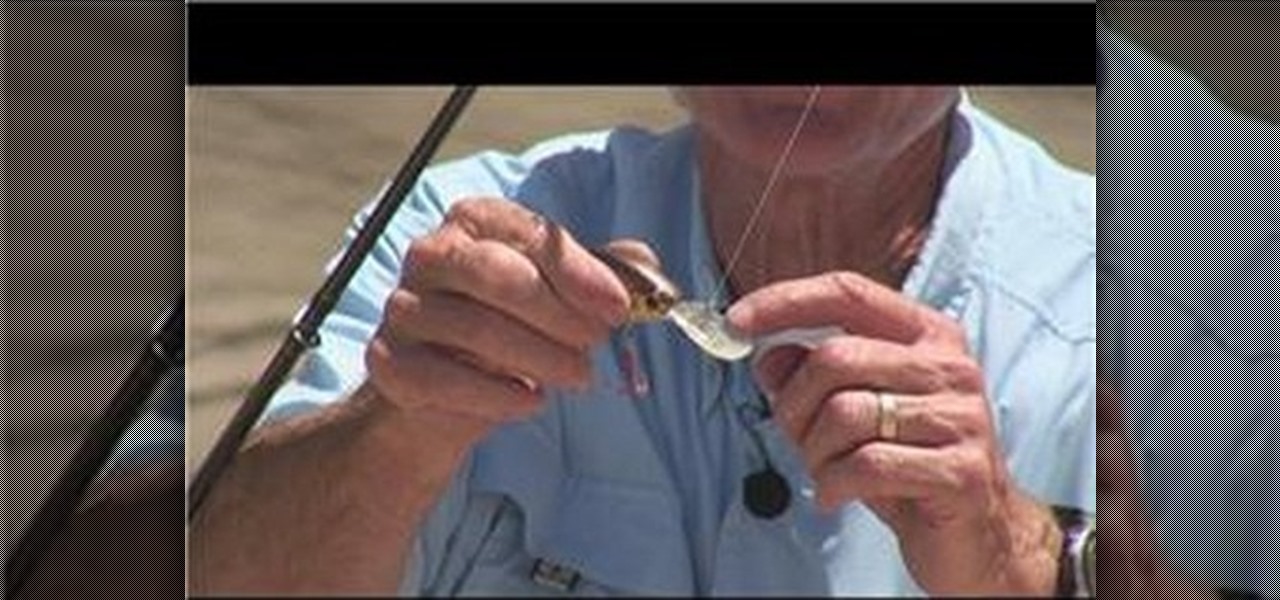
In this Outdoor Recreation video tutorial you will learn how to rig a crankbait. It is so named because it floats on the water and does nothing until the crank is turned. The turning of the crank provides the action to the bait and attracts fish to it. To rig it, there is an attachment point on the diving lip of the crankbait; it can be a small hole for the line to be passed through or a split ring to attach the line. Tie the line to the lip with a clinch knot and you are in business. In case...
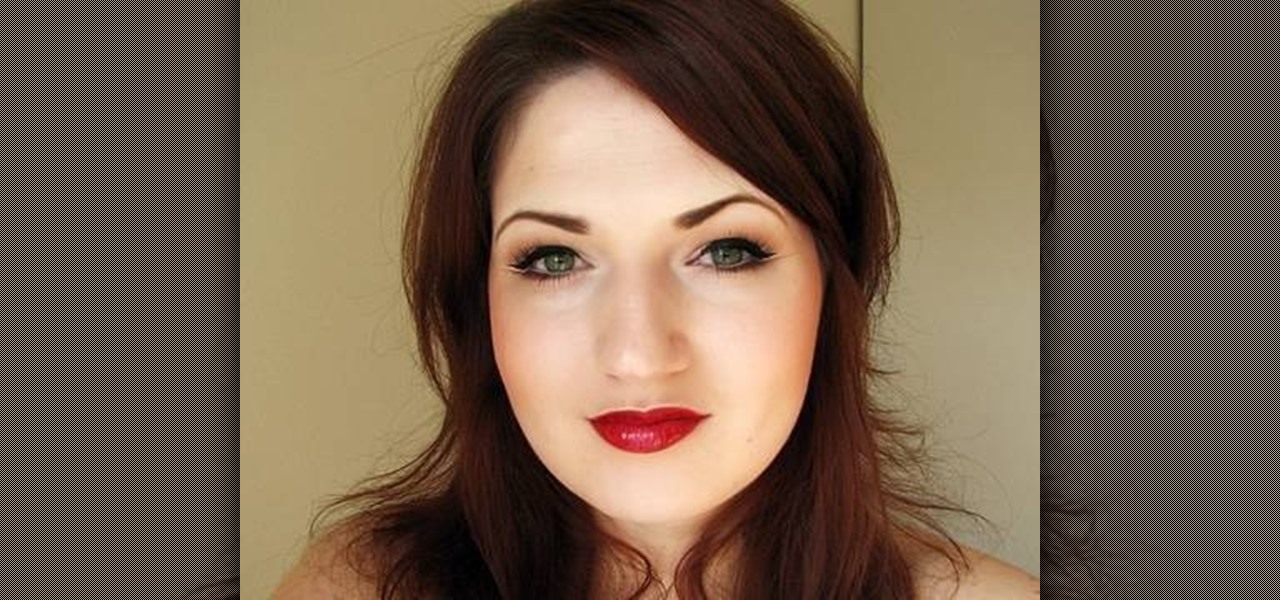
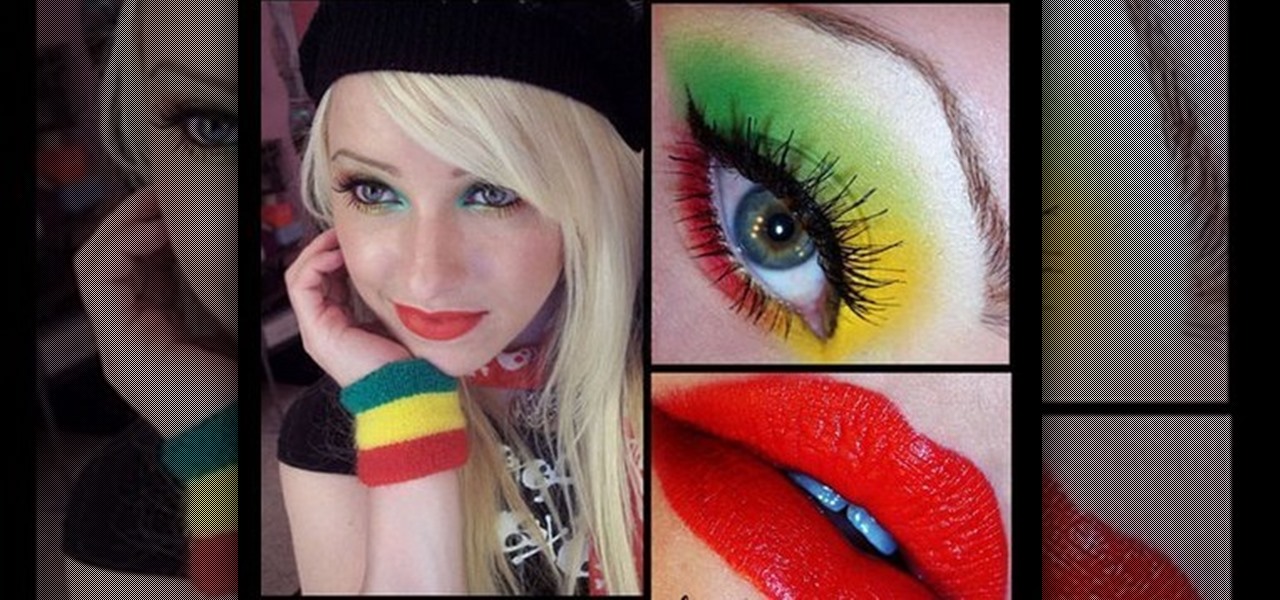
The first thing you do is apply your base. Then you apply mint green to the inner 1/4 of eye - the lid and underneath. You can use Beauty for the earth in apple green. You the apply the yellow to the 1/2 of the eye and under the lash line. You can use facefront cosmetics in bee incredible. You then apply the red to the outer corner of the eye and under the lash line and connect the two. You can use cupcake cult pigment in cherry. You can use tape to create a clean line. Apply a highlight colo...
QueenofBlendingMUA teaches us how to paint our nails purple black and add rhinestones. For the rhinestone nail you only need to add black nail polish two times and then add rhinestones individually. For the diagonal silver nail you use the Art Deco 3D silver to draw a diagonal line from the top on your nail. You then color it in using a silver nail polish called Chrome. You then use the black Art Deco to create a diagonal line on the clean line, in the opposite direction. For the purple tip n...
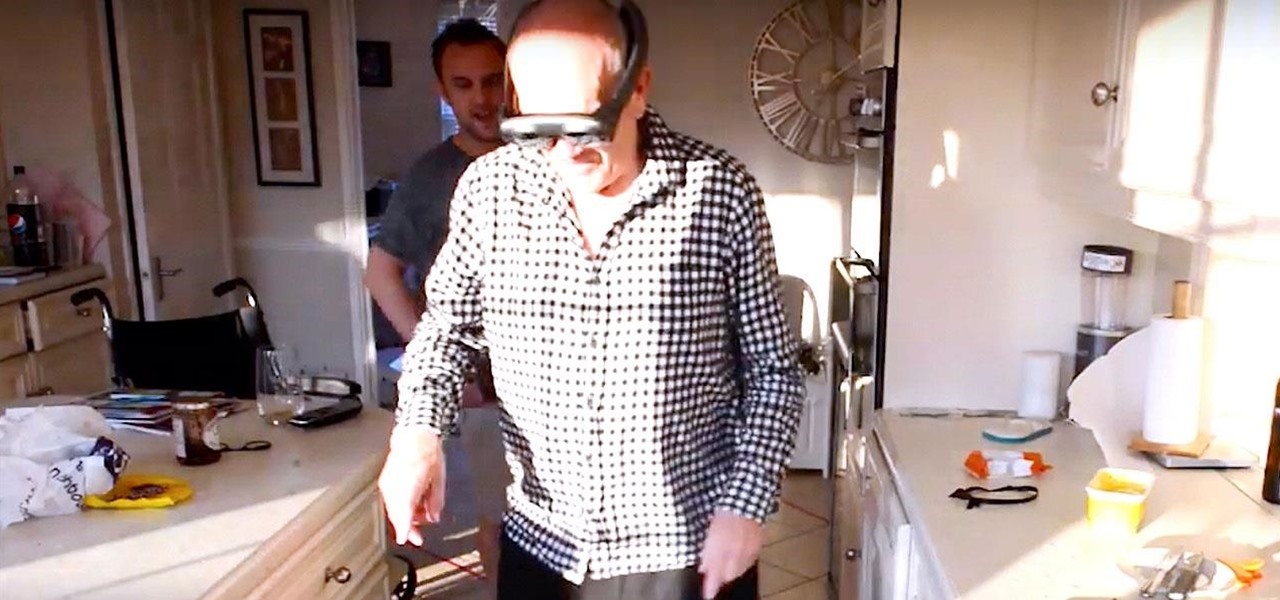
Parkinson's disease, a condition that can impair movement and coordination, affects over 10 million people worldwide. And with around 60,000 Americans being diagnosed every year, we're on track to see almost one million Parkinson's afflicted Americans by 2020.
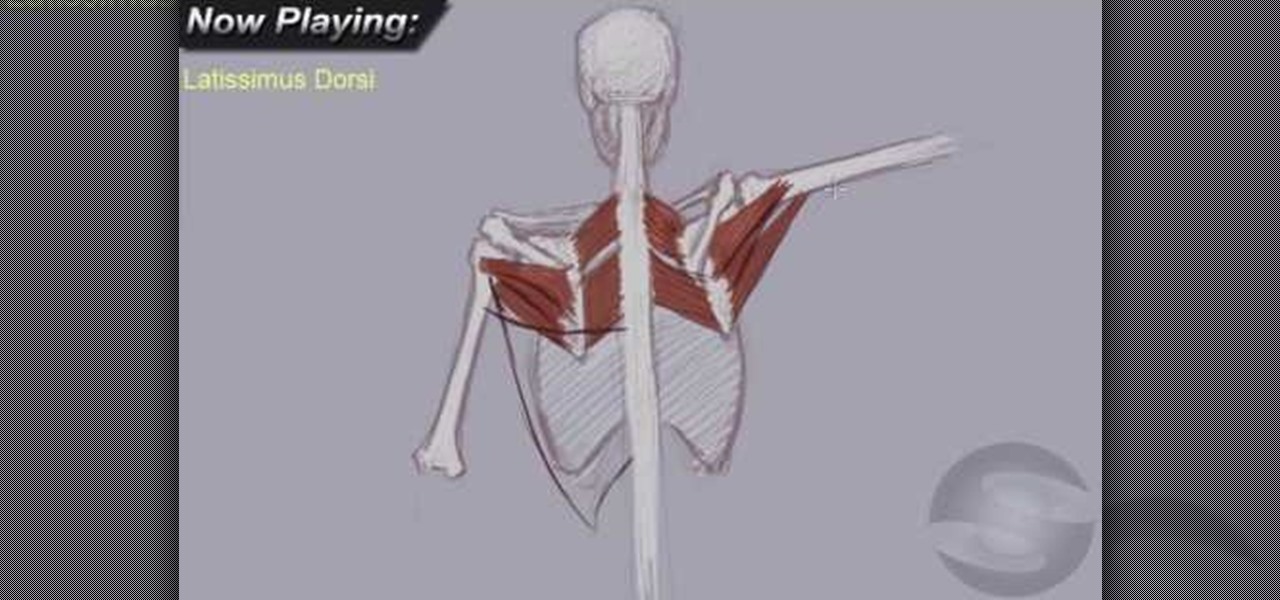
In this video, we learn how to understand the anatomy of the upper back for drawing. First, you will need to learn how to draw the skeletal block of the body. Once you have drawn the outline for the skeleton, you can continue onto the rest. Make sure to add in the details for all the parts of the body, using thin lines at first, then thicker lines. Color these in white once you have the bone shapes made, then color in the "meat" on top of those. Draw in lines to create shading and realism on ...
In this tutorial, we learn how to transform into Sailor Moon for Halloween. First, apply matte makeup onto the entire face, and white eyeliner on the bottom of the eye. When finished, place hair back into pins and apply Sailor Moon wig onto your head. Next, use liquid black eyeliner to draw a dramatic line from the crease of your eye line to the outer edge on the face. Next, draw a thin line underneath the white eyeliner on the bottom of the eye, drawing small lashes onto the bottom of the ey...
When you first begin to drawing dogs, it can be difficult to know where to start. Usually, there are tricks that can get you started with ease, and the same is true in regards to drawing dogs. You don't have to be an expert artist to learn how to draw a dog; it's as simple as beginning with a 'cheat', or a few specific lines, and building a style from there. To draw a dog, you should begin by drawing the number 'six', followed by three lines, fairly close together. This will create the dog's ...
Ian shows us how to draw Yoshi from the Mario Brothers video games. First, you draw three quarters of a circle, for the snout. Next, on the top right edge of the circle, before the opening you've left, you draw two ovals on top of it for the eyes. Next, finish out the circle (snout) by connecting the bottom end with back of the farthest-right eye, using a outward-bulging line. Draw a smile at the bottom of the circle, then fill in the eyes with a black oval in the bottom right corners of both...