This video is in the Family category and it will show you how to use a baby sling properly so that both you and your cuddly baby have a great time. It’s really simple and easy to do this. This video is presented by Nancy Stone, parenting coach. First take the sling and find the thickest part on the edges. You fold it in half from there making a tube of sorts. The thicker portion should be outside when you put the baby sling around your neck and shoulder. Ensure that the thicker part is away f...

Cheese is great, but if you're a vegan, you're not going to eat it, unless you make a healthier alternative to dairy products. This video will give you the complete recipe to learn how to make raw, vegan cashew cheese. It's very simple and very delicious.

In this video, Linnea Rose teaches us how to paint in a Norwegian folk style called "rosemaling". With this, you will double load your brush and do the strokes in the correct way. To double load your brush, first dip one corner into a color, then dip another color into the other color. After this, stroke again in between the two colors. Next, go to your canvas and simply stroke a looped shake on the paper. Firmly press down with your brush and as your curve around you lift it up to the chisel...

In this tutorial, we learn how to apply Beyonce's "I am...Yours" inspired makeup. First, take a light pink shadow and apply it all over the eyelids. Then, take a light brown shadow and brush it on the crease of the eye, then blend outward to the outer edge of the eye, after this, use black eyeliner on the top and bottom of the eyes, creating a winged effect on the outer edge of the eye. Apply thicker eyeliner on the top of the eye, then apply false lashes to the top of the eye and mascara to ...
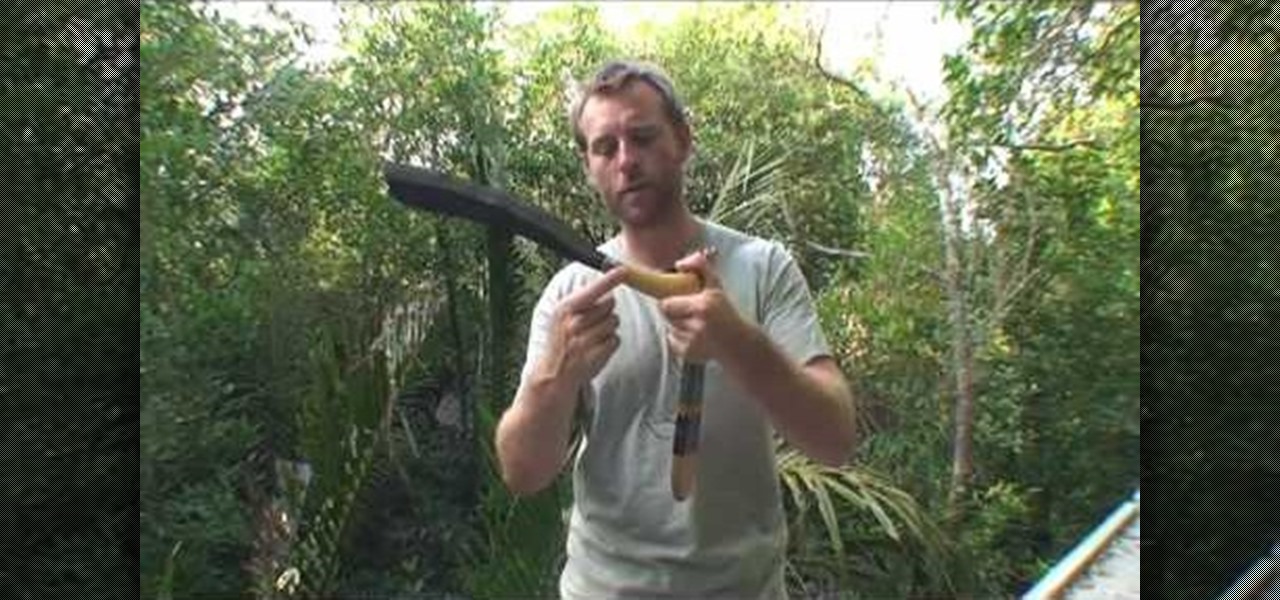
If you're ever stuck in the jungles of Southeast Asia, then your only hope for survival is the parang knife, which is a Malayan type machete. This is the ideal tool for the jungle, especially in Malaysia, where the typical vegetation is more woody, and needs something thicker for stronger chopping action. A parang has three different edges: the front is very sharp and used for skinning, the middle is wider and used for chopping, and the back end (near the handle) is very fine and used for car...
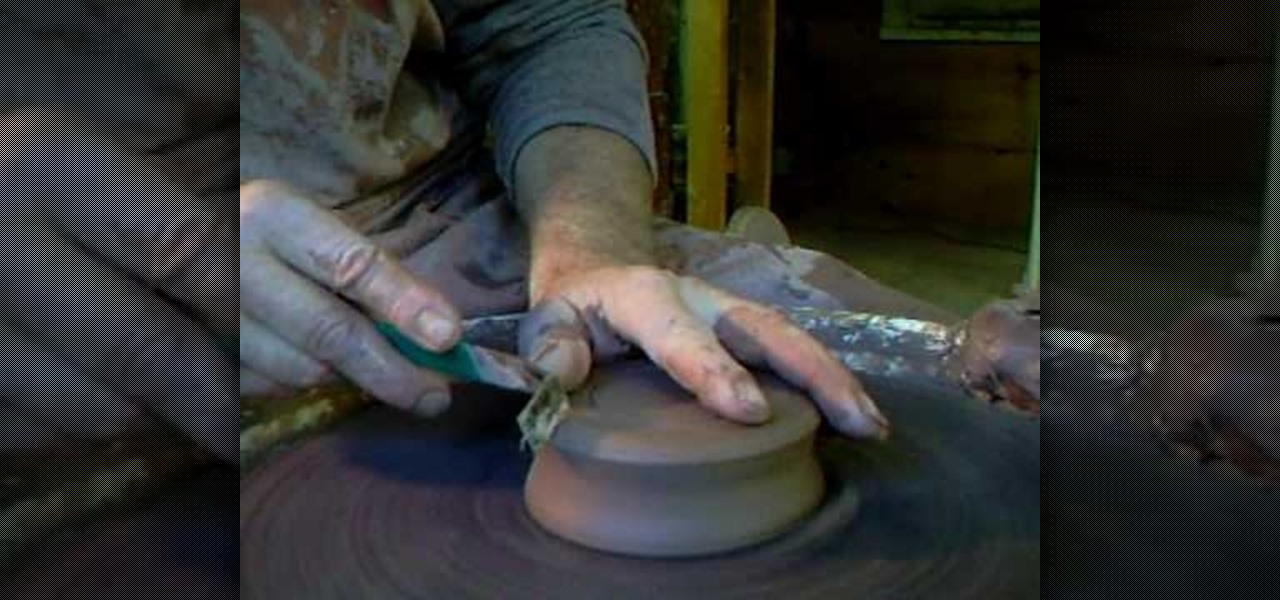
In this tutorial, we learn how to make simple pot stands. Start with your clay on the table and use water and your hands to start to shape it. Press down on the ball until it forms into a low bowl shape. Then, start to add more clay and water to the sides of the pot so that it's thicker on the edges. After this, place the pot stand onto a ceramic drying area, then you will be able to glaze it and fire it. Clean off your spinning table after you are finished, then enjoy your pot and pot stand!

In this video, we learn how to write the letter H in calligraphy copperplate. To make the upper-case letter, start off drawing into a thick line, with a curve at the end of the letter. Make the curve end touching the line, then draw it out to the right side of the letter, bringing it back down to a line to make the "h" shape. Next, draw a line across the two lines with a curve at both ends. To make the lower-case letter, start by drawing a thin line to make a loop at the top, then bring it do...
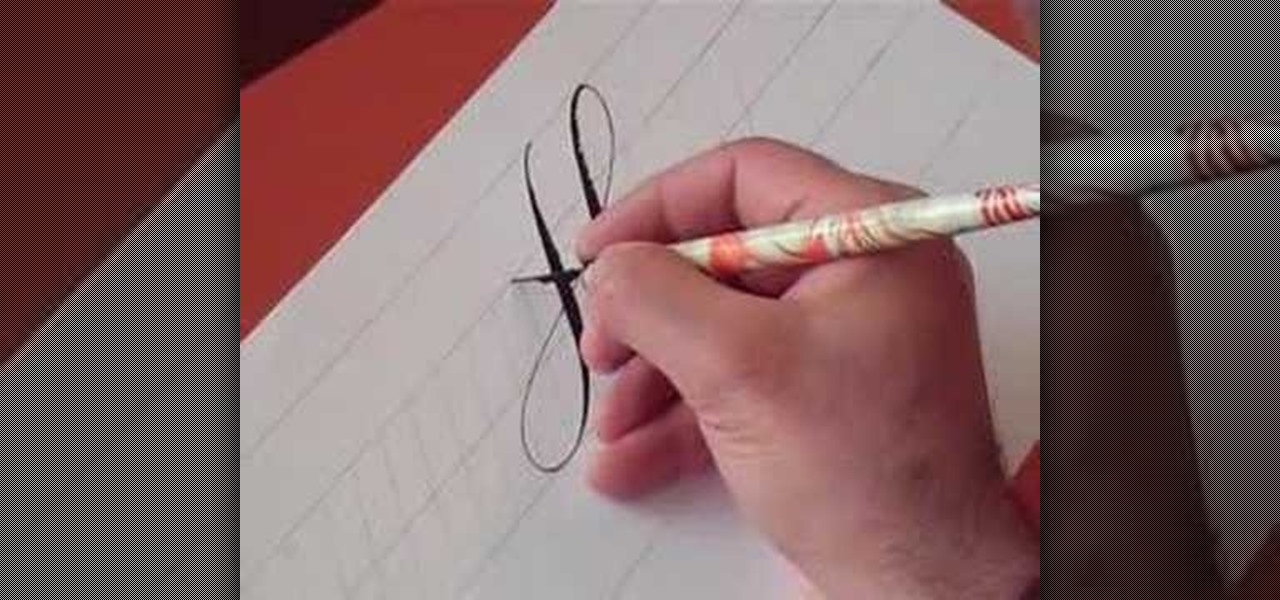
In this video, we learn how to write the letter O in calligraphy copperplate. Take your calligraphy pen and make a medium thick half loop at the top, dragging it down into a thicker line on the left side of the word. Then, continue onto the other side of the O with a lighter touch of the pen making a very thin line, finishing with a loop in the middle. Make the smaller O just like normal, making the thick line on the side and finishing with a small loop bending out to the right at the end. Wh...
In this tutorial, we learn how to make a Halloween card using Cricut Paper Doll. First, cut a skeleton out of the PaperDoll Dressup package, then cut it out two more times. Glue these together to make the skeleton thicker, so it pops out of the page. You can place this next to a paper sentiment that says "bone to be wild", with a black card stock underneath it. You can use die cuts with a view papers to make it look more interesting. Use any other type of decorations you like to decorate your...
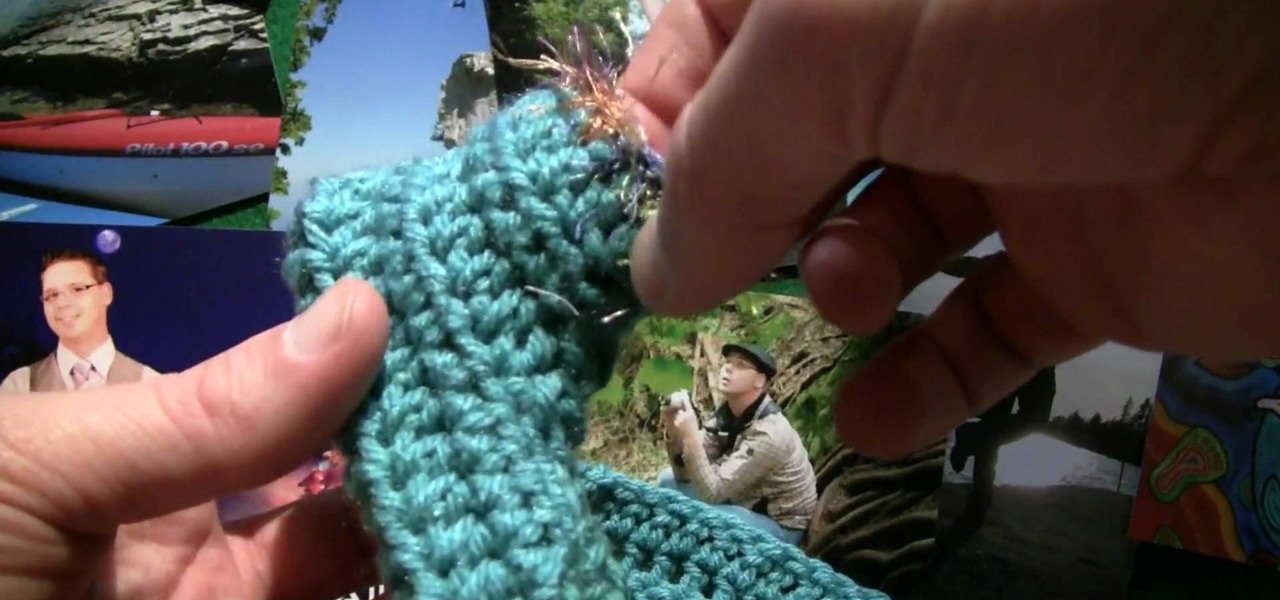
Expand your crocheting repertoire by learning how to crochet a crinkle stitch, which does indeed replicate fabric crinkles. With very hole-y yet tightly woven vertical lines of yarn intersection with horizontal ones, this type of stitch creates excellent warm fabric for scarves and cold weather gear.
Want to go fishing but lack the necessary technical know-how when it comes to the sport's specialized equipment? Never you fear, brave pescador(a): with this fisherman's how-to, you'll learn how to attach a bait worm to a fishing hook.
In this how-to video, you will learn how to choose the right sage plant for your garden or landscape. The Texas Ranger is one type of plant to choose. They do well in hot, dry climates and heavy soils. They do not need a lot of maintenance. Selective pruning is useful for this particular plant. Green Cloud has dark green foliage and is a lot thicker. Scarlet Sage attract Hummingbirds. These have little insect problems if you do not give them too much water. Mexican Sage dries very well. It ca...
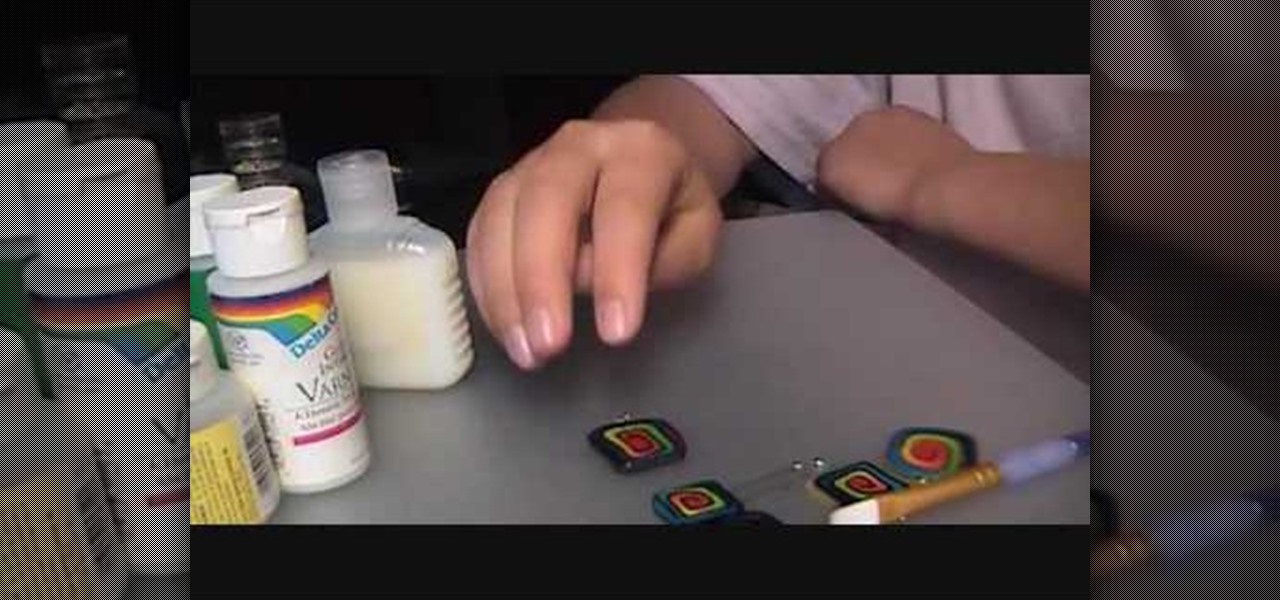
You'll learn how to gloss/polish your polymer clay pendant jewelry in this video. To do this, you'll need a brush. Preferably, a nice, soft brush. You'll also need your clay pendants (of course), some gloss, and aluminum foil. First, you pour two drops of the gloss onto the aluminum foil. Next, you take your brush, put it in the gloss, and run it across your pendant. This will give your pendant a really thin coat of gloss. Be sure to wash your brush soon after, otherwise the gloss will dry an...
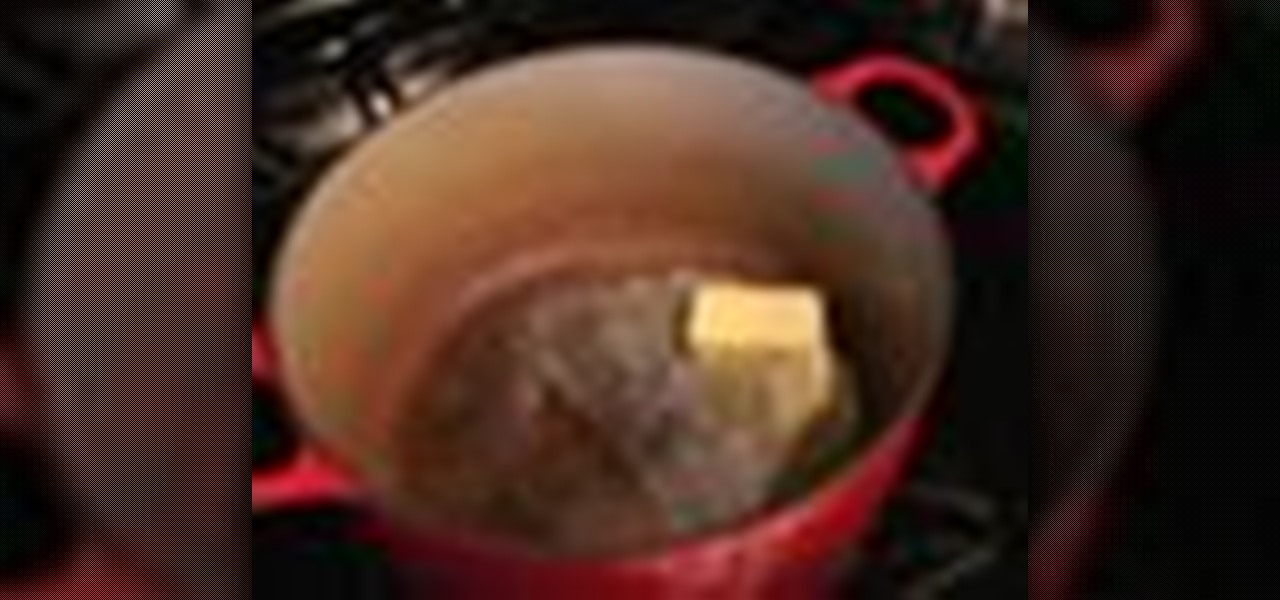
DianeMorganCooksPdx teaches you how to make great tasting gravy. Chop of gizzards, hearts and neck meat from a turkey. Add a few tablespoons of butter in a cooking pot and start melting it. Place the meat on top of that. Add turkey stock. Mix wonder flour with cold turkey stock in a bowl. Also add applejack sauce. Add the meat to a simmer and pour the bowl mix on top. Don't use turkey liver for this recipe, as it will give it a bitter taste. Add a pinch of salt for more flavor. Cook it for a ...
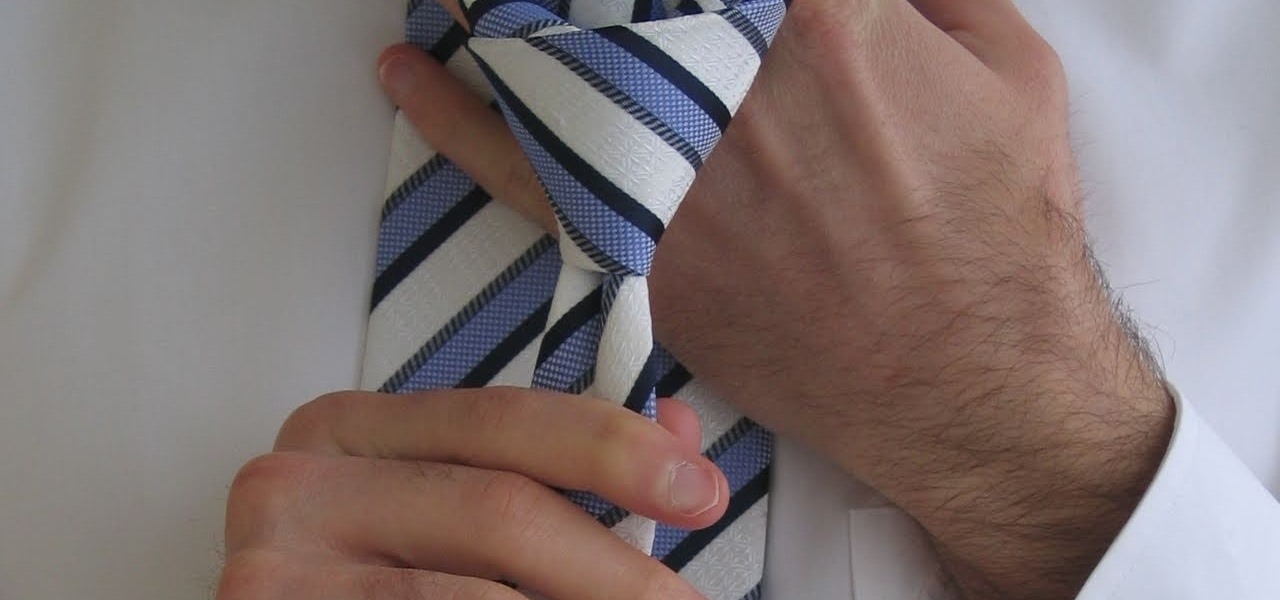
Tying a tie is a very useful skill, in this video, we are shown how to tie a Double Windsor knot, a very popular knot due to its symmetry. After placing the tie around your neck, if you are a right-handed person, make the thicker side the longer side on your right and pass this longer piece over the other one. Place the tie behind the other end and pull it through the hole and down, forming a small knot. Twisting the tie around itself backwards, pull the longer edge through on the other side ...
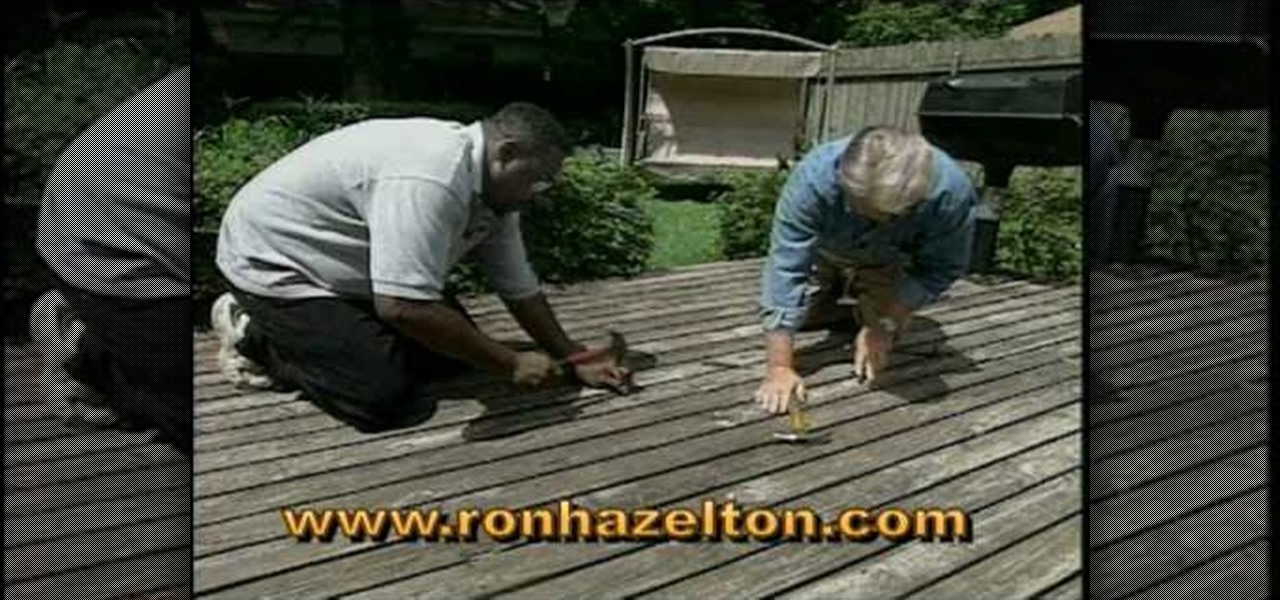
Ron Hazelton shows how to restore a weathered and worn deck. Twisted boards can be straightened using a notched 2x4 as a lever, then secured with 5 inch screws. Remove popped nails, and replace with longer thicker nails. Use a punch to countersink slightly high nails. Clean the deck with wood soap and a long handle brush, using a pressure washer to rinse. Apply sealer to the dried wood and let it cure, then enjoy your reinvigorated deck.
In order to decorate your presents during the holiday season, this quick tutorial will show you how to make a beautiful gift bow. Using a somewhat thick ribbon, determine the size of your bow and wind it around itself about 8-12 times, the more winds, the thicker your bow will be. Squeeze the loops of the ribbon together, making the ends overlap on the inside and fold it over. Then make two cuts on a diagonal through the center, making sure that you do not cut through. Unfold the loop and tie...
Styling gel is the Swiss army knife of hair styling—an all-purpose tool that can help you achieve any goal or look. You may even want to take some on your next camping trip.
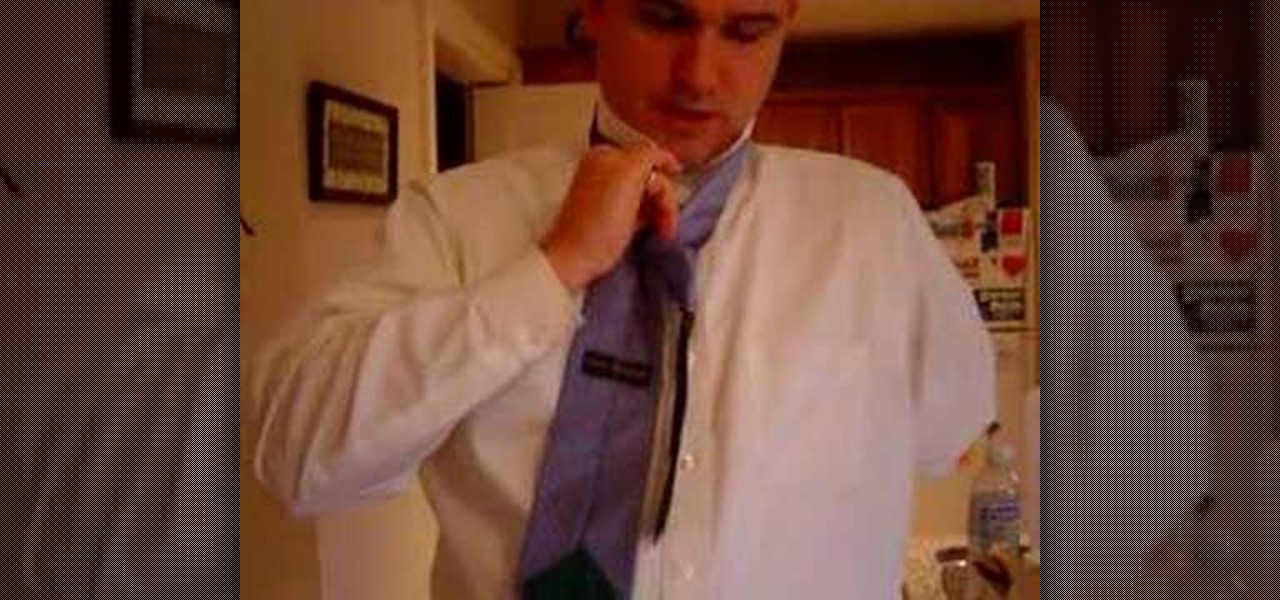
One armed tie tying and collar buttoning is tough for most people, let alone an individual who has suffered an amputation. Here's a lesson from an amputee on tying a tie and other suit tricks all while using one hand and no prosthetics. A thicker tie is easier as it will not bunch up or tighten. Only tie a Half Windsor as a Full Windsor is way too tricky for one hand. This is a step by step tying video by an amputee with only one arm. If it cinches up too much wiggle it out and it will loosen...
In this hilarious episode, Matt Busch continues the painting process as he pays tribute to the legendary Bob Ross in The Joy of STAR WARS Painting. See how Matt paints with thicker, opaque acrylics, with tips like using a toothbrush to create texture. Learn how to paint Star Wars by watching this video tutorial.
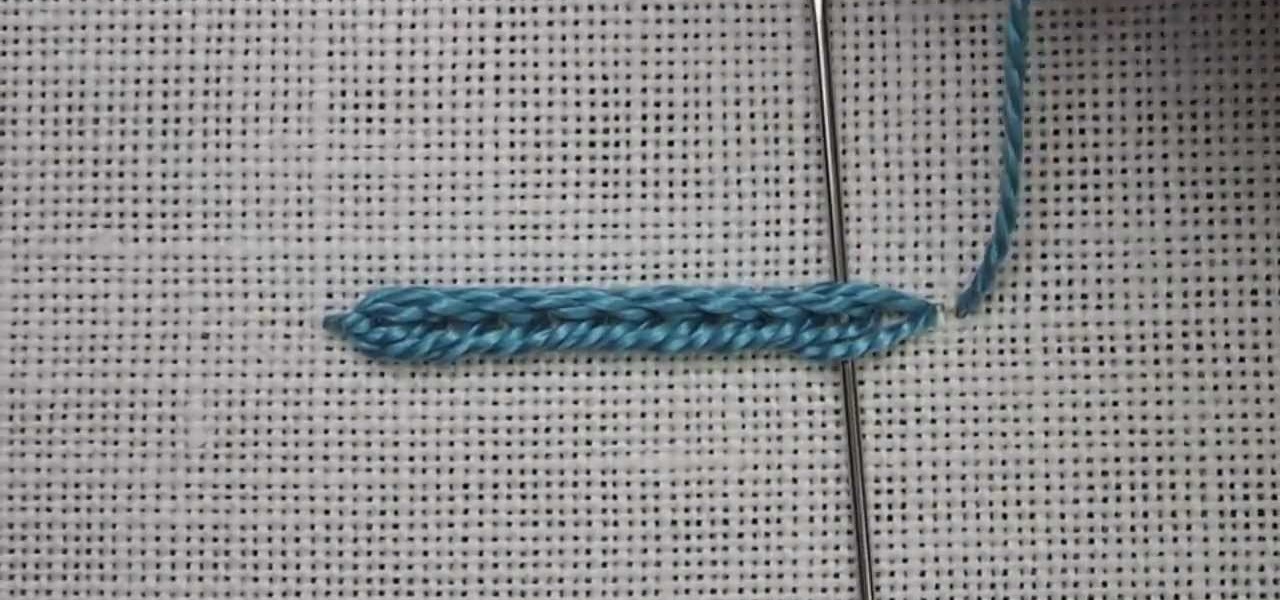
The heavy chain stitch used in hand embroidery is a variation of the regular chain stitch, but it creates a wider, thicker chain stitch band. It's an easy stitch to execute. When you want a bolder line, you can substitute it for the regular chain stitch. This video tutorial will show you the basic concept of creating a heavy chain stitch band. Watch this video from Needle 'n Thread to see how it's done.
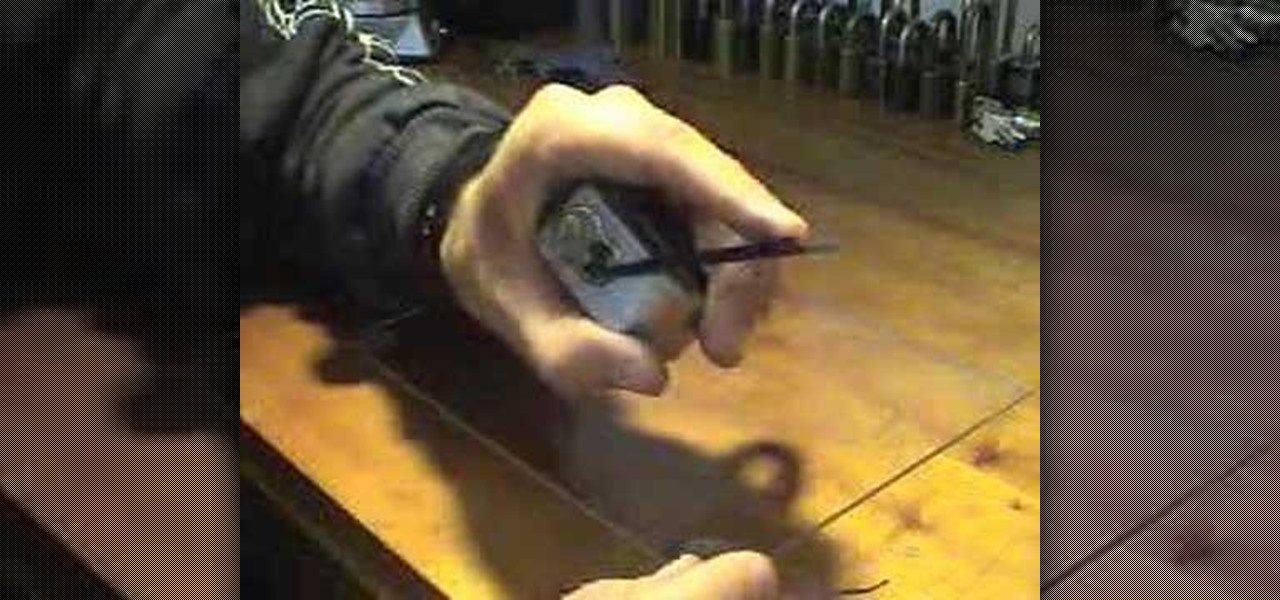
Grab a thin tension wrench and a thicker tension wrench, combine them with your favorite pick, and you'll be ready to unlock that 700 series American Lock that you, or someone you know has lost the key to.
Love the savory and richness of turkey pot pies? Instead of buying your next turkey or chicken pot pie, why not try making a homemade version? In this video presented by Kahunas Food and Wine, learn how to make a turkey or chicken pot pie with help from step by step instructions. A little tip? To make a thicker inside, cut the stock down to 3 cups!
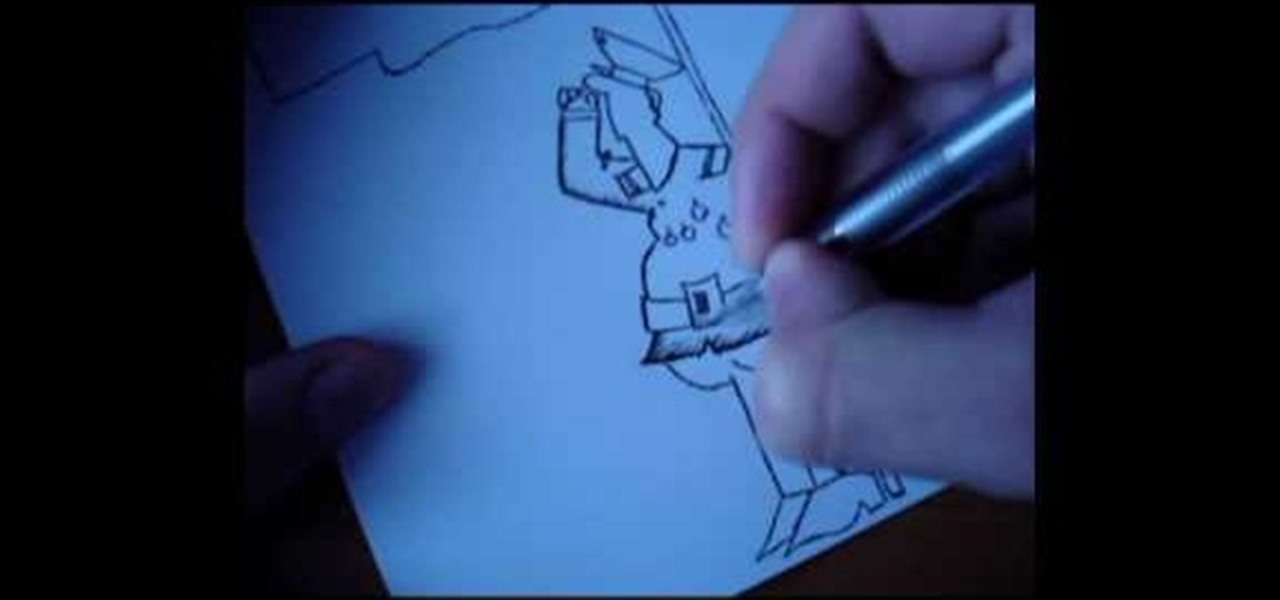
This video tutorial demonstrates how to draw a cartoon soldier or police officer. Begin with outline of an elongated face. Right above his nose, draw a small brim of his hat. Continue with the brim, adding the hat band and the top of the hat shaped somewhat like a bowl. In front of his face, draw his arm bent upward so his hand is appearing to salute. Add in shoulder patches. Next, draw his other arm bent in at his side. Add his belt buckle at the center of his waist. Now draw medals and acce...
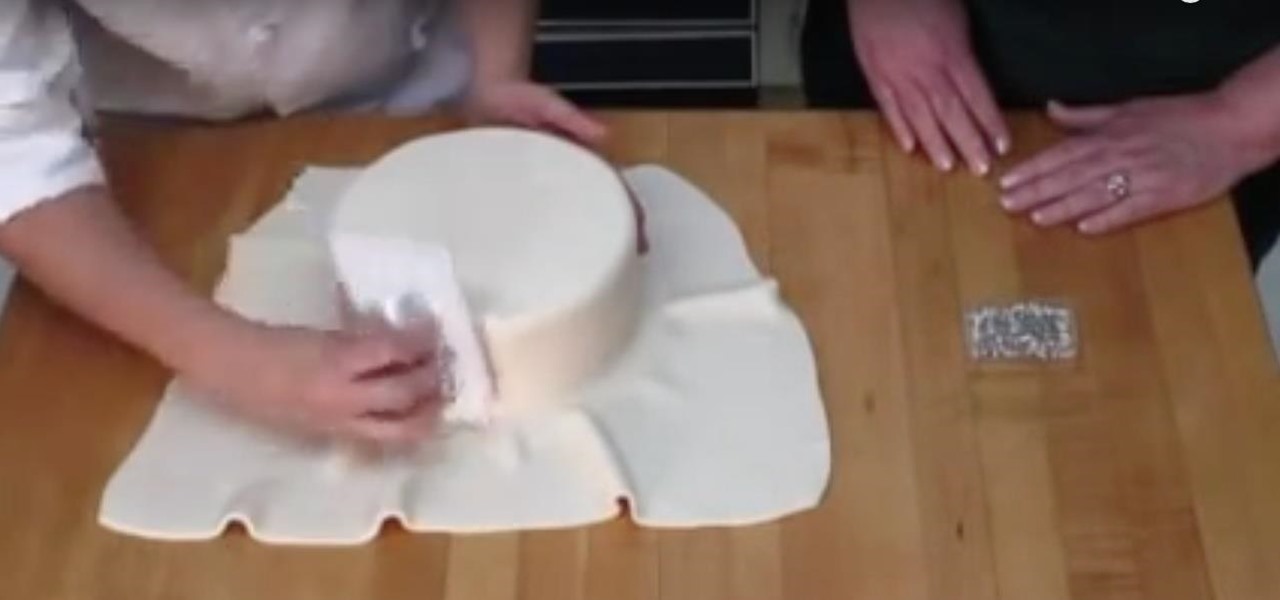
This is a demonstration of covering and decorating a cake with fondant. The cake is chilled and kept aside for covering. Fondant is bought from a cake decorating shop in bulk of about one pound as less is hardly available. The fondant is kneeded like a bread dough and made smooth and soft. The dough is rolled by a rolling pin after spraying a little corn starch on both sides so that it does not stick to the table or the rolling pin. It is rolled upto a thickness of 1/4" to 1/8" thick if the c...
If you want to paint shadow lines on a model care you should first realize that you can pair this technique up with any other technique you want to for different effects. Shadow lines occur when the out lines get thick and it provides a contrast to make something pop out. Shadow lines will focus on the light source. You want your shadow to be realistic so you want to think about where you light source will be. To paint on shadows lines, focus on where the light source is coming from and darke...
To make a Santa hat bead, begin with red clay and condition it by kneading it with your fingertips. Form the clay into a thick worm shape, with it being the thickest at one end then tapering off. Use your fingertip to make a shallow indentation on the thicker end, and remove any excess clay from the thinner end (total length should only be an inch or two). Curve the thin end over slightly to create a hook shape at the top of the hat. Take a small ball of white clay and make a small hole in it...
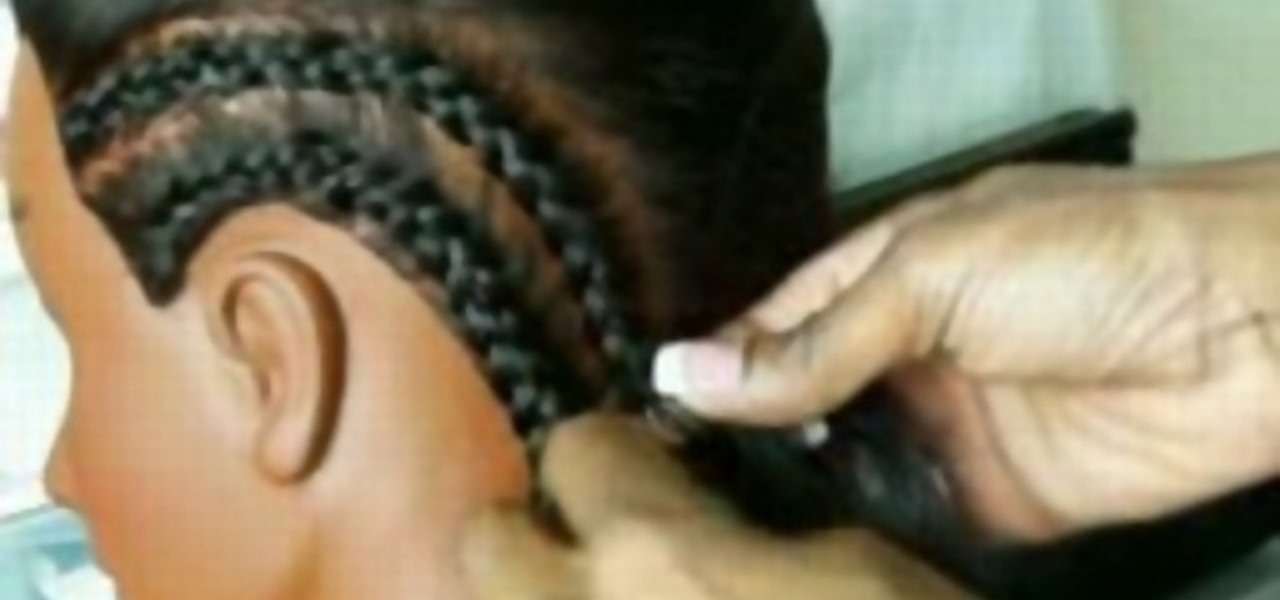
This video by Mschanda instructs viewers on how to 'French braid with or without extensions'. The instructor uses a mannequin to show how to french braid actually how to corn row. Extensions are fake loose hair (either synthetic or human) used in this case to make the hair appear thicker and/or longer. After watching this informative how to video you'll know how to french braid (corn row) hair with and without the use of extensions.
Mike shows you how to recreate a pair of baby booties in a design style he has created himself. He uses different yarns to create different sized booties. Thicker yarn will create larger booties than thin yarn does. He adds a row of eyelash yarn on row eight to beautify the design, yet it is optional. You can leave it off if you like. Also, on the finished booties he plans to add lacing on the front by weaving baby shoe laces, cords or string through the front area in a shoe lace pattern unde...
Start with a totally bare eyelid to create the base for the winged eye. It's important to go for a gel eyeliner. This allows you more precision than liquid eyeliners. Pull the skin taut at the outer eye, look down & using a flat brush, apply liner into lash line itself on top eyelid, in between root of lashes. Taking the line from the inner corner of the eye, put color in lash line all the way to outer corner of eye. Close eye; pull lid towards ear so skin is taut. Repeat base step; this time...
You've got style. You've got class. You've got... No reason to still be wearing a clip-on. Show off your suave side with a perfectly knotted tie. Watch this video to learn how to tie a bow tie.
Watch this quick video showing how to mix joint compound. In a large bucket, mix a fresh bag of joint compound with water, using an electric mixer. You can mix your joint compound to be thicker, or thinner, depending on the spackling project.
Watch this instructional knitting video to attach a single crocheted half circle ear flap to a single crocheted baby beanie. Use a tapestry needle to thread some yarn. This same process can be applied to adult caps and hats. Just use a larger needle and thicker yarn. It's easy to sew crocheted pieces together with regular yarn for an almost invisible seam.
Want fuller, thicker hair? Check out this new twist on an old style. This video tutorial shows how to back comb hair to add lift and volume at the roots for a great new look.
Do you want thicker, more realistic fog from your fog machine? Indy Mogul teaches you how to make realistic, creepy fog special fx for your films for under $30
The arbor knot is mainly used for tying the fishing line to the reel spool. The arbor knot is easy to learn and works well with thicker fishing lines.
Ever wondered how to make slime? Now you can learn! Make slime just like they use on Nickelodeon for Halloween, pranks, or just to play with! So gather up your ingredients and get cookin'!
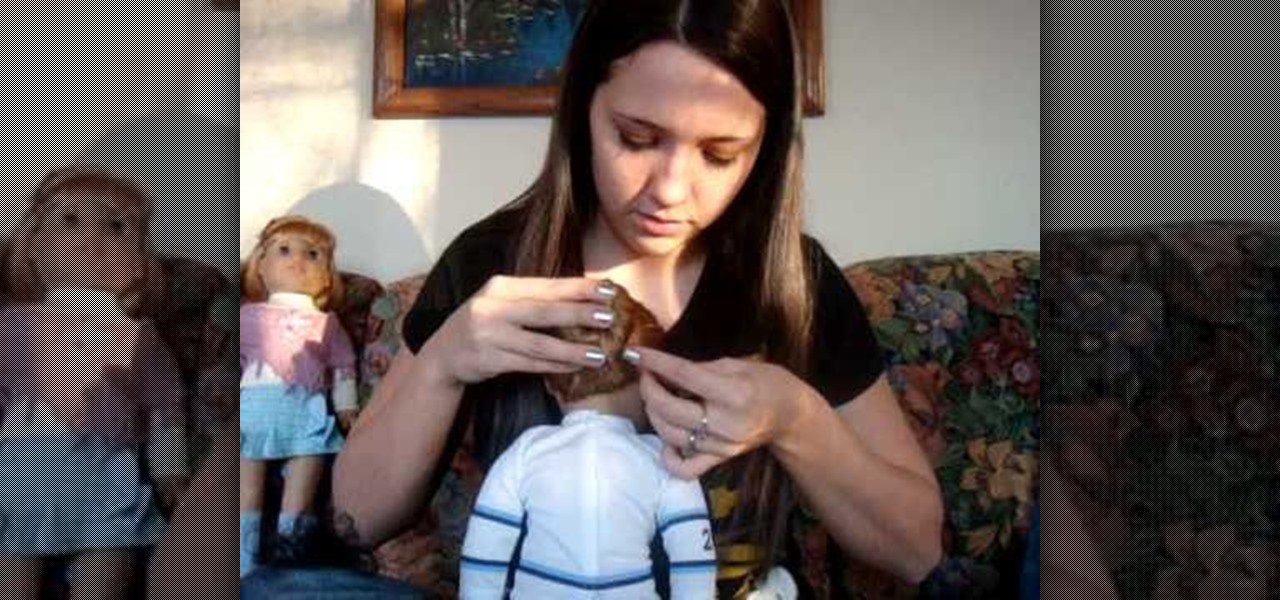
In this video, we learn how to do your American Girl Doll's in a ballet bun. First, you will need to brush out your doll's hair and put it into a low pony tail or high, depending on where you want the bun on the head. After this, take the hair and twist it around the rubber band base and then take a thicker rubber band to tie around the bun to keep it in place. You can then place another rubber band around for decoration. This will finish the simple bun, which will be easiest to do on a doll ...
In this video, we learn how to make a Rivulet scarf or reversible cable scarf. There are a couple ways to make reversible cables to look the same on the front and on the back. First, make sure you print out the scarf pattern and then learn where you want to cross to achieve a different look. First make your firs two cable crossings, doing forty stitches. Then, you can add in more stitches to make it thicker if you would like to. Continue to follow the pattern that you printed out, using both ...
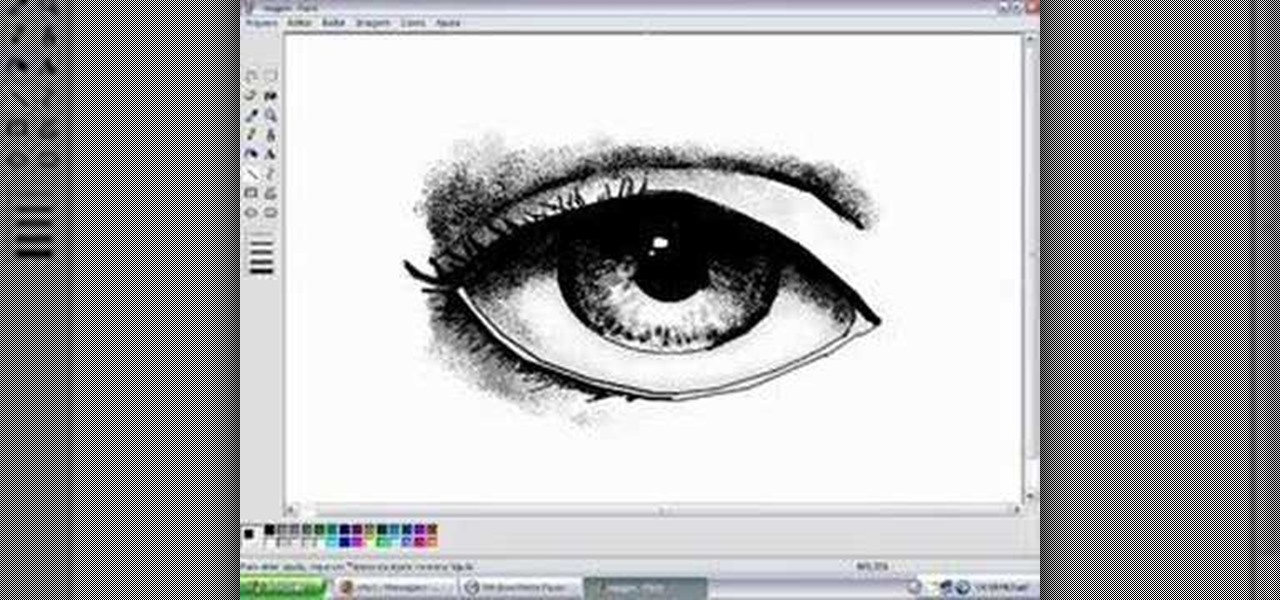
In this tutorial, we learn how to draw eyes in MS Paint. Start out by drawing the outline for the eye using a thin marker. After this, draw on a thicker line at the top of the eye and then draw on the crease of the eye above this. Now, draw in the details of the middle of the eye and start to shade in around the crease of the eye and the middle of the eye. From here, draw in the eyelashes on the top and the bottom of the eye, making them longer if they are for a woman. When finished, save thi...