
How To: Clean Nintendo NES classic games
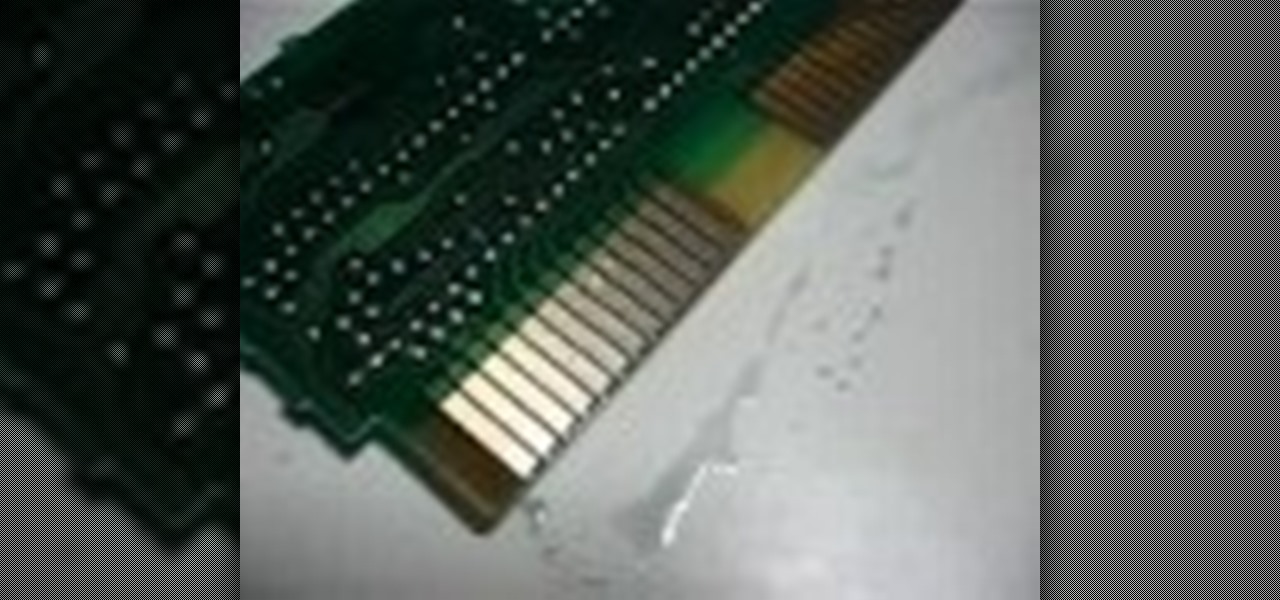
No more q-tips! No more alcohol! No more blowing in your cart! Did you know alcohol actually damages the carts? This is a much more effective, safe and long term way to restore the connection.

No more q-tips! No more alcohol! No more blowing in your cart! Did you know alcohol actually damages the carts? This is a much more effective, safe and long term way to restore the connection.
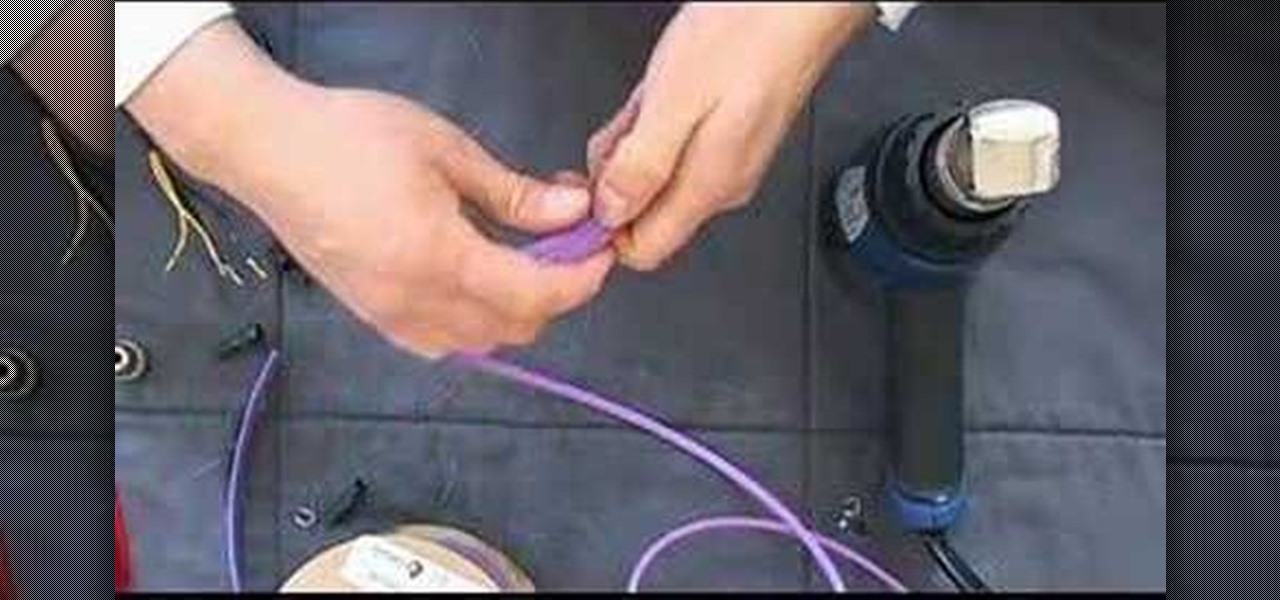
Watch as Novastar and Gundamaniac demonstrate detailed wiring for a crystal focus board for Star Wars Lightsabers! Making your very own Jedi Light Saber may be a daunting task if you don't know what you're doing, but this four-part video tutorial will save the day from evil forces. To start off wiring the CF board, make sure you have your SanDisk on it already.
Ever wanted to try encaustic wax painting? Here's your chance!! Learn the supplies, techniques and use for this innovative art technique in this free online art lesson taught by expert John Vanderbrooke.
Dawn Griffith creates a cute card with a 3D lemonade glass embellishment from start to finish. Create a template by making a rough sketch of an 8 ounce paper cup onto a piece of white cardstock and cut it out. Take the template and either trace it onto a piece of vellum cardstock and cut it out, or use Dotto adhesive to attach the template directly to the vellum and then cut around the shape. Score each side at about 1/4", fold on the score lines and trim the overlap at the top. Apply sticky ...
Need a new hobby? How about railroad modeling? You can turn a full sized train and rail transport into a scaled model for you to enjoy. Model railroading is a hobby that requires attention to detail, so no slackers here, please.

Be a DIY superstar and impress your friends with your newfound craft skills by turning simple votive candle holders into a hanging candle tree. You can do it all with simple home supplies and by following the instructions in this video.

Relieve stress and wrap your aches in warmth by making your own microwavable heating pad. Just gather up these supplies (cloth, needle and thread, uncooked rice, spices/herbs, and essential oils) and follow along with this how-to video. Since this easy crafting project is made from houshold supplies, you'll save money on buying a heating pad from the store. Follow along with the steps in this video project and enjoy your new therapeutic, homeopathic treat.
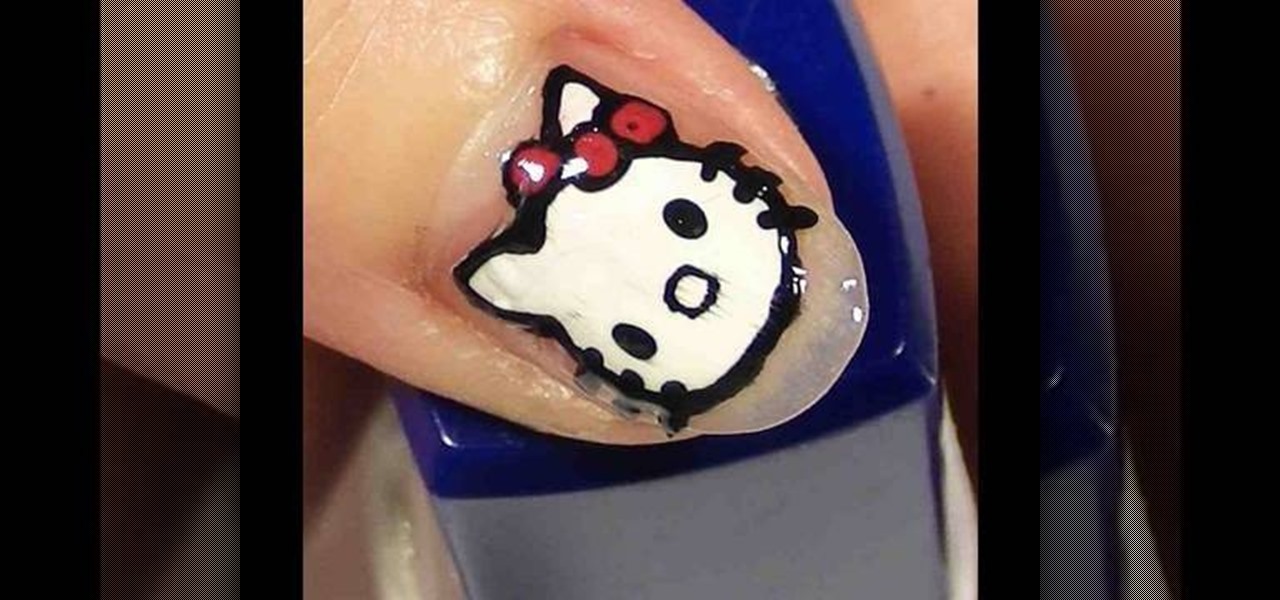
This video by KlairedelysArt demonstrates to us how to create a Hello Kitty nail paint design. She does this design by first painting it on plastic using any household plastic bag. She clearly explains all of the supplies needed and the demonstration on how to paint the actual Hello Kitty logo is very thorough. All she uses to make this happen is a plastic bag, white nail varnish, black and fuchsia nail art pens, and clear nail varnish. She paints the Hello Kitty logo onto the bag, lets it dr...
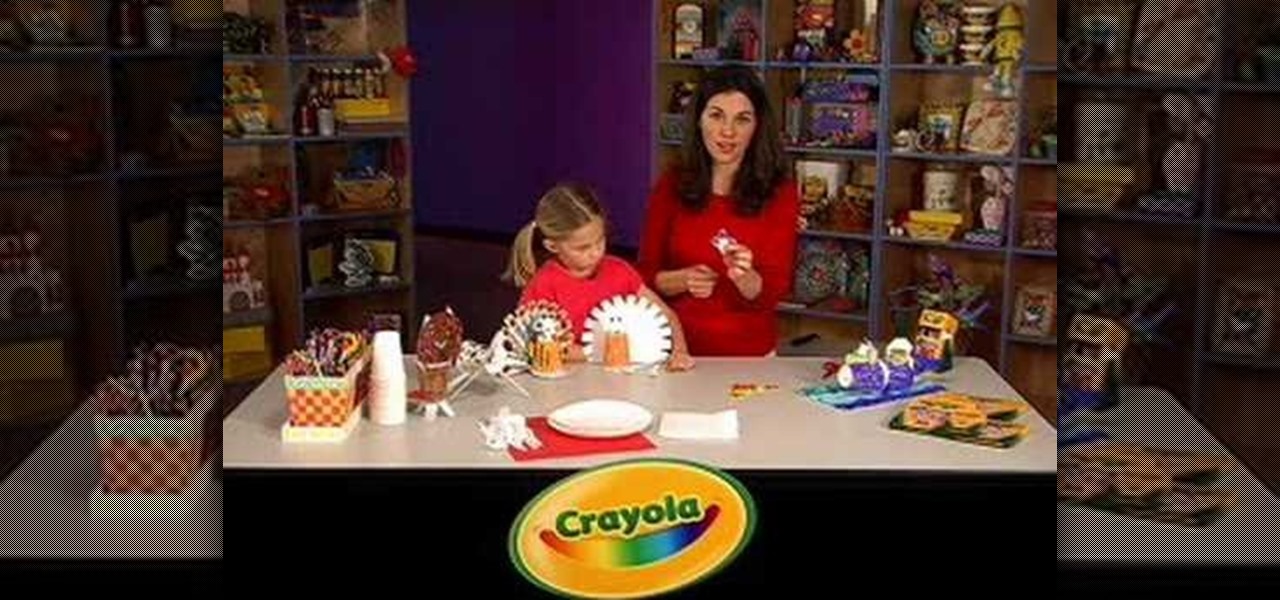
Pack some fun for your next gathering of family and friends. Imaginations run wild with everyday picnic supplies and your favorite Crayola Crayons and Markers. You will need crayons, markers, colored pencils, scissors, glue, tape, and picnic supplies (paper plates, napkins, cups, and plasticware.) This is a great project for summer parties with lots of children or just the young at heart. With this how to video you will be able to have a fun summer picnic craft challenge at your next family g...
Babysitting is the prime teenage job for young women to start learning responsibility and earning a wage, but it isn't all fun and games… you are dealing with an infant, which is far from fun, but it's money in your pocket. Earning a little extra money babysitting infants can be more fun — and a lot easier — than schlepping food at your local diner.
This video will go over how to insert a check box in Microsoft Word for printing or for electronic distribution. With just a few clicks you can get a check box. You can even add different symbols or styles for your check box.

This video gives instructions on how to make a stencil from a manila folder and a number of additional supplies. Supplies required aside from the manila folder include an X-acto knife, a pencil, an eraser, and a cutting board, the cutting board and manila folder are recommended. First step to producing the stencil is to draw an image to serve as the stencil pattern. After making the design, cuts must be placed in the design known as 'Bridges', bridges are links in the design which holds the p...
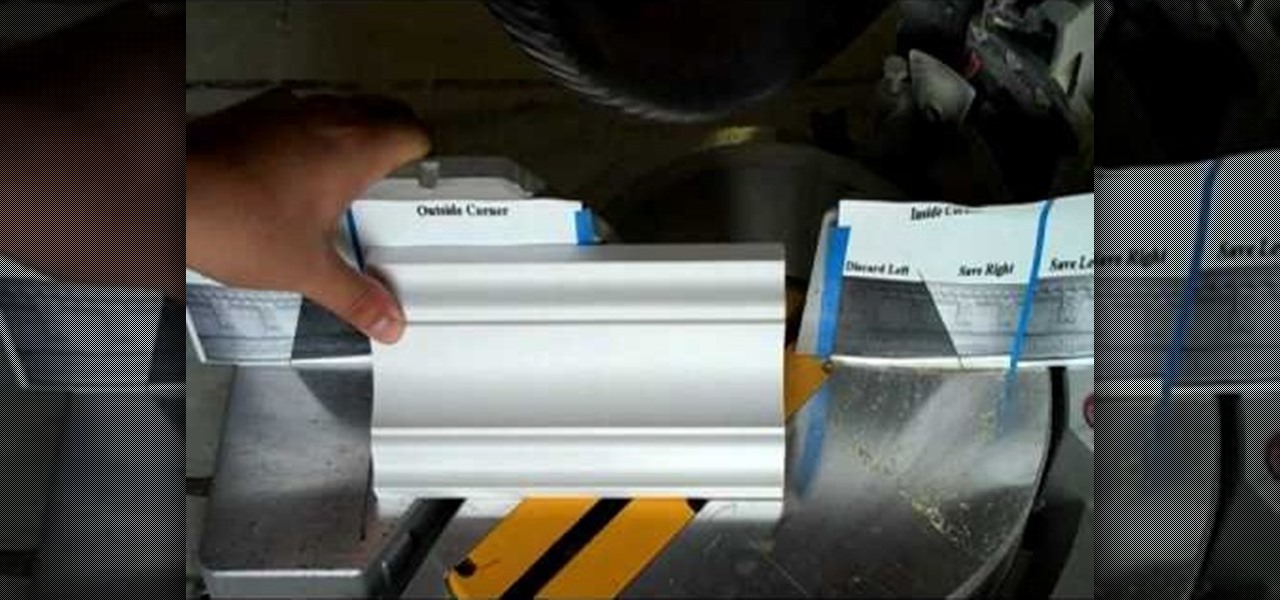
This video, from Superior Building Supplies, demonstrates the proper technique for cutting the inside corners of crown molding. The presenter suggests downloading several diagrams from the Superior Building Supplies website. These diagrams show the correct position of the miter for several different cuts. When using a miter saw think of the fence as the ceiling and the table as the wall. Cuts for inside corners will always be made using 45 degree angles on your miter saw. Using these techniqu...
Want to create the look of expensive Hollister designer jeans? Fancy department stores, specialty jean stores and boutiques sell them for outrageous prices. Now you can create them at home with simple supplies, a little practice, careful observation and some "elbow grease". The creator of this video uses common hardware store supplies to complete the task. With the help of the video's host, the right sandpaper and with the right moves, you can create all of the most common styles of Hollister...
Watch this painting tutorial and learn a method to paint acrylic paintings using an imaging editing program called Gimp. No drawing skills required. If you want to learn how to use acrylic paint but don't want to spend a ton of cash on supplies, here's how. The supplies are student grade and inexpensive. You can get them all for under $15. Learn how to become a better painter & be sure to stay tuned in for all 6 chapters!
how to apply braided sleeving to cables, especially on those of power supplies
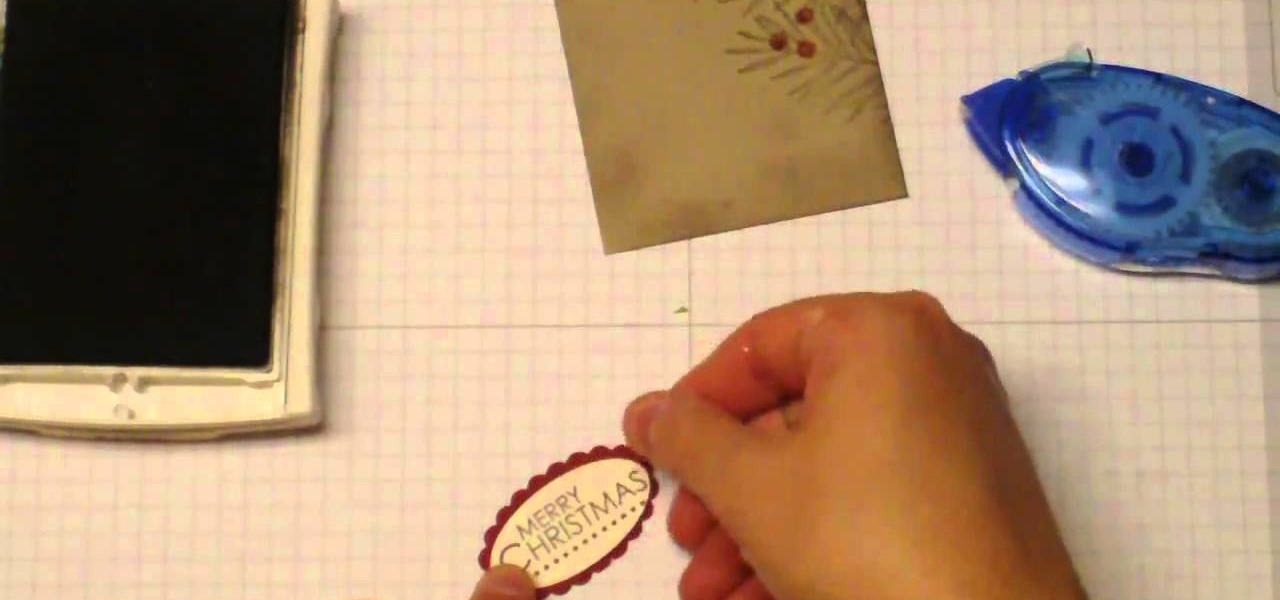
This is a quick and easy project you can use to make a beautiful, vintage inspired gift tag that you can attach to all your Christmas gifts! All you need is some basic papercrafting supplies in muted tones and your favorite vintage stamps!
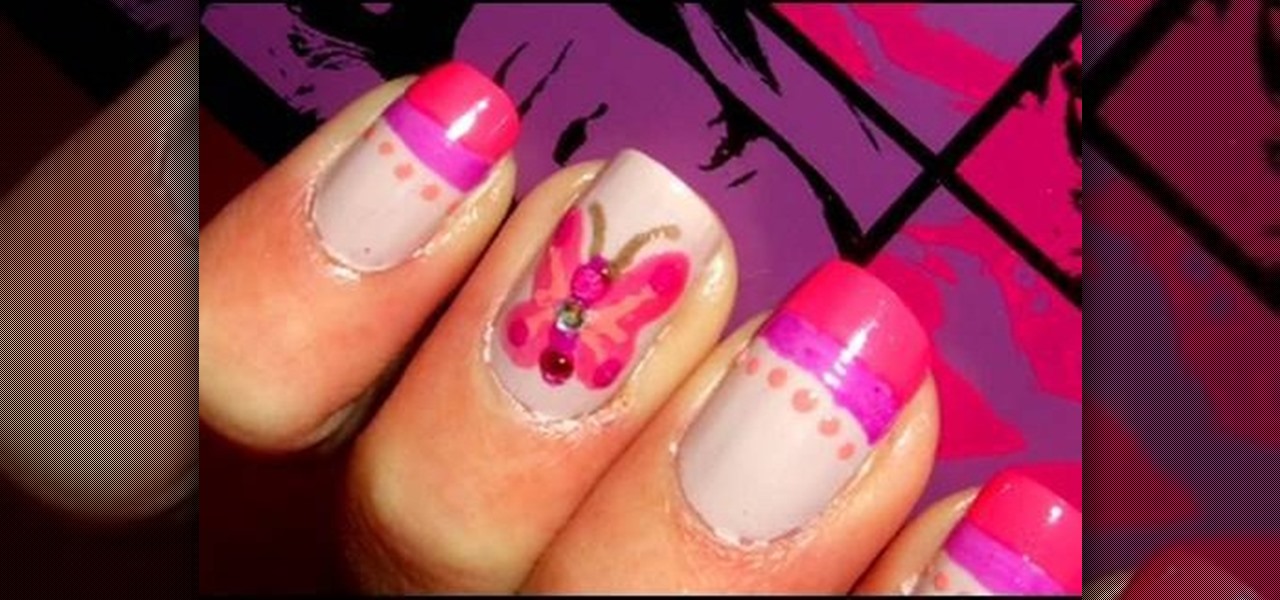
In this video, JulieG shows you how to create a unique and artsy nail look. Why bother with plain old red nails when you can get a unique nail look with hot pink butterflies? Bring your childhood back and bring out the art supplies. JulieG will walk you through each step of the way, until you have gorgeous nails to show off!
If you ever wanted to make your own rainstick from scratch, you've clicked the right video. In this tutorial, you'll be taken step-by-step on what supplies you'll need to make this cool looking trinket. It can take up to a day or less depending on your level of handiness in the garage, so check out the video, take notes, and enjoy!

In this tutorial, you'll be finding out how to tie the lizard tail sinnet. It's basically

Check out this clip before you head to any conventions this summer! In this video, learn how to create Lina Inverse's shoulder armor for cosplay and look great. You will need basic craft supplies and will be using things like duct tape, papier mache, tap lights and foam to build this piece of body armor.
Need to make a sample or draft of a booklet from your home computer? Caren Borowitz provides a straightforward way to complete the task. She presents a step by step method for organizing the pages using a total pages grid that can be modified to fit as many pages that your booklet or brochure may contain. She uses straightforward dialogue, visuals, simple tools and supplies to show the viewer, piece by piece, the process of organizing and assembling draft brochures.
From Systm learn how to build a USB battery supply that can charge your cell phone.

Hate those cheap multi-adapter power supplies that only provide up to 500ma of power? Here's how to use one high-output power supply (up to 3.5A in this case) to run all of your power hungry gadgets, like laptops, LCD monitors, etc...
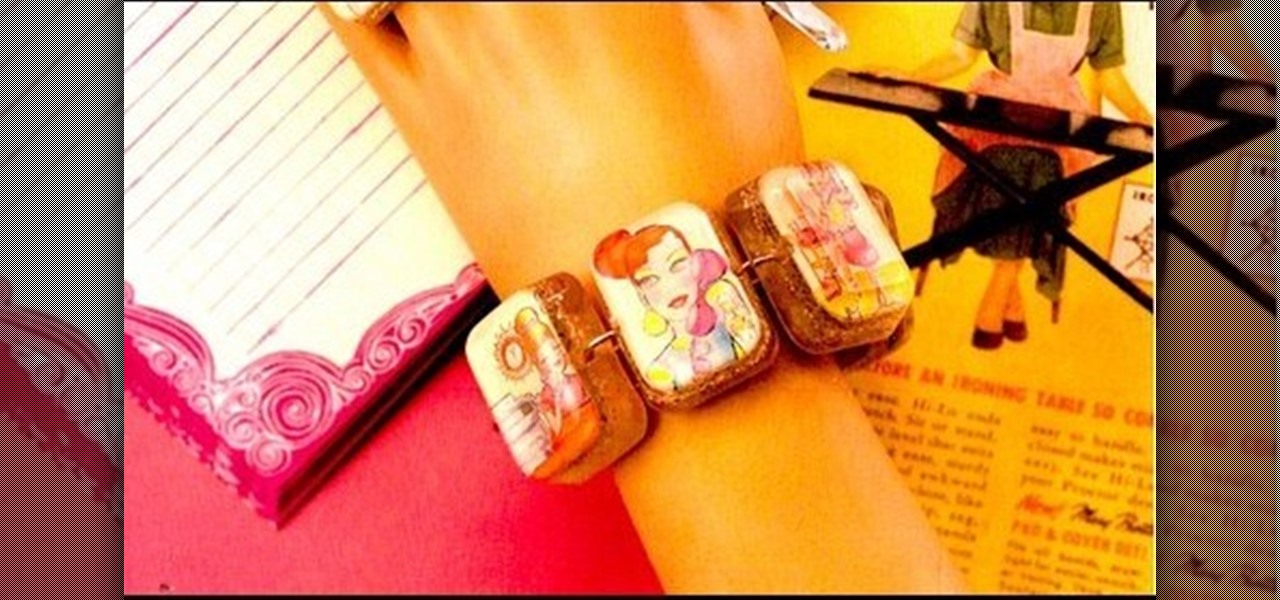
Make a resin bracelet with Threadbanger. Resin jewelry is easy and inexpensive to make. You may need to make a few stops at the local craft stores to gather all your resin making supplies. This resin bracelet is a unique piece of jewelry that you will enjoy making.

Wow! It's a dress! It's a trash bag! It's a trash bag dress! This dress is similar to the one Ke$ha wore this year to the MVA show, turning the fashion world on its head and showing everyone that you don't have to spend a million dollars to turn heads. In fact, you can create something cool for less than $2 in you check out this video. You probably already have all the supplies needed. For this project you'll need a trash bag, some scissors, some tape and a stapler. For your own flair, grab s...
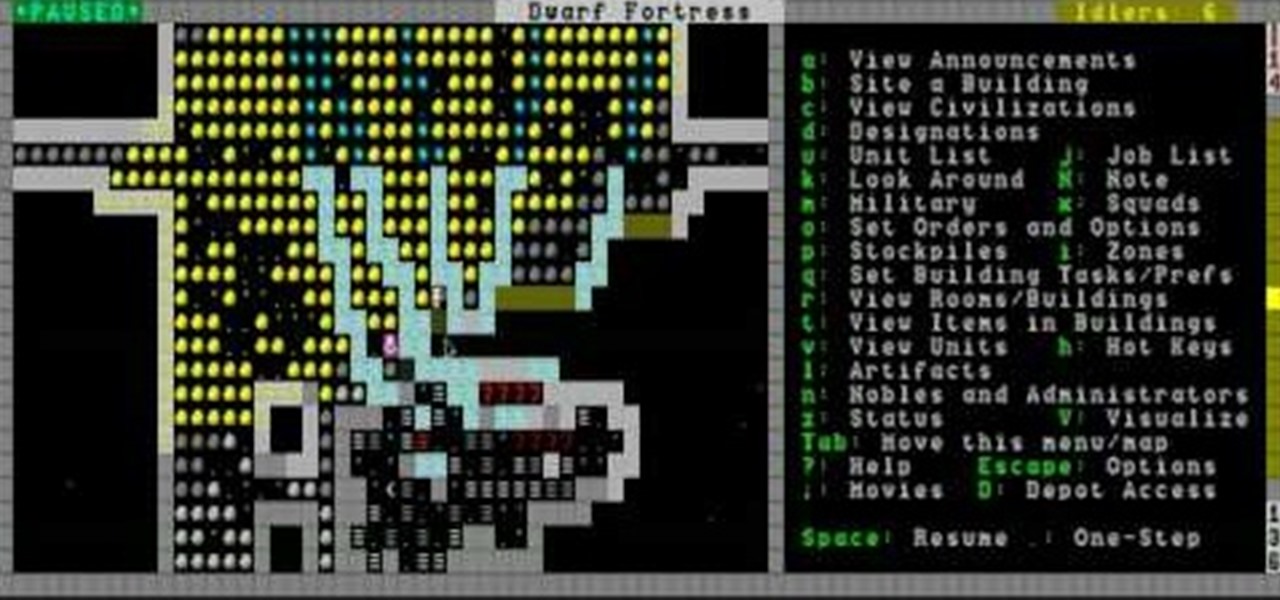
Adamantine is the best, most versatile metal in Dwarf Fortress, but discovering and using it bears great risk. This video will teach you all about adamantine and how you should react to ensure you survive what happens after you find it.
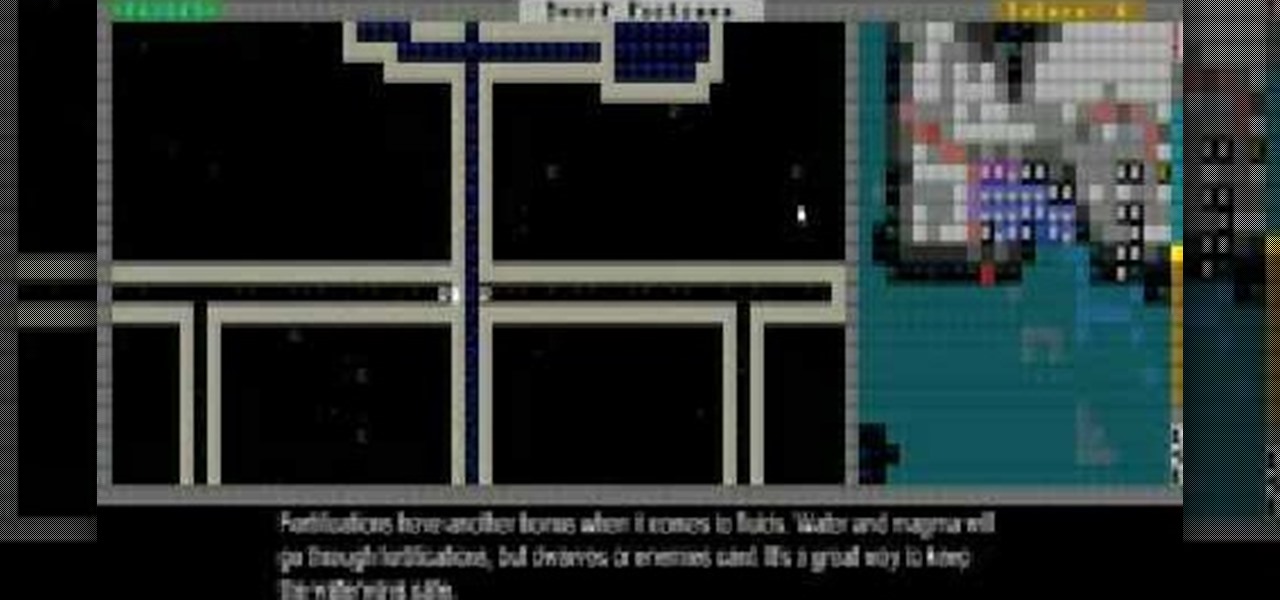
If your fortress is pretty big and advanced, watch this video. It will give you some advanced tips on building a nearly complete fortress, then show off the creator's beautiful, 20-tutorials-in-the-making fortress.
In this Arts & Crafts video tutorial you will learn how to use non-standard page protectors when scrapbooking. It is a tip on getting a large number of photos in an album without taking up too much space or using too many supplies. You can get 12 x 12 page protectors in terms of size but with pockets for 4 x 6 photos. This way you will have 6 photos on each side of the protector. Or maybe you put 5 photos and a card on one side. If you don't want to mess around with extra page protectors, you...
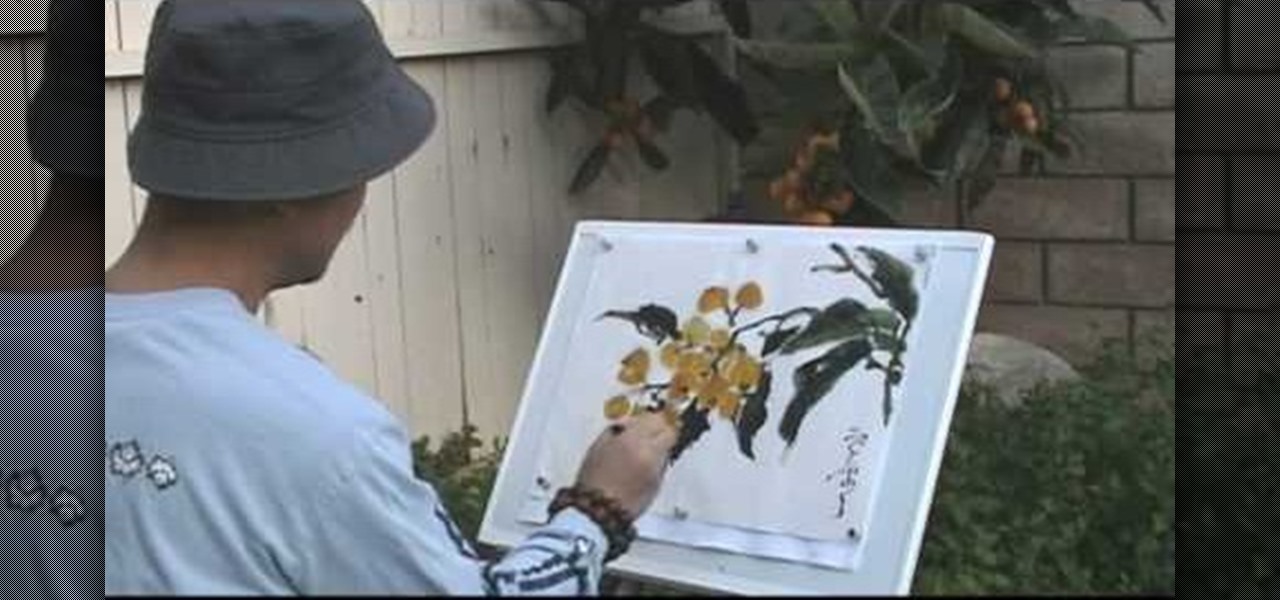
In Chinese watercolor paiting, static subjects like cherry blossoms and peach trees never go out of fashion because they represent the teeming life and beauty of nature that most Chinese watercolor artists enjoy representing.

Not every camper is looking to totally "rough it" while they are in the woods. In this clip, learn how to make a comfy, folding camping seat out of cheap supplies for less than five bucks! This foam pad is far better than the ones you buy at those expensive camping stores and because you made it yourself, you know it will work. The best part? If you lose it or it gets ruined out there in the wilderness, it was so cheap and easy to make that you can just create another one!
Keeping things like food and water refrigerated while you're camping in the bush is nearly impossible. Unless of course you've chosen to camp somewhere freezing cold. But if you haven't, evaporative cooling can be an effective technique to utilize for keeping water cool and food from spoiling as quickly. Obviously this can be crucial in a wilderness survival situation when your food supplies may be limited. This video outlines two ways to utilize evaporative cooling, first to cool a water bot...
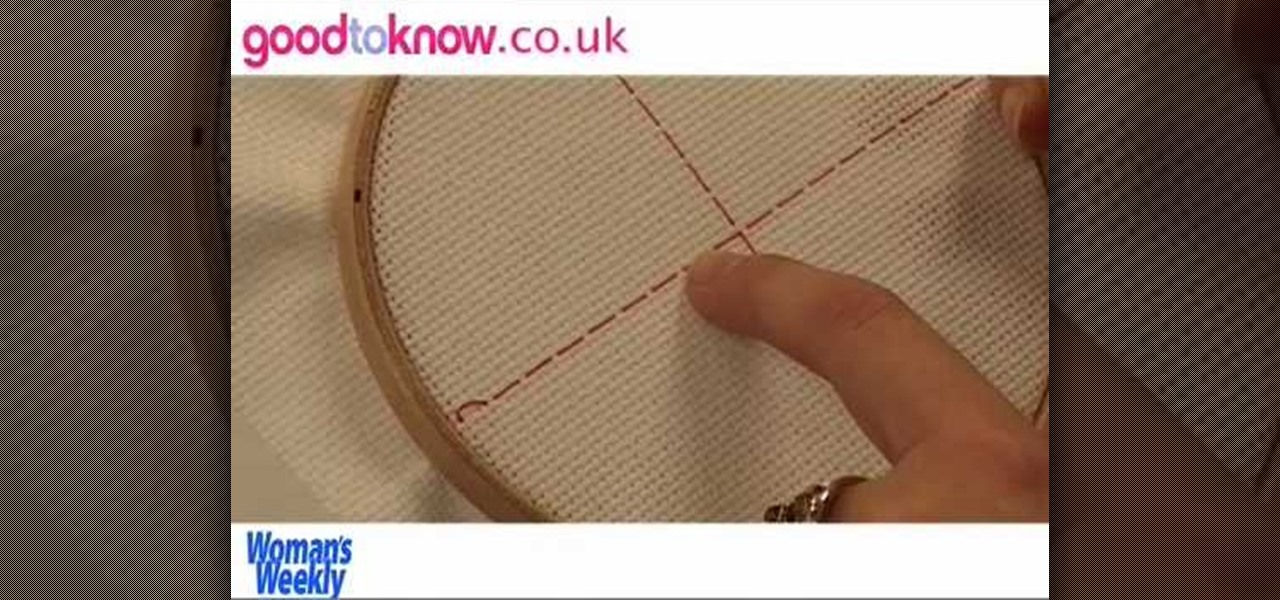
In this tutorial, Emily Dawe, assistant home and crafts editor for Woman's Weekly, demonstrates a simple cross stitch design. Cross stitching is a fun hobby and really helps fill any empty time you may have. If you are looking to start cross stitching, have a look at this video and begin with the basics.
Candles make a lovely addition to any home decor, and they are also fabulous gifts. In this video learn how to make your very own decorative candles for cheap. All you will need to create this funky gift if a plain white candle from any grocery store, tissue paper and some wax paper.

In order to build your own mini fridge, you will need the following supplies: a heatsink, a cardboard box, a petier unit, popsicle sticks, standoffs, an AC adapter, scissors, and on/off switch.

in this video Evan Burse teaches us an easy way to draw Toothless from the 3D cartoon how to train your dragon.

Your yard is full of free crafting opportunities! In this tutorial, learn how to take an ordinary stone and turn it into an adorable ladybug. In this craft project, grab a nice flat stone, some paints and some googly eyes and put together a cute little friend for your kids to enjoy. This project is not difficult and can be done (with a little help) by kids of all ages.
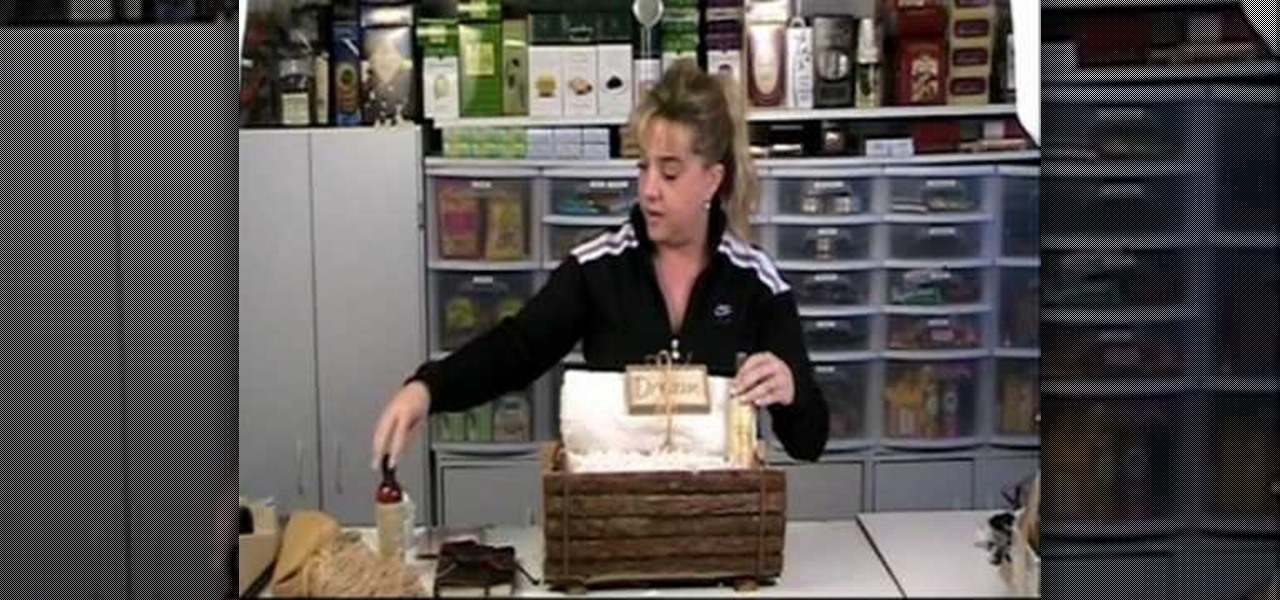
Debbie Quintata shows us how to make a gourmet spa gift basket. By starting with a planter as a gift basket container you can start filling it with your pamper spa items fit for friends, family, co-workers or anyone who deserves a gift basket. Suggestions to fill your basket include a high quality towel, body spray, relaxing music, linen, a simple white tea cup, box of relaxation tea, candle, body bar of soap, and a engraved rock. Very simple and a great gift for anyone, including yourself. S...
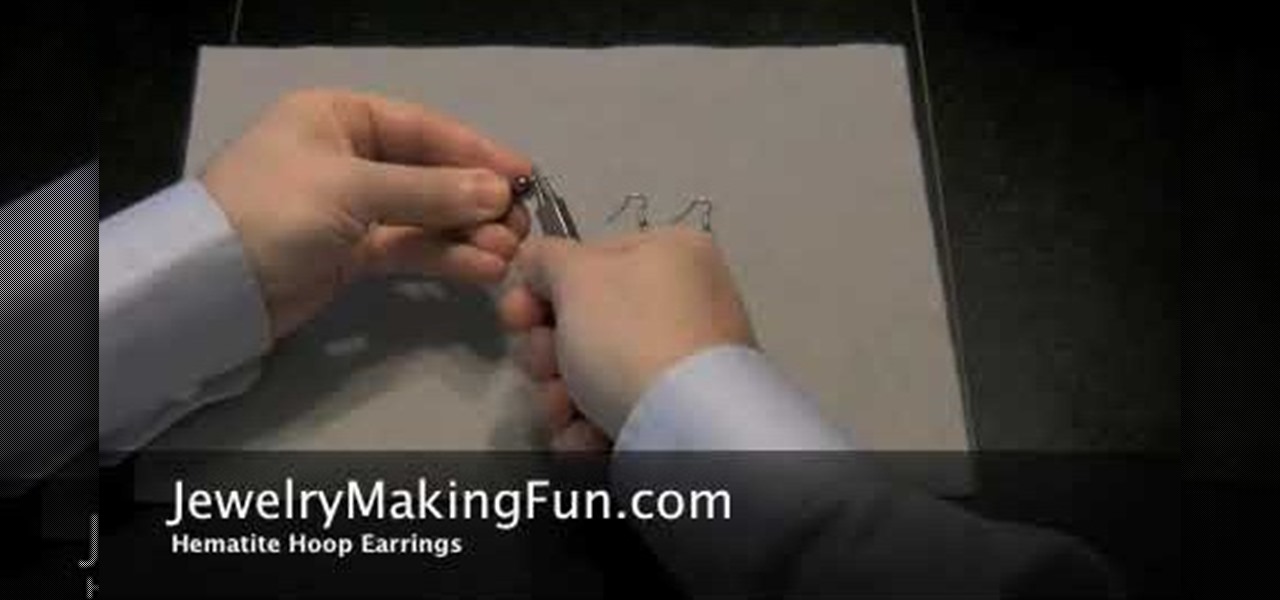
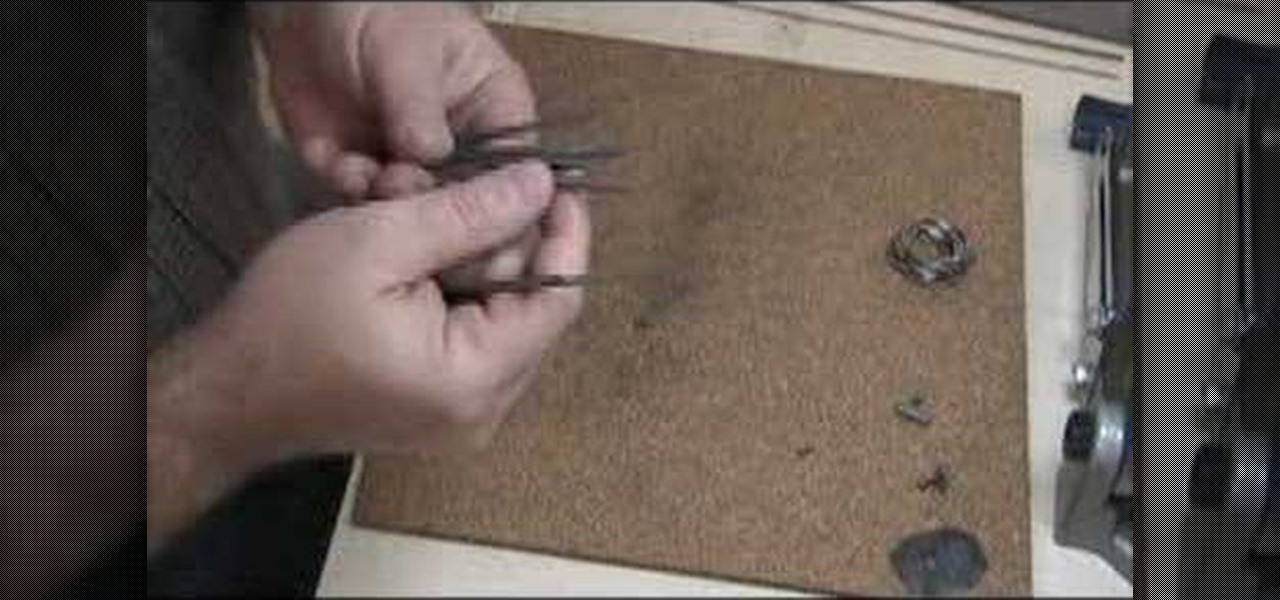
The first step in making a pair of hematite hoop earrings is to gather your supplies. You are going to need some needle nose pliers, two head pins, a hood bead, a small bead, a bigger bead, and two French earring hooks. First, take a head pin and insert it into one of the holes on the loop bead. Follow with the smaller bead and then the larger one. Then, taking your needle nose pliers, bead the remaining wire of the pin 45 degrees. After that, go above the bend about a quarter of an inch and ...
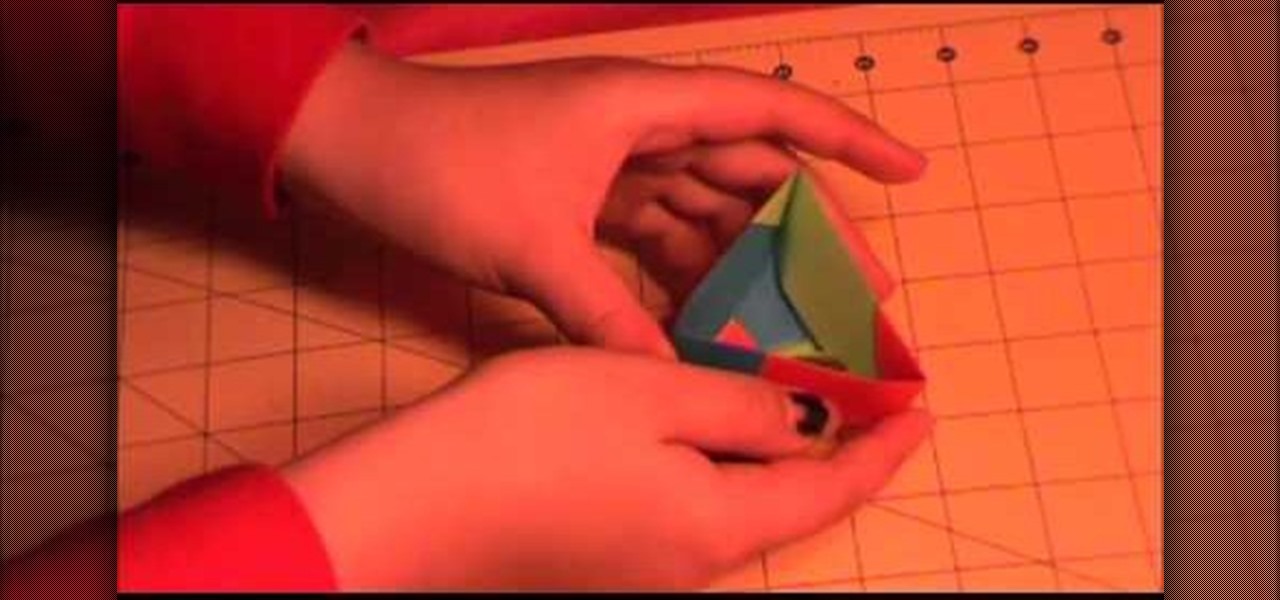
The Amazing Origami channel takes you through step by step instructions of how to build a triangle origami box in this video. Six pieces of origami paper, three different colors, are all the supplies you will need to make your very own box! First, separate the origami paper into two groups of three, all three colors should be in both groups. These groups will make the top and bottom of your box. The three pieces of paper used for the bottom will all use the same folding technique, this is als...