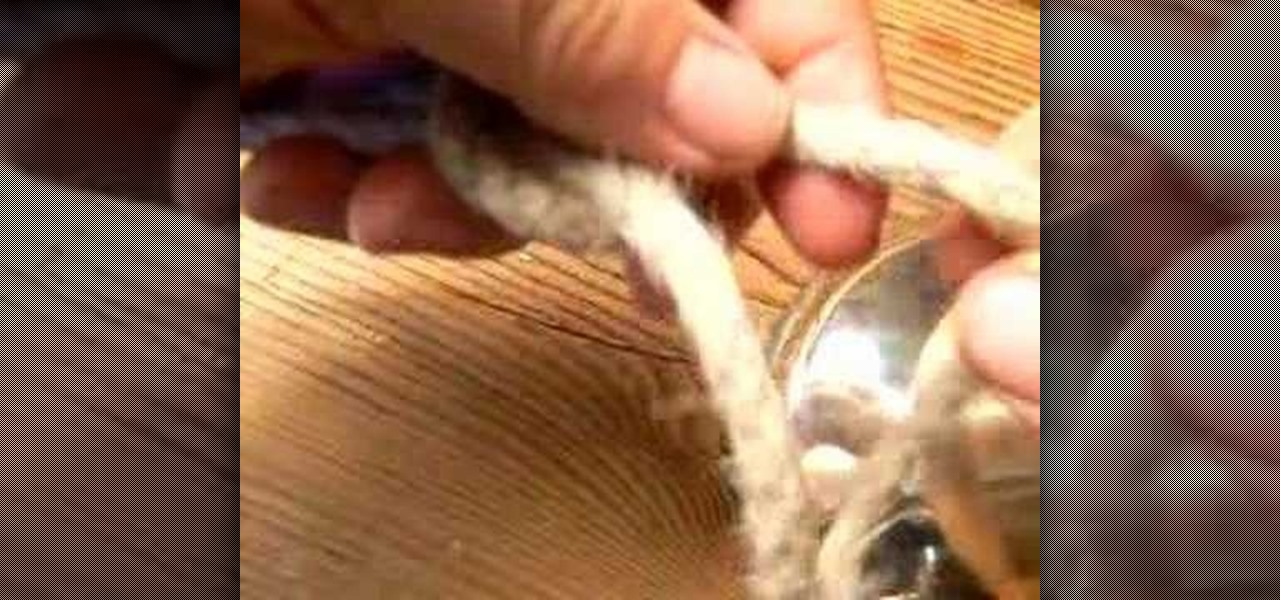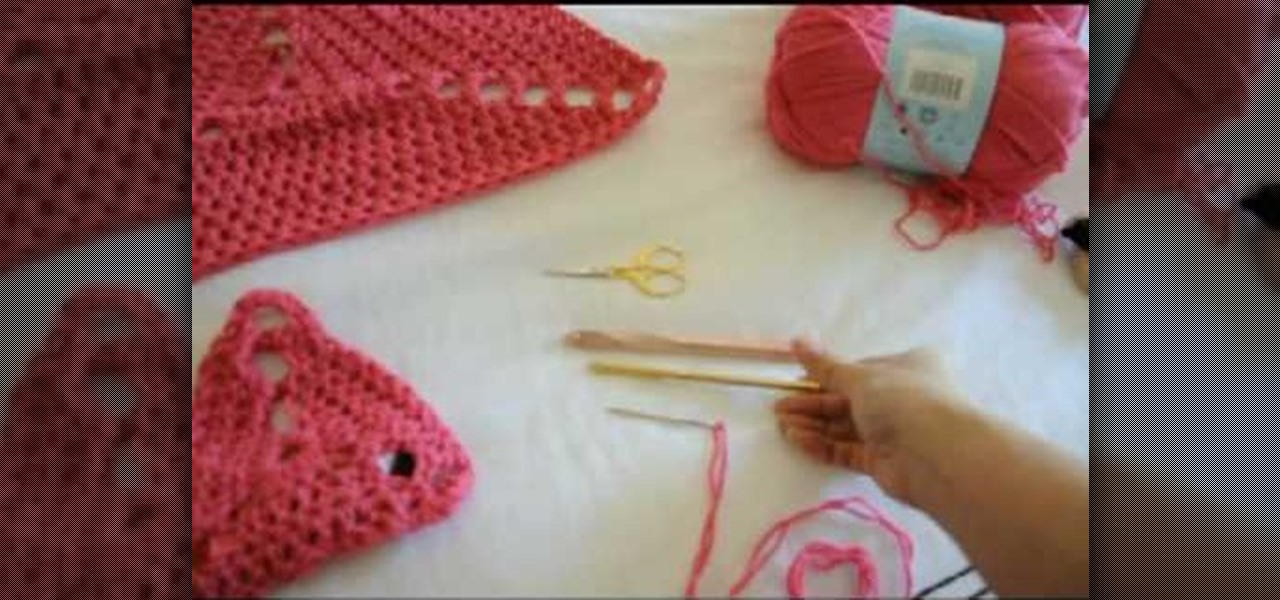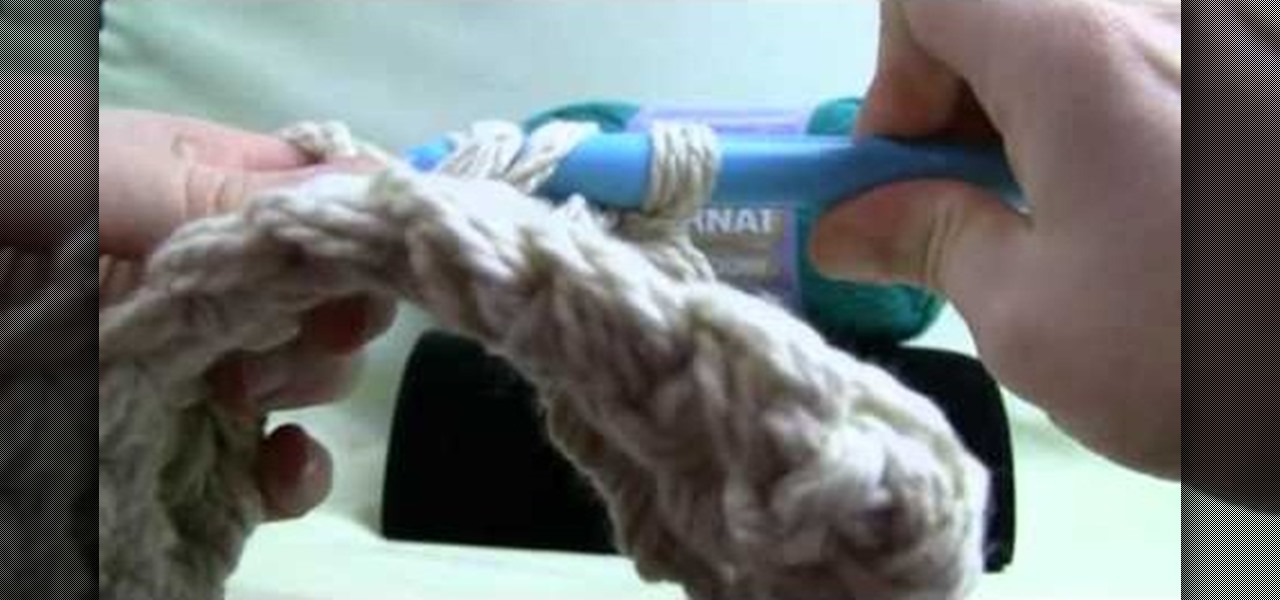
Extreme crochet brings together several strands of yarn, which you can use to quickly make things like afghan blankets. This tutorial shows you how to do the double stitch when working with extreme crochet. Make sure you have a size P hook!
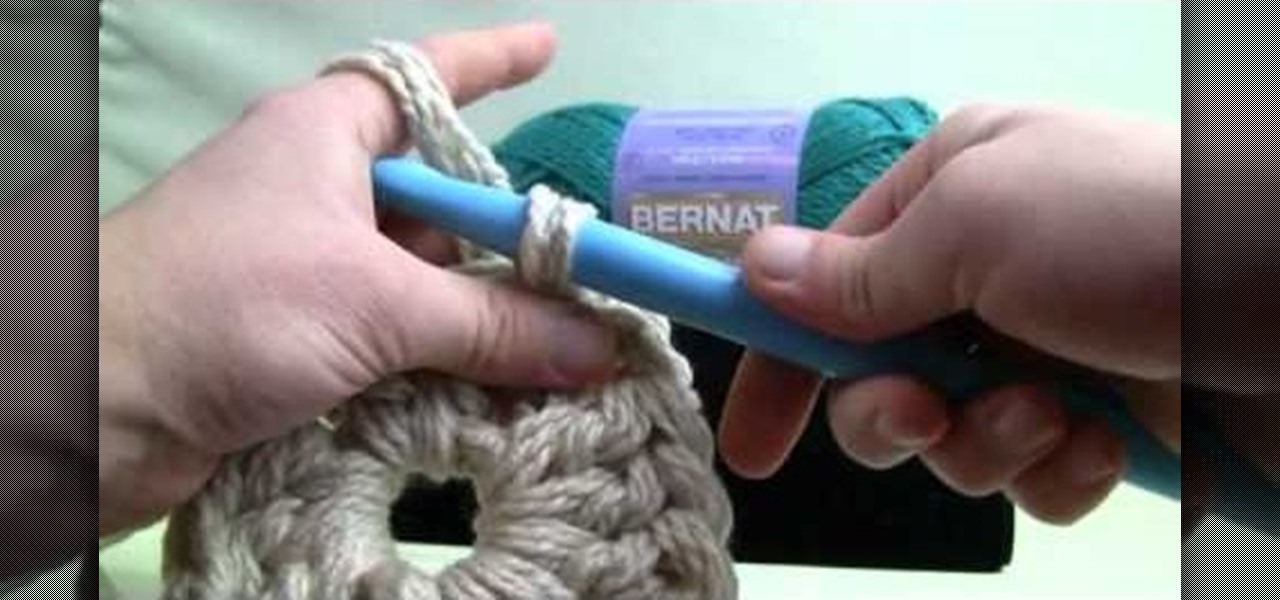
Want to learn how to make huge granny squares? The answer lies in extreme crochet - using multiple strands of yarn together. You will need your yarn and a size P hook. Then follow along, and learn how to make your own extreme crochet projects!
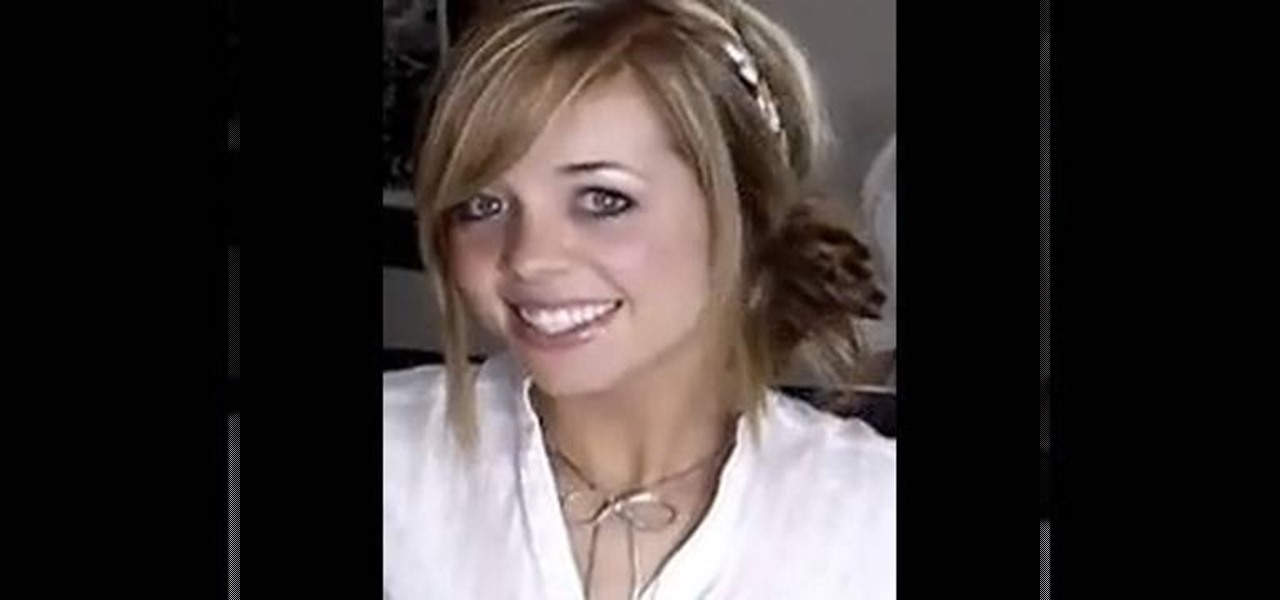
Even if your hair is thick and rather moisturized the rest of the year, don't be surprised if it starts looking more like tumbleweed than spun gold during the winter months. That's because the lack of humidity and raw cold strip your strands of natural moisture.
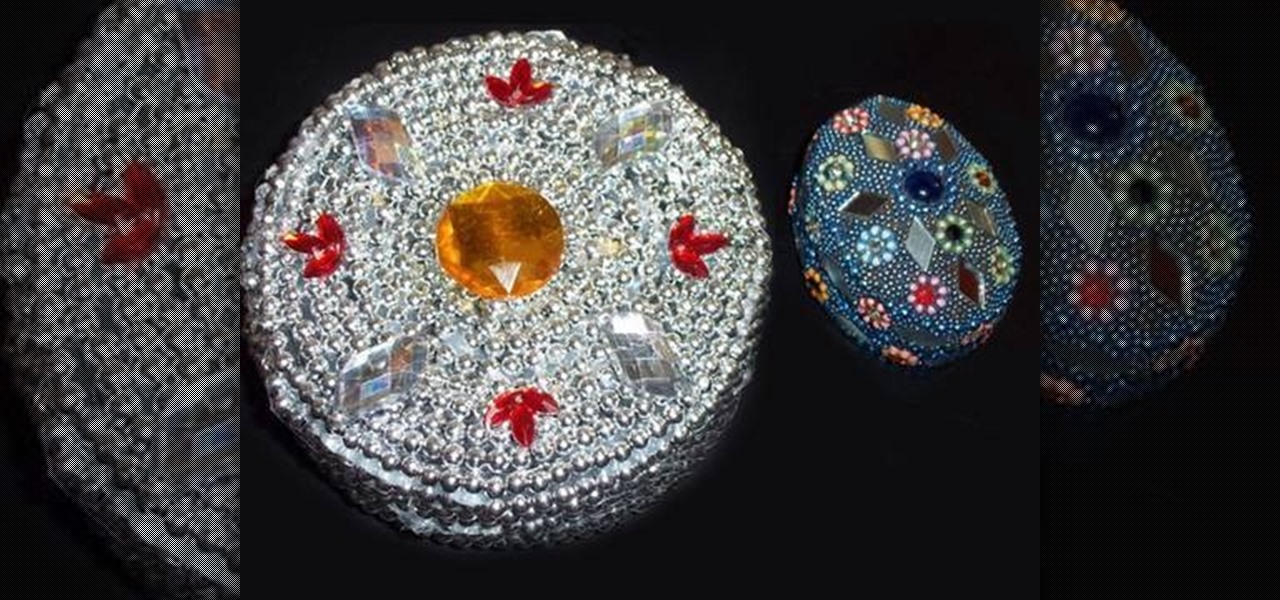
Make a beautiful box for your child to keep their jewelry or precious possessions in. You'll need a small plastic or metal container, strands of thread with small beads on them, plastic gems or rhinestones, a hot glue gun and a kid-friendly pair of scissors.

The granny knot, or square not, is one of the most basic knots used in macrame. This easy to follow tutorial shows you how to tie this knot using two separate strands of macrame, and even different colors for your next project.
We've all been there: You skip happily to the salon, hoping to get that haircut you saw on Beyoncé in US Weekly, only to come out with a haircut so terrible your hairdresser must have had a blindfold on while doing it.

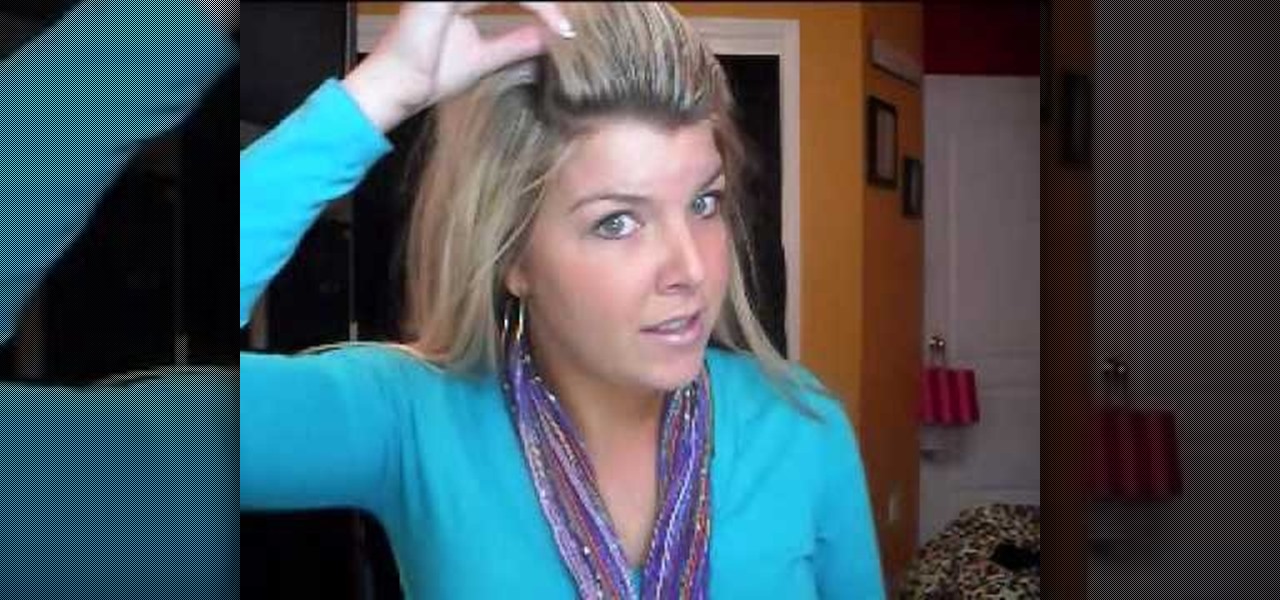
Ditch those wimpy flat strands in favor of touchable volume this summer by watching this hair tutorial by MakeupByTiffanyD. After all, there is a reason that "Victoria's Secret hair" is the most requested hairstyle year-round by beauty-saavy gals all over.
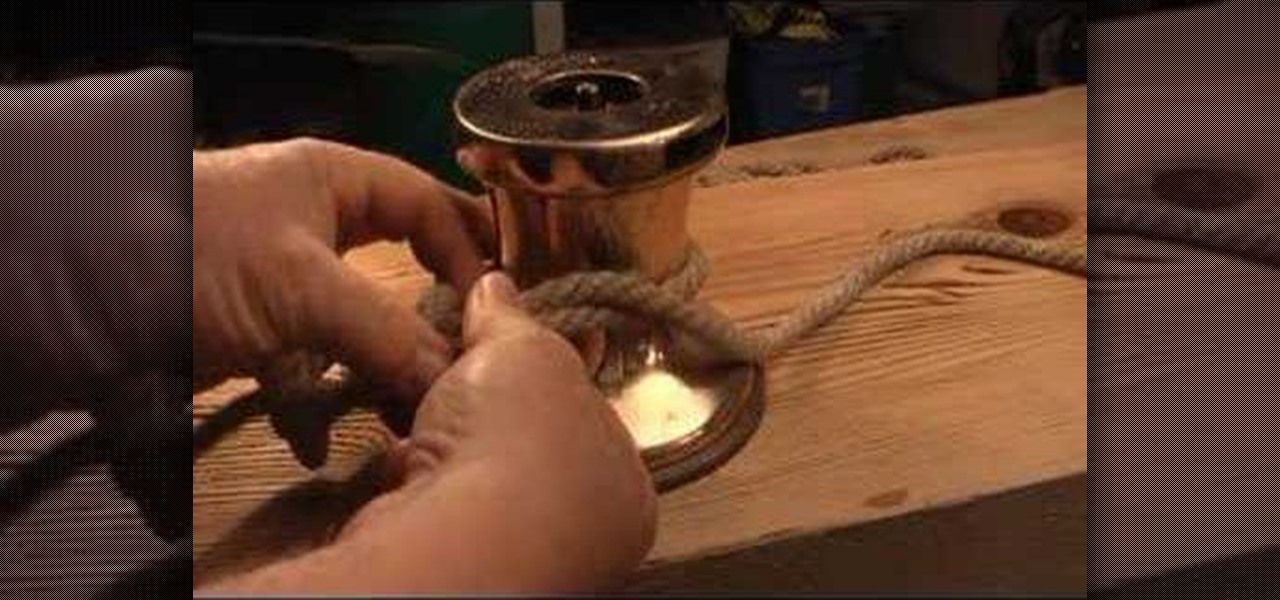
The tensioning knot, demonstrated in this how-to video, is a useful way to tie the strands of my whips to the rope machine. It is also useful anytime that quick tension is needed and a truckers hitch is too much or the distance is too short. Tie a noose in the line and snug it up then a slippery half hitch locks it in place. Watch this video knot-tying tutorial and learn how to tie a tensioning knot.
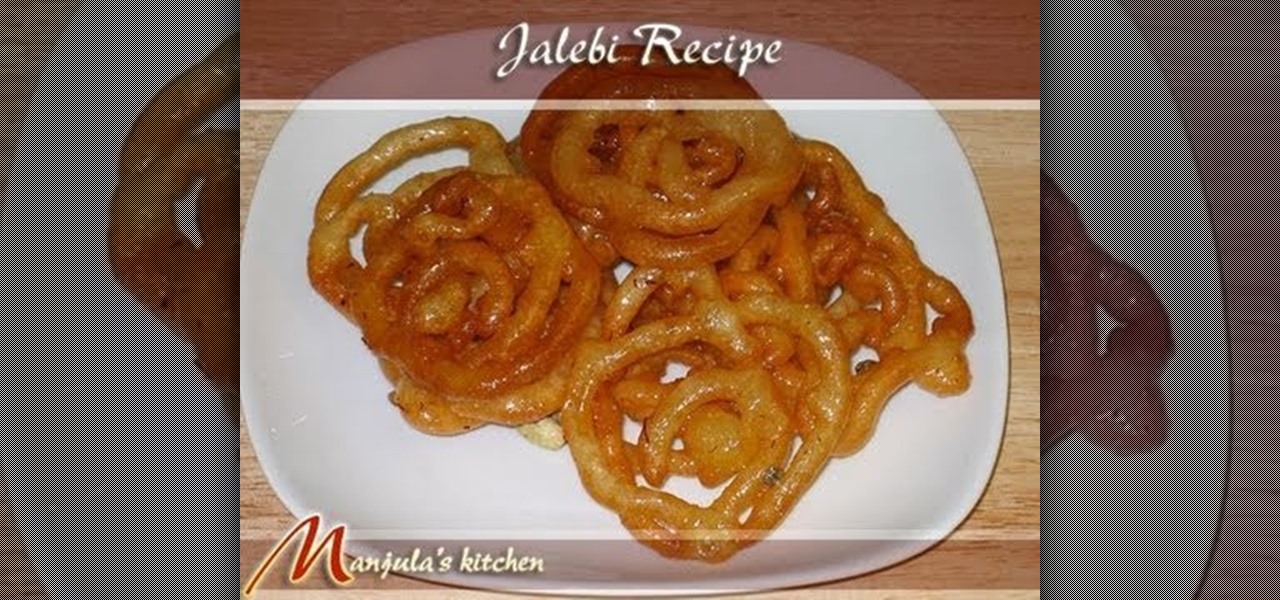
Watch this how to video to learn how to make Indian jalebi. This popular Indian treat is perfect for breakfast or dessert.
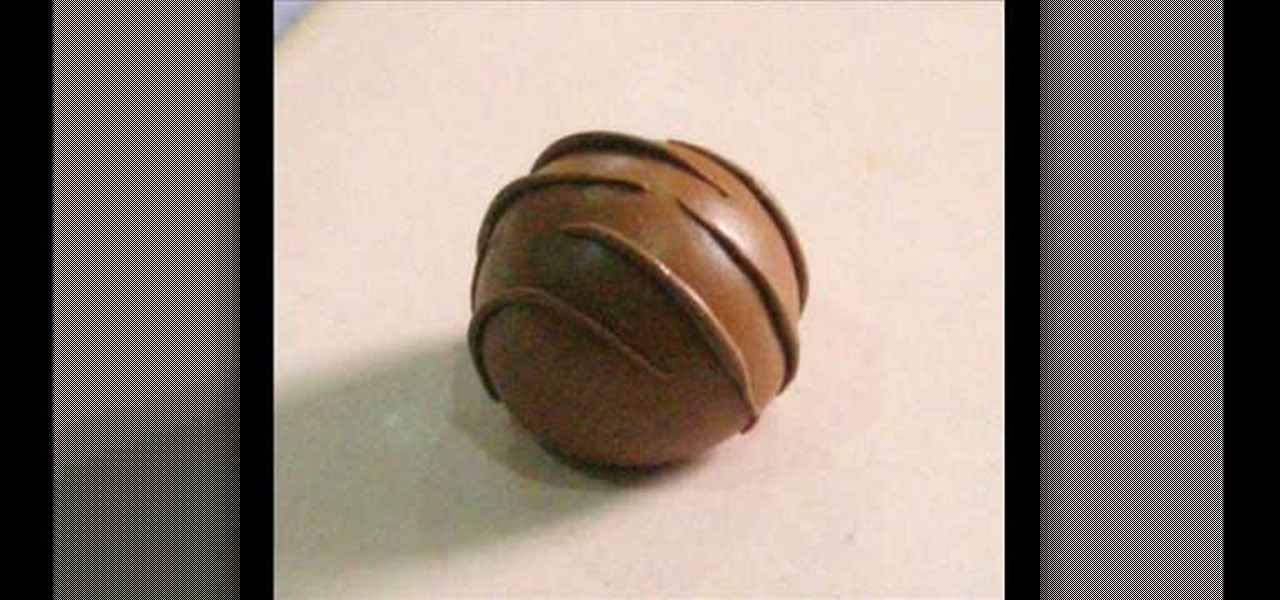
How to make a Polymer Clay Chocolate Bon-Bon (Chocolate Truffle with peanut Butter filling using polymar clay).
In this Arts & Crafts video tutorial you will learn how to do a lanyard super cobra stitch. For this you will need two pieces of gimp cord; one piece about 15 times longer than the other. Start the same way as you would with a regular cobra stitch. Make a loop on both the cords and pass the loop on the shorter piece through the loop in the longer piece. Then pass the upper end of the longer cord around the shorter cord and pull it up from under through its own loop. Now pull both ends to make...
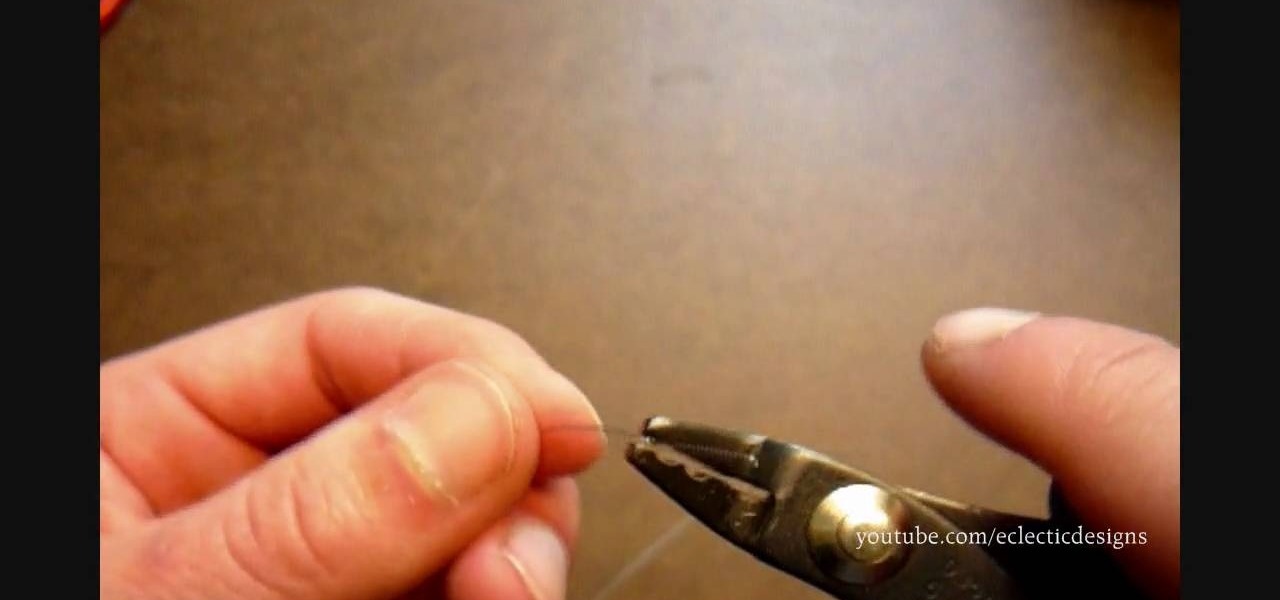
Attention jewelry makers! When making your own unique jewelry designs, one must learn how to secure the end crimp beads with crimping or chain-nose pliers. Crimp beads can be used for finishing off your strung jewelry or as "stoppers". In this tutorial, learn how to hone your jewelry-making skills!
Crochet a cool house-tent for your little homeless friends. This instructional video will walk you through a super simple pet project. Whether you're out to craft dwellings for a dog, cat, pig, or free-range snake, this tutorial demonstrates how to build and combine all the necessary components, including the frames, walls, and personalized decorations. The results are quite cozy.
Materials Needed: - Use a Size K Crochet Hook - 2 strands of 4 Ply Yarn Round 1: Start with the Chain 4, then join and wrap. Pull a loop up. Work 12-Full Size Half Double loops through the loop. Then join in the beginning Half Double crochet. Round 2: Start with a chain (1 loop). then work 2-Half Double crochets, in each stitch around for a total of 24-Half Double crochet on round 2. At end of round 2 join in beginning Half Double crochet. Round 3: Start with a chain (1 loop). Do 1-Half Doubl...
You know how sometimes you'll wake up in the morning gunning for a fabulous hairstyle, then spend an hour curling your strands to perfection only to find that when you step outside it's raining? Rain literally rains on your hair parade because it brings lots of frizz-causing humidity and wetness.
This video explains how to create loose curls and hair waves using only a curling iron. The first step is to treat your hair with some heat treatment spray so the curling iron cannot burn the hair being curled. The next step is to hold all of your hair up above your head and remove hair until your bundles are only an inch thick. After you make your hair into around seven one inch strands you can start to use the curling iron to straighten the hair. The last step is to roll your hair around th...
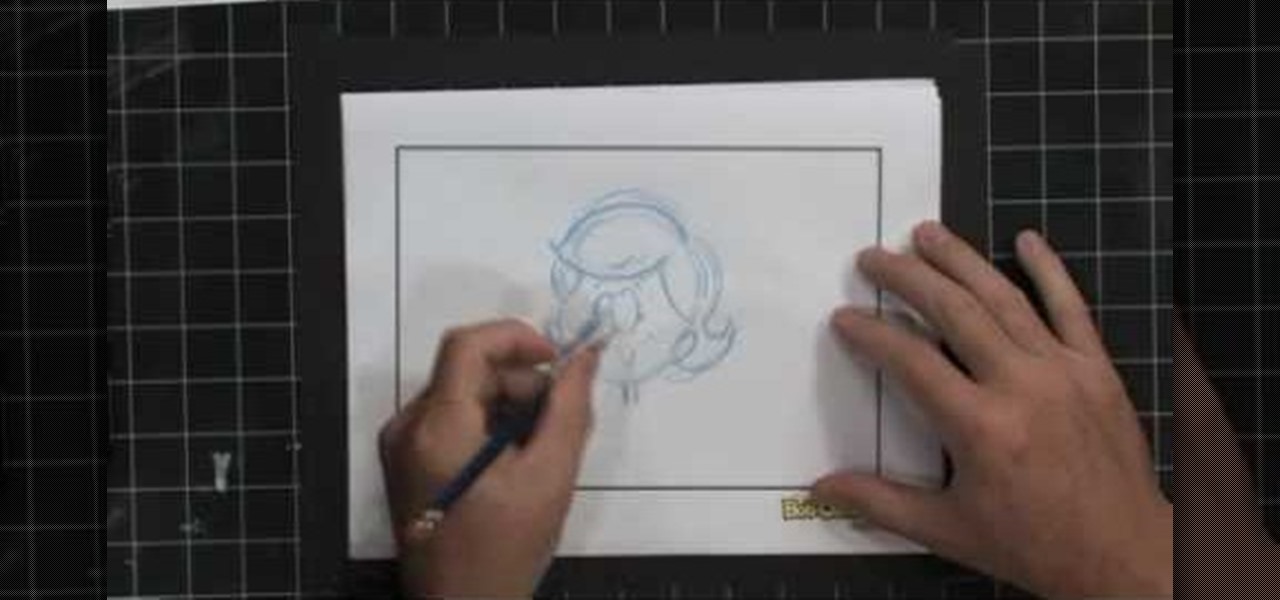
In this tutorial, we learn how to draw detailed hair. When you are drawing hair, you must remember to draw with the shape of the head not just the lines. You should also draw in the lines curved and feather them to show the different strands on the head. When drawing a guy or girl, draw different lengths in the hair and show the waves on them as well. For girls, when you are drawing curls you must make them ring shapes so they curve like curls. Just make sure you draw enough lines to show the...
First things first, ladies: You should avoid any type of heat styling when you can, since heat - duh! - ruins your strands and makes them weak and brittle, leading to split ends and just overall tumbleweed texture, which is not so pretty.
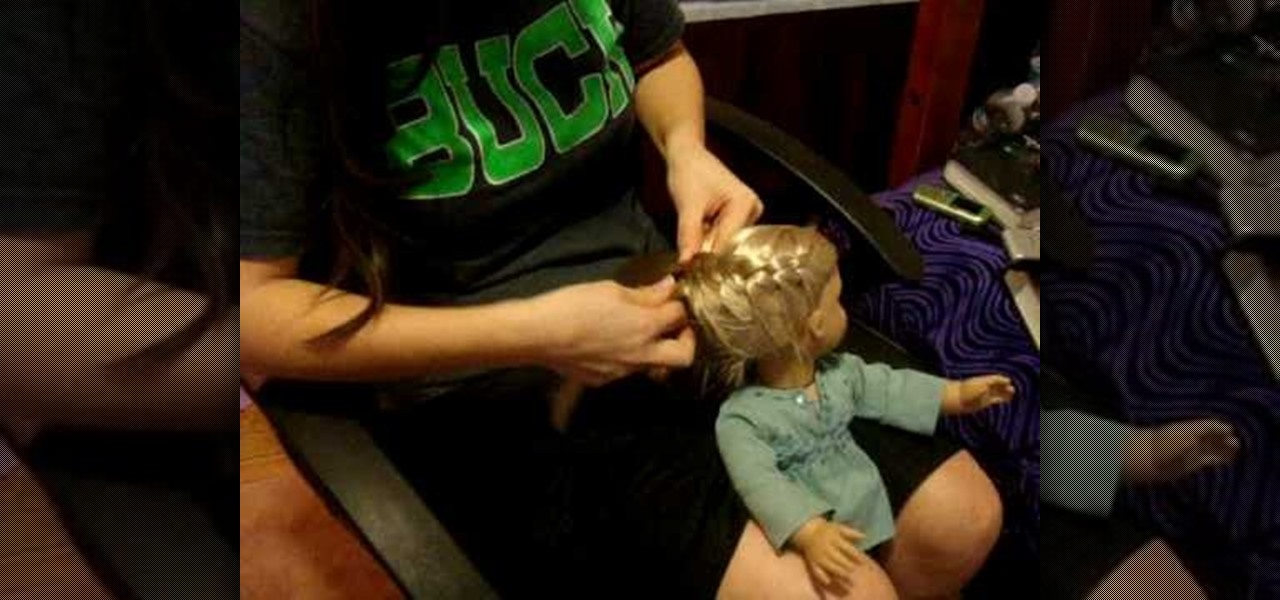
In this video, we learn how to do a French braid wrap around on your American Girl. First, brush the hair out and then grab the section on the right side of the hair. Split this into three sections and then start to braid down four times. After this, you will start to French braid the hair, adding more hair in as you go down. Incorporate the middle strands in and go to the other side as you continue to braid. Pretty soon, you will incorporate all the hair into the braid. Finish this off by ty...
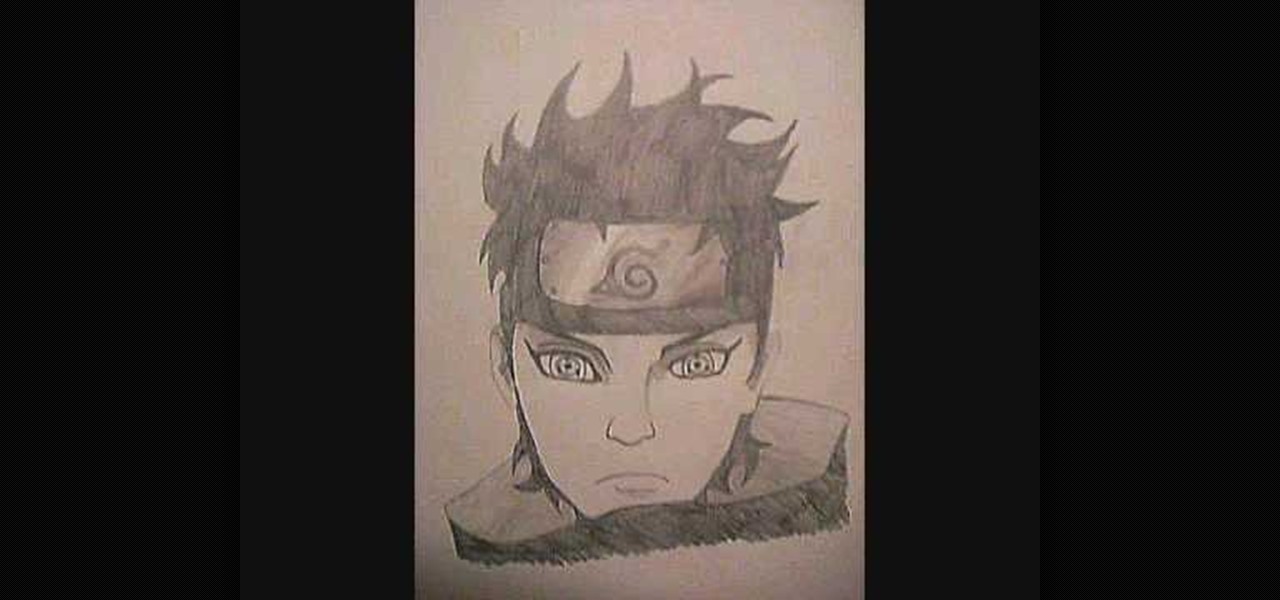
In this tutorial, we learn how to draw Shisui Uchiha. First, draw the outline of the face. After this, draw in the eyes pushing on the pencil harder to make them darker. Then, draw in the band around the forehead and draw in the details of the face as well as the facial features. Add in lines on the face to make it look more realistic and aged. From here, draw in the hair on top of the head, adding a lot of lines to show the strands. From here, draw the shoulders on the body under the head an...
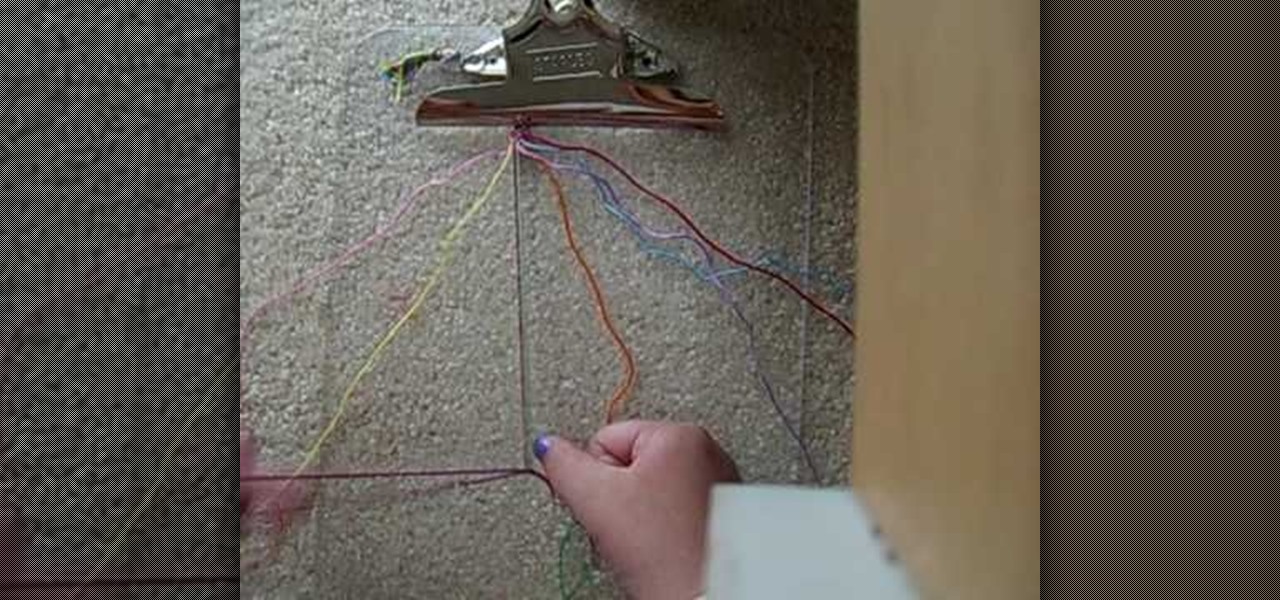
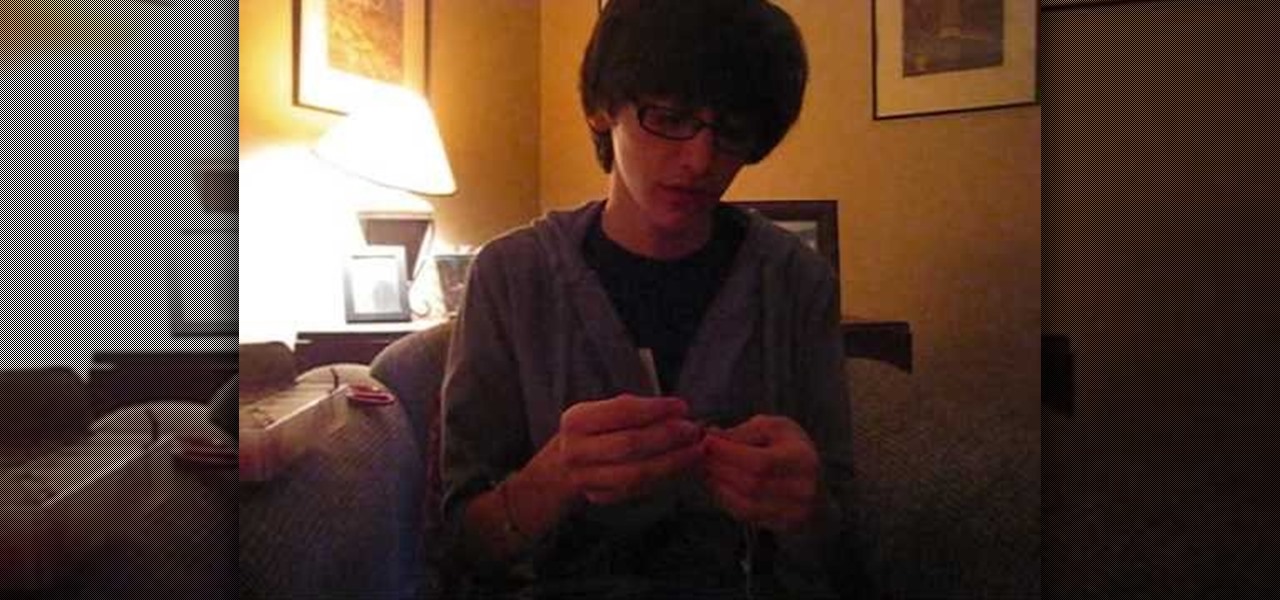
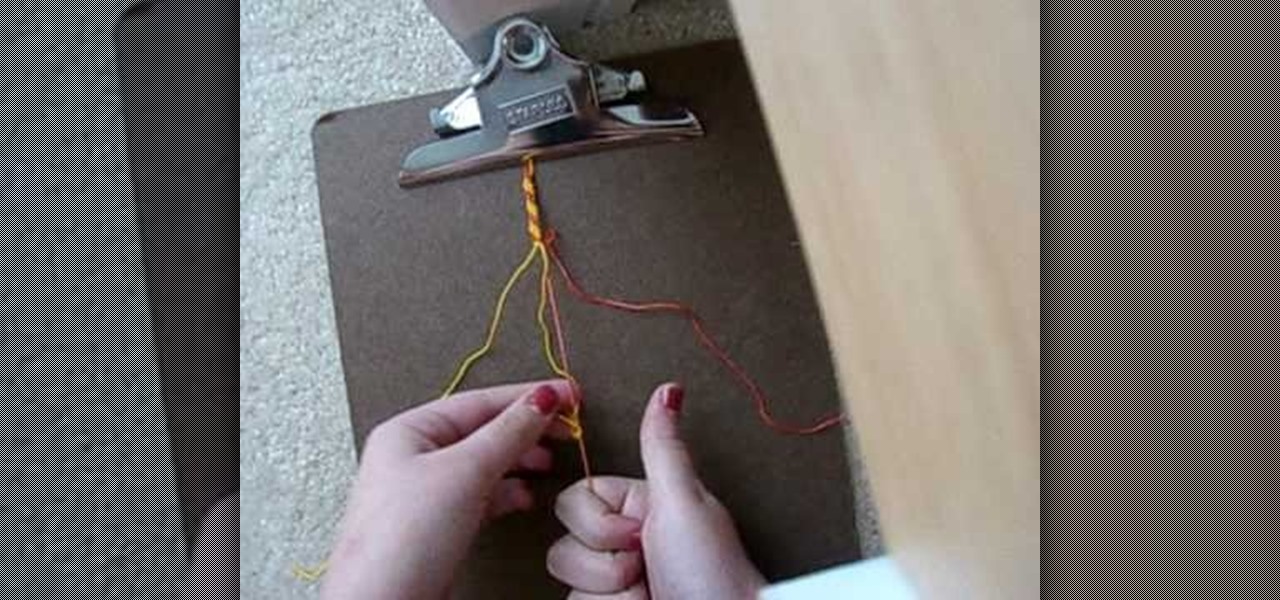
In this tutorial, we learn how to make friendship bracelets: the rag rug. First, grab eight different colors and arrange them all spaced out. Clip them to a clipboard at the top, then take your first strand and make a knot around your second strand twice. From here, you will take your third strand and tie it around your fourth strand. Continue to do this until you reach the rest of the colors that you have twice. Next, take the seventh and sixth strand and make a backwards knot. Then, do the ...
In this video, we learn how to use cones when jewelry making with Christina. First, take a half inch hard wire with a looped end and use a pair of pliers to open up the loop slightly. Next, take your strands of beads and place them onto the loop. After this, close the loop making sure it's secure and the beads won't fall off. Then, take the cone and insert the wire through the wide end and pull it through the narrow end. Using your fingers, bend the wire to a ninety degree angle, then trim of...
In this tutorial, we learn how to do a side headband braid with ribbon intertwined. First, grab a ribbon that is around 32 inches and any color you want. Now, take a chunk of hair on the side of your head, and place the middle of the ribbon underneath it. Now, separate your hair into three sections, then start to braid by connecting the ribbon in with the strands. Once you finish this, tie off at the end. Now, make a messy bun in the back of your hair with the braid on the side still. After t...
First, outline the upper portion and lower portion of the right eye. Make the upper line darker than the lower one. Copy and paste this to create the left eye of your anime artwork. Create the eyeball using the Circle tool. Create two more circles inside the eyeball - one bigger and the other smaller. Make eyelashes by using a set of curved lines. Create at least three thick strands of these eyelashes. Create another circle inside the eyeball that intersects the two smaller circles created ea...
In this how-to video, you will learn how to tie a slipknot on micro braids. First, braid the hair to the desired length. It is good to braid it close to the end, unless the hair is permed. Now, hold the braid and fix it so that it can be nice and neat. Take a few strands of hair and tie it around the rest of the hair. Now loop it around the finger holding it and put your thumb inside. Make sure to tie it up. Do the same thing about three or four times. Once this is done, take part of the same...
In this video tutorial, viewers learn how to make a natural and inexpensive Christmas wreath. The materials required for this wreath are: some greenery, garden wire, pair of pliers, ball of string, scissors and ribbon. Begin by cutting the wire into 120 cm and bend it in half. Now weave the strands together and bring the ends to each other. Hook them and twist it together. Now weave the greenery along the wire. Tie down the greenery with some string to secure it. Finish by trying the ribbon o...
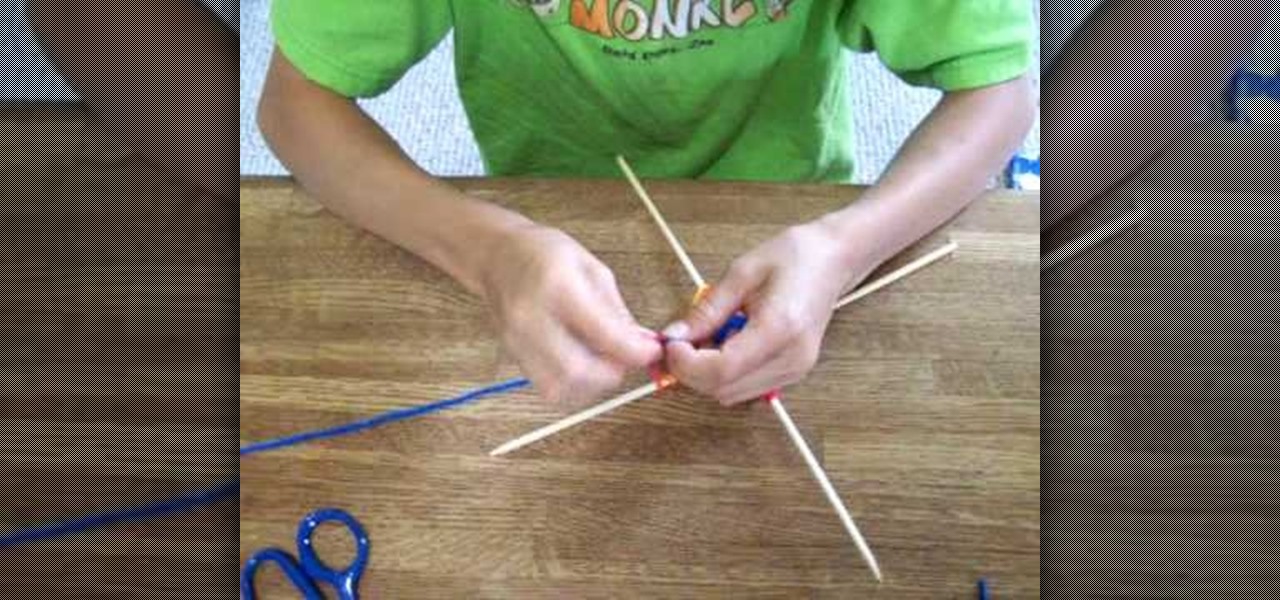
In this video and boy and a woman are showing you the steps to create a "God's Eye" or "Evil Eye". The materials that you will need are 2 sticks, yarn of your selected colors, and scissors. First, you take 2 sticks and use the yarn to knot around the middle wrapping diagonally to form a "t" shape. Then you take another piece of yarn, hold the end in the middle, and start wrapping around each stick going over one and under the next. Continue this pattern until you are done or unless you decide...
Follow along as we are given instructions on how to style a messy ponytail with a bump for a quick on the go look.
In this video we learn to make a zigzag Chinese staircase friendship bracelet. You can go wild and make it all different colors or all one color. You start off with 5 strings about a yard long and fold then in half. Then you make a knot creating a loop for the end and to hold to a nail or clip while you make it. Take a strand and make 5 forward knots. With the same strand you then do 5 backward knots. Repeat this one time, so in all are 20 knots and then switch color, or to another strand. Do...
Want to take your bob from straight and boring to curly and sexy? This video shows you how! First, spray a heat protectant on your dry hair, then put up most of your hair so you are working with the bottom section of hair first. Take your curling iron (whatever size curls you are looking for, smaller with create tighter curls, bigger will create looser curls) and start curling about one inch strands of hair. Alternate directions for a more natural look. Repeat the process with small sections ...
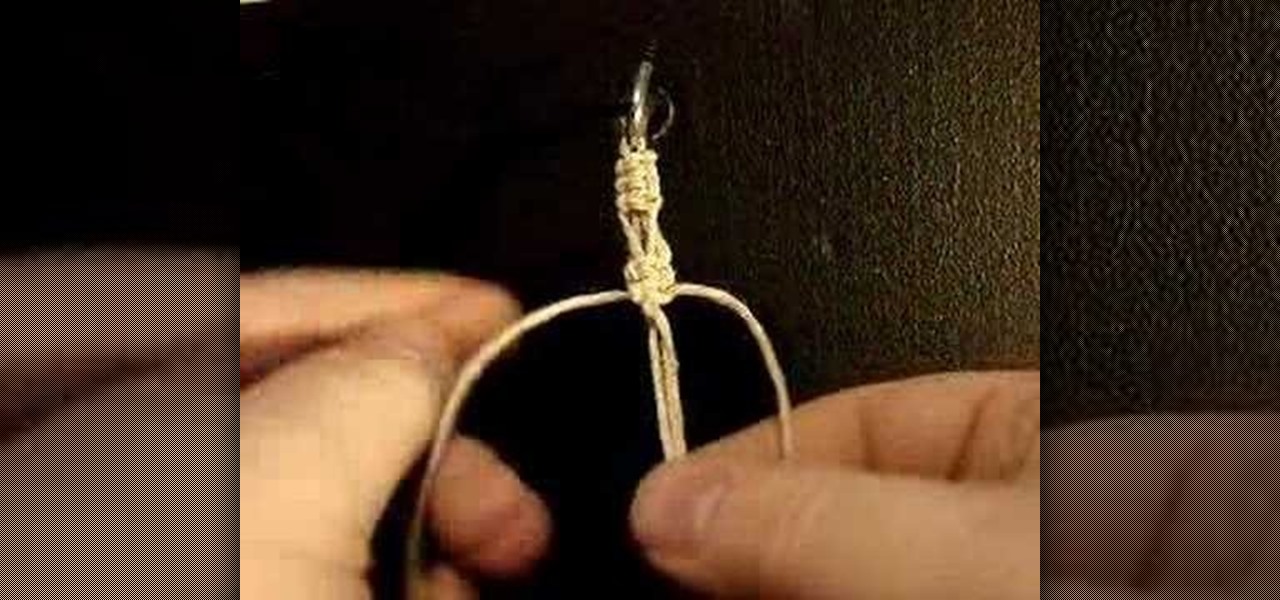
Utleyville Hemp teaches us how to tie a slide loop clasp for all your hemp jewelry. First tie three square knots at the top then tie something like a switch knot. First take your knotters and bring them to the inside and tie a square knot or two square knots if you feel like it. Next tie the parts of the bead carrier together. After that tie some more square knots. After you're finished tying your jewelry, finish it by tying an overhead knot, leave a gap, and tie another overhand knot. Stick ...
YouTube user DrawingNow teaches you how to draw Kim and Ron from Kim Possible. You start with a green background and use a pencil to sketch their bodies. Start with a simple circle for the head and then add ears and hair. Add the neck connecting to the body and a fist extending forward. Draw the other hand and remember the pants and shoes. Next start with an oval for Ron's face and draw larger ears, but smaller hair. He's also in an action move, so reflect that in the way he holds his hands a...
The Hempdiaries believes that you too can create a bracelet using hemp and jewelry accessories. The narrator first begins by showing you what the two mandatory materials you will need which are hemp and a dowel rod. To begin he shows you how set the dowel rod between your knees to provide a foundation for the string and then an arms length of two pieces of string folded in half. Tying the string around the dowel rod he shows you how to begin the flat pattern for the hemp bracelet and that thi...
This video describes the method of creating a "Flip Flop Candy Stripe" friendship bracelet using 4-8 strands of string and a clipboard. It is a step by step tutorial made by a young female with both visual and verbal instructions on the process of making the "knots". Throughout the video the girl narrates some aspects of her recent activities and keeps the attention of the viewer making the lesson more entertaining and enjoyable. After watching this video you should have a good understanding ...
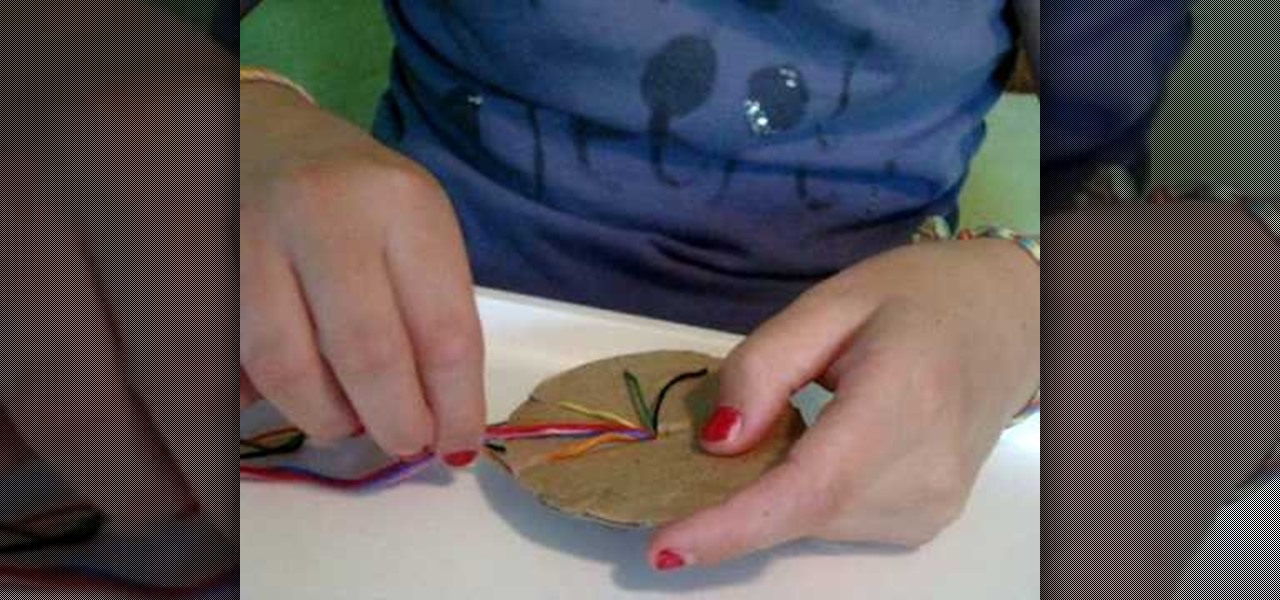
A little girl from Live Love Embroidery explains, in this video, how to make a circle woven friendship bracelet. The process involves seven strands of embroidery thread tied at the end with a simple half-hitch knot. The knot is fed through a small hole in the center of a circle of cardboard. The strings are then individually latched through seven of eight notches located at the end of the cardboard. After that, rotating in a circle pattern around the cardboard, the strings are exchanged aroun...
Toni and Guy Vancouver show you how to French braid hair. You should sweep hair in the front to the side. Then starting at the crown of the hair you should start your braid. After braiding a few strands you then start adding in pieces of hair while braiding keeping the tension and pulling tightly. You can either choose to put a band in the middle or braid down to the ends. It's supposed to look messy and sexy.
This video is a tutorial on how to create "friendship bracelets". In particular this style is called the "Egyptian" which is a particular style. You need to make two forward knots on your most left strand, you then do it with the next strand only this time you make a backward knot (two of them.) The most inner color you pick (you must pick four different colors, two strands each) will be your most prominent color. You continue this front knot, backward knot pattern etc, and eventually you wil...
Showing you how you can create the French braid look even with short layered hair about five inches in length. Starting at the front of your hair you begin the braiding process by gathering three lengths of hair. As you go further back you continue to gather hair into the braiding strands to continue the French braid look all the way back and secured with a scrunchy at the end to make a longer French braided style look otherwise not creatable with regular short hair. Easy to repeat and follow...
The eye splice might sound like some horrible procedure from the lab of Dr. Frankenstein, but it's actually a very useful skill to learn for camping or disaster preparation. Eye splicing is a way to secure different strands of rope together so they're stronger than a knot. In this tutorial, the guys at ITS Tactical show us how to do an eye splice.
This how-to video demonstrates a way of tying a bowline to adjust the snugness of the bowline on your winch or whatever you have tied it to. Tie the bowline as usual. Pull the top of the eye and the bottom of the turn apart then pull on both of the strands exiting the loop to capsize the knot. Then snug it up and reset it. Watch this video knot-tying tutorial and learn how to tie an adjustable bowline knot.