Michelle Stewart of BodhranExpert.com demonstrates to viewers how to treat the skin on a Bodhran drum. The skin on this particular drum is made of goat skin and, much like your own skin, must be treated with a skin-conditioning treatment in order to maintain proper moisture.
This video demonstrates how to make a broken mirror effect using Photoshop.

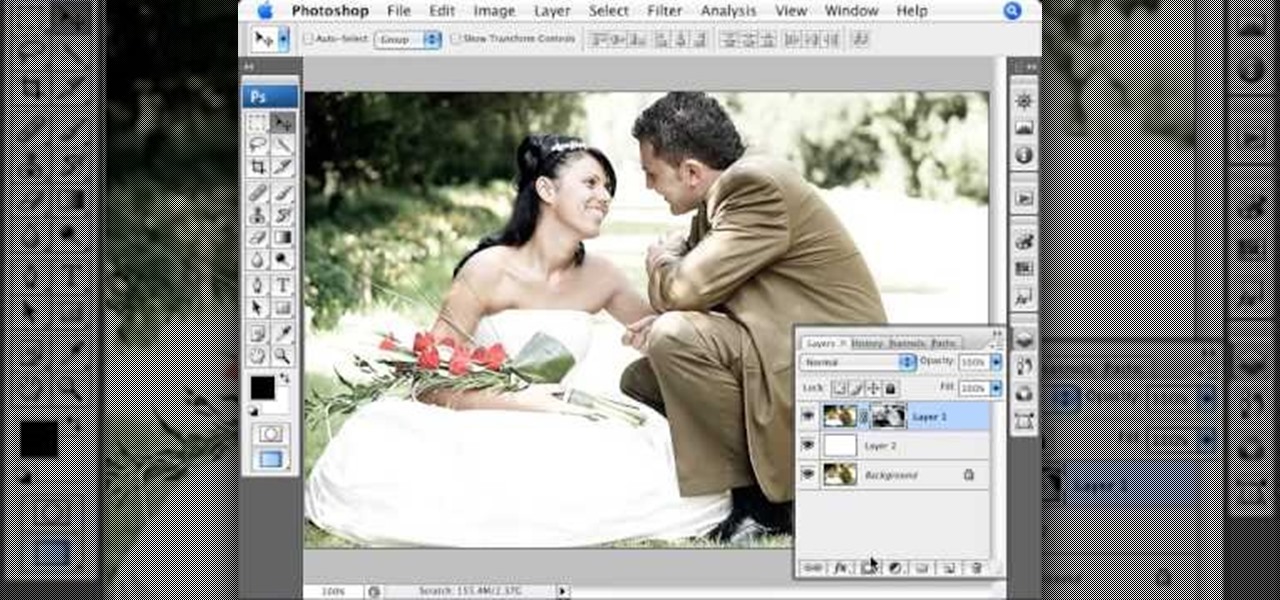
Layers are very important component of Photoshop. Without knowing how to use the layers correctly, one can not utilize the maximum what Photoshop offers to designers and digital artists. For a beginner, this video provides a good basic knowledge about Photoshop layers. Layers enable you to arrange different parts of a picture and manipulate them without effecting the content of other layers. Layers are added by using layers panel. Each layer is named accordingly. We can change the order of la...
Learn how to toggle layer visibility in Photoshop in this video tutorial. Nocole Young will show you how to do this easily. When you are working on any image in Photoshop, you usually create a number of layers. You would like to see what the image will look like before you start editing the image. You can always toggle the visibility between the layers by clicking the ‘eye-ball’ toggle on the right hand side of the page on the layer panel. Click the ‘eye-ball’ toggle next to a layer and you w...
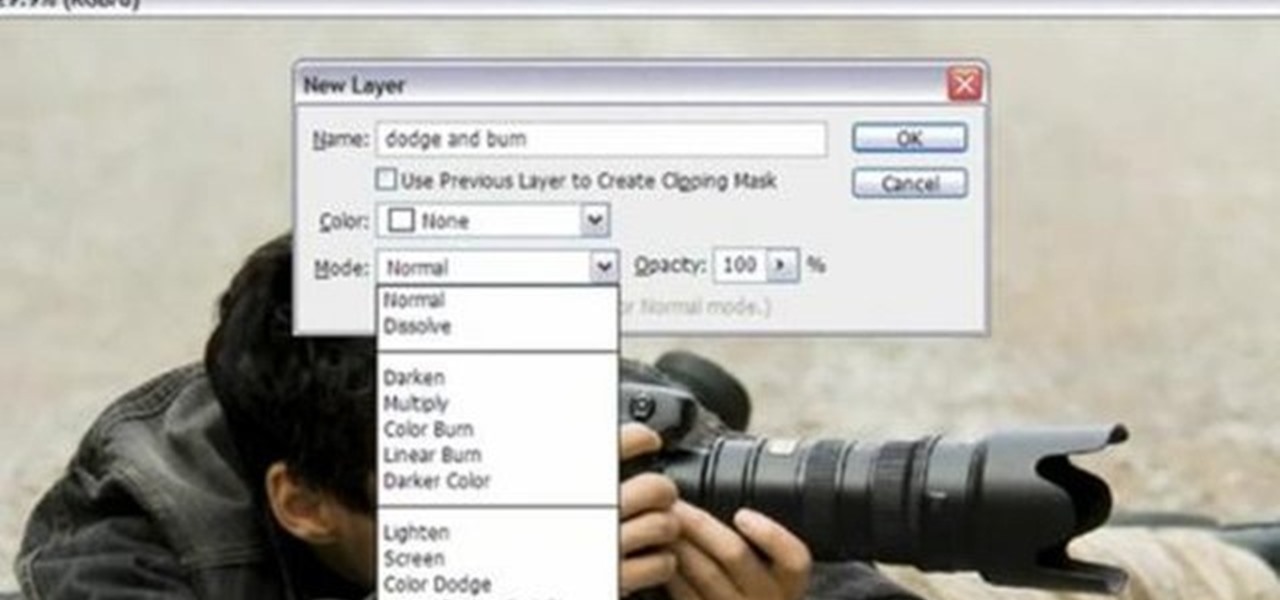
Yanik Chauvin demonstrates how to do Non Destructive Dodging (lighten) and burning (darken) of images using the tools in Photoshop. He shows the image of a man lying on earth with his camera. To start the work he wants to make a new layer which can be done in two ways either by clicking on the ‘layer’ button on top of menu or by pressing down the alt key and clicking on the new layer at button of the layer palette. It will bring up the dialogue box. He named it “dodge and burn” and from the l...
Click in File and New to create a new document, press OK and select the text tool and click once on your file and write something, then close the window. Click in move the active layer to make easier to move the text. Go again to the text tool and click on the Color to change the text color. Press Crtl+O, select the background layer and change the color to the one you want, now select the bucket tool and click on the background to paint it with the color you have selected. Go back to the text...

Watch this video to learn how to make marble cake. Stir margarine and sugar light and porous. Add the eggs, one at the time. Stir well between every egg. Mix in wheat flour with baking soda and skinned milk. The pastry should be well blended. Take one third of the pastry and mix in cocoa, vanilla sugar, sugar and skinned milk. The cocoa pastry should have the same consistency as the light pastry. Put half of the light pastry in the prepared pan and allot it even outward. Then put in the cocoa...
This Adobe Acrobat 9 Pro tutorial shows you how to work with layers. Learn how to view, navigate and control layers in Acrobat 9. Also learn how to add a PDF page as a layer, and use Adobe 9 Pro Preflight tools to assign objects to different layers. Great tutorial for anyone new to using Acrobat Pro, or needing to view the newer tools in Acrobat 9 Pro.
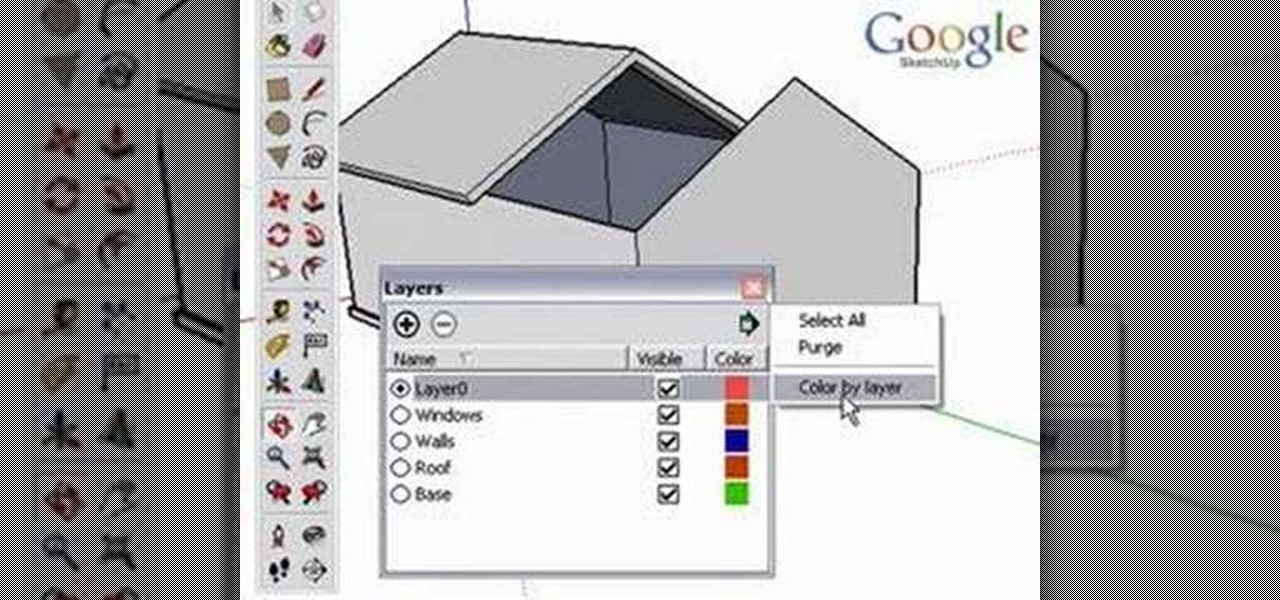
Using layers in SketchUp is different than many other applications. This instructional video to learn how to use layers, the layer dialog box, as well as some layer tips. In other applications, layers control actual geometry. This is especially true in CAD software. SketchUp's layering system only controls the visibility of the geometry, not the actual geometry itself.
Having a little trouble putting skin on your 3D animated characters in Autodesk Maya 8.5? Well, check out this five-part video tutorial on how skinning is done for your animation. You'll need those bones built, a nice skeleton structure to put some skin on, so get started. In this video you'll see how to bind bones together, create geometry, make your character move, and skinning. So, if you want to make a realistic skinned character in Maya, go no further.
Fight your acne with the use of French green clay. In this video, learn how to use French green clay to fight infections and reduce inflammation. This remedy is used to calm down acne, or irritated, red skin and is perfect for sensitive skin. You can purchase French green clay at almost any healthy & beauty store. Also gone over? The rose petal steam method, an oatmeal scrub, and an Aspirin mask. Follow the below instructions to a more beautiful you!
Maverick Television, from the United Kingdom, explains what stretch marks are, why they are undesirable, and some of the ways doctors treat them. But the more useful part of the video are instructions how to avoid having stretch marks in the first place. The Embarrassing Illness Clinic specializes in medical ailments which sap people's self-confidence. One example is the problem of stretch marks. Using the case of Jasmine Anne Smith, the clinic's physicians explain that stretch marks typicall...
The Style Diet's Anna Saccone takes us through the process of getting a gold and smoky eye look using basic everyday makeup!
Not everyone in Hollywood owes their nice complexion to a dermatologist. Here are some homespun beauty secrets you can steal.
This video explains the easiest way to get rid of the oil on your skin is to use blotting paper, and light dab it on oil spots on your skin. Do not rub it, dab it on the skin, the blotting paper will absorb the oil on your skin without adding dark colors onto your face that other papers would. If you have trouble finding blotting paper, a easy way to find some is go to a public washroom, and get the toilet seat paper that people use to put on top of toilet seats. They are the same material as...
In this Photoshop tutorial the instructor shows how to mask a photo to itself and produce a glowing effect. First open the image in the Photoshop tool and duplicate a layer and add another layer in between filling it with white. Now select and copy the whole layer. Add layer mask to it and alt click it. Now paste the copied layer on the masked layer. Now do the control+I to invert the masking. Now the images gets a glowing effect on which you can apply the glossy effect on it. Now merge all t...
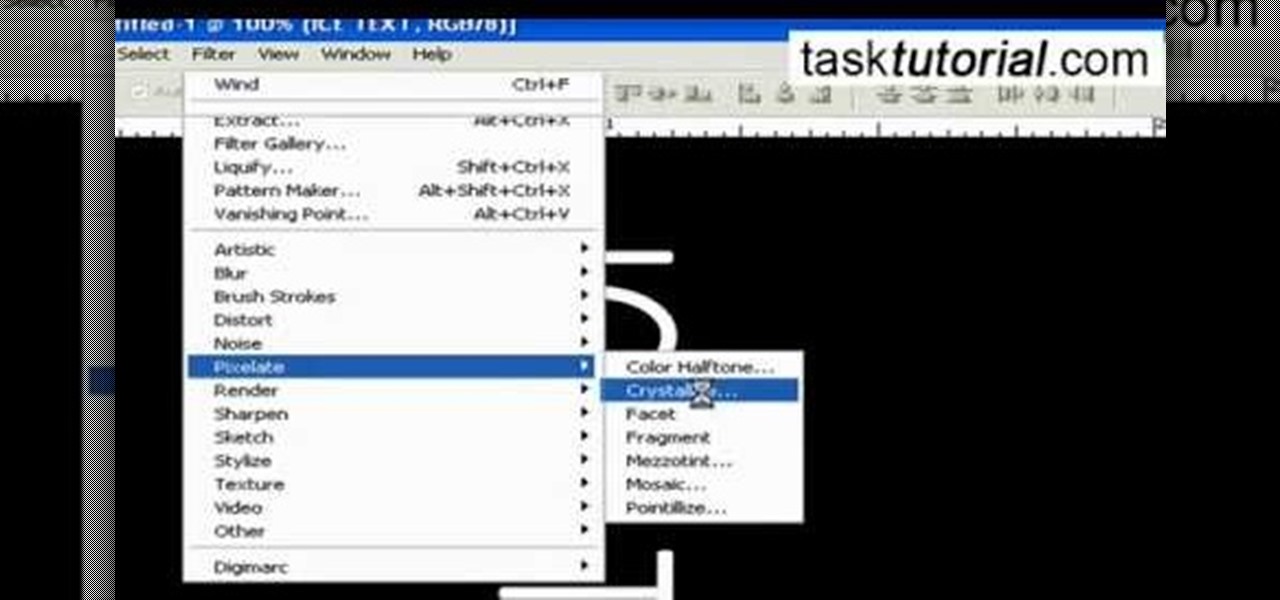
It is a tutorial that how to make an ice text effect on Photoshop. First create a new layer select paint bucket tool switch black color and paint the layer now create an other layer, choose type tool then switch the white color and create a text "ice text" after go to layer pallet merge the layers after that again create another layer select paint bucket tool and select black color now select ice text layer then go to image menu rotate canvas click clock wise then go to filter choose crystall...
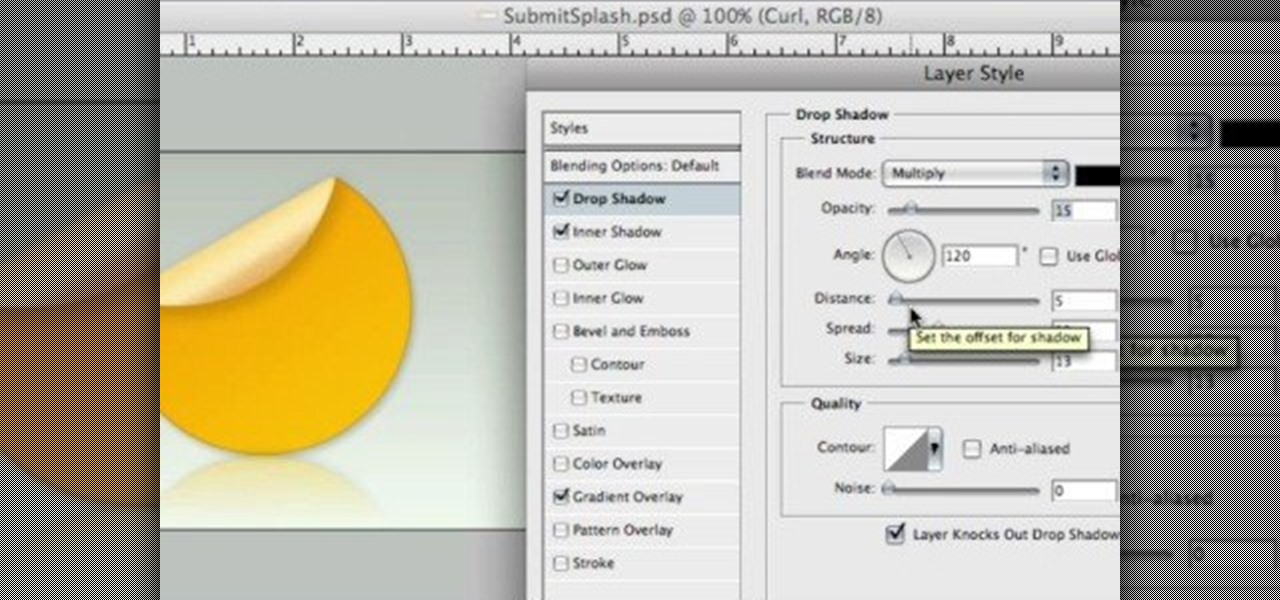
This image editing software tutorial shows you how to separate layer styles in Photoshop CS3. Learn how to separate your layer styles from it's parenting layer in Photoshop!
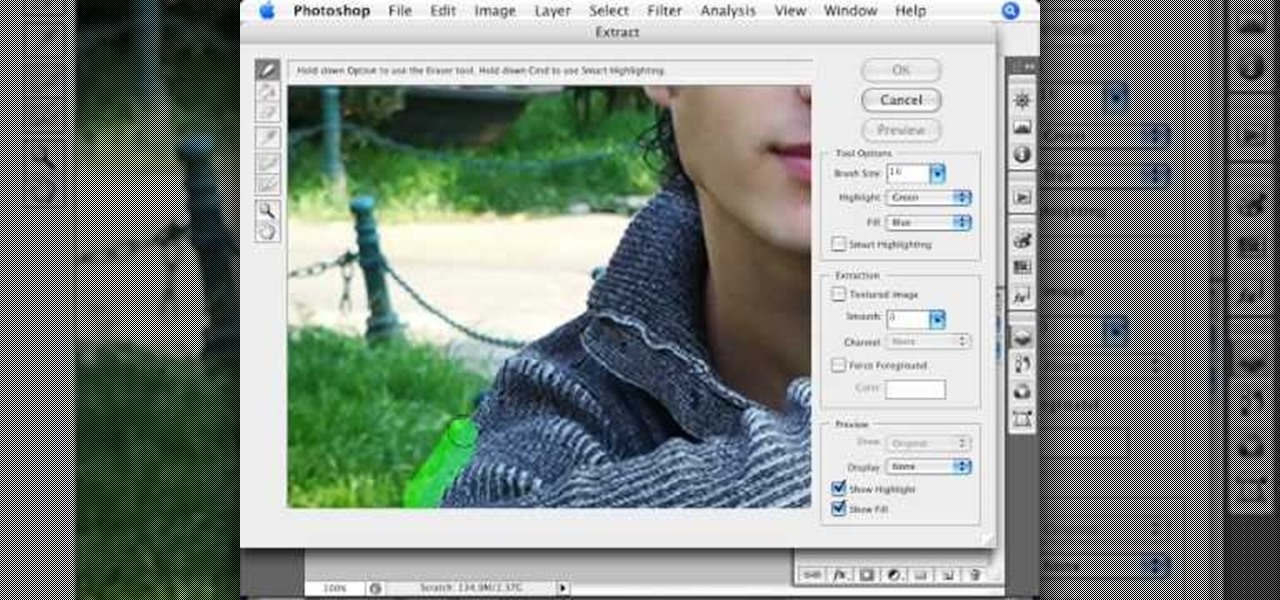
This is a tutorial in Adobe Photoshop CS2 demonstrating primarily the use of the quickmask tool to make precise selections of organic shapes. Other topics covered include adjustment layers and layer masks. So watch and learn how to enhance photos using quickmasks, layer masks and adjustment layers in Photoshop CS2.
Remember that feeling when you first took your smartphone out of the box, powered it on, then proceeded to futz around with it for the rest of the day non-stop? If you've owned your device for more than a year, chances are, that scenario is a distant memory by this point.
No matter how fresh, sharp, or clean a razor is, it can still create an itchy, inflamed trail of razor burn bumps. When razor burn appears, it's unpleasant, and can even affect your next shave.
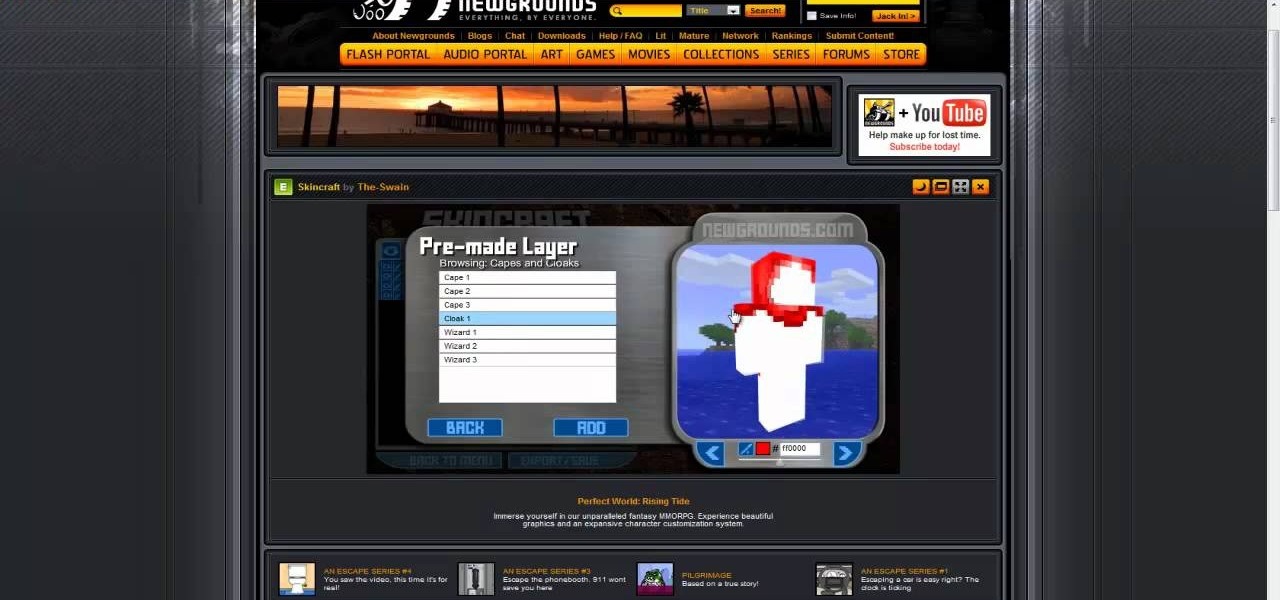
Check out this video to learn a great way to customize your Minecraft skin with Skincraft. Skincraft is a Minecraft skin creator that you can use to make your own Minecraft skin. Make your own character to explore your Minecraft world!
Bathing a baby means not only keeping them clean, but also taking care of their skin. This video shows you how to keep your child's skin soft and well moisturized. Make sure your baby doesn't continually suffer from dry skin, and always moisturize after a bath.
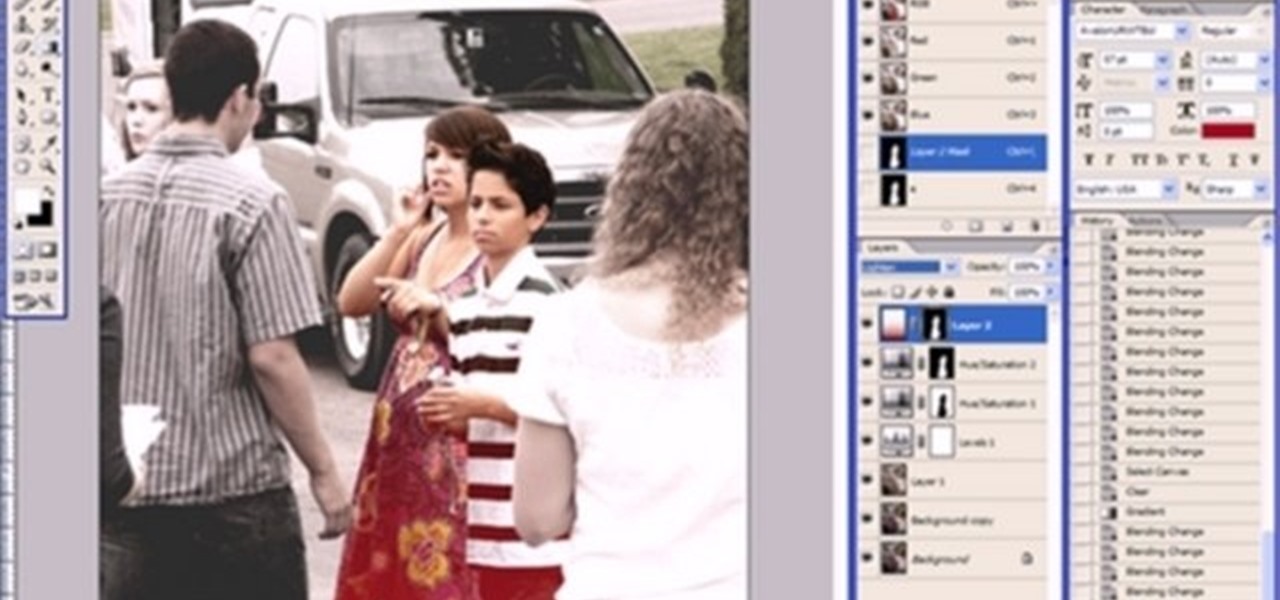
If you're taking a portrait with multiple people, you might end up with different skin tones as the light hits each subject differently. This tutorial shows you how to even out the skin tones for multiple subjects using the retouching tools in Adobe Photoshop CS5.
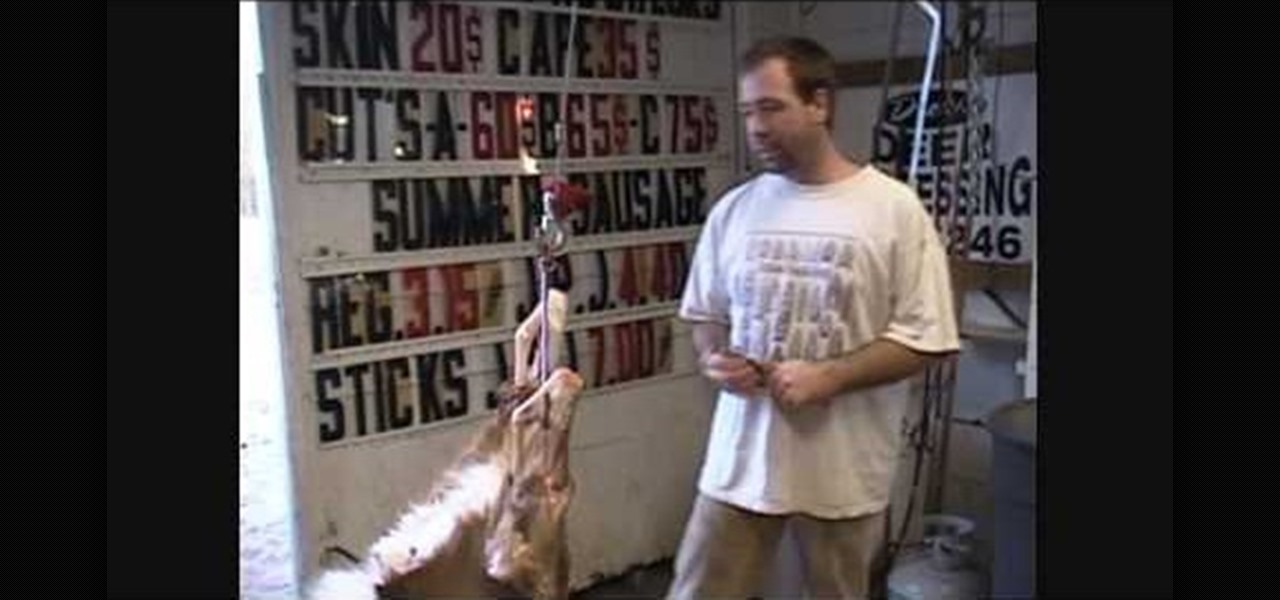
In this tutorial, we learn how to clean a coyote. Start out by cutting the legs and up to the inside of the rear end. Cut the skin around the feet and then peel the fur and skin upwards. Trim into the butt of the coyote, then cut around the tail into the middle. Keep pulling the skin up around the legs of the animal and around the thighs, using a sharp knife to loosen the skin. Remove the skin completely from around the legs, then cut the tail so only the bone is left and the skin is off. Aft...
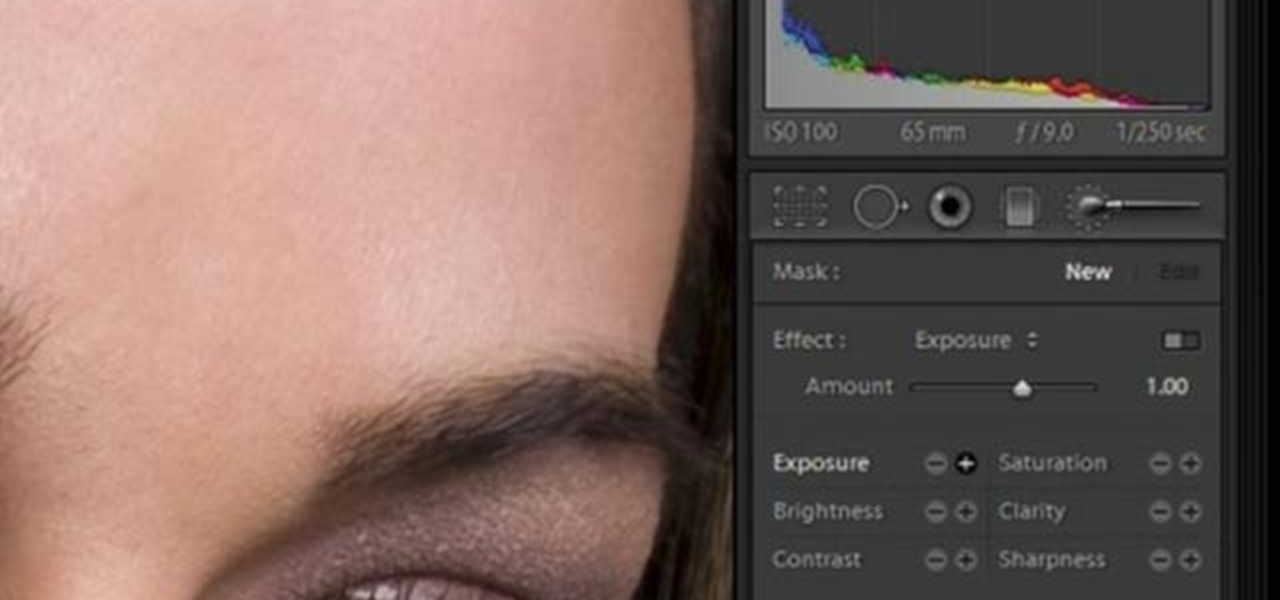
In this software video tutorial you will learn how to soften skin feature in Lightroom 2 in Yanik's Photo School. Select a photo and zoom in to the skin area. Click on the adjustment brush, or ctrl K. Here you can adjust 7 features; exposure, brightness, contrast, saturation, clarity, sharpness and color. But, if you click on the other 'exposure' dropdown menu, you will get these 7 options and additionally a 'soften skin' option. Click on 'soften skin' and it gives you the options to add nega...
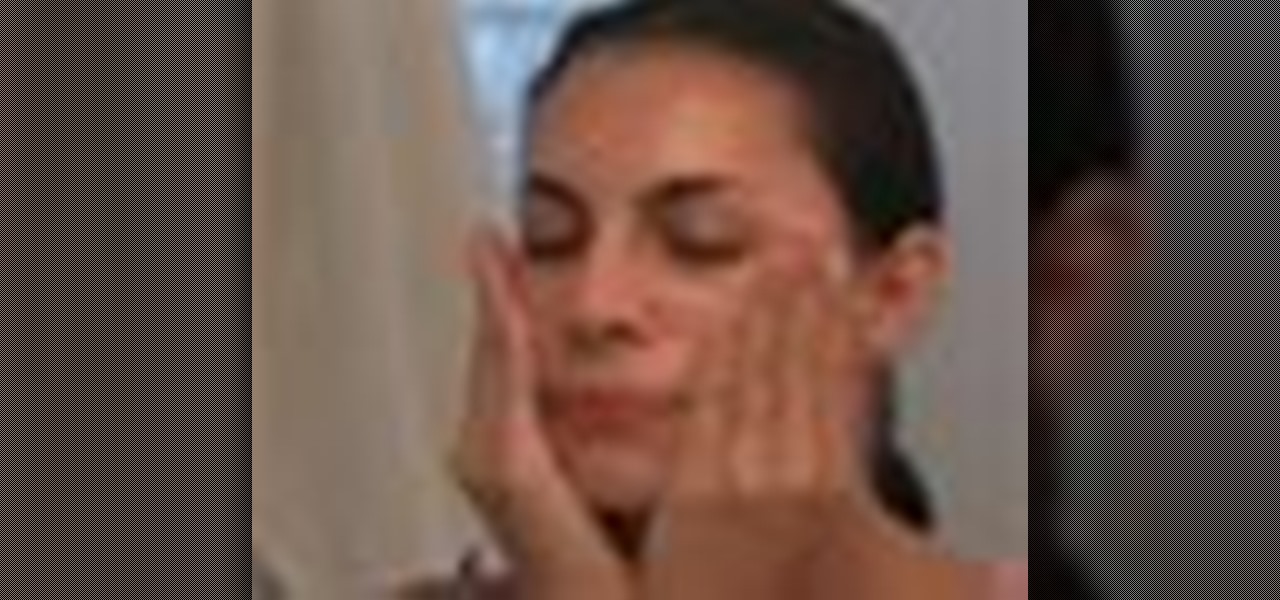
Learn about skin softening techniques and the controlling of color and tones when working in Adobe Photoshop! Whether you're new to computer graphics, new to Adobe Photoshop CS4 or a seasoned design professional just looking to pick up a few new tips and tricks, you're certain to like this free video software tutorial. For more information, including detailed, step-by-step instructions, and to get started managing skin tones in Photoshop yourself, watch this designer's guide!
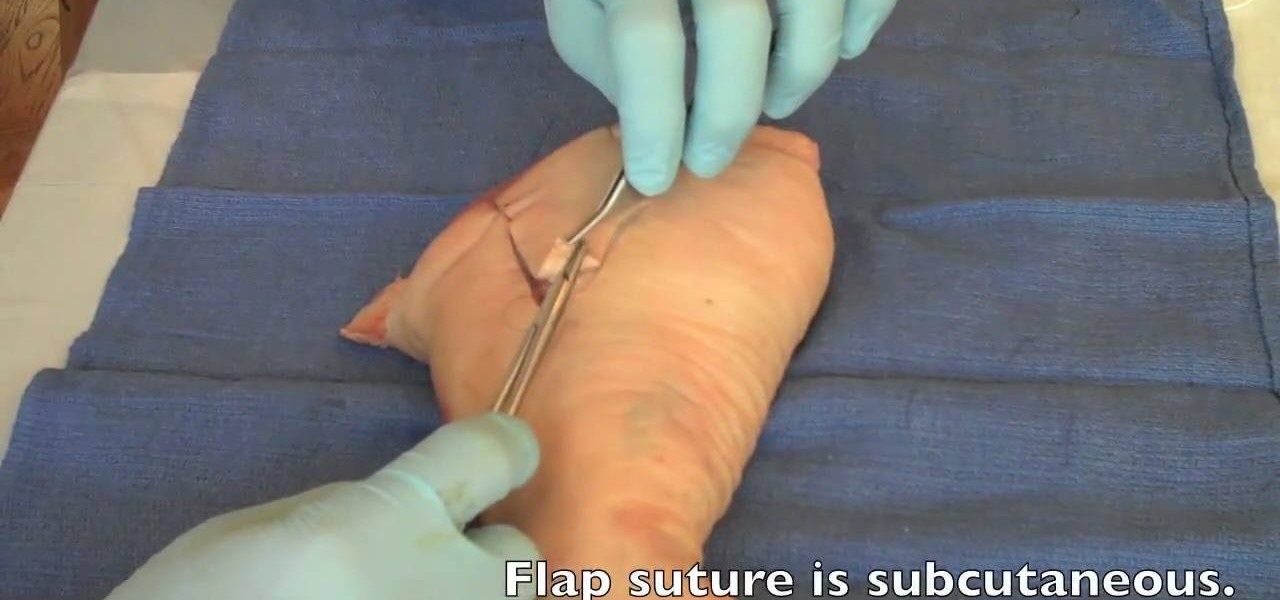
Many lacerations feature skin flaps dangling from the wound, begging to be reattached. It is very challenging to suture such a wound and reattach the skin without causing it to bunch up or hang too loosely. This medical demonstration video features a doctor explaining how to do just that, performing a flap suture quickly and efficiently.
This 3-part video tutorial series will show you a very thorough way to skin a deer. This method of skinning of deer will provide the best shape and condition for your next step - brain tanning. Follow along with each step of the way, and make sure you're using an ultra sharp knife to eliminate the dangers of accidentally cutting yourself.
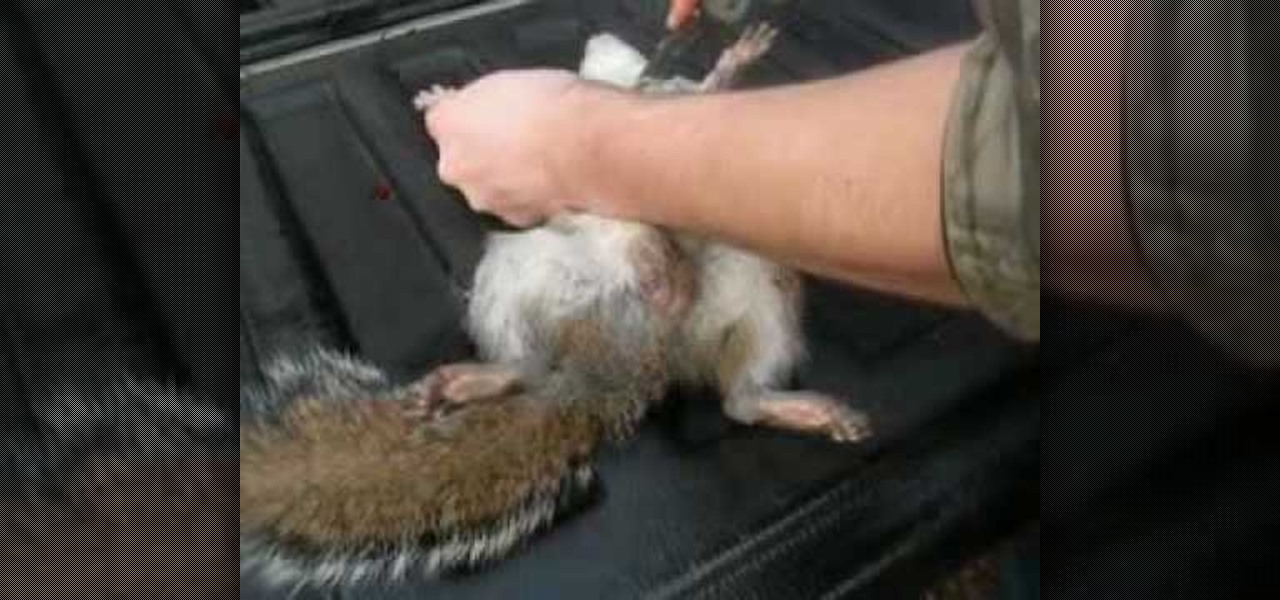
Viewer be warned! This video series is not for the faint of heart! If you think you can handle the contents inside, then you're about to get an in depth lesson on the proper way to skin a squirrel. This three part video series will show you how to skin a squirrel.
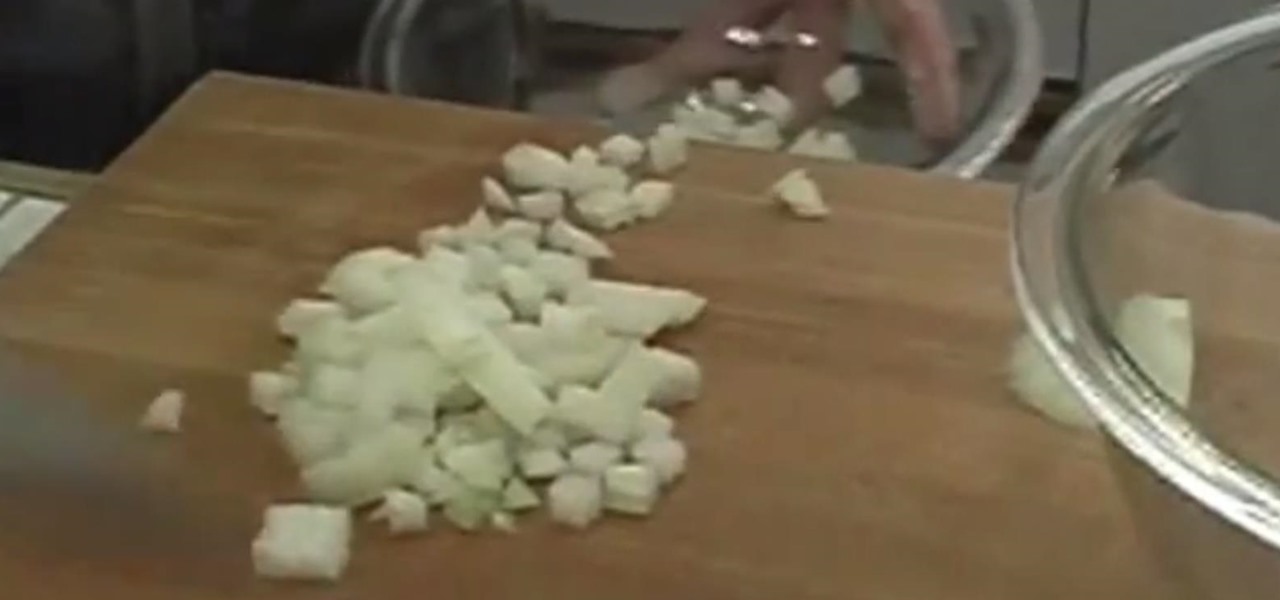
How to dice Onions ( easily and quickly)
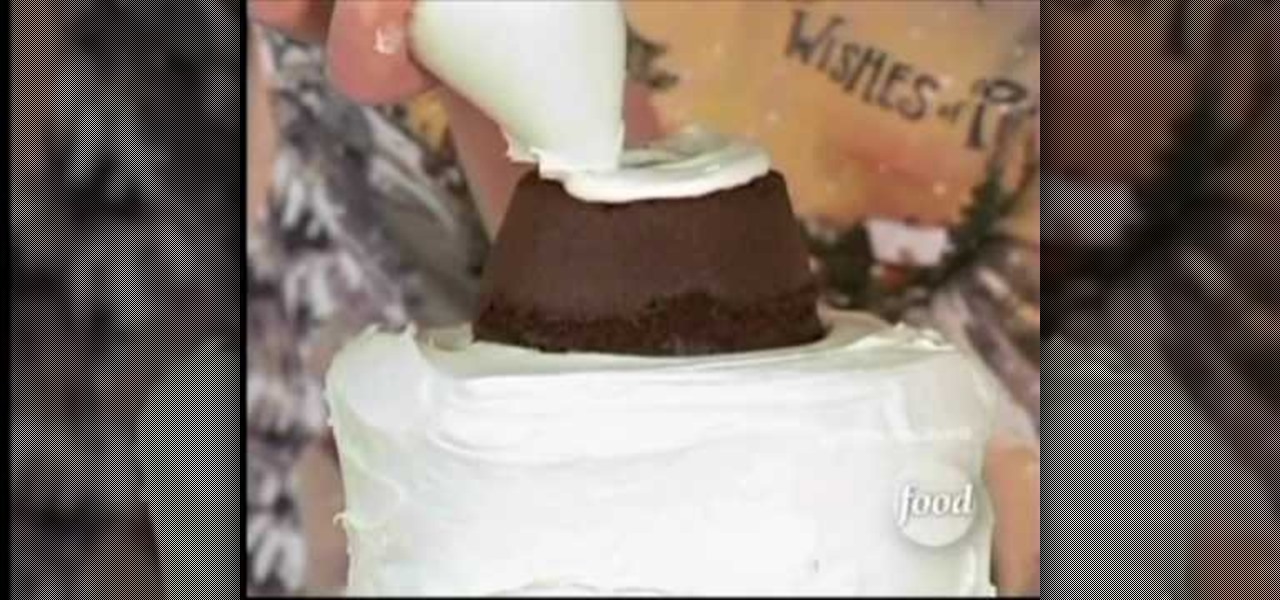
To decorate a noel cake, buy four layers of chocolate (two large sized, two small sized), two layers of spice cake (two medium sized), and a chocolate cupcake. Using a long serated knife, trim the tops of the cake to make the even. Put the one of the large chocoate cakes on your serving plater and put some frosting on top to "glue" it to the next layer. Now put the other large chocolate cake on top and gently press it into place. Frost the sides of the layer. Place a cardboard circle that is ...
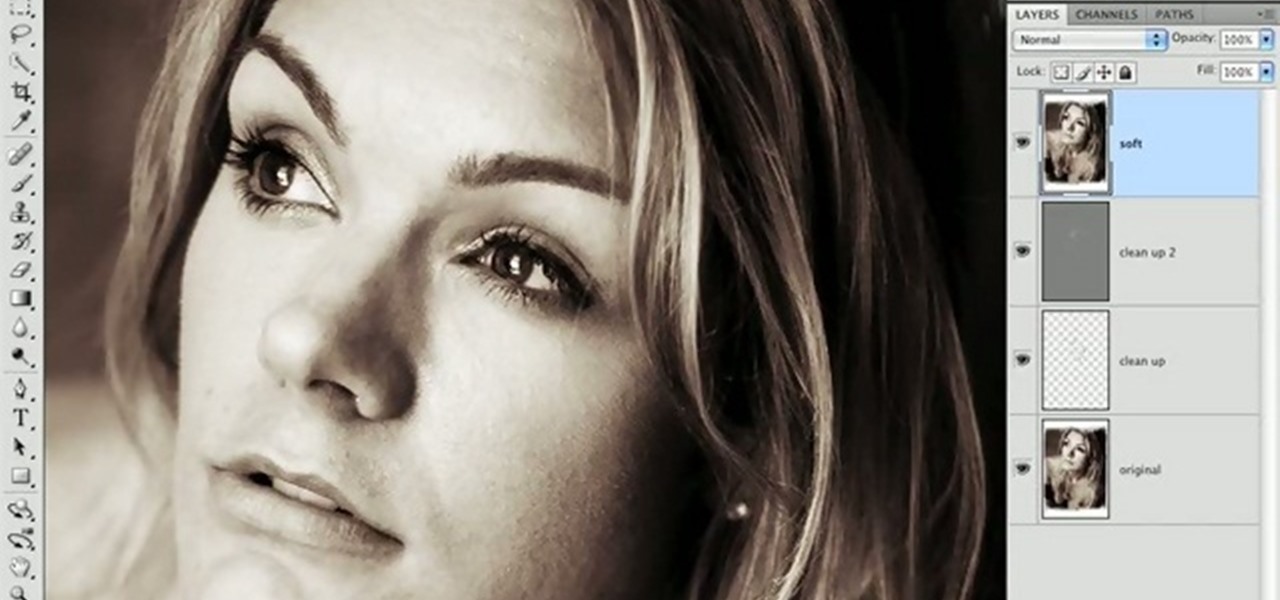
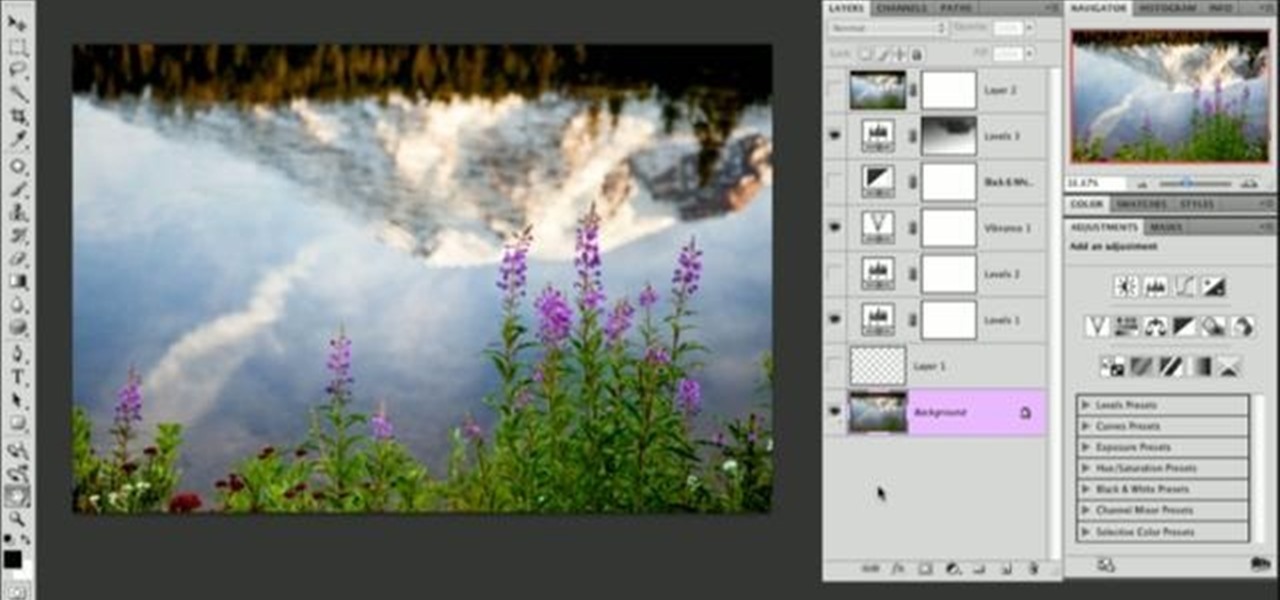
If the subject of your photos has skin imperfections, it is very easy to fix this in Photoshop. If you do not have the time to do each individual blemish, or wish to simply give the skin an overall fresher look, check out this tutorial.
Michael Andrew, from Meals Americana, gives us some interesting tips on dicing an onion without tears.
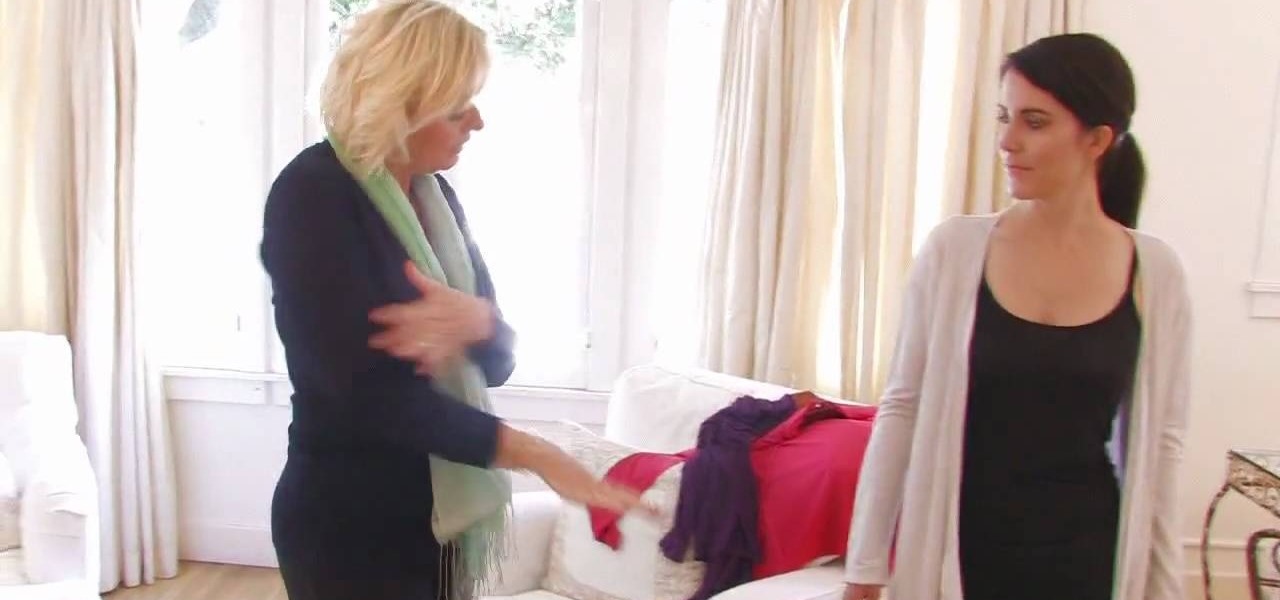
In this video tutorial, viewers learn how to layer clothes fashionable. When layering, do not wear thick clothing to avoid bulkiness and thickness. Wear thin clothing to make the layer more thin and less wide. Make sure that length of the clothing is right and vary in length. Use layers to flatter various parts of the body. This video also provides a visual demonstration of how to layer a shirt. It has 3 different layers that all vary in length. This video will benefit those viewers who are i...
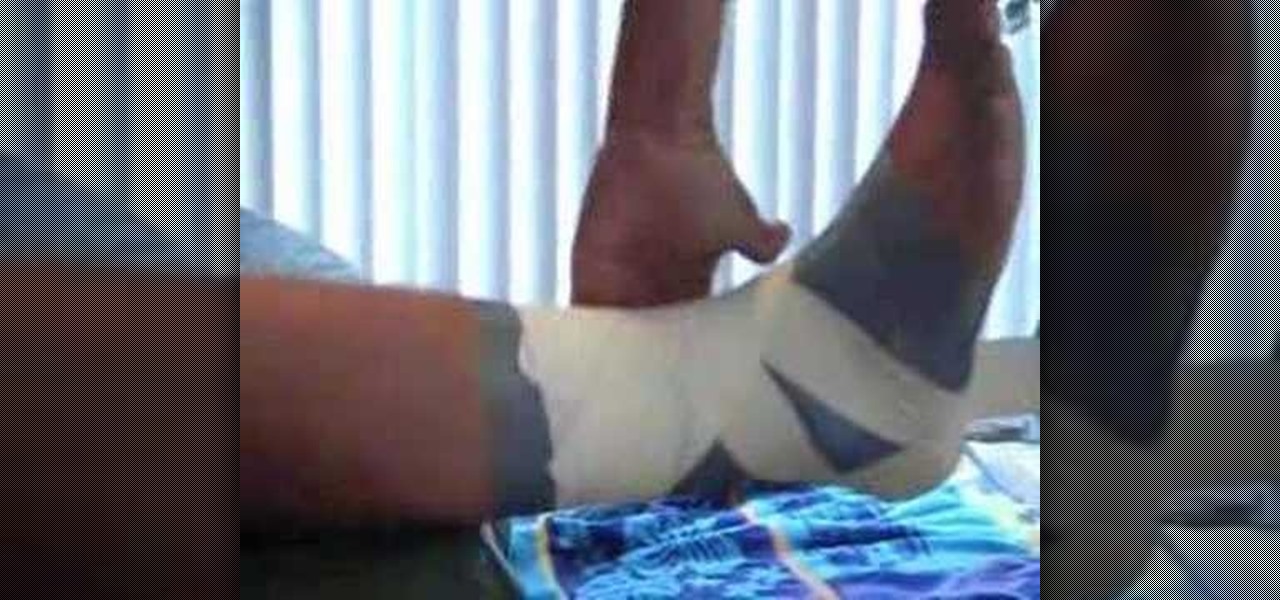
Use tough skin spray adhesive, under wrap or pre-wrap, athletic tape to wrap an ankle. Position ankle in 90 degrees of dorsal flexion. Spray the adhesive to insure tight taping. Heel and lace pads are placed over tendons. Pre-wrap is applied, the goal here is to apply anchors so adhesive from tough skin will adhere to tape. Three layers are applied working towards the calf. Apply heel lock tape from the calf towards the heel, applying tension as you cross the bend in the ankle. The correct lo...
This video by photoshopuniverse shows you how to make any photo seem as it was taken in a studio. Take the working photo and add a new layer over it and fill it in black as shown. Add a newer layer over that and add the filter> render> clouds effect. Increase the opacity of the cloud layer and merge it with the black layer as shown. Add the splatter effect and the sprayed stoke effect as shown onto the merged layer and add a hue and saturation adjustment layer and colorize it as desired. Go t...
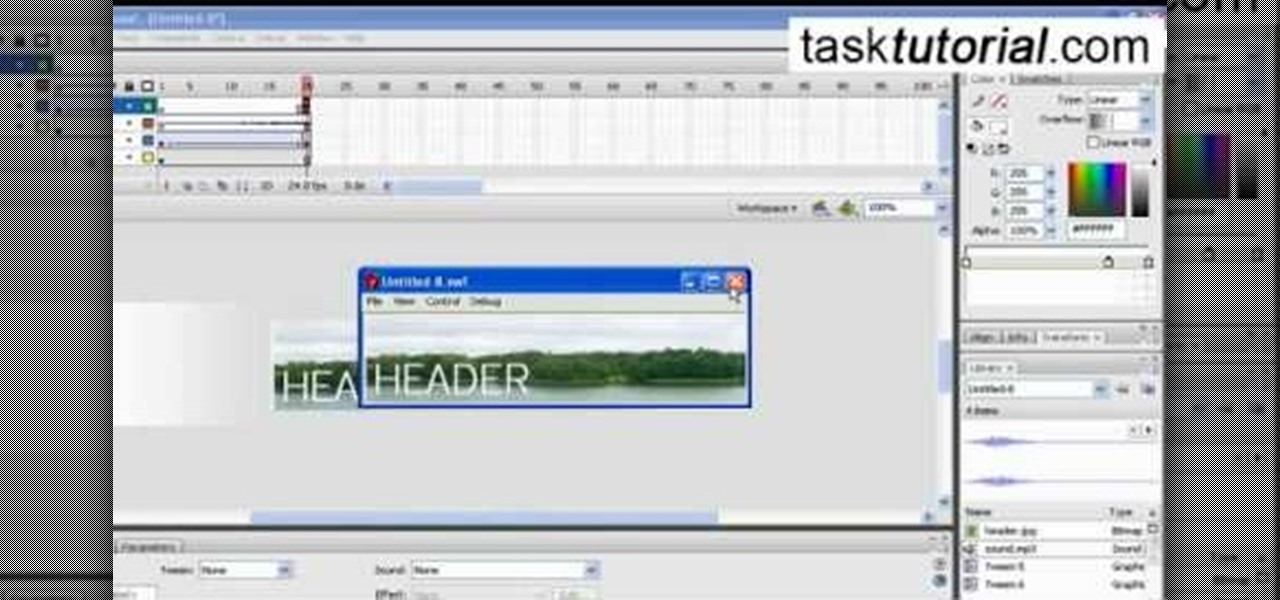
Today we learn about creating a header appearance in animation w/sound in Flash. First your import image. Create a new layer and then create our new shape. Then delete the stroke. Next select the shape and change its size to frame 20 and then press F6. Move your image as shown in the video. You will be asked to create a new layer three times. Just repeat the process of layer until you have a total of 35 layers. Now onto getting you animation to move. Mass layer is also acceptable in creating ...
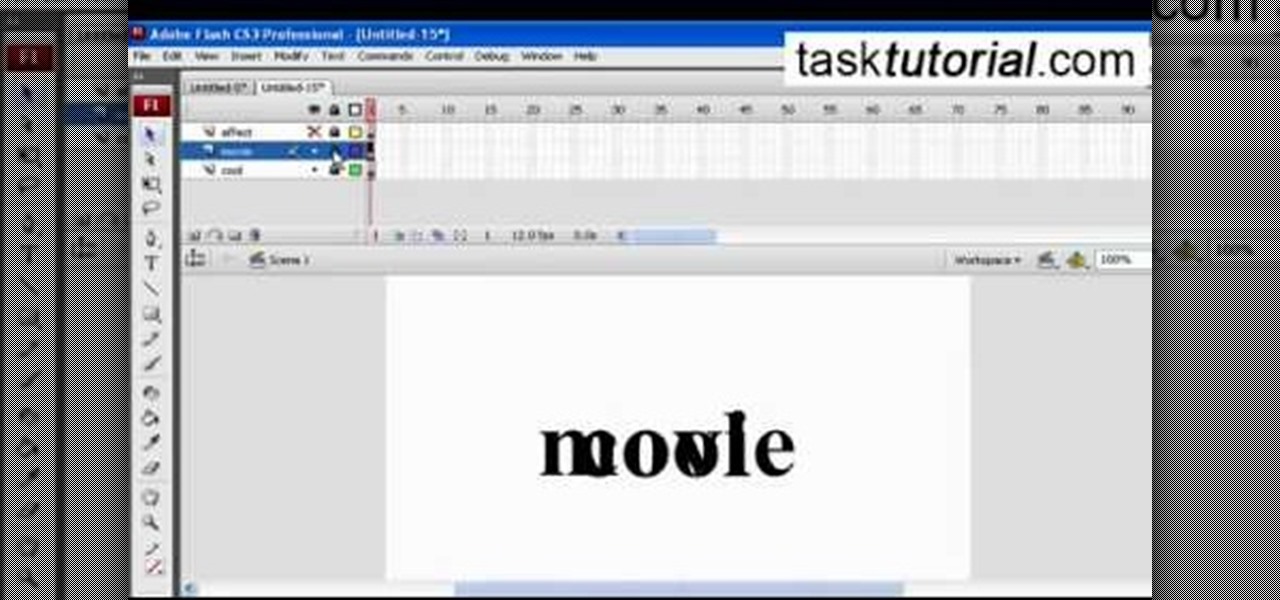
A great free video training from tasktutorial on how to create a cool movie text effect in Flash. Start by creating the text; type in "cool", rename the layer and lock it. Now type "movie" and rename the layer. Type in "effect" and rename this layer as well. Now focus on the first layer. Convert it to movie clip. Now convert the other two layers to movie clips as well. Stack the three layers on top of each other. Next add a key frame starting from frame 10. Select the "cool" layer. Re-size it...
Start with a totally bare eyelid to create the base for the winged eye. It's important to go for a gel eyeliner. This allows you more precision than liquid eyeliners. Pull the skin taut at the outer eye, look down & using a flat brush, apply liner into lash line itself on top eyelid, in between root of lashes. Taking the line from the inner corner of the eye, put color in lash line all the way to outer corner of eye. Close eye; pull lid towards ear so skin is taut. Repeat base step; this time...