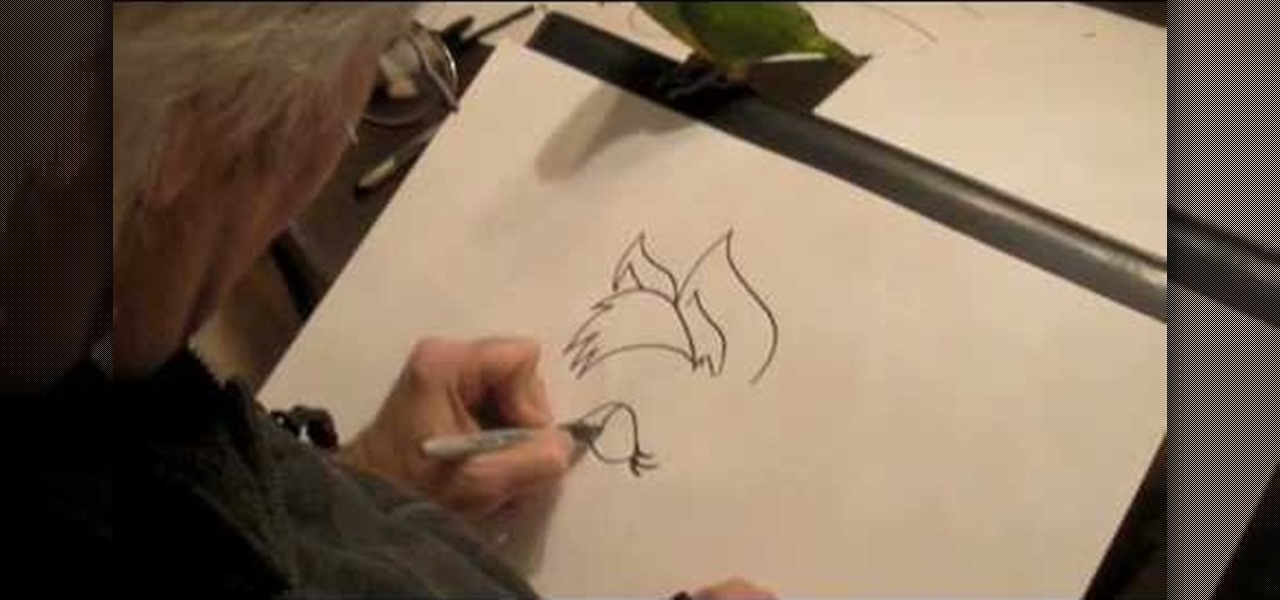
Learn the right way to draw a wolf with its full body, by watching this video. The artist begins by drawing three circles faintly and connecting them with a line, representing the head and body of the wolf. Next, the skeletal structures of the legs are outlined. The tail and ears are faintly outlined next. The artist then begins outlining the face in detail, adding the eyes, nose, mouth, ears etc to the wolf’s head. The body is now outlined adding rough edges to indicate fur. The legs of the ...
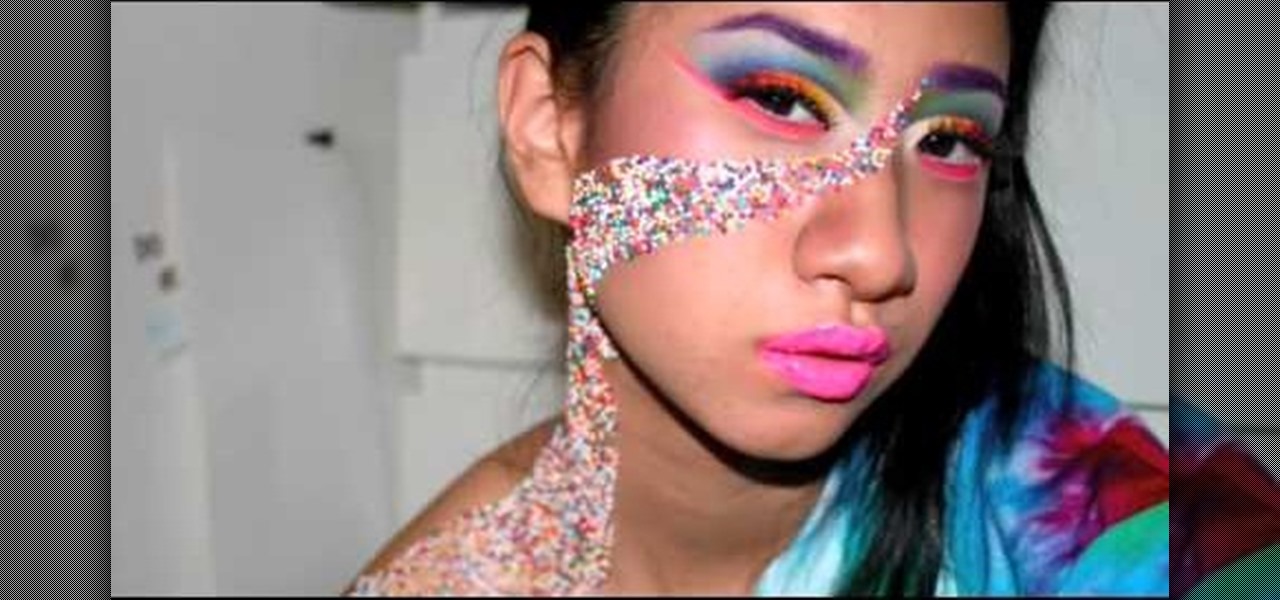
Aspiring makeup artist demonstrates how to apply nonpareil sprinkles to achieve a candy-inspired look Purchase rainbow-colored nonpareils (tiny round sprinkles). These can be found in the baking aisle at your local grocery store. Apply sprinkles using a clear sticky lip-gloss. Create unique patterns, such as this swirl from the corner of the eye to the collar bone. Pair with candy-inspired jewelry and a chunky bun positioned high on the head to finish the look. Follow these suggestions to tur...
Ironing a button up shirt is an important way to make sure you are always looking in top shape. When ironing a man's shirt, you should always start with the collar first and then move to the shoulders and back. Make sure the shirt is stretched out properly over the ironing board. Then move from the shoulders and down the sleeves, making sure you iron both sides, moving slowly and carefully. After ironing your shirt, make sure you hang it up to prevent more wrinkles from forming. Using this ca...
This is Cartoonsmart's introductory lesson on how to draw using vector illustration Flash CS4, CS3 or Flash 8.
EFT "tapping" is a self helping movement in a sequence of tapping across the hand, face, head, chest and arm that will allow you to alleviate a specific pain, problem or stresses in your life. This video shows you how to tap away your problems with acupressure.
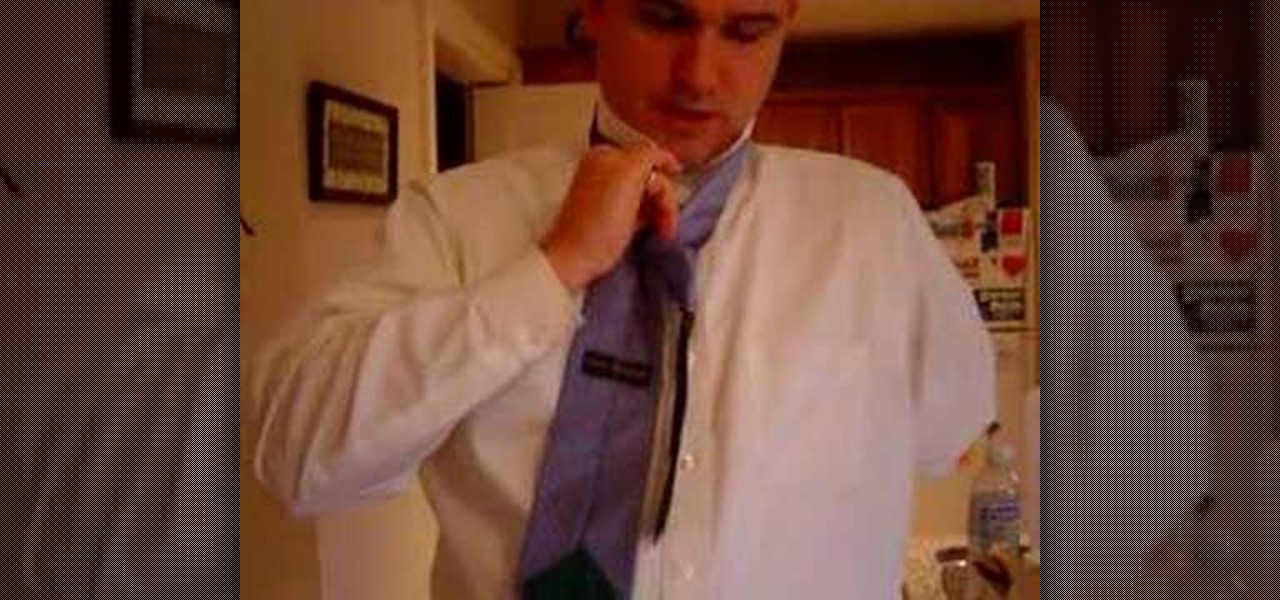
One armed tie tying and collar buttoning is tough for most people, let alone an individual who has suffered an amputation. Here's a lesson from an amputee on tying a tie and other suit tricks all while using one hand and no prosthetics. A thicker tie is easier as it will not bunch up or tighten. Only tie a Half Windsor as a Full Windsor is way too tricky for one hand. This is a step by step tying video by an amputee with only one arm. If it cinches up too much wiggle it out and it will loosen...

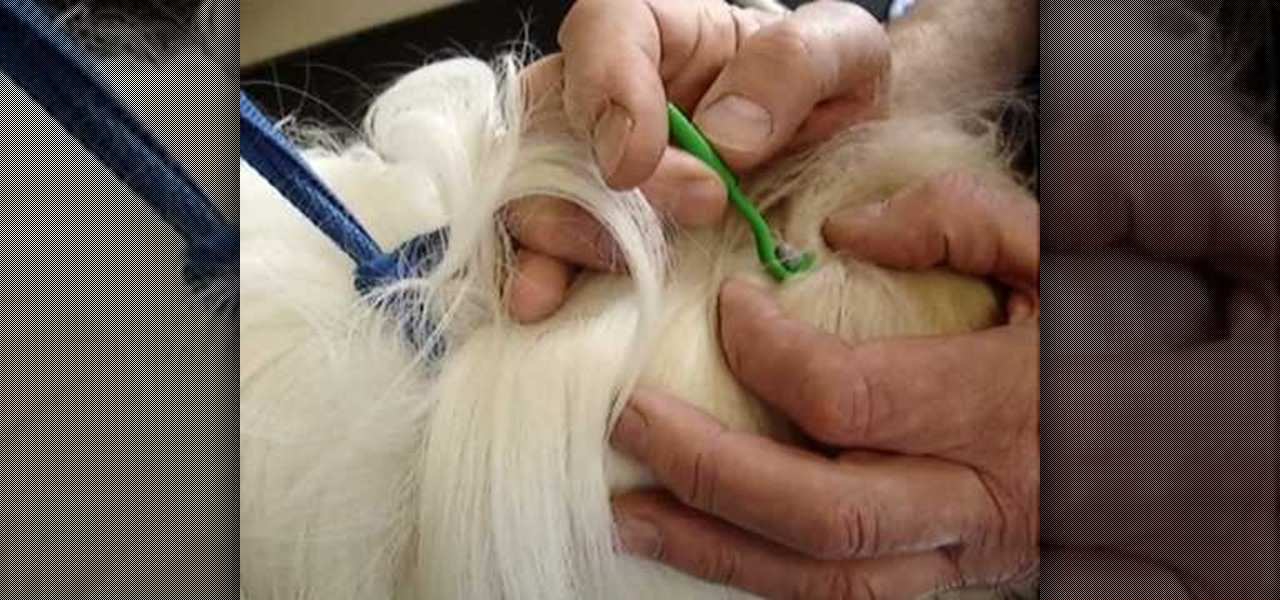
In this video, we learn how to remove a tick from a dog. First, brush the hair away from the tick so you have a good view of it. After this, take the removal tool and place it underneath the tick. Slide it all the way underneath the tick and then gently pull while twisting. This will remove the tick from the dog without leaving the rough parts on the inside of them. When you are finished removing the tick from the skin, make sure you kill it and give your pet a flea and tick collar. Do this f...
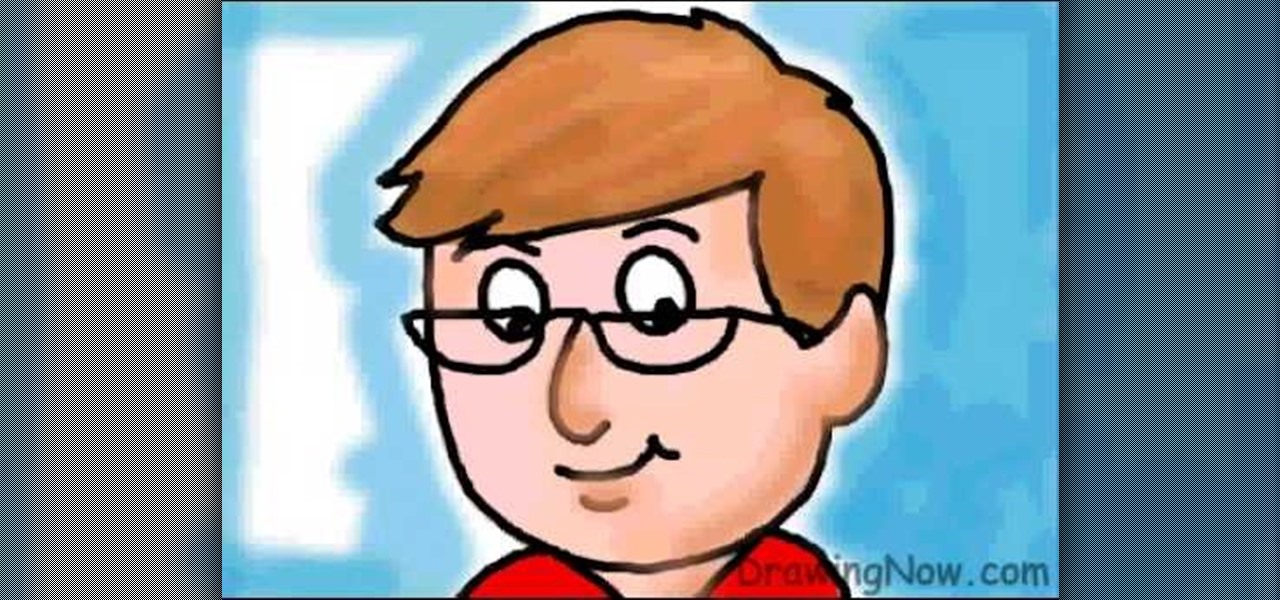
In this tutorial, we learn how to draw a cartoon dad. First, draw the oval for the head and then draw the hair and the facial features on with an outline. After this, color in the skin, hair, and collar of the shirt. Next, add in details for the hair and the face to make it look more realistic. Then, color in the shirt and outline the head and rest of the body with a black thick paintbrush. Draw on glasses to the face underneath the eyes to give the dad an older look. Then add shading and whi...
In this tutorial, we learn how to draw the cartoon vampire character Alucard. Start out by drawing the outline of the face, along with the hat and the collar as well. Then, draw in a cross in the teeth, with just the upper teeth and fang showing. Then, draw in all the details of the face, along with the hat details. After this, color in the skin and then the rest of the clothing around the face and on the body. Color in the background as well, with black and reds to create an eerie glow with ...
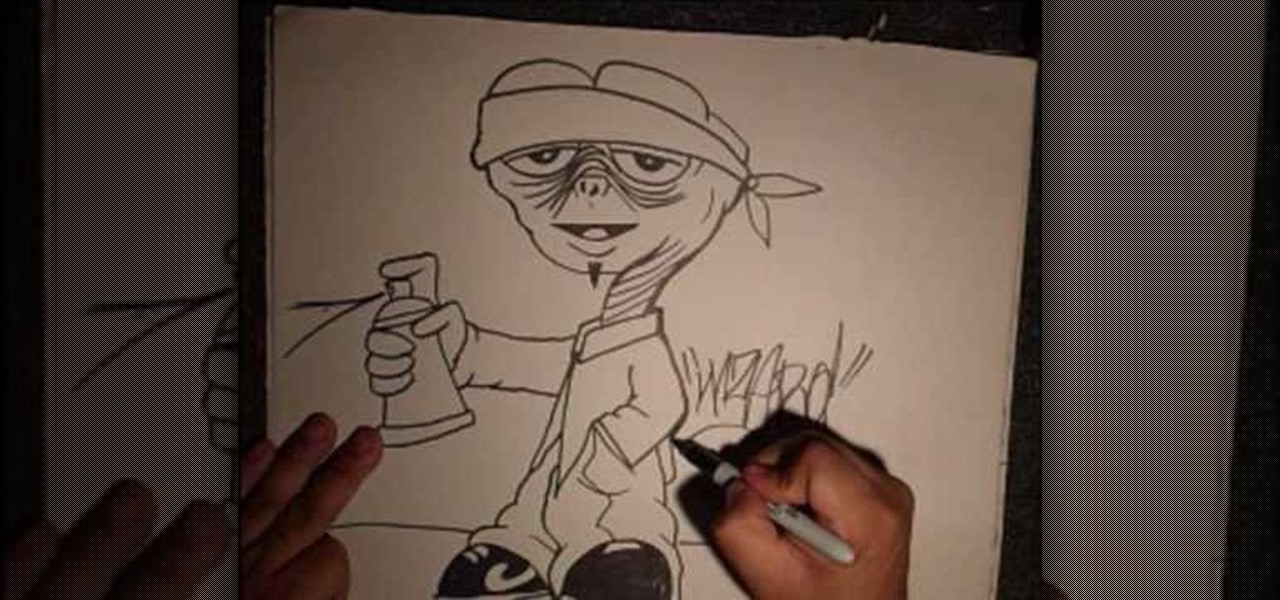
In this tutorial, we learn how to draw a gangster graffiti ET character. Start out by drawing the eyebrows and the hat, then draw down to make the eyes. After this, draw in the details of the eyes, then make the nose and the mouth. From here, create the head and the neck, as well as the rest of the body. Draw on large pants that look baggy on the legs and a large collared shirt. One hand should be in the pocket and the other should be facing out with a finger on a spray paint can. From here, ...
In this video we learn how to tie a skinny necktie in a Half Windsor. First, take the wide end over the thin end and then go over and under the loop. From here, take your wide end over the knot and then under and through the hole. Now, adjust your knot up to your neck where it's comfortable. Place your collar down and then you will be finished with the half Windsor knot. This is a very easy way to tie a tie that a guy can do on himself or have someone else do to him. Practice this to get good...
In this tutorial, we learn how to draw Tenten. To start this character, draw a light circle along with lines in the middle for reference points. Use a bolder line to draw the chin and then the eyes, nose, and mouth. also make sure to draw in slight eyelashes and eyebrows above the eyes. After this, draw a line around the head and erase the background lines. Draw ears on the top and then start to fill in the hair for the bangs on the front of the face. Finish this off with a headbands, then dr...
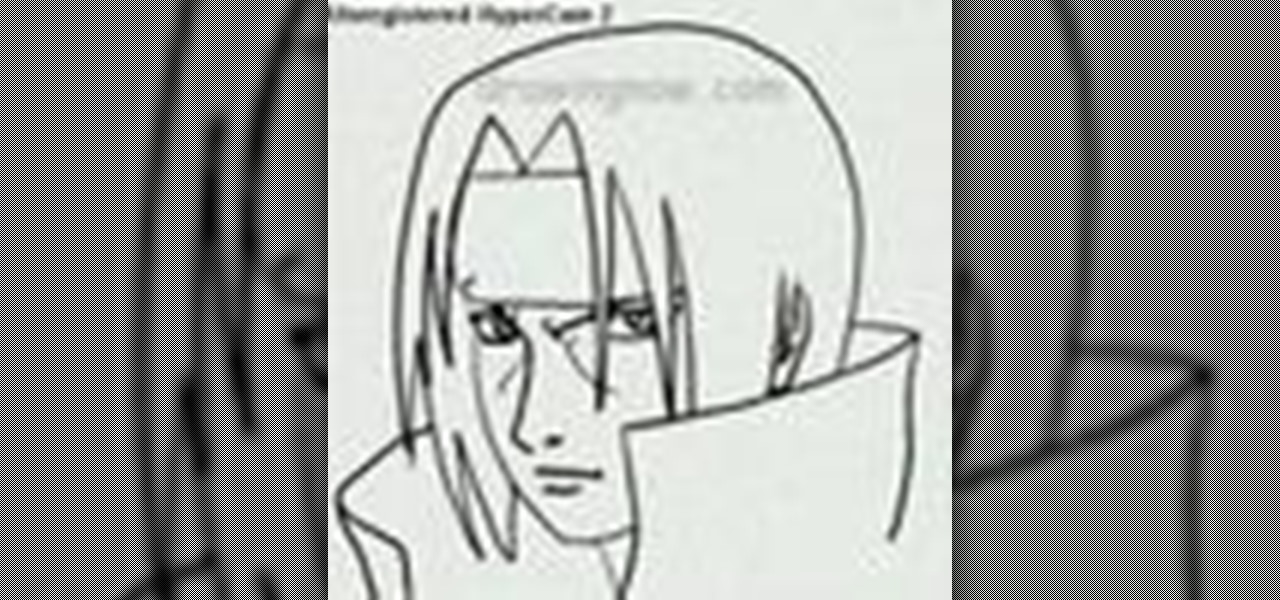
In this tutorial, we learn how to draw Itachi. First, draw your reference lines on the head so you know where to place the features of the face. Draw in the eyes, adjusting them so they are more towards the left of the face than the right. After this, draw in the bridge of the nose and the nose, as well as features of the cheeks. Next, draw in the nostrils and the mouth, as well as eyebrows and creases around the eyes. After this, draw in ears on the side of the head, then start to draw in th...
In this video, we learn how to make a shirt out of a wool blanket. This is great if you need something really warm to sleep in or wear out around. First, design the shirt so it's longer on the back than it is in the front. That way, when you sit down you will have extra wool to help keep you warm. You don't need to sew a collar on it,, because it will just take too much work. Make the arms extra long, depending on how large your blanket is. If it's too long, you can fold the ends over, or cov...
In this tutorial, we learn how to change your body features with makeup. To enhance the cleavage, you can purchase a product called Beautiful Breasts. You will first take the matte color and start to define where the breasts and cleavage are. Make the angles natural and make sure the makeup is blended so it's undetectable. Apply shimmer to the collar bone and shoulders to give a glow as well. The products work for any size and any shape and will give you extra enhancement. There is also a pro...
In this tutorial, we learn how to draw a cartoon horse's head. First, make a large ear followed by a large amount of hear and a smaller ear. Next, draw a large eyes underneath the ears with eyelashes. Then, draw a nose for the horse and a mouth making a smile coming outwards of the eyes. Next, draw the mane with a lot of hair and the neck going downwards off the paper. You can add a collar onto the neck of the horse if you want it to look like it's wearing a shirt. To finish, add in more hair...
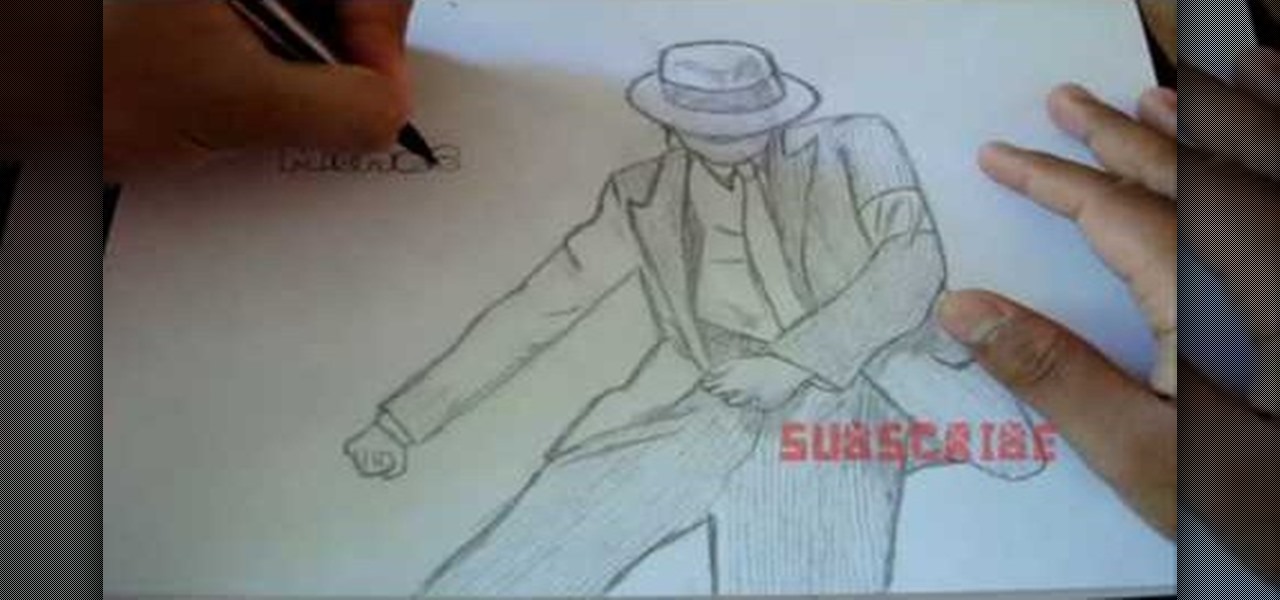
In this video, we learn how to draw Michael Jackson. Start out by drawing the body shape, outlining the clothes first. Draw details on the pants and shirt, then add a hat on top, shading the face. Now, draw hands onto the drawing, along with shoes on the bottom. Next, add details to the hat and a tie to the shirt with a collar. After this, draw on a belt and shading and lines to the jacket and pants. Add shading underneath the hat to make it look as though the face is underneath, then when fi...
In this tutorial, we learn how to throw an upside down double walled pottery vase. Start off by using water every few seconds to craft your vase. Use your fingers to press down in the middle, to make the round shape and have the vase rise up into the air. Make this into a bowl shape, which will be into the air. Next, shape the middle using your hands into a triangle shape. Raise the side bowl around it, and keep using water to increase the size of the bowl. Collar the bowl in, then start to m...
In this tutorial, we learn how to draw Ryo Bakura Yu Gi Oh style. Start off by drawing the head, making a pointy nose on the front of the face. Next, draw in the eyes making eyebrows in and pupils. Also draw in the shapes on the head, then start to draw in the hair. Make two sides of the hair pointy spikes on both sides. Start to draw the neck and shoulders going down to the very bottom of the paper. Place a collared shirt, then start to add in shading on the picture. Draw in lines, then add ...
In this tutorial, we learn how to draw a husky puppy. Start off by drawing the head, don't use a straight line at the top, make it look like it has hair. After this, continue and draw teeth and a tongue hanging out of the dog if you want it to look happy. Next, add ears to the top of the head and eyes to the face. Give the dog markings and pupils on the eyes. Then, add the nose on with a button shape at the top. Draw out the collar and chest of the dog, then add on the two front feet, the bel...
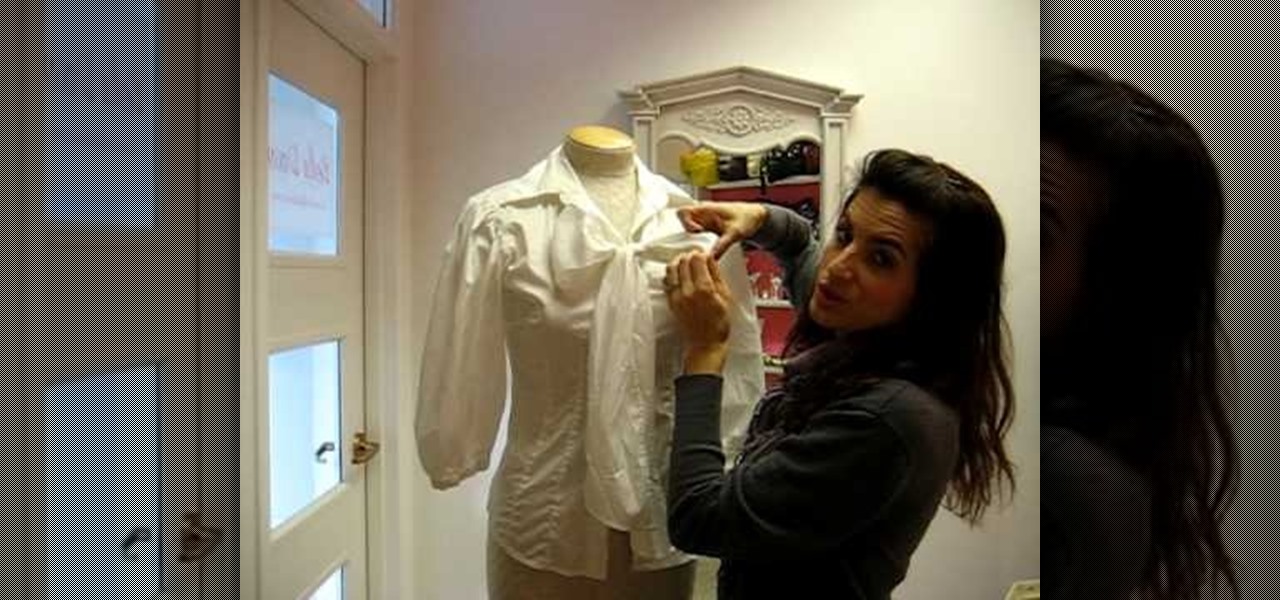
In this tutorial, Dawn teaches us how to wear a classic button down blouse. The first blouse you can have has a round collar with a ruffled sleeve and a pleated front. Look for something that has more detail which gives it a more feminine look. Also, look to find a shirt that has an extra panel on the side so you can't see your skin in the middle of the buttons. Also, make sure shirts have a little bit of stretch in them so they fit and contour to your curves. This type of shirt can be worn w...
In this video, we learn how to fully remove a tick. Ticks can carry diseases, so it's best to get rid of these right away, checking your pet daily. Find the tick and then grab it as close as you can to your pet's skin. Pull it out and make sure you've gotten all the parts. Then, flush the tick down the toilet. You can also use a pair of tweezers to make this easier for you. Make sure you check thoroughly and don't miss if your pet does have these, they can spread onto the carpet and around th...
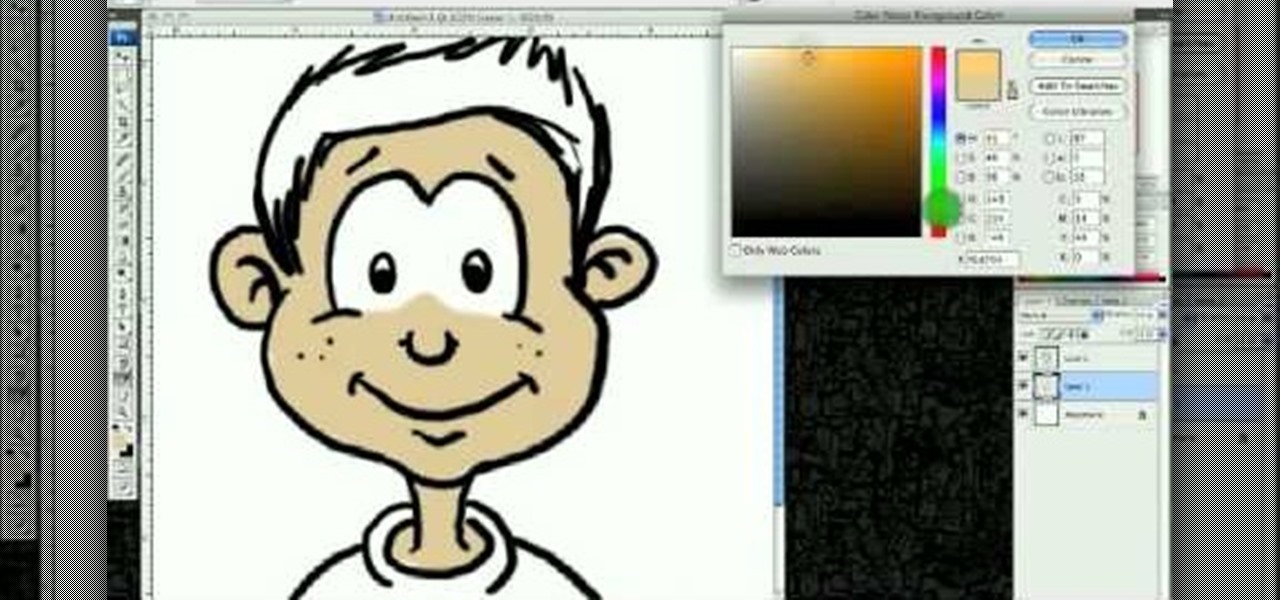
This video illustrates how to draw a cartoon boys face in Adobe Photoshop.Here are the following steps:
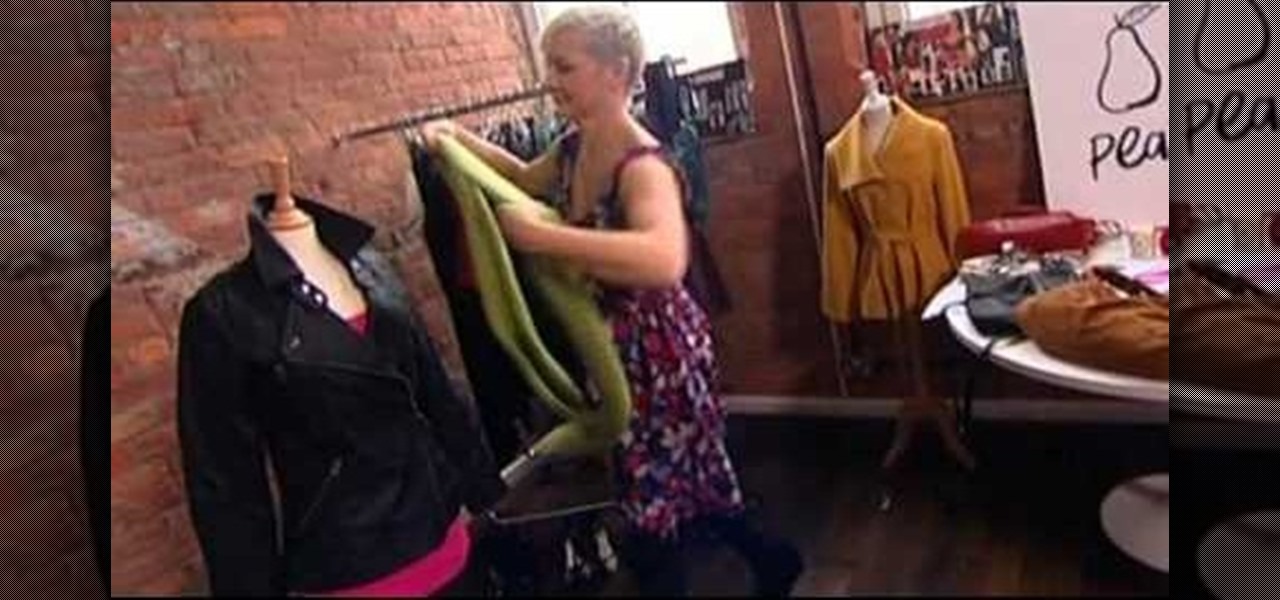
Being pear shaped means your body is smaller on top and bigger around the hips. While this can seem like a difficult body type to dress, a few tips can make a pear-shaped woman look amazing. For example, start with a bright top that calls attention to your bust. Add more volume on top with layers, such as a leather jacket. Add another brightly colored scarf to draw the eye towards your face. You've created a tough chic look very quickly!
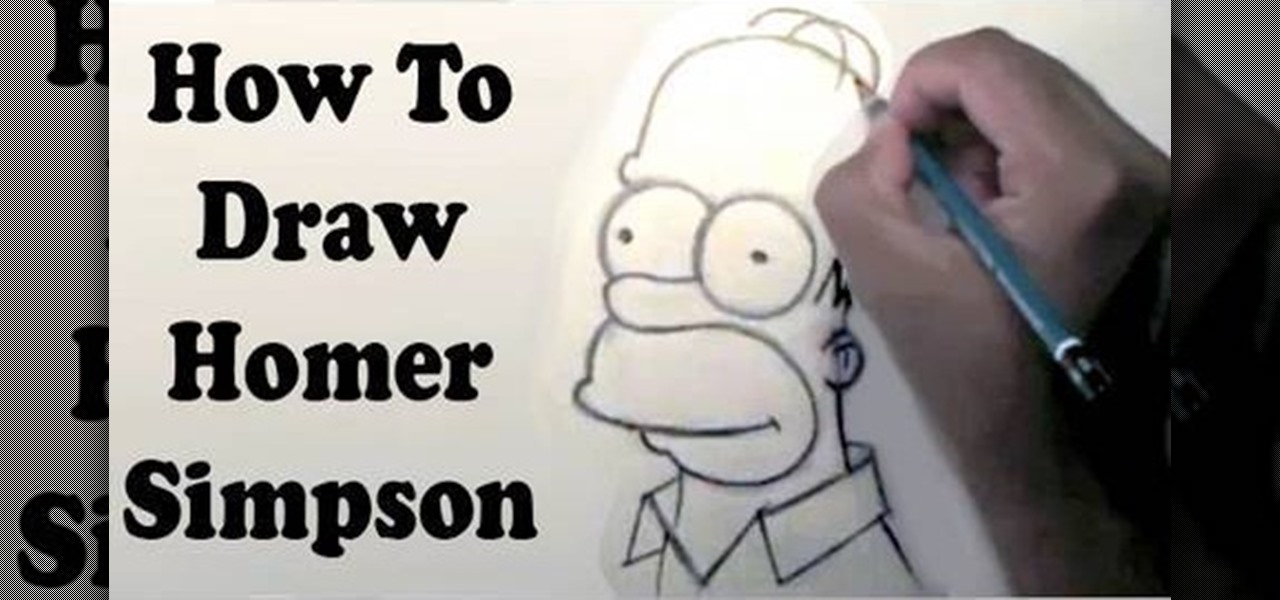
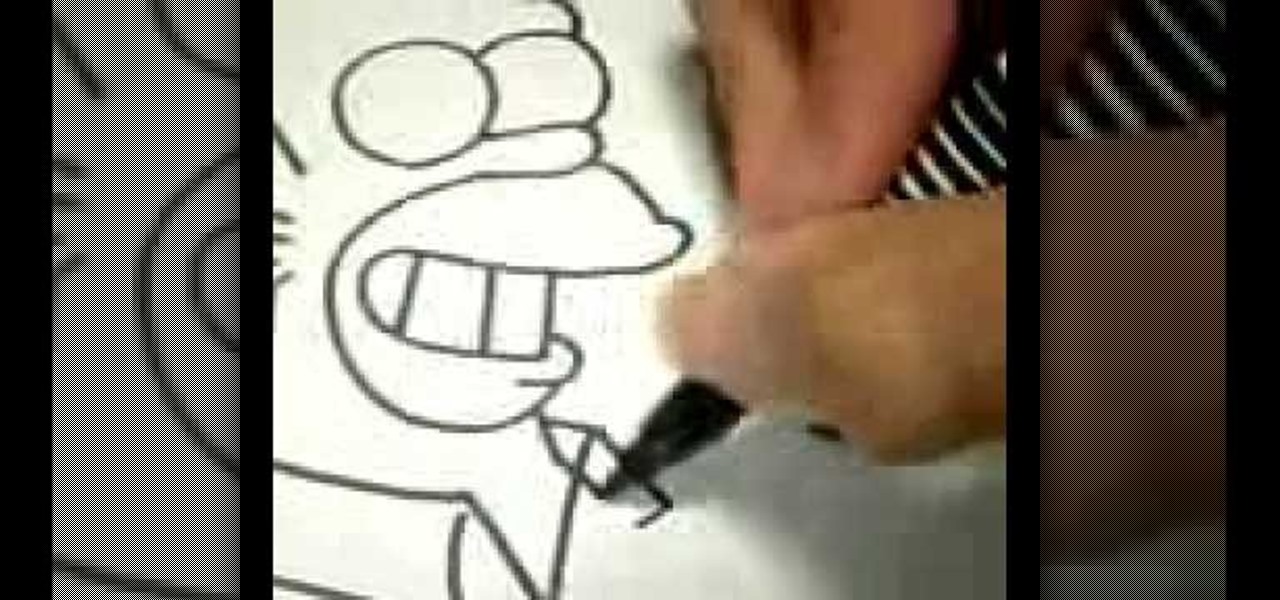
In this how-to video, you will learn how to draw Homer from the television show, The Simpsons. You will need a piece of paper and something to draw with, such as a pen or pencil. First, draw two circles for his eyes. Next, move on to his nose and mouth. From here, you can draw the outline of his head. Add the lines for his hair. Move on to his ears and neck. You can also fill in the pupils. Next, draw Homer's collar. You can shade in the color of Homer's skin if you want. This video shows you...
This video is about drawing a horror anime.The materials required for this are a large sheet of paper,a pencil and an eraser.To create the anime, you need to fist draw the skeleton, then do the eyes followed by the eye brows. You should add more details to the face as this would help in creating the nose.Switch over to the mouth,then the ears and the hair.After you are finished with the head,erase the inner circle and start drawing the neck.Then you have to draw the shoulders and the collar b...
Japanese kimonos are a beautiful and whimsical clothing full of tradition and grace but are not really appropriate to wear in everyday life. Luckily you can make a cute and hip kimono inspired dress with the help of this video that is perfect to wear out anytime. You will need a large piece of fabric whatever color you would like the majority of the dress to be. Use a t-shirt to sketch out an outline for the top of the dress. You will then only need to finish sewing the dress with some accent...
This video shows us the method to reconstruct your t-shirt with a fringe design. You will need a long fitted t-shirt, scissors and a sewing machine which is optional. Cut off both sleeves of the t-shirt. Now cut the middle of the shirt on only one side. Cut off the collar. Hem both sides of the cut so that you have a clean finish. Now take the scissors and start cutting the fringes. Open the t-shirt so that all the fringes are even. Mark the length of the strips and start cutting. Once you ha...
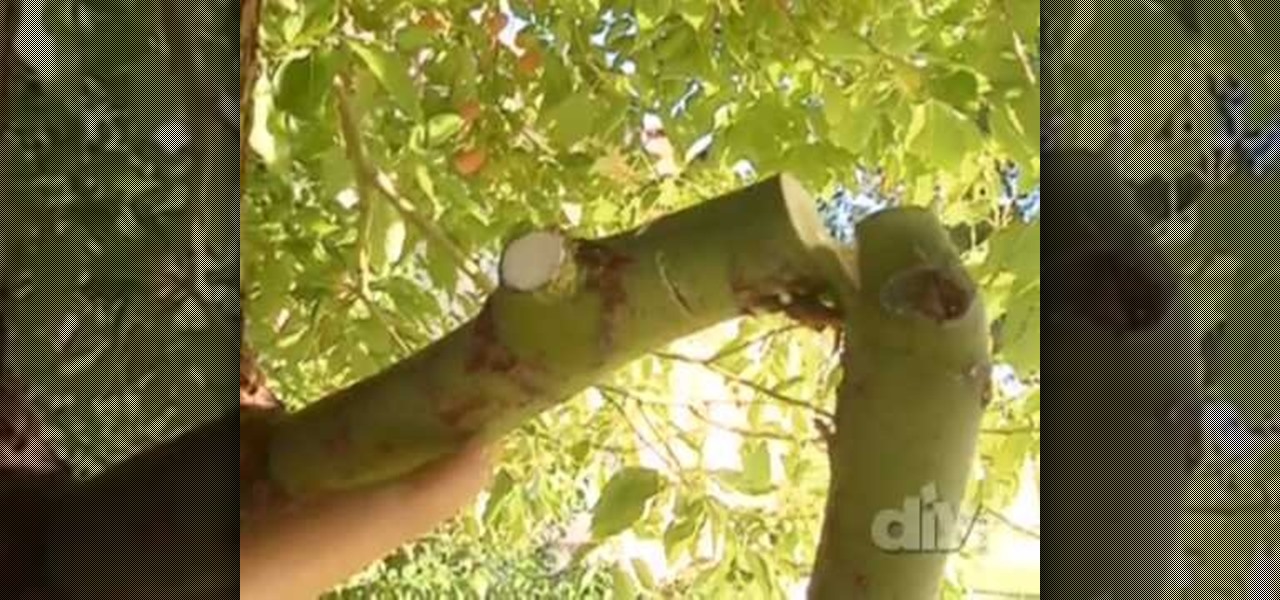
In this how-to video, you will learn how to prune a tree yourself. You start by using the four D's. The four d's include removing things that are dead, damaged, deformed, and dysfunctional. If the branch is brown and crispy, you can remove it. Remove any stubs as this will affect the tree over time. Get close to the branch collar when cutting. Do not cut it near the base if the branch is bigger than an inch in diameter, as this may damage the tree. Do this instead by cutting an under cut and ...
In this how-to video, you will learn how to draw Ned Flanders from The Simpsons. First, start off with the basic outline of the body. Use simple shapes for this. Next, fill in the eyes, hair, nose, mustache, ears, and mouth of the figure. From there, you can move on to the details of the clothing such as the collar and cuffs of the sweater. Finish with the shoes and the fingers on the hand. The basic outline is finished. Now, go in and erase the simple shapes from the drawing and fill in more...
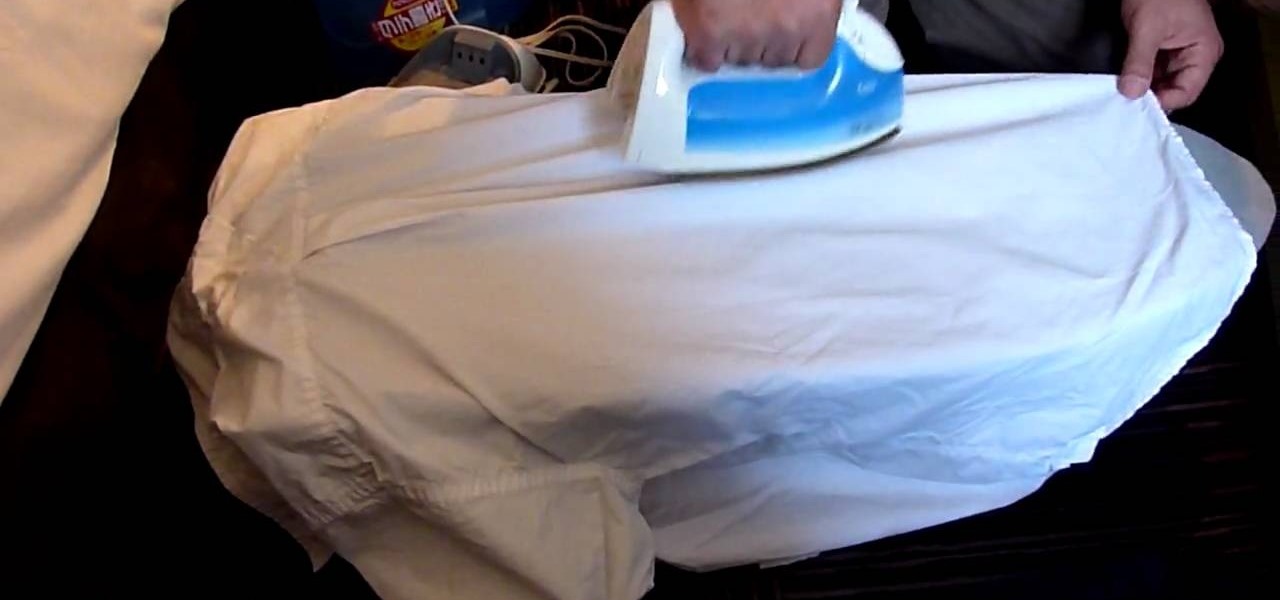
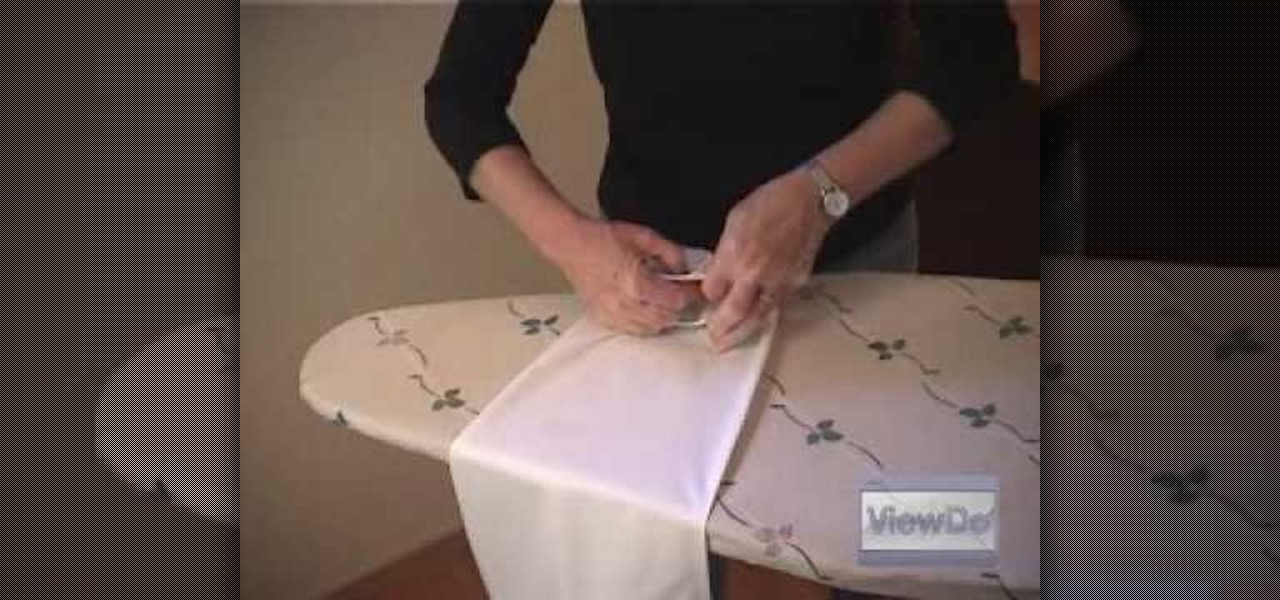
In this Beauty and Style video tutorial you will learn how to iron a men’s dress shirt. Make sure the shirt you are going to iron is a clean one. Place it on the iron board with the shoulder towards the narrow end of the board. Switch on and allow the iron to heat up. Then take a spray bottle and spray some water on that part of the shirt which is on the iron board. Now you take the iron and apply it over the shirt while holding the shirt with your other hand to keep it in place. For the part...
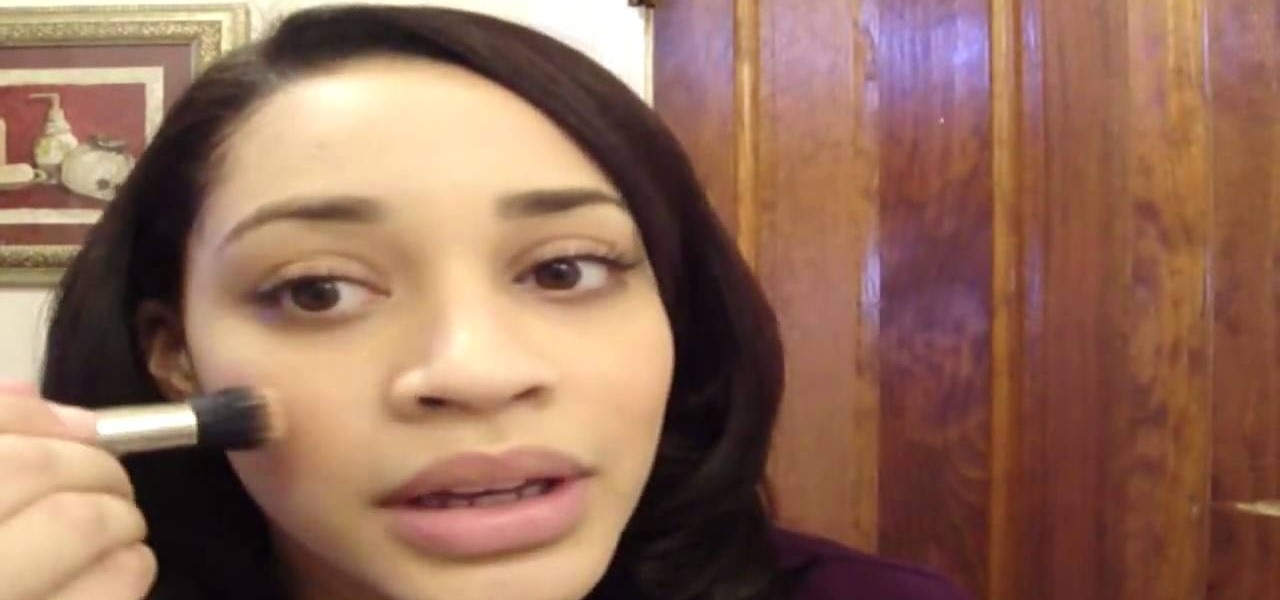
It is a demonstration of a cream blush with a # 130. We will be using a steela convertible collar and a color called camellia which is #1 and is used mostly as a blush which nice and bronzy. You firstly stamp the brush onto the blush and then lightly tap the brush onto your hand first so as to ensure you won't have too much of blush on your face.
In this Beauty and Style category video tutorial you will learn how to iron a white men’s dress shirt. Place the shirt on an ironing board. Make sure the iron is warm. Then start ironing as shown in the video. Iron the edges, iron between the buttons and iron over the pocket. Apply a little bit of pressure at the thick parts of the shirt like the flaps over the pockets. Iron the sleeves on both sides. Iron the collar. And most importantly, don’t forget to iron the back side of the shirt. Hold...
The video shows you how to draw a Homer Simpson cartoon. Start off with a big circle and a smaller circle below. Draw two slightly diagonal lines to the sides, a slightly curved line below and two lines for the lower part of the head. Then add another circle on the left side of the smaller circle. Draw a small pickle shaped nose and an eyebrow above the left circle. Draw the ear just below the eye line. The hair is drawn above the ear, like an M shape. Draw the mouth and the lower lip and ext...
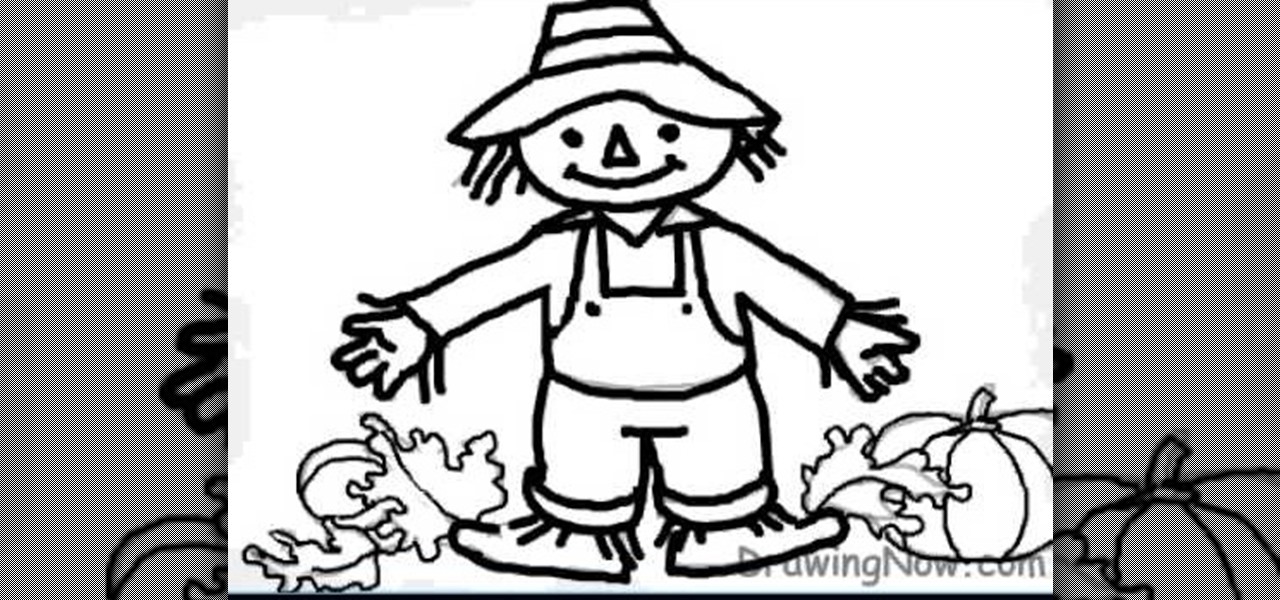
This silent video clip shows step by step how you can easily draw a cartoon scarecrow right rom scratch. First you sketch in the outline. Then you can go over the initial lines with a marker pen or similar. The design even includes some vegetables from the farm! Once you've got the whole thing drawn, you can start coloring in or painting your scarecrow. This design shows him in a checked flannel shirt and blue dungarees, but you can ring the changes if you like. You can add detail - like pock...
This silent video demonstrates visually how to draw a Homer Simpson character beginning with a series of simplistic shapes and lines. The artist begins by drawing two very basic circles for the eyes, then adds a curving line beneath to create the nose. The artist continues building on the image using the basic line and shape technique to create the full face image of the infamous cartoon character, and then, as a finishing touch, adds the collar of Homer Simpson's work shirt. This video provi...
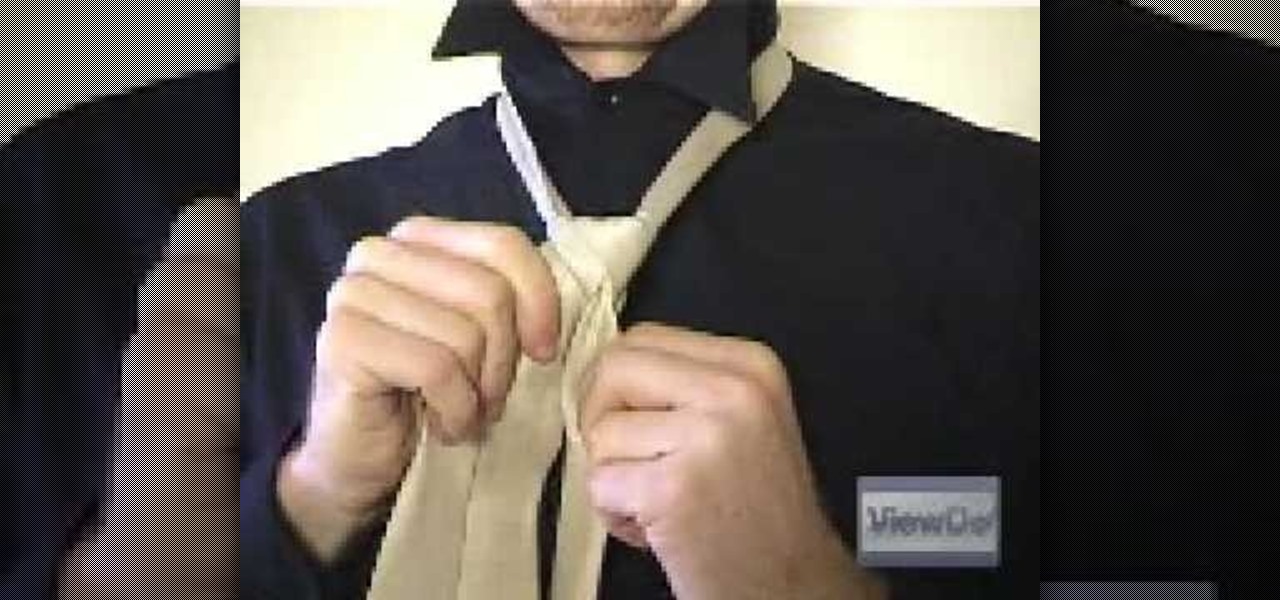
This video demonstrates how to tie a double Windsor knot, which is the neatest and most uniform looking tie knot. This knot can be tied in a few steps. First flip the shirt collar up and drape the tie around the neck as shown. Make sure to adjust the tie length so that the narrow end is just above the navel ring. Cross the wide end over the narrow end, pull the wide end back up the loop you just made, wrap the wide end behind the narrow end and back through the neck loop as shown. Pull both e...
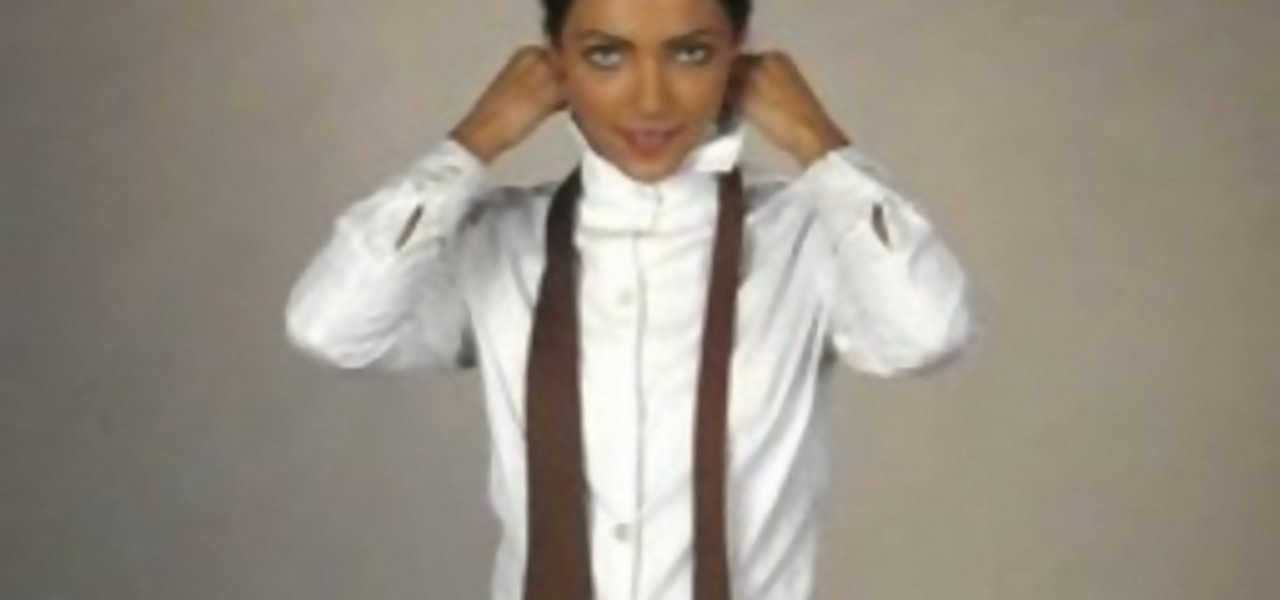
Linda shows us how to easily tie a tie for a woman. To tie a tie: Start with the wide end of your necktie on the right. make sure that it is longer than the one with narrow end. Then cross the wide end over the narrow end. Turn the wide end back underneath the narrow end. Do steps 2 and 3 thrice. Then, pull the wide end up and through the loop around your neck. Hold the front of the knot loosely with your index finger and bring the wide end down through the front loop. Lastly, remove your fin...
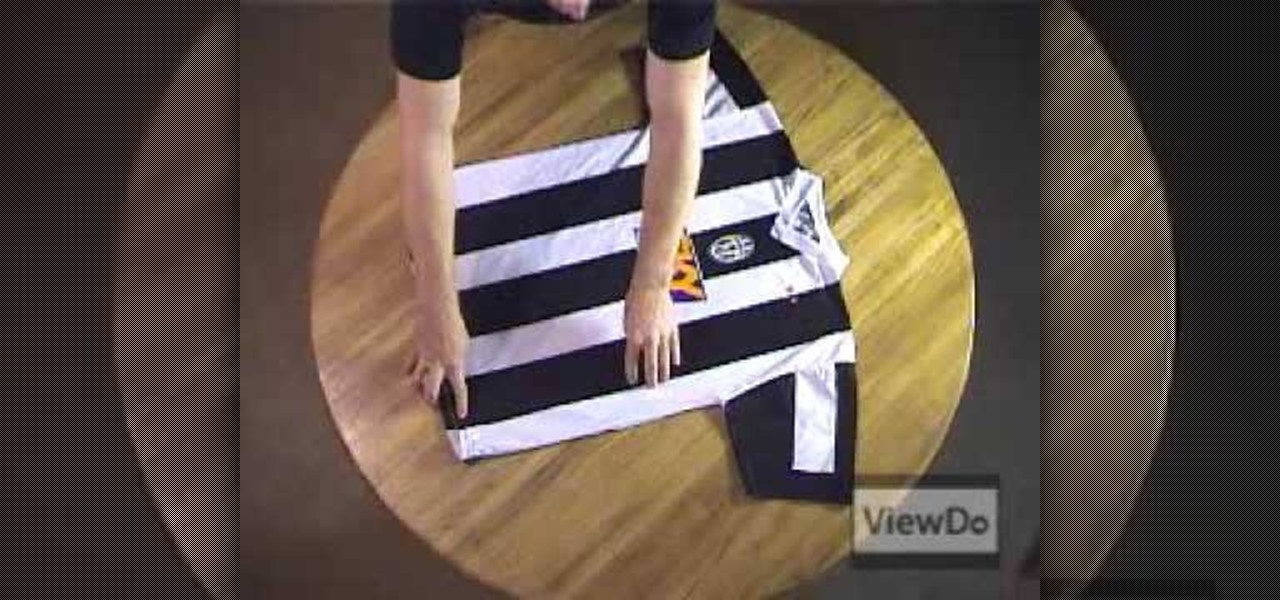
Here is a quick and easy way to fold a T-shirt in less than 5 seconds, all in one quick motion. Laying your shirt down on a table or flat surface, simply pinch your shirt with your left hand about halfway down the line of one of your sleeves. Crossing over with your other hand, grab the shirt by the collar and pick up the shirt. After laying down the shirt, you should have a perfectly folded shirt in one quick motion. This technique should be very useful if you ever want to fold your laundry ...
This video teaches you how to tie a bow tie. Take the tie over the collar and make sure that one side is sticking a little lower than the other.