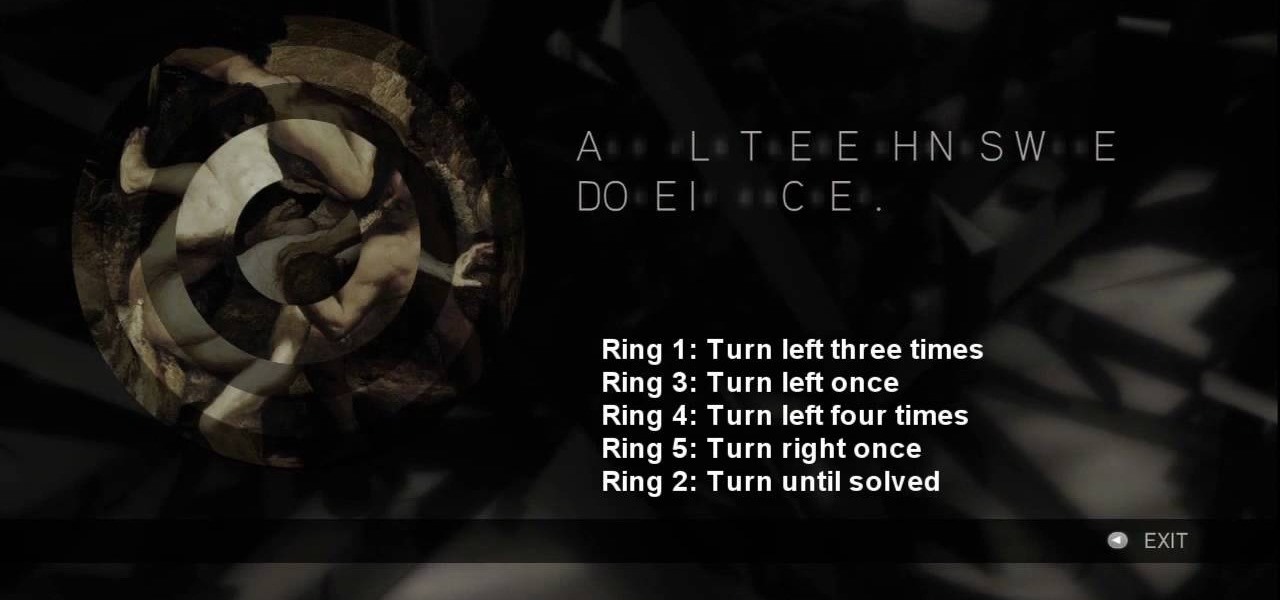
See the key to the sixth puzzle "Brothers" in Assassin's Creed 2. This is where things start to get tricky; while the first batch of ring puzzles were simple, these link some of their rings together, so that you can’t move one without moving another. For more info, watch the whole gameplay.
Try your hands at one of the first puzzles in Assassin's Creed 2. “Core?” “Pick?” That’s a dead giveaway right there. Just pick out all the paintings that contain apples. For more info, watch the whole gameplay.
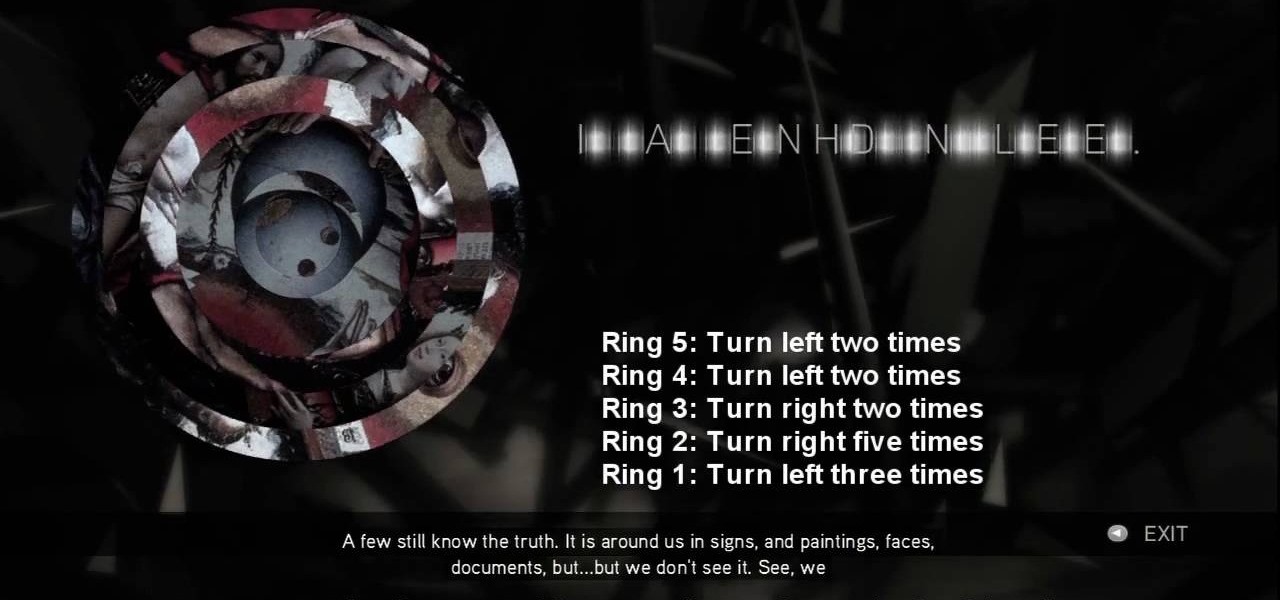
No need to figure out the 20th puzzle, entitled "The Origin of the Species", in Assassin's Creed 2. Here's the answers! Puzzle wheel: Start by turning the fifth ring right ten times, then turn the fourth ring left twice. Then rotate the third (and first) rings right twice, the second ring right five times and the first ring left three times. Image 1: Highlight the eye at the top of the painting. Code wheel puzzle: Ignore the numbers and focus on the Assassin motto: “Nothing is true, everythin...
Here's the answers to the 19th puzzle, titled "The Fourth Day", in Assassin's Creed 2. Image set: What used to be worshipped by every primitive culture under the…? That’s right, the sun. Pick the five images that focus on it. Image: Find the tiny image of Earth in the lower-left quadrant of the sun. For more info, watch the whole gameplay.
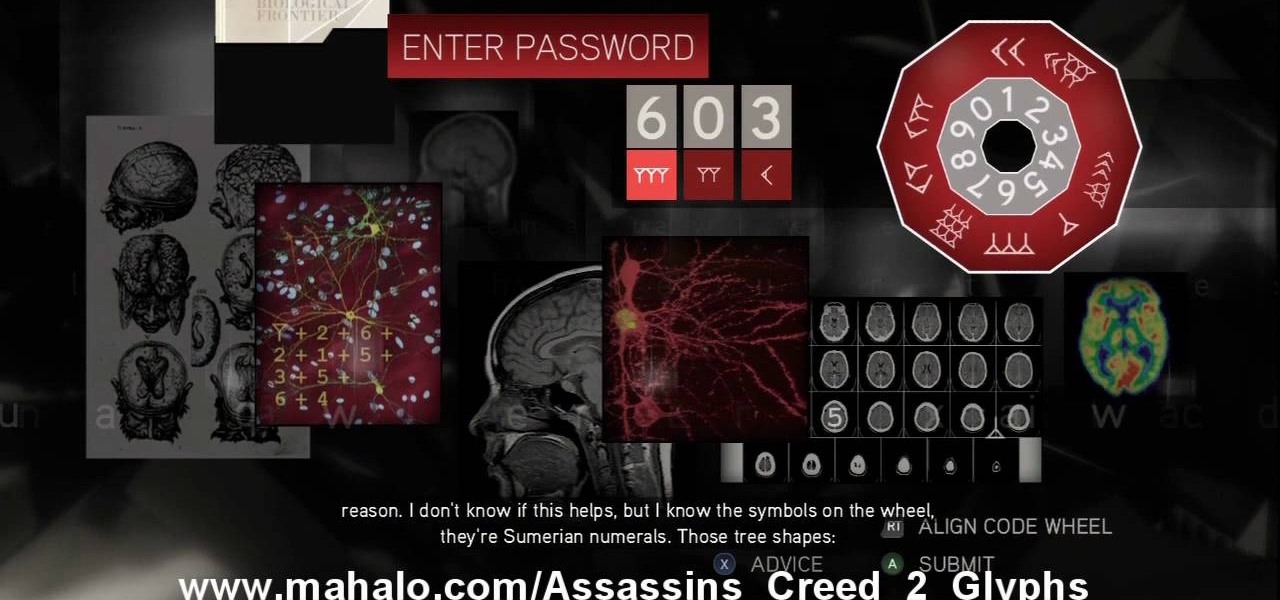
The 18th puzzle is called "Synapses". See how to solve it in Assassin's Creed 2. Code wheel puzzle: Your first clue is to line up 5 with a single tree-looking symbol. The key here is the weird-looking equation on the left, which offers a hint as to the progression of the symbols.
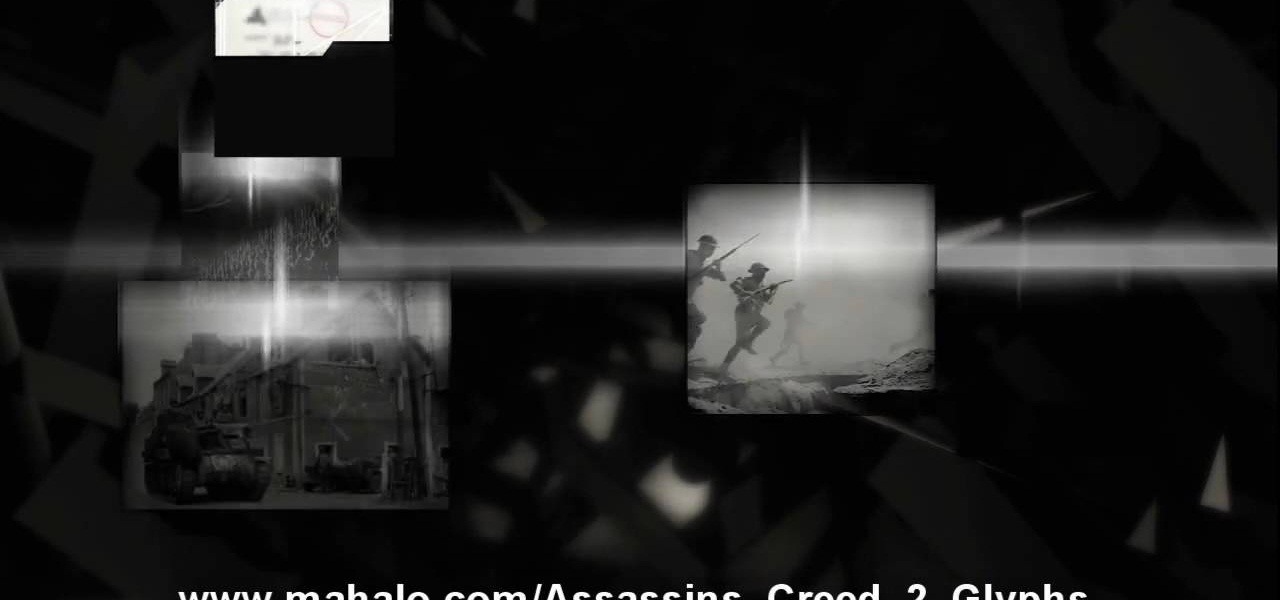
Figure out the 17th puzzle, entitled "The Bunker", in Assassin's Creed 2. Code wheel puzzle: Here’s a tricky one; your clues are “<” and “2,” and the only advice you’ll get from your handlers is that maybe there’s “something we can count” on the strange symbols. In this case that “something” is the number of times each symbol bends sharply. Don’t expect consistency across the wheel on this one; just take a look at what symbols flank the blank spaces and pick a shape with the number of bends t...

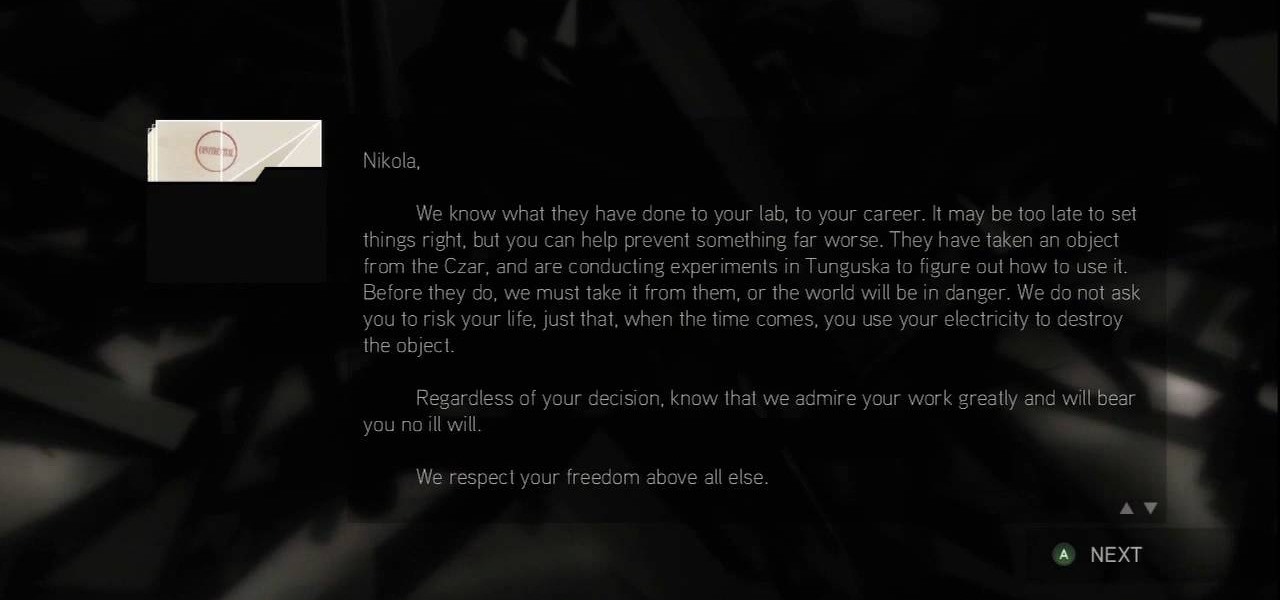
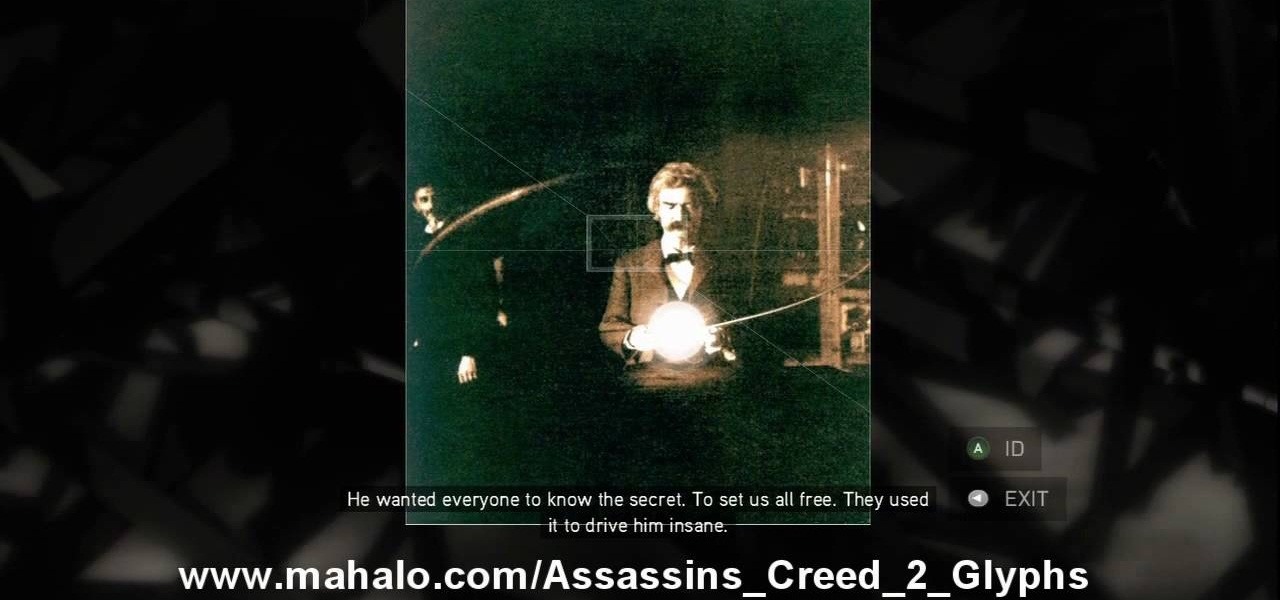
This one's pretty easy. Here's the solution to the 16th puzzle, entitled "The Cavalry", in Assassin's Creed 2. Image 1: Just move the cursor to the word “Tunguska.” Image 2: Move the cursor onto the staff and drag it onto Tesla’s photo. For more info, watch the whole gameplay.
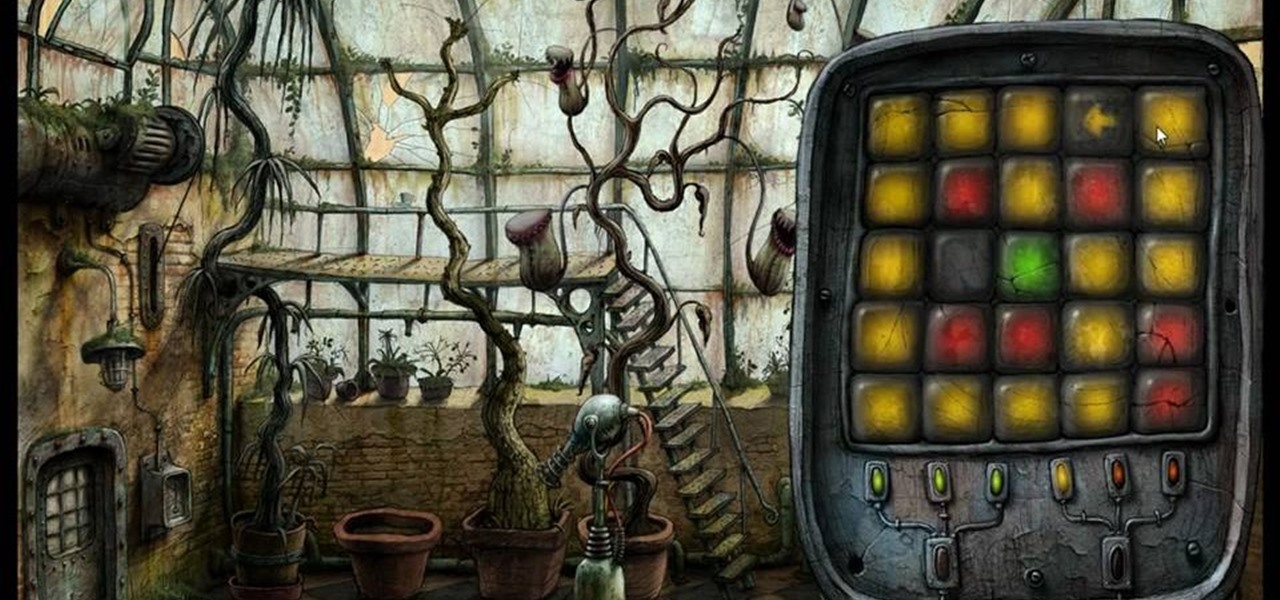
Get all of the info on the 15th puzzle, entitled "Guardians", in Assassin's Creed 2. Puzzle wheel: Seemingly every other ring is linked here, so we’ll cut straight to the chase: Turn the third (and fourth) rings right twice, the fifth (and first) right four times, the fourth (and first) right five times, the fifth (and first) left five times and the second left five times. Finally, move the fifth (and second) rings right five times. Image: Another gimme – just move the Assassin logo over the ...
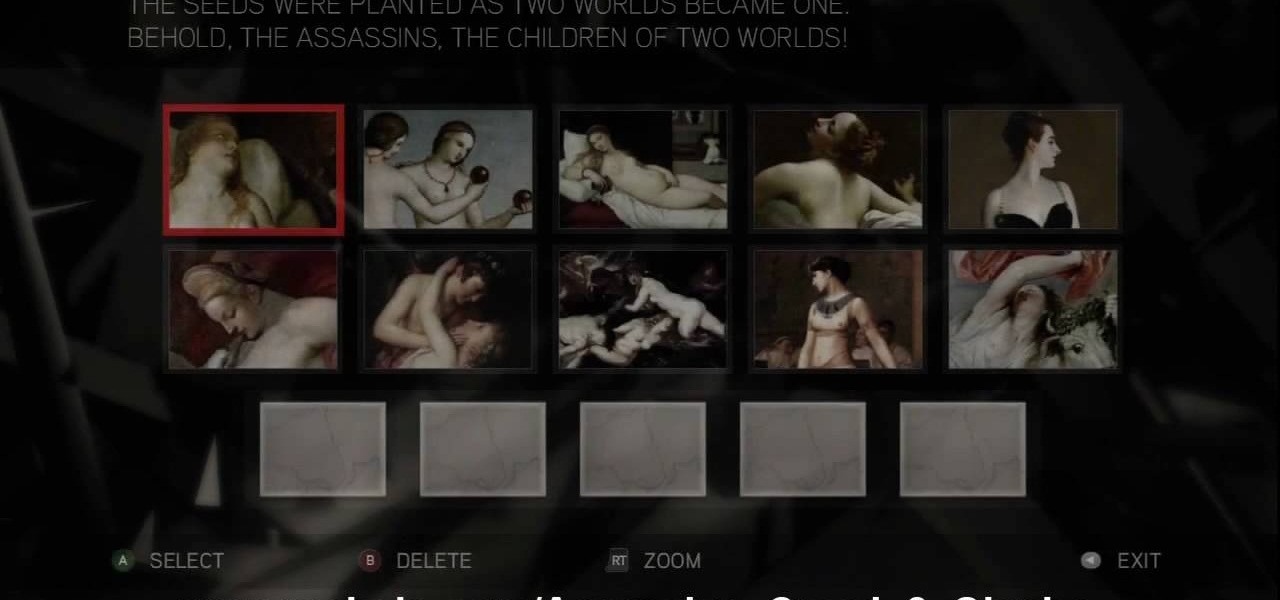
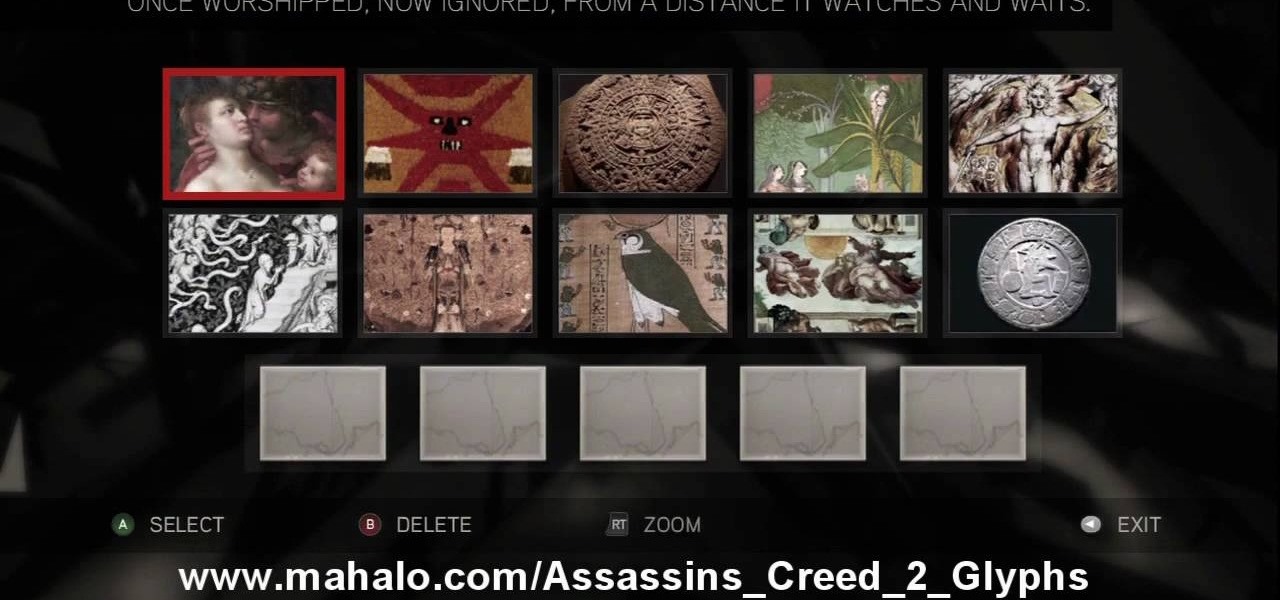
The 14th puzzle, entitled "Bloodlines", isn't really that hard in Assassin's Creed 2. Set 1: Highlight the images that depict women and gods in amorous entanglements (especially if those gods are disguised as animals). For more info, watch the whole gameplay.
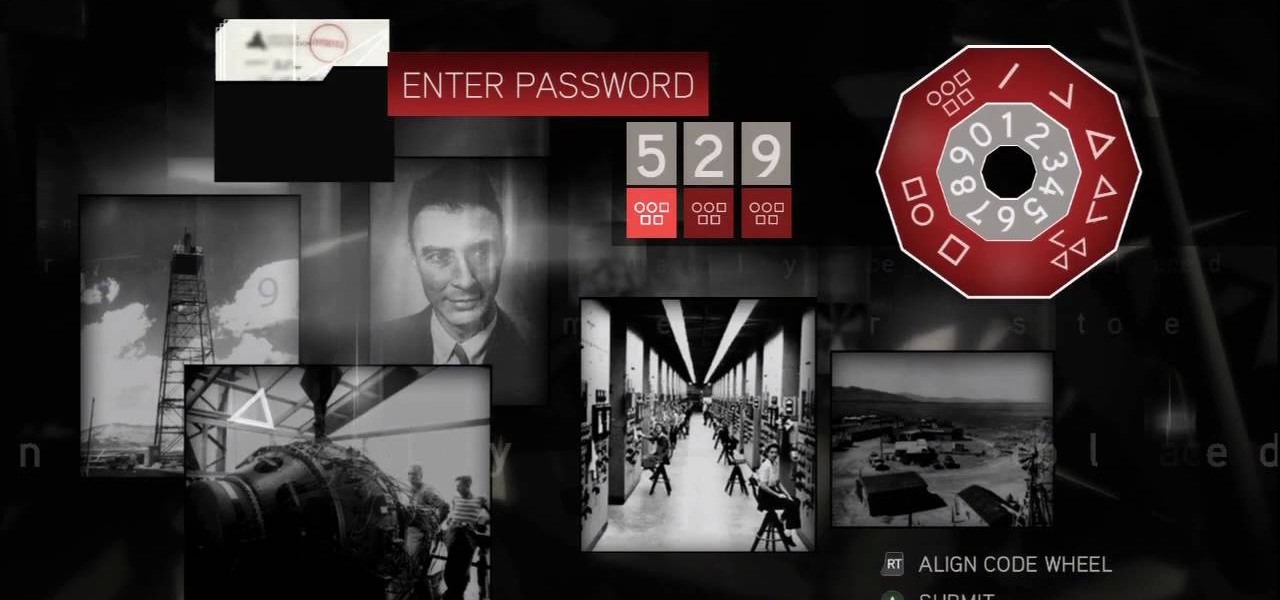
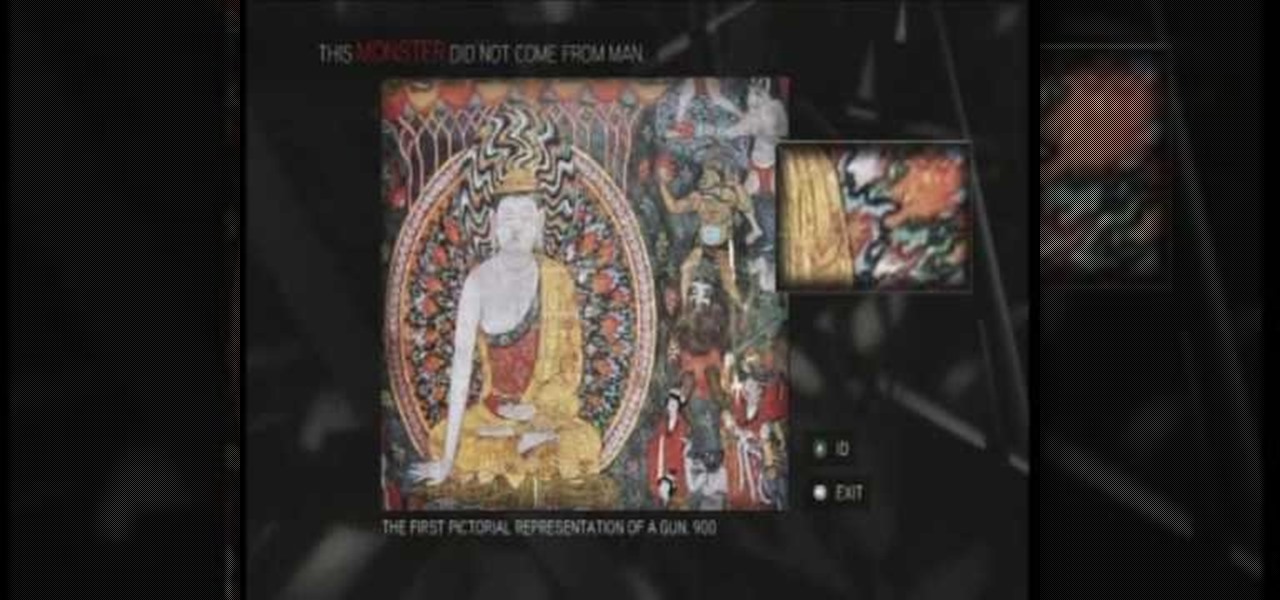
Solve the challenging 13th puzzle, entitled "I Am Become Death, the Destroyer of Worlds", in Assassin's Creed 2. Code wheel puzzle: This one’s even trickier than the last one; starting with the hint that 9 (next to the tower) equals “triangle” (up and to the left from the bomb), you need to figure out which symbols would fill in the blank spots on the wheel, going by the symbols next to them. Image 1: Just hit the button. It’s not hard. Image 2: Use the Geiger-counter clicks to guide you. For...
This is the 12th puzzle, entitled "Titans of Industry", in Assassin's Creed 2. Code wheel puzzle 1: The key here is in the “4=1” on the blueprint at the left of the screen. Line up the red 4 over the gray 1 and input the following code: 917240. Image 1: This one’s the opposite of the light-bulb “puzzle” from before – just move the dollar sign over the bulbs to extinguish them. Image 2: Highlight the glowing ball at the center of the image. Code wheel puzzle 2: Your hints here are the “2” on t...
Find out how to solve the 11th puzzle, entitled "The Inventor", in Assassin's Creed 2. Image 1: Just move the lightning bolt over the bulbs to bring them to life. Image 2: Highlight the area just at the base of the tower, between the two windows, to find this hidden image. Image 3: Move the pointer onto Tesla’s lap. For more info, watch the whole gameplay.
Figure out the 10th puzzle, Apollo, in Assassin's Creed 2. Image 1: Highlight the lunar lander just down and to the left of the moon. Puzzle wheel: Another linked-ring rotation puzzle. Your job here is to align all the channels; do this by moving the fifth ring to the left six times, the second ring to the left four times, the fourth ring to the right three times and the third ring to the left five times. Then snap the first ring into place. Image 2: Move the cursor down between the flag and ...
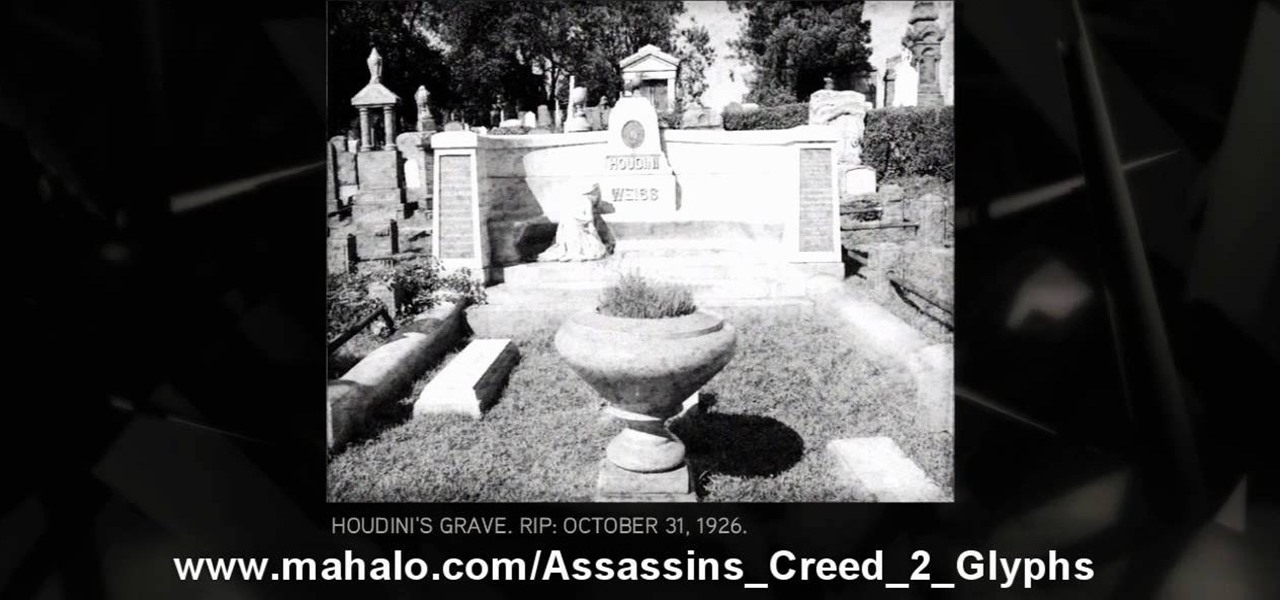
Execute the 9th puzzle, called Hat Trick, in Assassin's Creed 2. Image 1: Move the cursor onto Houdini’s torso. Image 2: Move the cursor over Gandhi’s heart. Code wheel puzzle: Your hint here is pretty obvious; there’s a big, glaring “6=1” next to Oswald’s picture. So move the red wheel so that the 6 is over the gray 1, and plug in the corresponding numbers. For more info, watch the whole gameplay.
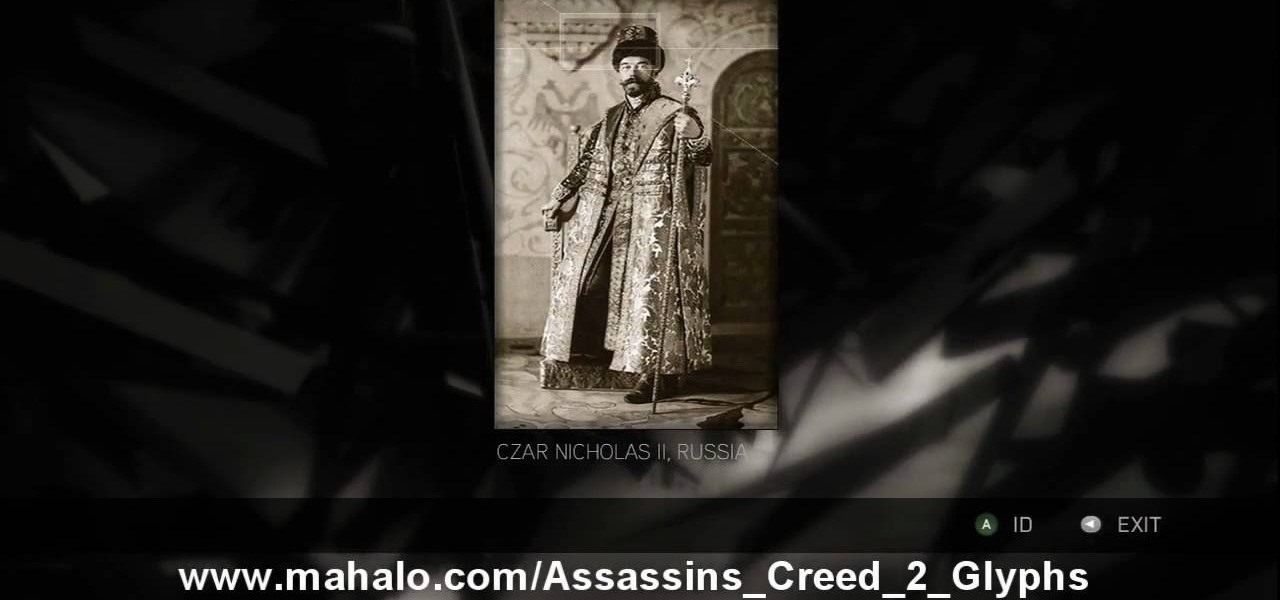
Learn about the 8th puzzle, titled Martyrs, in Assassin's Creed 2. Image 1: Highlight Czar Nicholas’ staff. Image 2: Highlight Joan of Arc’s sword. Image 3: Move the fireball to Joan of Arc’s portrait. Image 4: Move the photo of Rasputin onto Czar Nicholas’ portrait. For more info, watch the whole gameplay.
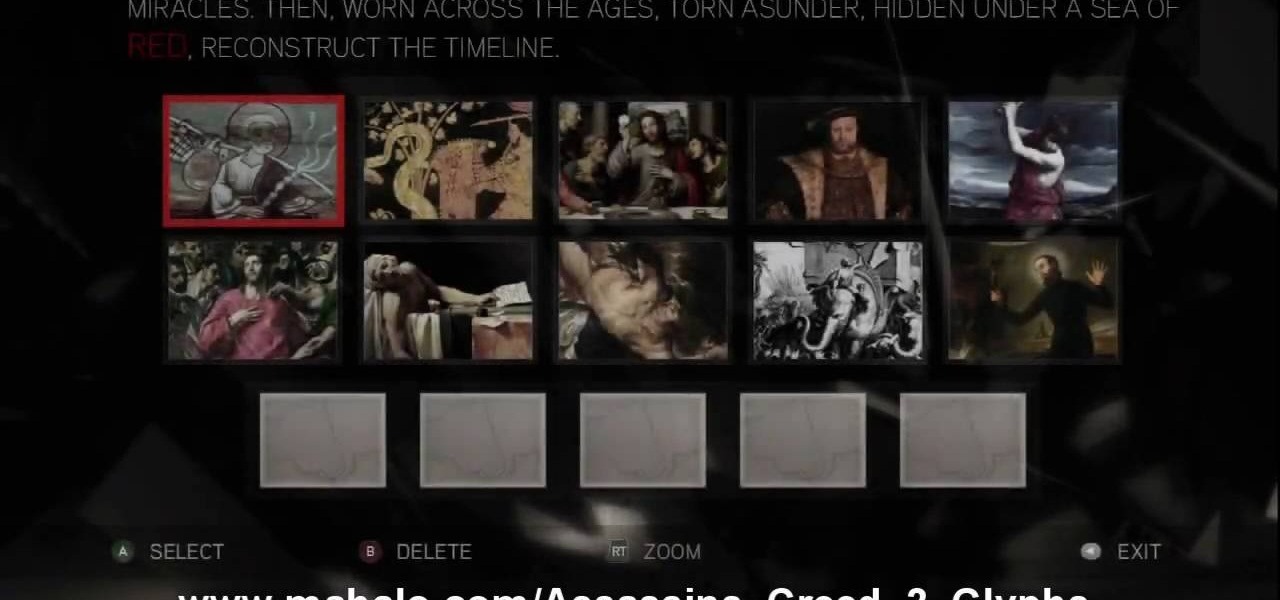
This is about the 7th puzzle in Assassin's Creed 2. Keep on seeking, and you should find… in the first image set, the key word here is "red", so pick the images in which that color shines the brightest. In the second image, highlight the area to the right of Jesus’ hips to reveal a Piece of Eden. For more info, watch the whole gameplay.
Find out the solution to the 5th puzzle in Assassin's Creed 2. For set one, the hint here is “cut,” so pick the five paintings that feature swords. For set two, what do the people in these paintings lean on? That’s right – pick out the images that feature staffs. For more info, watch the whole gameplay.
Get the answers to the 4th puzzle in Assassin's Creed 2. This is just another hidden-image puzzle. Find them in the barrel of the bazooka, on the helmet of the soldier crouching in the background, on a rifle held up just to the left of the officers, and in the hand of one of the monsters. For more info, watch the whole gameplay.
Find out about the third puzzle in Assassin's Creed 2. Another simple one – just highlight the spot in each image where the Apple is hiding. You can click around at random and maybe find a couple of hidden messages. For more info, watch the whole gameplay.
Find out the secret to solving the Muses Puzzle. If you're having trouble with the solution, this video guide will show Kratos step-by-step what to do to win. Watch the walkthrough for the Muses Puzzle in God of War III on PS3.
Can you solve the portal puzzle in this mission of God of War 3? Ready Kratos Ballista for this, because the ballista is the main weapon for which you will solve this dilemma. Watch the walkthrough for the Portal Puzzle in God of War III on PS3.
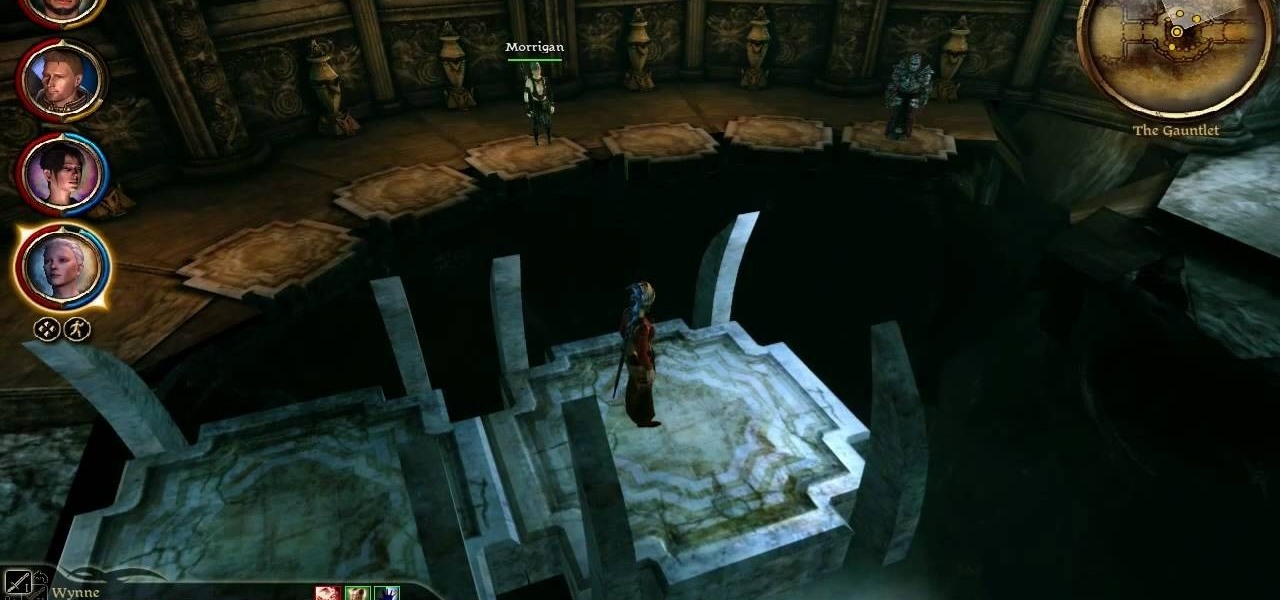
Apparently, only people who are good at solving puzzles are worthy to find the sacred ashes of Andraste... This is one of the few puzzles in the game, but it's very difficult to solve. Here's how you have each of your party members stand on the stones so you can get across the bridge.
Machinarium is an innovative robot adventure game, where you point and click your way through all the puzzles. This tutorial starts off by showing you how to solve the six pointed puzzle, and then moves through several of the other solutions in this part of the game.
They might seem intimidating at first, but the Celtic Knot puzzles you come across in the Elite Treasure Trails in RuneScape can still be solved. No matter what puzzle you're given, this method will let you figure out a solution to all of them.
There are twenty different glyph puzzles scattered throughout the game Assassin's Creed: Brotherhood, and you will need to solve all of them. This walkthrough shows you where you can find each individual glyph, and then shows you how to solve them.
Check out this 6 coin puzzle bar trick from Revision3, Scam School and Brian Brushwood. Brian introduces a new diabolical coin puzzle to stump your friends.
It's a puzzle. It's a gun. It's awesome. Titled "The Intimidator", this 125-piece puzzle requires a special key to disassemble. Once disassembled, 20 of the 125 pieces can be pieced to form a real working single shot pistol.
The object of Peg Solitaire is to finish the game with only one peg remaining on the board, preferably in the center hole. You can remove a peg by jumping over it with another peg. Only certain jumps are legal: you must jump horizontally or vertically, and you can jump only one peg at a time. Here is one the most genial solutions in the allocated 31 moves. Solve the Peg Solitaire puzzle.
Klotski is a small brick puzzle. The aim is to release a red block and move it to a destination gate by moving other surrounding pieces, within a confined outer border. It sounds simple but it's a real brainteaser, especially the Forget-me-not brick layout. Solve the Klotski Forget-Me-Not puzzle.
Puzzle games are great at giving your brain a workout while keeping things fun and killing time. They stimulate your noggin as you strategize and plan your next move, whether it's to keep your character from getting killed, or to get that special item to finally complete your collection and unlock a new feature within the game.
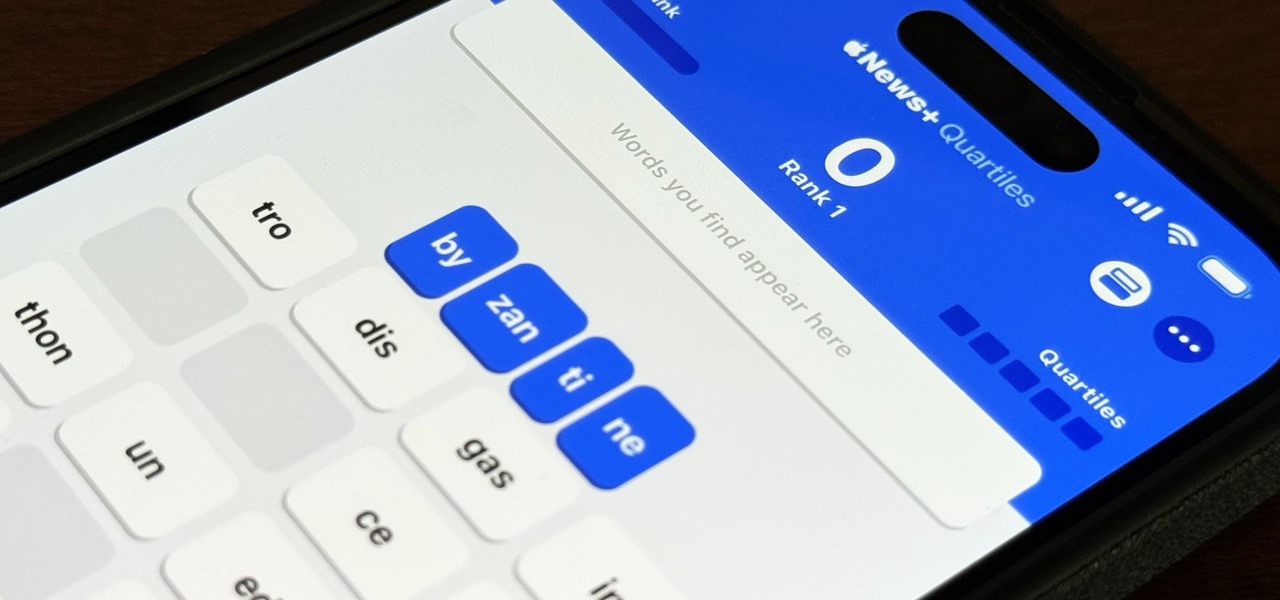
Apple's next software update, iOS 17.5, is relatively minor. Still, it includes one killer new feature for people who like word games: another lexical challenge to complement the crossword puzzles that Apple News already has.
Puzzle games are a great way to kill time and exercise your brain in one fell swoop. They challenge you to think strategically and plan ahead, whether that's to create killer chain combinations for maximum points, or to plain old keep from getting killed.
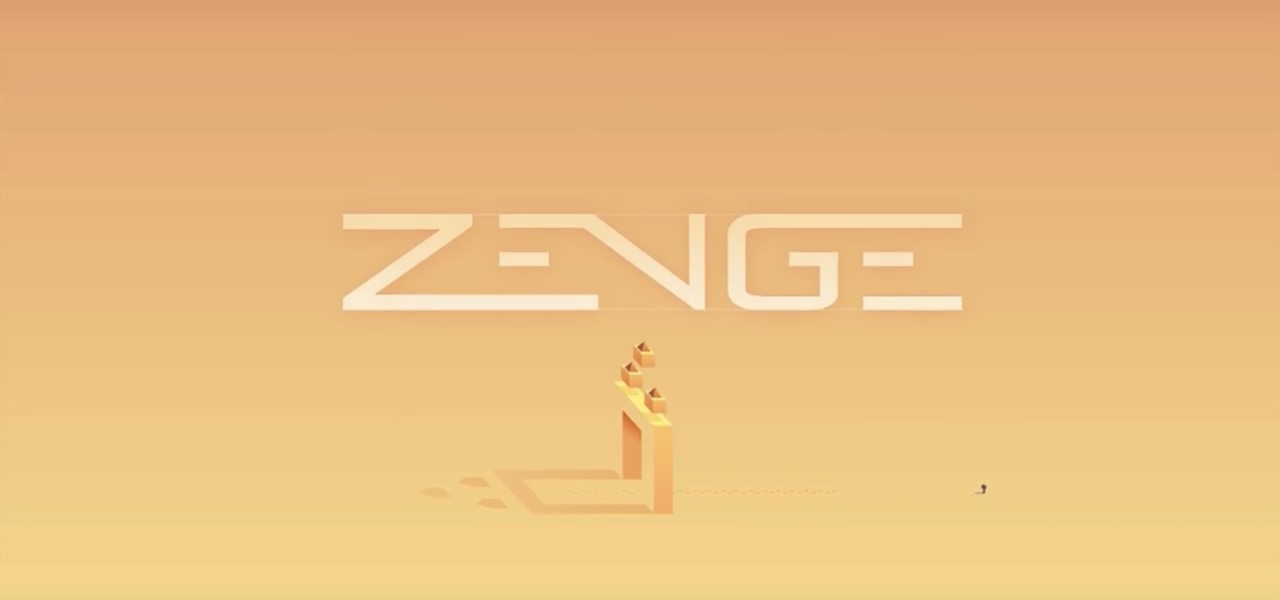
Zenge came to my attention as a free game on the Google Play store — it will remain free until midnight, so anyone catching this review on the 25th, download it ASAP — but I imagine it would be worth the typical $0.99.
At first glance, it may not sound like there's much value in doing a crossword puzzle in augmented reality, but The New York Times has managed to revamp the pastime as an immersive game.
A match stick puzzle. Can you make the matchstick cow look the other way by only moving two sticks (not the tail) and the eye. This also makes a good bar bet. Solve a match stick cow puzzle.
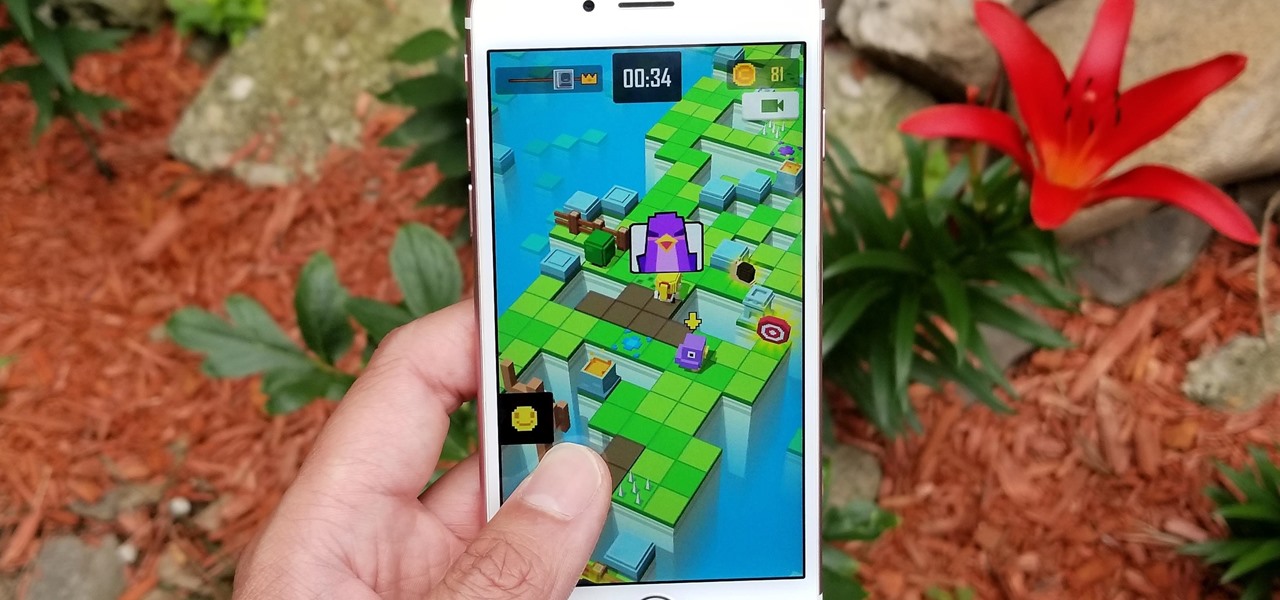
This week's review roundup is a diverse lot. They really only have two things in common—their indie origins and puzzle elements. Otherwise, they come from France, Spain and the U.S., a few from unknown designers and one by the guy who inspired Minecraft.
Mods have gone from car parts to British youthful rebels to computer game addons to this. Rubik's Cube mods. Yes, they're here. This video will show you how to modify a standard 3x3 Rubik's Cube so that it will turn and solve much more quickly and smoothly. You will need a dremel, vaseline, and some other tools, but the results are impressive.
Okay, solving a Rubik's Cube one-handed in 15 seconds is pretty impressive. If you find solving a Rubik's Cube with two hands to be lacking in challenge and flair, try doing solves using only one hand. There is a technique to it, and this video will teach it to you. Basically, you just turn R and U a lot and rotate the cube.
If you've watched our video on solving a Domino Rubik's Cube, you know that asymmetrical Rubik's "Cubes" exist and are readily solvable. If you haven't, go watch that video and come back, because this one is going to teach you how to solve the mother of the domino cube, the 3x3x4 MEGADOMINO (not it's real name). It takes a while and requires some pretty sophisticated Rubik's skills, but if normal Rubik's Cubes are too easy for you go buy one of these!
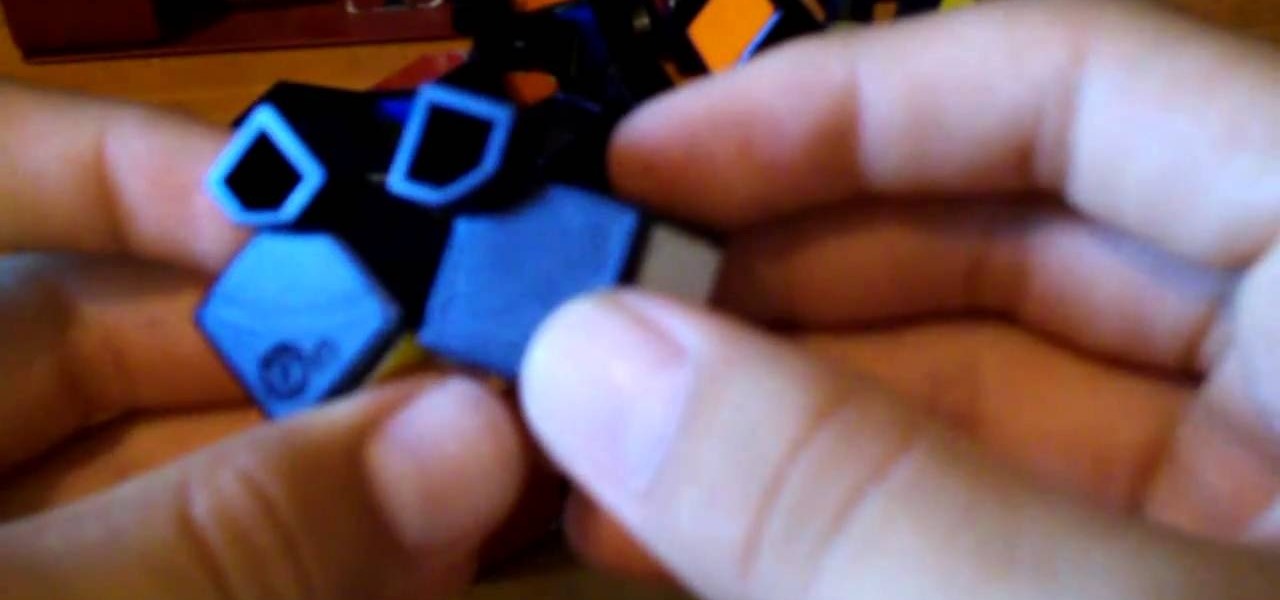
A Mastermorphix is sort of like a more intense version of a Rubik's Cube. This tutorial will show you how to solve this triangular puzzle. Basically, once you know how to solve a normal Rubik's Cube, you will be able to master this in no time.