
How To: Create a warm, grungy background in Photoshop
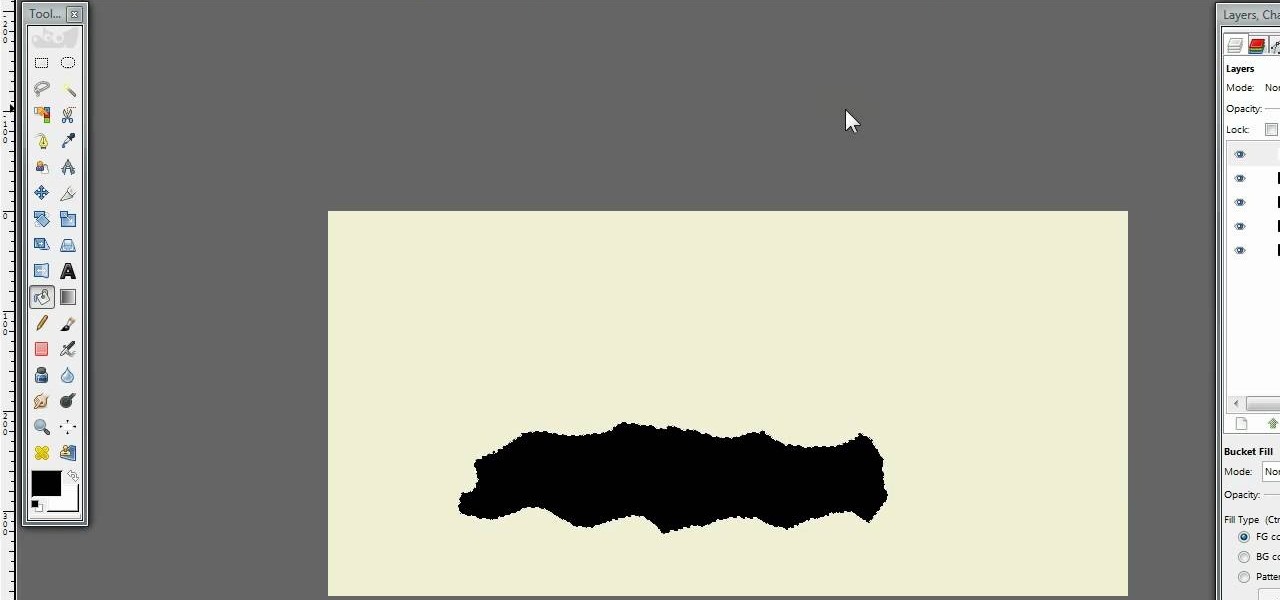
Learn how to create a warm, grungy background in Photoshop. - Open up a brand new document at 1280 x 720.

Learn how to create a warm, grungy background in Photoshop. - Open up a brand new document at 1280 x 720.
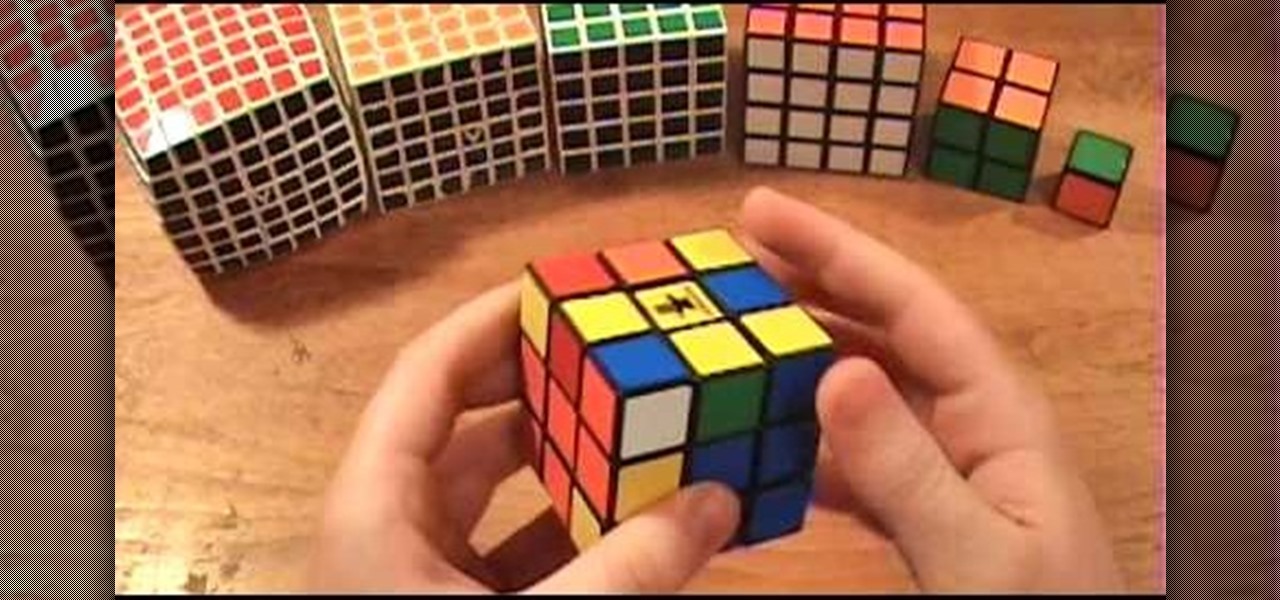
It's time to solve that Rubik's puzzle of yours, but how do you do it? Erno Rubik designed these three-dimensional mechanical puzzles to be precariously difficult, unless you know a little about mathematical algorithms, then it's just a matter of time and determination.
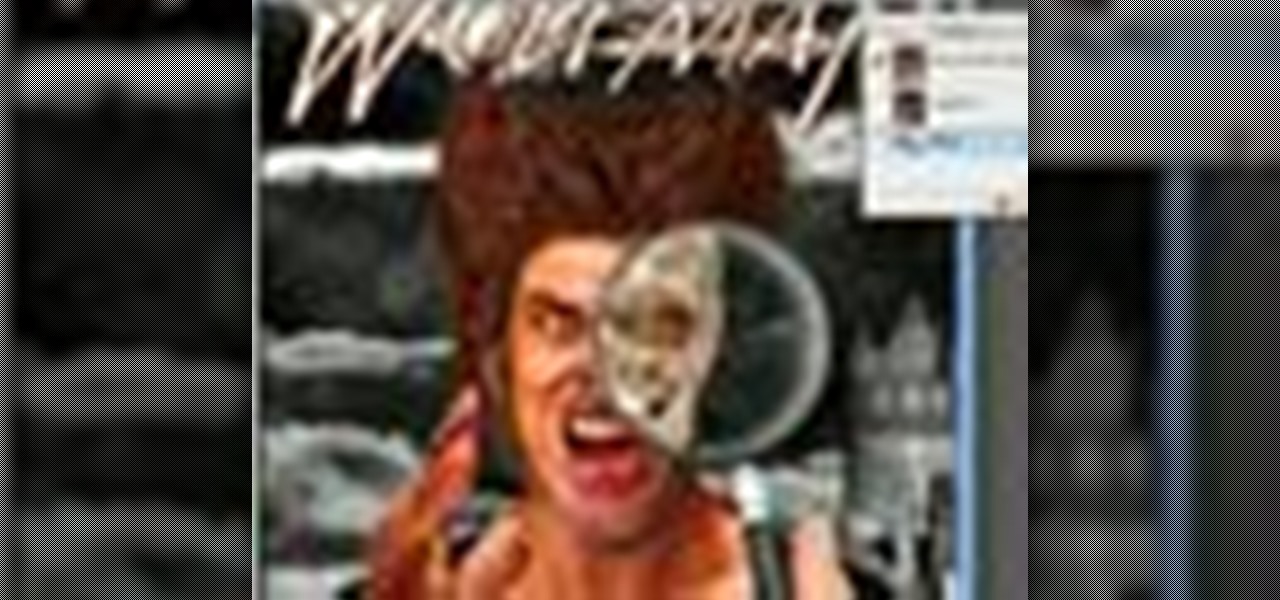
In this Photoshop CS3 tutorial you will learn how to use the knockout feature. This advanced masking technique allows you to move a targeted layer around, revealing the layer underneath. This video will show you how to reveal a creepy skeleton under a monster werewolf right in Photoshop. This classic technique lives again! Learn the subtle qualities of the Deep, and Shallow, Knockout feature in Photoshop.

Ever hear of a Rubik's Cube, well, did you know that some people can actually solve the mighty puzzle? Yes, that right, they sure can, and so can you... maybe.
The V-Cube 6 puzzle is a uniquely designed and constructed skill game. V-Cube 6 is a multi-colored, multiple-layered cube, rotating smoothly on based axes. The player is required to discover a strategy to achieve uniform color sides on her or his V-Cube, but in this process, the Rubik's Cube-like puzzle may break, especially if you're in the process of speedsolving.
This tutorial covers how to use layers to composite footage together and then how to keyframe footage layers. The tutorial gives a clear and easy step-by-step breakdown of using compositing and keyframing in Final Cut Pro 6.
In this video tutorial you will learn to use custom shape clipping masks in Photoshop CS2. The masks offer you great control over your design. This example involves the use of layers and layer style.

In this video, we learn how to ink and color in Photoshop. First, you will want your background and sketch in two layers. Make a new layer which will be the layer you ink your art on. Move the opacity down on this, then zoom in and start inking your art. Use a normal brush in whatever size will fit your art the best. Take your time, then start a new layer when finished. Color the areas of the picture, then when you join these layers together, you will have an entire drawing finished. Make sur...

This video tutorial belongs to the software category which is going to show you how to darken the background in Photoshop using the burn tool. This is an example of how to improve your dodging and burning using the adjustment layers.

In this tutorial, we learn how to make a cool neon text effect using Photoshop. First, type your text using a big and simple font. After this, right click on the text layer and click on "rasterize type". Now, press the control button while you click the thumbnail of the text layer. After this, grab the lasso tool and click "select inverse". Then, set it on 12 pixels in the toolbar. Now, use the magic wand too and select each of the letters by holding shift. Next, create a new layer and click ...

Open the picture you want to edit. Right-click on the main picture layer in the box and then select "Duplicate Layer". Then, in the same box, go to the drop-down menu that says normal, and change it to "Overlay". Then, select Filter>Other>High Pass. In the box that comes up, set the radius to 7.4 pixels. Next, go to Layer>New Adjustment Layer>Gradient Map. Then, when the box comes up, click OK. Then click on the main gradient in the Gradient Map. In the new box, there is a bar that goes from ...

In this video, we learn how to turn a photo partially black and white using PhotoShop. First, open up the program and open up the picture you'd like to change. Now, click with the right key above the layer and choose duplicate "layer". Now click above the eye icon to hide the layer, then select the layer. Now you can go to image, adjustments, then black and white. Now make the second layer visible and select the eraser tool. Wave your brush over everything but what you want to keep colorful. ...

Sandra Lee shows viewers how to make a No-Bake Love Cake in this video. You will need the following ingredients:
First create a new 800x600 document and fill it with black color. Then create a new Layer and add a white circle with the hard edge Brushtool Select the 'Eraser tool' and use the same brush (a bit smaller) to erase the inside of that circle. Rightclick an layer 1 and go to the blending options. Add a contour. Now you should have a simple ring. Create a new layer again, and drag a dark red/brown circle inside the ring. Open up the Apple Logo (download in discription). Resize/replace it. Rightc...

River City Graphix Tutorials demonstrates how to make a reflection in Photoshop. First, fill the background layer with black. Then, select the text tool and a color of your choosing. Type the words that you would like to reflect. Next, duplicate the layer to make a copy of the layer. Hold shift and bring it down, setting it on the bottom of the other layer. Select the rectangular marquee tool, right click to get the free transform tool. Right click again and then flip the image vertically. Se...

In this how to video, you will learn how to turn a photo into a line drawing in Photoshop. First, open your image in Photoshop. Create three layers of the same photo. The top two layers will be worked with. The bottom layer will remain the same. Take the top layer and change it to color dodge. Select control and I on the keyboard to invert it. Go to filter and blur to choose Gaussian blur. If you have dark lines, use a small amount of blur. You can use a lot of blur to get a unique look. Clic...
To create glossy or reflective vector image, you will need to know how to use the offset options in Adobe Illustrator and the basics for pathfinder. You will be creating a vector image that can be resized without hurting its quality. To start select you text style, which be glossy for this. You will have first a white layer, a shadow, a radiant layer, a white outline and a shadow going underneath. In this video the Oh Gizmo Logo! is being used as the template. Right click create outlines. You...
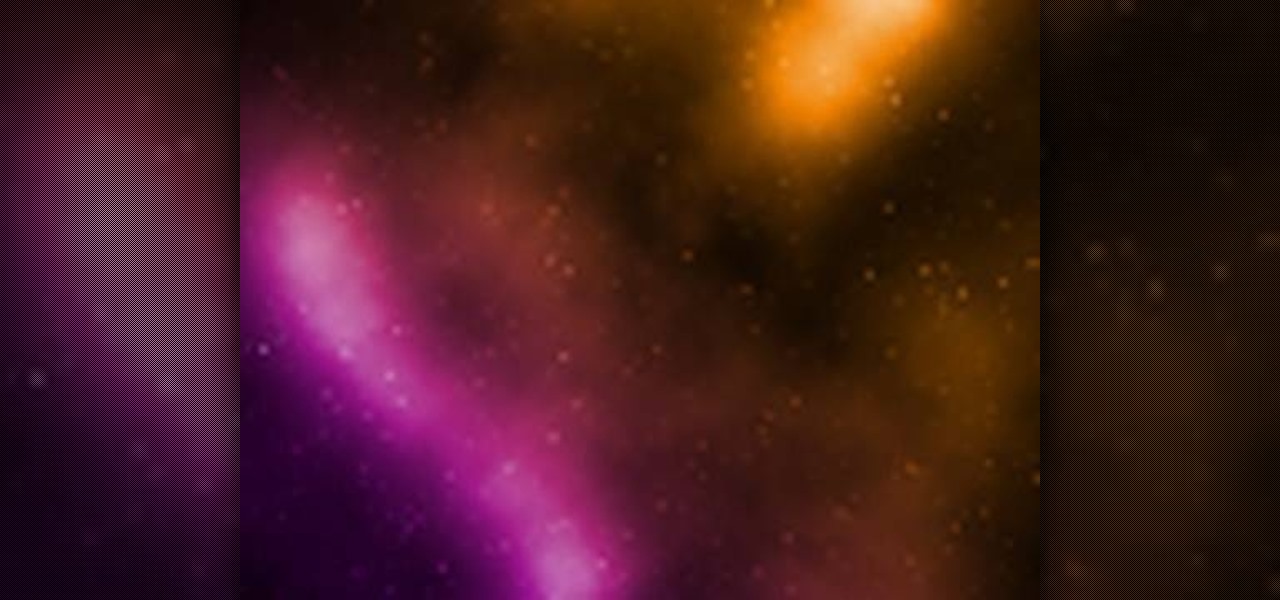
This how to video shows you how to create a nebula star scene in Photoshop. First, create a new image in Photoshop. Fill the background with black. Next, create a new layer and call it stars. Go to filter and select noise. Choose Gaussian and click monochromatic. Click okay to add the noise. Once that is done, go to adjustments and levels. Change the settings so that you have less clutter. Next, make a selection in the middle. Copy and paste it as a new layer. Go to edit and select free trans...
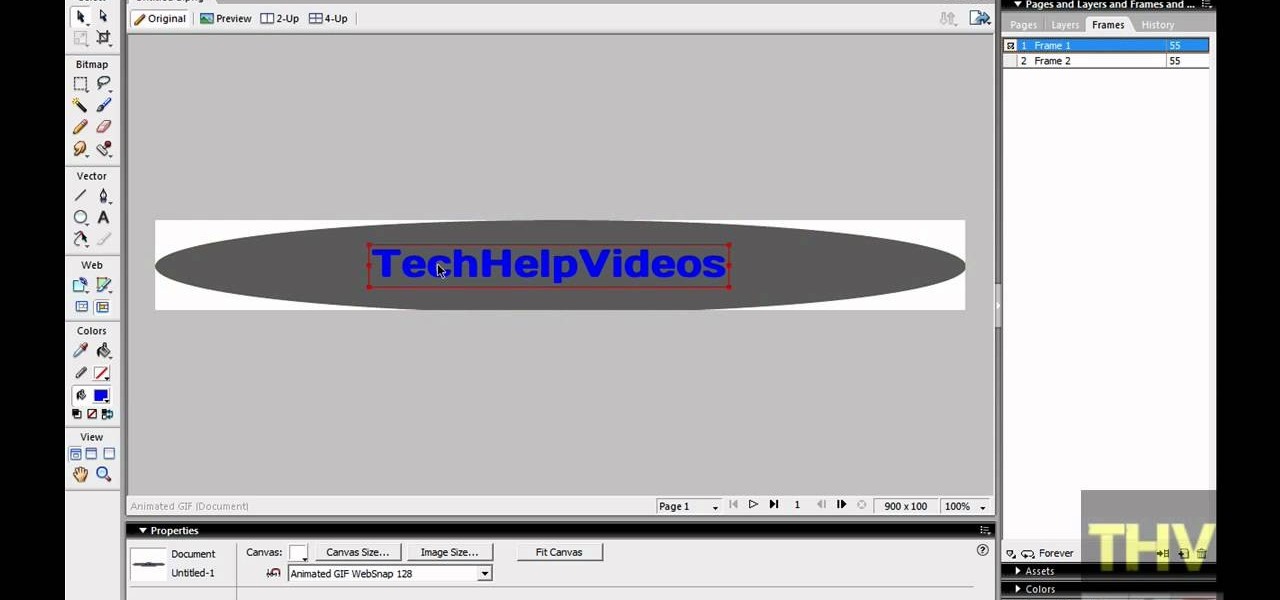
First of all open adobe Firework CS3/CS4. Open the 'file', then 'new' and set a banner with 'width' as 900, 'height' as 100 and ‘resolution’ set as 72. It shall open a banner for you on the screen. Now from the side bar underneath the vector, select the 'ellipse tool' and then drag the ellipse to fill in the whole banner as shown in the video. Now from the right side bar you have to expand the 'pages and layers'. Now select 'optimize and align' and select 'animated website 1. 2a’. Now minimiz...
Hulldo teaches you how to create your own headlines in GIMP. You start off with a new file and paint that a light brown. Make a selection on the file and create a new layer on top. Color that layer black and add Gaussian blur. Put that layer beneath so it will make a shadow on your selection. Create the start of a gradient or simply a Grey layer on the bottom of the headline. Then add your text with black color. You can duplicate these layers, reside the selection and change the text. You are...

1. This video describes how to make an ice cream casserole. For this first, you need the following ingredients "Ice cream Sandwich, Cool whip, Caramel Sauce, Chocolate Sauce and Butter rings. Now take a big pan and arrange the "Ice cream Sandwich" in the bottom of the pan and in the next layer apply the "Whipped cream" to cover on fully on the Ice cream sandwich layer.
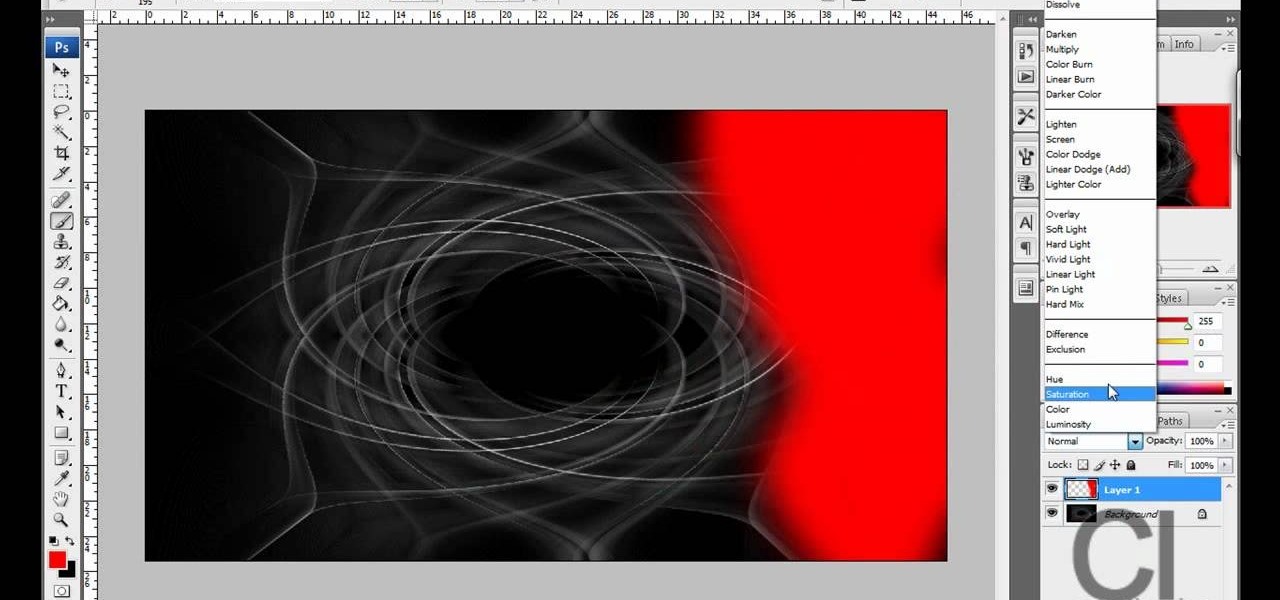
CreativeIceDesigns teaches you how to make a colorful abstract background using Adobe Photoshop. Go to File - New and make it 1280 x 720 pixels. Make the background black. Use the Lasso tool to make a star shape and fill it with white. Go to Filter - Blur - Radial Blur, amount 100%, zoom best. Go to Filter - Radial Blur. Then Filter - Stylize - Find Edges. Press CTRL + I to invert. Go to Filter - Distort - Twirl - 300 and press OK Duplicate this layer. Go to Filter - Distort - Twirl and choos...
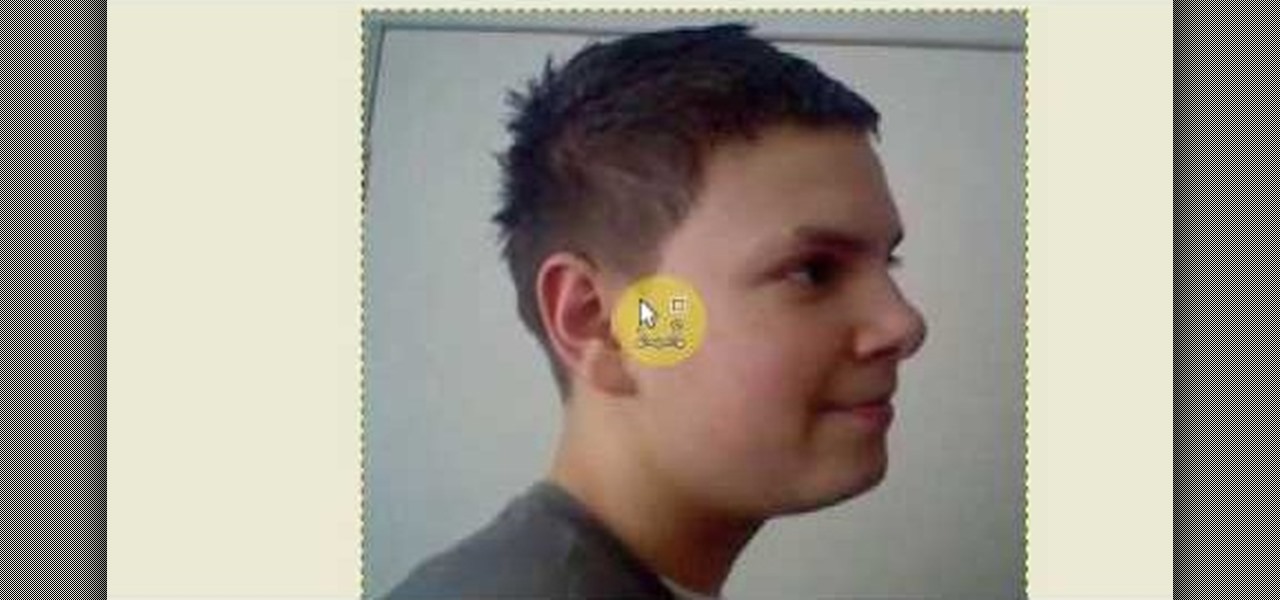
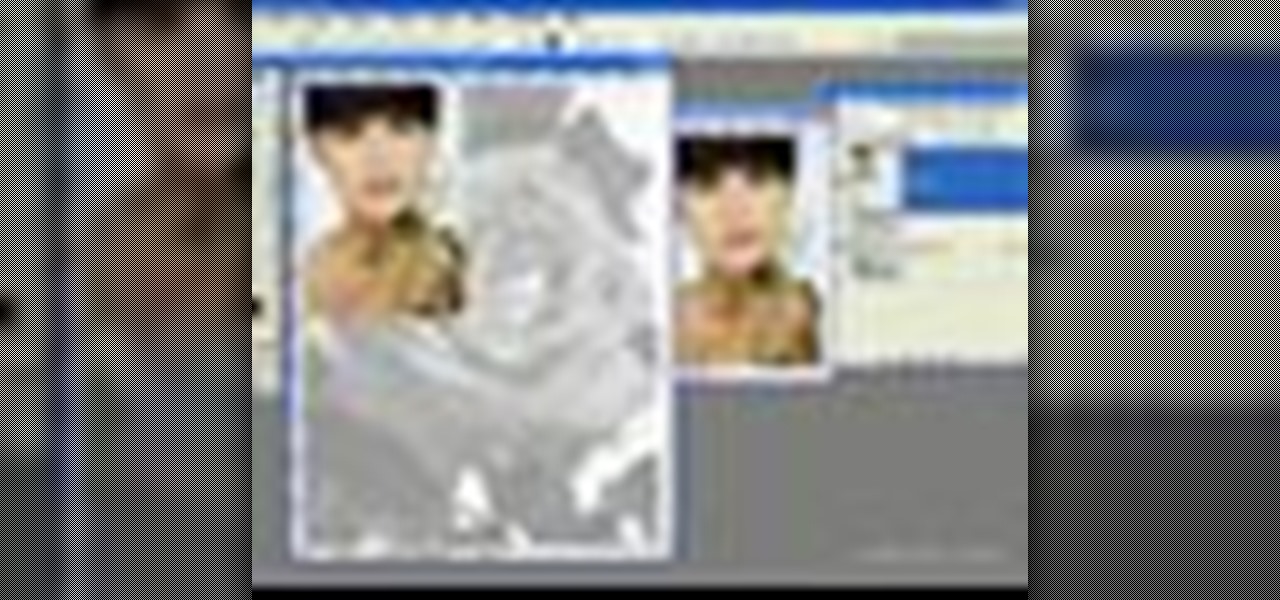
Open up the GIMP on your computer, and then proceed to open up the photo you wish to modify. Now, select the scissors tool from your Tool palette or by clicking "Tools" on the menu bar, then click "Selection Tools," and also click "Intelligent Scissors." Use this tool to outline the person's hair in the photo by clicking along the hairline at about 1/4-inch intervals until you return to the first place you clicked.
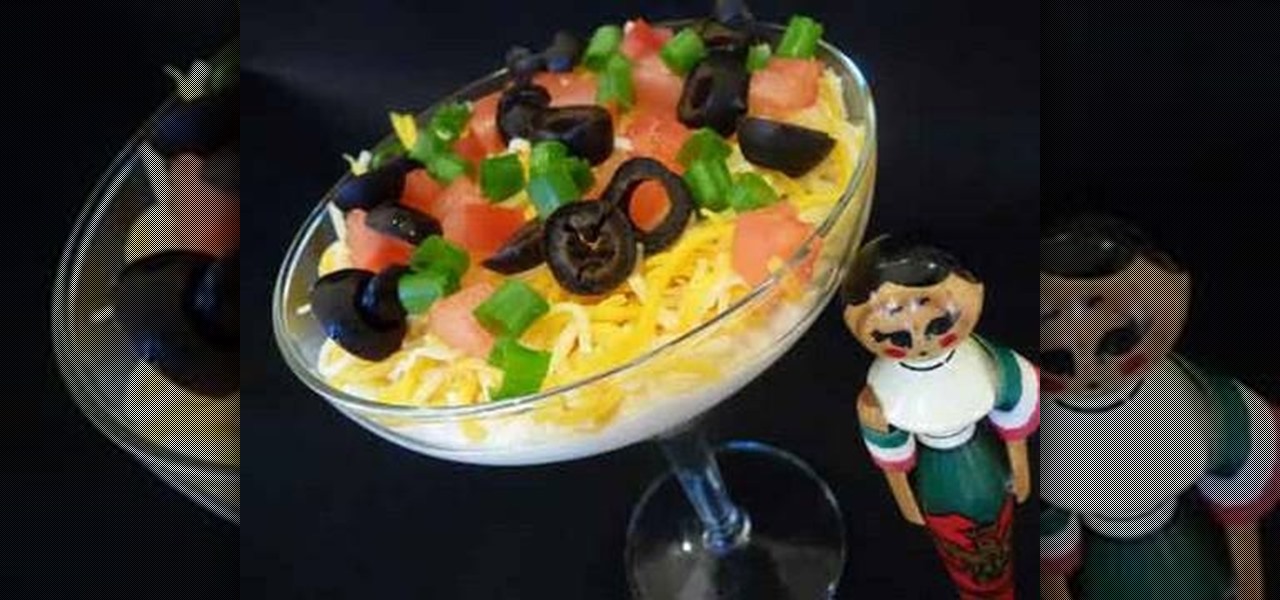
Hetal and Anuja from Show Me the Curry! take a step away from their usual Indian cuisine to show you how to make a delicious Mexican-style seven-layer dip. Choose the serving dish. For large parties a decorative bowl is suggested; otherwise, you can make individual servings in a margarita glass. For the first layer, spread refried beans in the bottom. Make this a thick layer as it is the most substantial part of the dip. The second layer is guacamole; spread this over the top of the refried b...

Do you want to learn how to create a comic book style cloud using Photoshop? Now you can with this video. First of all, create a blue colored layer. Next, create a few white shapes on this background. Now duplicated this layer. Go to the bottom layer and make it black. Go back to the top layer and move it a tiny bit so that the black shows. Combine the layers and now blur it. There you have it, a comic style cloud in under 3 minutes.

This video instructs you step by step how to make a six layer Mexican dip. It's very simple to make and this video proves it. You should evenly layer refried beans, then tomatoes and onions on the next layer, then the sour cream, next the cheese, and put it in the oven for about 5 minutes. Then finally layer the green onions on the top and you are done. With just a few simple steps you can complete this easy dip.
This is a very informative video on creating multiple layers and short cuts on how to edit the already made layers to match your preferences.
This instructional video demonstrates how to paint, collage and stencil using a layering technique. Experiment with as many layers as you want. Make sure each layer is completely dry before beginning the next layer.
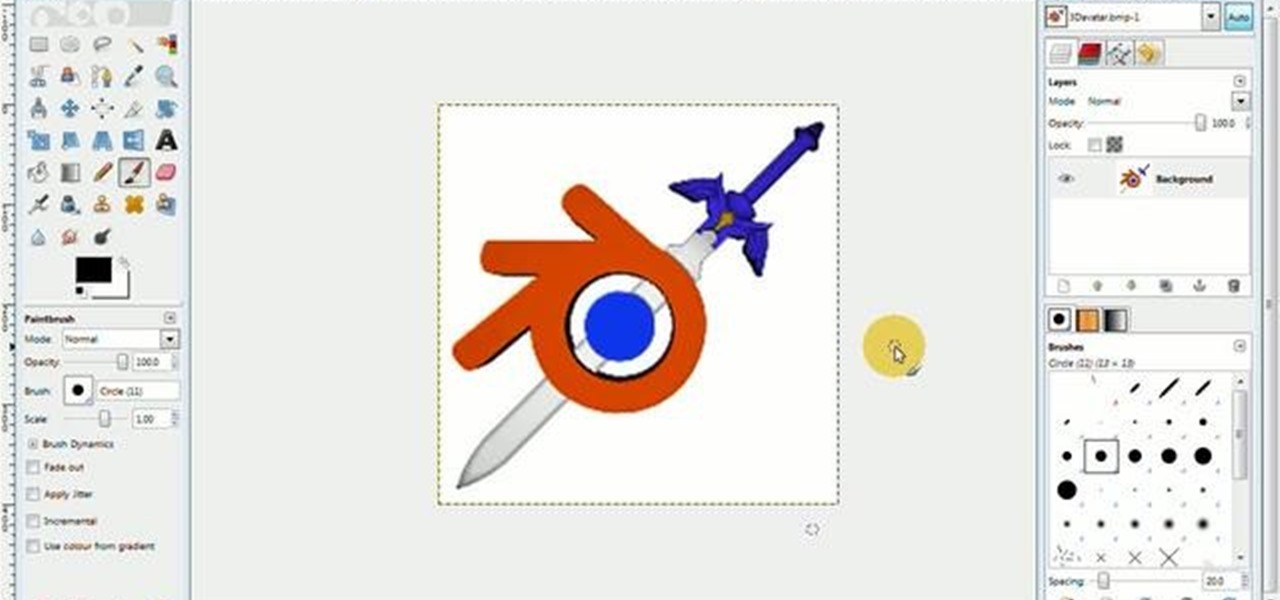
With this free video software tutorial, you'll learn how to create and stack multiple layers à la Photoshop in the GIMP image editor. This particular clip uses the effect in service of making a Blender logo with a Zelda sword through it but, obviously, it has quite a lot of other applications. For more information, and to get started using multiple layers in your own GIMP projects, take a look.
This video describes how to create an easy glossy button in Photoshop. This is done by "simpleretouch.com" website. First select the "Ellipse Tool" from the Photoshop tool bar and then drag it on the layer; it will give the ellipse shape in the layer. Select the "Blending options" from the "Layers" Menu by double click on the layer which is right below corner. From the blending options choose only the "Gradient Overlay" and in that we can choose color and its gradient as your wish. Now take a...
This video will walk you through the process of creating your very own icon to use for your email by using Adobe Photoshop. Photoshop is a great tool to use for a variety of purposes and in this instance can make the perfect icon in just minutes.
Embroider away with the layered lace technique! Add embroidered petals to your flowers and wings to your butterflies with a new technique called layered lace. After embroidering the separate pieces, layer them together for a fantastic three-dimensional effect! Layered lace is a wonderful embroidery technique for pins, barrettes, napkin rings, and more. Enjoy this instructional video.
Many transformations can be applied to a layer in Photoshop. This three part tutorial covers them starting with scale. Part two works with a few of the other transformation menu items. Select a layer - Choose Edit > Transform > and select a sub menu item. Part three covers the uses of Free Transform. Layer flipping and a very cool shortcut to rotate a layer with the Measure tool.

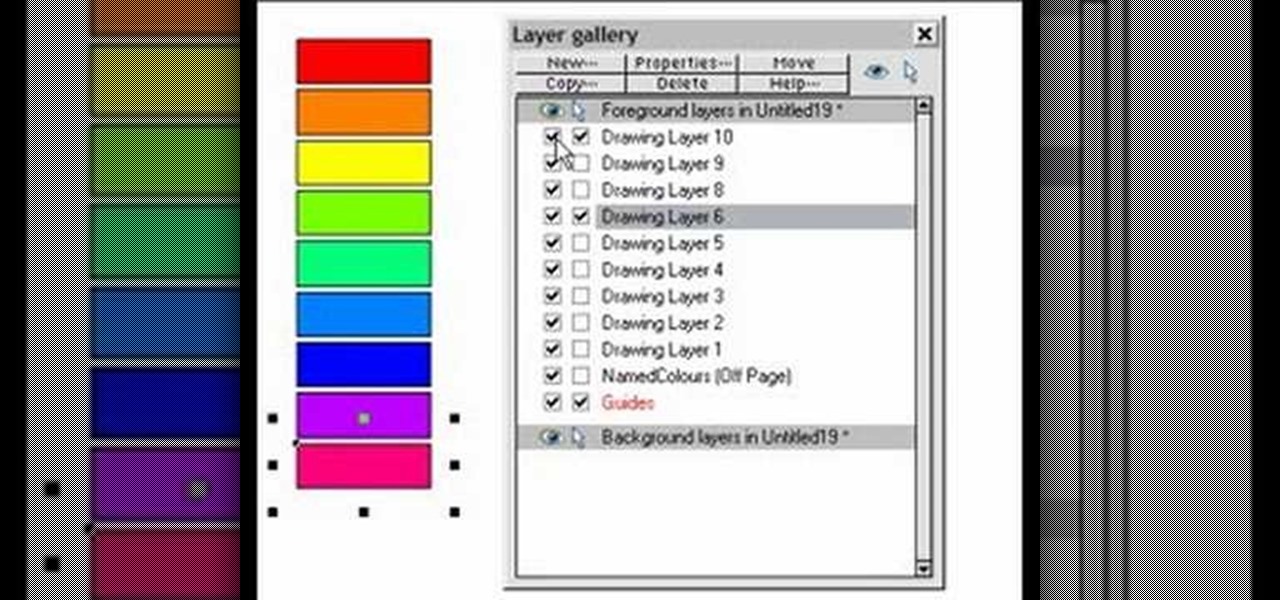
This Photoshop tutorial is a series covering the Layers Palette. The first tip covers the background layer. Layer locks and Layer Fill options. Different layer types will be covered in the second tip. As well as layer duplication, hiding and deleting.
Having short hair is both a blessing and a curse. Short hair is a LOT easier to maintain than long hair, but at the same time there are fewer options for styling.
Duct tape isn't only handy for taping your rear view mirror back when your drunken cousin knocks it off in a fit of intoxicated rage. In fact, duct tape is a excellent and cheap material for crafting.
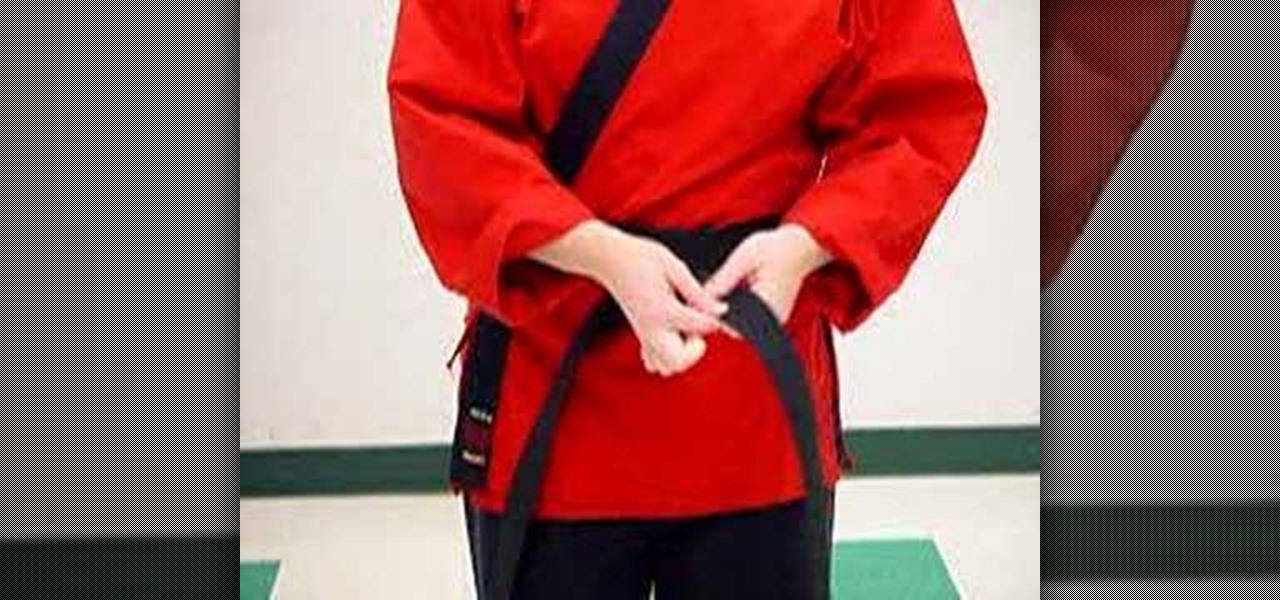
This video shows how to tie a karate belt. Take a double wrap belt, place the middle of it on your belly button and pull it around on to the back and cross the belt on the back. Take the layer on the bottom and tuck it underneath the top layer all the way around to the front side. Thus you can get a single layer of the belt on the back. In the front there are two layers-one coming up from the bottom and the second one is the top layer. Take the top layer and push it up from underneath the bel...
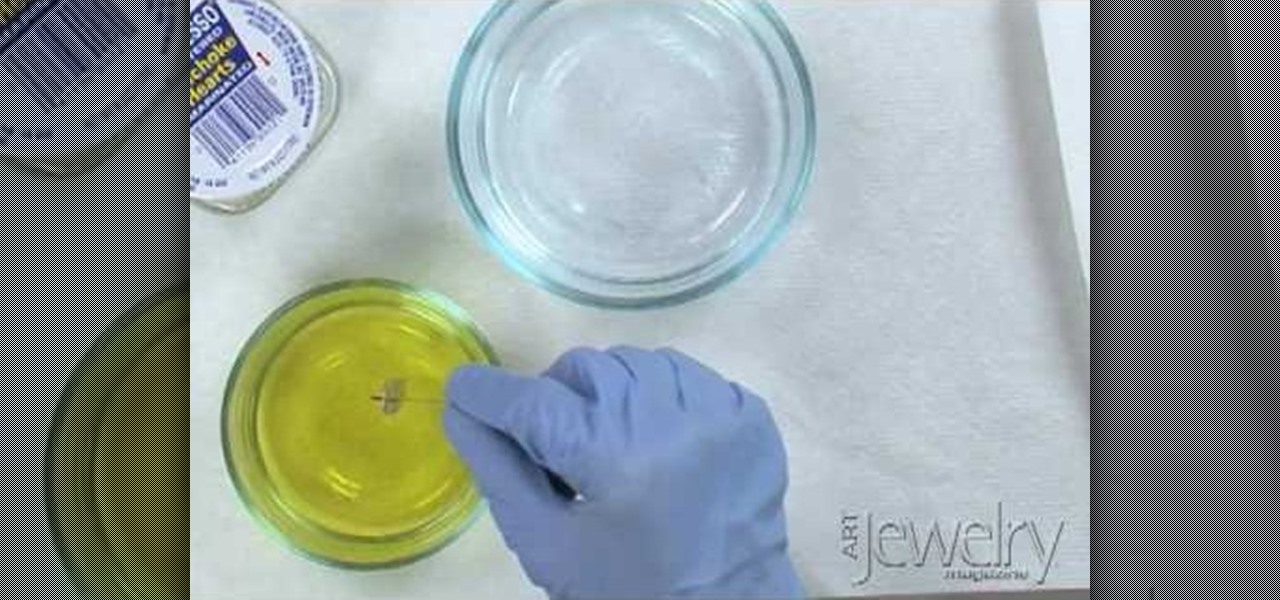
artjewelrymag teaches you how to use a liver of sulfur solution to create a patina. First, be sure to wear protective gloves and eye gear. Be sure to perform this operation in a well-ventilated area because sulfur smells like rotten eggs. To get started, add a few small pieces of liver of sulfur to a small dish of warm water. Use a wooden stick or a small PVC pipe and stir. The temperature and the amount of time you leave the metal in the solution will affect the patina. You can dip the metal...
Ever wondered about those digital effects in advertisements having some parts in pixels? Let's try it. Open Photoshop and take a picture. Duplicate its layer and on the new layer,select it and go to filters->pixelate->mosaic. Then you can mask the new layer with having some parts in blur and the other one's in focus or can use gradient. You can lighten or darken the mask layer for better output. This helps in creating unique styles and digitize your world.
This video from photoshopuniverse shows us how to make your picture look like it's a puzzle by using Photoshop! First you want to open up the layers palette and duplicate the layer. Now add a new layer and bring it down to the middle and fill it in with black. Now to get the puzzle into place, go to Filter---Show Menu Items---Texture---Texturizer. Click the arrow to load texture. Load in puzzle texture. Now you can set the scaling to however many puzzle pieces you want. He put it at 75% and t...