

News: Print a 3D Model of Your Face Using Your iPhone
There are plenty of cutting edge apps out there, and endless innovations in the field of 3D printing. But to combine the two—and make it available to the common consumer—is unprecedented.

There are plenty of cutting edge apps out there, and endless innovations in the field of 3D printing. But to combine the two—and make it available to the common consumer—is unprecedented.

Have you ever felt the desire to reach out and touch a galaxy? Or "feel" those stunning nebulas and planets you see in Hubble photos? As alluring as it sounds, it's safe to say the odds of your whim coming true are nonexistent. You'd have to travel about 6 earth years and spend millions of dollars building your own personal spacecraft to get close enough to actually wave your hand through one of Saturn's rings. But in an attempt to help the blind "see" what they're missing, some semblance of ...

Architect Enrico Dini is an innovator in the world of 3D printing. Dini is racing to produce the first marketable printer that can print full scale structures on site. Development has been seven years in the making (which has left him nearly bankrupt, and cost him his marriage).
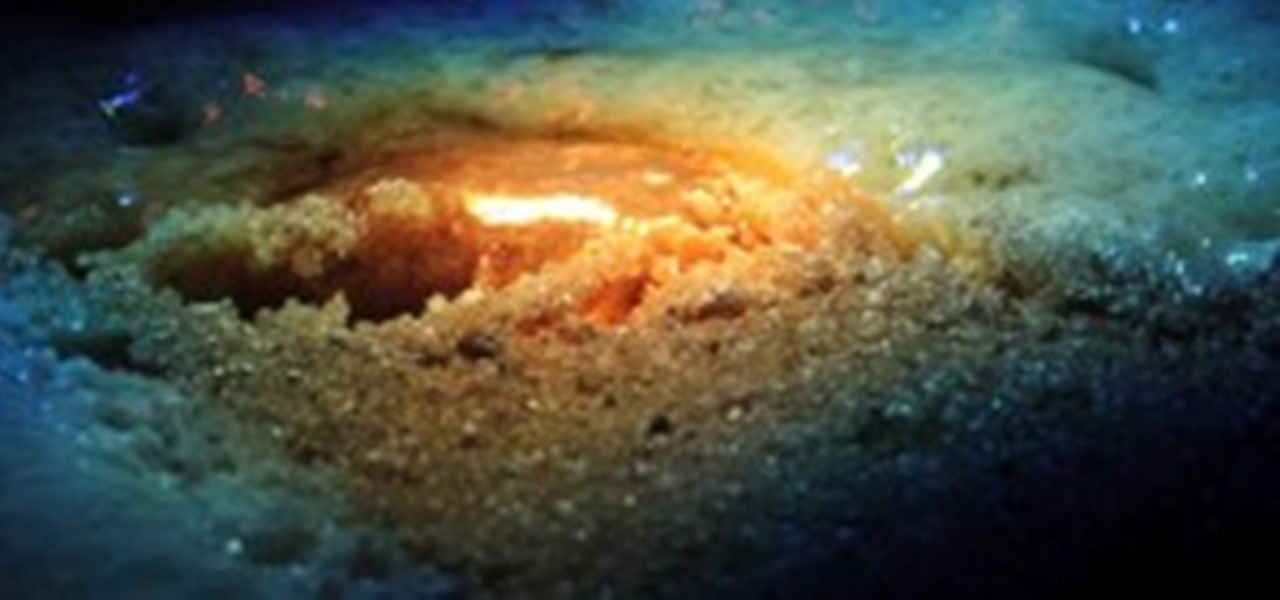
No matter if you've used one or not, you've got to admit that 3D printers are pretty darn awesome, especially the self-replicating ones that extrude molten plastic and the shoebox-sized versions that use mesmerizing stereolithography to build tiny objects layer by layer. But what's even cooler? A solar-powered printer that uses the sun's energy to melt sand and make 3D objects out of glass.
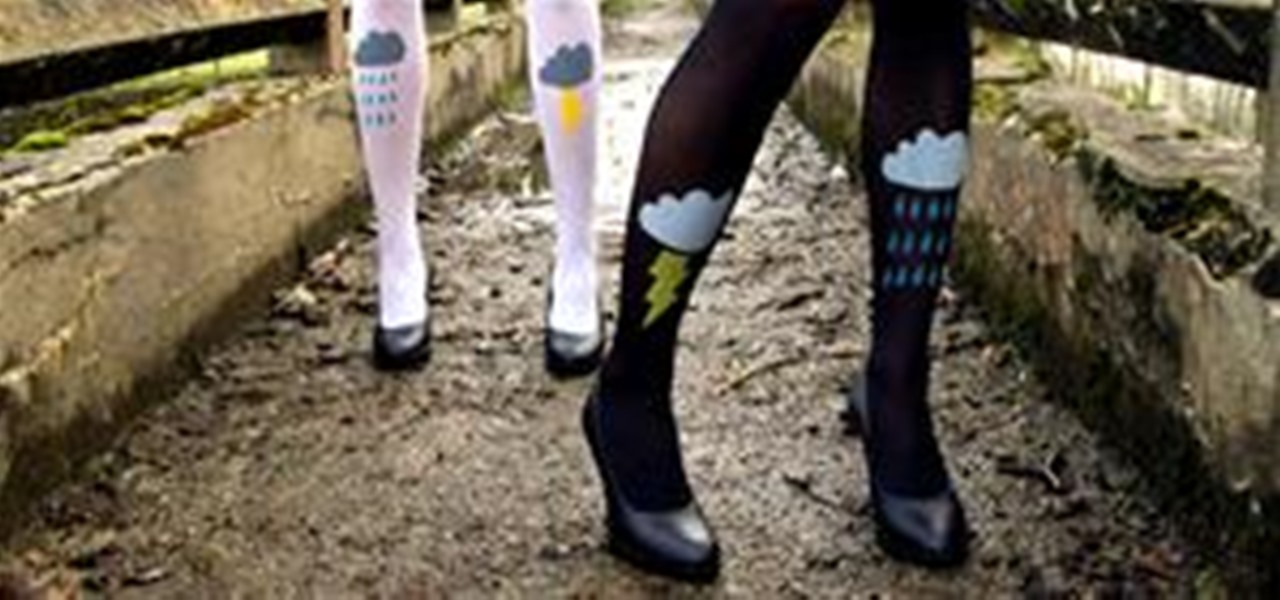
We've seen screenprinted t-shirts, sweatshirts, maybe even a dress or tie... but what about tights? Predicted trend forecast for 2010, these hand printed tights are available in limited quantities from designer Les Queues de Sardines. You can buy now at (my favorite) Colette, the famed French boutique, always on the forefront of fashion.
When turning your 3D model into a 3D print, Maya requires some extra editing before you end up with a printable piece: the wall thickness needs to be checked, the model needs to be watertight, and your final printing size needs to be defined. To make your life easier, Autodesk Maya expert Russ Ogi has put together a step-by-step tutorial about how to make your Maya 3D model printable. See more at: 3D Printing with Maya: Step-by-Step Tutorial on How to Turn Your 3D Model into a 3D Print.
We've all tried writing with lemon juice (a.k.a. invisible ink). It's a mess. And the main draw back is definitely efficiency.
Check out this 1959 instructional film on how to manually set type on a letterpress. You can use these techniques to create posters, chapbooks, artist prints, and all kinds of D.I.Y. old school printing fun. All graphic designers and anyone working in the printing should check this out. The video demonstrates basic principles of typesetting and distribution. The film stresses the correct way of manipulating the type, spotting letters before they are chosen and the importance of following copy...
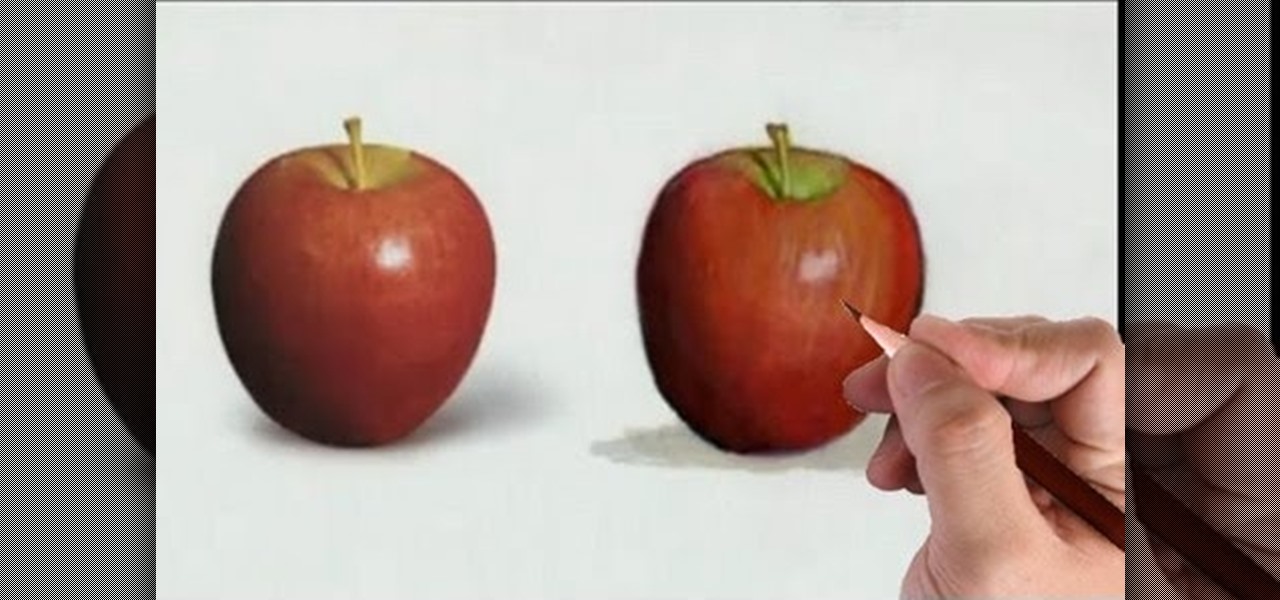
Watch this fine art video tutorial to learn how to illustrate with markers and colored pencils. "This video shows my process for making an illustration (non tradigital). I use illustration markers (usually prismacolor) and color pencils (usually prisma once again) and a wax blending stick. I make my illustrations in two steps:

Remember those old vinyl records? Remember jumping on the 8-track bandwagon? Switching over to cassette tapes? How much money you spent converting your music collection to compact discs? To MP3s?
Adobe InDesign is the document-making arms of the Adobe CS4 family of products. This video tutorial demonstrates some handy tips for using it more effectively, including how to prepare InDesign documents for printing and some tips for what color modes and dpi's to use when preparing your documents.
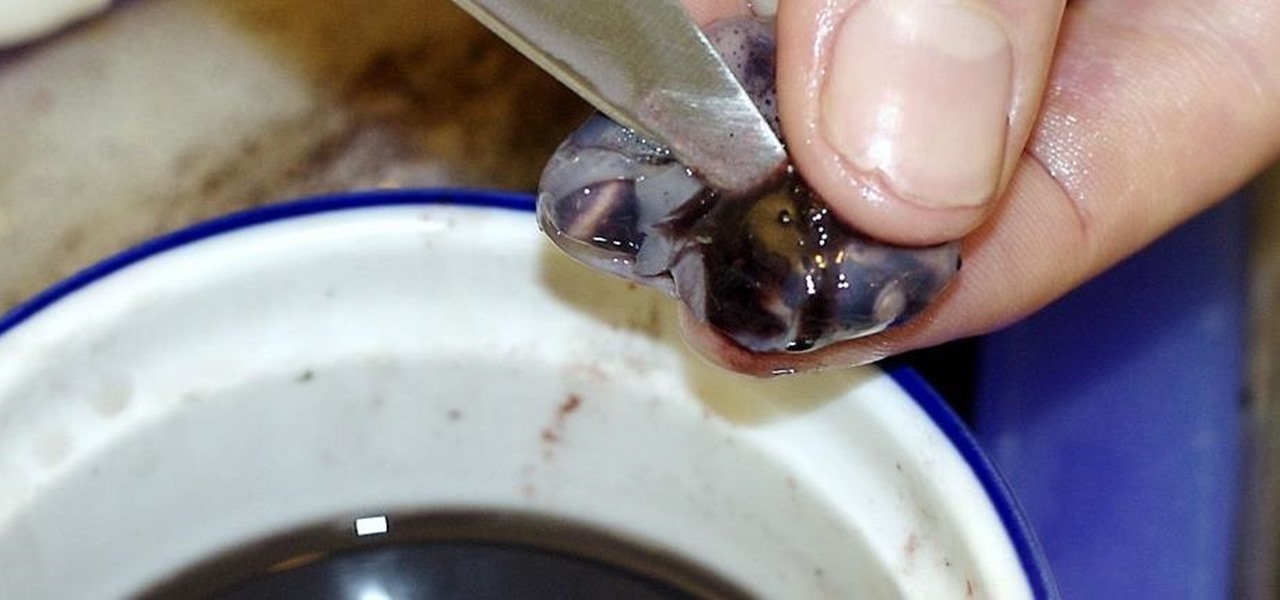
This is an Instructable by canida on how to harvest squid ink. Clean your own squid, and collect ink for printing or cooking!

Google Earth is a great tool of the web, if you know how to use it the right way. Learn everything you need to know about using Google Earth in this powerful video series set to show you all the basic maneuvers and tricks to using the well known application. Google Earth is a cross-platform program, so the steps shown in this video series will work on Windows operating systems, as well.
What's the easiest way to keep track of your website passwords? Maybe in a password-protected document on your computer? Makes sense.
In this clip, you'll learn how to export poster art for high-resolution printing when working in Adobe Photoshop CS5. Whether you're new to Adobe's popular raster graphics editor or a seasoned designer looking to better acquaint yourself with the new features and functions of the latest iteration of the application, you're sure to benefit from this free software tutorial. For more information, watch this video guide.
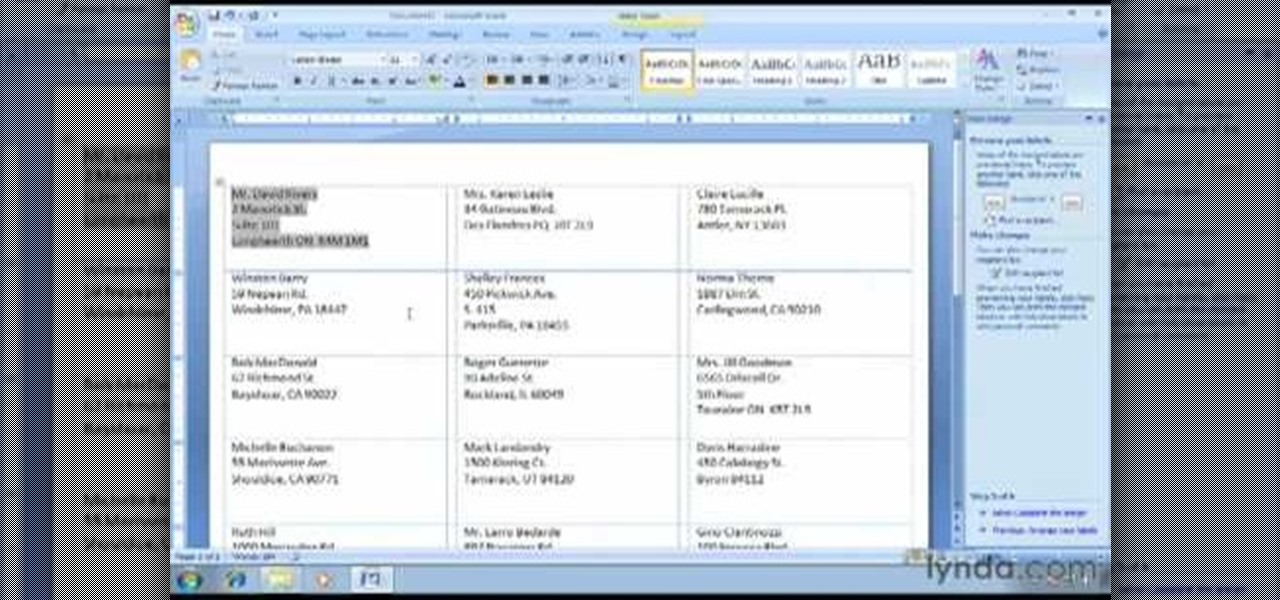
Interested in designing and printing out custom envelopes within MS Office Word 2007? Whether you're new to Microsoft's popular word processing application or a seasoned professional merely looking to pick up a few new tips and tricks, you're sure to benefit from this video tutorial. For complete instructions, and to get started designing your own envelopes and labels in Word 2007, take a look.
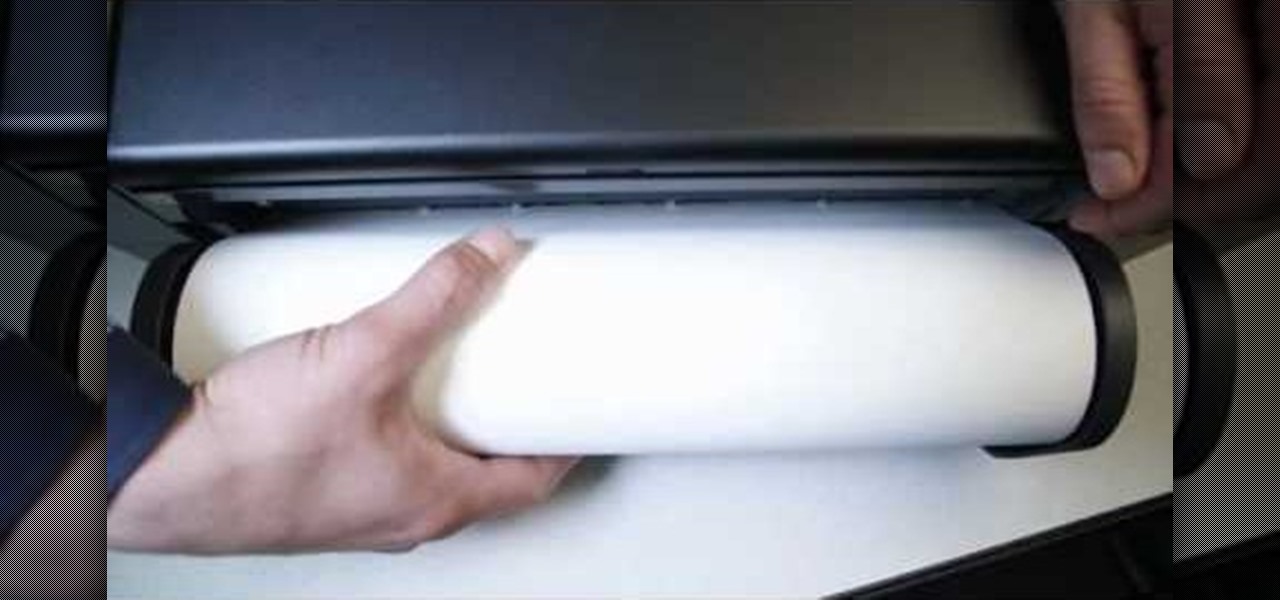
The Epson Stylus Photo R1900 printer can not only print on paper, but it can print from roll paper, too! No more single sheets of paper are needed, which is especially nice when printing banners or larger documents. Epson shows you how to load roll papers such as Premium Canvas Matte and Satin into the Epson Stylus Photo R1900 using the roll paper holders that are mounted on the back of the printer.
Have you ever been in a situation when you needed to remember something real important, but you didn't have you didn't have your trusty cell phone or other electronic savior with you?
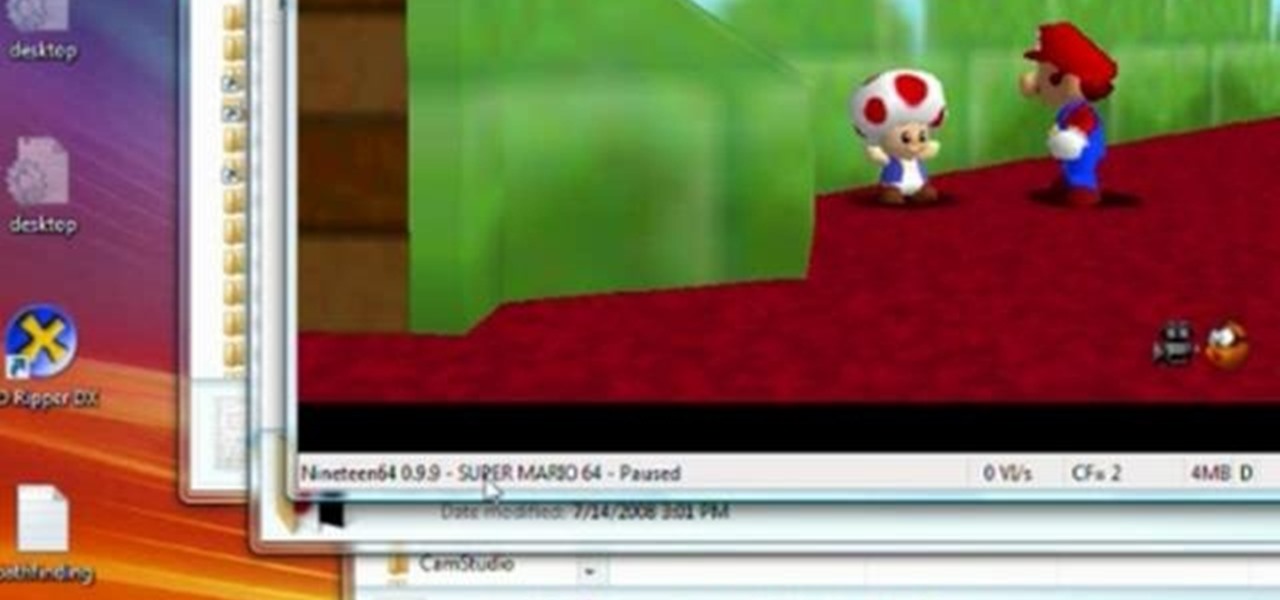
With paper crafting you can build intricate paper models of your favorite characters, from Jack Sparrow to Nintendo's own Toad. This video tutorial shows you how to rip 3-D characters from your favorite Nintendo 64 games for the purposes of paper crafting. It will take some editing to be able to get your favorite videogame characters into a workable papercraft format.
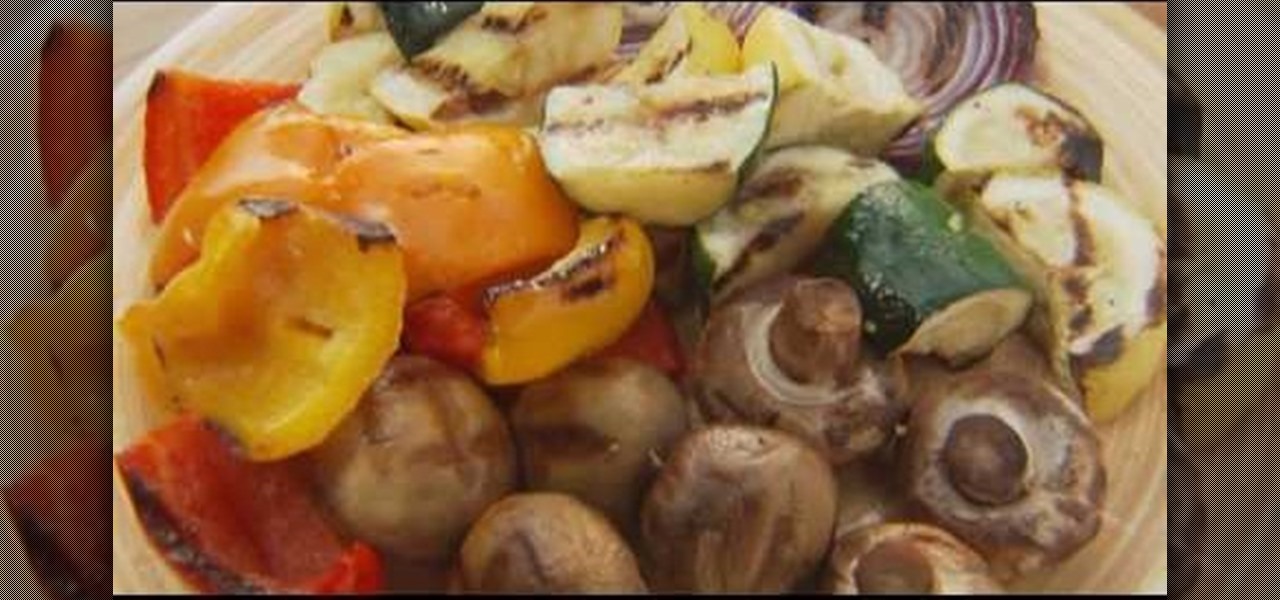
In this Do-it-Yourself video, presented by Lowe's, you will learn step-by-step how to Cook Fruits and Vegetables on your Grill. Cooking utensils needed: Tongs, a Spatula, Skewers, and a Basting Brush. It also gives the option for printing the instructions at Lowes.com/Videos. It explains how to cut the vegetables and sear them until they are tender, giving them a smoky flavor. It then explains how to cut and grill the fruit so that the fruits natural sugars are caramelized, giving them a swee...
Instead of using Photoshop, why not give Apple's Aperture a try? Aperture is designed more for post-production work for professional photographers, letting you cull through shoots, enhance images, manage massive libraries, and deliver stunning photos.
Before there was digital music and fancy computers and music software, people use to employ the power of the electric color organ (now more commonly known as the "light organ") to add some visuals in sync with their music. MAKE shows you how to build your own sound-to-like circuit— your very own light organ!
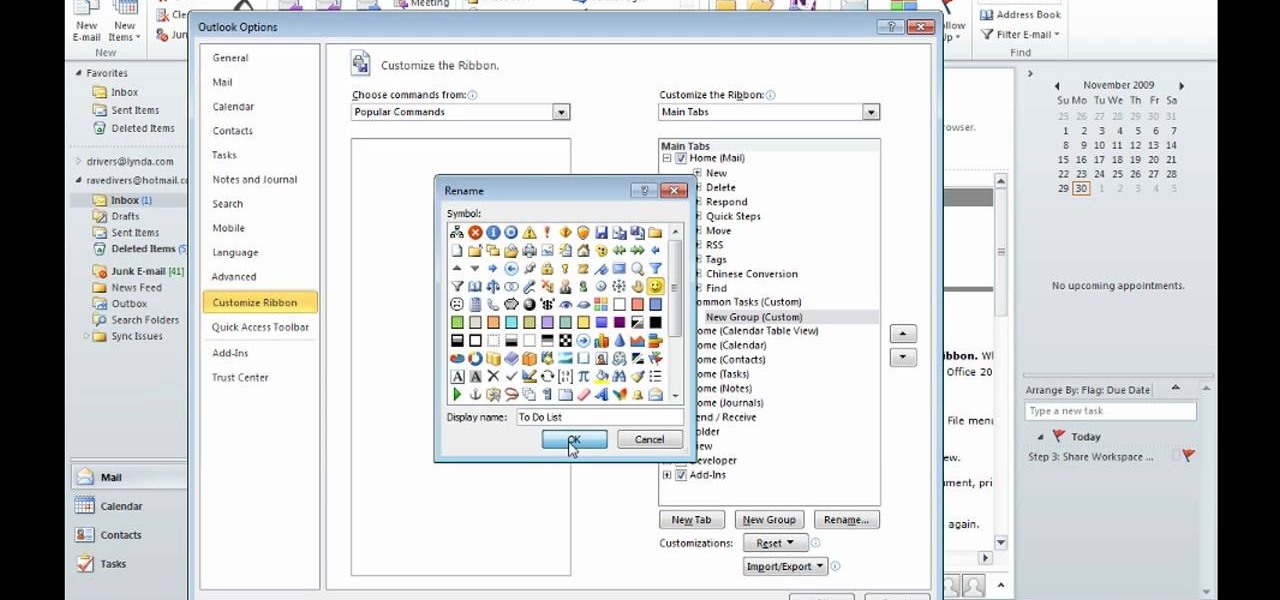
After you launch Outlook 2010 in your computer, you will see the Ribbon strip immediately in the main window. The button for writing a new e-mail is separated from a button for creating new items in the calendar, contact list or task manager. An independent Quick Steps section offers functions allowing you to move a message into different folders, to save it into a calendar as a meeting reminder, to quickly forward it to a chosen person or to more people and to forward it with a FYI note. If ...
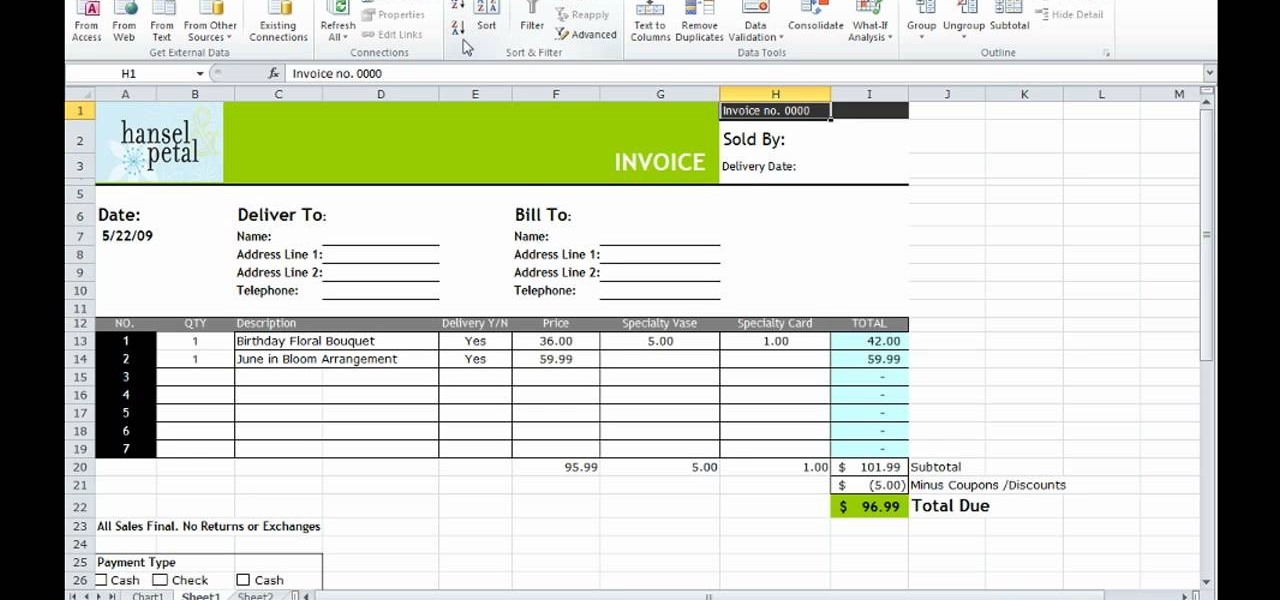
This how-to video is about how to use the Ribbon and Backstage view in Microsoft Office Excel 2010.
Need a little help choosing the right paper for the job? When it comes to making a good impression, choosing the right paper can make all the difference. Use guidelines will help you pick the best type for your project.
This shows the process of making a positive image on clear glass; traditionally, this would be called an Ambrotype. Here, it is a little bit overexposed to get a "soft negative" or a negative that can be used with modern silver paper (printing). Learn how to make a glass positive or soft negative picture with the Collodion printing technique by watching this video photography tutorial.
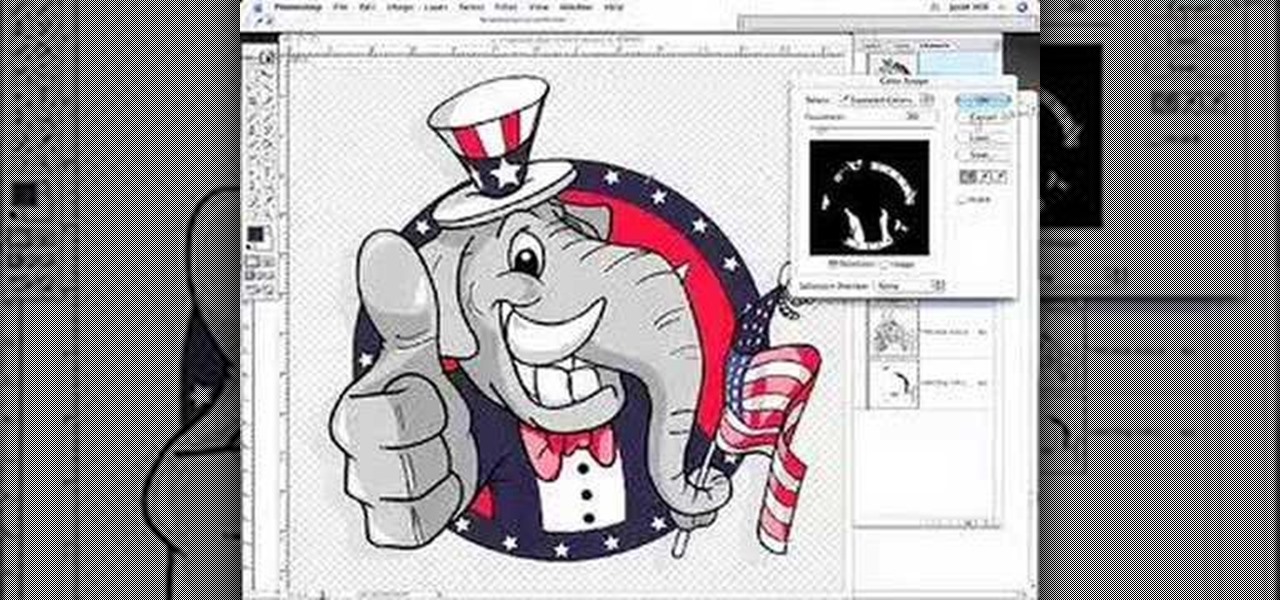
In screen printing, Photoshop can be a powerful tool. If you have a jpg, tif, eps, or other type of file in which you can't alter, printing from Photoshop will give you too many separations. Here is a way to take a simple design in Photoshop and convert it to spot colors in order to print solid colors instead of mixing inks.
In order to secure a PDF with a password when opened in Adobe Acrobat 9 Pro, press the secure button and go into password security settings. Here you can change on what versions of this software the file will run on, the next option asks which portion of the document is to be encrypted when a password is placed. Further below here is where you actually choose the password, this ensures that only people who know the password will be able to see the contents of the document. Below this is the d...
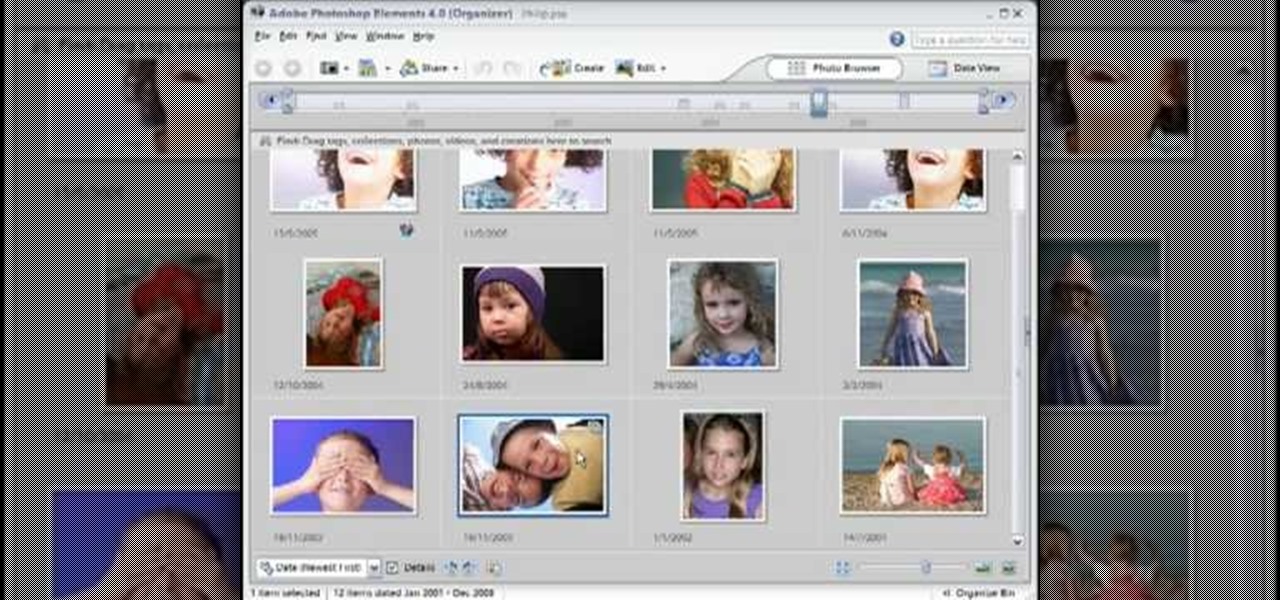
This video tutorial belongs to the software category which is going to show you how to use color options in Photoshop Elements 4. This version of Photoshop includes color settings that help you to control the way in which the colors in your photos are managed from capture to editing to printing. To use the options menu, click on edit > color settings. Now you get a dialog box with 4 options. Check the option that you want and click OK. Let's say you select the 'allow me to choose' option. Fli...
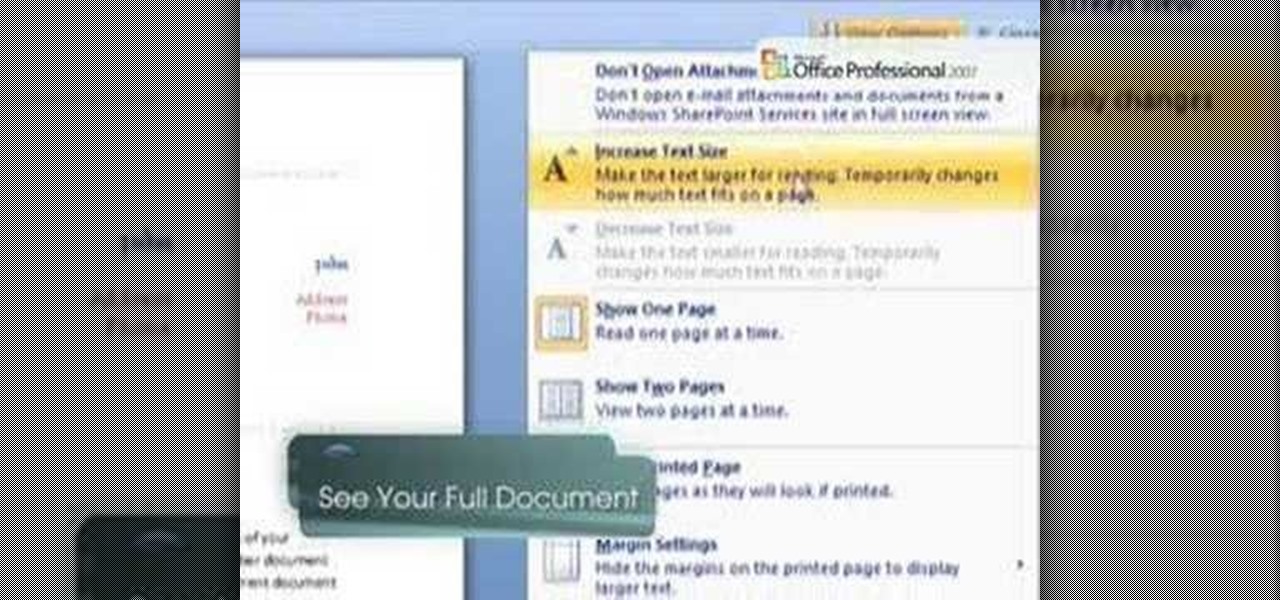
If you've ever found yourself printing a copy of a document in Microsoft Office Word just to be able to read it, you'll appreciate the new Full Screen Reading feature in Microsoft Office Word 2007. For more on utilizing this handy new feature of Word, watch this MS Office how-to.
This week Kim Hall, a teacher at the EtsyLabs and an Etsy Seller (nottene), came by to show her technique for dyeing natural fabric with organic ingredients. Kim has worked with many different dyeing and printing methods. If you've always wanted to dye your own fabrics or yarn, this is a great video to get you started. Watch this video tutorial and learn how to use cabbage, onion, or tumeric to make a natural fabric or yarn dye.
Learn how to make a silk screen for printing a t-shirt. Build a mesh silk screen with fabric & an embroidery hoop for low cost. This video provides detailed instruction and is incredibly easy to do at home.
If you've ever wanted to know how to write checks in Intuit QuickBooks program, this instructional is for you. To write a check in the QuickBooks program: Select banking from the menu bar, and then the write checks command. Select the checking account for which the checks will be drawn from the checking accounts drop down menu. Assign the check a number if you will be printing the check. If you are printing the check, make sure that the "to be printed" box is checked. Enter the correct date f...
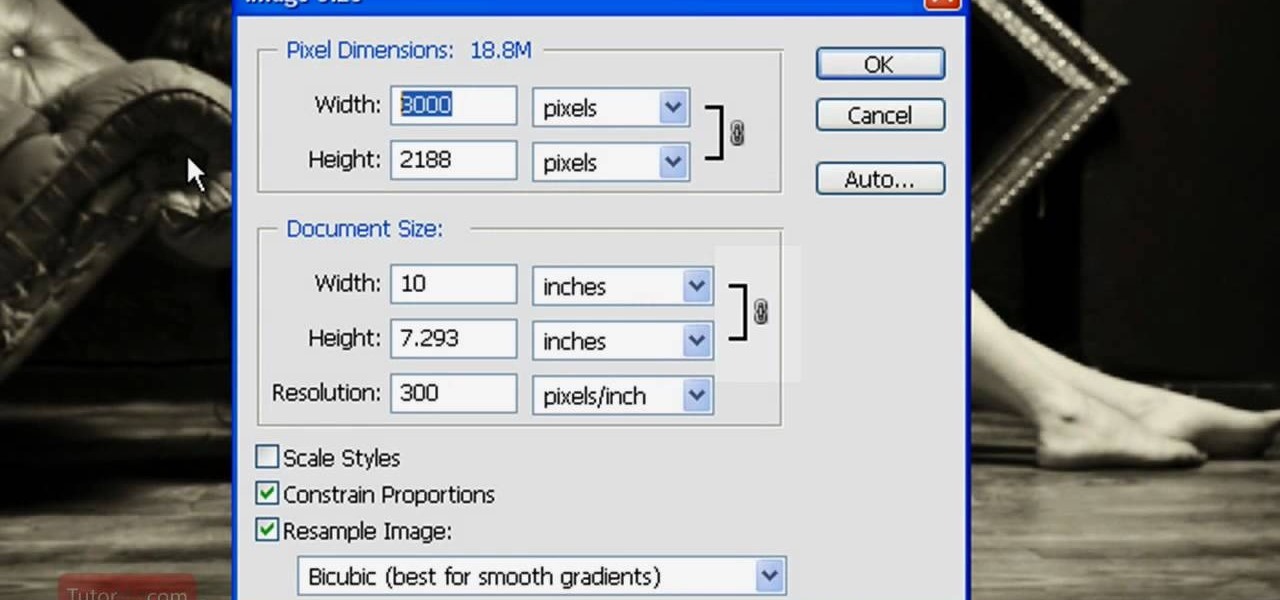
In this Software video tutorial you will learn how to resize a custom image using Adobe Photoshop CS4. Select your image. Click on ‘image’ tab and select ‘image size’ from the dropdown menu. In the ‘image size’ box you can change the height and width pixels. But, if you check the box ‘constrain proportions’, then when you change one pixel dimension, the other will automatically change. Similarly, for resizing drop shadows proportionately, check the ‘scale styles’ box. The ...
In this Computers & Programming video tutorial you will learn how to make a simple CD / DVD cover in Google Picasa. Go to ‘Tools’ and select ‘Options’. In the box that opens up next, click on the ‘Printing’ tab and from the drop down menu, select ‘CD Cover Size’ and click OK. Then on the top left hand corner, go to ‘File’, select ‘Print’ from the drop down menu. On the next page, click on ‘CD cover size’ and you get the print preview. Then all you need to do is to just print that out and you ...

This video demonstrates how to show and hide the ruler in Microsoft Word 2007, along with working with page margins. The presenter indicates that if you click the small button above the vertical scroll bar, Microsoft Word will then display Rulers. To work with margins you'll need to click on the Page Layout tab to display the Page Layout ribbon. The video shows the different options located on the Margins menu. There are several built in settings for wide, narrow, normal, moderate, and mirror...

While printers are not normally considered to be at the leading edge of computer technology, these devices have evolved at a lightning pace over the years. Before today's low cost, high-quality inkjet and color laser printers, we used low-quality dot matrix printers and slow laser printers where quality and performance of printing was often questionable. Additionally, documents that looked correct on screen often came out looking differently on paper, due to differences between what the scree...

A PDF file is a great way to share your documents with anyone. Both Macs and PCs can read them and it's very easy to create them in Mac OS X. From any application that you can print from, go to File–Print–which will open up the print dialogue box–and find the PDF button in the lower left corner. To learn more, and for a complete walkthrough of printing to PDF in Mac OS X (as well as information on using the handy Web Receipts) feature, watch this video tutorial.
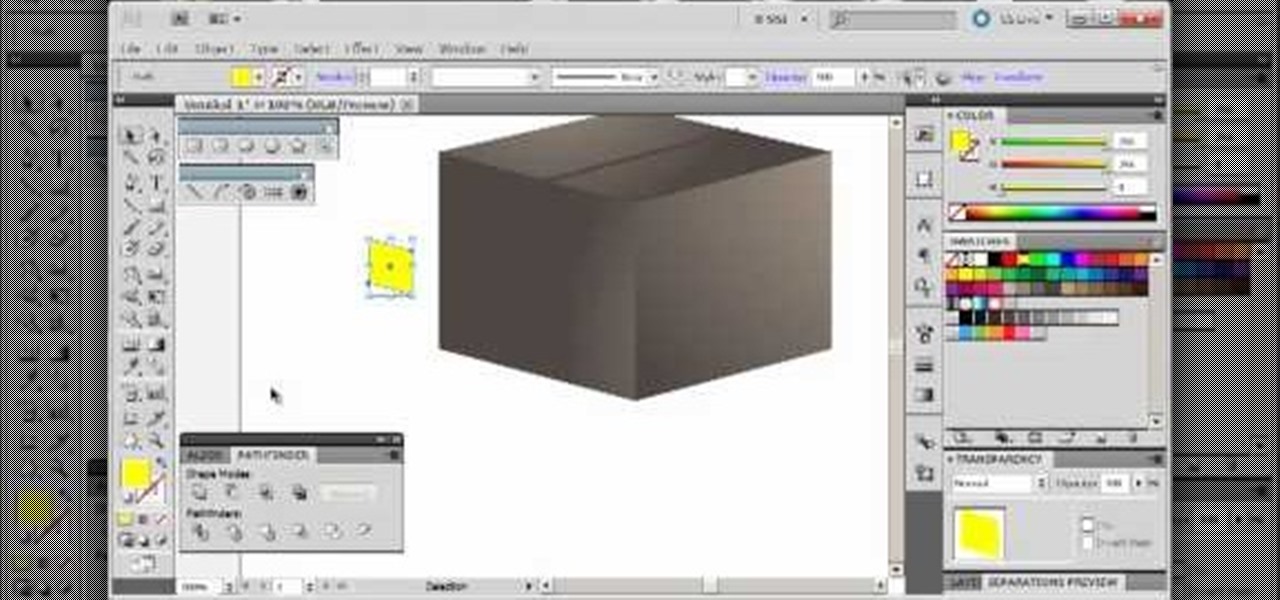
Start with a square and then use your perspective grid in Adobe Illustrator 5, part of the newest Adobe Creative Suite. Then you can transform this basic square into a 3-D box. You can even add logos or printing onto your box.
Kingsley Singleton teaches us about cropping images in Adobe Photoshop. He discusses the importance of properly cropping pictures, and the basic ways to do so. He first shows us how to properly crop images to ensure that printed pictures are the proper size for the paper. Clicking on the image and then dragging the marquis over the picture will select the area of the picture that you would like to use. Moving the corner arrows will adjust the size of the area selected. Then, to properly size ...