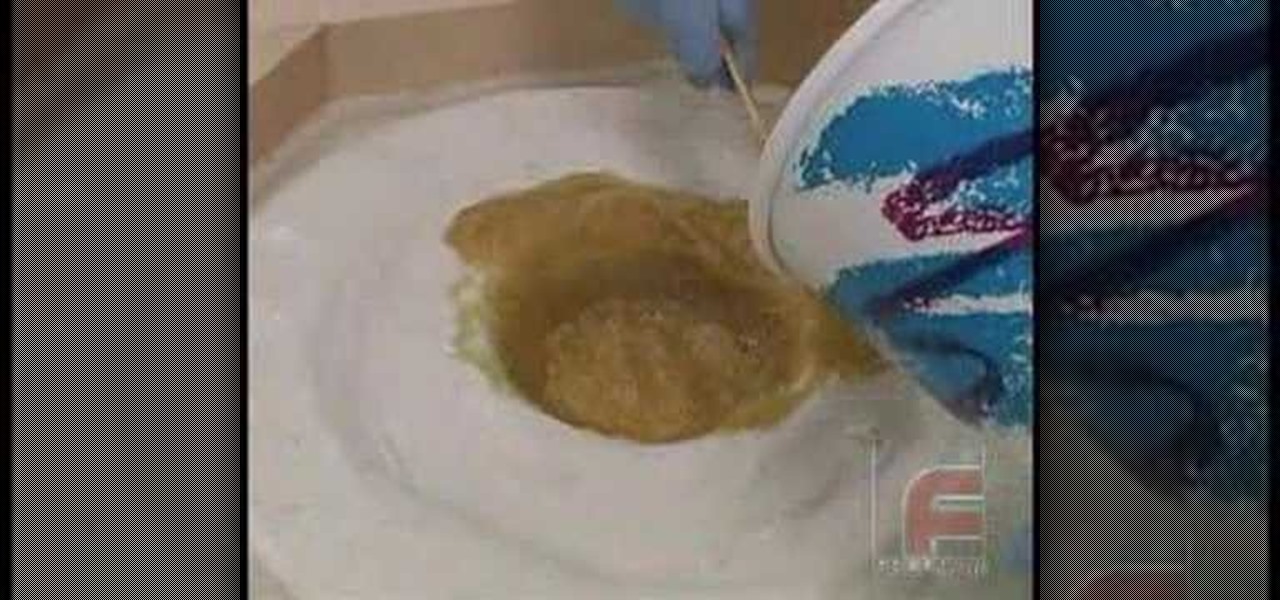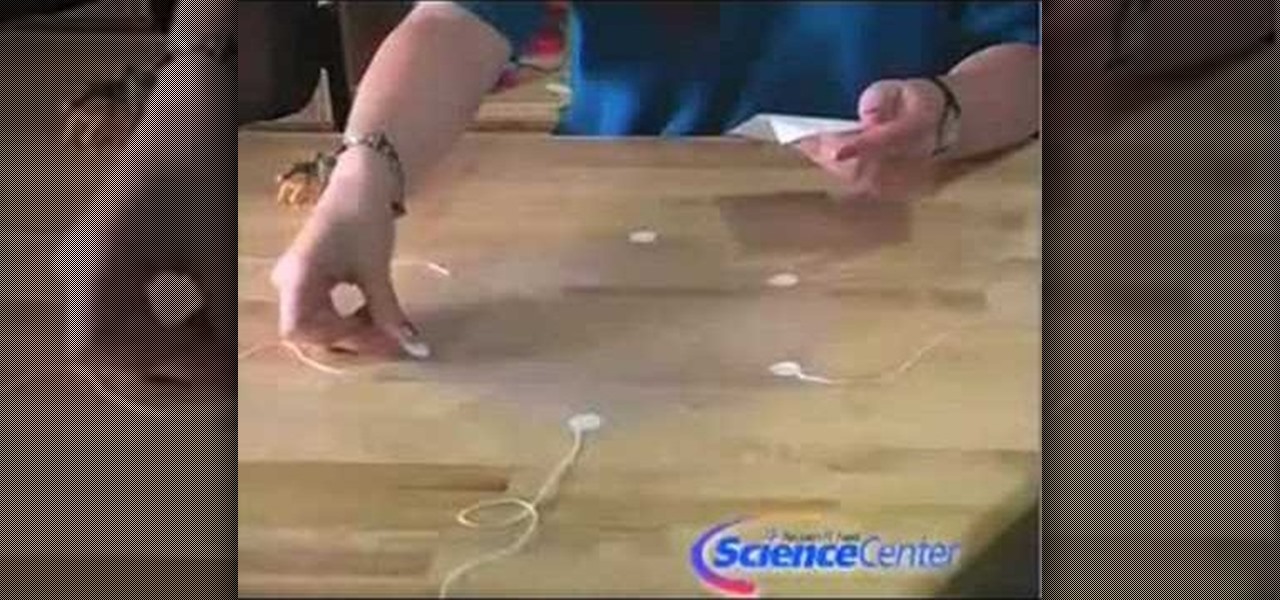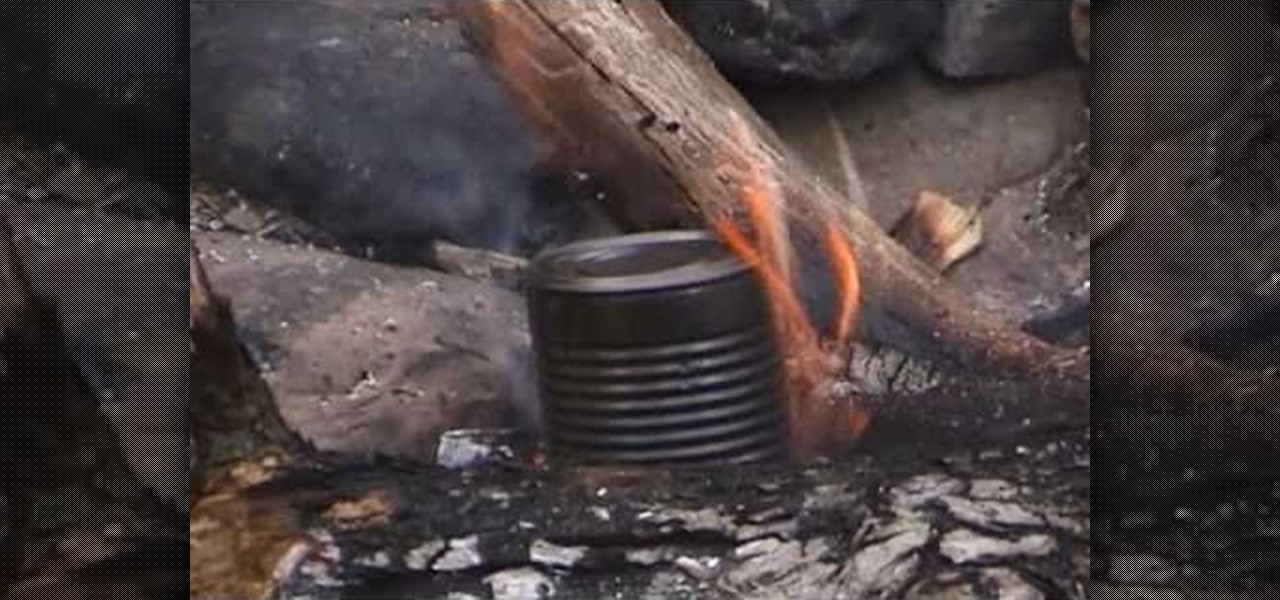
In this video tutorial, viewers learn how to make a char cloth. The materials required for this process are: cloth, container and tinder. The cloth must be made of any woven, cotton material. Begin by placing the cloth into a container. The container should be a metal material. Then close the container and make a while on top to allow the smoke and flames to escape. Leave the container in some fire and wait for it to finish. Then take it to cool and take out the cloth. Now strike some spark o...
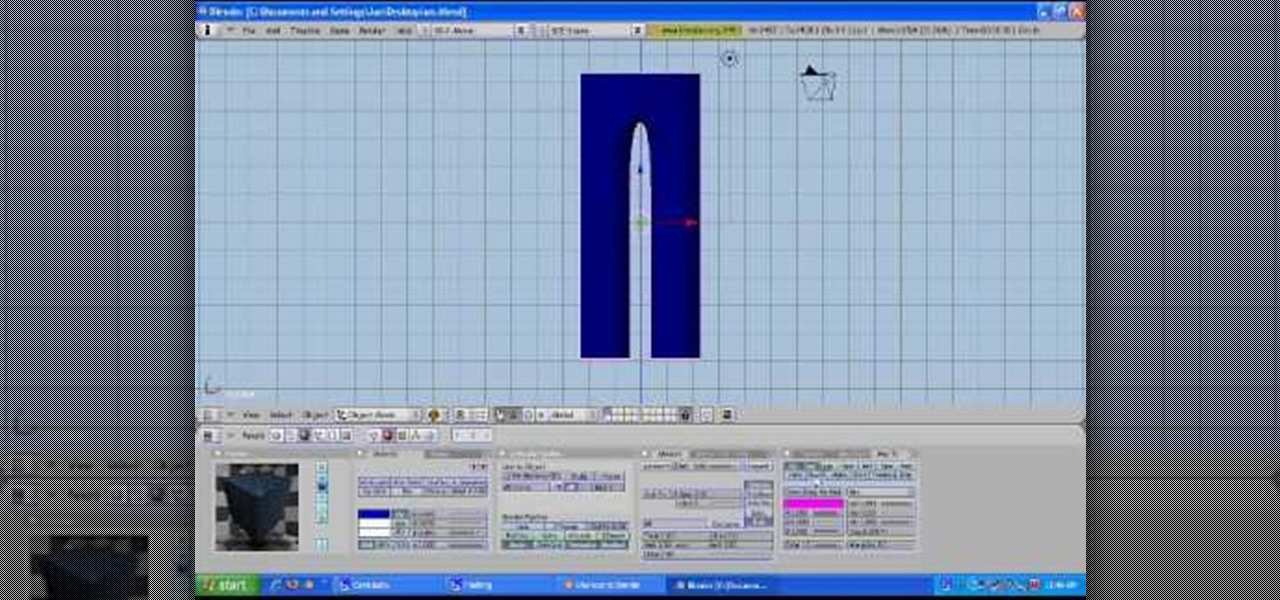
This CAD software tutorial shows you how to work with lights and materials in Pro/DESKTOP. This is an advanced tutorial that will show you how to add materials to a figure, add lighting, backgrounds and export the image. Rendering completed images is an important part of working in ProDESKTOP since it showcases your final products. Learn how to make your models good with lights and materials in this Pro/DESKTOP tutorial. This video is best viewed full screen.
There’s a good chance that you’ll be alone in life one day, and no... I’m not talking about a couch-bound, dateless loser with a pocket pussy and a bag of potato chips. I’m talking about alone. In the wilderness. Hungry. Cold. Lost. You can’t stay in one place too long, so it would be nice to have something to carry your belongings in. Maybe it’s post-apocalyptic land where you’re the sole survivor, and all the backpacks and rucksacks in the world are but mere ash. Either way, knowing this si...

It's been a few years since Finding Nemo became the highest-grossing animated film of all time, but it's cultural appeal lingers on. If you want to capture some of that Nemo cuteness for your Halloween costume, watch this video to learn how to make a really cute Nemo costume with no sewing required.
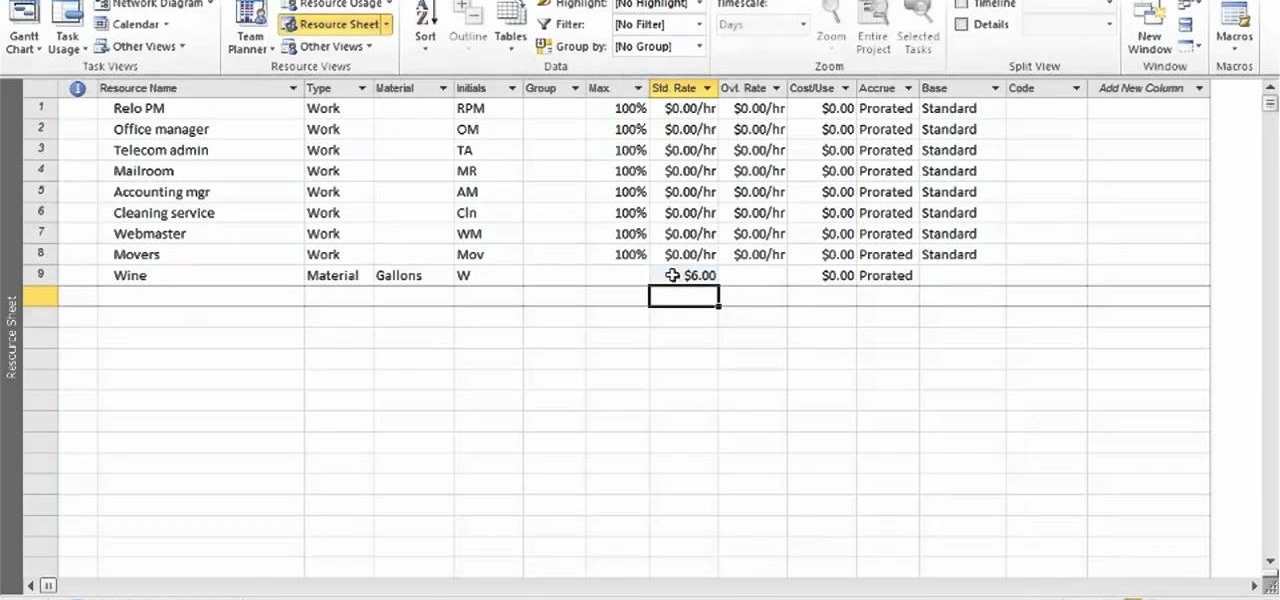
In this clip, you'll learn how to create a new material resource when using MS Project 2010. Whether you're new to Microsoft's popular project management application or are just looking to better acquaint yourself with the Project 2010 workflow, you're sure to benefit from this free video software tutorial from Lynda. For more information, including detailed, step-by-step instructions, take a look.
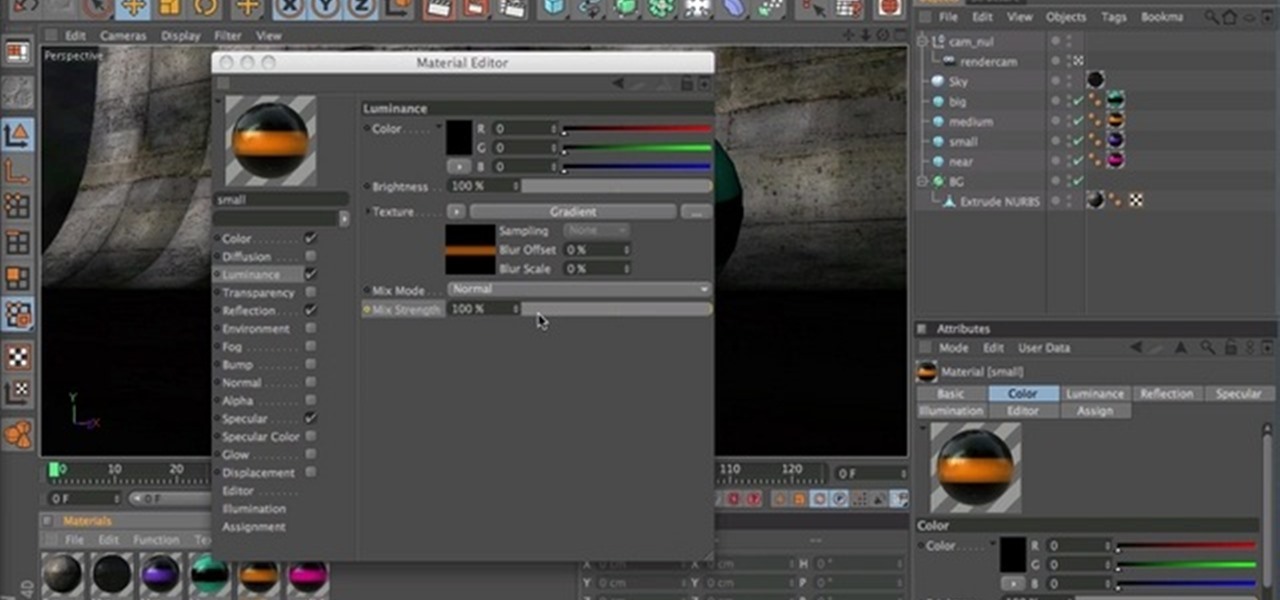
This clip presents a general introduction to the process of animating materials within MAXON C4D. Whether you're new to MAXON's popular 3D modeling application or are just looking to get better acquainted with Cinema 4D and its various features and functions, you're sure to enjoy this free video software tutorial. For more information, and to get started using this trick in your own Cinema 4D projects, watch this 3D modeler's guide.

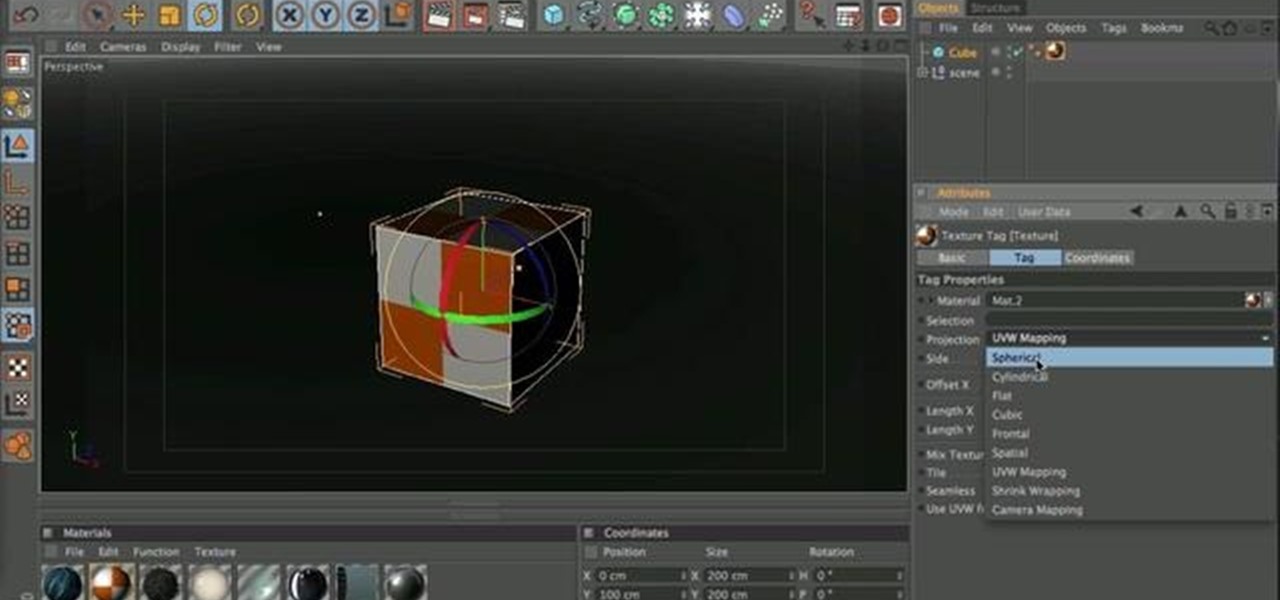
This C4D basics tutorial explains how you can use some of the different project modes to apply your materials. Whether you're new to MAXON's popular 3D modeling application or are just looking to get better acquainted with Cinema 4D and its various features and functions, you're sure to enjoy this free video software tutorial. For more information, and to get started using this trick in your own Cinema 4D projects, watch this 3D modeler's guide.
Stencil maps can help push your model to the next level by allowing you to layer materials exactly as you see fit. This tutorial covers how to create a stencil map, applying it to your model in Blender and then using it to layer two different materials via the Material Nodes. Whether you're new to the Blender Foundation's popular open-source 3D computer graphics application or are a seasoned digital artist merely on the lookout for new tips and tricks, you're sure to be well served by this fr...
This clip offers a primer on how to create and manipulate materials within the 3Ds Max 2011 user interface. Whether you're new to Autodesk's popular modeling software or a seasoned 3D artist just looking to better acquaint yourself with the application, you're sure to be well served by this video tutorial. For more information, take a look!
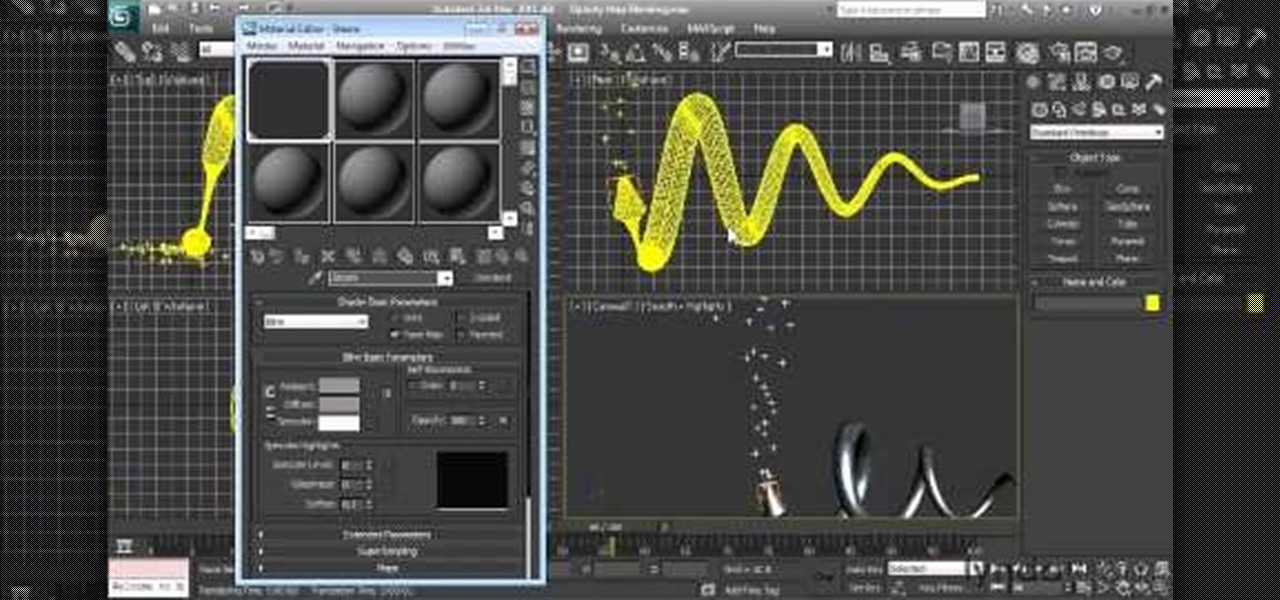
Learn how to take use the Slate material editor in 3ds Max 2011. Whether you're new to Autodesk's popular modeling software or a seasoned 3D artist just looking to better acquaint yourself with the 3ds Max 2011 workflow, you're sure to be well served by this video tutorial. For more information, and to get started using the Slate tool in your own 3ds Max 2011 projects, watch this free video guide.
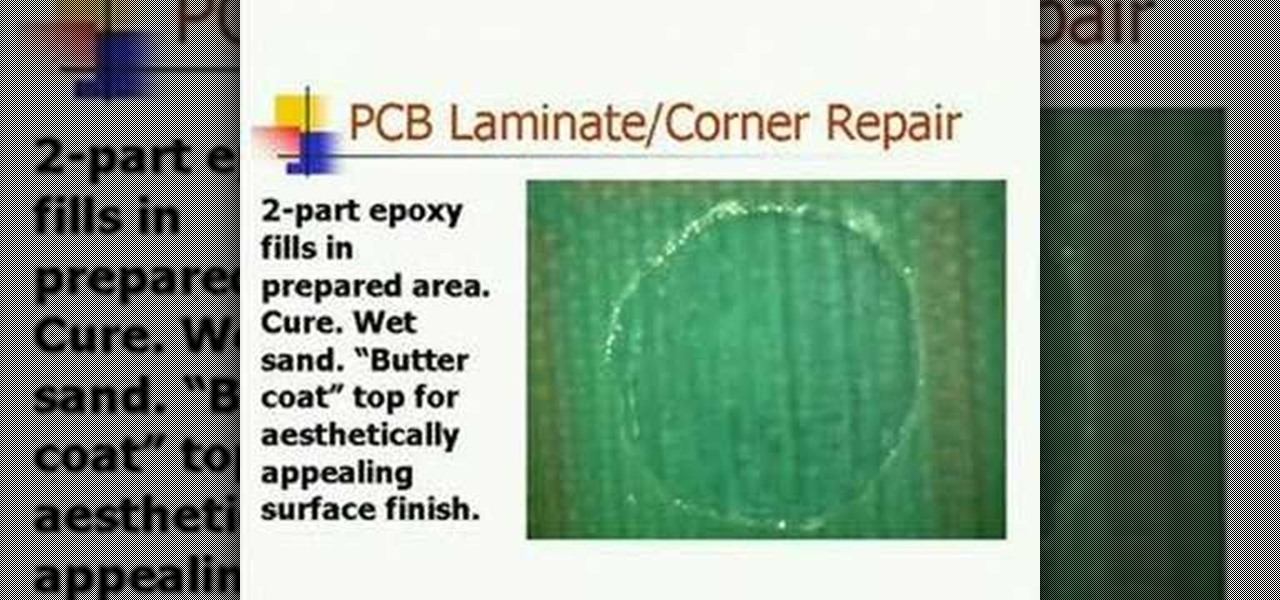
In this soldering tip video brought to you by BEST, Inc. Bob Wettermann demonstrates how to repair damages that have occurred to the based printed circuit board laminate materials as well as to PCB corners.
Watch this video to learn how to use glove molding systems. Glove molding systems are ideal for working on medium and large projects, this process involves creating a thin layer of flexible material and backing it up with a stronger, rigid material.This process can be used in automotive, mechanical, fine art and film special effects uses.
Designing 3D graphics is one of the most challenging and lucrative fields of computer design. This video for beginning 3D graphics artists features a tutorial on how to make materials and textures in Blender, one popular 3D modeling software suite. Making this pair of pants will have you well on your way to making more elaborate images.
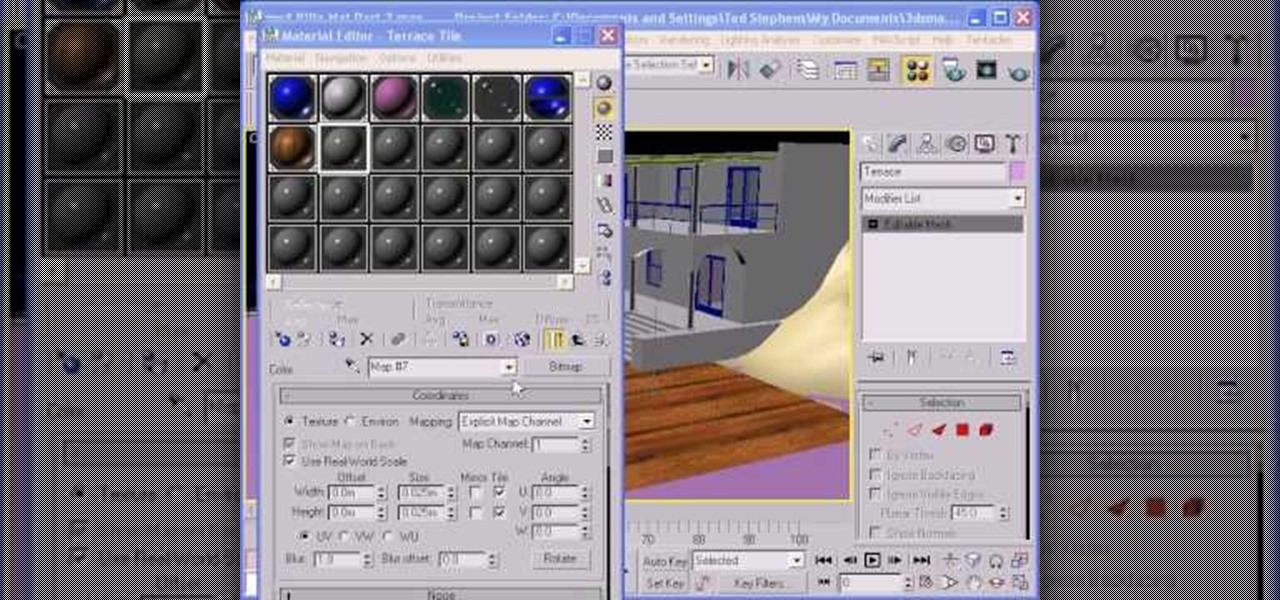
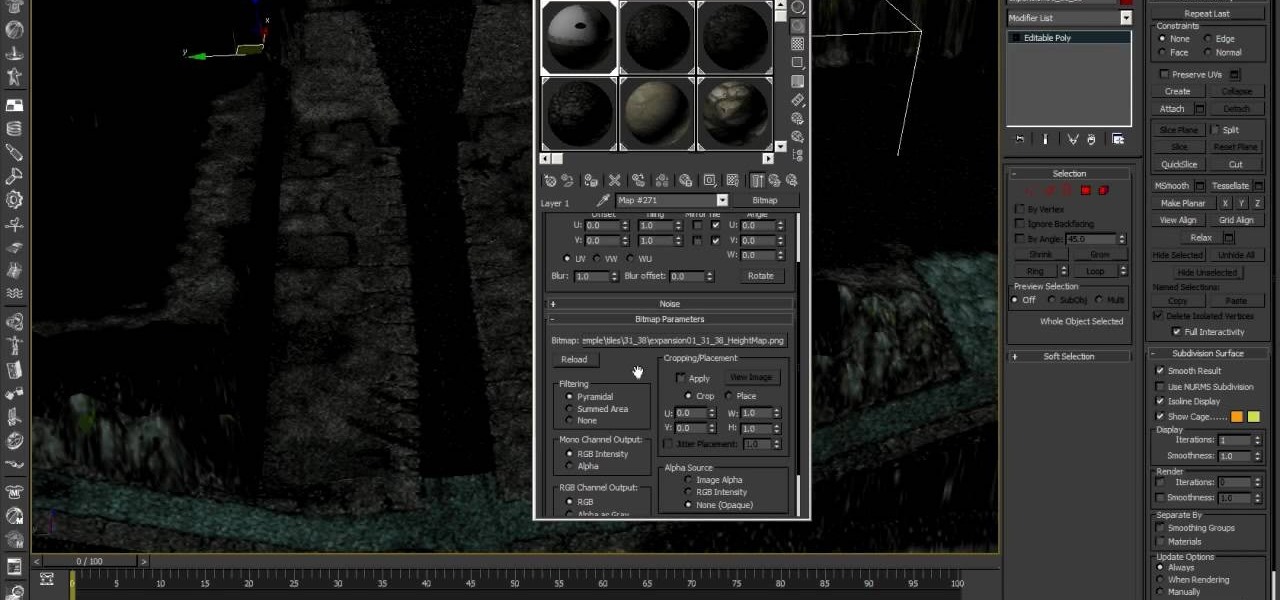
In this how to video, you will learn how to work with standard materials in 3D Studio Max. The material editor is found by clicking the multicolored button to the right. You can see sample spheres where you can see examples of materials. Below, you can see surface properties such as shaders and ambient colors. You can select the type of material to be applied here. You can select the standard material to get familiar with it. First, decide the shaders. Blend is the default shader, although th...
In this video tutorial, viewers learn how to make a Christmas wreath. The materials used in this video are a Christmas wreath are: a greenery wreath, extra greens, pinecones, berries, bells and ribbon. If using artificial materials, you will also need a hot glue gun, glue sticks and wire. Begin by adding the extra greens on the wreath. No layout all the materials on the wreath before adding it on. Once finished outlining, glue the material on the wreath. Hang some bells inside the wreath. Thi...
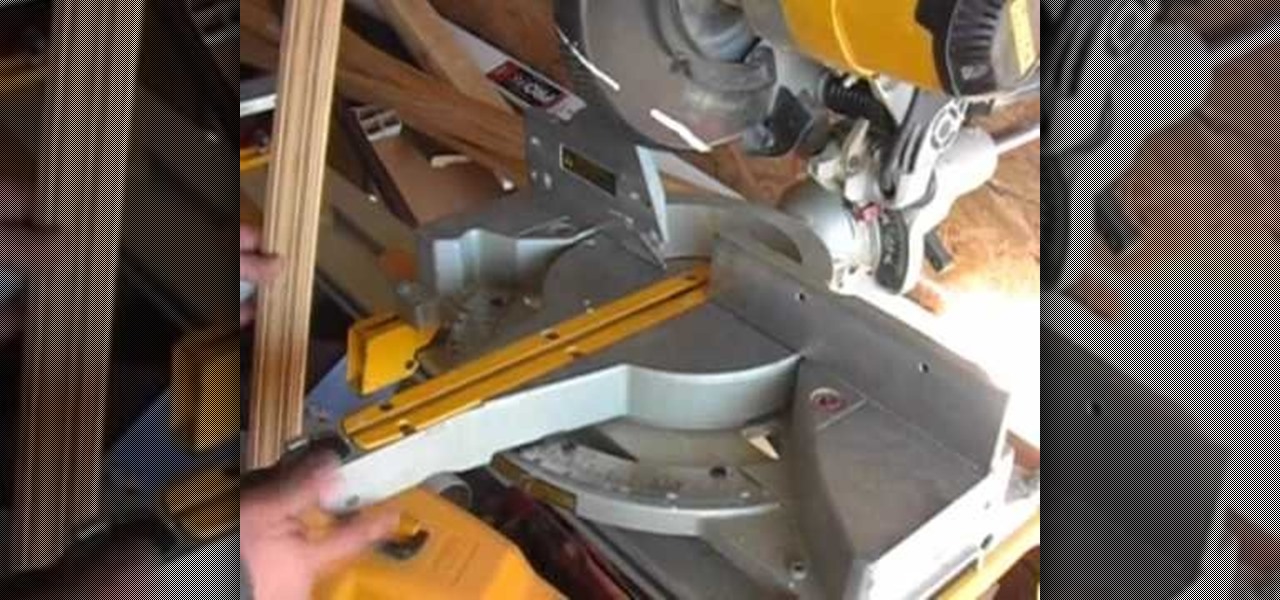
In this video tutorial, viewers will learn how to use a chop saw. A chop saw is a power tool which is typically used to cut hard materials. This saw can cut pieces at different angles. When cutting any material, make sure it is pushed tight against the fence. Hold the material tight in this position and make sure it is correctly leveled. When using this machine, be sure to wear safety glasses or a face guard. Avoid cutting small pieces of material and go at a slow pace. This video tutorial wi...
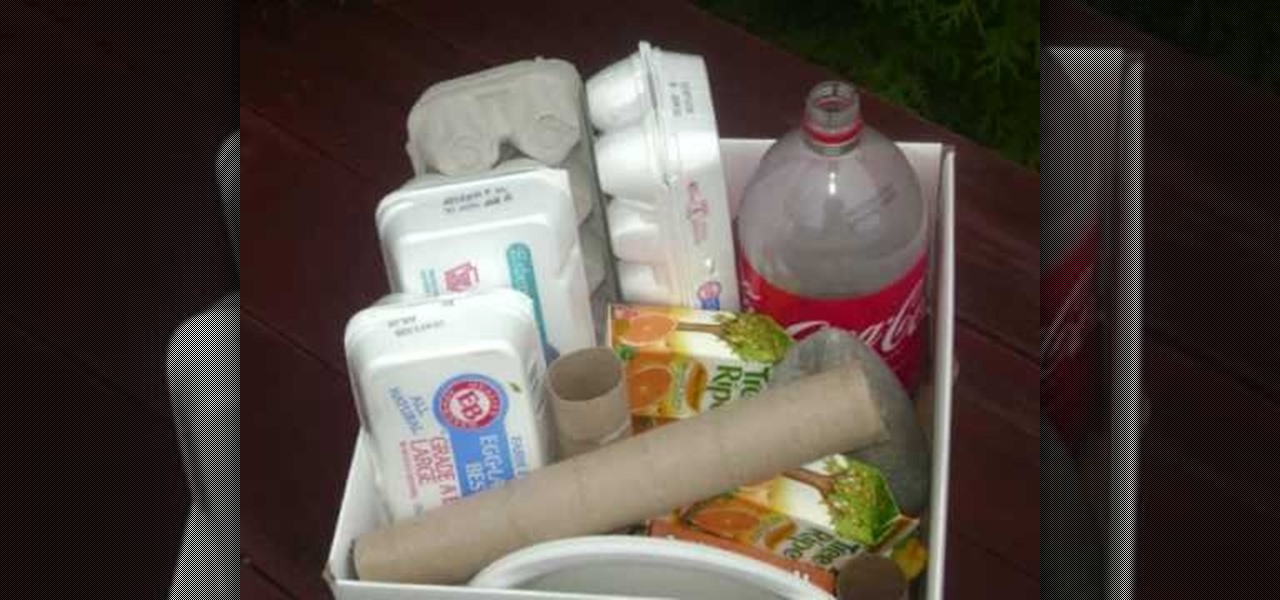
Making crafts with a group of children can get a little hectic and also maybe a bit costly. Recycling materials to use for creative activites with your kids can be a fun and and economicly fiscal alternative to your normal purchases. This video will give you some example on how to recycle materials for your kids arts and crafts. Using these everyday materials, accompanied with some great insight from this video, you can have a lot of fun creating all sorts of interesting projects with your ch...
Take a look at this instructional vidoe and learn how to use the paint bucket tool in Google SketchUp. Selecting the paint bucket tool will open the materials browser. The materials browser is different for windows and mac users. On windows, the browser has two main tabs to select and edit materials. On the mac, you have several tabs giving you different ways to paint colors into your model. To start using the paint bucket tool, simply pick a material and choose a surface to paint it into you...
Recycling things isn't nearly as efficient a means of conserving resources as reusing your waste material in it's current form. Enter this video. It will teach you how to make an awesome little trash can / waste paper basket out of perhaps the most appropriate material of all: old newspapers!
In this video, we learn how to use custom map or UVW map in 3D Studio Max. First, go to the material editor and add a custom map to it using a hardwood deck. Change the material to cedar fence, then change the size as you would like it. As you continue to edit the different surfaces in the picture, it will preview it for you in the main screen. You will be able to see it customized how you would like it to be as you edit it. The material editor can be changed in design and renamed to help you...
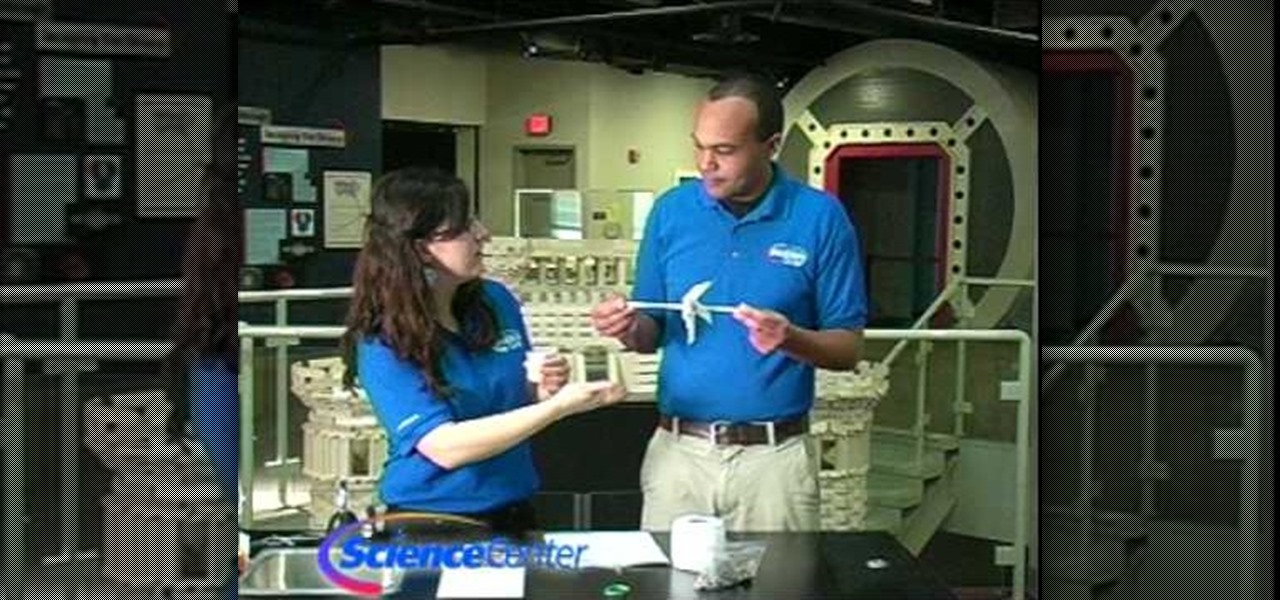
In this Home & Garden video tutorial you will learn how to build your own windmill with household materials. Materials needed for the windmill are a template, scissors, straw, some yarn, some pennies, a paper cup, rubber bands, pencil, single hole punch, a skewer and thumb tacks. Take the template, cut it out along the solid lines and punch holes on the corners as shown in the video. Now with a thumbtack and a pencil make a nice hole at the center of the template. Fold the template along the ...
Materials and lighting are two of the more basic elements of making good 3D models on the computer. This video teaches you how to use and manage these two important facets of a 3D model using Cheetah3D, Apple's popular free 3D editing suite.
There are a lot of different software options for modeling 3D. A lot. This video uses Cheetah 3D for Macs, and outlines the use of materials and lighting in 3D modeling. It only covers the basic use of each, so once you've watched this video, check out some of our other, more advanced tutorials to start making some seriously cool models.
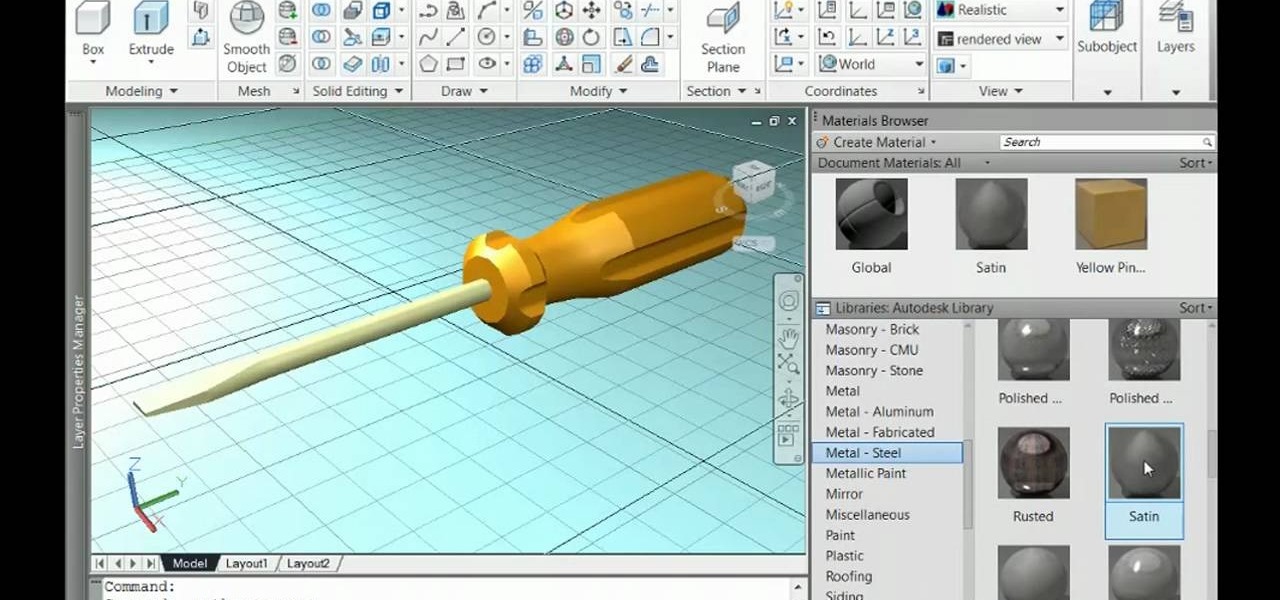
Need some help wrapping your head around AutoCad 2011's Materials Browser? Don't fret: Whether you're new to Autodesk's popular 3D drafting application or a seasoned professional just looking to better acquaint yourself with the newest iteration of the program, you're sure to be well served by this video tutorial. For more information, including step-by-step instructions, watch this free video guide.
Have you lost your way? Don't sweat it. Find your way back with a homemade compass. In this video, learn step-by-step how to make a simple compass at home for cheap using household materials.
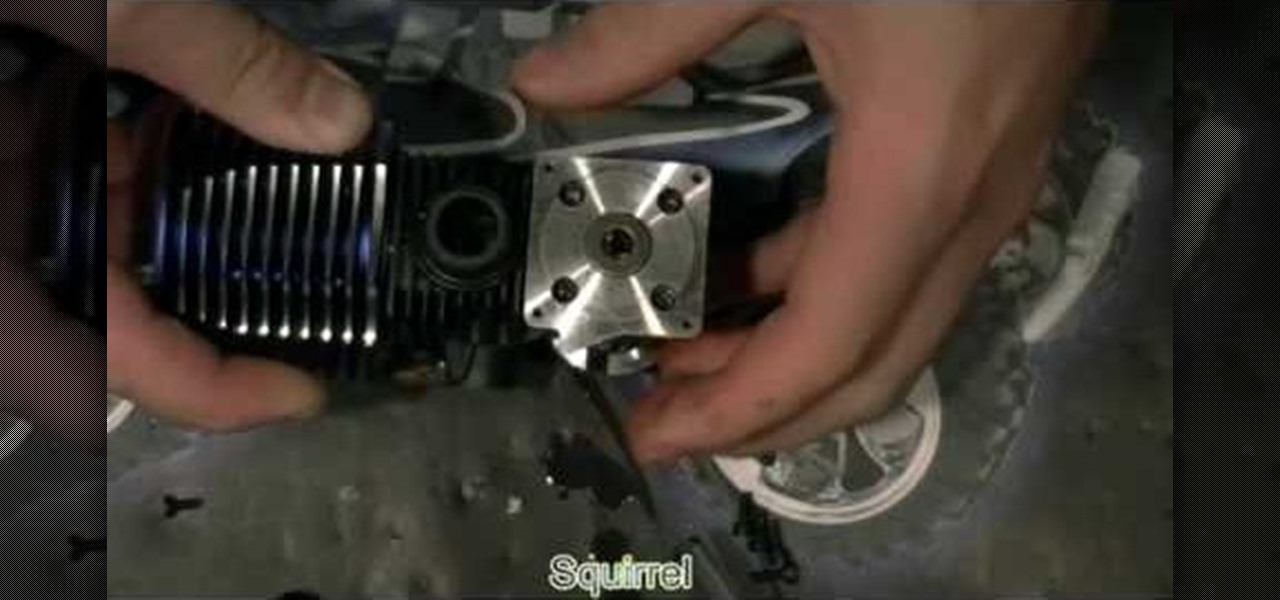
In this video tutorial, viewers learn how to seal a nitro engine. Nitro Engines are used for R/C models. This video will help viewers learn how to protect a nitro engine from air leakage. The video provides all the materials required to seal the nitro engine. The materials required include: automotive gasket material, green slime lube and screwdrivers. This video will benefit those viewers who have an R/C model and would like to learn how to seal the nitro engine.
In this tutorial, we learn how to make a Kufi cap with Threadbanger. First, grab a thick black jersey material and your added material of choice. Cut the fabric in a circle pattern to make the size of your head. Then, cut the band material for 3 inches longer then your head measurement. Fold the material and create the bands with thick cardboard. Once you do this iron the bands down and then fold the added material down as well. Adhere the piece pieces together while still folded, then sew th...
This Crutchfield video tutorial shows you the basics on installing vibration dampening material for your stereo into your automobile. If anyone knows how to install stereo systems into a vehicle, it's Crutchfield. There's no better way to eliminate outside sounds than to use vibration dampening material from Dynamat for your vehicle's stereo system.
This video weaving tutorial describes the creative process by which materials are decided upon and how to sequence the fabrics together into the rug. Naalbinding or toothbrush rug making recycles wasted clothes, plastic bags, hosiery, and time into beautiful durable rugs. Watch this instructional video and learn how to plan out and organize the fabrics and materials for toothbrush rug weaving.
Wow! No longer do you have to buy those huge marble machine roller coaster toys — you can DIY one! This video covers the materials, tools and techniques used to make a homemade rolling ball marble machine. If you haven't seen this rolling ball marble machine toy in action yet, WATCH IT. It's a looping rolling marble machine made with wood, rebar tie wire and polyurethane tubing, featuring a magnetic elevator.
I have a personal rule when it comes to an app's interface: If it doesn't follow Android's design guidelines, it was probably written with Apple's iOS in mind first and foremost.
Say goodbye to the age of metal robots—C-3PO and K9 are a thing of the (future) past! Anette Hosoi, Professor of Mechanical Engineering and Applied Mathematics at MIT, and her former graduate student Nadia Cheng, have created a robotic material closely resembling human skin.
Unless your work clothes require dry cleaning, you probably only go to the cleaner a few times a year. And for those few items in your closet for which you do, you have to then find the time and extra budget to make a trip all the way to the cleaners and back again. In the end, it can be quite the hassle.
This video begins by showing what a folding painting canvas looks like and what the final stretched canvas should look like. The first step shown is to make sure the bars are measured and marked with a simple A and B for easy measurement recall. After a wood frame is added over the canvas you must fold the material over the back of the wood and nail in place. Once the canvas is nailed to the frame you must add A, B, C and D markings to continue proper alignment procedure. The last step shown ...
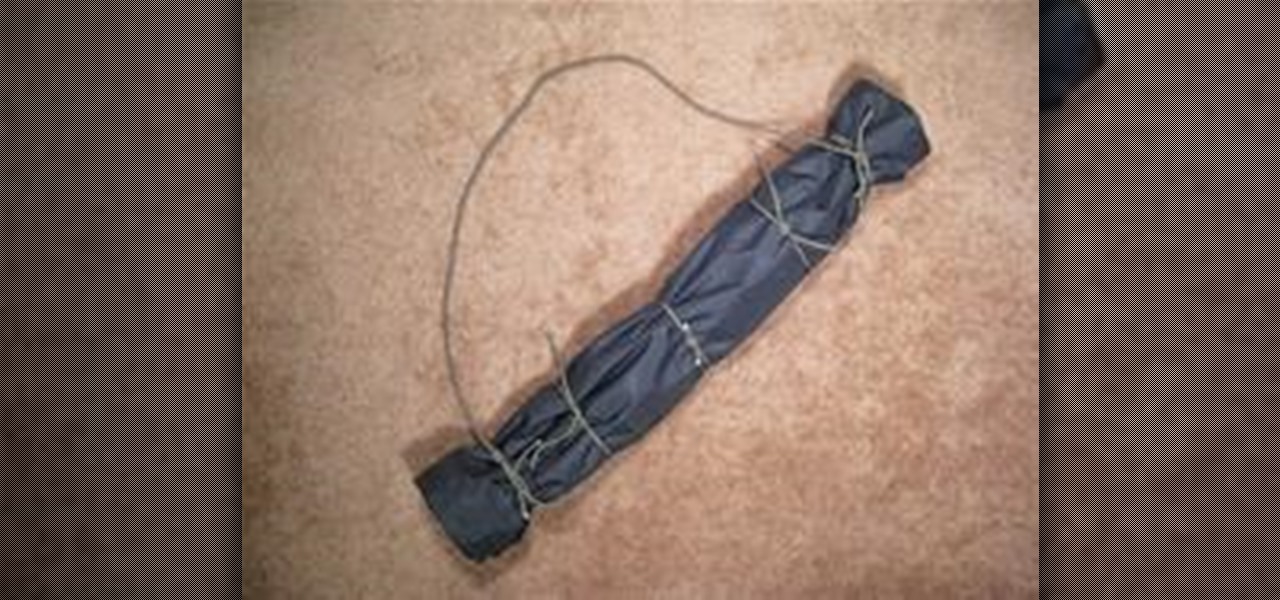
In this video, we learn how to build parachutes with household materials. You will need: a long string, Mylar, mesh, plastic, scissors, tape, and a weight. To get started, you will first cut your plastic or mesh into a circle or octagon shape. Then, take your string and cut it into several pieces. Then, tape the strings onto your material all around. After this, tie your weight to the strings so it's fully secured. Now, go to somewhere high and throw down your item! The parachute will help ke...
In this video tutorial, we learn how to use materials in Autodesk 3ds Max. Whether you're new to Autodesk's popular modeling software or a seasoned 3D artist just looking to better acquaint yourself with the 3ds Max 2011 workflow, you're sure to be well served by this video tutorial. For more information, and to get started using the lessons imparted by this free video software tutorial yourself, watch this free video guide.
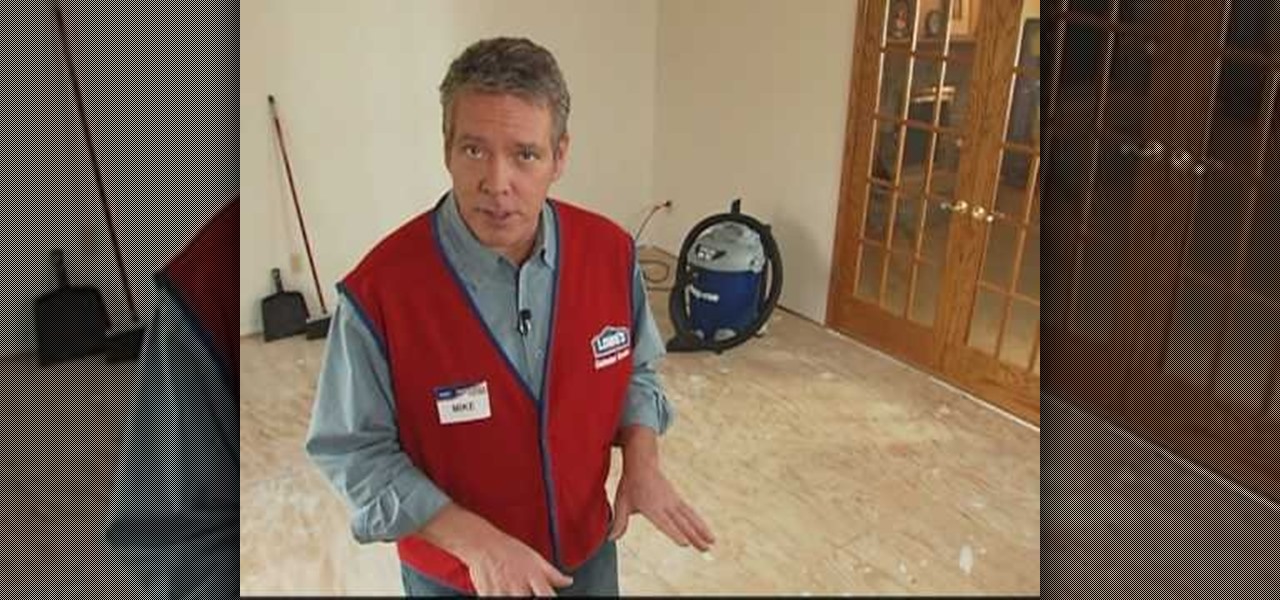
In this tutorial, we learn how to prep plywood subfloor for hardwood and laminate with Lowe's. Before you prep your floor, read the manufacturers direction and information on the flooring. After this, gather all of your materials and tools you need to complete the job. Then, measure out the floor to figure out how much material you will need. Take off all the carpet and base boards from the room, then clean off the floor from dirt or dust. When finished, cover the subfloor with the right type...
This video tutorial goes into how to set up composite textures for terrain when designing a landscape using Autodesk 3ds Max. Part Two then goes into some issues that users have had exporting their ADT terrain, and addresses the solutions to these problems.
Band bios have a cherished place in the world of band promotional material. A killer one can do wonders for cultivating your image among your fans and potential employers. This video will give you tips for writing a killer band biography that will get you noticed.
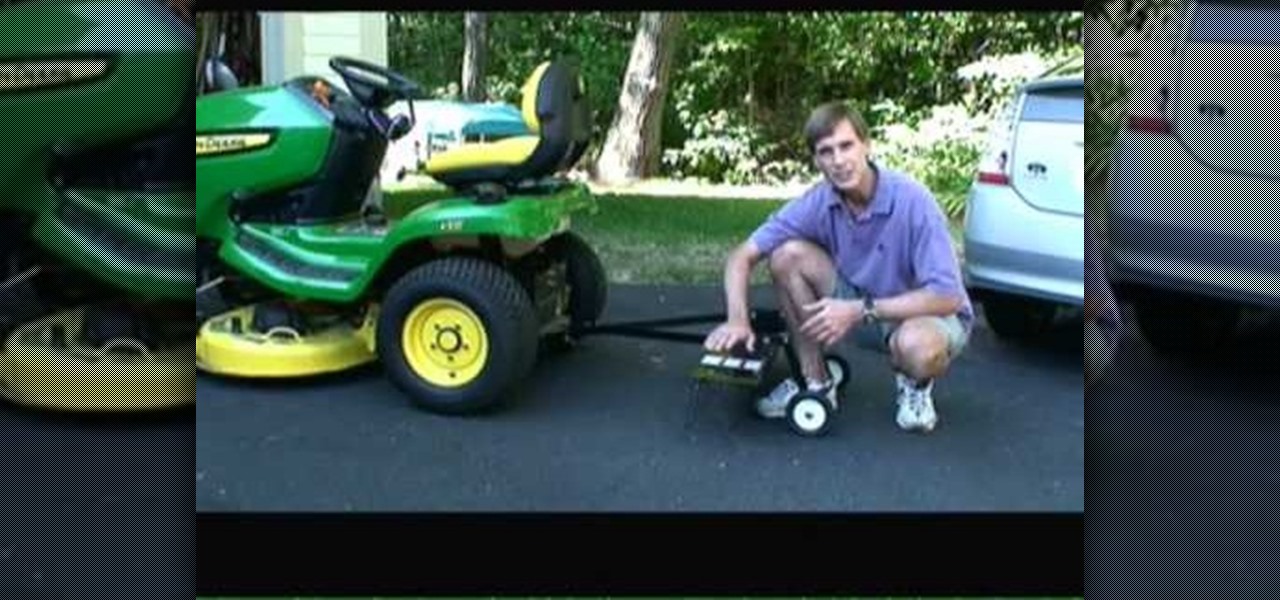
Thatch is the material that is left over after your mow your lawn, and this old dead material can build up and ruin your lawn's health. This video will show you how to use a rear-attachment dethatcher for a riding lawnmower to dethatch your lawn, leaving it the picture of health that you want in front of your home.