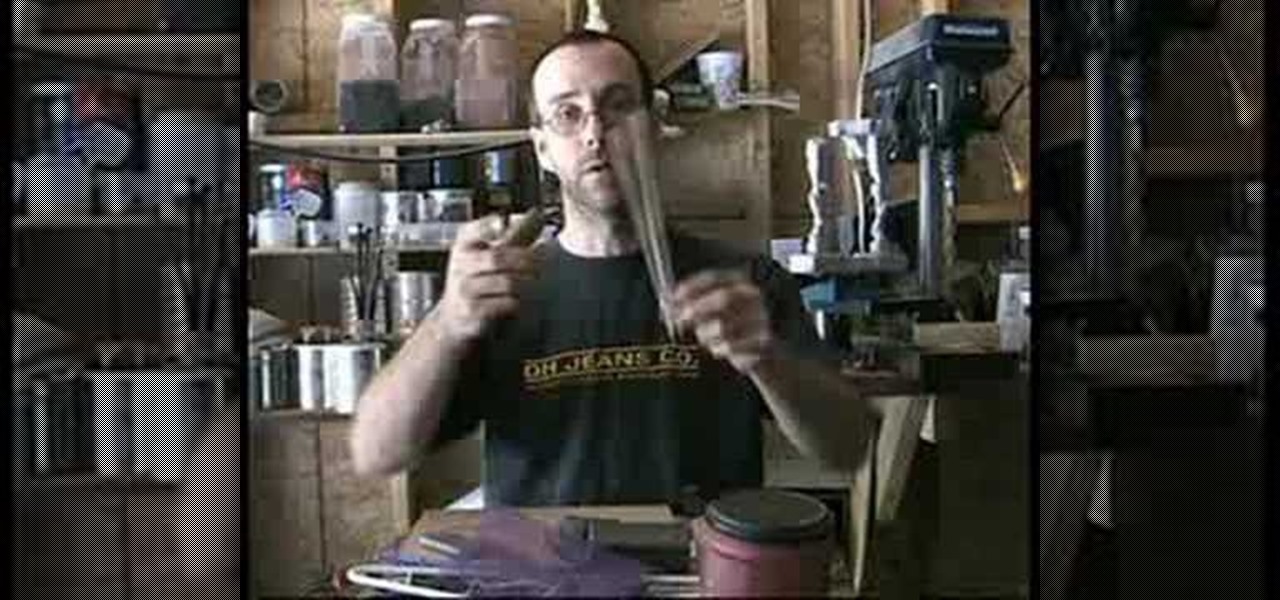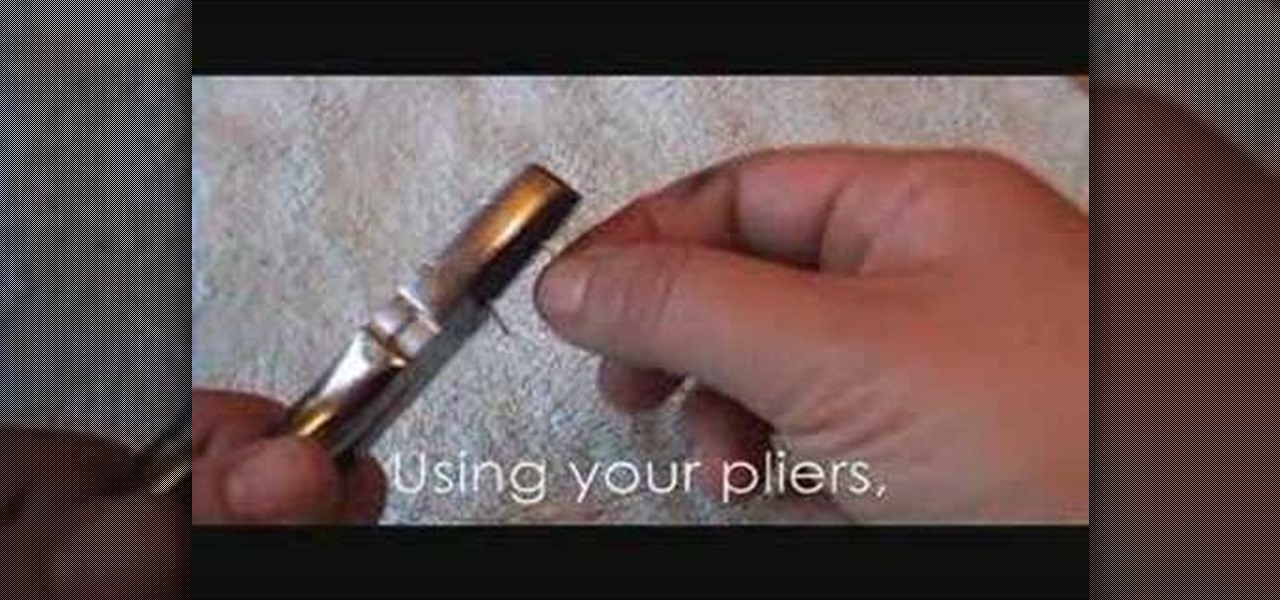
Learn how to straighten wire with this jewelry making video. Use a pair of pliers to straighten a piece of warped wire. When making earrings, bracelets, rings and necklaces, don't throw away the bent pieces of left over wire. They can be salvaged!
There are various techniques one must learn for jewelry making. Create gorgeous earring, pendants and charms by learning bezel casting. This how-to video tutorial demonstrates the basics of bezel set casting for making jewelry. Watch and learn how easy it is.
Watch this video jewelry making tutorial and learn how to flatten a crimp tube while making jewelry. Crimp beads when clamped, other beads from sliding around past a marked section,as well as secure closures on earrings, necklaces, or any other kind of jewelry.

In this video, we learn how to use cones when jewelry making with Christina. First, take a half inch hard wire with a looped end and use a pair of pliers to open up the loop slightly. Next, take your strands of beads and place them onto the loop. After this, close the loop making sure it's secure and the beads won't fall off. Then, take the cone and insert the wire through the wide end and pull it through the narrow end. Using your fingers, bend the wire to a ninety degree angle, then trim of...
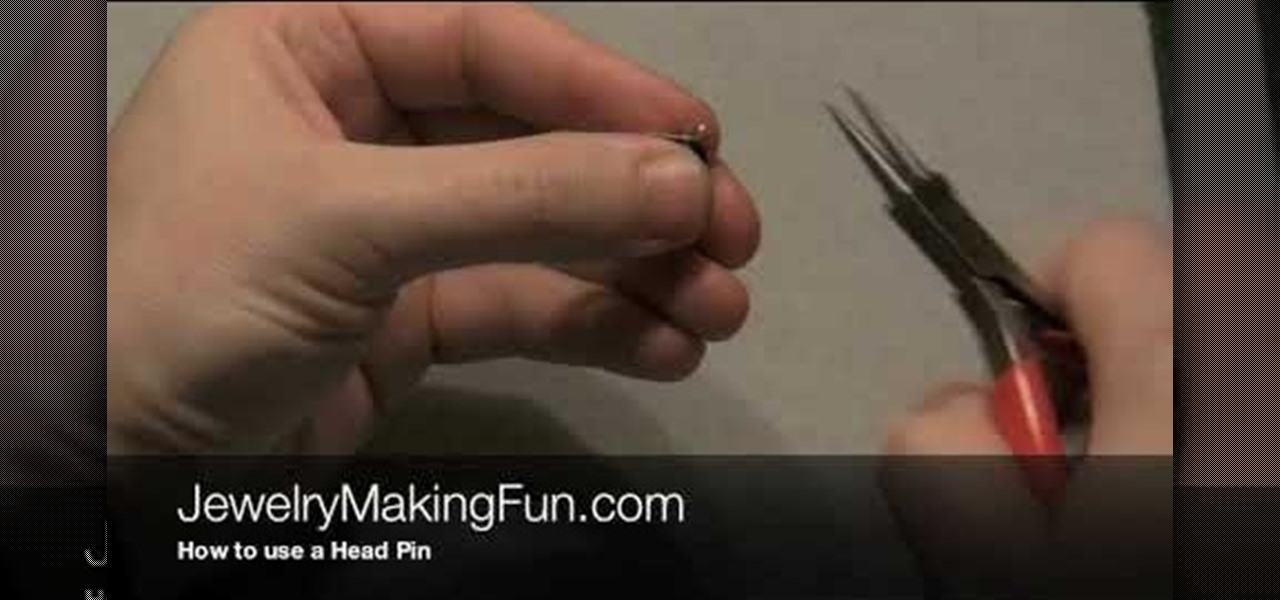
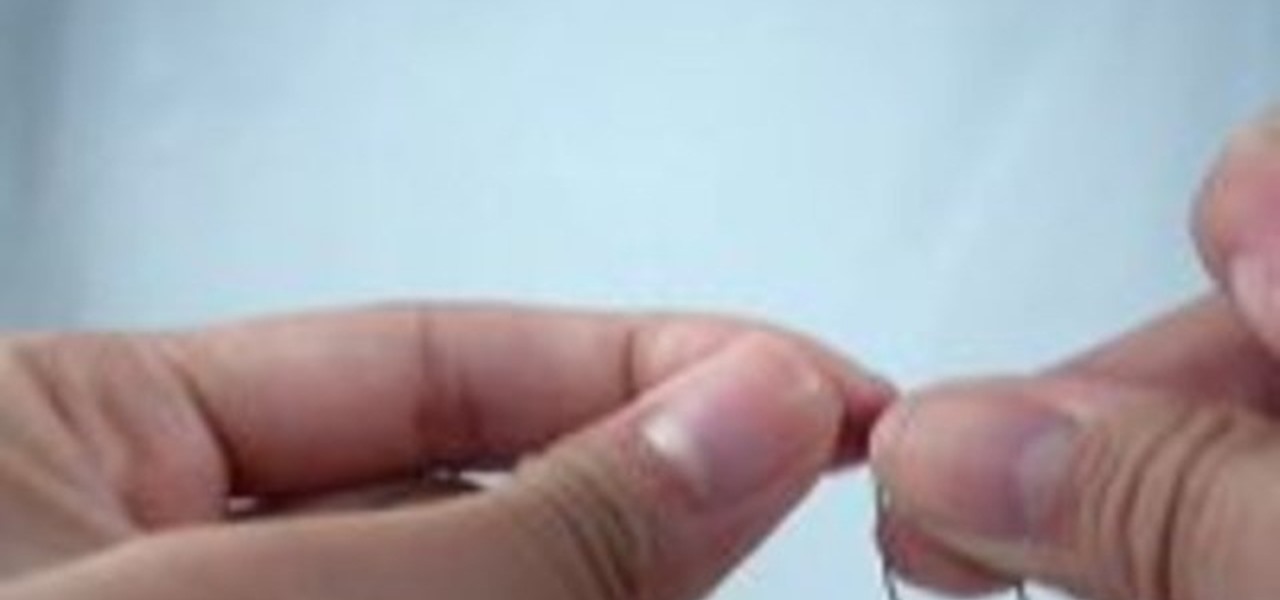
In this video, we learn how to use a head pin while making earrings. Start off by grabbing a 1" long headpin and feed a bead through it until it reaches the other end of the pin. Now, decide how you want to close the loop. The first way to close it is to make a single loop by using pliers and making a 45 degree bend. Cut off any excess wire with wire cutters. The next way to do this is to wind the excess wire around the base until it comes to the bottom of the bead. This is visually appealing...

Rob shows us how to use a silver one inch long wire head pin to place a bead on. He uses both flat nose and round nose pliers to close the loops he demonstrates how to make. outlining the basics for loop making and the loop connection process. He slowly and clearly shows us how to make two different types of loop closures. On of the loop closures is simple and easily reopened. The other loop closure is made by making the first loop and then using tools to wrap the rest of the wire around the ...

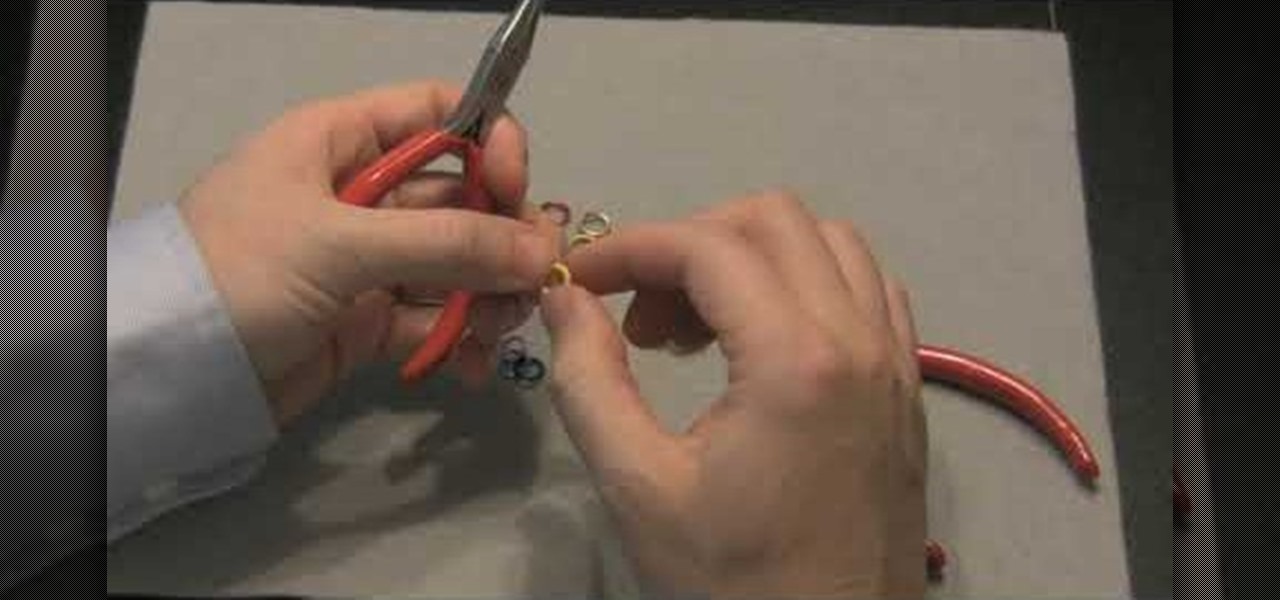
This video is about jump rings and making earrings. Jump rings have a cut in them so that they can open. To open, hold ring on either side of split with pliers. Add a slight twisting motion. Do the opposite to close. Rubber rings have no split and stretch. To make an earring, take a surgical steel French hook, open and attach jump ring to French hook. Add 3 more jump rings in succession. Add a bead on a head pin.
This video origami tutorial shows how to make a triangular box from one piece of paper. It can hold small gifts and goodies, and can easily be decorated and embellished to suit the purpose. Follow along with the step-by-step instructions in these video origami lessons, and fold an easy gift or storage box. All you'll need is paper, ribbon, a piercing tool, scissors, a brad, a paper clip, and a scoring tool.
Copic markers have a slightly involved numbering and indexing system, but this how-to video offers advice for using them. Since Copic markers are so expensive, there are tricks for multi-tasking the pens to get more colors out of fewer colors. Watch this video crafting tutorial and learn how to use Copic markers with stencils and card making.
Watch this instructional book making video to make a Zutter binding for your hand made book. A Zutter is a tool for punching in coil binding. Choose the paper and binding material that your would like to use for your book. This is an easy way to make spiral notebooks and bound books for gifts, school projects and manuscripts.
If you make mead honey wine or are thinking about making some you have to be very conscious of the santization of your equipment. This tutorial looks at how to correctly clean and sanitize your equipment so you have a successful batch of mead.
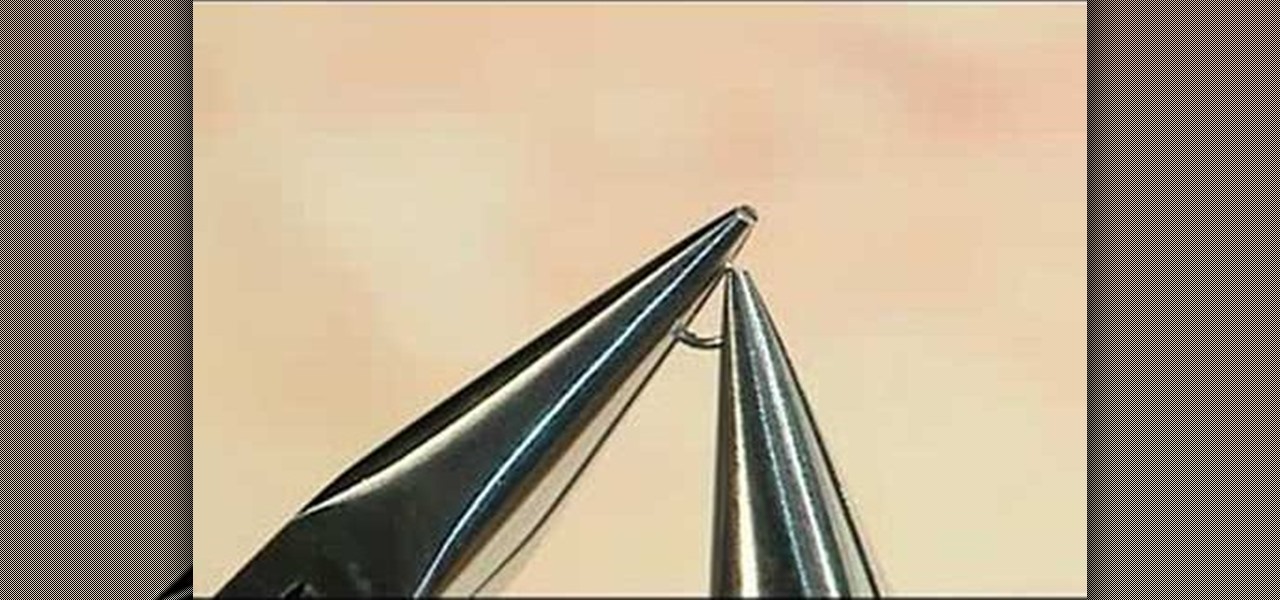
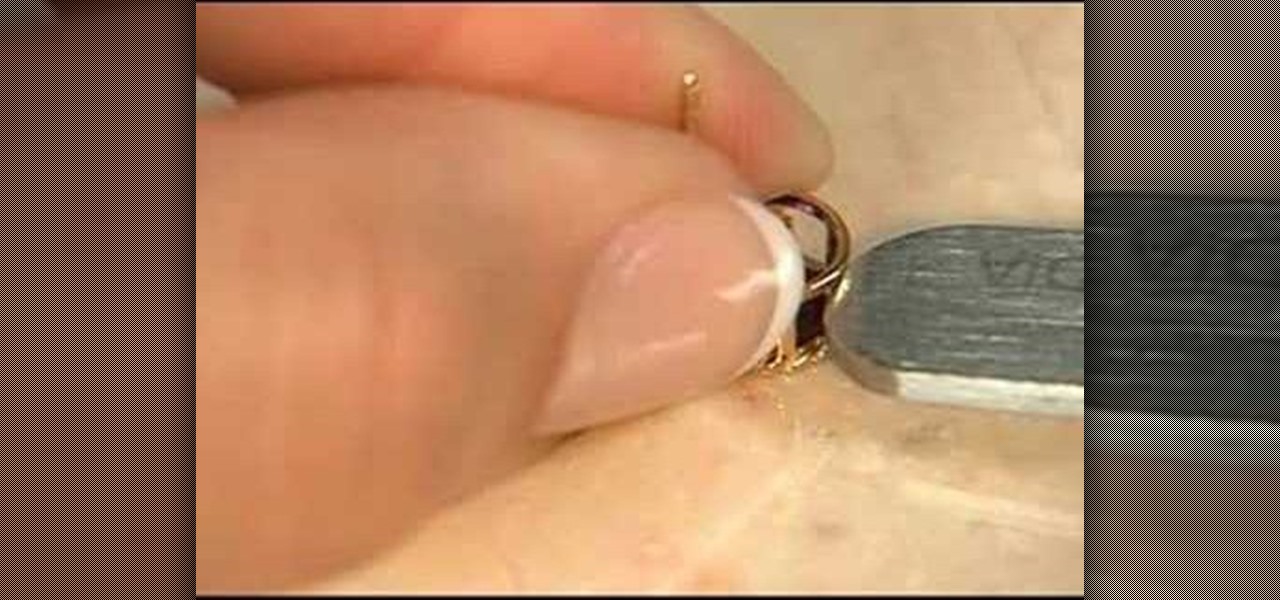
One important part of jewelery making involves properly opening and closing jump rings. This jewelry how-to video demonstrates the proper way to do just that with chain nose pliers. Watch and learn how easy it is to connect your pieces of jewelry with a simple jump ring.
One important part of jewelery making involves properly opening and closing a jump ring. This jewelry how-to video demonstrates the proper way to close a jump ring. Avoid closing it the wrong way as it may cause the jump ring to break in half.
This instructional video provides examples various supplies for war game terrain and diorama making. Most of these supplies for miniatures can be found at a local dollar store. Look for cardboard tubes, plastic sheeting, high density foam, metal foils and wires, plaster, sand twigs and other found materials.
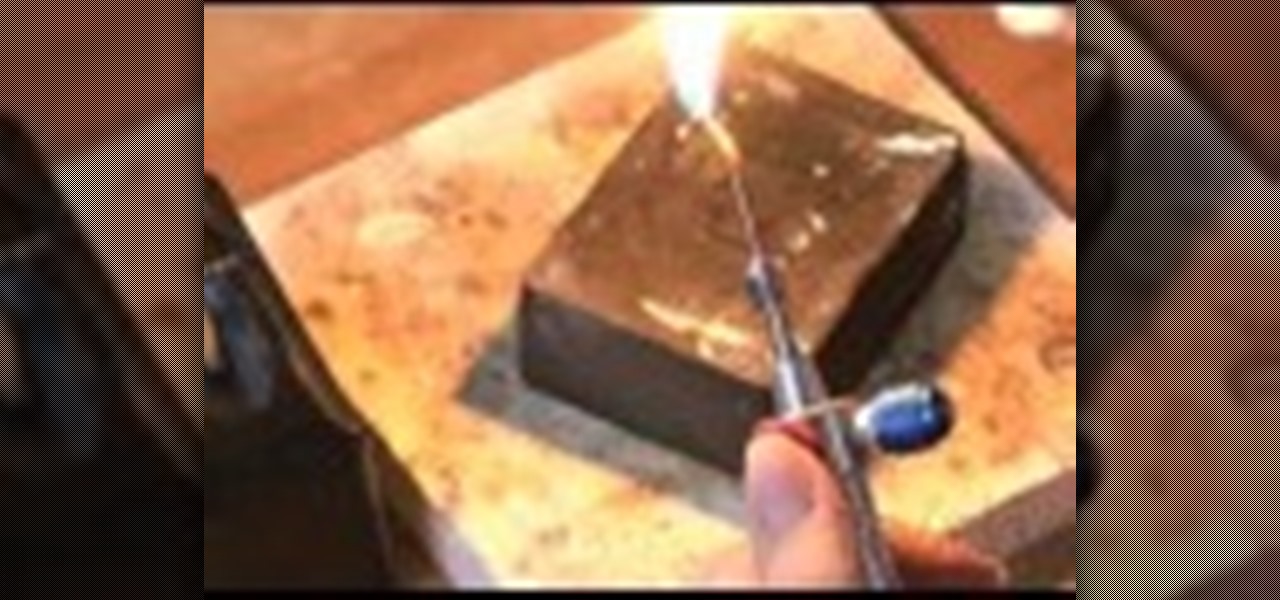
Art Jewelry Magazine associate editor Addie Kidd shows you how to light and use an oxygen/propane torch. Torches don't need to be dangerous; with proper handling, they are a safe and useful tool in jewelry projects. Learn how to light and use a torch by watching this video jewelry-making tutorial.
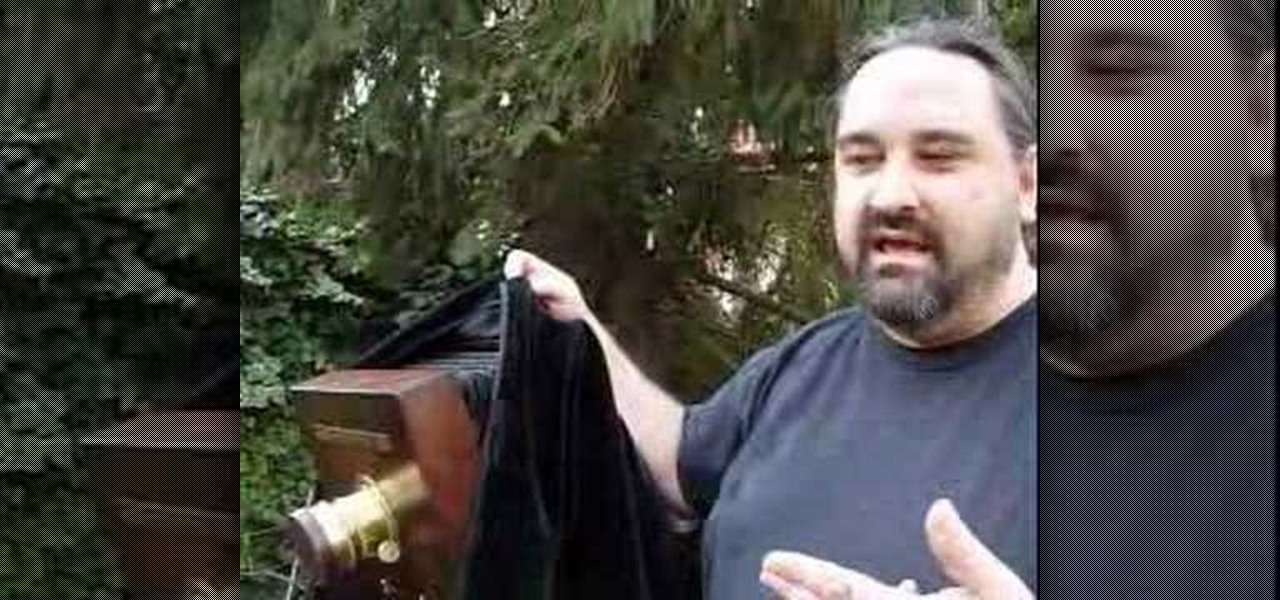
This is a video demonstration of making a wet plate collodion negative, or ambrotype. Learn how to make a print a Collodion picture by watching this video photography tutorial.
Sometimes we can get so caught up in what we're filming that we forget that how we're filming is also important. Use these tips to spice up your amateur film making and change around your camera angles.
Watch this video to learn how to use different tools, split rings and jump rings for making jewelry.
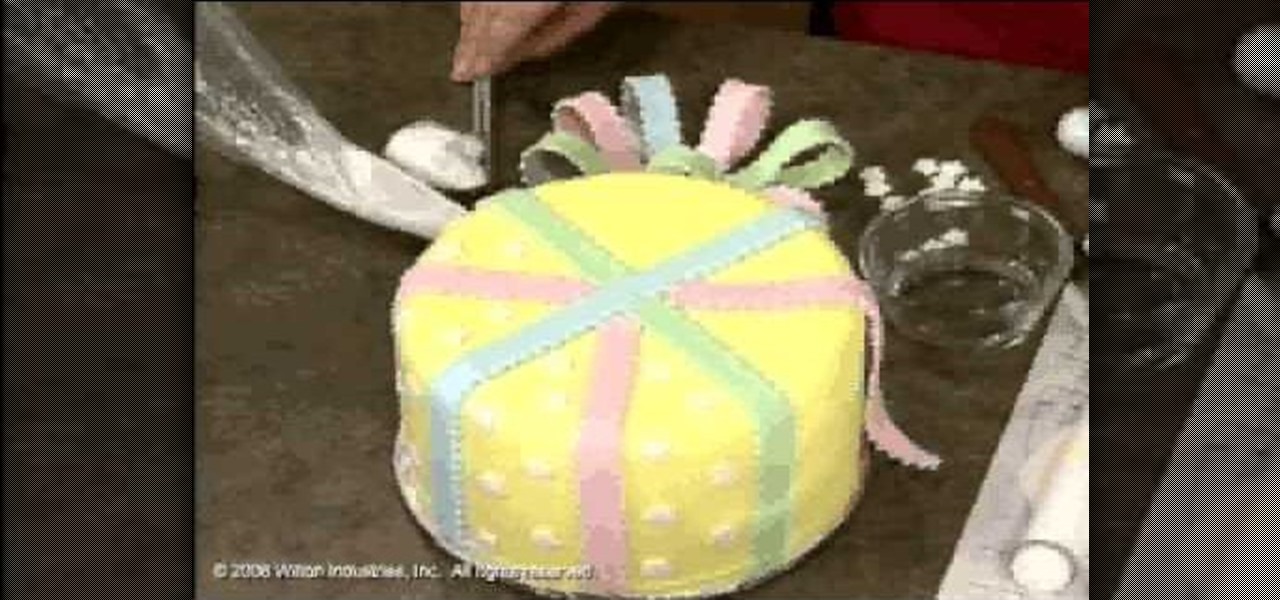
In this video, we learn how to use fondant when making & decorating cakes. Fondant is a dull type of sugar paste that you can form different shapes with and add colors to. When you add the color to the fondant, simply work it with your hands until the color runs all the way through and is smooth. Roll it out when finished, then you can apply it to the cake. To apply it, you will simply drape the fondant over the cake so it's hanging off on the sides. Then, flatten it out on the top and sides ...
In this video we learn how to pray in Islam by making Salaat. First, make the intention from the heart to pray to Allah. Ten, you will recite the prayer out loud saying "Allah is the greatest. In the name of Allah, most gracious, most merciful, all praise is due to Allah, Lord of all that exists. The most gracious the most wonderful master of the day of judgment." Continue to say the rest of the prayer as you are crossing your hand and focusing on your prayer. Repeat this several times and fi...
In this video, we learn how to use French wire when jewelry making. First, you want to take your wire and cut it to the length you need, using wire cutters. After this, you will place a stopper next to the pendant or bead that you are applying inside the necklace. Next, string on the clasp to the wire and then bend the end of the wire to the inside of the stopper, then cut the end of that with wire cutters. When finished, your clasp should be secure at the end of the wire and ready to hook on...
An EZ-Crimp is a very useful tool in jewelry making; with a rounded loop on one end and a flat rectangulr space equipped with a hole on the other, it allows for the attachment of a piece of wire (inserted through the hole) and can be used to close a necklace.
In this video, we learn how to use a big eye needle when making jewelry. This is a great tool when using stripping material. The needle is made of the eye and will work with ribbon or thread. First, open the eye of the needle, then thread the material through the opening of the hole. Next, string your beads over the point of the needle and then onto the material. Continue to do this for all the different beads you want to add, then your bracelet will be complete in a few short minutes. This m...
If you're thinking about what kind of project you can tackle with a lathe, ever thought about making a pen. You can make a great looking pen using many different kinds of wood. It all depends on what you want it to look like.
In this jewelry-making basics tutorial, learn how to make an eye pin. To create an eye pin, you will need wire. Size 24 or 22 gauge wire is the best kind of wire to make an eye pin. The thicker the wire, the more difficult it may be to work with. To begin, straighten out your wire and cut the length you need to make your eye pin. Taking some round nose pliers, you will bend the wire up while rolling it toward yourself. Do not pinch the wire too tightly with the pliers because it can leave per...
In this video, Andrea Albin, Assistant Food Editor at Gourmet Magazine, explains an easy tip for measuring honey. She says that it can be difficult and messy to measure honey because it sticks all over the spoon when you try to get the spoon out of the jar. She suggests taking a small bowl of neutral flavored oil, such as vegetable oil, and dipping the spoon into the oil first. Next, pour the honey into the spoon. When you turn the spoon over, the honey slips out of the spoon easily without s...
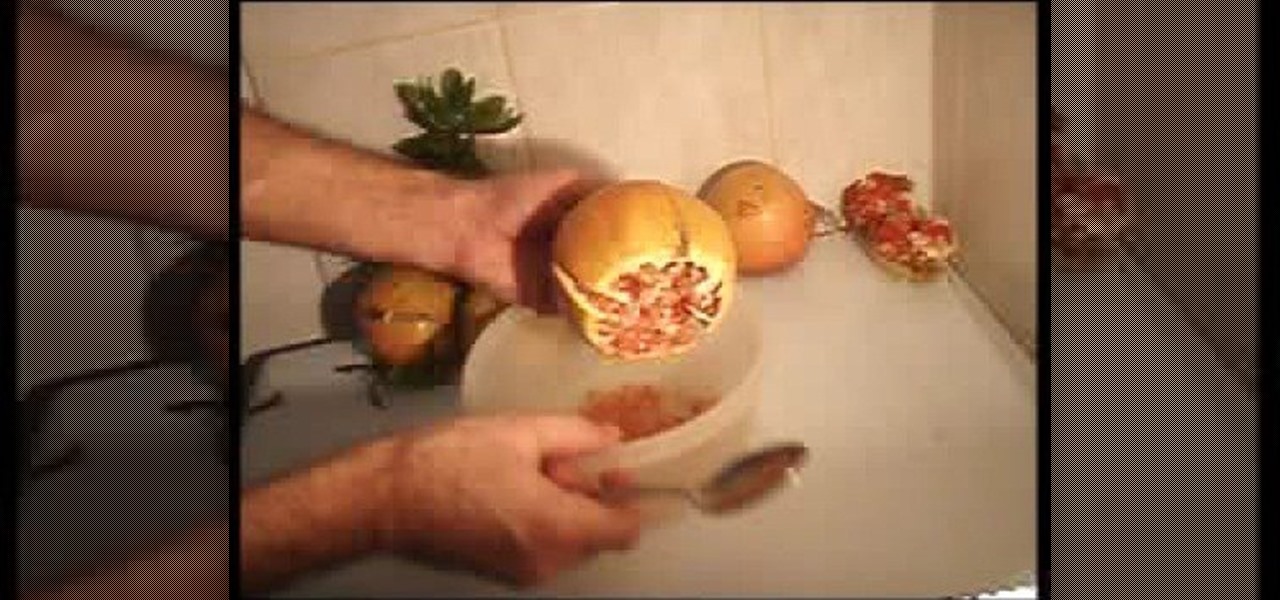
Hate the sticky mess of slicing into a pomegranate? Of course you do, but it doesn't have to be like that. By cutting off the top and making a few precision incisions down the outside, you can crack that sucker open and knock out all of those little arils into a bowl (or, just eat them straight out of the fruit).
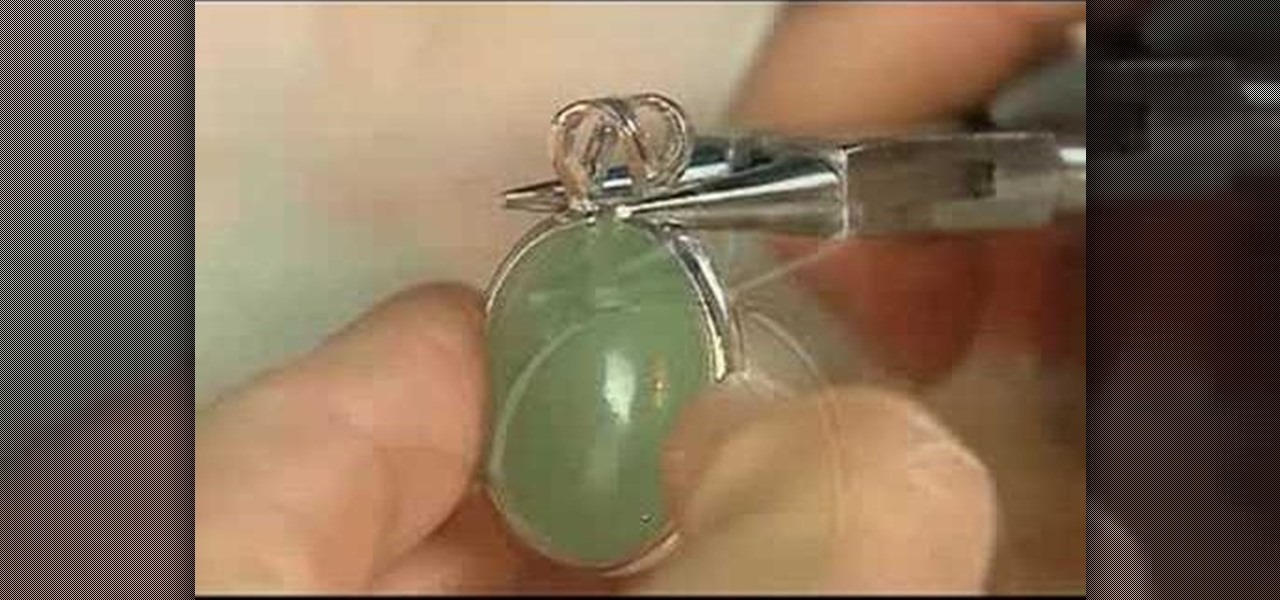
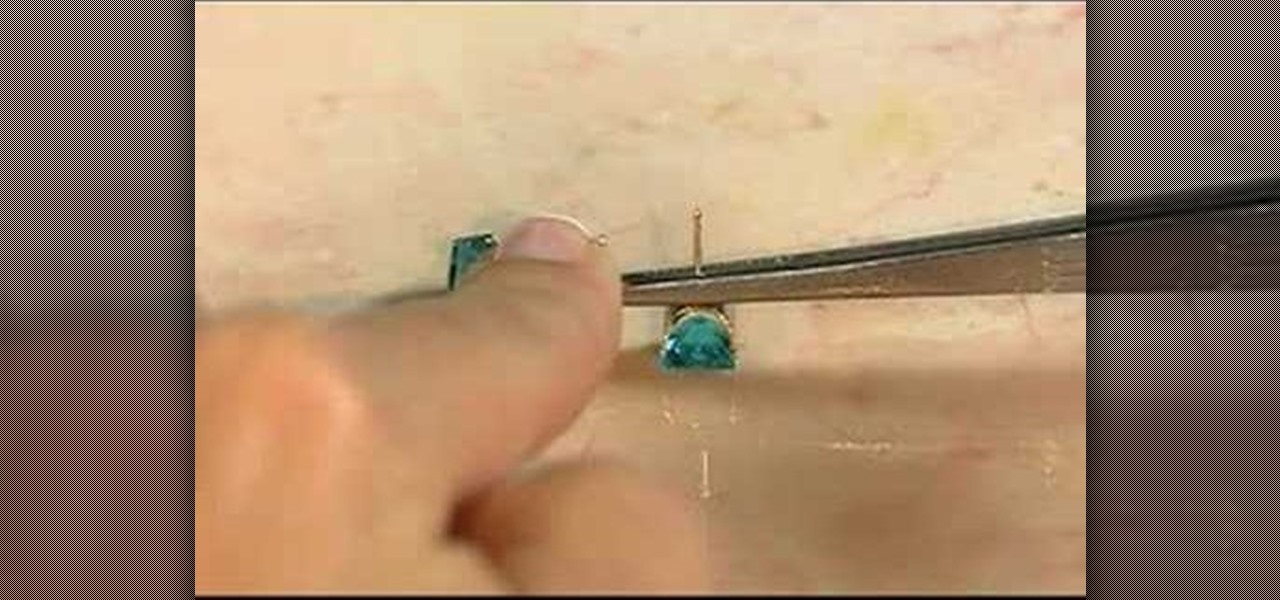
An important part of jewelry making involves properly setting gemstones. This how-to video tutorial demonstrates the proper way to set a stone in a cinch mount. Begin by placing the gemstone face side up in the casting. Use a pair of needle nose pliers to grasp the casting at the base of the bail. Gently squeeze the pliers to close the gap and tighten the casting around the stone. Test to ensure that the stone is properly set.
One important part of jewelery making involves properly doing setting snap tension mounts. This jewelry how-to video demonstrates the proper way to set stone with a tension mounts. With the crimp bead on the wire place the bead in the first notch of the crimping pliers. Begin with your stone face down on a flat surface. Place the casting over the stone. Firmly press the casting over the stone and you stone should snap into place. Use this technique to create beautiful earings.
Backyard FX shows how to build a real lightsaber. Erik Beck unearths the original lightsaber blueprints from the special effects creator for Star Wars, and show you how to buy parts to a real lightsaber so you can have your own custom Star Wars weapon. In the test film you'll see our rotoscoping technique on how to complete the effect with some simple computer animation. You will need chrome plated slip joints, black vinyl rubber, a nylon slip joint, a rubber slip joint, rubber O rings, and m...
Depth of field is the term for how much of an area your camera keeps in focus. Moving your camera allows you to keep your subject clear, and make the background blurry. Use this video to get better control of your film making.
This is a walkthrough for the first parts of playing the game Wizard101. If you want to know about creating your wizard and stepping off in the game, keep watching.
If you love coconuts, coconut water or even coconut meat, you should know how to open one up. This HowTo video tutorial shows you an easy way to open a coconut without making a mess.
Darts add shape and a more fitted line to garments that use them. While many patterns come with the darts pre-printed, how do you add darts when you're sewing without a pattern? This tutorial shows you how to add your own darts by hand.
This tutorial gives you five useful tips that will ensure your next film is utterly brilliant. Use what you've got, have a single message, entertain your audience no matter what, write a good script and storyboard, and make sure your sound and light are calibrated properly.
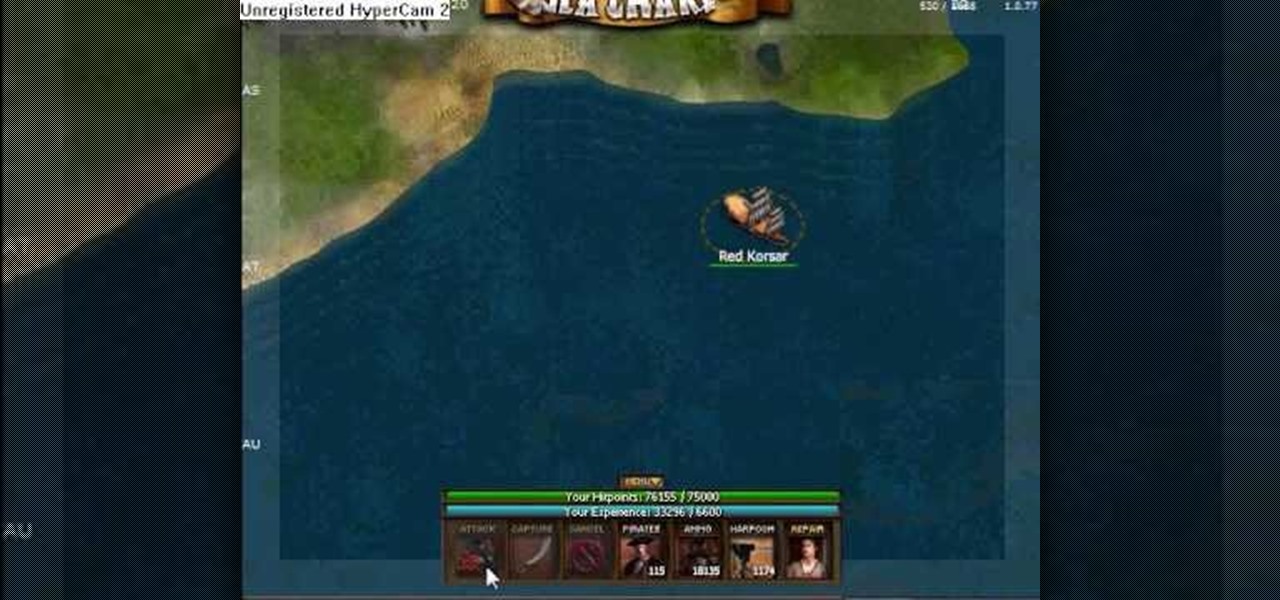
Ready to become a pirate and adventure on the high seas, in search of gold and glory? This tutorial, for the free browser based game Seafight, shows you exactly how to do just that! Play as a pirate, explore the high seas, kill monsters and earn as much booty as possible!
Turn craft time into an educational experience! Using one paper triangle for the cone, you can use other paper circles to represent scoops of ice cream to teach your child about different shapes. This is a fun and easy craft for young children and their parents to do together.
In this health-minded video tutorial from SavantMD, one doctor offers some useful advice on the natural health benefits of midday napping. For all of the details, and to learn more about how the positive health and productivity effects of naps, take a look!
This is a great way to teach your child about basic shapes and basic animals! All you need are some paper triangles, and maybe a googly eye and a bit of glue! Use four triangles to make the head, tail and fins for your fish!
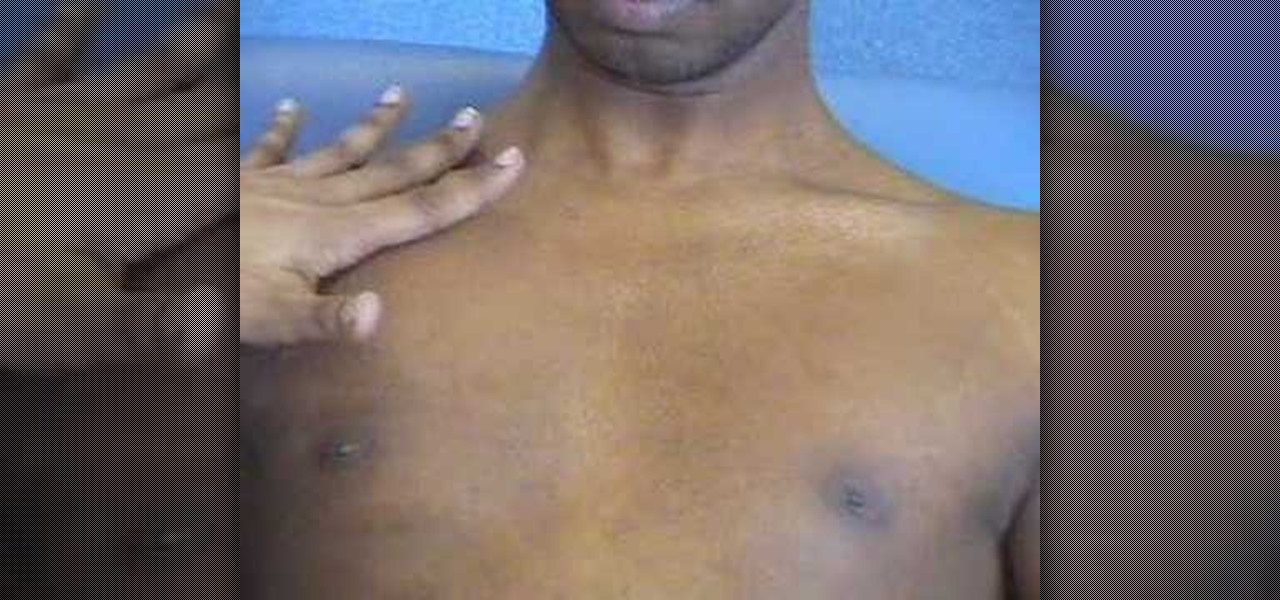
This video offers a quick demonstration of a basic clinical chest examination. It is a useful thing to know if you are a medical student or if you are a patient who will be having a chest exam performed on you. Watch and learn how to use the percussion technique.