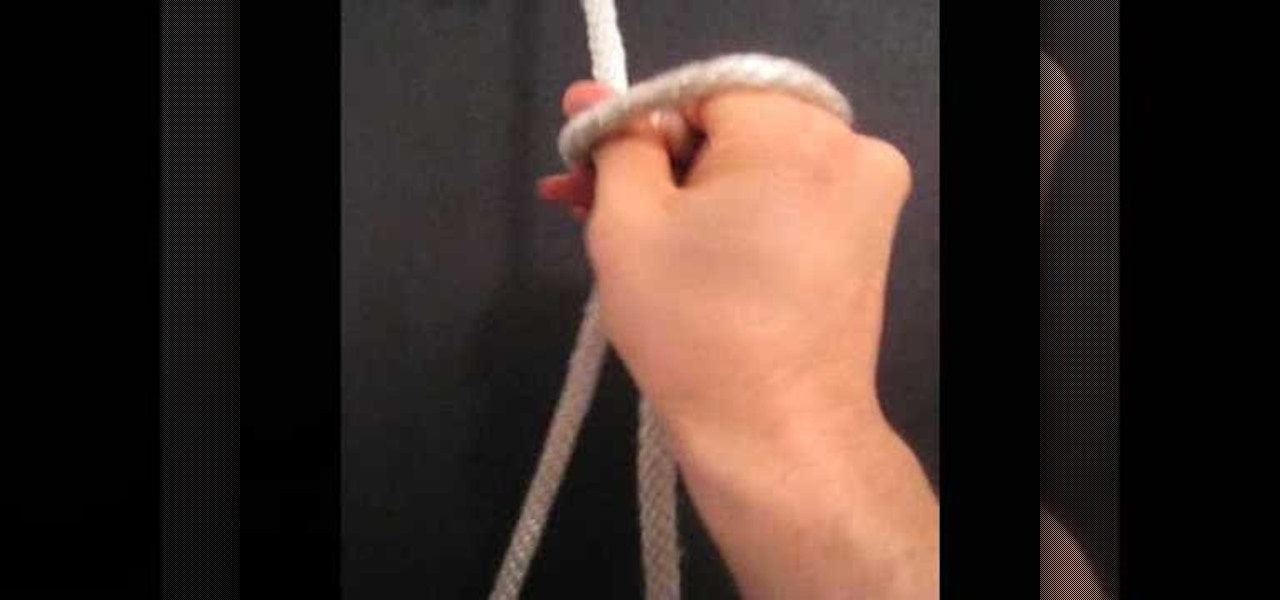
He explains how to tie a "blood knot" and what the blood knot is used for, which is joining two separated rope/string ends. He demonstrates the knot, which starts by taking the two lines and lining them up one on top of the other, so they are parallel to each other. Then, start winding one end around the other, at least 3 or 4 times. Do the same with the other loose end as well. Then, place the first end through the wound part of the two ropes where you started. You pass the other end through...
Want to play your video collection on any media extender, console or AppleTV? Step one is to get your movies off of the DVDs and onto your hard drive! If you're like most people you probably have a huge library of DVDs that you've bought and collected over the years. Unfortunately, it's an inconvenient format if you want to playback all that content anywhere around the house. So, learn how to rip and encode that stack of DVDs into a format that you can play on your Windows Media Extender, set...
The Pilates Stomach Series is also known as the “fabulous five,” because of the wonderful way the five movements tone the tummy. You will need a mat, floor space, and some flexibility. Pilates tip: If at any time your lower back comes off the mat, bring your legs higher as you extend. If your neck begins to hurt at any point during these exercises, simply lower it to the mat.
From the Fallout 3 SuperGuide on MyCheats. MyCheats staff writer Mike Nelson talks about his favorite exploits and tricks in Fallout 3.
If your car goes careening into the water there are but a few ways to make it out alive and survive. Submerged vehicle crashes have a higher mortality rate than head on collisions. Don't die of drowning while trapped in a sinking vehicle. Watch this video tutorial and learn how to survive driving into water.

Make your lighter into a miniature flamethrower just by flipping one little switch.

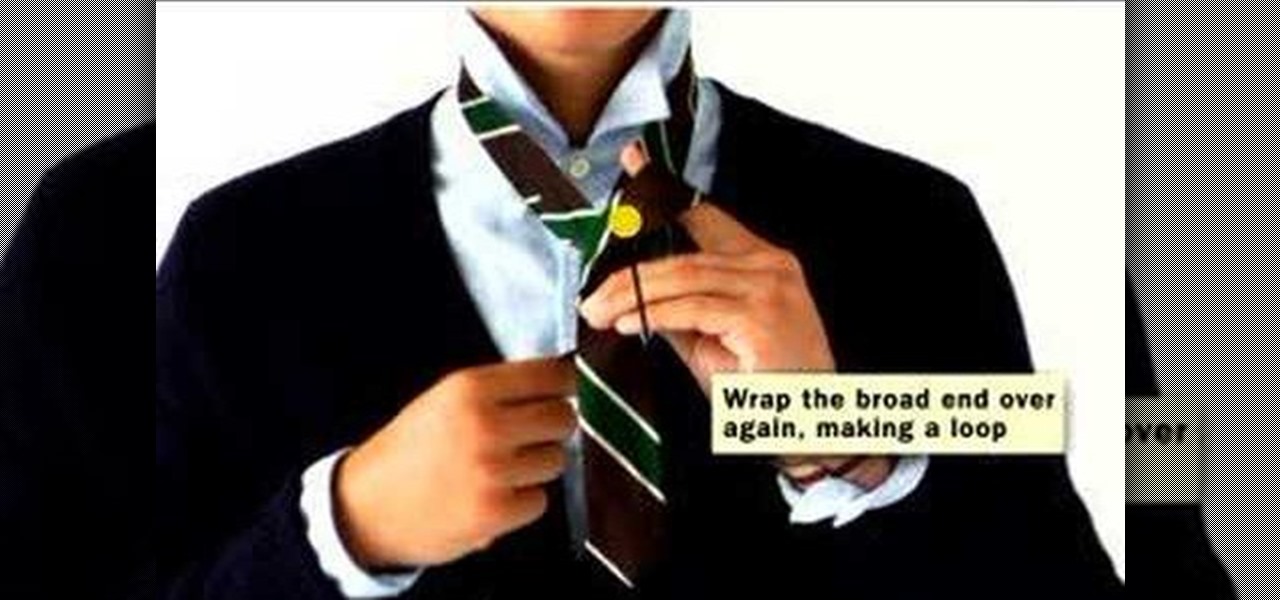
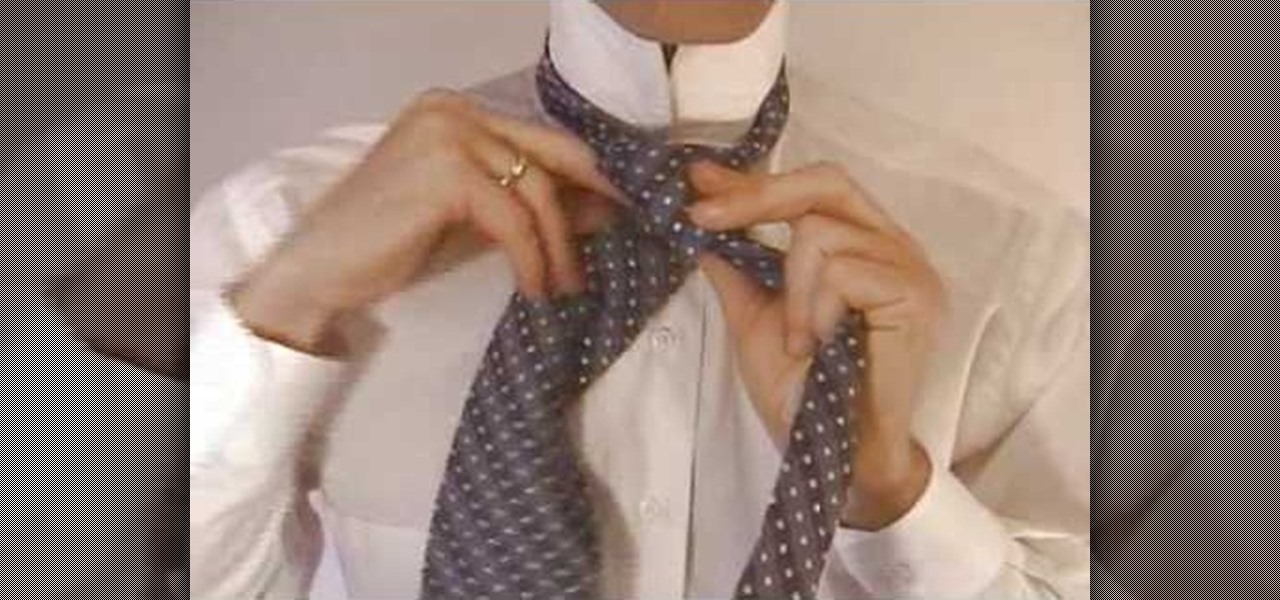
This video tutorial is in the Beauty & Style category which will show you how to tie a necktie in a four-in-hand knot. The broad end should hang lower and to the right. Take the short end of the tie in your left hand and bring the long end of the tie across it and hold it in your left hand. Then bring the long end back underneath the short end showing the back of the long end in front. From there you bring the long end back over the front of the tie to create a cross-section of the tie. Now p...
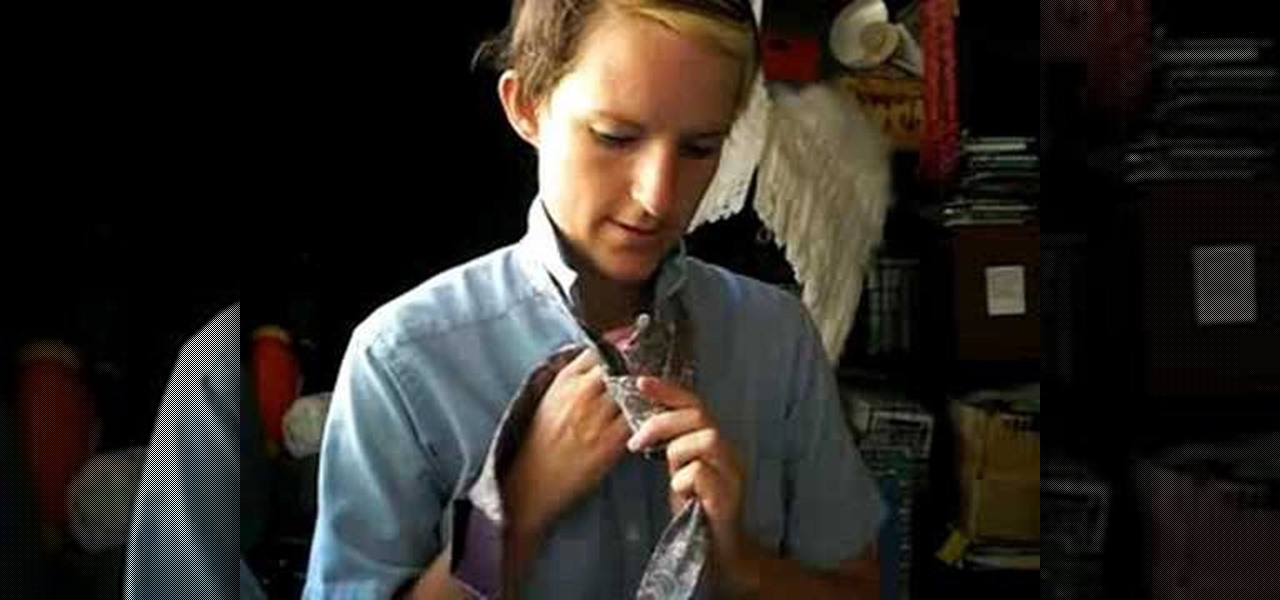
In this tutorial, we learn how to tie a necktie on someone else. First, pop the collar and drape the tie around the neck with the wide end on your right. Then, tug the wide end down, so it hangs 12 inches below the narrow end. After this, cross the wide end over the narrow end, and bring it up through the neck loop and down the front. Swing the wide end to the right, pass it under the narrow end, then cross it back over the right. After this, push it up through the neck hole. Now, tuck it thr...
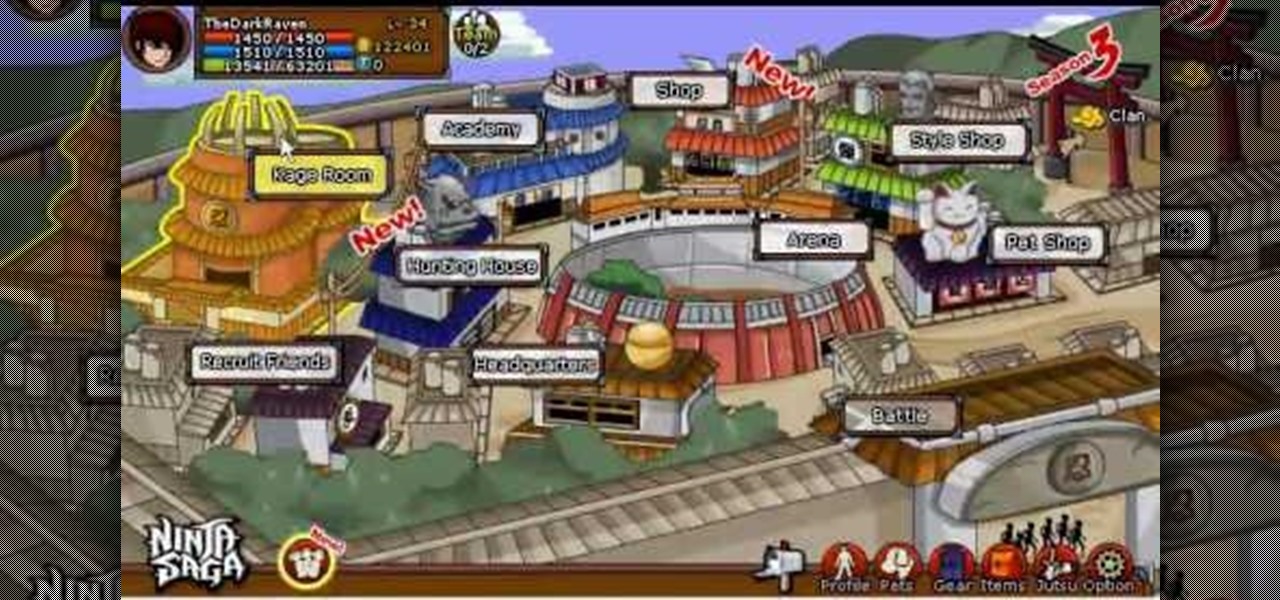
Get higher skills in Ninja Saga! This cheat lets you hack into the game and give yourself higher skills in your jutsu. This shows you how to use Cheat Engine 5.6 and increase all your jutsu skills for your play session. As long as you're using Mozilla Firefox, this cheat will work!
In order to make a neoprene necklace, you will need the following: neoprene, scissors, end caps, clasps, glue, and 2 pairs of pliers.
Make a hematite bead ring
In this video, we learn how to tie a tie in ten easy steps. First, you will need to put the tie on and put the wide end in your right hand and the thin end in your left hand. After this, place the wide end over the top of the narrow, then put the wide end back over top the narrow end. Next, put the wide end through the loop made with the tie and your neck. After this, put the wide side through the front loop of the knot and pull the wide end down tightly. After this, hold the knot and pull th...
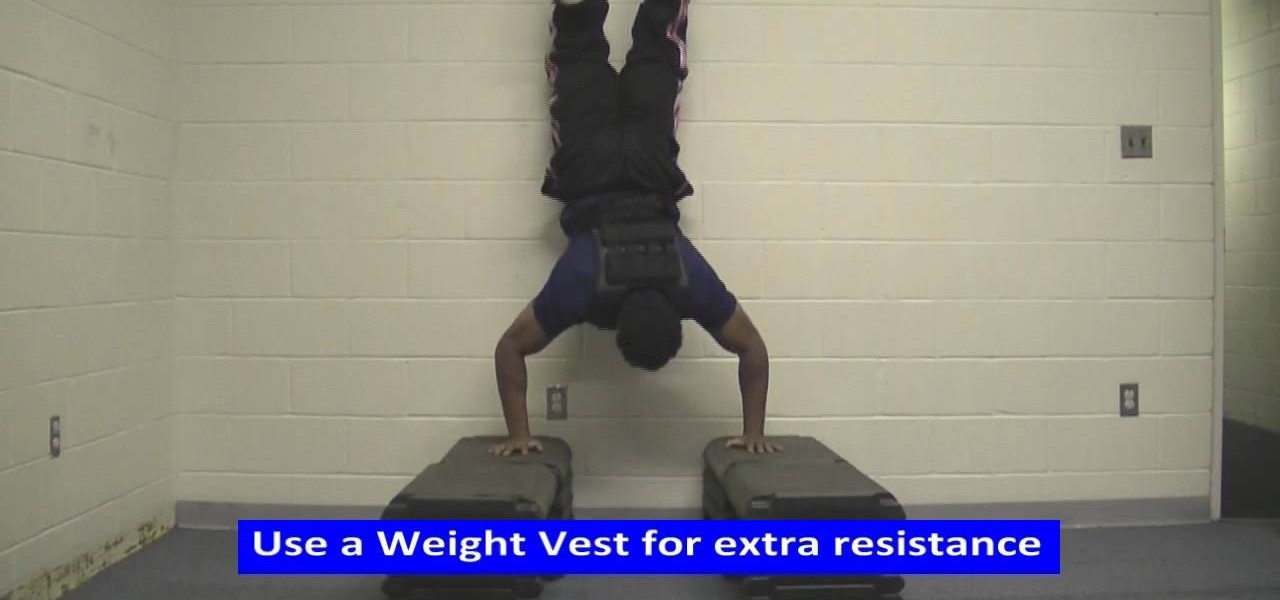
First of all you need to place your palms on the floor and place your feet upside and touch the wall. Now start walking on your hands backwards towards the wall and at the same time moving your legs higher on the wall. Try to get as close as to the wall. Once you are into the basic hand stand then hold this position for sometime. After this get out of the hand stand position and then again repeat this exercise and holding for five to thirty seconds. Do it five to ten sets. And do it five to t...
Place you tie around your neck. Make one side longer and one side shorter. Then you will criss-cross the two sides of the tie, with the longer end being placed over the short end. Take the long end and loop it around the shorter end. Then you will take the longer end and bring it through the little loop that you have already formed by looping the end around. This will give you the ascot. To do a scrunchy tie, take the ends and pull them through the loop that has formed, and then you will have...
This video shows expert instructors tying a tie in the full Windsor knot. First you cross the wide end of the tie over the narrow end. After that you put the wide end up through the loop (behind the narrow end) and then you pull it through the tie. Next you cross the wide end behind the narrow end of the tie and then pull it back over the loop. Then you cross the wide end in front of the narrow end, go up the loop around your neck, and then down through the loop in the tie. You have now tied ...
Our host Roe is going to show you how to tie a double Windsor knot into a tie, with this quick step by step guide. To begin, you want to make sure the wider front end of the tie is on your right side and the little end is shortened to about the pectoral level of your chest. Next, you want to cross the two ends with the wider front end on top of the little end, hold where they cross and then bring the wider end through underneath the spot where you're holding. Now, hold the spot where the two ...
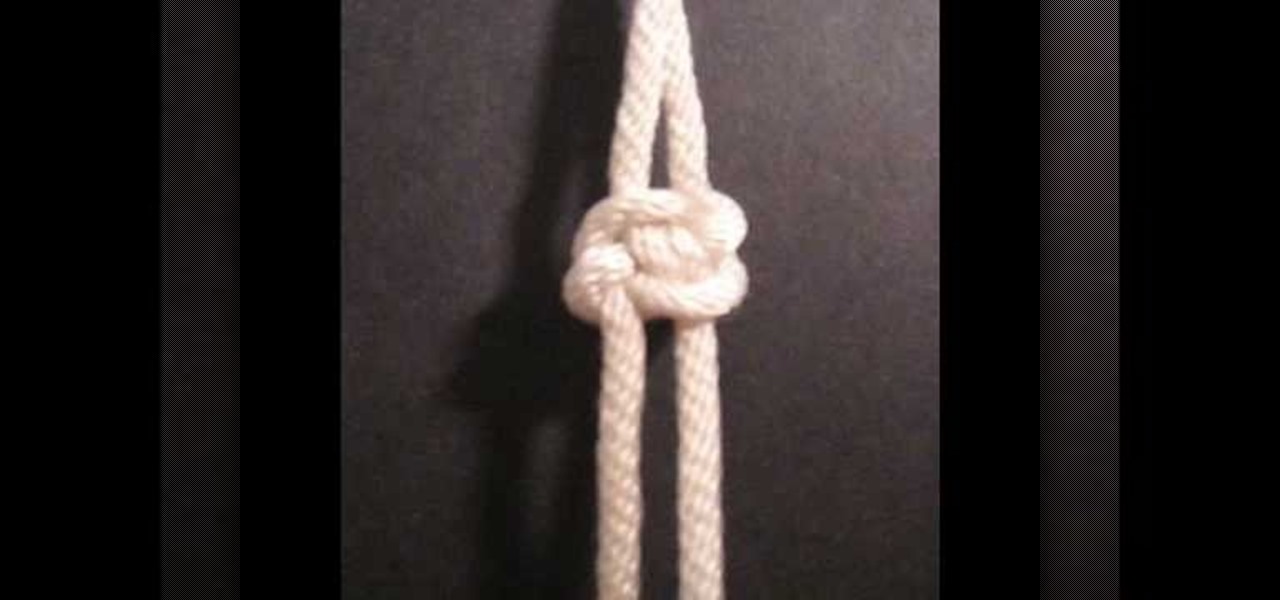
To make a Kinky Lover's knot, first hang or keep the tag on something. Then take the first end. Tie it by keeping a loop. Then take the second end and pass it through the loop by leaving a loop. Then take the second end, which was taken earlier , through the loop made by the first end. Then pass the second end through the loop, which was made by the second end. The knot is ready! All we have to do now is to tighten the knot by pulling the two ends. Make it beautiful by arranging the tag clearly.
Bridge is one of the most popular games in the world. The rules may seem overwhelming, but all you need are a few easy steps to learn the basics.
Watch this video tutorial to learn how to play war. Not only is War a great way to pass the time with a friend, but it's so easy to learn that both children and adults can play.
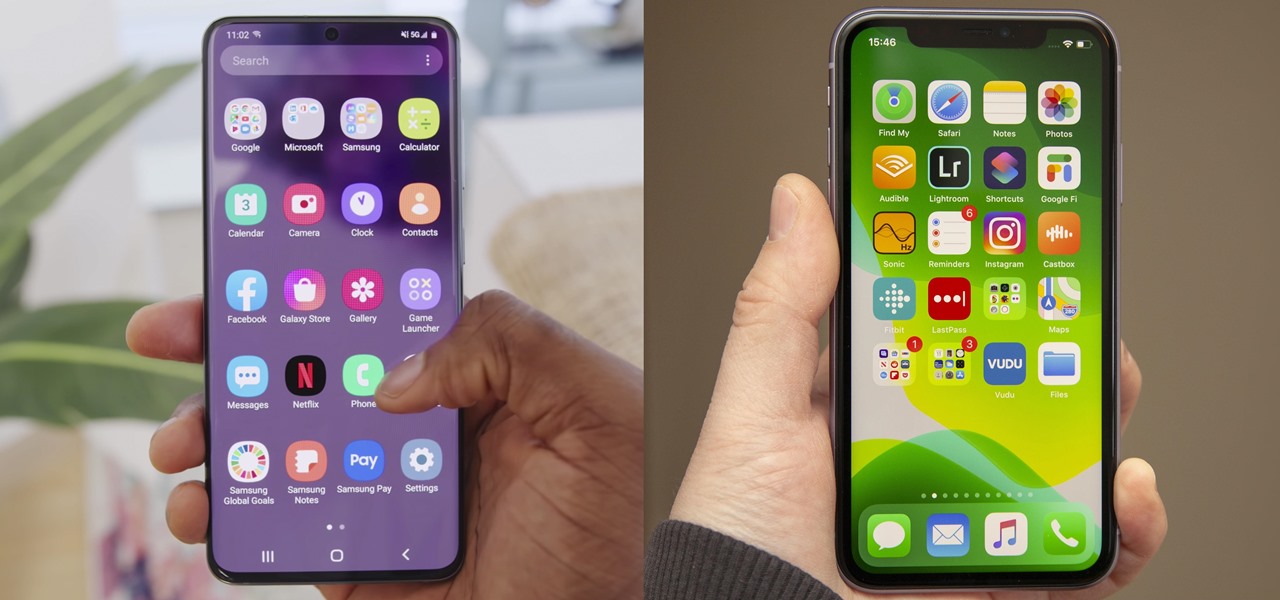
Apple has their regular iPhone 11, then two higher-end "Pro" models. Samsung went the other way — they have the Galaxy S20 and S20+, then there's the S20 Ultra. But one thing these smartphone lines do have in common is the base model flagship. How do they compare?
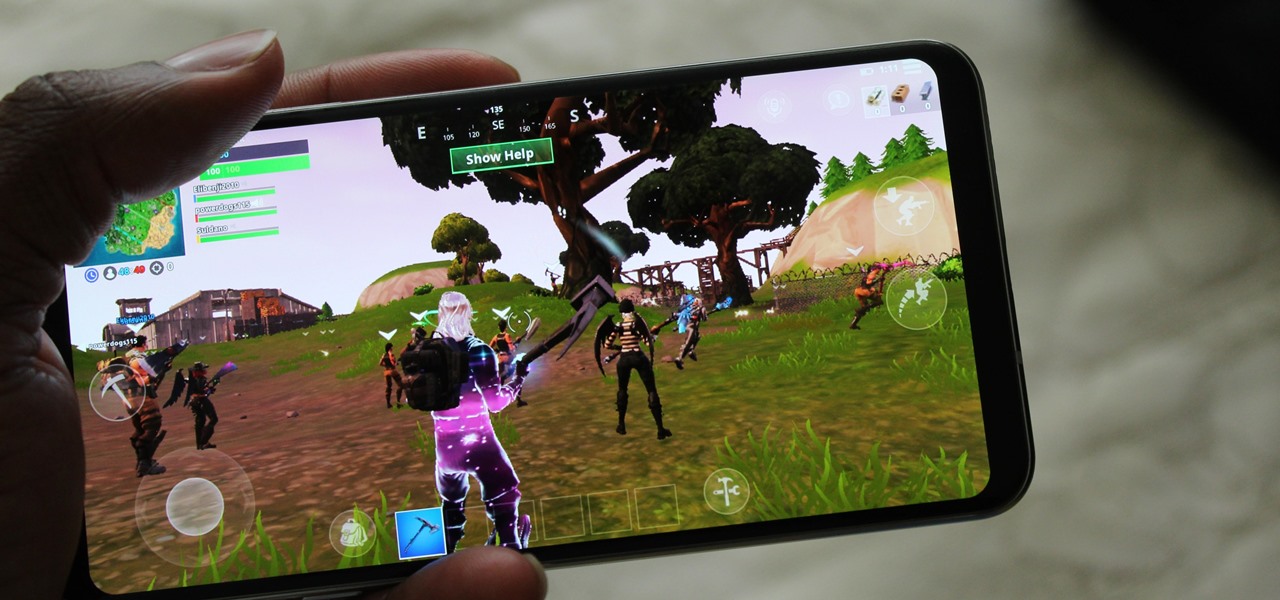
After the limited initial release of the massively popular game on the Android platform, many users have been stuck waiting to play Fortnite. That's because, initially, Epic Games only released the game to Samsung Galaxy devices, and asked non-Samsung users to join an invite list. Well, the wait is finally over.
Starting Nov. 1, 2018, Google got a lot tougher with Android app developers. New apps being uploaded to the Play Store already had to target Android 8.0 Oreo or higher as of August, but now, every update to existing apps has to do the same. It may seem like a simple rule, but it will have some serious repercussions.
Like previous installments in the Pokémon series, as you progress through Pokémon GO you'll be able to evolve your Pokémon into more-powerful monsters with new and more-damaging attacks. However, unlike older entries in the series, your Pokémon won't simply evolve when they reach a certain level. Instead, you'll have to "feed" them a certain amount of character-specific candy to induce the transformation.
This is a video tutorial in the Arts & Crafts category where you are going to learn how to tie a Bowline knot with one hand. Doing this is really simple and easy and doesn't take any time at all. Hang a line from any support. Take the lower end, that is the running end in one hand and pass it around the standing end. Then take it out through the loop and pass the running end around the standing end and pull it out through the loop. Tighten the knot and it's done. It's really that simple and e...
In this tutorial, we learn how to tie an Alpine Coil knot. When you start your coil you want the starting end to be inside your hand. First, take the working end of your rope on your last coil and make a loop in your rope. Then, wrap a couple of turns around the rope and lock it into place. Once you've made a couple of turns, the working end will go into the loop. To secure, go over to the end from the loop and give it a tug, which will lock the working end into the rope and make a nice way t...
Have you ever thought of building your own social networking site? Before you get to making websites like Facebook, you need to start off smaller, and this 29-part video series is where to begin with developing a social networking community website . Before you start with these lessons though, make sure you have all the following:
This video tutorial is in the Arts & Crafts category which will show you how to tie a decorative Door Knocker knot. Take a piece of rope and make a loop at the center with the left hand end of the rope over the right hand end. Now pass the right end above and through the loop to make a half knot. Twist the loop to make a figure of eight, pass the right hand end through the lower loop of the "8" and back through the upper loop. Repeat this once again. Now repeat these steps with the left hand ...
In this video tutorial, viewers learn how to insert or delete footnotes or end-notes in Microsoft Word 2007. A footnote is a little reference which will place a small number in subscript and link it to a comment. A end-note is similar except it links the comment to the end of the document, rather than the end of the page. Begin by highlighting the text. Then click on the Reference tab and select Insert Footnote/End-note. Then just add a comment to the subscript. This video will benefit those ...
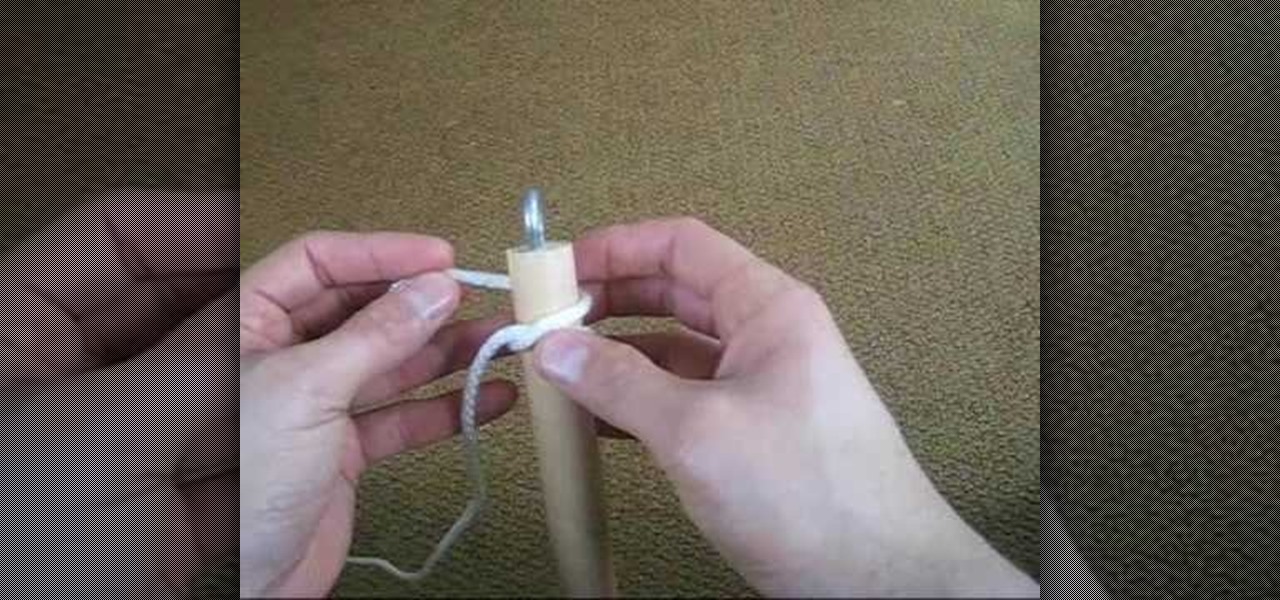
In this Outdoor Recreation video tutorial you will learn how to decoratively wrap a wooden staff in rope. First make the clove hitch at one end of the wooden staff, and tighten it firmly. Pass the rope around the staff and take the working end of the rope above the standing end, take another turn and pass it under itself. Push the knot to the end of the staff and tighten firmly. Next step is making a spiral hitch. Take the other end of the rope to the other end of the staff, put a half clove ...
In this Arts & Crafts video tutorial you will learn how to tie a Padlock style decorative knot. Padlock knot is a clever way to achieve the look and function of a padlock without having to bother about the key. Take a piece of rope, bend it in the center and make two loops on either side of the rope. Ensure the working end is over the rope in the left side loop and under the rope in the right side loop. Now overlap both the loops so that the left side loop is over the other loop. Now pass the...
Paul shows us how to make a gigantic three dimensional five-point star out of paper. First, glue A4 sized paper together to make a long strip. Make a U-shape on one end, cross the shorter end under the strip and make a knot by placing the end into the loop. The knot now looks like a pentagon. Flip the pentagon over and over until the end of the strip so that the paper strip is bundled into the pentagon shape. Stick the end of the strip to the pentagon shape. Press the centre on each side of t...
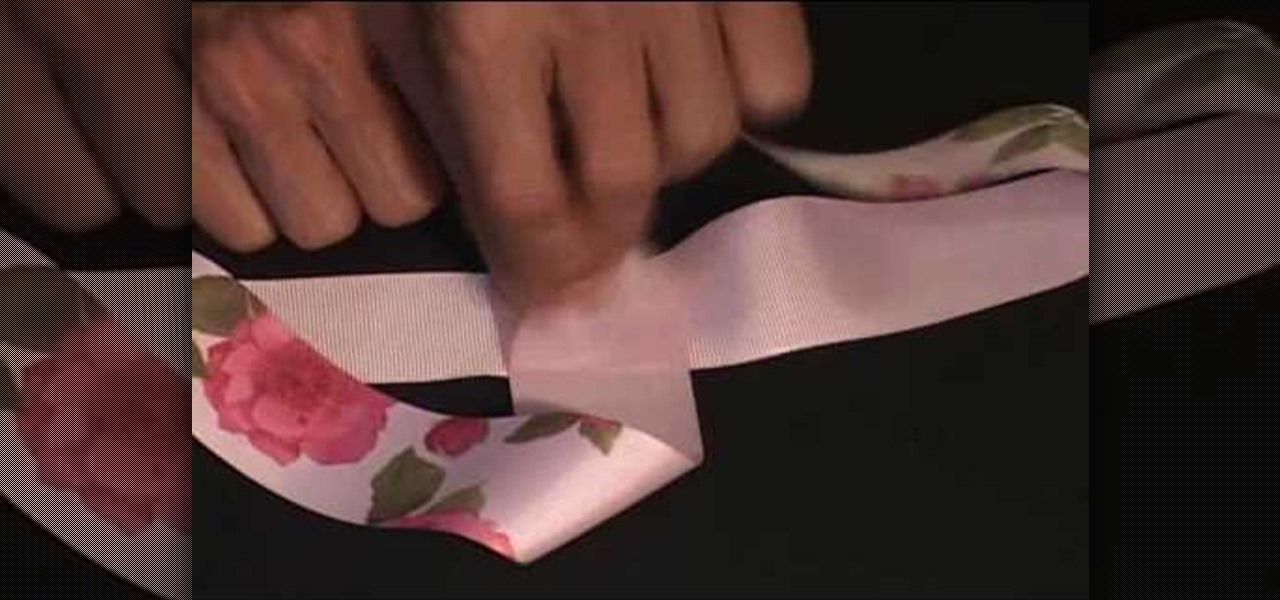
get a long piece of ribbon, put the ends together and make a crease at wear the ribbon folds, that'll be your center point. Now get one end of the ribbon, and without it flipping over, bring the end to the center of the ribbon and lay it perpendicular to the direction of the ribbon. Also bring the other end of the ribbon to the center of the ribbon but from the other direction. Hold the ribbon together using a gator clip. Obtain a piece of string or plastic strip, tie the folded ribbon tightl...
John Campbell, from azbushman, demonstrates how to make a quick bow and arrow in the wilderness by collecting natural materials and constructing them with cord. He starts by finding seep willow (also called coyote willow) that grows in clumps near rivers. He cuts ten willow sticks and ranges their lengths from about five feet down to about one foot, each a couple of inches shorter than the next.
If you're new to the Visual Basic IDE, looking to brush up on your VB programming skills, or simply have a burning desire to code a simple calculator, this three-part video lesson is for you.
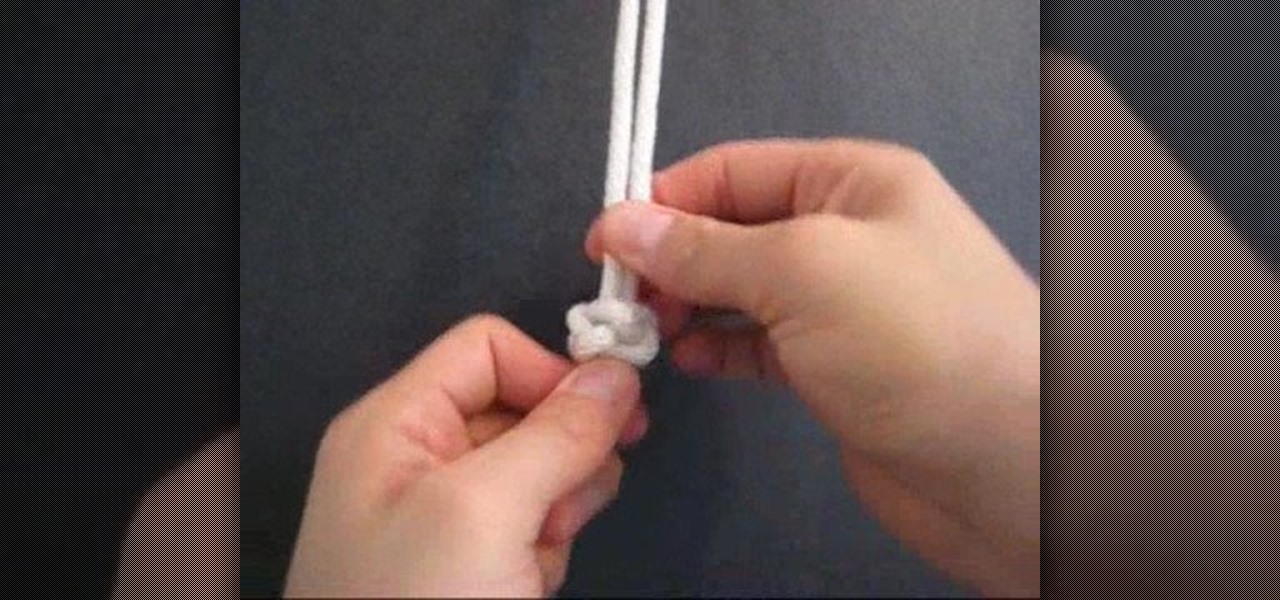
"How to Tie a Decorative Diamond Knot: Tying It All Together" explains how to tie a decorative diamond knot. The diamond knot is a decorative cylindrical knot, which is also known as the lanyard knot and the knife lanyard knot. Make a loop with one end of the string, and fold the other end parallel in the center of the loop. Feed the end of the right string over the left string and pull down. Fold the right string over and feed through the left side of the loop. Pull a second loop behind the ...
You could be going into a job interview with the wrong ideas. This video, however, teaches a person how to go into an interview and have a higher chance of landing the job. Learn how to go into the job with the right mindset. You can make the job interviewer see you're serious about working for their company, and not the opposite by having the right mindset.
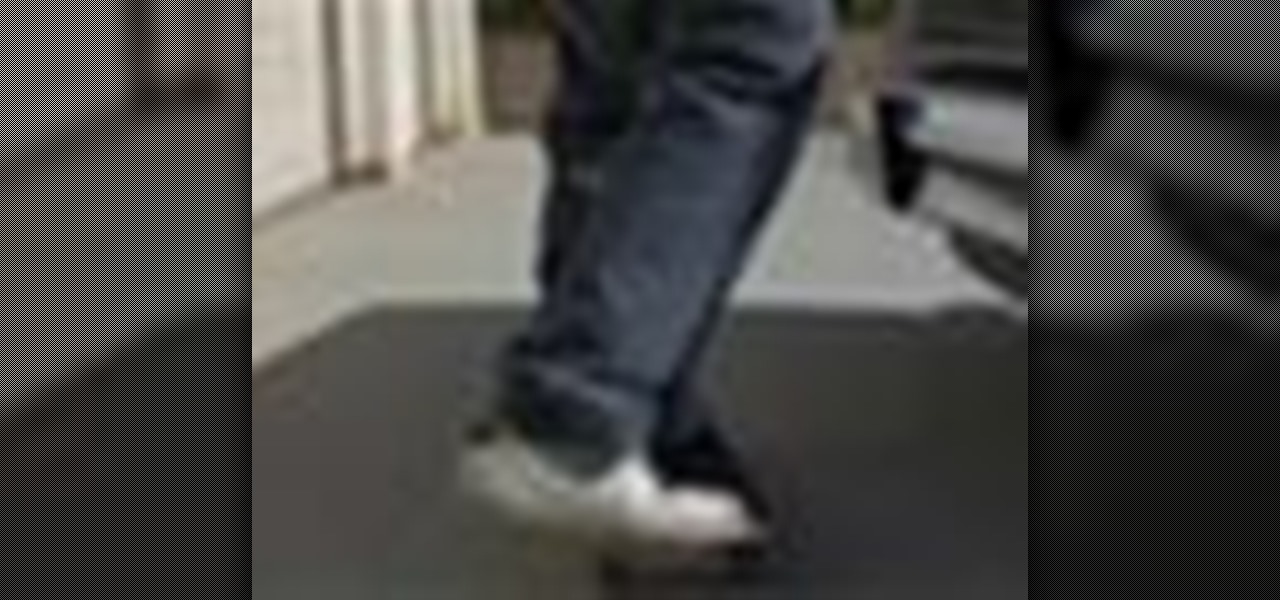
The Frontside 180 Ollie is a skateboarding maneuver where the rider pops their board into the air and then does a 180-degree turn in mid-flight. Exclaiming “Gnarly!” afterward is totally optional. You will need a skateboard, a flat & dry surface, lots of practice, and courage & stamina. Tip: the lower you bend down, the higher your board will fly into the air.
This automotive performance customization tutorial shows you how to install Road/Race Motors (RRM) grip springs in a 2008/2009 Mistubishi Lancer. Grip springs are higher performance suspension components. If you bought RRM grip springs for your Lancer, this tutorial will show you how to install them.
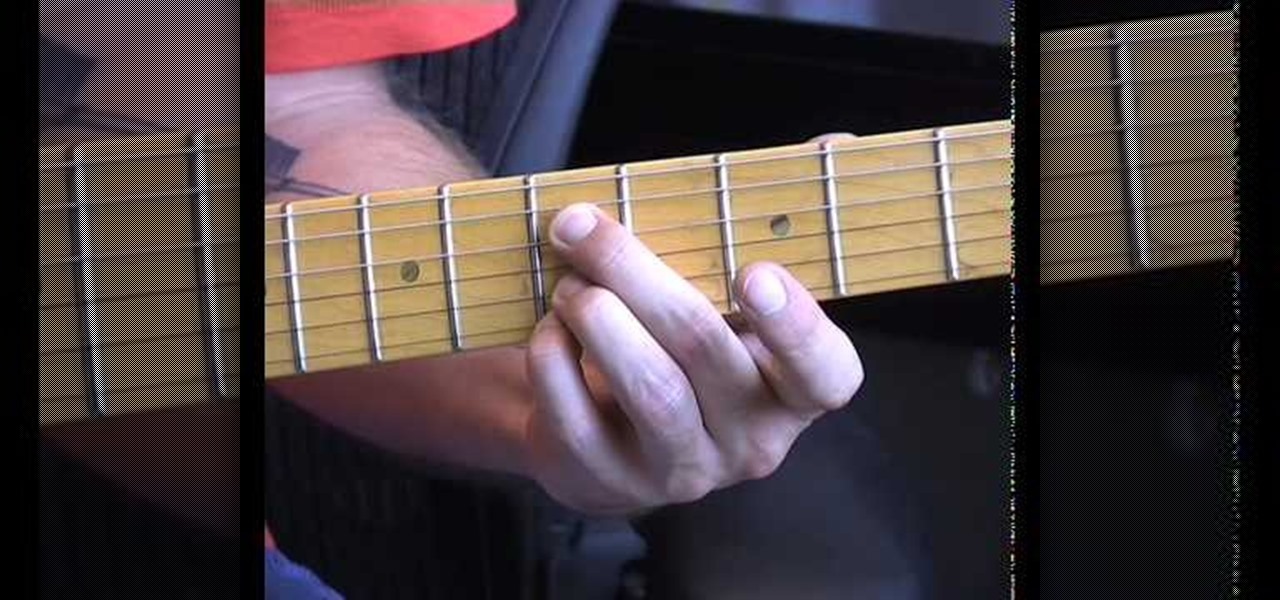
This lesson covers five intro and ending licks and how to use them. Intros and ending licks are an important part of blues guitar improvisation. They convey to the listener whether the song is continuing,in the case of an unresolved chord progression, or in the case a resolved chord progression conveys the ending of a tune. With this how to video you will learn several examples of licks for beginning and ending a blues guitar song.
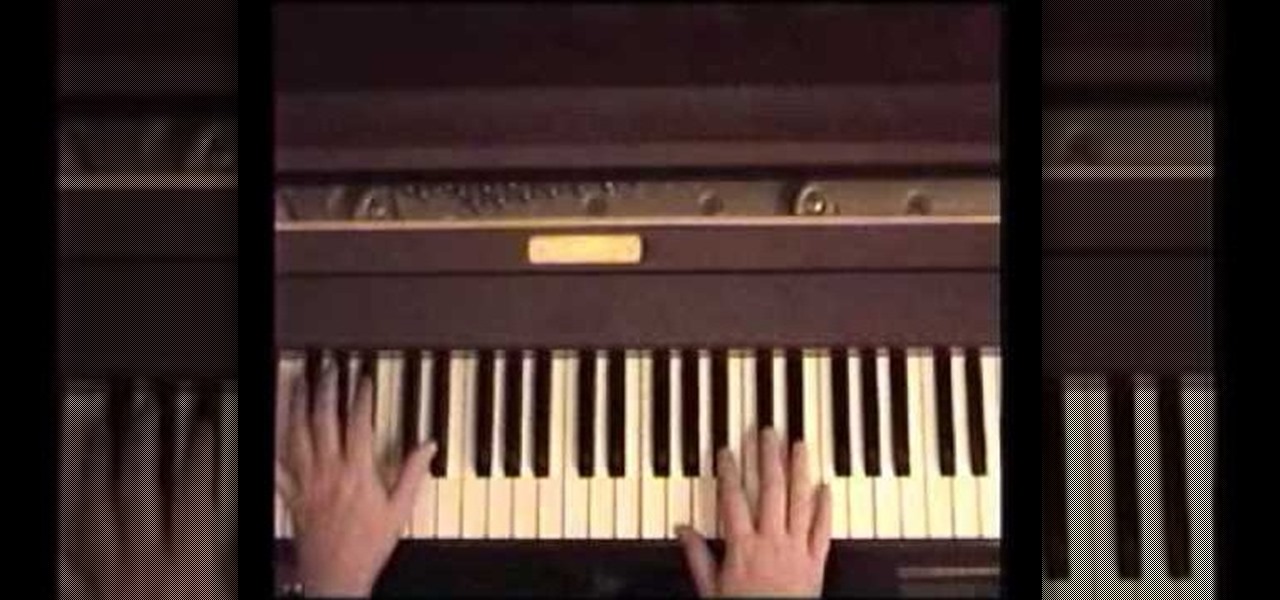
A bit higher on the difficulty scale for a Beatles tune, the piano solo in "Lovely Rita" is piece that will amaze your friends and may even get you that job promotion. And all you need to do to get started learning said solo is press play! Take a look!