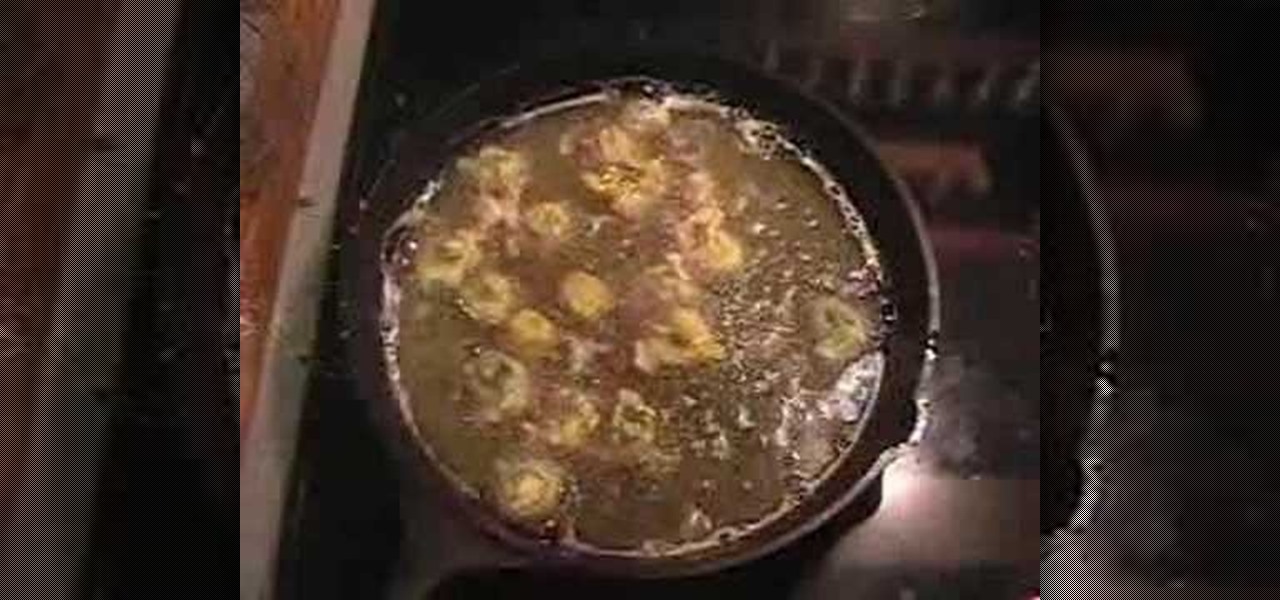
In this tutorial, we learn how to make fried okra. You will need: okra, corn meal, salt, pepper, onion powder, garlic powder, eggs, and vegetable oil to make this recipe. First, cut up your okra into small pieces then place into a bowl and cover with the egg. Next, let this sit for five minutes, then put the corn meal inside of this and fry it. Fry it in a pan filled with oil and keep grilling until it's golden brown. Add in your seasonings while it's cooking, then enjoy when it's finished! Y...
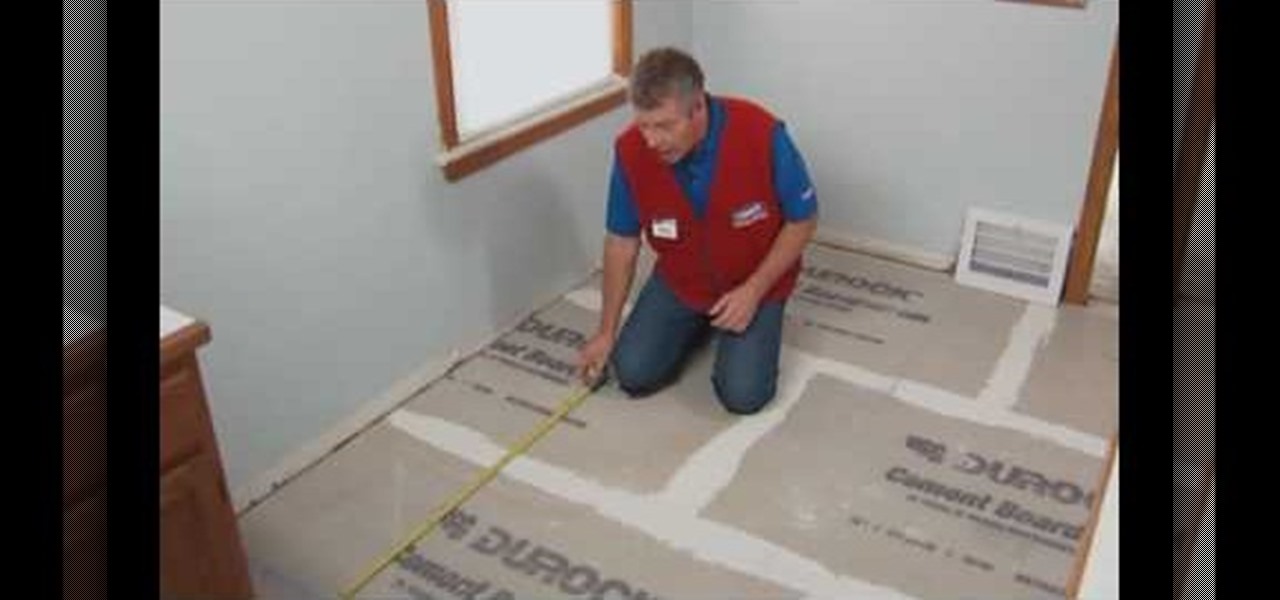
In this tutorial, we learn how to install a ceramic tile floor. Before installing, you need to prepare a solid base. First, you want to take off the trim, then calculate the area of the room. Prepare the floor by inspecting low or high spots. You will want to apply mortar, then set the backer boards into place. Screw these into place, then finish covering the floor with seam tape. Apply mortar over these then let dry. Now, you can start laying your tile onto the top of this! Once you are fini...
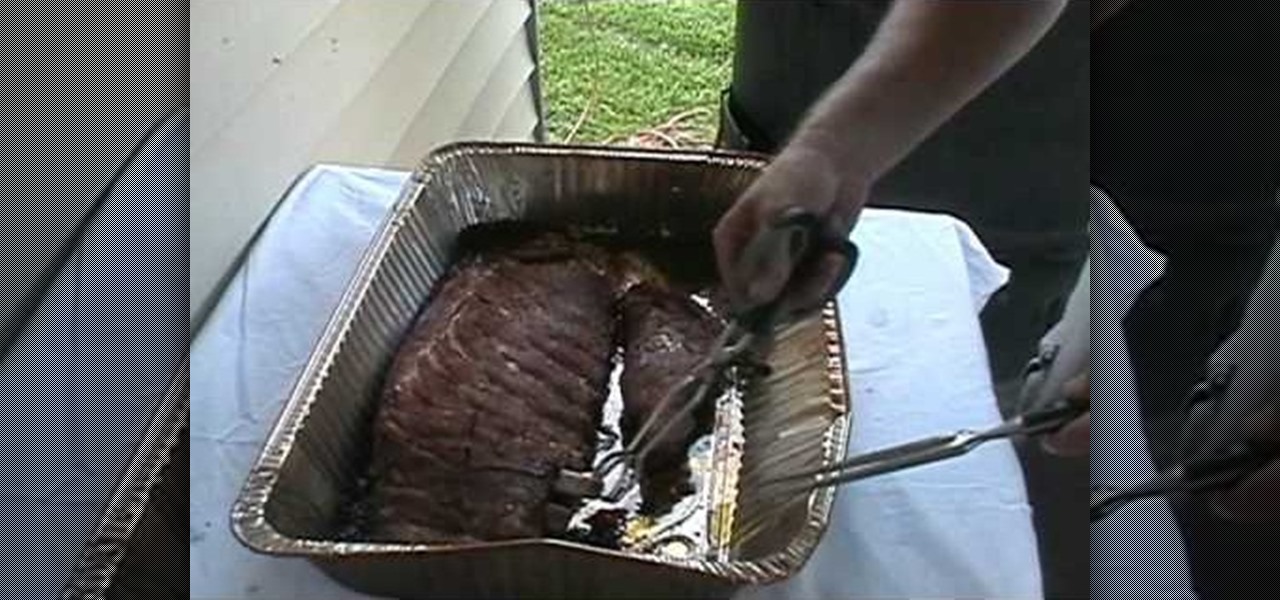
In this tutorial, we learn how to smoke pork ribs Texas style. First, grab your pork ribs (around 5 lbs) and place into a large baking tin. Next, apply your favorite type of rub to the top and bottom of the meat. Use a lot of the rub and cover the entire piece of meat. When finished, smoke your pork ribs in a hot smoker with water in a pot underneath. Close the door to the smoker and make sure you shut all of your vents. Let the ribs cook and you will know they are finished when the temperatu...
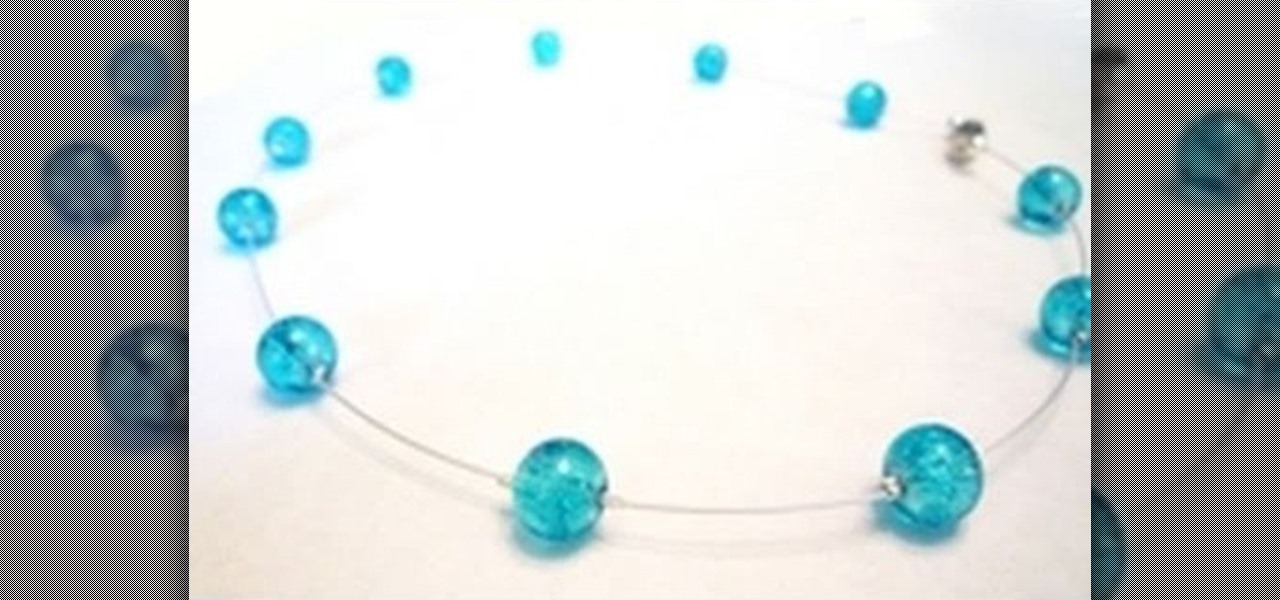
In this tutorial, we learn how to make a floating illusion style necklace. You will need: beading wire, crimping pliers, wire cutters, beads (your choice), crimp beads, crimp covers (3mm), and a clasp (barrel clasp). First, cut your beading wire to the length you want your necklace, add 3-4 extra inches. Next, space your beads out on a beading board evenly, 1 1/2" apart. Now string a crimp bead onto your wire and take the end of the wire and string it through the crimp bead on the opposite si...
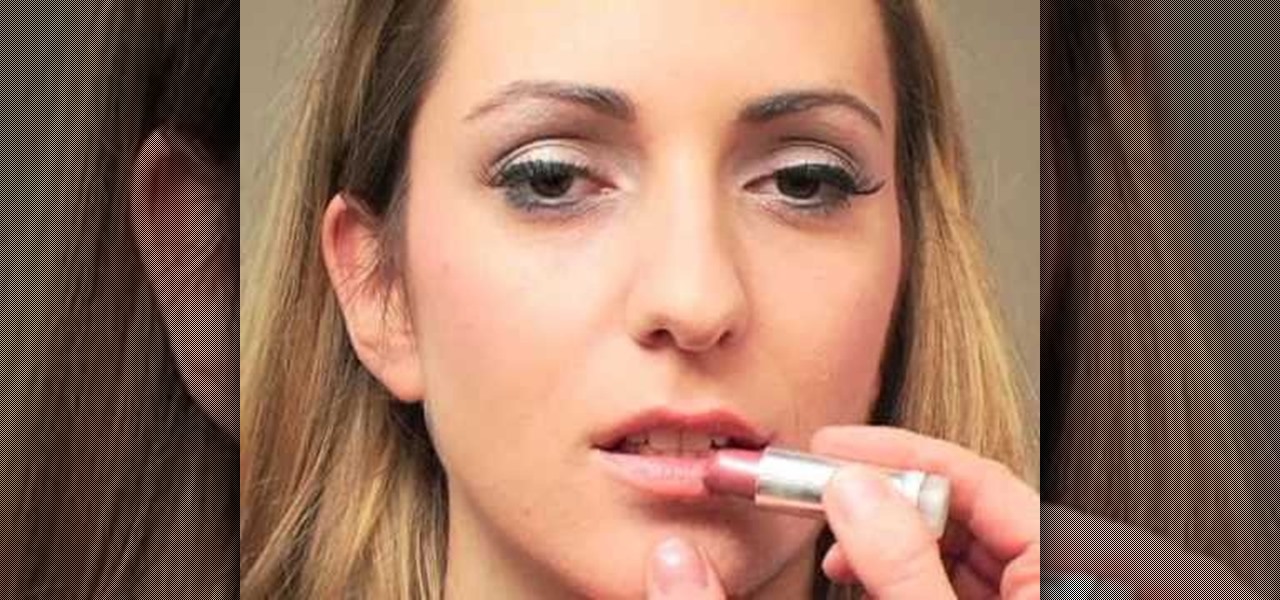
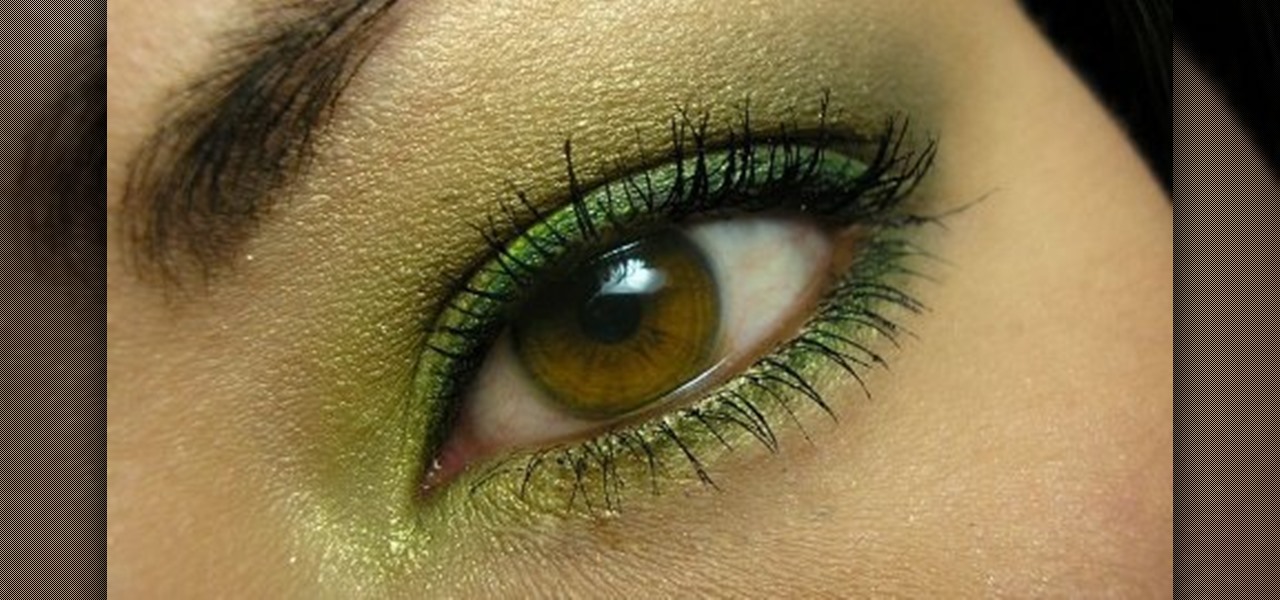
In this video, we learn how to do makeup like Lady Gaga from the "Bad Romance" music video. To begin, apply ivory foundation all over the face with a foundation brush. Now, blend the makeup out with a sponge then apply a finishing powder. Next, apply a pink and white eyeshadows that are both pale on the entire eyelid up until the brow bone. Once you get to the lid, put on a brown color to the upper eyelid above the white eyeshadow. Now, apply the white eyeshadow to the bottom of the eye and a...
The artist begins by sketching house the outline of the face and body using a pencil. Then he begins to form the eyes, nose, hair and ears, and applies a gray mask to the face which is then covered by the tan coloring of the woman. The lower body is applied with a lighter mask which is converted to the white furry coating of the coat. The drawing is then smoothened out showing us the main features of the realistic woman. Using the software and computer graphics that he uses, the hair, eyes, a...

In this video, the girl is showing us how to do Taylor Swift inspired hair. The first step in obtaining this look is to have straight hair and a curling iron (around 3/4" or smaller). You will first need to take a small strand of hair and twist it around with your finger so it's loosely twisted. Then, take the curling iron and place it on the strand just so the bottom of it is covered. Then, curl up and leave it curled for at least 15 seconds. Next, once you take the curling iron out, you wil...
Everybody loves dogs, but not everybody can own one. Although… everyone can own and enjoy a painted dog. And if you want to learn how to paint a puppy dog yourself, this is the video tutorial for you. Make sure to pause the video after each step and look at the screen every few seconds while you are drawing.
Scratches are unsightly and can alter the value and look of your car. Watch this automotive video tutorial to see how to fix scratches in your auto finish. You need to purchase primer paint made for use on an automobile. Pick a primer that is lighter in color than your car so it is easily covered by the touch-up paint in one coat. Use some mild laundry detergent to wash the scratch to remove any wax or coatings, which could effect your vehicle's paint job. The rest involves some sandpaper and...
Tim Carter demonstrates a few simple tricks when using paint rollers. Tim Carter also talks about putting the right amount of paint on a wall surface. These interior painting techniques will help with that professional finish.
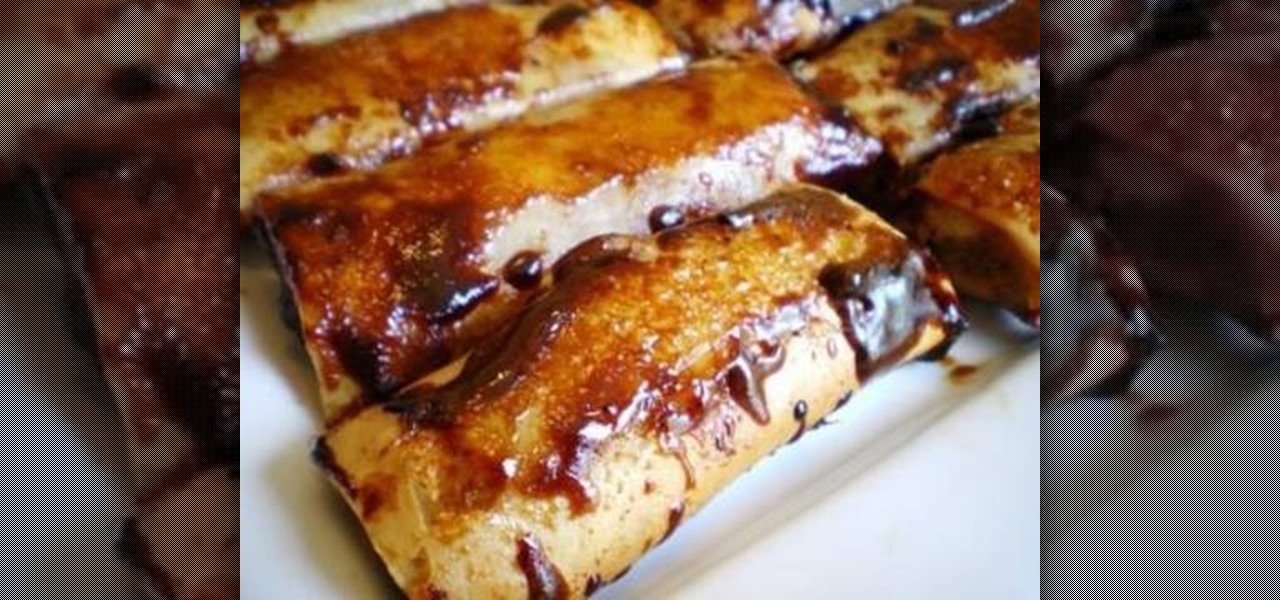
In this tutorial, we learn how to make Filipino turon. Ingredients you will need include: A bag of whole steamed Saba bananas, spring roll pastry, and brown sugar. First, take your bananas and cover them completely with brown sugar and place onto a plate. After this, roll the banana into the spring roll tightly so nothing falls out. Place water on the outer edge of the spring roll before finishing, to make it stick together. Repeat this step for all of the bananas, then fry them in a skillet ...
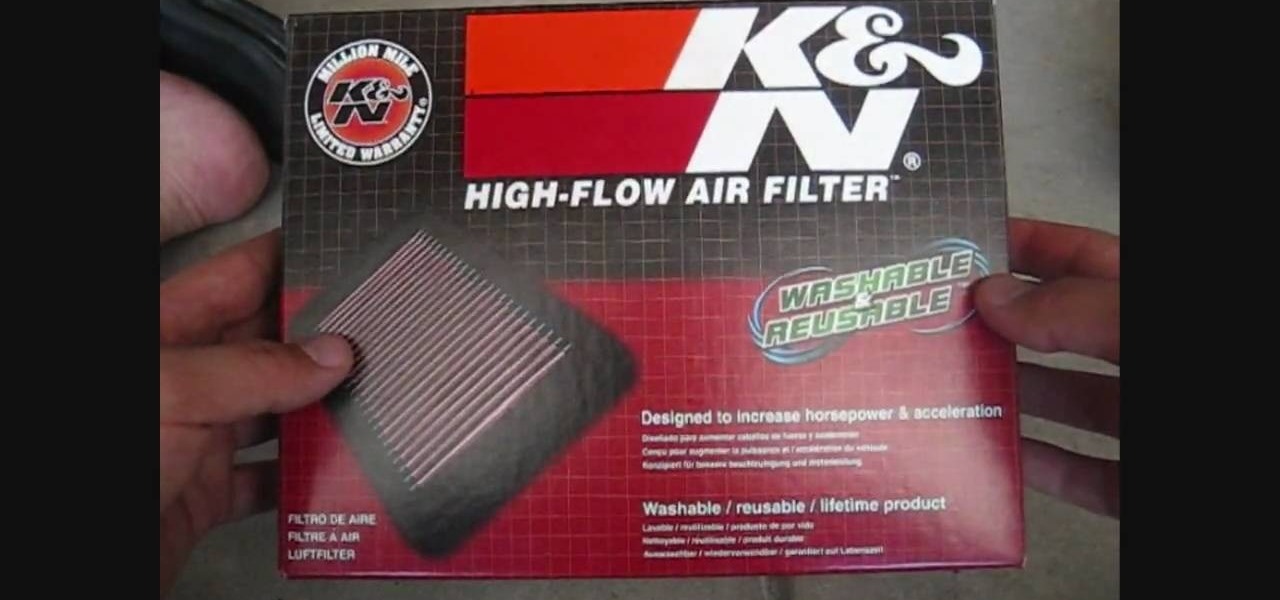
In this tutorial, we learn how to replace the stock air filter on a Ninja motorcycle. Start off by opening up the air box using an Allen wrench. After this, take the bolts out of this and set the air box cover down. Now, remove the air filter to see how dirty it is. If the air filter is full of residue, then you need to change it! Now, clean the inside of the air filter area with a wash cloth . After this, replace your new air filter back into the right spot. Next, apply the filter cover back...
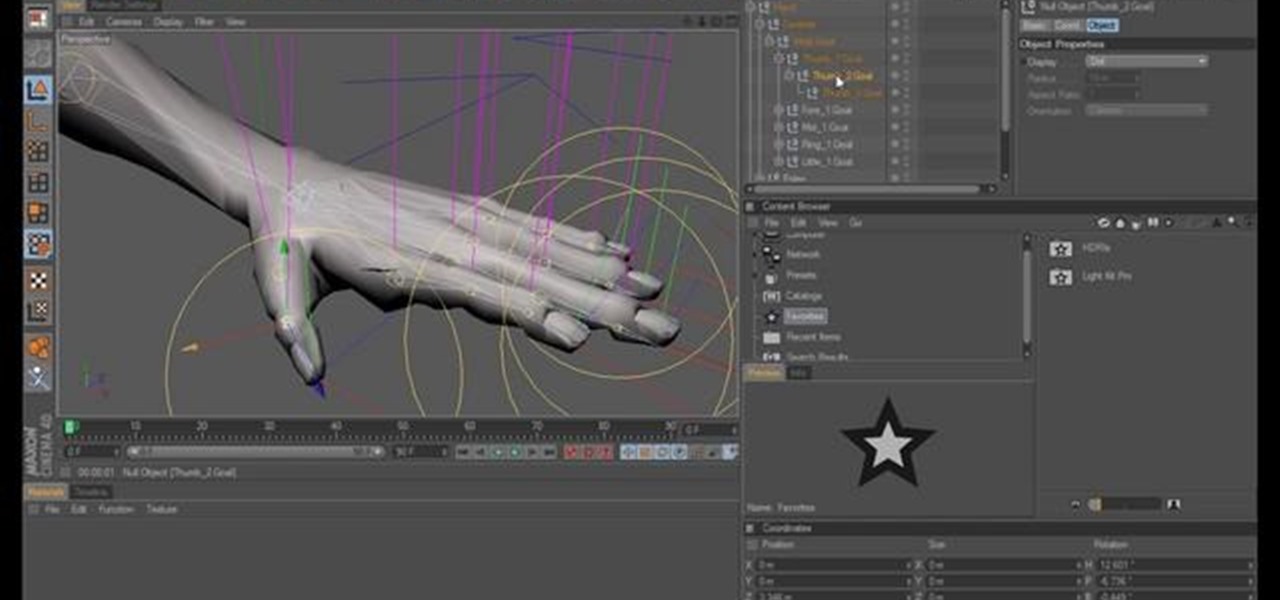
This tutorial covers the C4D rigging system, applying it a model of a hand. It goes from start to finish covering all the different aspects of the technique. Whether you're new to MAXON's popular 3D modeling application or are just looking to get better acquainted with Cinema 4D and its various features and functions, you're sure to enjoy this free video software tutorial. For more information, and to get started using this trick in your own Cinema 4D projects, watch this 3D modeler's guide.
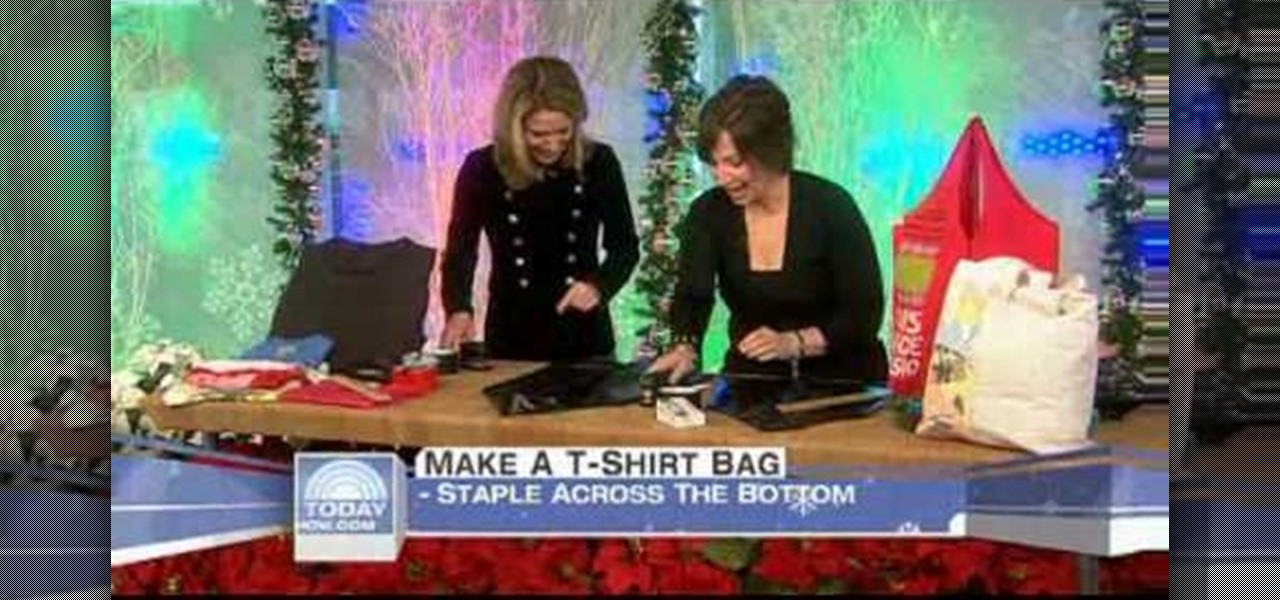
This video shows the viewer how to turn an old t-shirt into a tough bag that can then be reused many times. This is done by first cutting the sleeves off. This creates a top that resembles a tank top. The t-shirt should then be turned inside out and then covered completely in duct tape. The bottom of the bag is then stapled closed and another layer of duct tape then covers this up. A line is then stapled across each corner to change the angle and create more conventional corners. When the bag...
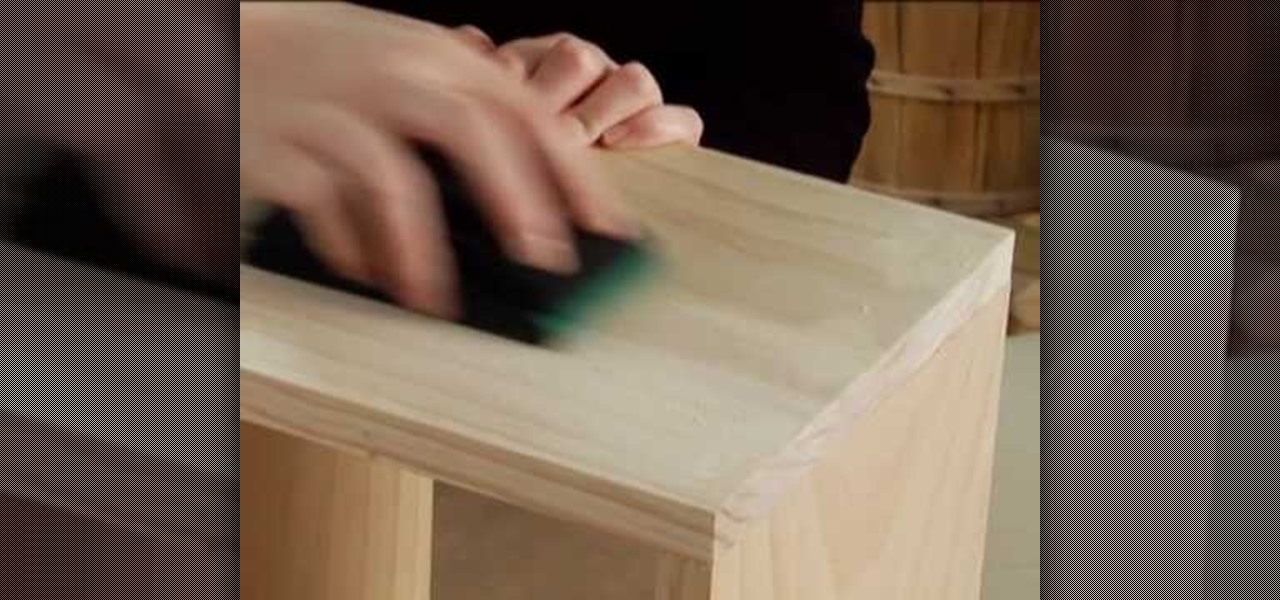
This video describes how to improve one's skill when performing home based projects with wood which is a useful skill if one wants to build a table, chair or even a box. In this video one will learn how to sink a nail, cover the hole and leave a sanded finish. For example it is important to drive all nails 1/8 an inch into the surface of the wood so the filler can cover the hole properly and avoid leaving sharp edges or uneven surfaces. Overall this video is simple, easy to follow and useful ...
This video shows you how to create beautiful make-up using the loreal hip products. Products Used:
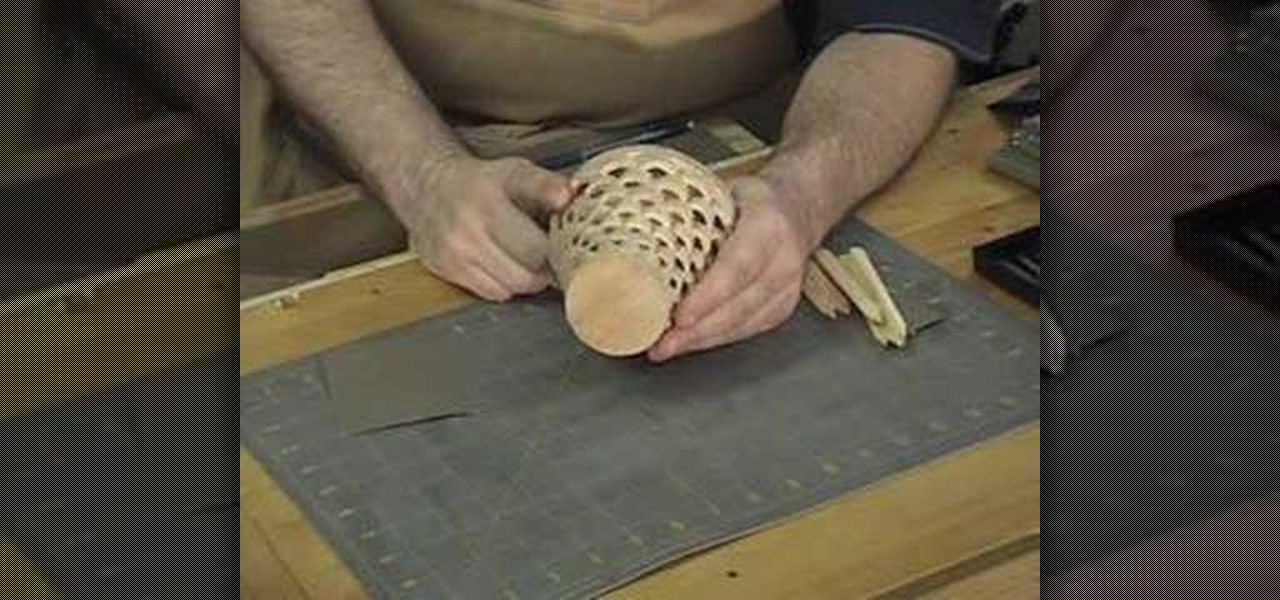
What tools and materials do you need for turning a bowl on a lathe? Learn more about the equipment for woodturning in this free woodworking video from a wood shop expert.
In this tutorial, we learn how to make a Halo Needler prop. You will need: knife, scissors, pink straws, paint colors, cardboard, paint brush, and pencil. First, draw the pattern out on a piece of cardboard. Next, cut this out and make four layers of it. After this, glue or tape it together and then line glue everything together. Now, cover this with paper mache until all parts are fully covered and dry. Next, color with your paint and then let it dry until the paint is no longer wet. This wi...
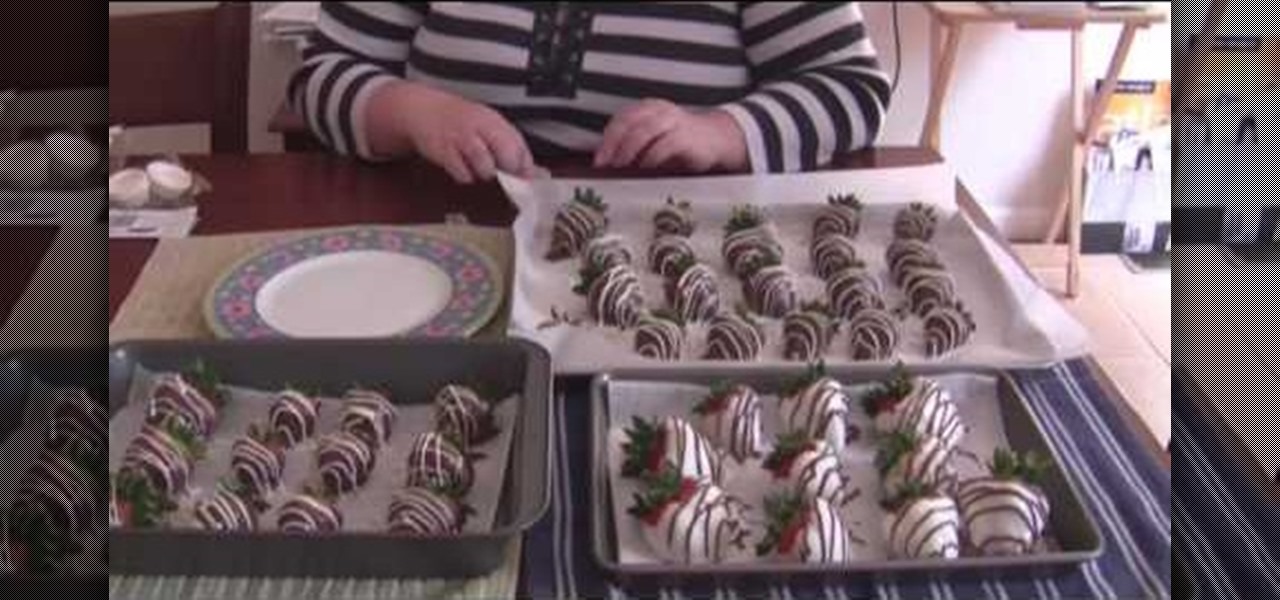
In this video, we learn how to make chocolate covered strawberries for dessert. First you will wash your strawberries and then thoroughly dry them as well. After this, you will take two squeeze bottles from a craft store and fill them half way through with two different kinds of decorating chocolate. Then, heat up a double boiler and heat up chocolate candy melts. Then, melt the two craft bottles in the hot water from the double boiler. Now, dip the strawberries into the chocolate and place t...
In this tutorial, we learn how to make & decorate a vintage retro rose romance cake. Start out by rolling out fondant that has been mixed with yellow coloring. Once this is rolled out, you will lay it over the cakes and then cut off the excess fondant from the bottom. Do this on all the layers of the cake until it's fully covered and completely smooth. Then, you will use the same fondant to roll into small flowers that you will apply around the outside of the cakes. Use icing to help the rose...
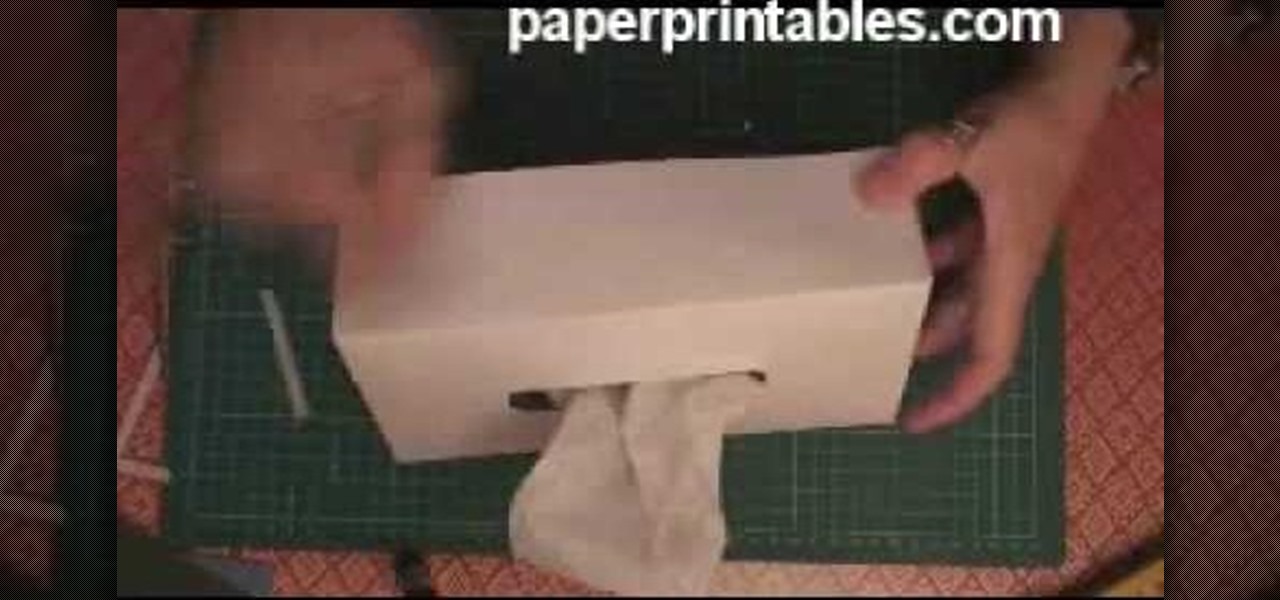
In this video, we learn how to make a decorative tissue box cover. First, you will need to get a piece of paper in your choice of color and set your tissue box on top of it. Use different colors of paper to trace out the edges of the box and then you will tape them all together. Make edges off the paper when you trace them so they fold over. When finished, you will put this onto the tissue box. You can also decorate this with any accessories that you would like to add a personal touch to the ...
Simon Leach teaches us how to glaze trailing and pouring for pottery. First, you will dip the entire pot into the glaze after you have poured it into the middle. Wind up your wrist as you are pouring it out so you cover all of the sides in it. Just dip it down a little bit so it goes over the edge of the tip to cover the mouth of it. To use a balloon wand, fill it with the glaze and then use this to glaze the pots. Simply drop the liquid onto the pot in straight lines as you are turning it wi...
In this tutorial, we learn how to take apart the Google Nexus One. First, take the battery cover off, then remove all the screws along the side and top of the phone on the back. Next, use an opening tool to pry the case off of the back. Then, pry the bottom cover off and then remove the two T5 screws underneath that. After this, take the casing tool off of the back and then remove all the Philips screws. Now, remove the three flex connections and the cable connected and set them aside. Pry th...
In this tutorial, we learn how to make a file folder organizer. First, you will need to apply double sided tape to paper, then apply a thicker cardboard paper over it. Now, cut most of the excess paper off, except around 1/2". After you have this cover made, apply tacky glue to some manila folders, and stick them into the cover you just made. After you complete this, you will be able to apply the backing to the folder as well. When you are finished, you can add different decorations to your f...
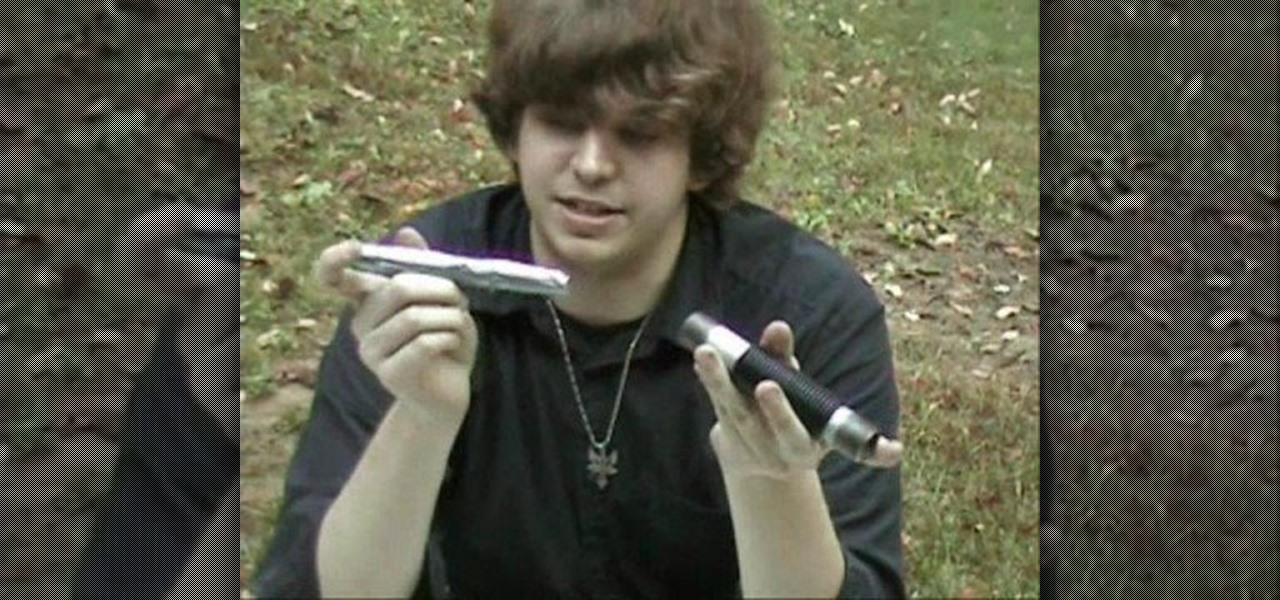
In this tutorial, we learn how to make a prop light saber. you will need rubber o rings, a metal pipe, a dow rod, and attachments to combine the rods together. First, grab the metal pipe and dow rod, and place the rod inside of the pipe. After this, use an attachment to combine the two together. Next, cover one end with duct tape. Now attach two endings onto the rod and place a longer dow rod covered with duct tape onto the rods. When finished, use the o rings to keep the blade in place and y...
In this tutorial, we learn how to sharpen your chainsaw with a hand file. First, take the cover off of the chainsaw and jam something into place so the chain stays in place. Put gloves on before you touch the chain, and use a hand file to file down on the chain. Look for the shortest tooth and put the file in, holding it well and giving it two or three strokes. When filing, be consistent on each different tooth you are sharpening. You will be able to feel the blade being taken off. You might ...
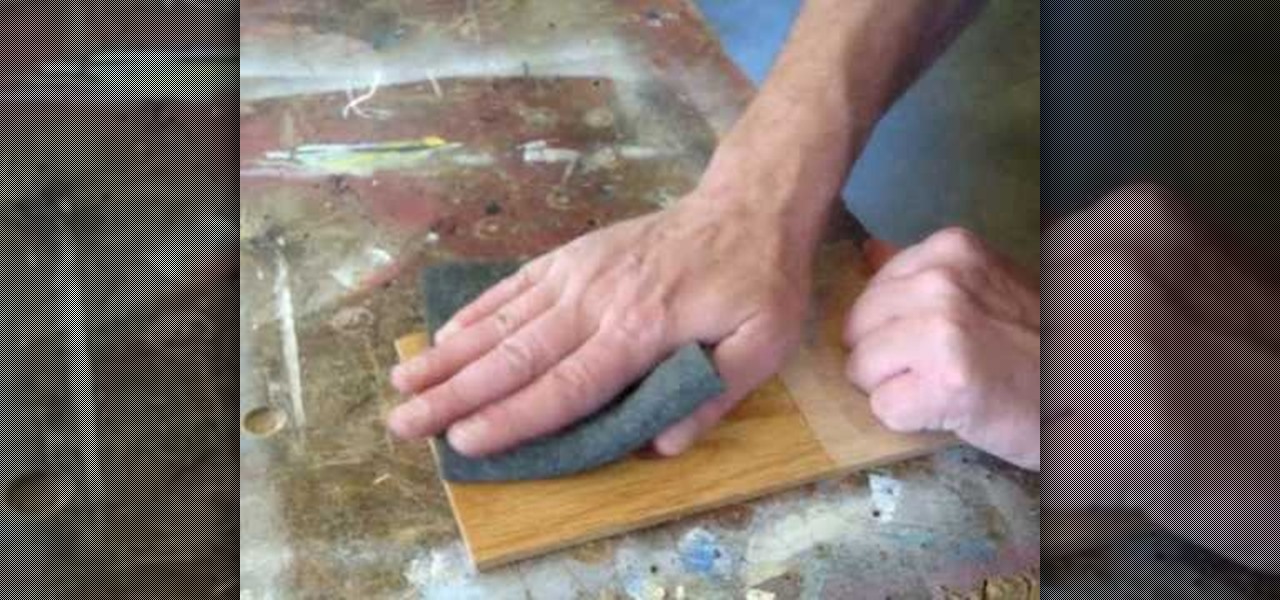
Many may not realize it, but finishing any kind of wood project is a great way for ensuring that it will last longer, as well as look great in the end. In this tutorial above, you'll find out some helpful tips for finishing your wood finish. You'll find an easy way to smooth out your lacquer or polyurethane wood finish after you've applied it. So good luck and enjoy!
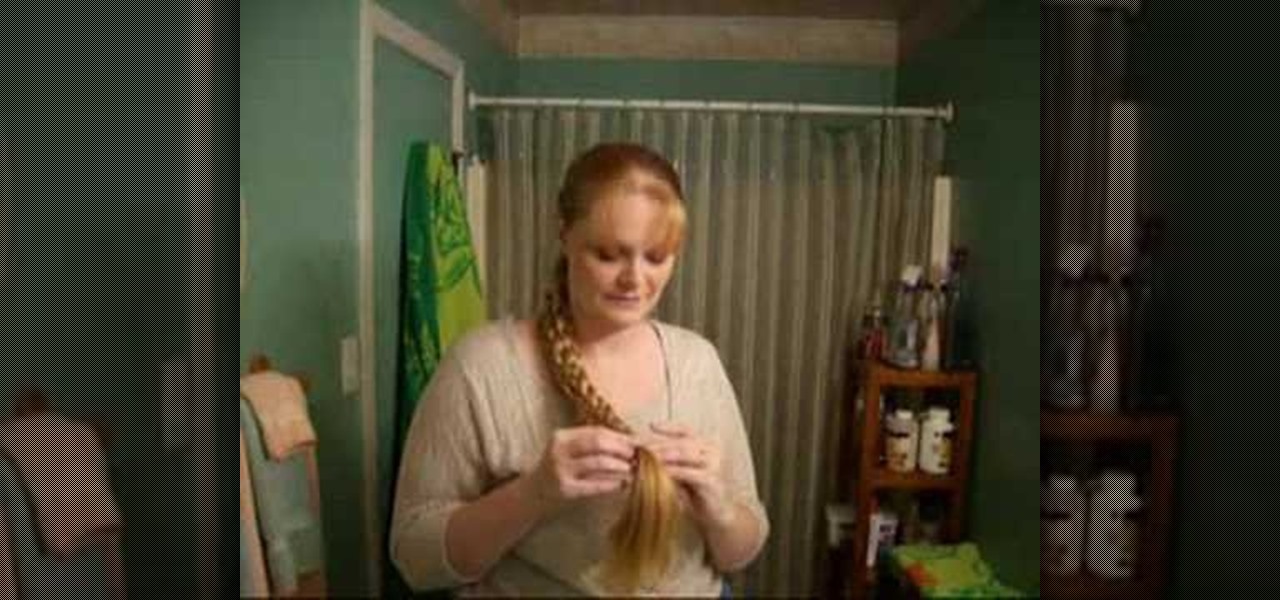
Torrin creates a Victorian up-do with long hair. The style can be done with hair that is at least just past the shoulders in length. Make a ponytail at the base of the neck. Slide the band down a bit and poke fingers through the middle of the ponytail to split the hair. Then pull the ponytail through the split from top to bottom. Separate the ponytail into three sections and make three English braids. Attach the three braids together with one rubber band, leaving several inches of hair left o...
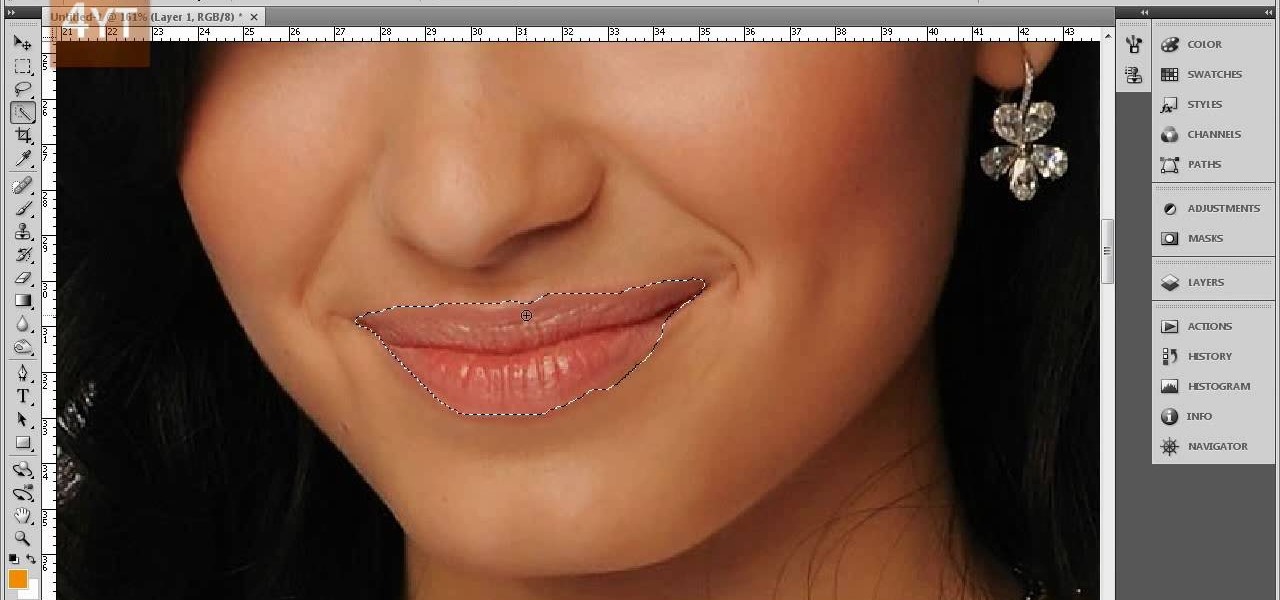
Forget to put on lipstick before a photo? Or perhaps you want to spice up an old photo of someone you love. Well their is a way, as 4YouTutorial demonstrates step by step using Photoshop CS4. First upload a photo or image into Photoshop. Next access your Photoshop layers and delete the default locked layer. After, activate the zoom tool and zoom in on the photo where the lips are located. Next choose the quick selection tool (make sure it's on plus) and drag it over her lips. This process can...
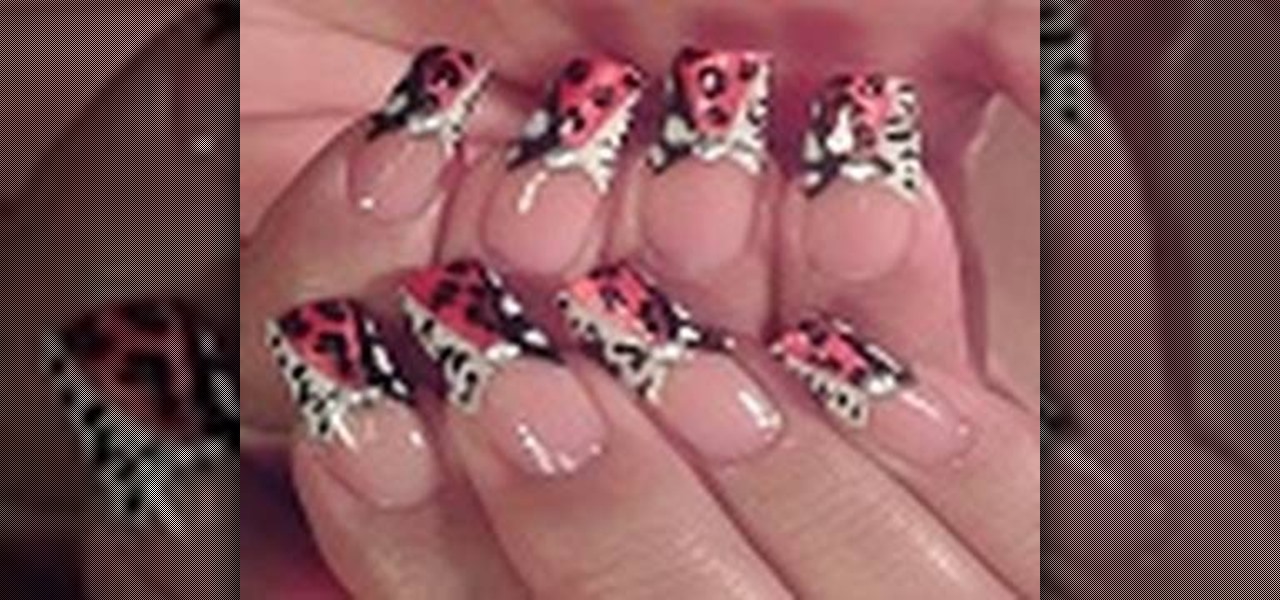
This video is a tutorial on how to paint your fingernails with a sassy animal print. The video begins with a an example of the finished nails being shown and the various alternatives used being explained. The first step completed is to dip the tip of the nail in a gray off white color and then use the color red to make small dots covering the entire surface of the nail. The red dots are then accentuated using the color black to give them a black shading. The final step taken by the nail artis...
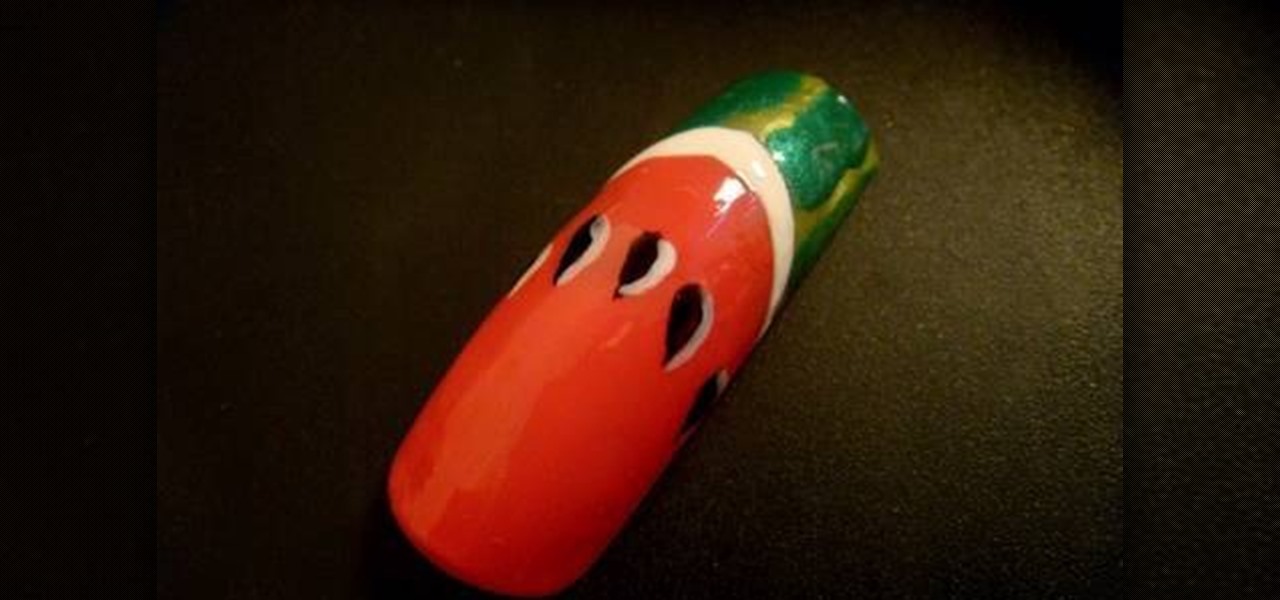
BeautifulYou TV presents how a watermelon nail art design is painted. The nail painting starts off with a white line drawn between the base and the tip of the fingernail. Pink is used to cover the base and light green for the section from the white line moving towards the fingernail tip. Streaks of dark green nail polish are then painted on the light green section to give the look of a watermelon. To decorate the watermelon with seeds, draw black tear-shaped designs on the pink section and cr...
This video teaches the secrets of installing a light bulb in your own home. First turn on the light switch to check whether your old bulb still works, but its not working. Now turn off the light switch to start the replacement and remove the light cover. Remove the bulb by twisting in anti-clockwise direction carefully. Now install the new bulb and turn on the switch to check if it works and the lighting is good enough. Finally attach the light cover to finish.
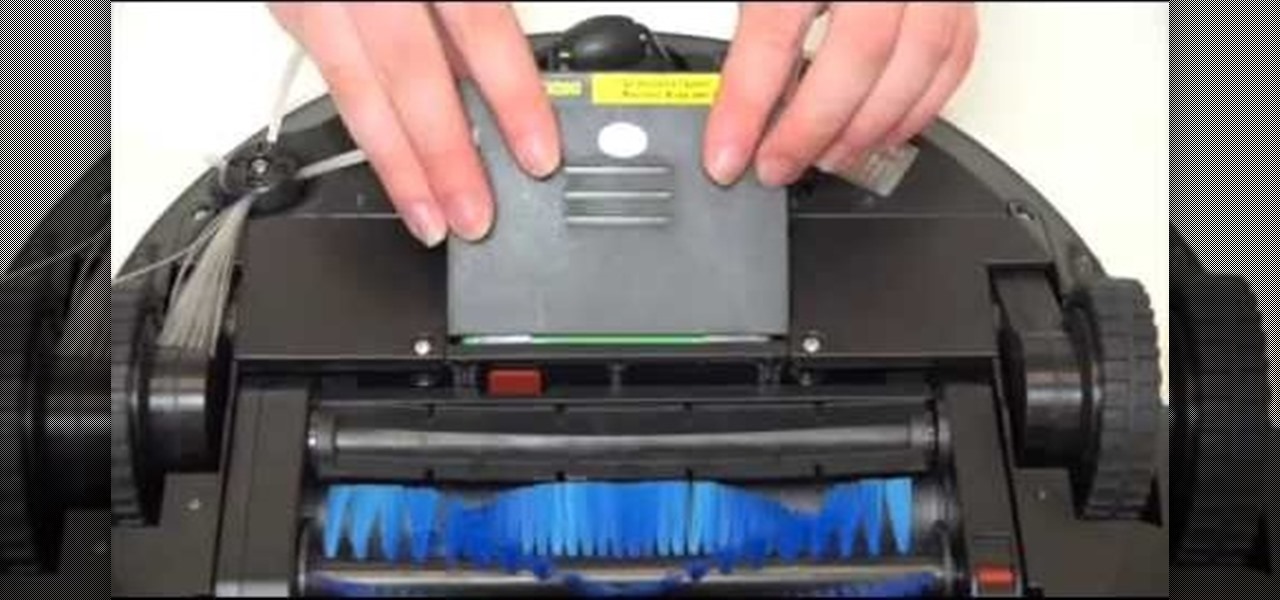
When you first receive bObi, the battery is not plugged in. Luckily all you need is a Phillips head screwdriver to install it before bObi starts working for you.
In this software tutorial you will learn how to create an island terrain in Unity 3D game engine. PART 1 covers creating a new project and exploring the interface.
This is a great project to make as a gift, a shell or wave pattern crocheted blanket. Special attention is paid to the two most challenging parts of the project - how to get it started, and how to finish it off.
Clam Shell end tips, or knot covers, are normally used when you are stringing pearls or other beads on silk or nylon thread. They cover the knots on the ends of the thread so they can't be seen.
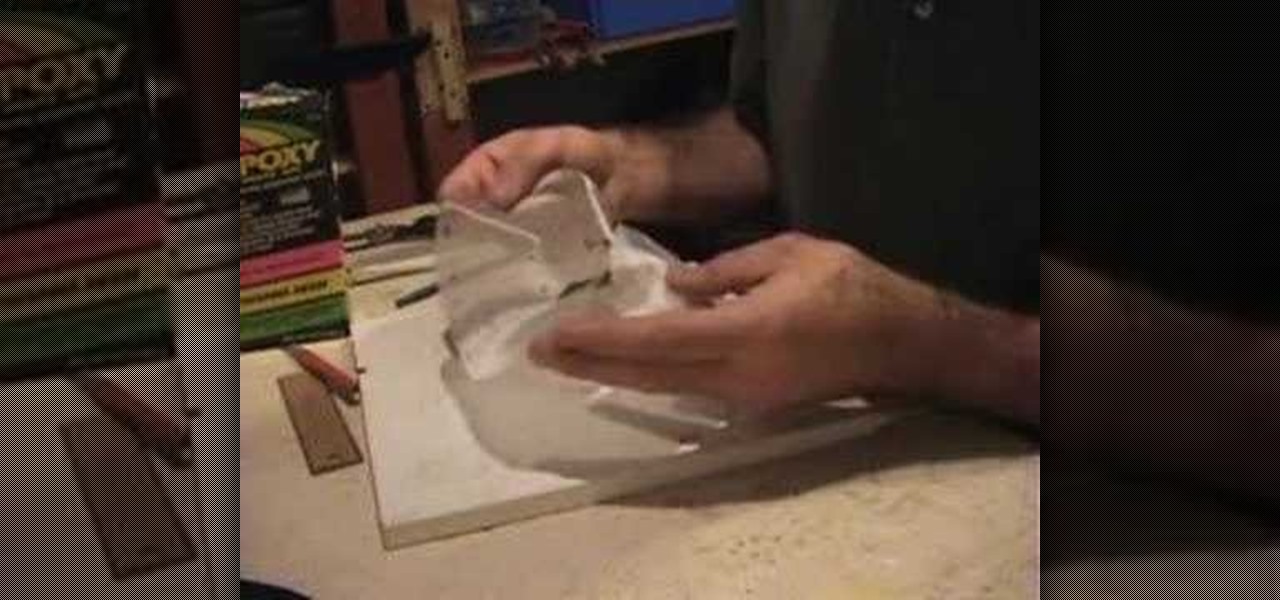
Check out this five-part video tutorial on how to use fiberglass finish over balsa wood for RC airplanes. If you like building engines and bodies for remote-controlled vehicles (airplanes), then this will definitely help you out, just by learning how to apply simple fiberglass to the balsa wood parts of the RC airplane body. You will learn all of the tricks needed for fiberglassing.
In this two-part tutorial series from the Scrollsaw Workshop, Steve Good discusses how to finish scrollsaw projects–a process which, according to Steve, includes four steps: gluing, sanding, beautifying and protecting. Let Steve walk you through his finishing process with this tutorial.
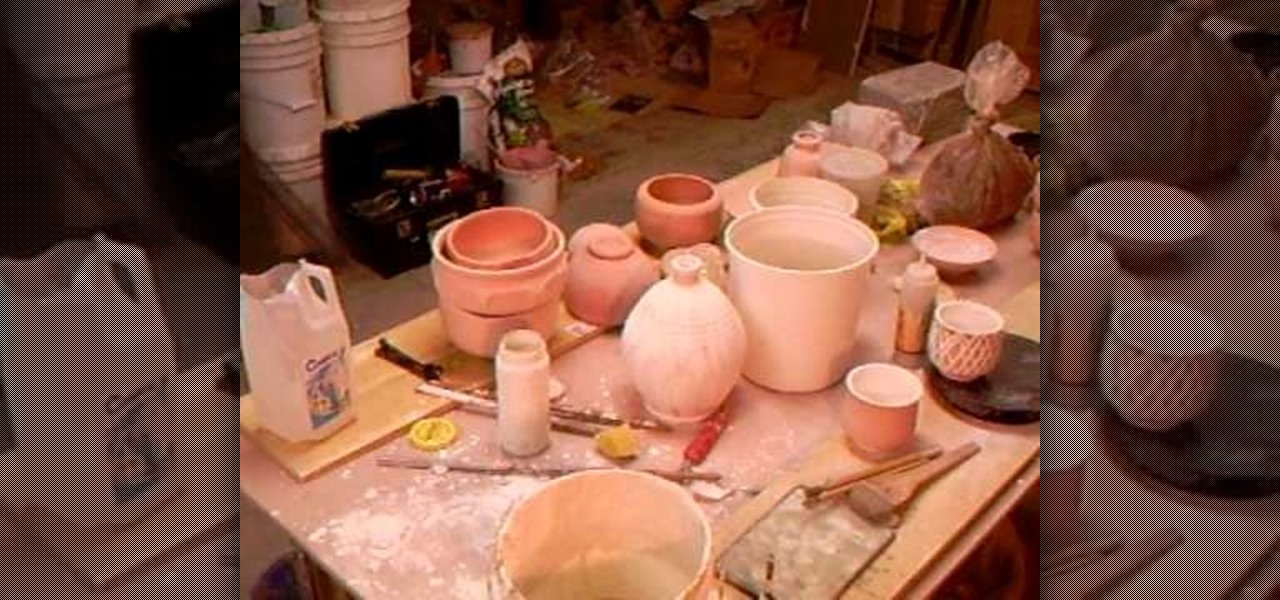
This comprehensive pottery sequence from Watchmojo.com will show you the basic steps of making pottery. You will be guided through the basic pottery making processes of wedging, prep, shaping, removing, firing, and glazing.
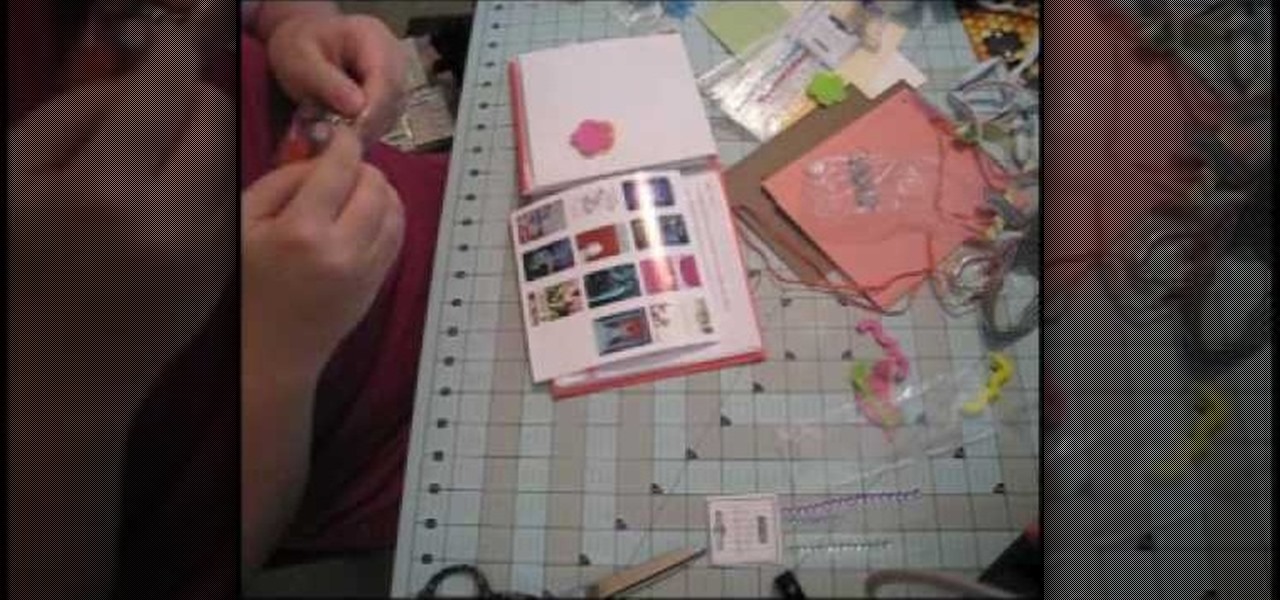
In this tutorial, we learn how to make a scrapbook about all of the books you've read. First, you will want to take a part from the pages that meant the most to you. Type out the text that was written, then glue it onto a similar sized piece of card stock. Adhere this to the top of a picture that has the same theme as the text that you just wrote out. After you do this, decorate your page even more until it's completely finished. You can also take pictures of the books that you have read and ...