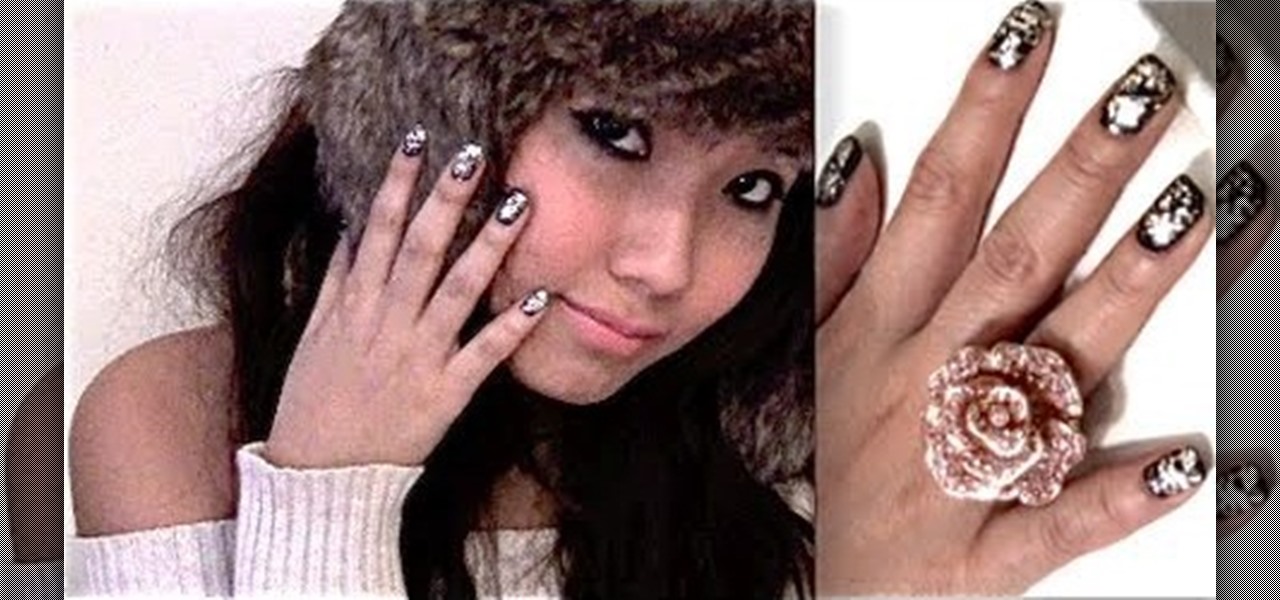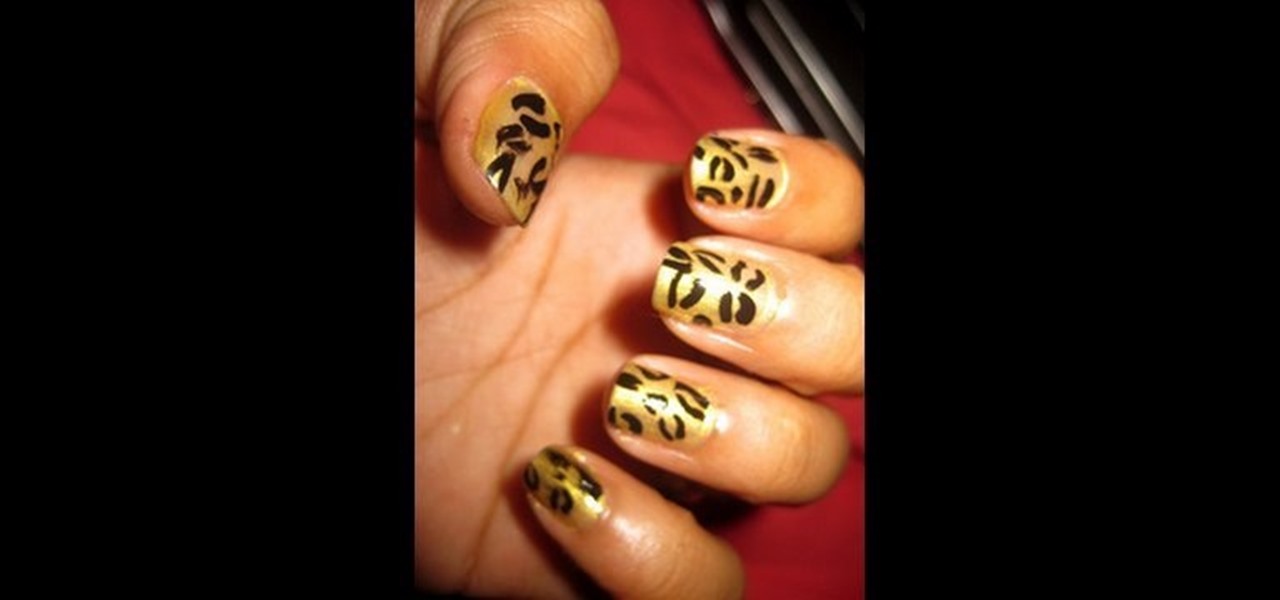
For a unique style on your nails, consider these cheetah print nails. After applying a base coat, you should simply apply a gold-yellow nail polish as a background for your cheetah prints. With little artistic skill required, you should be able to make a perfect cheetah print using a thin brush with black nail polish. Simply make small C's on your nails that join to make a small oval. Repeat as necessary until you have the desired number of cheetah spots on each of your nails. With this simpl...

Learn to create red, green & black nails for Christmas with this video tutorial. This is a really cute look and it is great for Christmas. You could have a really great outfit to match with your nails.
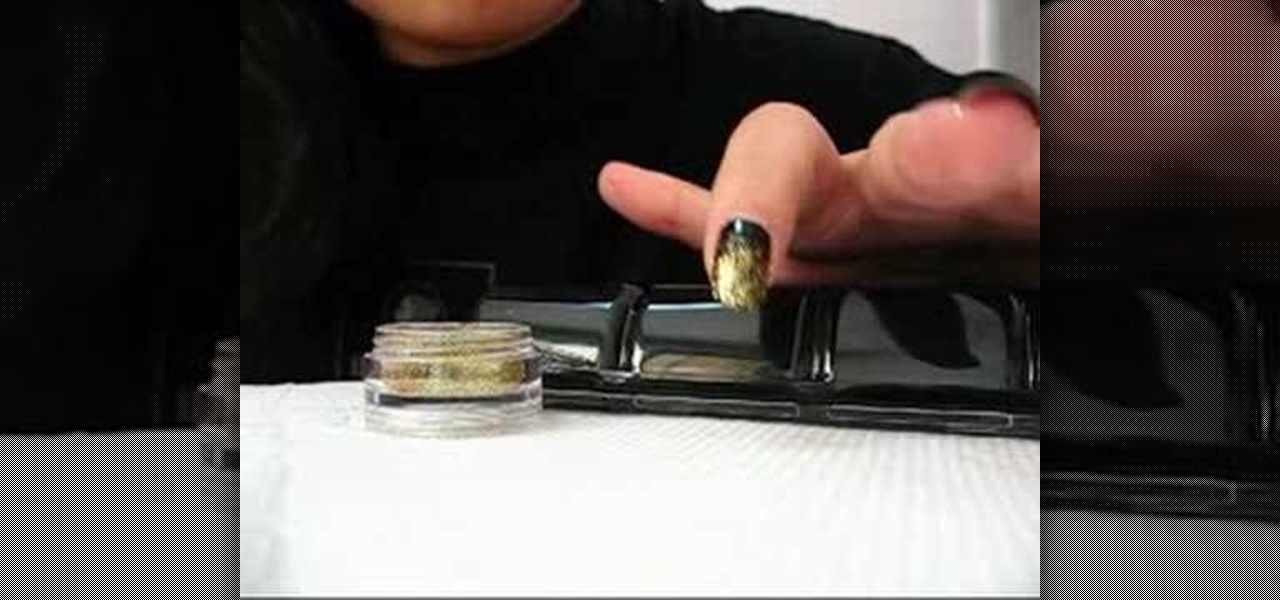
Tired of your boring one color nail polish? Learn how you can create this black with gold glitter nail decoration with this tutorial. You will need a base coat, black nail polish, gold glitter, a small brush and a clear top coat. With this how to video you can paint you nails black with faded golden sparkles.
Watch this instructional manicuring video to paint a cosmic nail design. You will need black, white and clear sparkle nail polish. If you paint nail designs frequently, make sure to paint a protective coat before laying down any colored nail polish.
Watch this instructional manicuring video to paint a a black and red flower on a single fingernail. You will need five different colors of nail polish. To complete this design, you must not let the nail polish dry. If you paint nail designs frequently, make sure to paint a protective coat before laying down any colored nail polish.
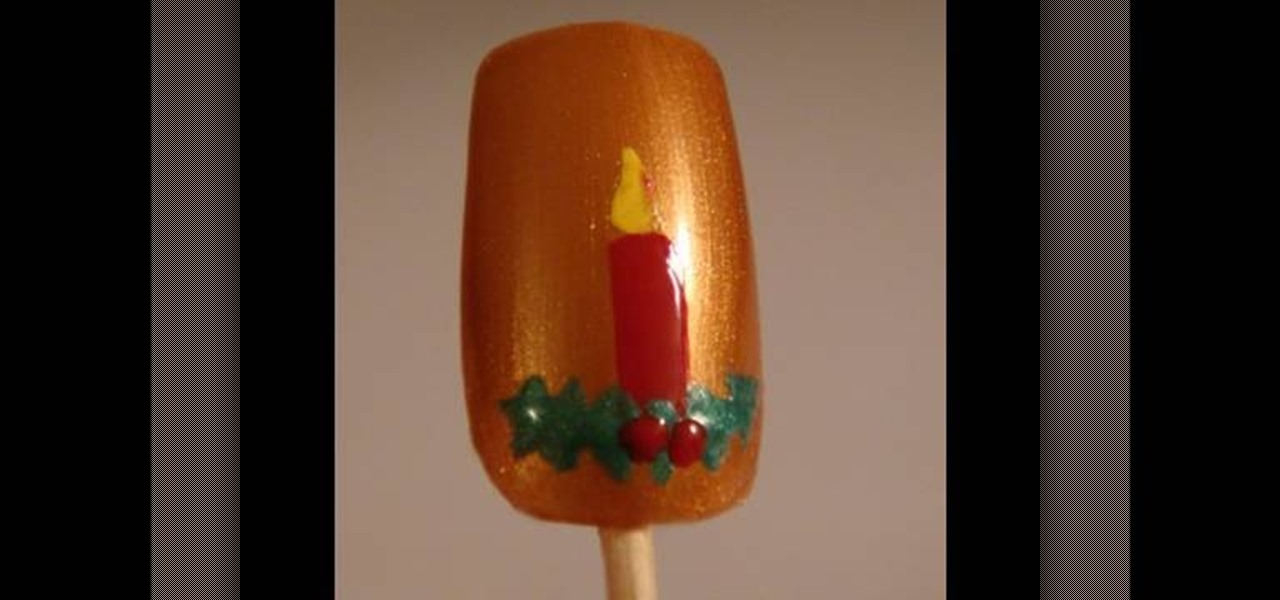
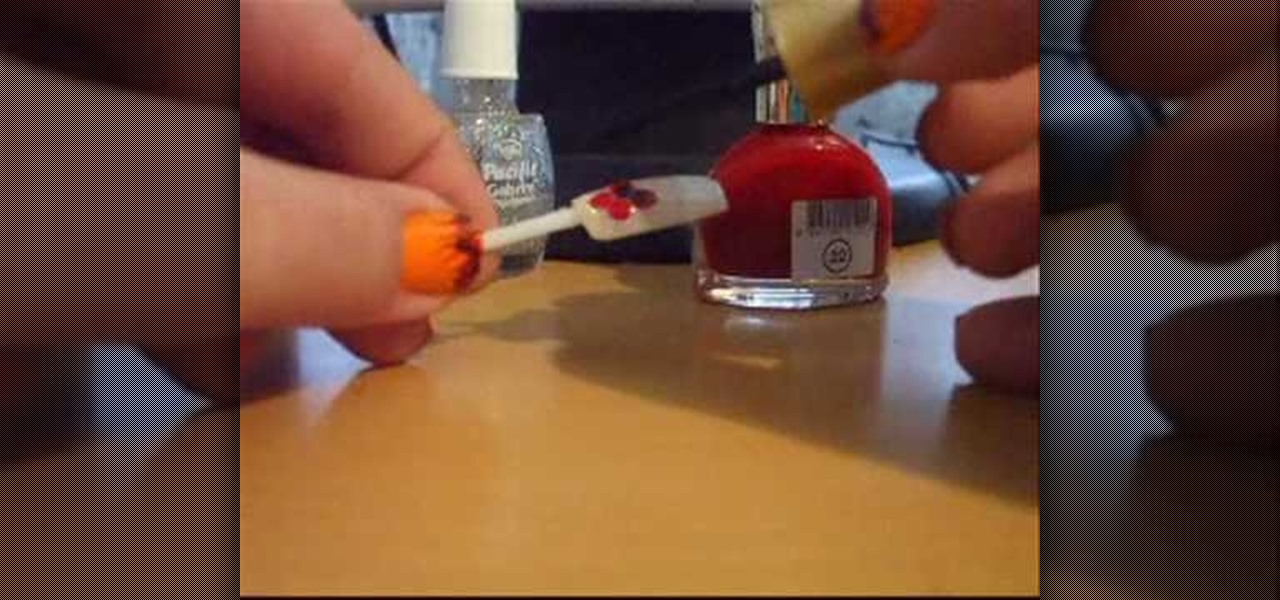
In this tutorial, we learn how to design Christmas holiday winter nails. First, purchase acrylic nails and paint them a burnt orange or copper color. Now, take a very small and pointed brush and dip it into red nail polish. Draw a candle onto the acrylic nail, then paint green around it to make holly and yellow above it to make a flame. Set this aside and let it dry, then continue to decorate the rest of your nails with either the same design or something else Christmas related. Apply to your...

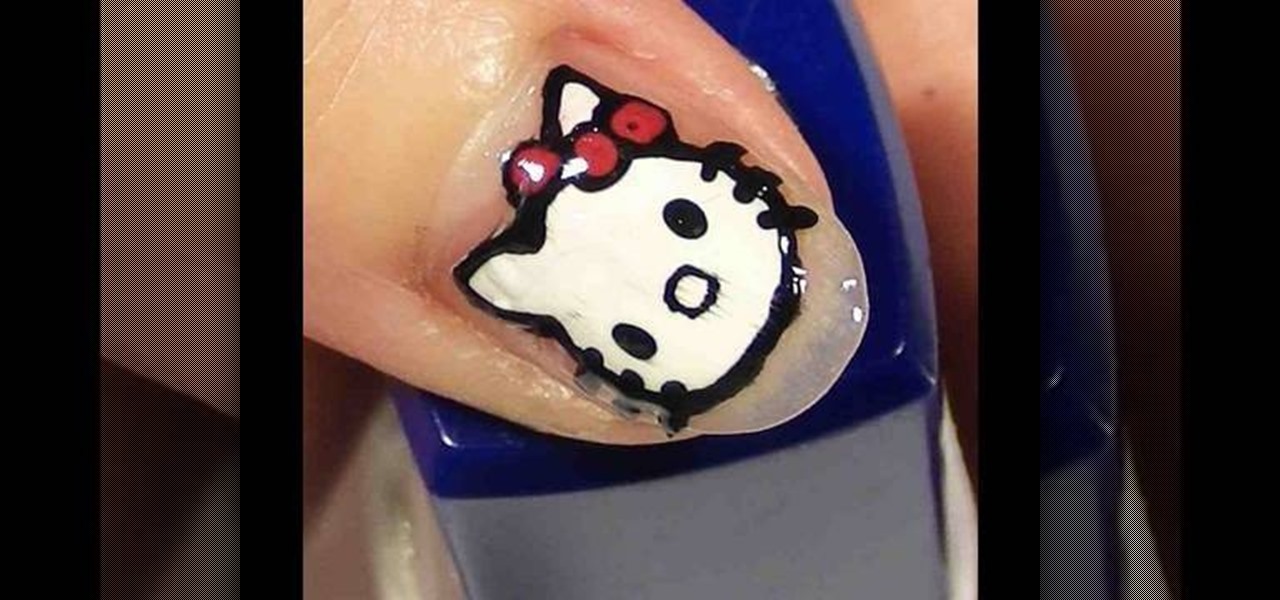
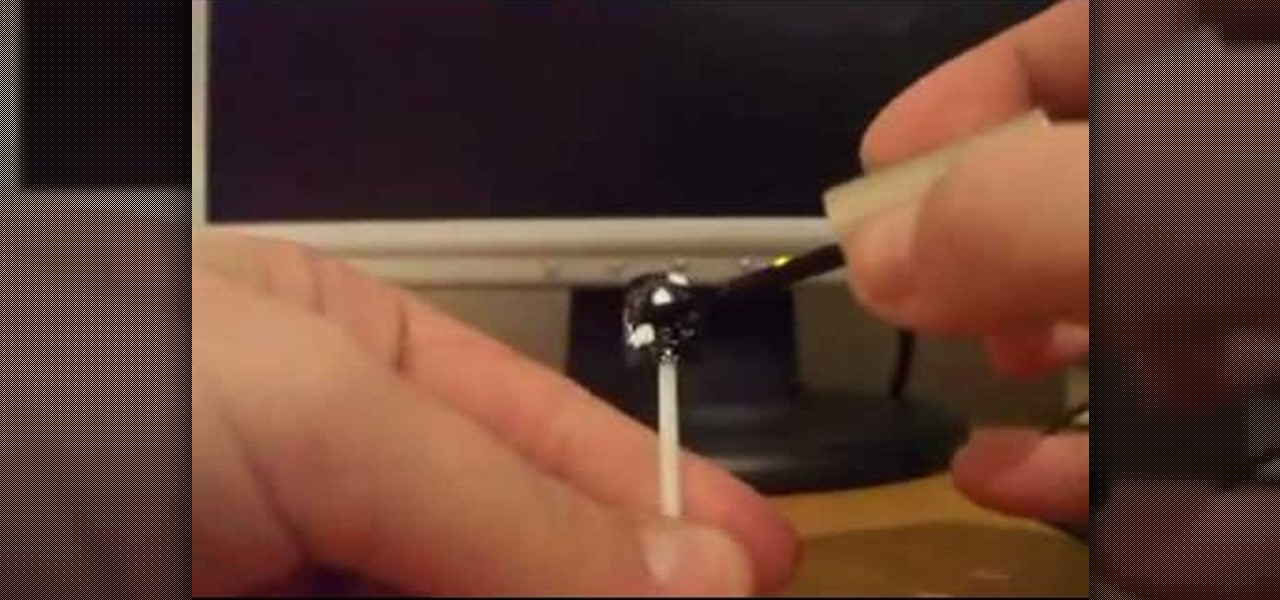
This video by KlairedelysArt demonstrates to us how to create a Hello Kitty nail paint design. She does this design by first painting it on plastic using any household plastic bag. She clearly explains all of the supplies needed and the demonstration on how to paint the actual Hello Kitty logo is very thorough. All she uses to make this happen is a plastic bag, white nail varnish, black and fuchsia nail art pens, and clear nail varnish. She paints the Hello Kitty logo onto the bag, lets it dr...
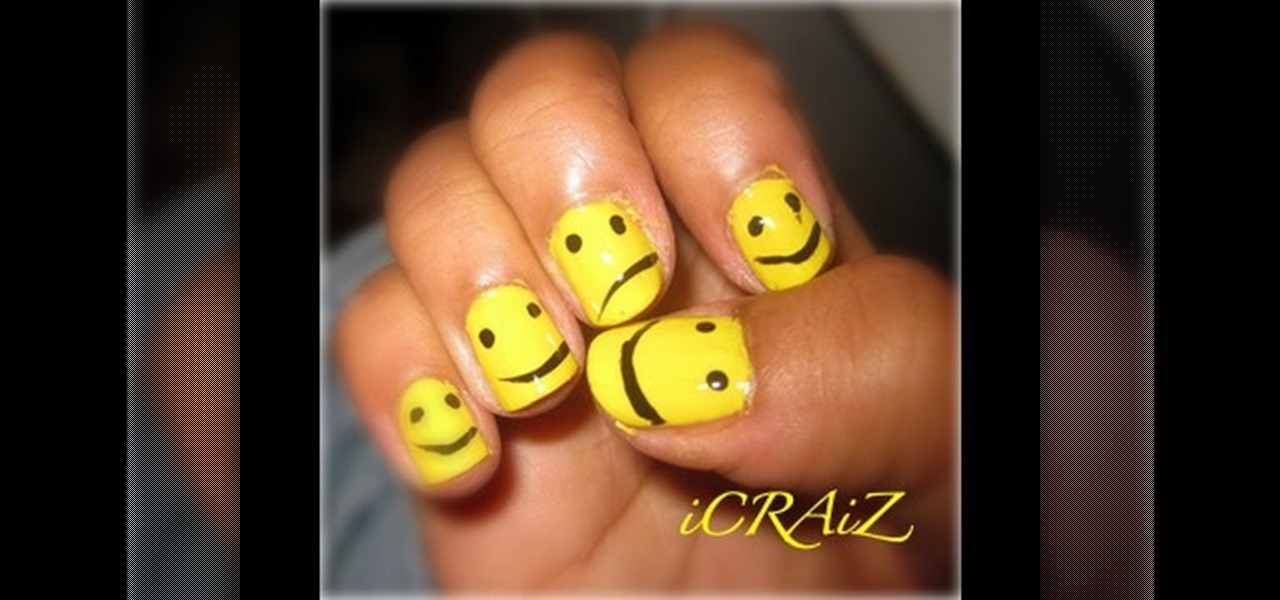
For those who would like to have fun, interestingly designed nails, this video shows how to paint smiley face nails. After applying a base coat, mix a plain matte bright yellow and a plain matte white nail polish together on a piece of paper. This will create a lighter shade of yellow. Apply the lighter yellow mixture to the nails. After applying two coats and allowing them to dry, use a black nail polish to draw the eyes and mouth of the smiley face. This will give you a cute and stylish des...
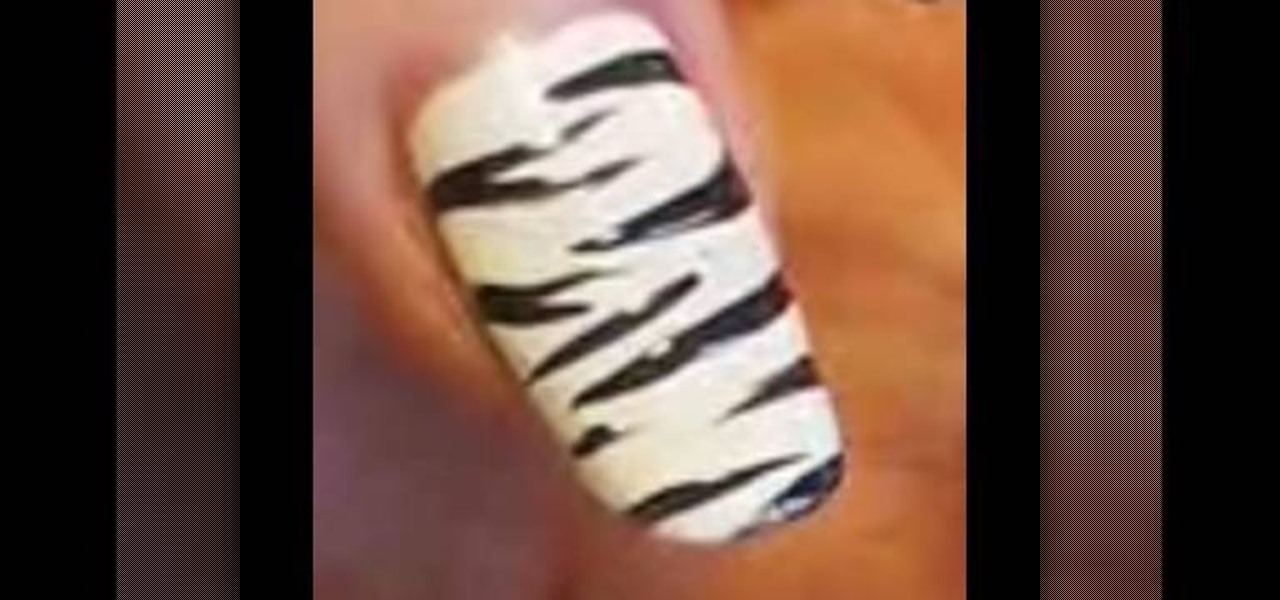
For nails that always look unique, stylish, and are simple to make, you should take some advice from this video. After cleaning and shaping your nails, you should apply two coats of a white or slightly off-white nail polish. After allowing these layers to dry, get some black nail polish and make the zebra print by carefully swiping the brush over your nail. Alternate sides from which you start the lines and you should soon have a very stylish and interesting nail pattern.
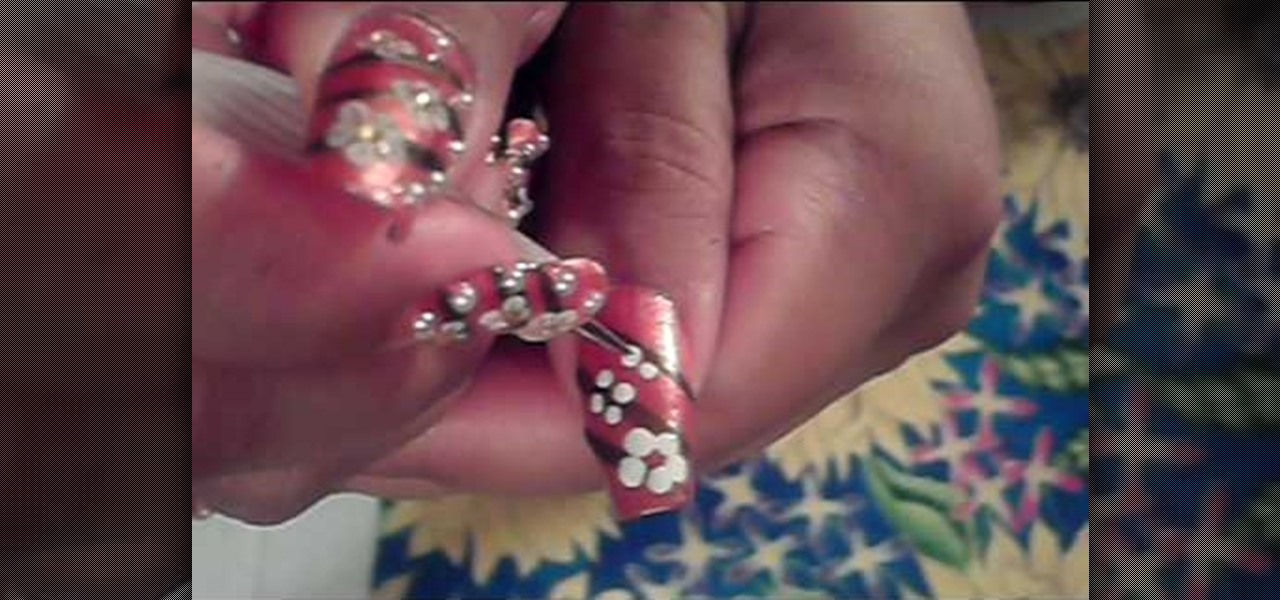
Want a change from your boring manicure? Learn how to apply dark blue nail polish with white stripes and yellow dots with this tutorial. You will need a base coat, a blue black nail polish, white nail polish, yellow nail polish, and a clear top coat. This fun look takes a steady hand and a bit of practice. With this how to video you will be able to create these pretty dark blue nails with white stripes and yellow dot nail art.
Just because it's winter and sparkly, cheery colors abound doesn't mean that you can't lean a little to the dark side. While we simply adore gold nails, we dig these black and gold "gold leaf" nails, which mix black and gold together for a multifaceted, edgy look.
In this tutorial, we learn how to create colorful fingernails for Mardi Gras. First, paint your nails purple and let them dry. After this, apply a dark green polish over half of the purple and let it dry. On your ring finger, paint it a pearl white and let it dry. Then, grab a glitter gold color and apply a line in between the green and purple on the other nails. Now, draw a mask on the white nail with a black nail polish. Color the mask in with the purple and green, then add glitter to it. W...
Save your plain French manicures for work, gals - when it comes to nighttime fun, it's time to bring out the glittery, colorbursting big guns.
Can't decide between two new nail colors you snagged at a Sephora sale on Essie nail lacquers? We understand it's sometimes difficult to choose a color when both look so tempting.
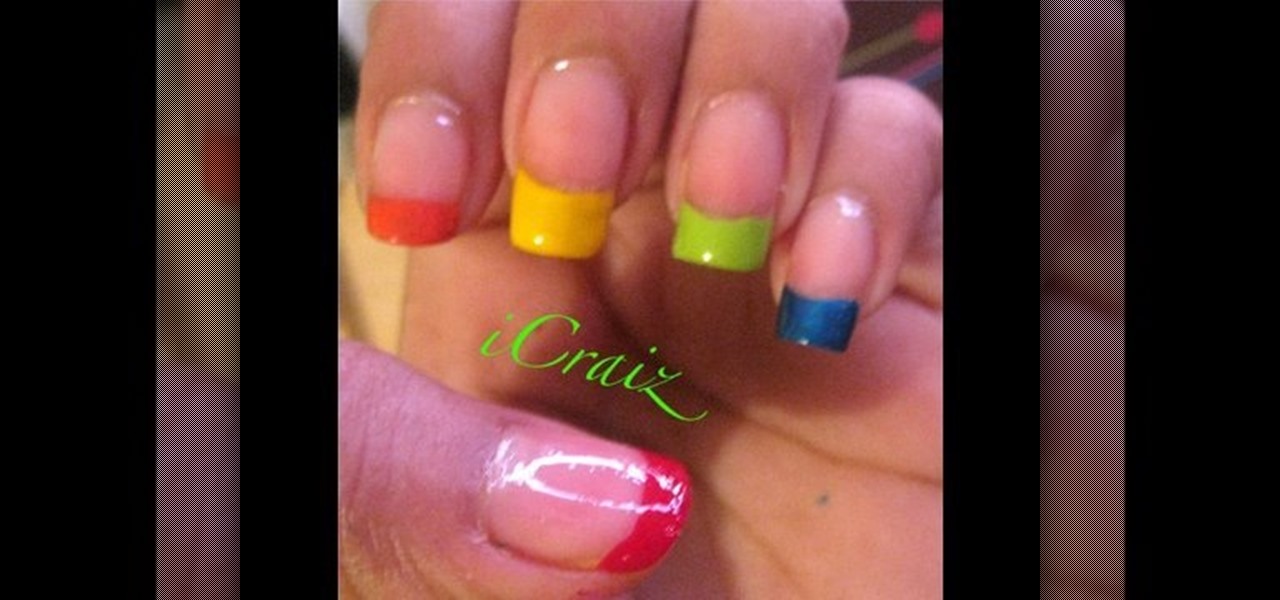
Colorful fingers really look amazing and nothing stays colorful like rainbow tipped finger nails. Going to the nail salon can get expensive and at times can be unneeded, as they aren't always perfect. I will show you how you can make your own rainbow tipped finger nails from the comfort of your own home. Whether you are a perfectionist about your nails or if you are fine with a little unevenness about your finger polish, follow this video and you will have amazing rainbow tip finger nails.
Bobby pins have been integral tools in a girl's makeup case since the 1920s, when bobby pins were used to secore the fashionable hair bobs of the Jazz Age. They've also recently been used by young boys and hackers to pick open locks. And now you can add one more fun use to the list.
In this video, we learn how to paint your nails in a pink and purple French manicure. Start off by cleaning your nails from any dust, debris, or colors. Then, you will paint on black to one side of your nail with a fine tip brush. After this has dried, paint pink on the other side of the nail, a pink glitter color would be the best. Next, you will wait for this to dry and then paint on a white line in between these two colors. From here, you will apply three small rhinestones with nail glue t...
In this video, we learn how to paint nails with an orange, white, and brown theme. First, apply an orange shimmer polish from the top to the bottom of the nail. After this, let them dry and then grab a brown nail polish with a pointed brush. Then, draw on three stripes from top to bottom with the brush. After this dries, use another pointed brush to draw three flowers in a row on the nails. Use the brown to create the details for the petals. Then, you will finish this off by applying four sma...
Zebra striped nails don't necessarily mean a big canvas of white paint striped meticulously - and painstakingly - with thin black lines. In fact, if you're going for a more avant garde nail look that's unique yet not too crazy to wear to the office, this minimalist zebra striped look may be it.
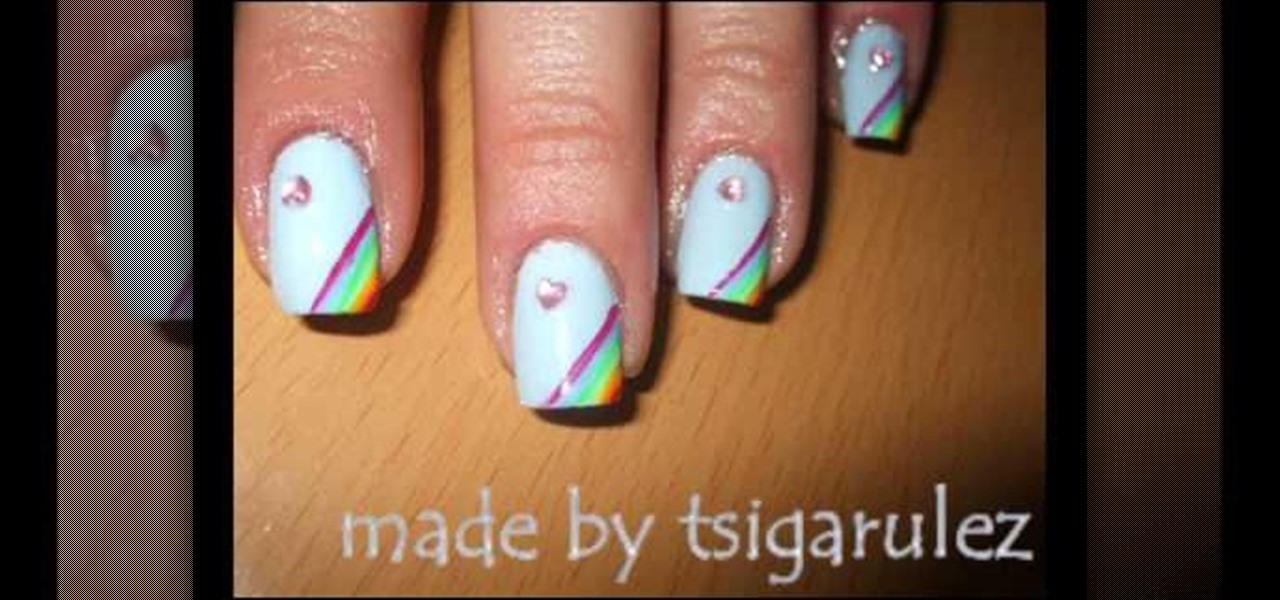
In this tutorial, we learn how to paint rainbow nails with rhinestones. First, paint the nails light blue and let them dry. After this, grab several other colors, enough so that you have the colors of the rainbow. Now, paint lines onto the left hand corner going diagonally across the nail, making each line next to one another. After you get to the very tip of the nail, let the colors dry completely. Next, paint on a clear coat on top, then apply a pink heart rhinestone on the bottom corner of...
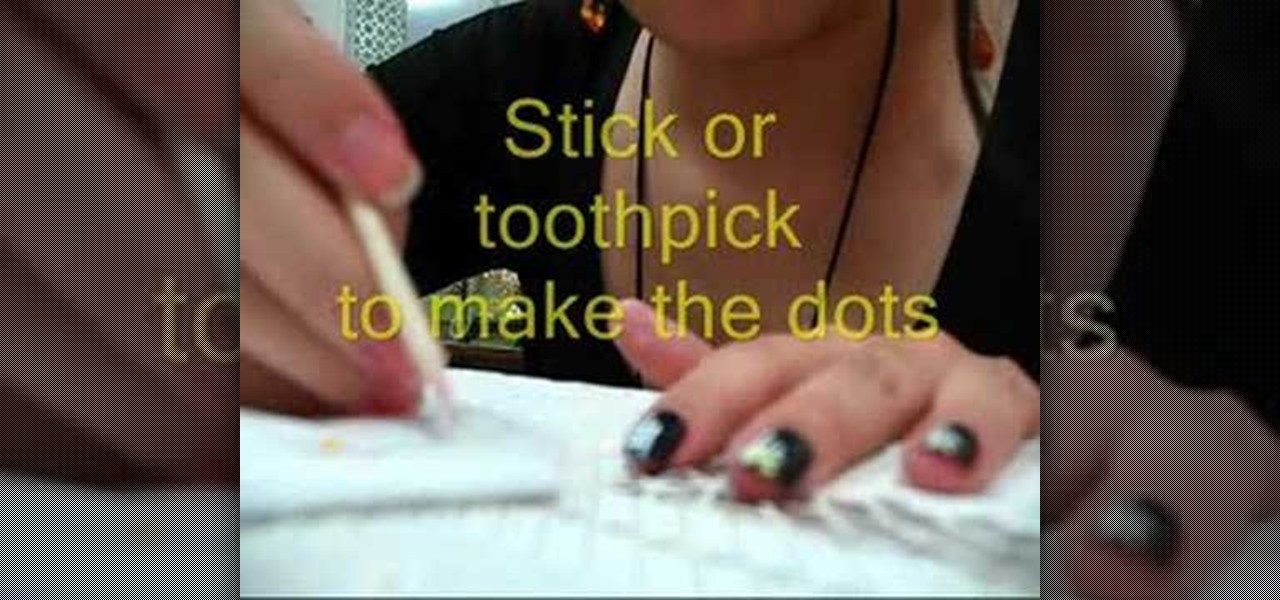
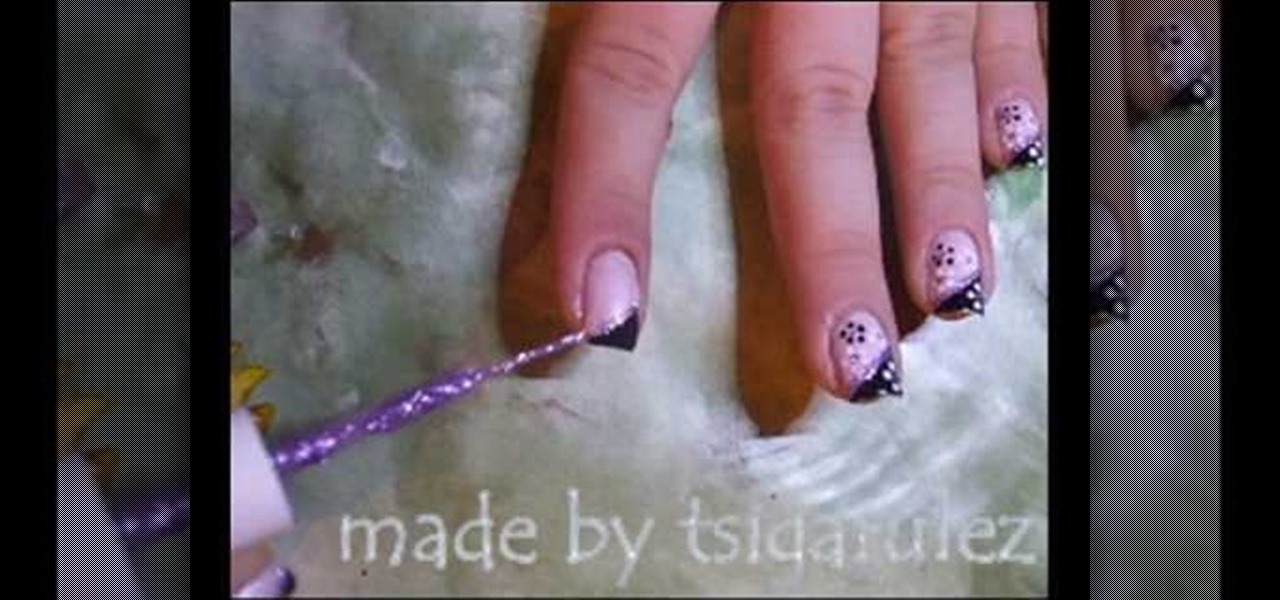
In this tutorial, we learn how to paint a black & pink French manicure with flowers. Start by painting the nails with a light pink nail polish, adding a couple layers so the color shows on top of the nail. Wait for this to dry, then paint black nail polish in a diagonal line across the top corner of the nail. Now, allow this to dry and take a sparkly purple nail polish and paint it in a line directly underneath the black polish. Next, use a toothpick or dotting tool to dot white nail polish i...
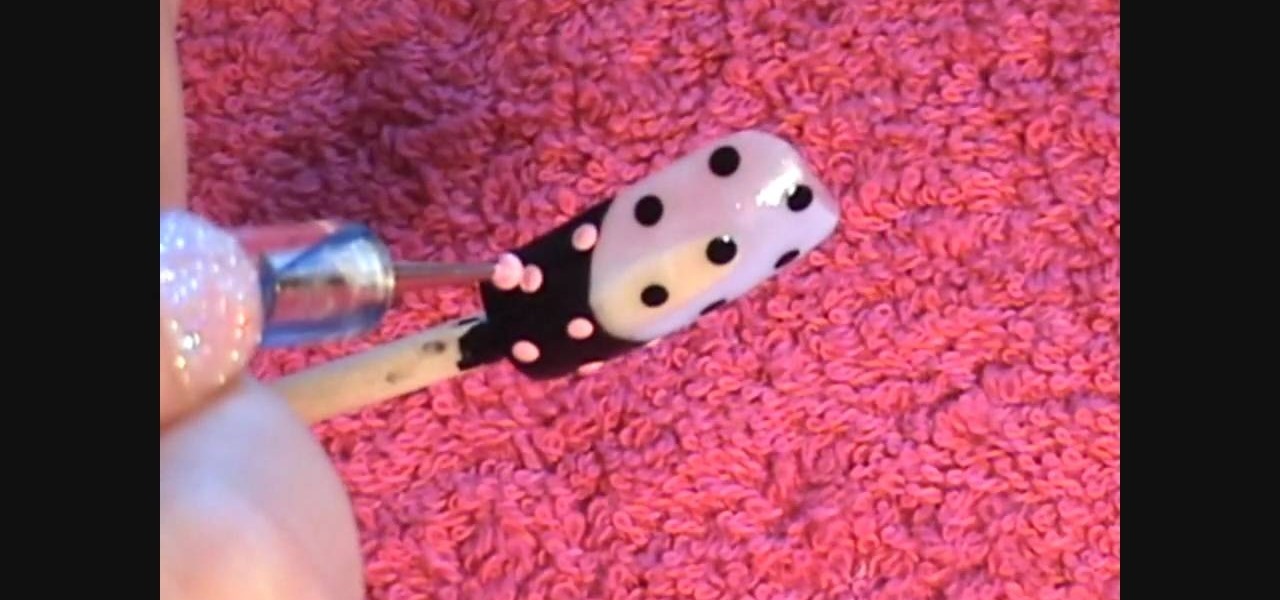
In this Beauty & Style video tutorial you will learn how to create cute polka dot acrylic nails. For this you will need acrylic paint and acrylic nails. First paint the lower part of the nail with black paint in a curved manner. Then you put three black polka dots in the unpainted area along the centerline of the nail. Now put two more black dots on either edges of the nail. Then you put light pink dots over the painted area in line with the black dots. Paint the smile line and the bow with l...
Whether you were born with brittle talons or have suffered from cracked, weak nails since you became addicted to sticking on fake nails, a nail strengthener is vital for keeping nails healthy and strong.
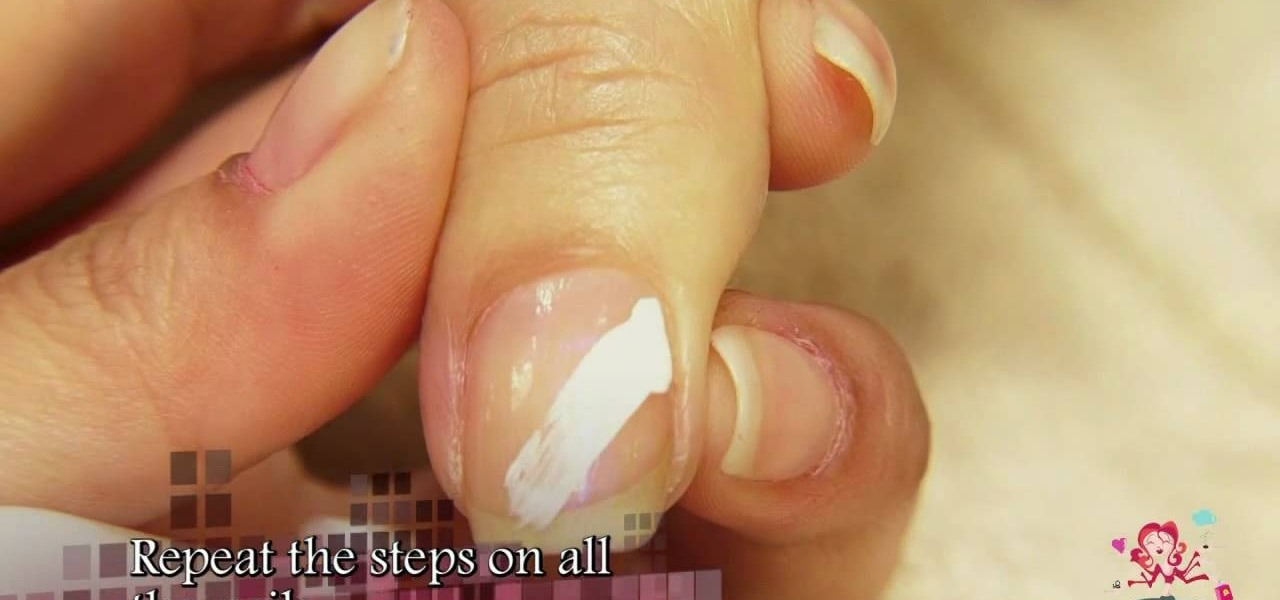
In this video, the instructor shows us how to remove acrylic nails quickly and easily. First, remove some of the acrylic using a professional nail tool, you can find this online or at a beauty supply store. Next, take a big bowl of warm water and a small bowl of pure acetone. Soak your nail in each of these for a few minutes. After this, you should be able to gently push the acrylic nail off while it is still wet. Once you have removed the acrylic, brush your nail with cuticle oil to help pre...
The narrator describes how to paint your nails with gold leopard print. Using two coats you can now have gorgeous, glossy nails within a short amount of time. First by making an x shape (like a French tip) then with a second coat going over with gold. Finally by "striping" and "spotting" your nails (like a leopards skin) it finishes off the look. This is a simple process that anyone can follow through with. The end results are fantastic nails resembling leopard pattern. What you need: Gold Sh...
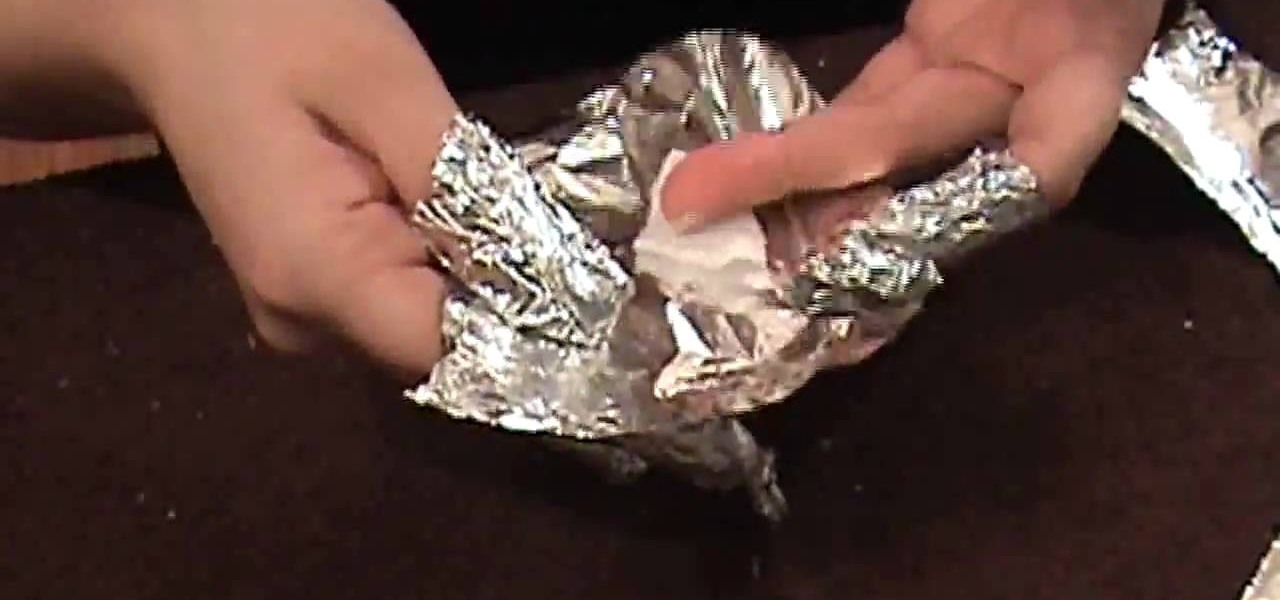
In this video, we learn how to remove acrylic nails easily! First, you can cut down the acrylic nails using fingernail clippers if you want to keep your natural nails the same length. Next, take a drill or buffer to remove the shine from the acrylic. After this, put acetone on a cotton pad and place on nail, then wrap the nail in foil. Repeat this for all nails then leave on for one hour. Next, you should be able to easily remove the acrylic. Make sure you buff off any excess material then ap...
This video on nail art shows how to paint your nails with a summer rainbow stripe design. The nail colors needed for this design are yellow, orange and pink, a glittery color, a transparent clear polish and a black thin nail polish. The first step is to color only the bottom of the bare nail with yellow, here neon colors are used. Next the middle portion with orange and the tip with the pink color. Quick drying polishes can be applied one after the other or else the colors are applied after d...
The first step in removing acrylic from nails is to cut nails down with clippers. Next file off gel sealer and seventy percent of acrylic with file or nail dimmer. The demonstrator then cut ten squares of foil, one for each nail. After the foil is completed cut cotton rounds into four pieces. You will only need two and a half cotton rounds. Using one hundred percent acetone saturate each cotton piece that you cut. Place saturated cotton pieces on each finger and then wrap securely with foil. ...
This tutorial shows a quick, interesting 80's inspired neon colored nail design. Using a base coat and then 2 layers of a while polish will establish the white background for these nails. Using a light, thin brush, make thin lines horizontally across your nails in a kind of blinds look, running all the way across your nail. For the paint-splattering effect, use small amounts of the desired colors and lightly stipple it over your nail, to simulate a splattering effect. This technique will crea...
In this video, Tsigarulez shows you how to paint dotted flowers on your nails in these few simple steps.
What is better than wearing makeup? Cool colors on your nails with funky designs. Watch this Beauty & Style how to video to learn how to apply white flowers with yellow vines on acrylic nails. Everyone is sure to love this unique flower nail design. The nail enamels you will need for the fancy nail look are: hot pink, yellow, white, green, dark purple and glittery nail polish.
If you're trying to do nail art yourself, learn tips for making nail art designs and patterns with this free video series from a professional nail artist.
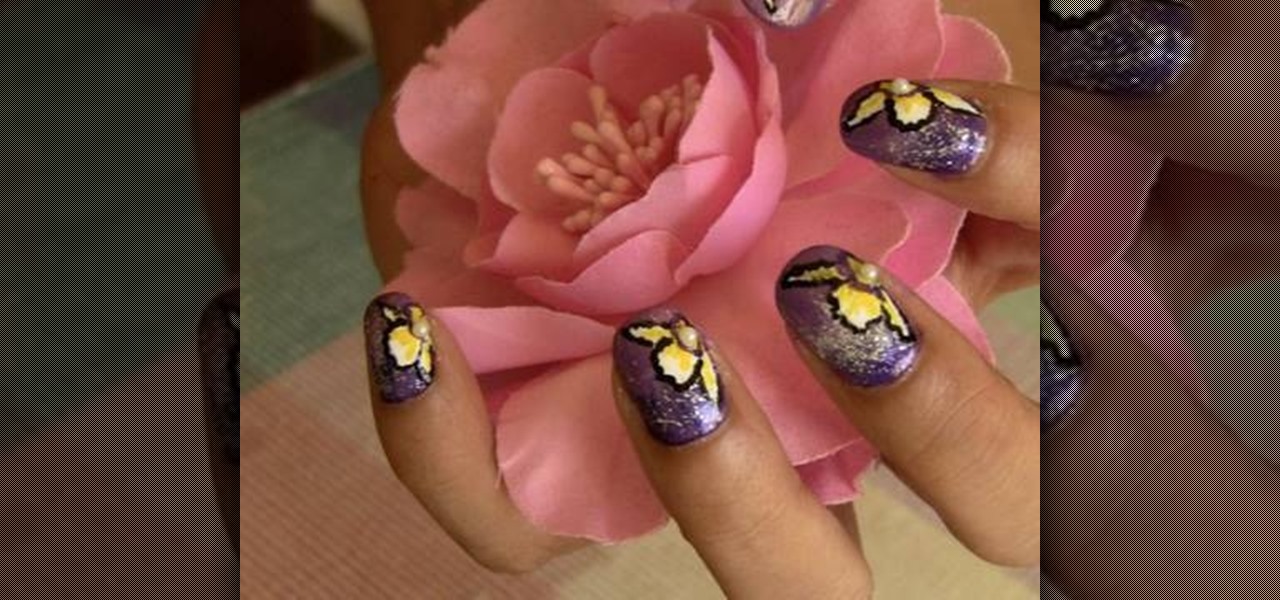
Cattleya orchids are amongst the rarer orchid species, known for their almost jellyfish-like, ethereal lower sections and great range of color. So what better way to experiment with bright nail colors than buy painting some of these exotic orchids on your nails?
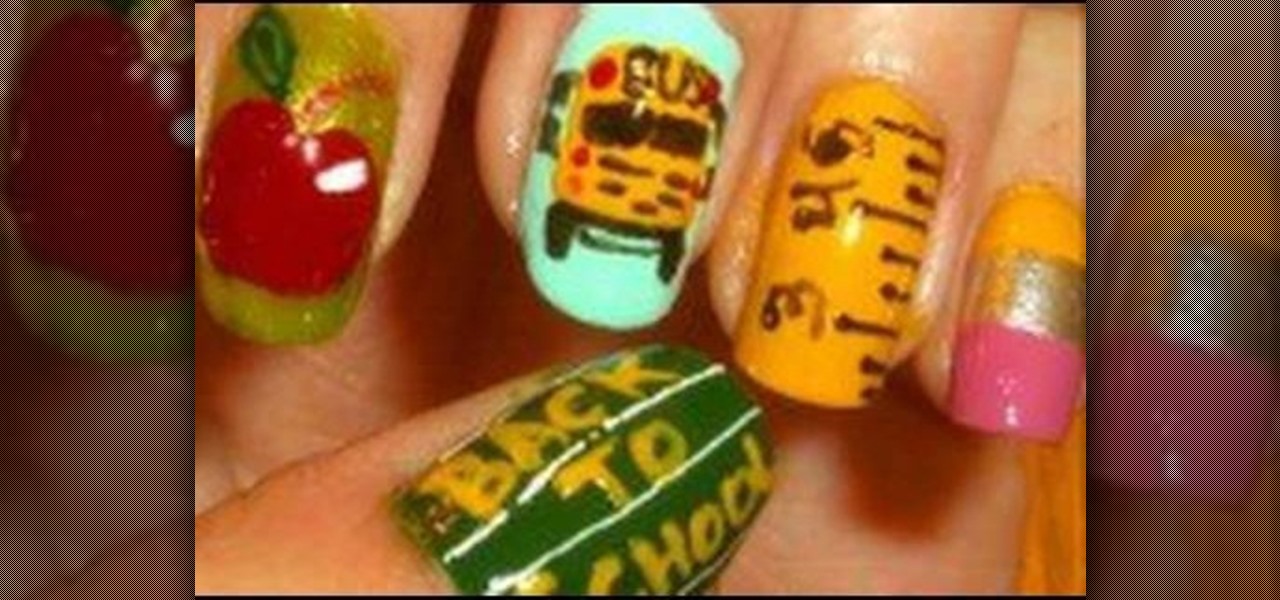
You know what all the girls are going to be wearing when they start school again this September? Nothing, or a boring, single-hued nail polish if they're up for it. So why not stand out in the sea of griege nails by creating your own fun little nail designs?
Miss 80 Million provides viewers with a step by step tutorial on how to create a ballet slipper look for your nails. Use black sparkle nail polish. Create a French tip with a very deep smile line that goes all the way to the corner. Use the same polish to draw a line straight down the middle vertically. Let it dry. Next take white Art Deco nail polish to create a diagonal pattern across the nail first one way then the other making sure the lines meet in the middle. After it dries, apply a top...
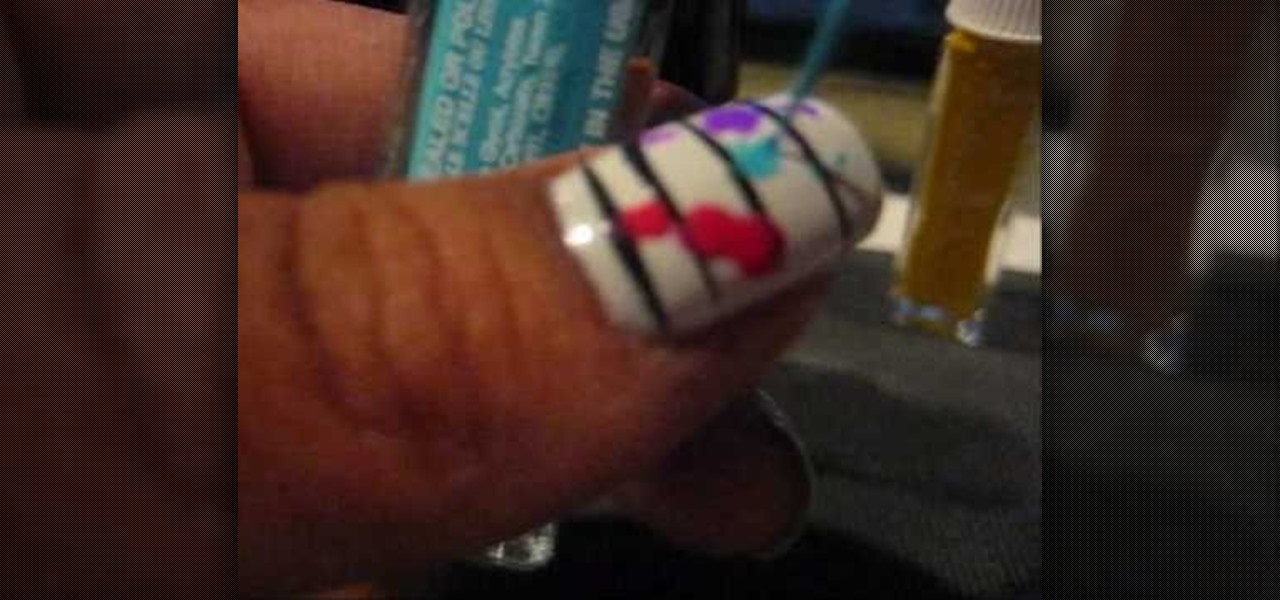
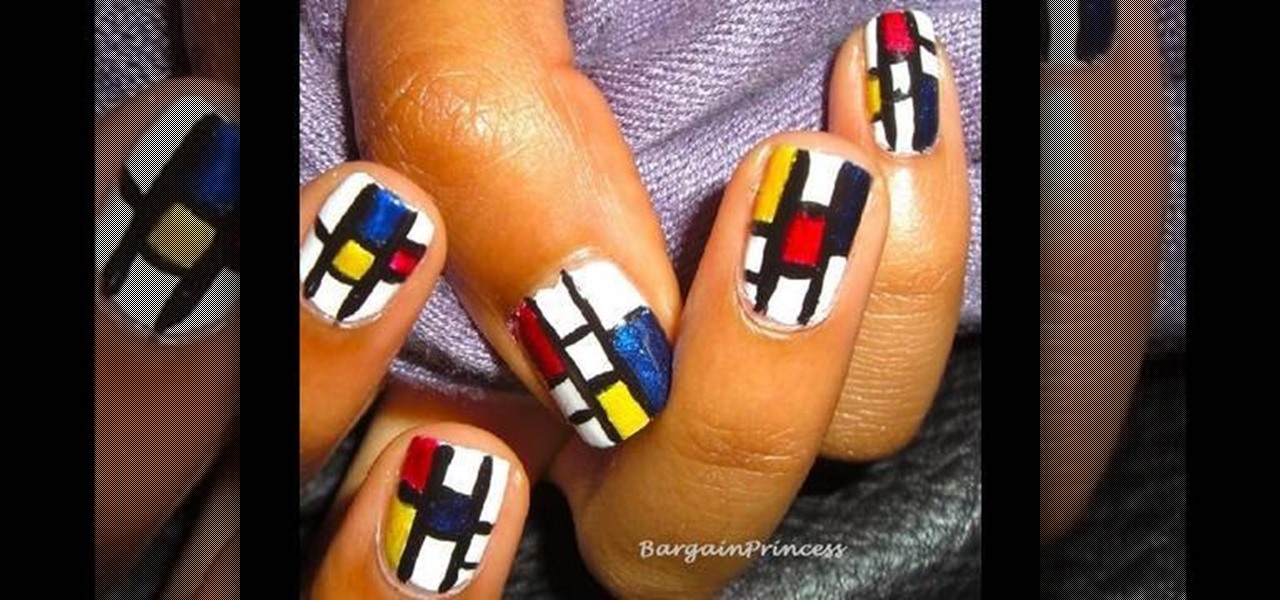
This video shows how to paint Piet Mondrian inspired block print nails yourself. Apply a white base coat and top coat. Use black nail art paint because of the thin brush. Paint two black lines the length of your nails. Then paint black lines going across the width of the nails to make random size boxes. Dab the color of paint you are going to use on a piece of paper and use the nail art brush to get the paint off of the paper and apply the different color paint to the boxes. Wait about 10 min...
Lauren, AKA QueenofBlendingMUA has joined the ranks with the other YouTube beauty gurus. Lauren is a makeup artist with a large collection of eye makeup & nail art video tutorials. Her eye makeup look span from everyday makeup to creative, more expressive party looks. Her nail art/ manicure looks are also lots of fun. Check out this nail art tutorial video to learn how to create a neon orange and dark blue nail art design. Search QueenofBlendingMUA on WonderHowTo for more beauty videos.
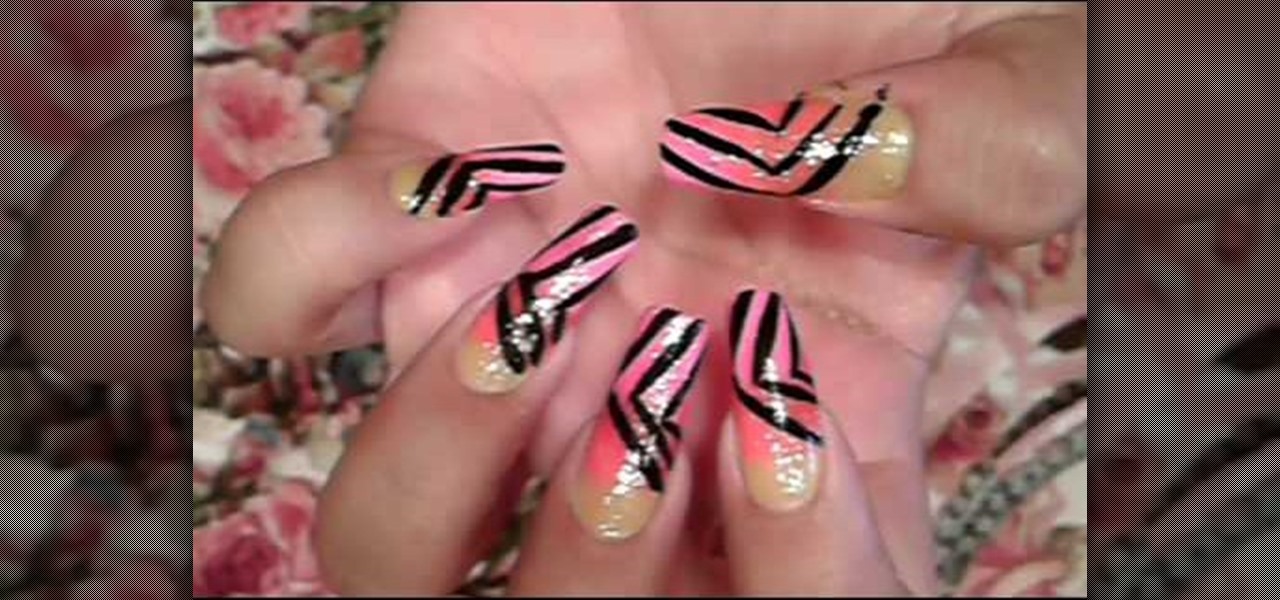
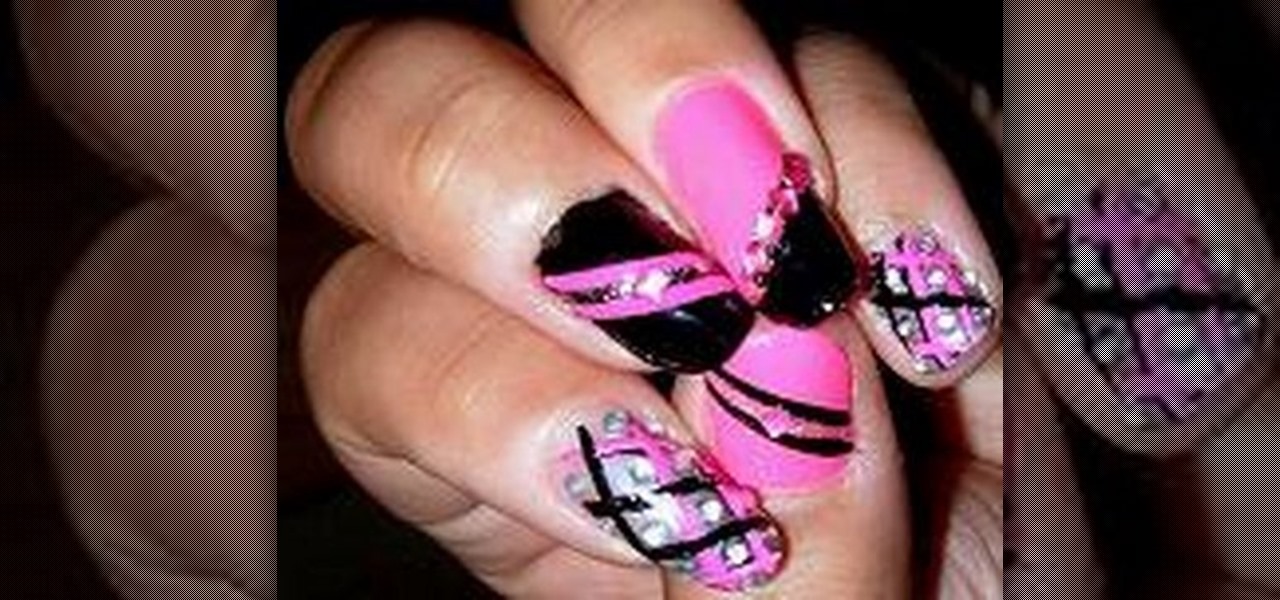
Lauren, AKA QueenofBlendingMUA has joined the ranks with the other YouTube beauty gurus. Lauren is a makeup artist with a large collection of eye makeup & nail art video tutorials. Her eye makeup look span from everyday makeup to creative, more expressive party looks. Her nail art/ manicure looks are also lots of fun. Check out this nail art tutorial video to learn how to create a hot pink and black nail art design. Search QueenofBlendingMUA on WonderHowTo for more beauty videos.
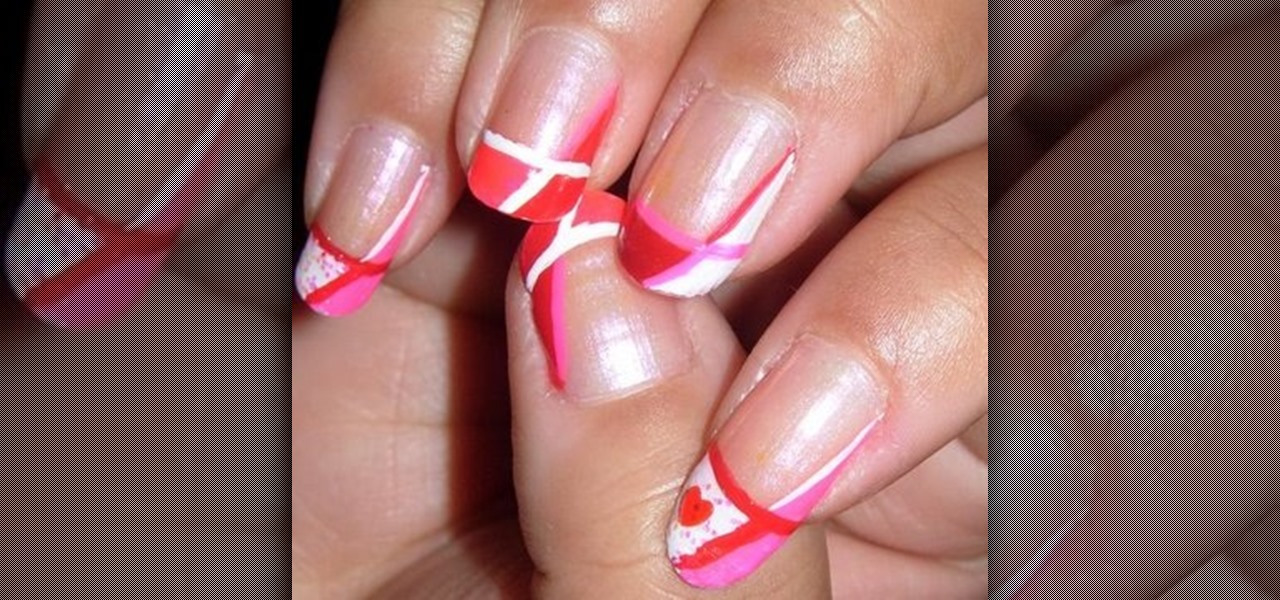
Lauren, AKA QueenofBlendingMUA has joined the ranks with the other YouTube beauty gurus. Lauren is a makeup artist with a large collection of eye makeup & nail art video tutorials. Her eye makeup look span from everyday makeup to creative, more expressive party looks. Her nail art/ manicure looks are also lots of fun. Check out this nail art tutorial video to learn how to create pink, white, and red Valentine's Day nail art. Search QueenofBlendingMUA on WonderHowTo for more beauty videos.
Want to know how to make a cool winter nails look? Just follow this video tutorial to see how to paint winter, ice and snow inspired nails. This nail polish look is a great decoration for the winter season and is not super bright, but very girly and tender.