This is a great instructional video on how to apply star wars makeup. First you have to take off some glue stick to smudge on the second half of your eyebrows. Apply liquid green all over the face. Now apply yellowy green powder allover the face with a brush. Now contour bitches. Draw eye shadows with dark colors and eye brows with black color. Taper it out into a point both on the outer corners going up and in the inner corners going down, an Arabic kind of eye. Now set liner with black powd...
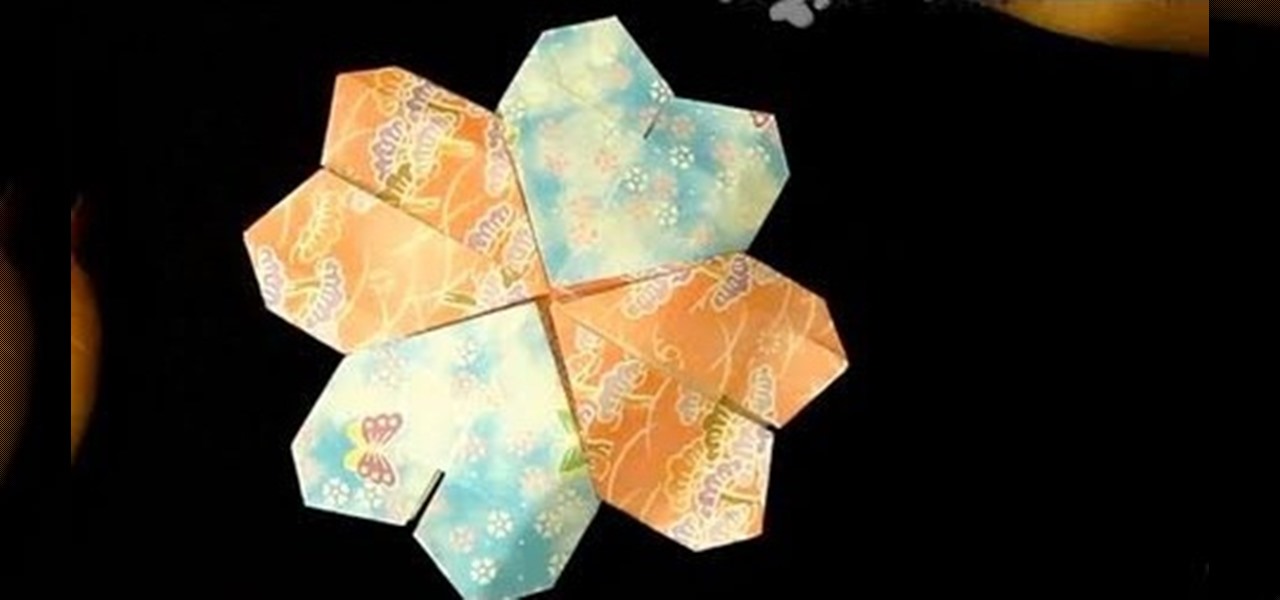
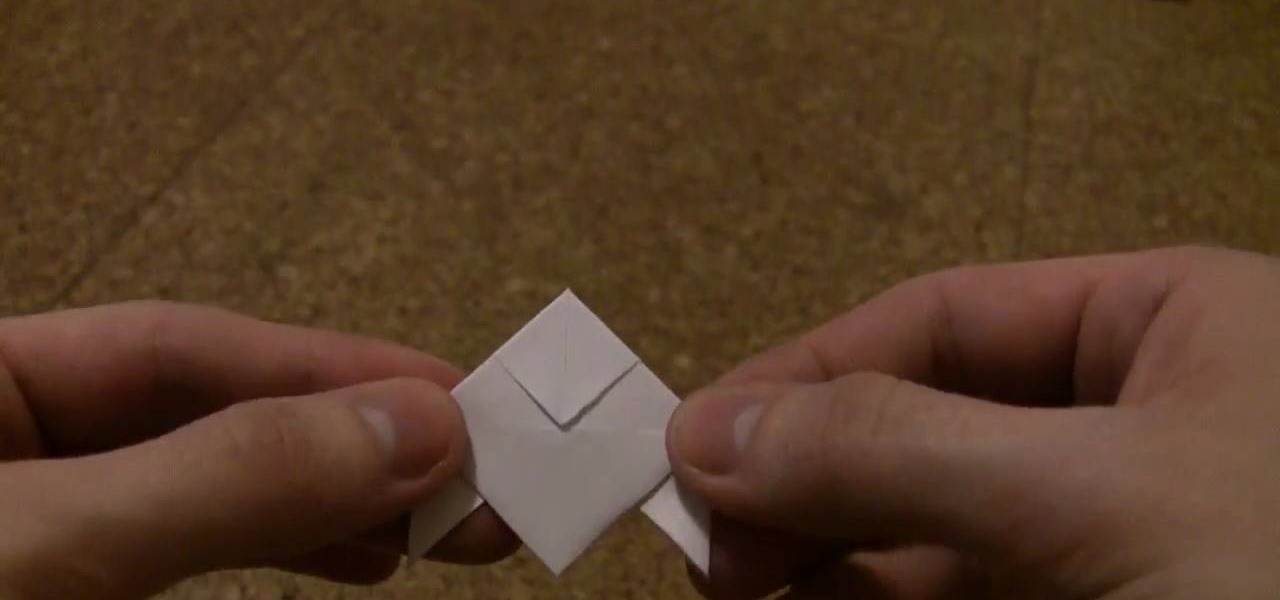
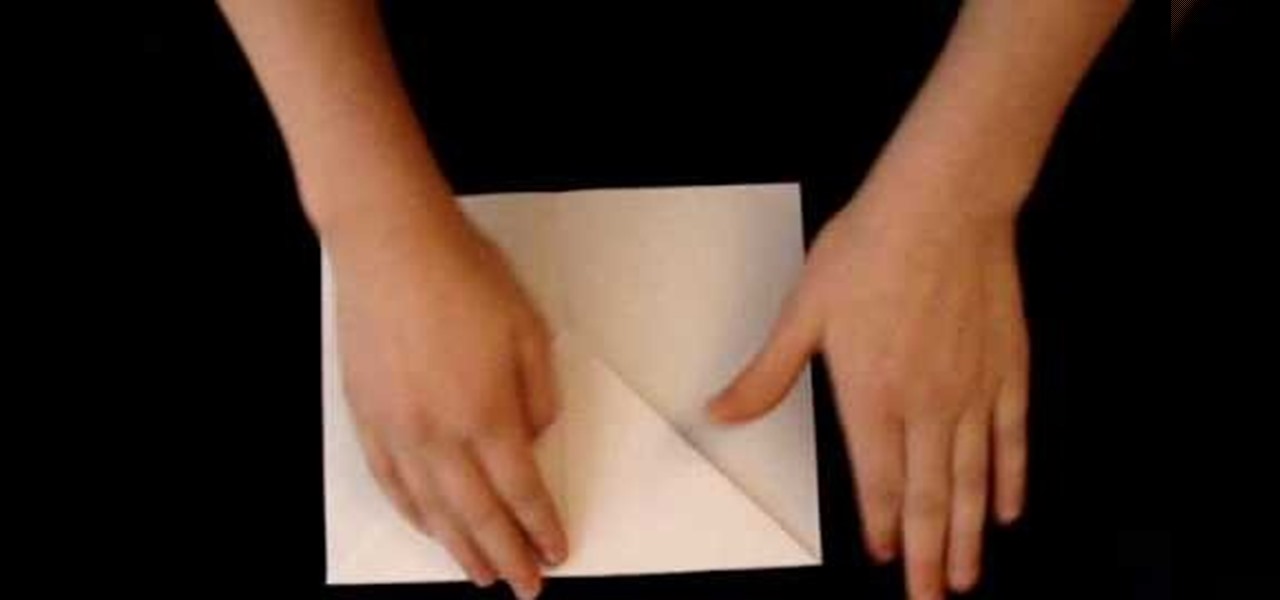
To fold an origami mandala heart you need to follow the steps below. First cut 2 triangles out of the paper you have, fold one of the triangles in half. Then, unfold the folded in half triangle and fold the top of the triangle down about two thirds of the paper. In this stage you will be making folds 3 and 4. Next, fold both of the side corners of the paper up to the top, creating the picture below. Now you will make folds 5 and 6. Then, turn the paper around. Now just fold the top flaps into...

In this video tutorial, viewers learn how to make an origami fortune teller. Fold a sheet of blank paper in half--vertically and horizontally. Fold the four corners of the paper into the middle. Flip the paper over and fold the corners into the middle. Fold it on the horizontals and diagonals. From then on, users can decorate the fortune teller. This video will benefit those viewers who enjoy origami and art.

Create a photo frame out of an origami paper or any art paper in minutes! 1) Lay the paper down on a flat surface. 2) Fold the paper in half with the shortest ends together. 3) Fold in half again so that you get quarters. 4) Unfold step#3 and with the first fold at the top, fold the top corners down along the center fold. 5) Unfold the corner flaps, open up the original fold and fold the corner flaps inside, now close the original flap. 6) Fold the lower edge up as far as it will go, do the s...

To make a paper gift box is one of the simplest projects that you can create on your own. In order to do this you need some materials: a Square of Paper, a Pencil, a Ruler & a Folding Bone. Take any size square of paper and draw two lines diagonally from corner to corner. This will form a large X, marking the center of the square. In turn, fold each corner into the center of the square. Firmly crease the fold. Fold the first corner to the line of the first fold made on the opposite side. Repe...
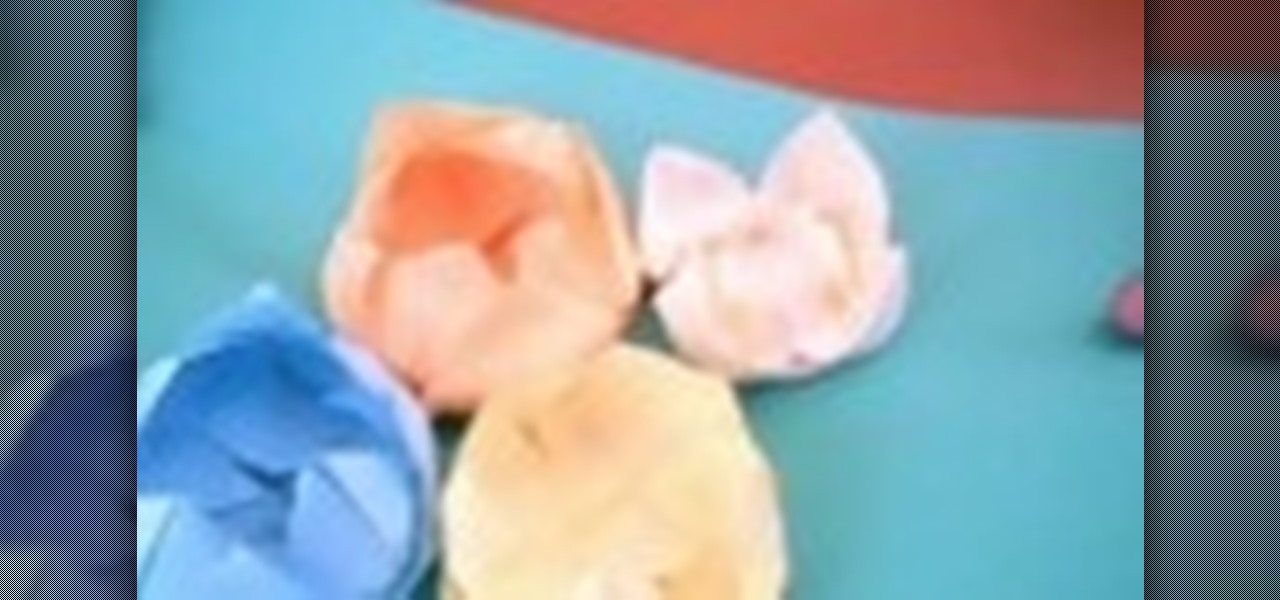
1) Make sure the paper used to make the origami water lily is a true square. One can use the paper one happens to have on hand, but anything heavier than lined notebook paper is best. 2) Work on a flat and hard surface so that all creases and folds are precise. 3) Place the paper square on the flat, hard surface so that the edges are facing in every direction. Be sure to have the colored side down if the paper is two sided. 4) Fold the paper in half from top to bottom. Crease the fold then un...

Learn to make an origami flower with just a few easy steps in this video tutorial! 1. Use an 8 inch by 11 inch piece of paper.
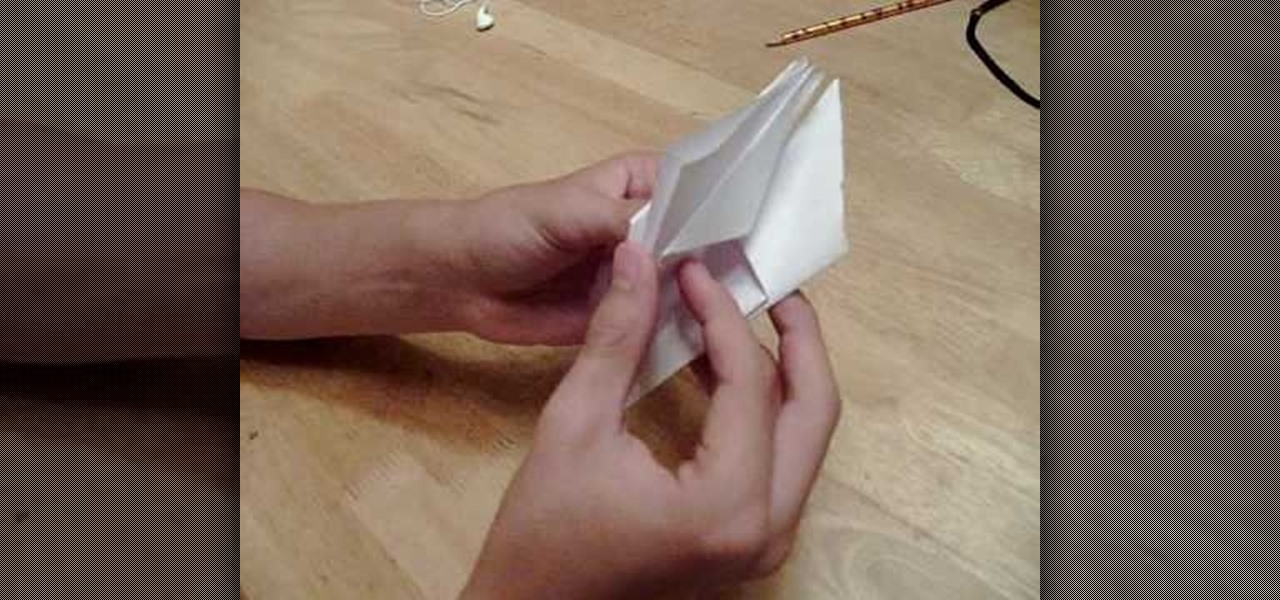
For all origami enthusiasts, here is something new. This video details how to make your own origami enigma box. As with all origami pieces it can be made using just a single piece of paper. The paper is first folded, taking from two separate parallel ends, in such a way that both sides meet in the middle of the paper. This will make four rectangles when unfolded which are to be further folded into half to make eight. Now, the paper is to be taken from the other two ends and folded to meet in ...
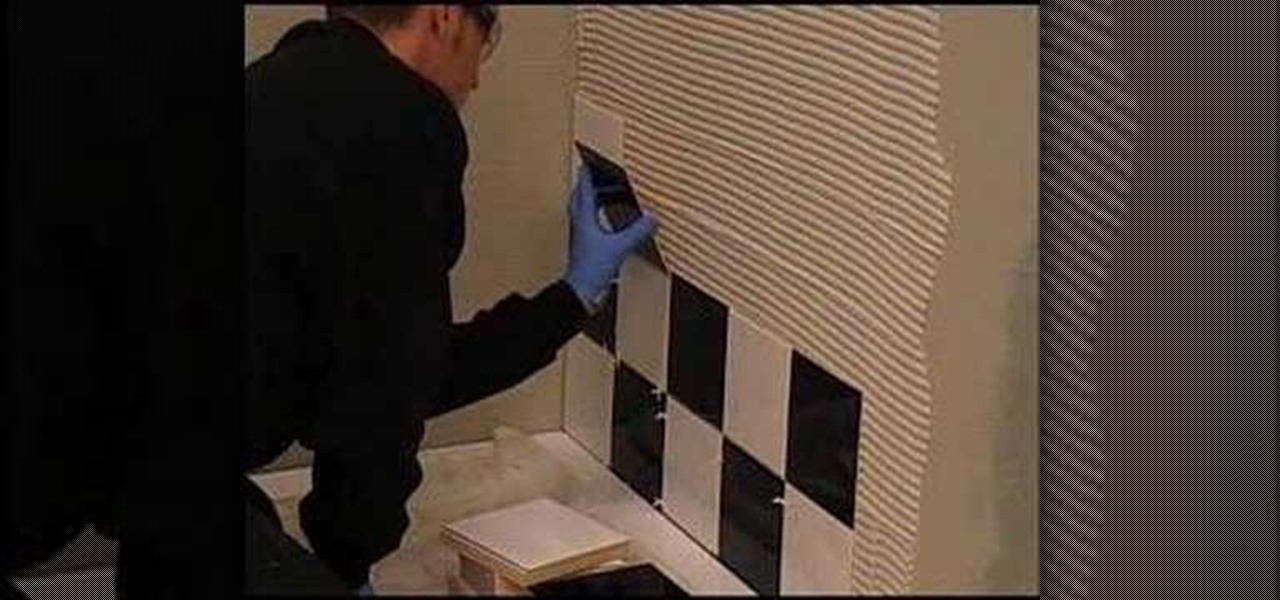
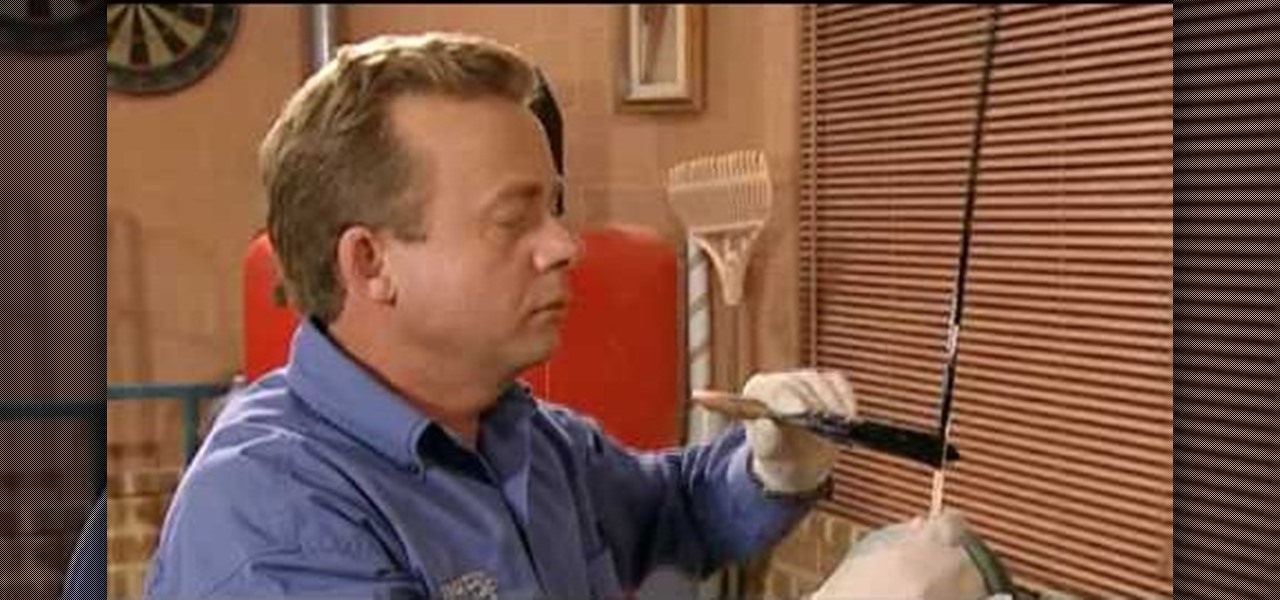
This video shows you how to tile and waterproof a shower. Stage 1
In this video tutorial, viewers learn how to fold a paper airplane. Begin by folding the paper vertically in half. Then open the fold and fold the 2 top corners to the center crease to form a triangle. Now fold the top point down so the it tucks underneath the fold to form a envelope shape. Then fold the 2 top corners to the center crease to form a triangle once again. Now fold it vertically in half and fold the wings down so that they are aligned with the bottom of the plane. This video will...
Secure a square-shaped piece of paper preferably six inches long on both sides. Cut the square paper into two equal halves. Fold one piece longitudinally right at the middle. Open the fold and refold it horizontally, on the shorter side. Refold the longitudinal crease you made earlier. Then, fold both sides diagonally but facing opposite each other.
In this video tutorial, viewers learn how to draw a rebel flag. The materials needed are a ruler, sheet of paper and drawing utensil. Begin by using the ruler to draw a rectangle for the flag. Then draw an X in the center of the flag, going diagonally from the top corners to the bottom corners. Now draw outer lines on the X. Then draw the 13 stars on the flag, The first star is in the center of the X and add 3 stars on each side. This video will benefit those viewers who enjoy drawing, and wo...
In this Arts & Crafts video tutorial you will learn how to make a lily flower from folded paper with origami. For this, you need a square sheet of paper. First you fold it in half and then fold it in half in the other direction. Next you fold it diagonally across to form a triangle. Then fold it again across the other diagonal. Open up the paper and push the diagonal folds inwards slightly so that the center point is pointing upwards. Then press the folds in to form a triangle. Take one of th...
In this Arts & Crafts video tutorial you will learn how to fold a Heavy Rain-style paper origami bird. For this project, you will need a square sheet of paper. Fold it diagonally across both diagonals. Open it up and fold one corner up to the center point of the paper. Flip it over and fold the other three corners to the center point. Now fold all the four corners to the center point. Flip it over and now fold it in half as shown in the video. Then you pull out both ends from the center and w...
In this Arts & Crafts video tutorial you will learn how to create a box to hold a mini album or small cards. Take a shiny card stock 10.5 x 6 inches. On the 6" side, score at .5" and 1" on both sides. On the longer side, score at 3, 3.5, 7.5 and 8 inches. Cut out the corners on the flap side of the card as shown in the video. Do a step cut on the other side of the card as in the video. Round the four corners with a corner rounder. You can do some stamping now if you want or you can also glue ...
This video shows you how to make a very good paper airplane, that will fly in the air for about 10 seconds before it falls. Start by folding your paper in half length-wise, and then at one end fold triangles from the corners into the middle. Then flip your paper over, and fold the same corners in again, so that your paper looks like a taller point. Take the last 3 inches of the point and bend it into the middle of the paper, creating an X out of the folds. Then fold it all in half so that you...
That Paper Guy shows you how to make a simple paper airplane. First, get a piece of paper 8 1/2" x 11" and fold it in half lengthwise. Then fold on one side a triangle. Flip to the other side and fold a triangle as well. Fold the corners down in the same direction on both sides, making sure the edges meet the center fold. Fold the corners down one more time on both sides, again in the same direction. Open up the finished airplane so that you're able to grab the center with your thumb and inde...
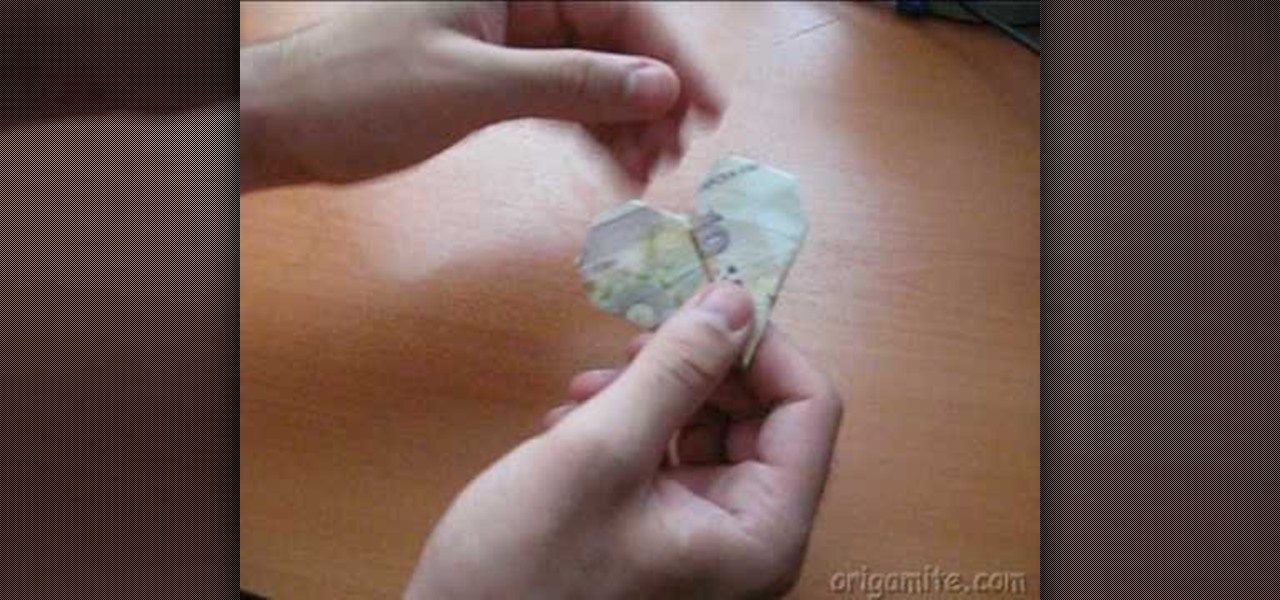
We learn an easy and fun way to make an origami heart out of a dollar bill. No supplies needed. Just the dollar bill and two capable hands. First fold up the bottom of the bill. Then fold it in half. Fold both sides into triangles bringing them to the middle. Turn over in. Fold in inside corners. Then the outside corners, rounding into a heart. Make sure the creases on the sides are well done. Flatten the paper out with palm to make it completely flat. And there in your hands you have a paper...
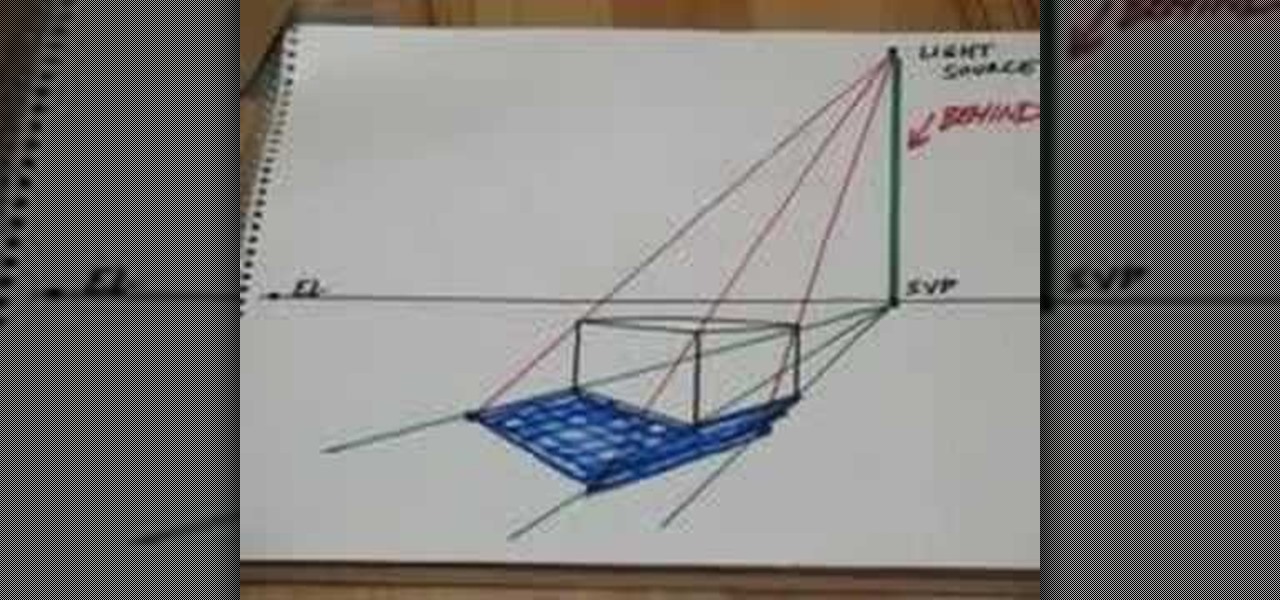
This video demonstrates the process for drawing prospective shadows using a light source. Start with the shadow vanishing point which is directly below the light source on the horizon line. Draw lines from the shadow vanishing point to the front three corners of your box. Next draw lines from your light source to the top three corners of your box. Where the shadow lines intersect, that area defines the shadow area and can be filled in for shadows. The shadows, of course, will line up with you...
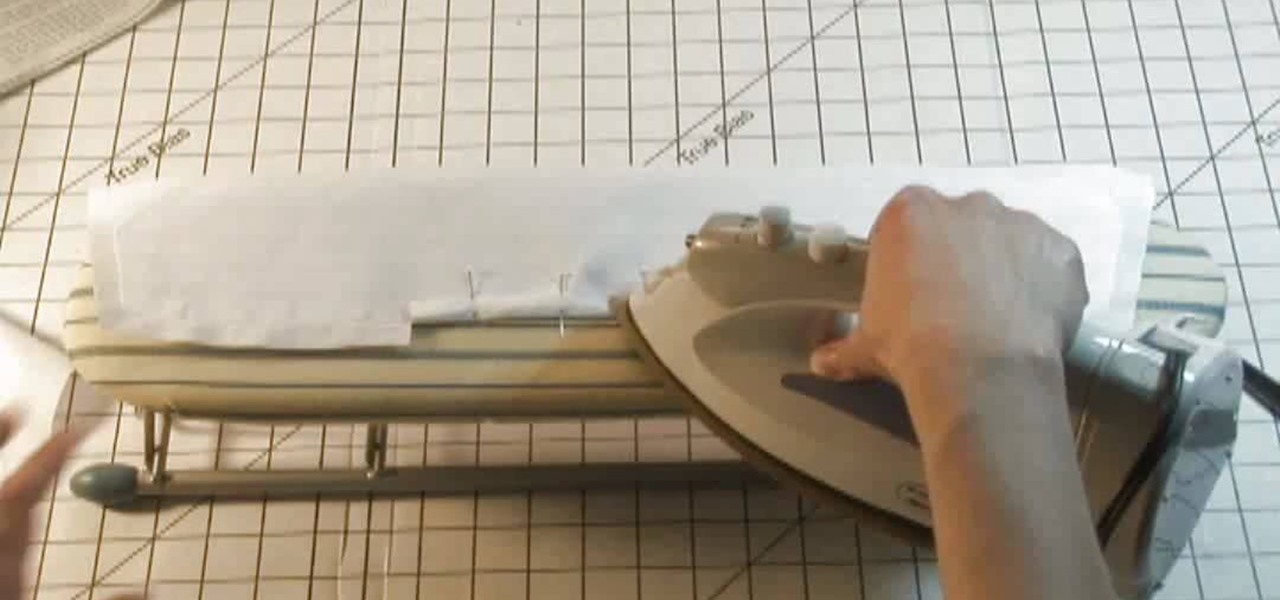
By using sewing pattern Simplicity 4670, the author of this tutorial video takes you through the steps needed to produce a great shirt collar. First you should attach interfacing to one piece of the shirt collar. Here you will be using fusible interfacing and taking the facing to the shirt collar iron the interfacing to the wrong side of the fabric. Sew a guide line that is 5/8ths of an inch wide along the notched edge of the shirt collar's facing piece. At the dot markings of the collar clip...
Elvira, Mistress of the Dark, was created in 1981 by Cassandra Peterson. She was the hostess of a local Hollywood horror movie show that became nationally syndicated. Elvira was the first horror host to be nationally syndicated, first person to be broadcast in 3-D on TV, and first female celebrity to do a national beer campaign and market her own beer.
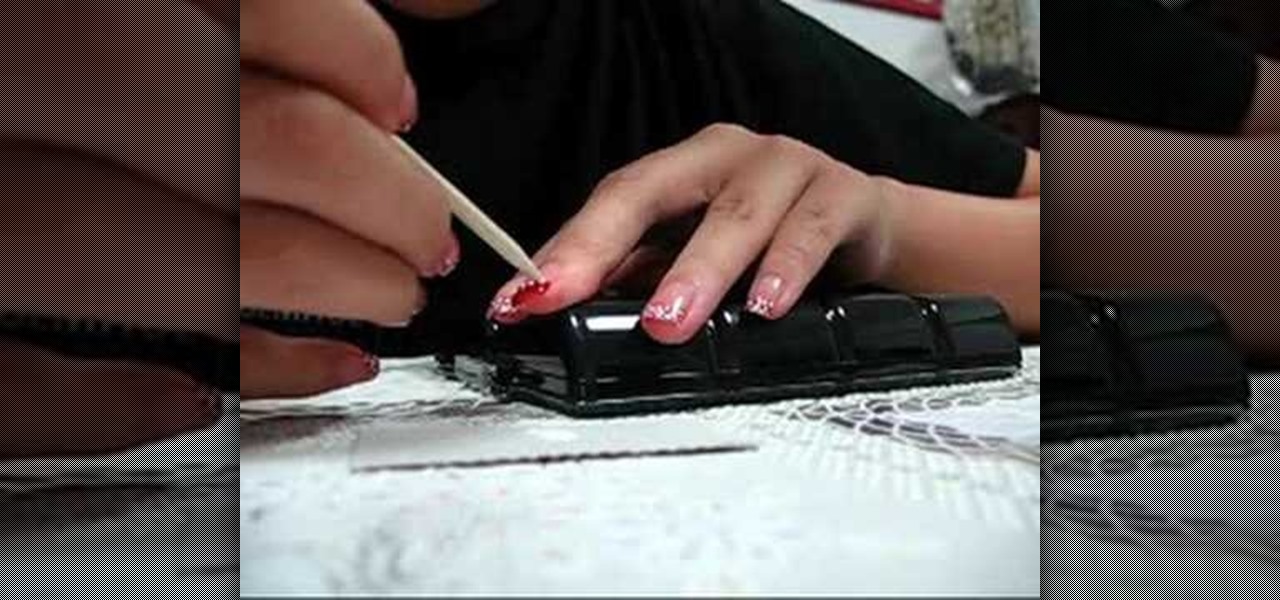
Want a change from your boring old pink and white French manicure? Learn how to create red French style nail tips with white polka dots with this manicure tutorial. You will need base coat and top coat, red and white nail polishes, and Q-tips or corrector to clean up corners. With this how to video you will be able to create a red French manicure style nail tips with white polka dots.
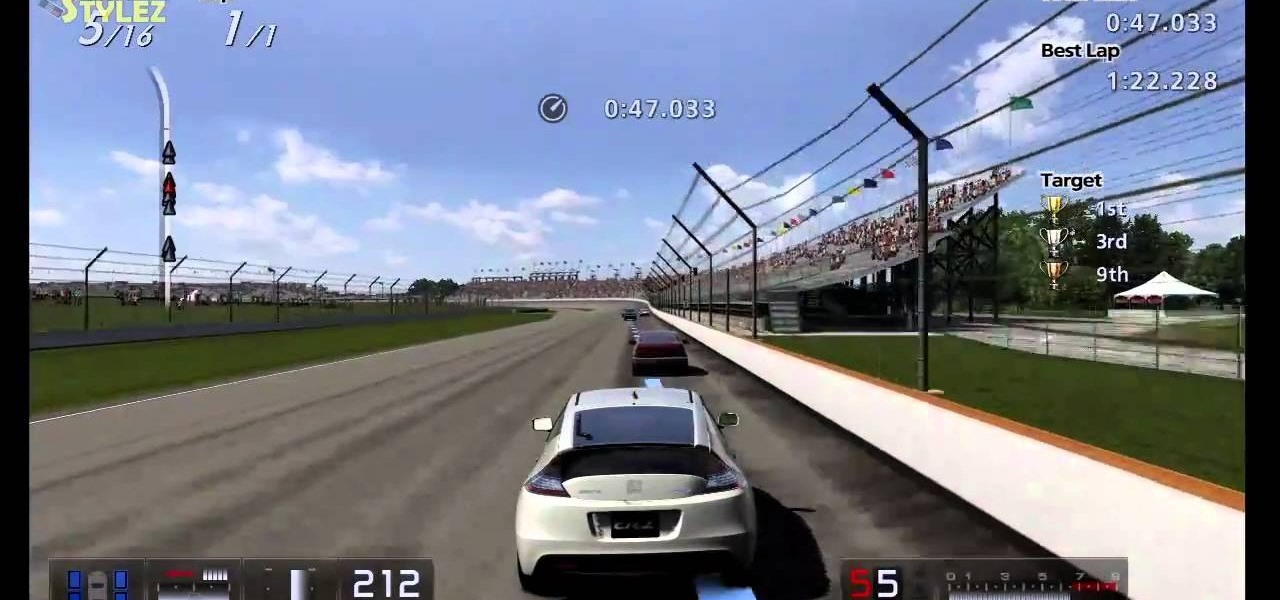
Now that you've earned the gold on all of the previous National B License Tests in Gran Turismo 5 on the PlayStation 3, you have one more to go— the lap battle (B-10) at the Indianapolis Motor Speedway. If you still haven't unlocked these tests, just buy your first car and start driving… um… racing!
In this tutorial, we learn how to fold a basic paper airplane. First, fold the paper in half and make a crease. Next, unfold it and then line the corners with the middle line you just made on one side of the paper. From here, you will fold the paper down until you reach as long as the crease can go. Next, take the point on the side and fold it an inch over next to the point. Then, repeat this on the other side, touching the other point in the middle. Now, take the tip and fold it over. From h...
With a little practice a cushion cover can be made at home easily. The materials/equipments required are as follows: fabric of your choice (having appropriate dimensions) to make the cover, scissors, measuring tape and ruler, needles, threads, sewing machine and an iron.
In this video we learn how to make a speedy paper airplane. First, fold the paper in half and make a crease in the middle. Next, fold the corners down on the top. After this, fold these into another triangle going half way down the paper. Then, fold the tip all the way down so it rests on the opposite side of where it started. Do one more fold like the ones you did in the second and third steps. Make sure you are making crisp creases in the folds that you make. After this, fold the tip to the...
In this video, we learn how to turn a composition book into a decorative notebook. First, measure your composition book, then measure out that same size on a piece of decorative paper. Next, put adhesive on the back of this on all four edges, then diagonally. Now, you will have a solid attachment for the paper to be placed on top of the composition notebook. Use a straight edge to push it down and it's completely flat. Then, use scissors to cut any excess paper off of the edges and corners. Y...
In this video, we learn how to make a mosaic picture frame with ceramic micro tiles. First, glue on the four gemstones. These will go on all four corners of the frame. Next, place the square mosaics onto the base. You will place these around the edges of the frame that are perfectly square. After this, cut the other squares in half and glue them onto the entire frame in the middle of the squares on the frame. Next, let the frame dry for two hours, then mix the powder together with water and r...
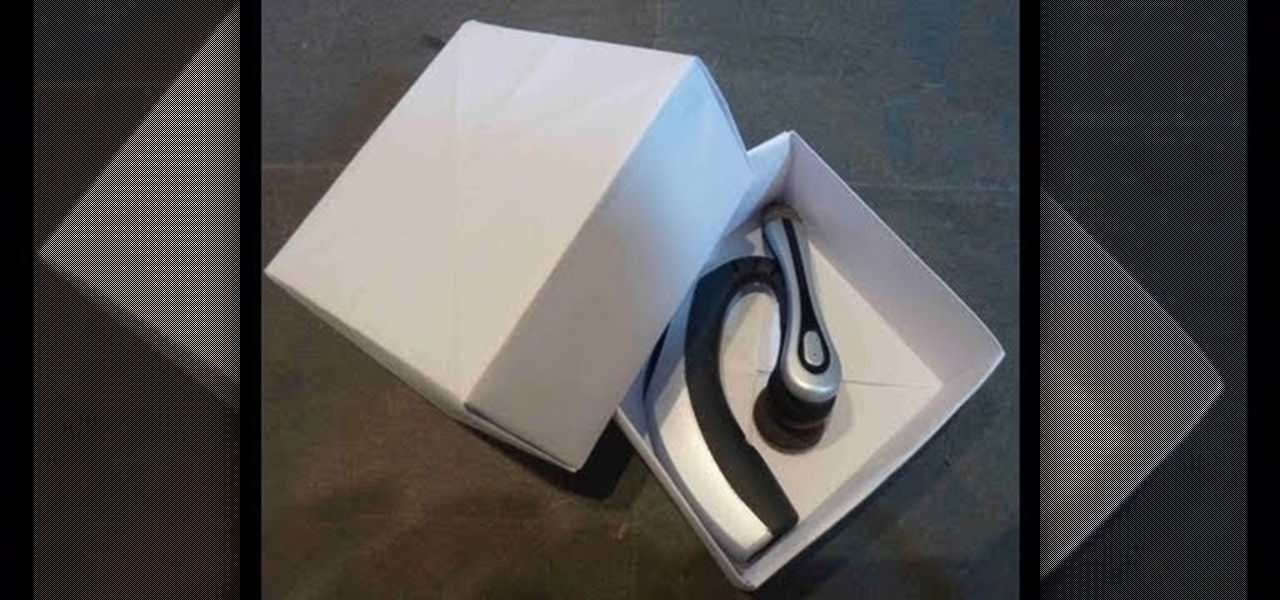
Don't get us wrong: We adore gift boxes, as they let us both conceal a gift and make the gift look more appealing by wrapping up the box in pretty wrapping paper and smacking a bow on top, but there's one big gripe we have about them. They either come in Small, Medium, or Large. So if your gift doesn't exactly fit one of those predesignated sizes, then the box is either too small in areas or too large, which is a pain.
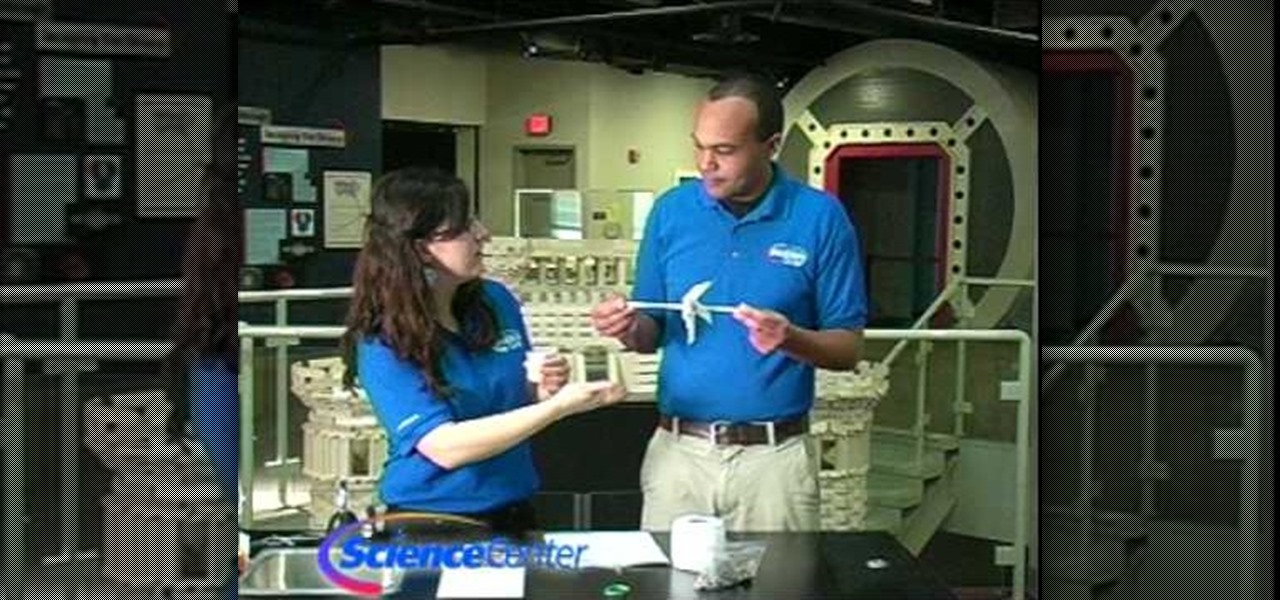
In this Home & Garden video tutorial you will learn how to build your own windmill with household materials. Materials needed for the windmill are a template, scissors, straw, some yarn, some pennies, a paper cup, rubber bands, pencil, single hole punch, a skewer and thumb tacks. Take the template, cut it out along the solid lines and punch holes on the corners as shown in the video. Now with a thumbtack and a pencil make a nice hole at the center of the template. Fold the template along the ...
In this tutorial, we learn how to make a small folding box for Easter. First, cut a shimmery white piece of card stock to 6" x 8 1/4". After this, score the paper at 2 and 3/8". Then score again at 2 and 7/8", flip it over and do again on the other side. After this, cut the four corners with score lines off, then fold the score lines that are left. Now, grab an Easter stamp and stamp the inside of the box underneath the top flap. Place a candy inside of the box, then fold it up and place an E...
In this Fine Art video tutorial you will learn how to draw with basic shapes and apply them. The four basic shapes are spheres, cubes, cylinders and cones. A sphere is a three dimensional circle. On paper it will look flat without shading. Make sure you practice all kinds of circles. A cube is a three dimensional square. You can make a basic cube by drawing two squares and then join the corners. Cylinders are tubes or pipes. Draw two ellipses and join them by lines. If you are just starting o...
In this tutorial, we learn how to make a Japanese screen. First, cut your wood out and sand it down. Then, use a corner clamp to drill a hole in and screw the different sides together. Also use wood glue to help stick the pieces of wood together. Once your frame is assembled, sand the corners of it. Next, you will stain the wood with black Japan wood stain. You will only have to put one or two coats of this on, because the color is so dark. Now score notches onto the wood to allow your screen...
Want your bum to look as perky as it did twenty years ago in a bikini? Unfortunately there's no way to cut corners when you want to tone your glutes and thighs (lipo is an alternative, but that just gets rid of fat and doesn't actually help you tone or increase muscle).
In this video tutorial, viewers learn how to fold an origami water bomb. Users will need a square paper. Begin by folding the paper in half both horizontally and vertically. Then fold the paper diagonally in half both ways. Now fold the edges into the middle to form an isosceles triangle. Then fold the edges to the middle to form a diamond shape. Fold all the tips to the middle and then fold all the corners to the middle. Finish by tucking the triangle edges into the pockets and blow up the p...
In this Arts & Crafts video tutorial, Ana Maria, Origami artist, will show you how to fold an origami paper pyramid. For this you will need a square piece of paper; preferably colored. Fold the paper in half, open it up and fold in half in the other direction. Open up and fold all corners to the center point of the paper. Now fold it in half in both directions. Open up the last fold and fold one of the edges inwards. Open up again, unfold the adjacent flap and lock the flap down as shown in t...
In this tutorial, we learn how to wear a bandanna "homegirl" style. First, lay your bandanna out flat then fold a triangle in the bandanna so it has a slight border around it. Now, do your hair how you want to style it. Fold the bandanna over a few different times, making sure it is thick. Now, place it over the back of your neck and tie at the top with two knots. You can do this a different way by flipping it over and just placing that on your head, folding the corners into your hair and mak...
In this how-to video, you will learn how to make a paper snowflake. This is great for the winter. The best way to make a good snowflake is with the way you fold it. Start off with a square piece of paper. Fold the paper into a triangle. Now, fold the triangle along the height into another triangle. Take one of the lower corners and fold it 60 degrees. Fold the other side the remaining 30 degrees. Snip off the trails with scissors. Now, cut patterns into the sides of the paper. Unfold and then...
In this video tutorial, viewers learn how to use the vanishing point filter in Adobe Photoshop. Begin by selecting the image you want with rectangular marking tool. Then hold Control and C to copy it. Now go to your 3D shape. Press on Filter and select Vanishing Point. Click on one of the corners and drag to each corner. Hold Control and drag it down to create another selection. Now paste the photo by hold Control and V. Then drag the photo to the selected shape area. This video will benefit ...
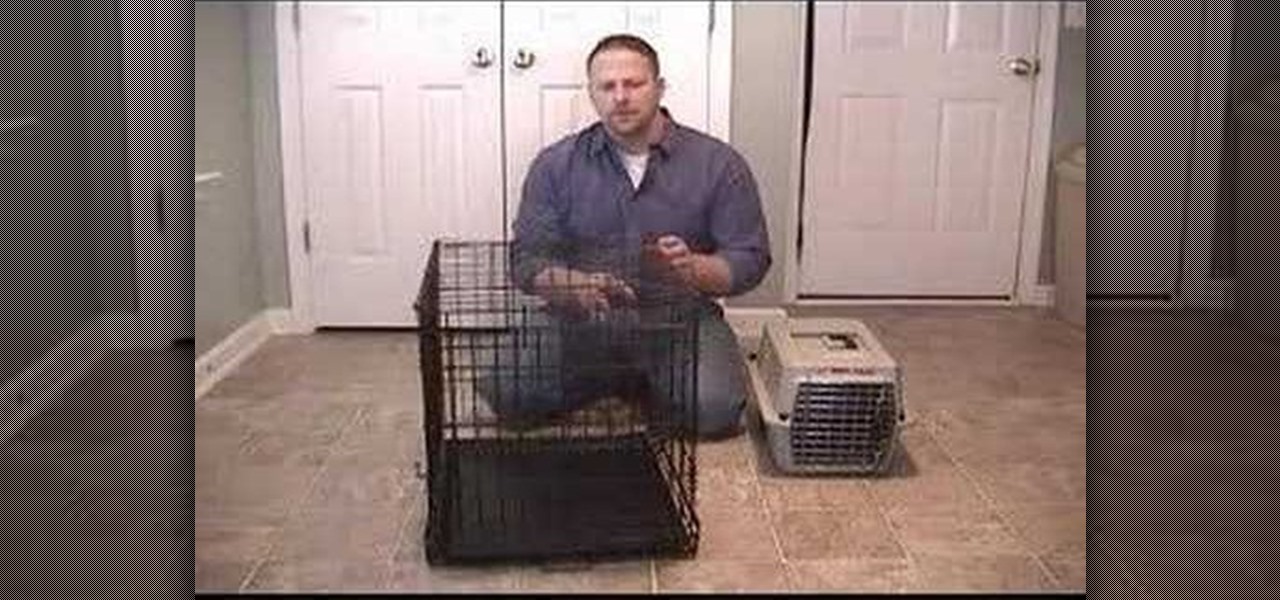
This video solves the problem of getting the right crate for your puppy. You should visualize the size of your puppy after six months and get a crate of that size. If you have a mature dog, get a crate in which the dog can move and turn around easily. The presenter recommends a plastic crate. It is designed well. The door can be opened in both directions. The top can be removed easily and there are holes for the air to come inside. The wire cage is not recommended. Its door is fixed and the c...