Web browsers such as Windows Internet Explorer 7 have become an important part of the computing experience for business and home users around the world. With the popularity of web browsers for accessing information, running programs, and even accessing corporate resources, the browser has become a target for viruses, malware, and phishing schemes that present real dangers to Internet users. Microsoft Internet Explorer 7 has several new features that make using the web easier and safer than ev...
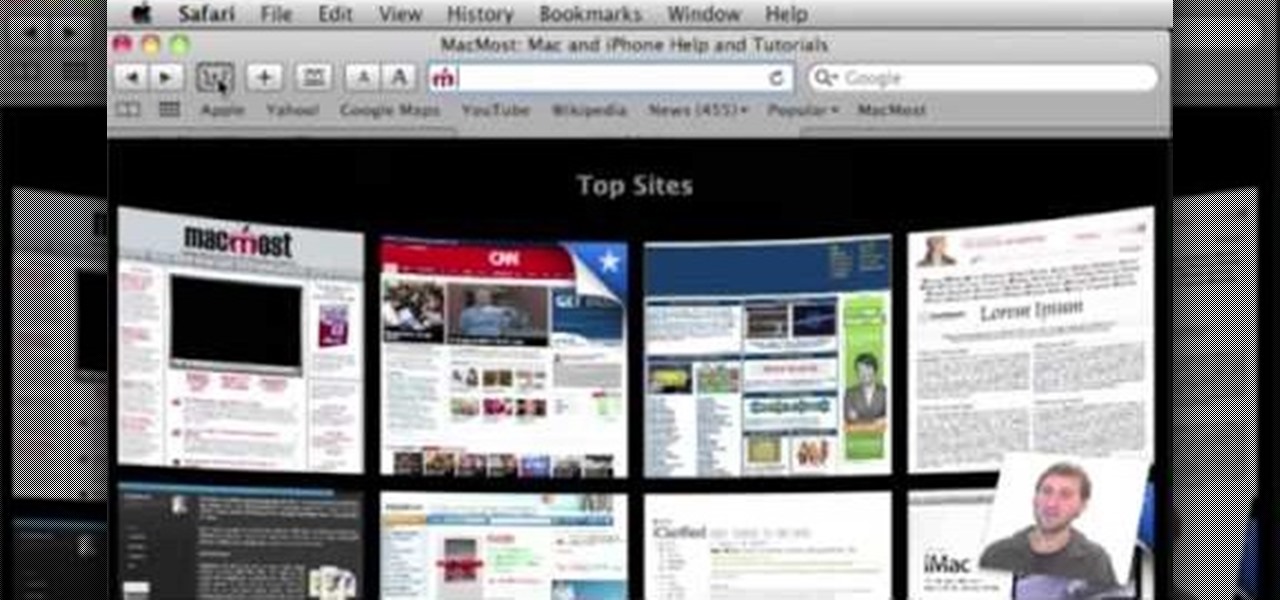
In order to customize your Safari tool bar, you can alter your buttons. All you have to do is click on "view" and "customize tool bar". Select a button that you like from the 2 rows in display. Then, click on the button you would like to add to your tool bar and drag it to your tool bar. You can use buttons as shortcuts to go back and forward, with the back and forth arrows and to take you to your favorite sites, with "top sites".
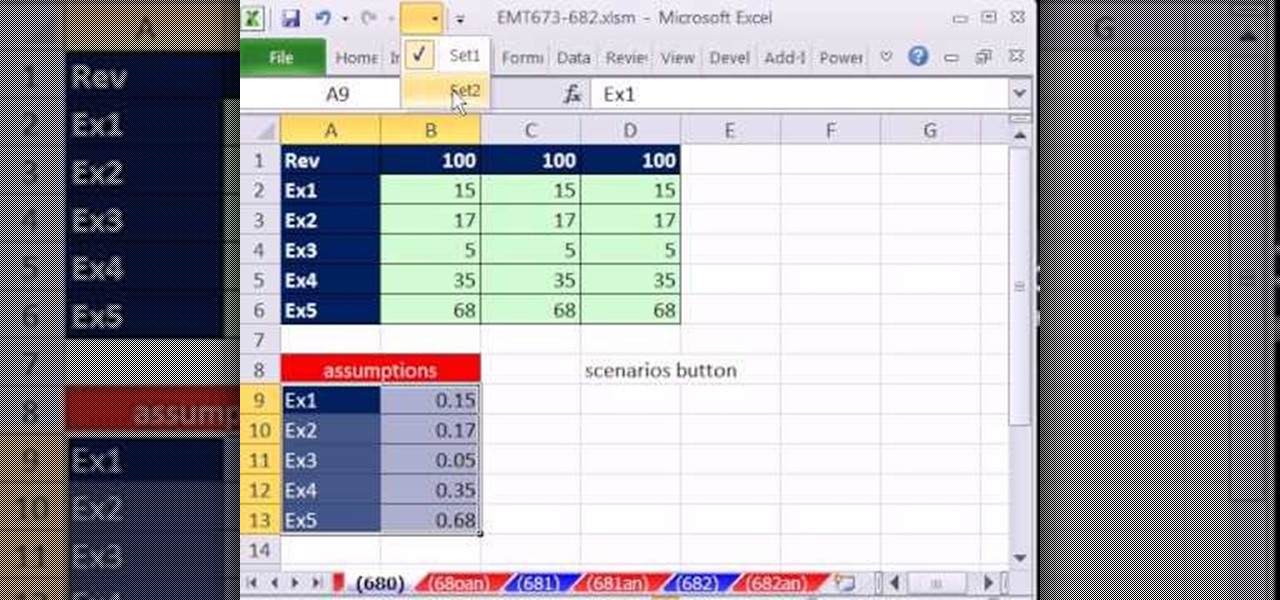
New to Microsoft Excel? Looking for a tip? How about a tip so mind-blowingly useful as to qualify as a magic trick? You're in luck. In this MS Excel tutorial from ExcelIsFun, the 680th installment in their series of digital spreadsheet magic tricks, you'll learn how to add a scenario button to a tToolbar or Ribbon in Excel 2010.
Some people aren't entirely happy with the new UI tweaks in Windows 7, and miss features in Windows XP. Conveniently, some of the functionalities in Windows XP can be brought over to Windows 7. Check out this video for a tutorial on how to bring back the quick launch bar in Windows 7.
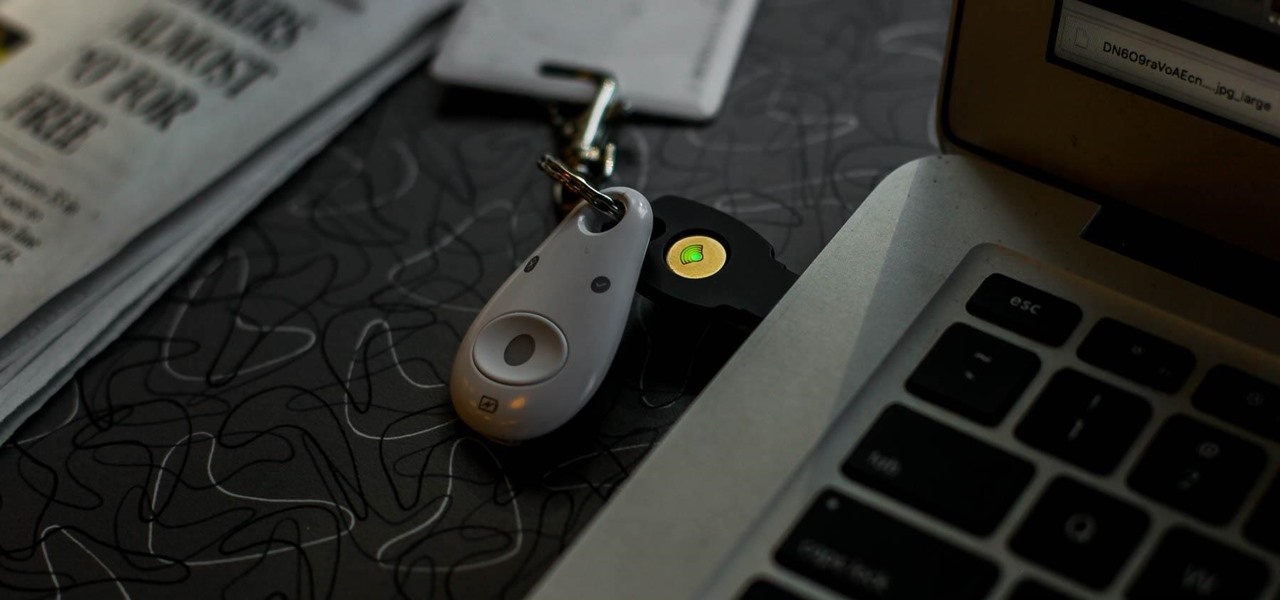
It's easy to have your password stolen. Important people like executives, government workers, journalists, and activists face sophisticated phishing attacks to compromise their online accounts, often targeting Google account credentials. To reduce this risk, Google created the Advanced Protection Program, which uses U2F security keys to control account access and make stolen passwords worthless.

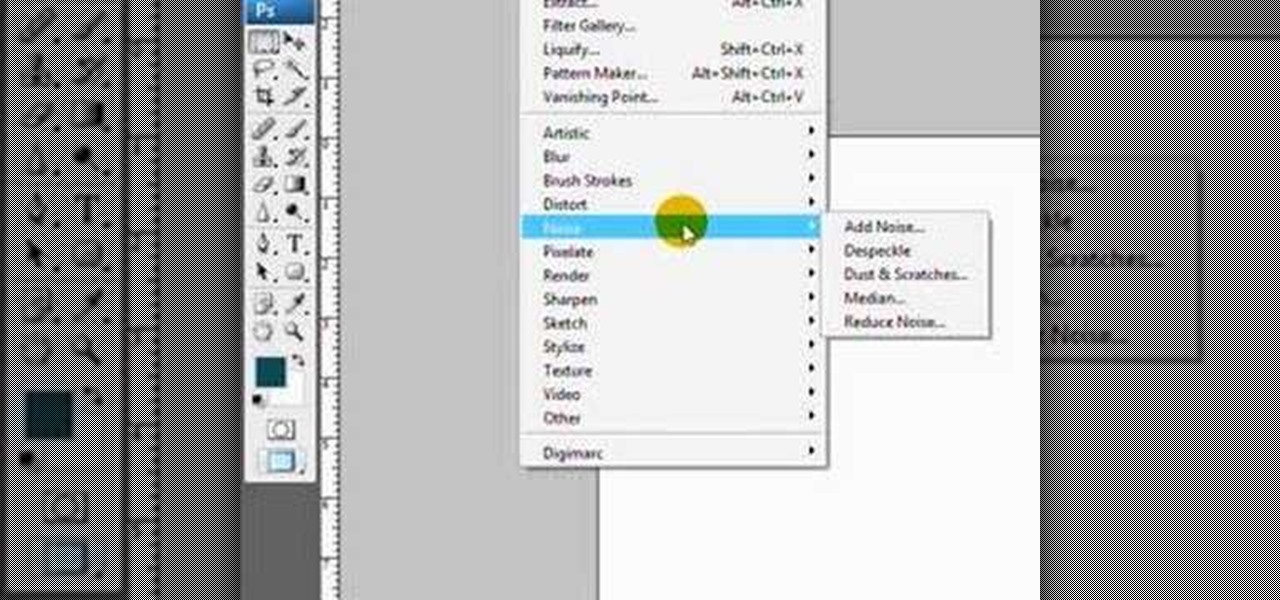
In this video, we learn how to use the polygonal lasso tool in Photoshop. This will allow you to create a selection on your photo in a freehand style. First, select the tool from your toolbar, it's the third selection down. Once you select this, go to your picture and find the piece you want to cut out or copy. Press and hold the control and space bar, then highlight the area you want to. This is great to make a selection that has a straight edge. If you just click with it, it will have a dia...

In this tutorial, we learn how to create links between tasks in MS Project 2007. First, select the task you want to link, then click on the link task button on the toolbar. You will now see a finished task link between these tasks. In the entry table, you will see the predecessor, which is task two. You can also type the numbers in the predecessor column and enter the information in. You may want to create a link that is different, so you don't confuse two things that will start at the same t...
See how to create value-based formatting using data bars and color scales in Excel 2007. See how to use the Format Cells dialog box and the pop-up mini-toolbar in Microsoft Excel 2007. Whether you're new to Microsoft's popular digital spreadsheet application or a seasoned business professional just looking to better acquaint yourself with this particular iteration of the program, you're sure to be well served by this video tutorial. For more information, including step-by-step instructions, w...
If you use Microsoft Excel on a regular basis, odds are you work with numbers. Put those numbers to work. Statistical analysis allows you to find patterns, trends and probabilities within your data. In this MS Excel tutorial from everyone's favorite Excel guru, YouTube's ExcelsFun, the very first installment in his "Excel Statistics" series of free video lessons, you'll learn how to get started doing statistical analysis in Microsoft Excel 2007.
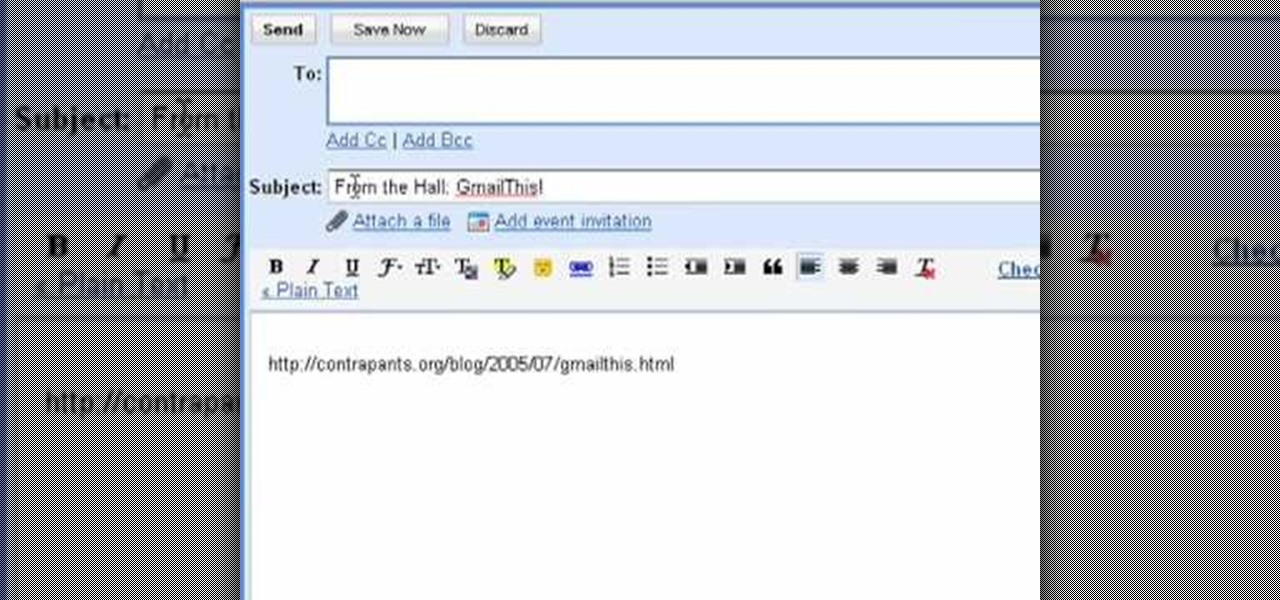
The bookmarklet tool lets you send Gmail messages with the click of a button so you don't have to visit your Gmail account. It's an application called GmailThis! From the developer's website, drag the GmailThis! link to the browser's toolbar. Then, if you are already logged into Gmail, just click on the bookmark and a Gmail applet will pop up with a link to the website you were visiting, along with any text you may have been highlighting. You may notice that the subject line is already filled...
In this video tutorial, viewers learn how to make a batch render in Sony Vegas. Sony Vegas is a professional non-linear editing system. Viewers will learn how to use the batch render. At default, it is located on the toolbar. Begin by importing your clips or images into the time line. One of the batch render's features is to render regions. Begin putting regions around the clips by highlighting the clip, press R and press Enter. The add the Add Regions To Event script to automatically set reg...
Get to know how to use Logic Pro's arrange page in this short tutorial. Use the arrange area to work with the audio of your song. Change the timeline by choosing a time and beat. Use the toolbar area to do some functions. Use the icons to easily open up media and list areas. Use the bin to store your audio. Use the browser to look for your audio songs. Use the event list editor to edit your MIDI information. Use the inspector to view the channel strips of your track. Use the editors in the bo...
Learn how to watch TV on your computer with Firefox add-on. * Note: You must have a version of Firefox that is older than 3.5.
Social media accounts are a favorite target for hackers, and the most effective tactics for attacking accounts on websites like Facebook, Instagram, and Twitter are often based on phishing. These password-stealing attacks rely on tricking users into entering their passwords into a convincing fake webpage, and they have become increasingly easy to make thanks to tools like BlackEye.
In this tutorial, we learn how to password protect a folder on Windows Vista. To do this, you will first need to have WinRAR downloaded on your computer, you can get it here: http://download.cnet.com/WinRAR-32-bit/3000-2250_4-10007677.html. Next, you will right click on your screen and click "new" and "folder". Then, you will rename your folder to anything you'd like. From here, you will right click and then click "add to archive". Then, go to advanced and set password from the toolbar. Enter...
In this video, we learn how to resize an image in MS Paint without losing resolution. First, you will go to the file menu and then open. From here, open up the photo you want to resize. After this, go the 'image' section on the toolbar and then click 'stretch and skew'. From here, change the vertical and horizontal stretches until you have the size of picture that you want! Continue to play with it until it's right and then save this over again. This should only take a few minutes and will ke...
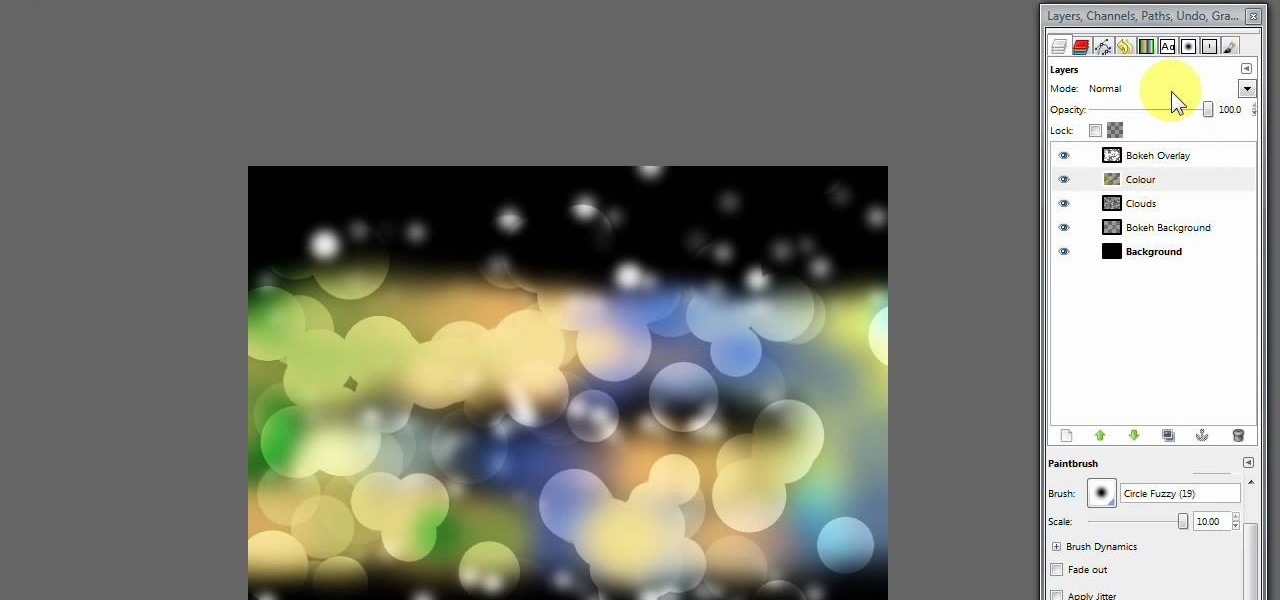
In this video, we learn how to create a modern bokeh effect in GIMP. First, start a new image and then change it to the size that you want. From here, click on the paint can and then fill your box up with a color. Then, create a new layer and name it "bokeh background". Click on this layer and then use the paintbrush tool to paint a small brush with color onto it. Start to paint on small dots and you will see that there are small tiny star like dots that start to appear. Then, fade these out ...
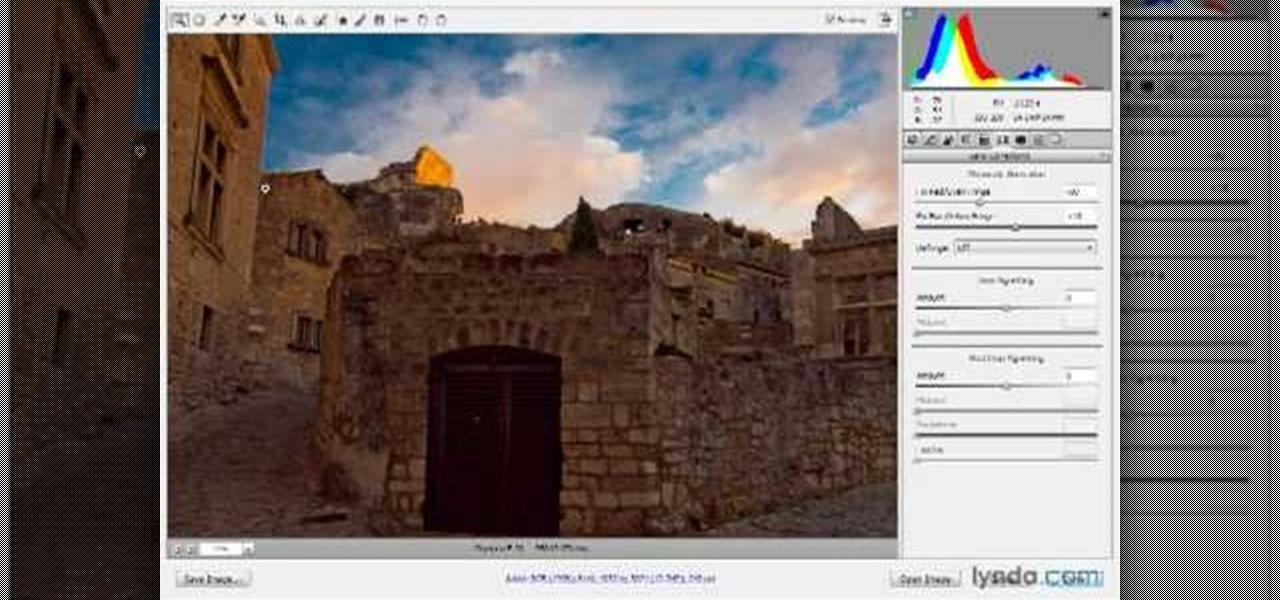
In this video, we learn how to use Camera Raw in Photoshop. This is a great program to use with your SLR digital camera that will make your photos come through more clear than ever before. After you have downloaded this application, you will load your photos to it and open up your desired on to edit. On the right hand side you will see a toolbar allowing you to edit and change different effects on the photo. Move the bars from left to right to edit how the photo looks to your liking. On the t...
In this video, we learn how to partition your hard drive to back up important files. First, go to the start menu and then right click on your computer. From here, go to the left hand side toolbar and find where it says "disk management". Click on this, then you will see the partitions on the computers. Right click on the partition, then go through the wizard that pops up on the screen. Type in the size that you want your partition size to be, then continue on through the wizard. When you are ...
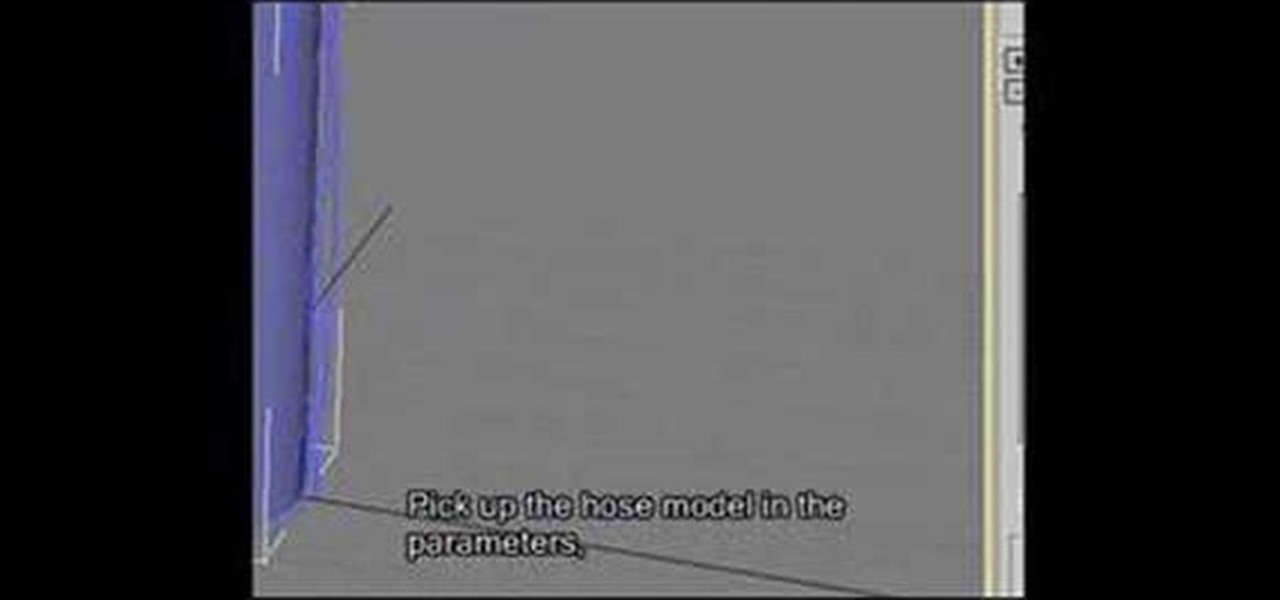
In this video, we learn how to apply normal maps in 3D Studio Max. First, go to the cylinder button and name it. Then, change the radius and height how you would like them. After this, select "extended primitives" from the drop down menu on the top. From here, enter in the diameter and sides for the round hose and then select the diameter of the cylinder. This will create a cylinder but with the look of a hose instead. Use the bottom toolbar to edit the sizes of the map and then save this whe...
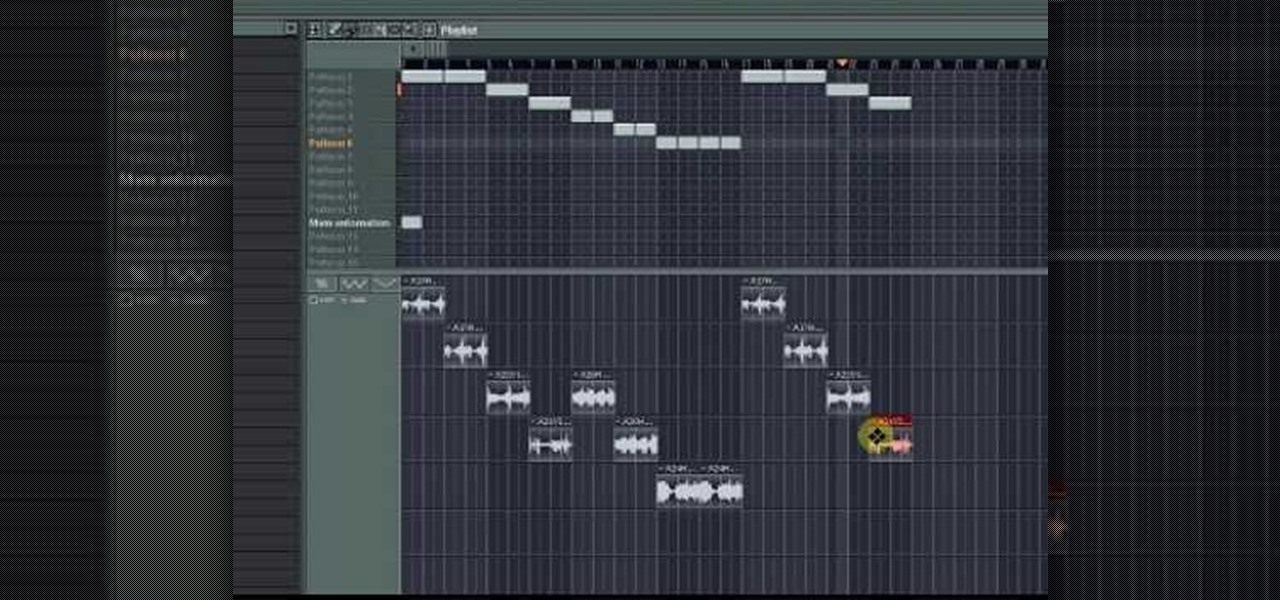
In this video, we learn how to use Lloyd Banks drum samples in FL Studio. You can get the Lloyd Banks drum samples from: Class4beats. Start off by making various different types of drums tat you like using the drum kit on the left hand side toolbar. Put on a pattern and then listen to how it sounds. After you add this, you can change the tempo and volume of each of the drums to make it sound exactly how you want it. Make it up as you go along to change the drum sounds and when you're finished...
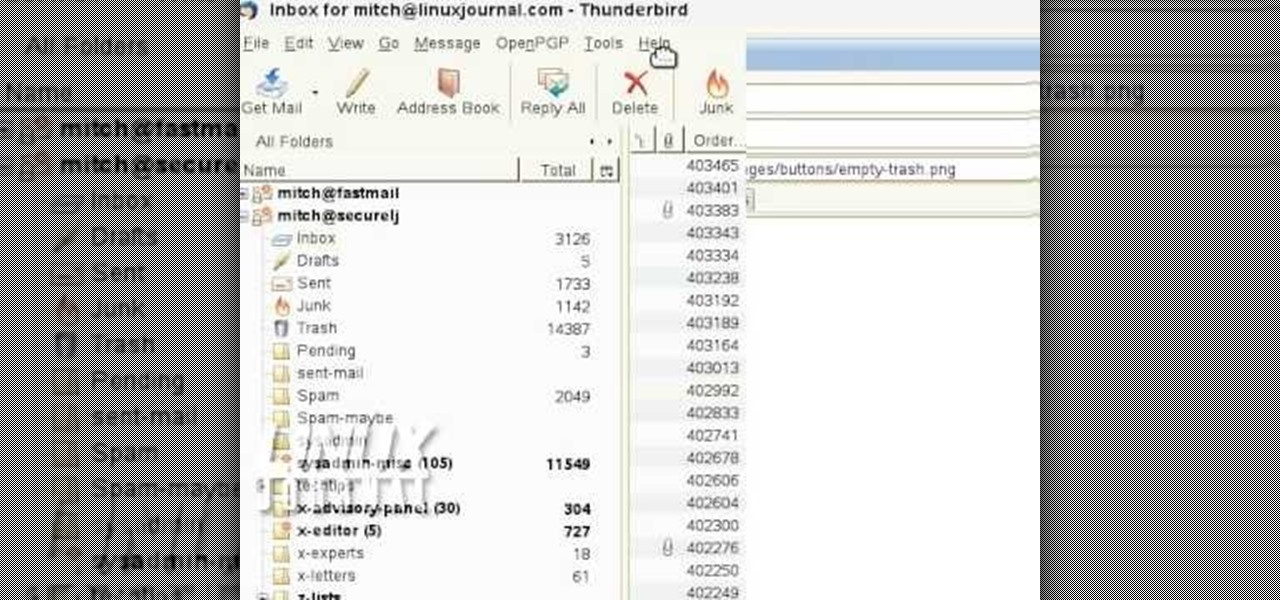
In order to add additional buttons to your Thunderbird Tool Bar, you will need an add-on called "Custom Buttons". It will allow you to add additional buttons to your tool bar. You will need to give instructions for the buttons, which you will use Java Script in order to set it up. Otherwise, the button will not have a function.
In this video, we learn how to disable password when waking a laptop. First, go to terminal, then type in "gcomp-editor". Now a configuration editor will open, go to the gnome-power-manager, then lock on the left hand toolbar. After this, un-check the boxes that say "hibernate and suspend", then exit out. Now, go to look at your screen saver preferences and make sure it isn't set to lock when your computer hibernates. After this, when your computer wakes back up, you won't have to worry about...
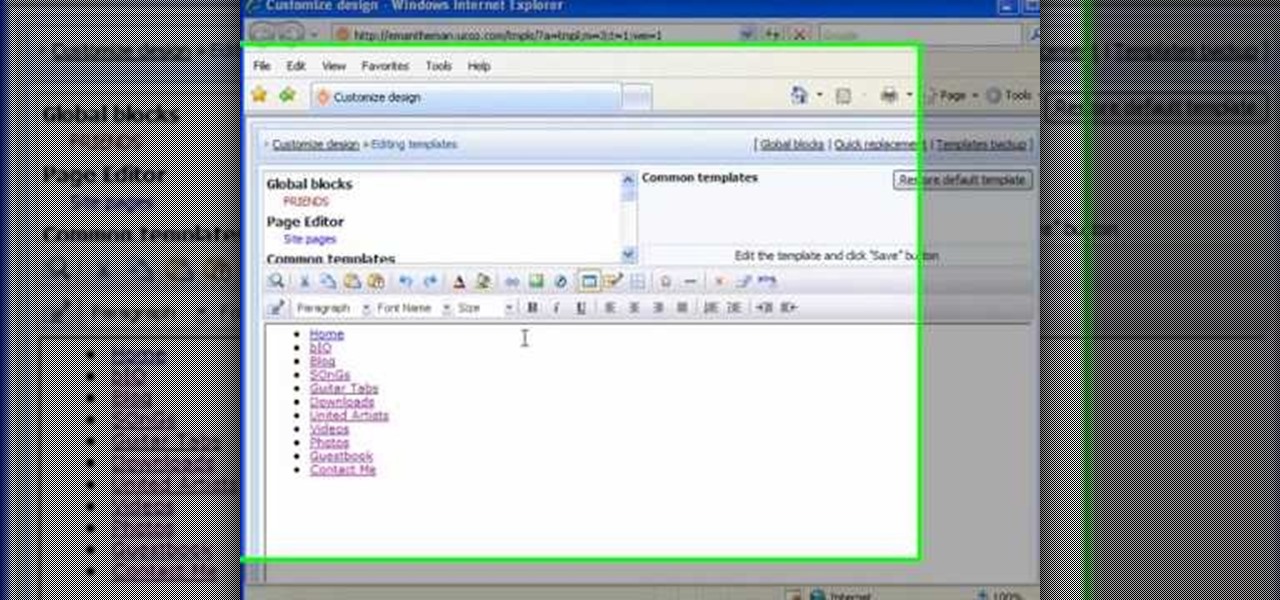
In this tutorial, we learn how to create a free website with uCoz. First, register an account at uCoz. After this, log into the site and add your page to the website by clicking "page editor" on the side toolbar. Next, click "add new page", then use the HTML editor and type in the page name at the top. After this, your page will be brought to the site and you can save it. Then, you use the website to edit your page and change different things on it. Add friends and links to your site to get y...
In order to get the broken glass effect on all of your wallpapers, you will need the following: the program called Broken Desktop Final by Somrat.
In this tutorial, we learn how to make a cool neon text effect using Photoshop. First, type your text using a big and simple font. After this, right click on the text layer and click on "rasterize type". Now, press the control button while you click the thumbnail of the text layer. After this, grab the lasso tool and click "select inverse". Then, set it on 12 pixels in the toolbar. Now, use the magic wand too and select each of the letters by holding shift. Next, create a new layer and click ...
In this video, we learn how to use the web application, Sumo Paint. First, go to the website Sumo Paint and the website will start to load in a new window a Flash application. Once it's fully loaded, you will be able to add an image and then start to edit it. There are several different tools available on the side, whether you need to resize, crop, erase, or anything else to your picture! This is a great website for editing and makes everything simple. There is also a toolbar on the top where...
In this tutorial, we learn how to use the main menu functions in Photoshop CS3. All of your main menus are up on the top toolbar. There will be a drop down list for each different tab you select. When you create a new document, you will be prompted with a dialogue box that asks you how you want your page to be set up. Change the preferences to fit how you want your page to look. When you have changed all of your different settings, click on "ok" and you will be brought to your new document cr...
In this Computers & Programming video tutorial you will learn how to archive and preserve web pages. To do this, you don't need to install any program. You just need to sign up for a free account with iterasi. Go to the site and crate an account by typing in a username, password and your email id. Then go to your email and click on the confirmation link. Hit 'Ctrl + b' on the page that comes up to bring up your bookmarks and drag the bookmarklets that it gives you to your bookmarks toolbar. N...
In this video tutorial, viewers learn how to use the zoom tool in Adobe Photoshop. To select the zoom tool, click on the magnifying tool in the toolbar. Users are also able to press the "Z" key to select the zoom tool. Once selected, users are able to zoom into the image by left-clicking on the image. Users are then able to select the hand tool to move around the image. To zoom out, right-click on the image. This video will benefit those viewers who use Photoshop to edit images, and would lik...
In this software video tutorial you will learn how to use Form Tracker in Adobe Acrobat 9 Pro. The forms tracker window can be opened by clicking on the 'forms' on the toolbar, or 'forms' in the menu bar or, if Acrobat is not open, by double clicking on the notification button in the tray. Here you are taken to the latest update category. On the left hand side, you will find the response file location. Check its status; whether it is active or not by clicking on 'view responses'. This will gi...
If you're a novice looking to learn how to use Microsoft Excel, a video series from digital spreadsheet guru ExcelIsFun is a great place to start. But which of his many series should you choose? The one titled "Excel Basics," that's which! This free video MS Excel lesson, the very installment in said tutorial series, covers the following topics:
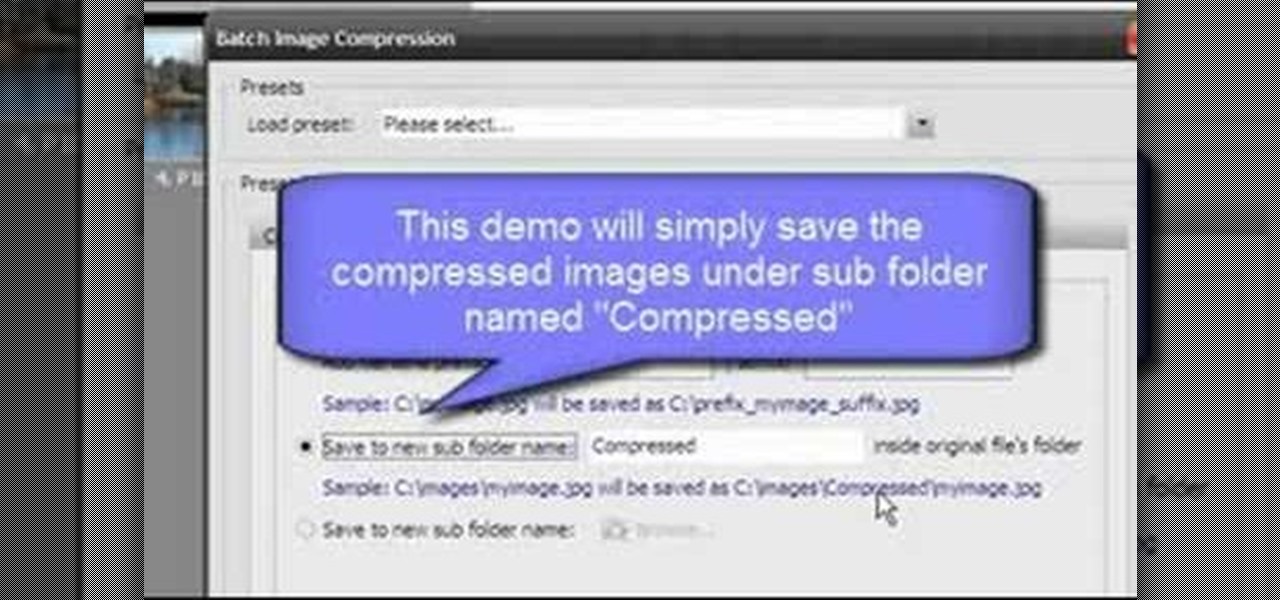
Open Image Compressor 2008 and go to the Image Tray. Pick the images you want with the image selector and click on them to add them to the Image Tray. If you want to add every photo in a certain folder, you just click on the Add All button. Once you have the photos you want, you can batch compress them. You can go to File>Batch Compress to start the process, or just click on the Batch Compress button in the toolbar. Then, pick the compression options you want, or edit the images. You can also...
Firefox is one of the most customizable web browsers available. In this browser, you are able to install multiple add-ons and toolbars, all of which do something different for the performance level of your program.
In this video, we learn how to create a picture frame on a photo using PhotoShop. First, open up the program and open the picture that you want to change. Next, select the rectangular marquee tool from the toolbar on the side. Now, create a selection of what you want to frame. Then, click with the right key and select "inverse". Click again with the right key and choose "layer via copy". Now, click 2 times on the layer to open and the layer style menu will show up. Now put the contour to crea...
Want to become a good Ballroom dancer? Libreros step number five of tango dancing is the ouside swivel - a mans step. Start by facing the center of the room in the close position. Take a forward step on the left foot and a side step swinging your right foot to the side. Put your weight onto the right foot and lean back then take a step back with your left foot in the contra body position. As you are stepping back with the left foot, your body turns to the right, helping you partner "swivel." ...
In this video tutorial, viewers learn how to use the full screen view in Apple's Pages. To enter the full screen view, click on the the Full Screen button on the toolbar or click on View and select Enter Full Screen. Users will only be able to see the document on the screen without the tool bars and desktop. If you hover your cursor over to the left side of the screen, you will be able to see the total number of pages in the document. This video will benefit those viewers who use a Mac comput...
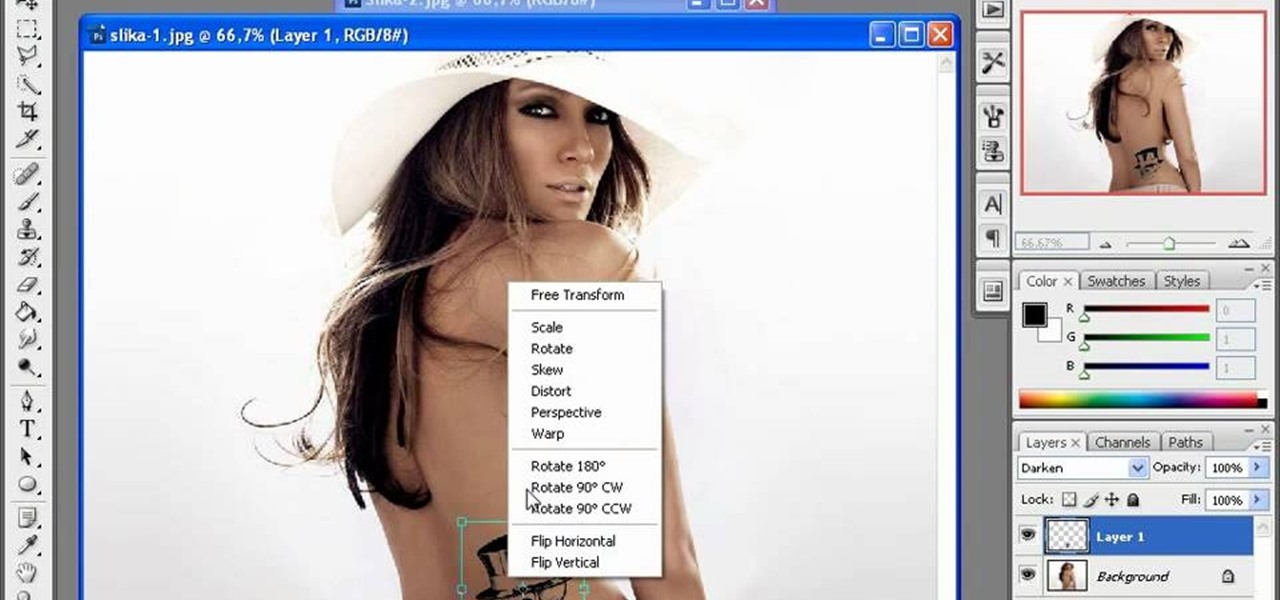
The first thing to do is open up Photoshop. Find a pic of a person and clip art you would like to use. Open those documents. On the side of the toolbar, find the brush tool to adjust the clip art correctly. Make a rectangle inside the clip art. Then hit Ctrl+c to cut the clip art out of the box and paste in the picture of the person. Then you remove the white in the picture by clicking on layers, and darken. When you do that, you are ready to shape the clip art to the body by clicking the box...
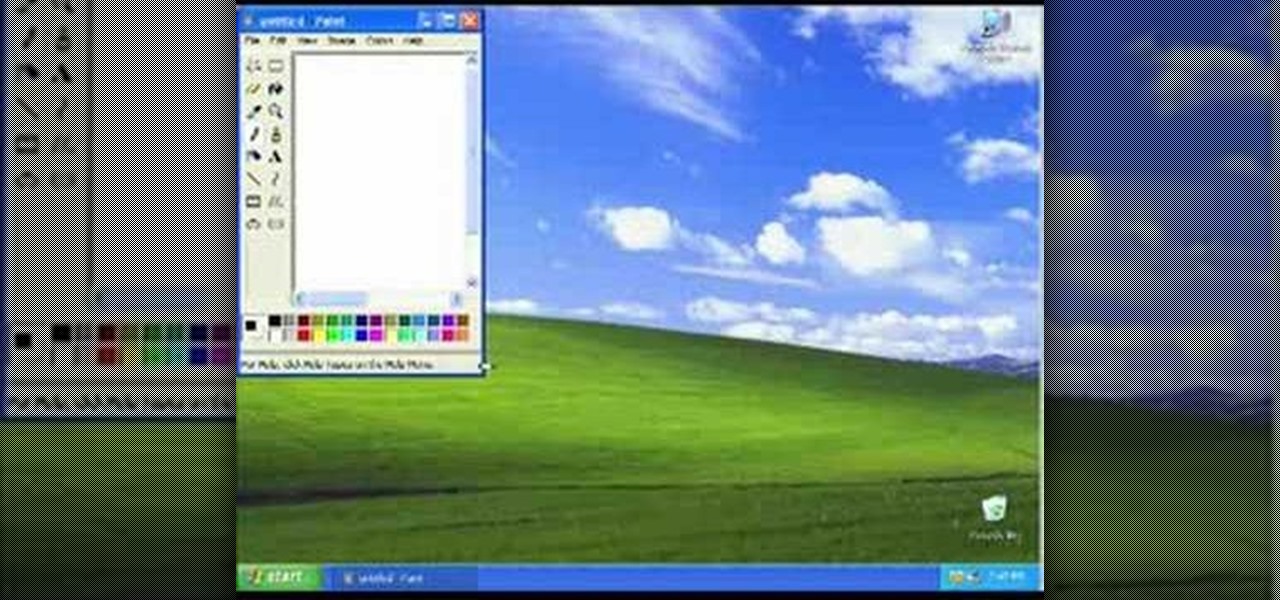
In this video, the instructor shows us how to take a screen shot off of Windows XP. First, you will want to pull up the screen that you want to take a screen shot of. After you have this up, you will hit the "Alt" and "Prnt Scrn" button at the same time. Nothing will show up on your computer, but it will have saved the image. Next, open up the program "Paint" and click "edit" on the top toolbar, then click "paste". The image will then show up on your screen. To save, click "File -> Save As", ...
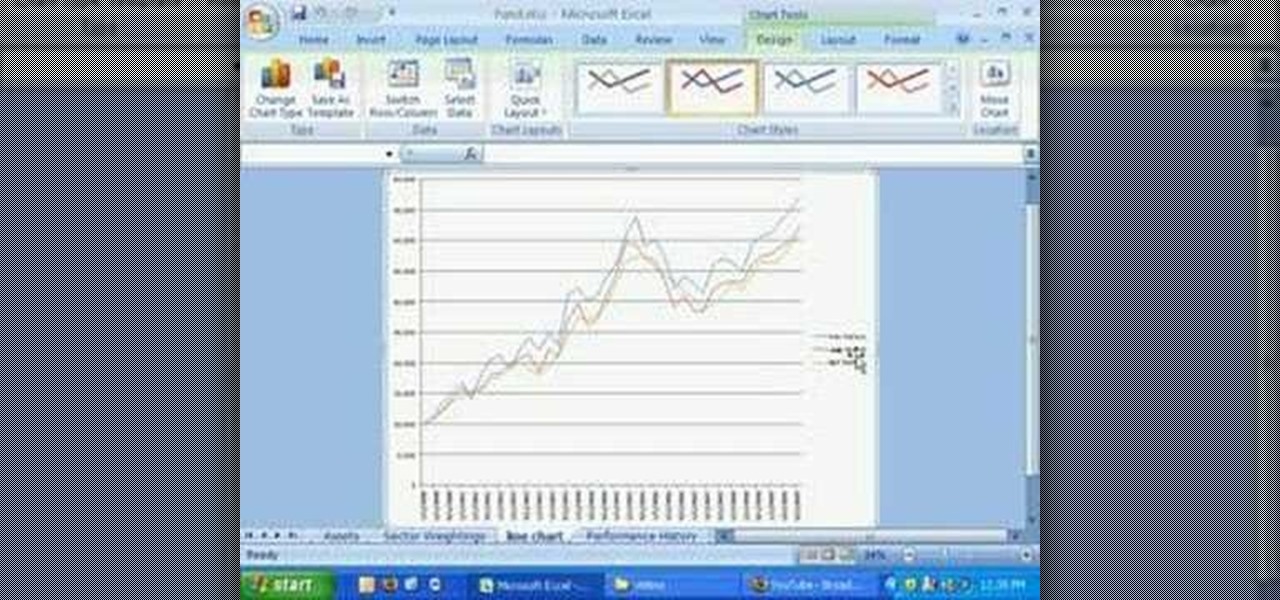
Namuoc demonstrates how to create a line chart in Excel. To create a simple line chart in Excel 2007, first highlight the cells in your worksheet that you would like to include in the chart. Then, select the insert tab on the top of the worksheet toolbar. Next, click on the line option. Select the two dimensional line graph option from the given choices. Move the chart to a new sheet. Label the new sheet in the appropriate field and click the OK button. Your line chart will now be created usi...