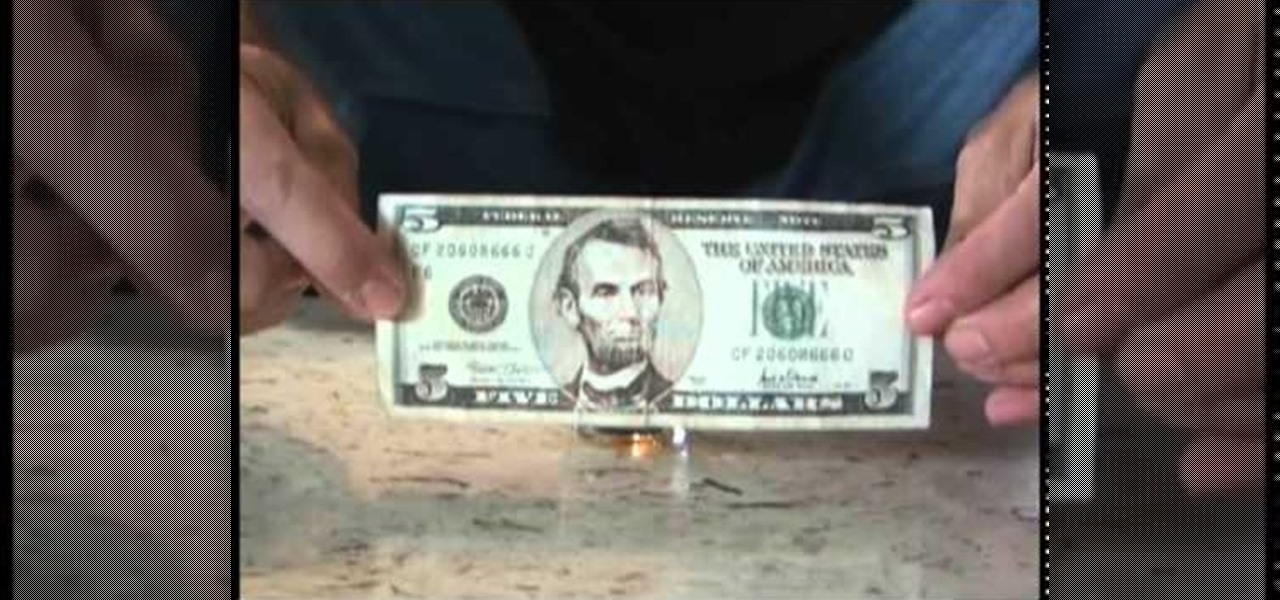
Kipkay shows you how to make 5 bucks, quick and easy, every time! Fill up a shot glass halfway, then bet your friends that you can lift it up with the palm of your hand, using just the palm of your hand, no fingers and no cupping the glass.
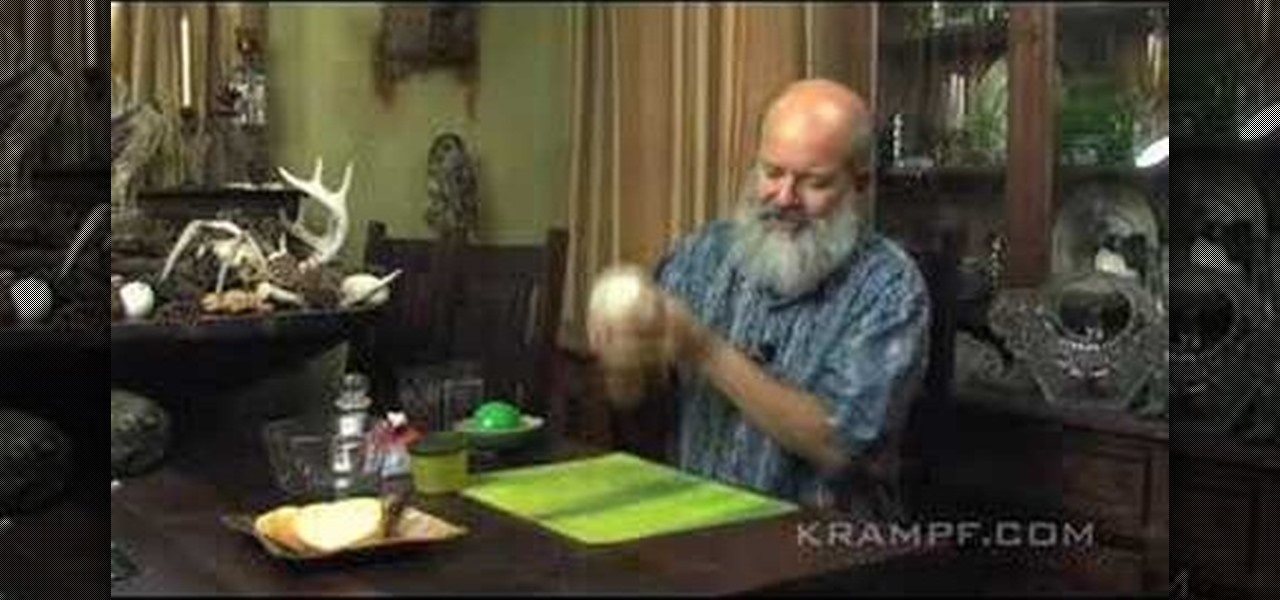
In this tutorial, we learn how to make butter. First, you will need some cream in a carton left out in the room for around 12 hours. After this, pour the cream out into a glass jar and put the lid on tightly. Now you will shake the jar nice and slowly. You want about 1 shake every second. Continue to do this for about 2-3 minutes. At first, you will notice the glass is covered with cream, but every time you shake the bottle, the butter fat will start to stick together into clumps. Continue to...
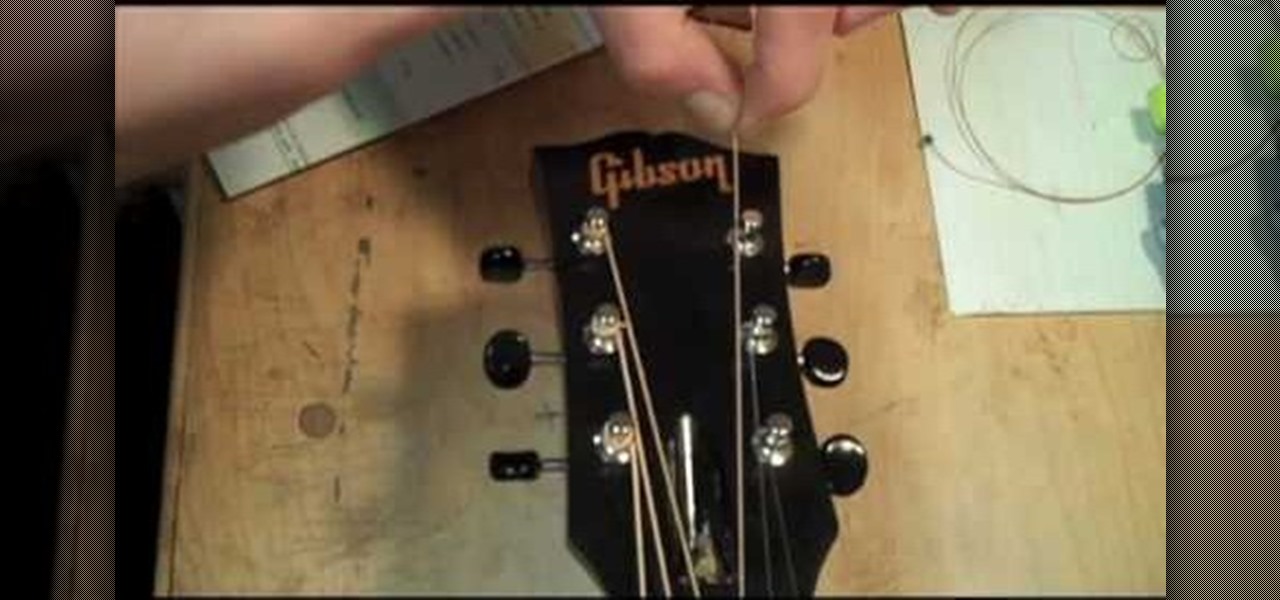
In this tutorial, we learn how to change a string on an acoustic guitar. First, you will put the string in the bridge pin. Make sure the ball from the string is against the bridge plate. If the ball is underneath the bridge pin it will make the string come out easily. After you have the string locked in, pull the string out tightly until it reaches the bottom of the guitar. Pull it to the tuner you want to wind it to, then pull it out a couple of more inches to know how much slack to give it....
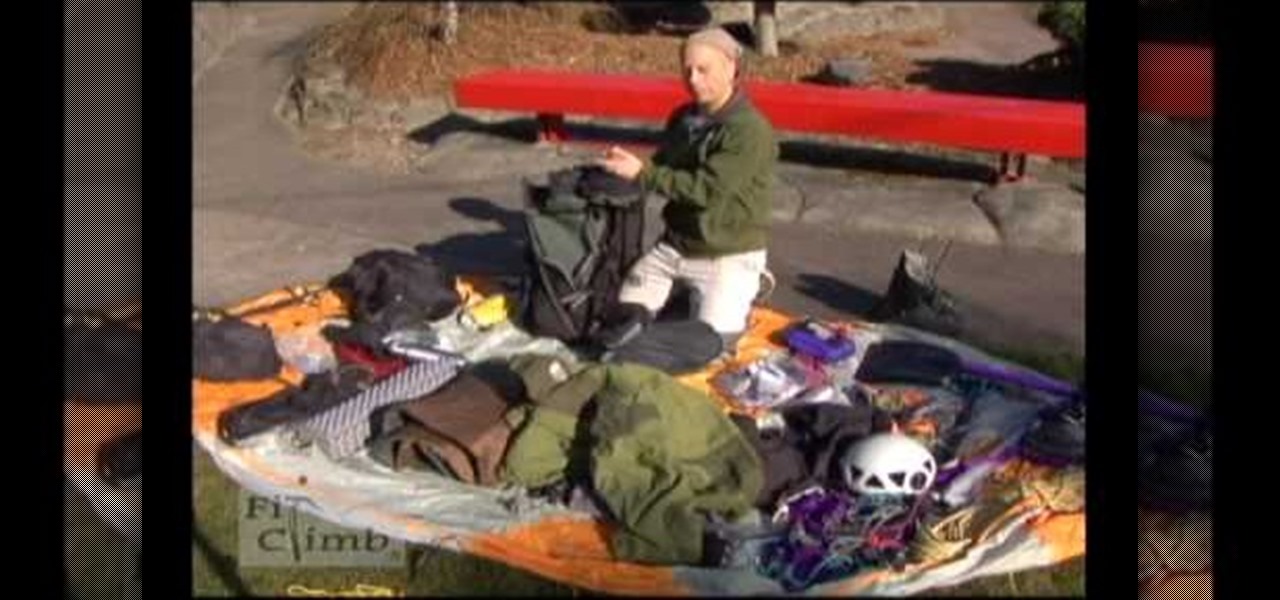
In this tutorial, we learn how to pack for mountaineering and backpacking trips. You will need a large backpack that fits your body, then lay out all of your items in front of you. Place your sleeping bag on the bottom of the backpack first, rolling it up tightly. Next, place climbing gear into the backpack and then fuel for the stove. After this, add rope to the bag, then a first aid kit. Next, add in a space blanket and some other clothing items you may need. Next, take a thermal foam pad a...
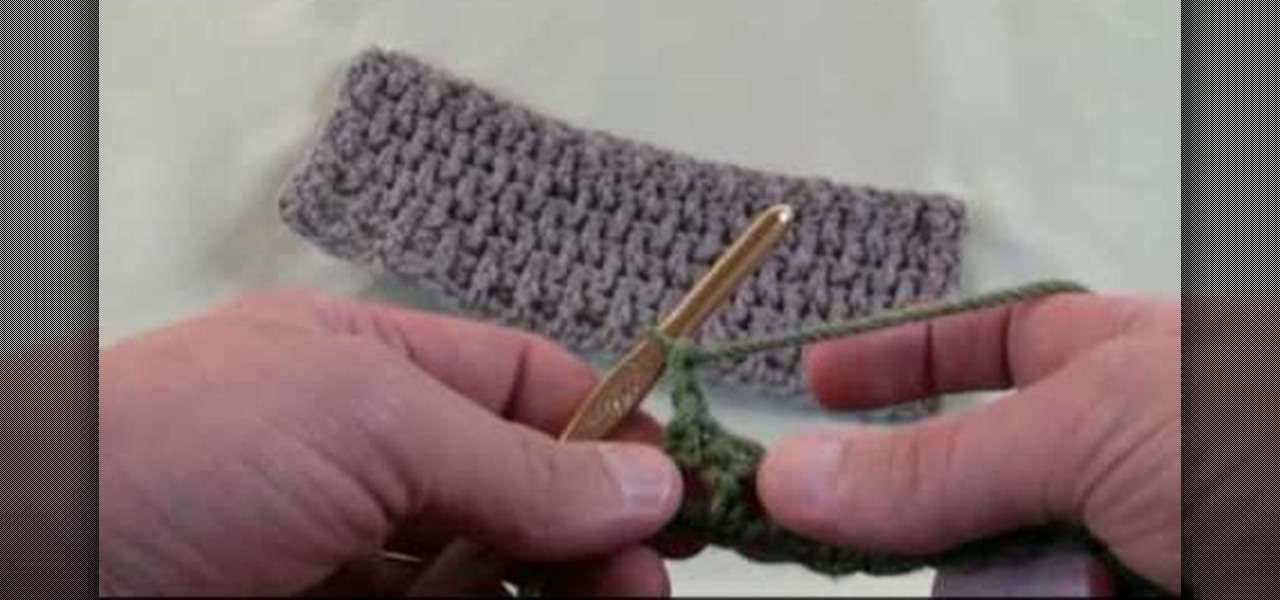
Expand your crocheting repertoire by learning how to crochet a crinkle stitch, which does indeed replicate fabric crinkles. With very hole-y yet tightly woven vertical lines of yarn intersection with horizontal ones, this type of stitch creates excellent warm fabric for scarves and cold weather gear.
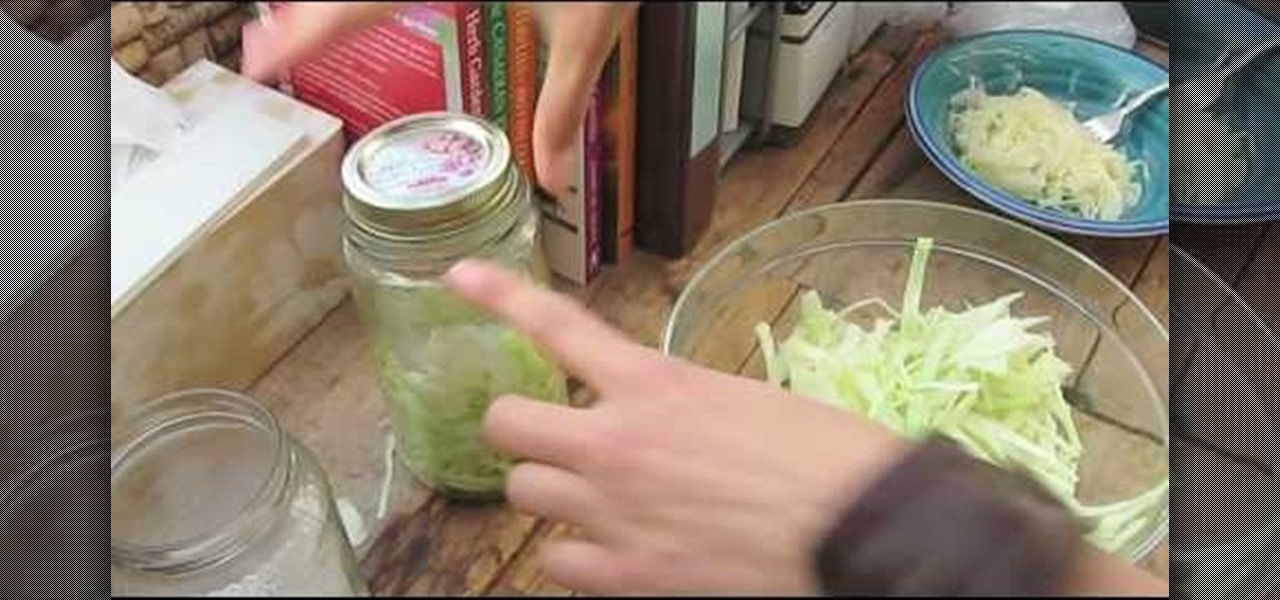
To make your own Krautini (i.e. a Sauerkraut Martini), you will need the following ingredients: fresh cabbage, sea salt, an olive, and vodka.

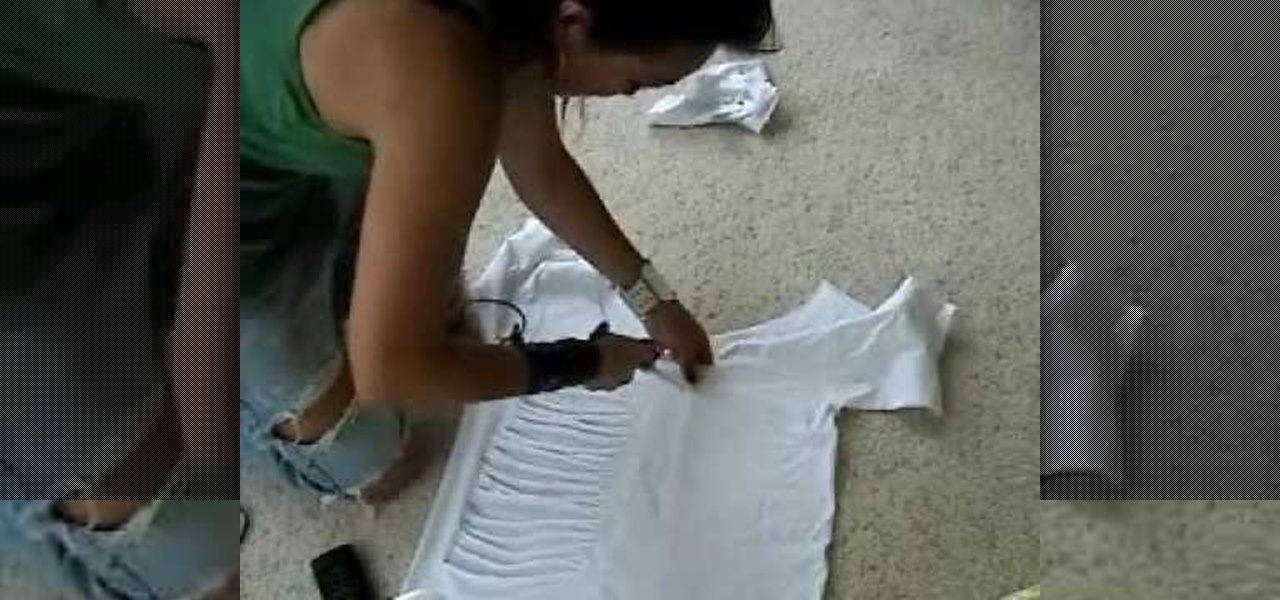
This video is a demonstration of how to cut up a T-shirt, inspired by 80's rock band fashions. Use a regular white T-shirt and start by cutting a deep scoop neck out of it, starting about an inch outside the neckband. Turn the shirt over and fold it in half Snip horizontal lines down half of the shirt all the way down. Then stretch out the thin strips. Cut the other side of the shirt the same way. Cut the sleeves off completely so it's more like a tank top. Wear the shirt over another tank to...
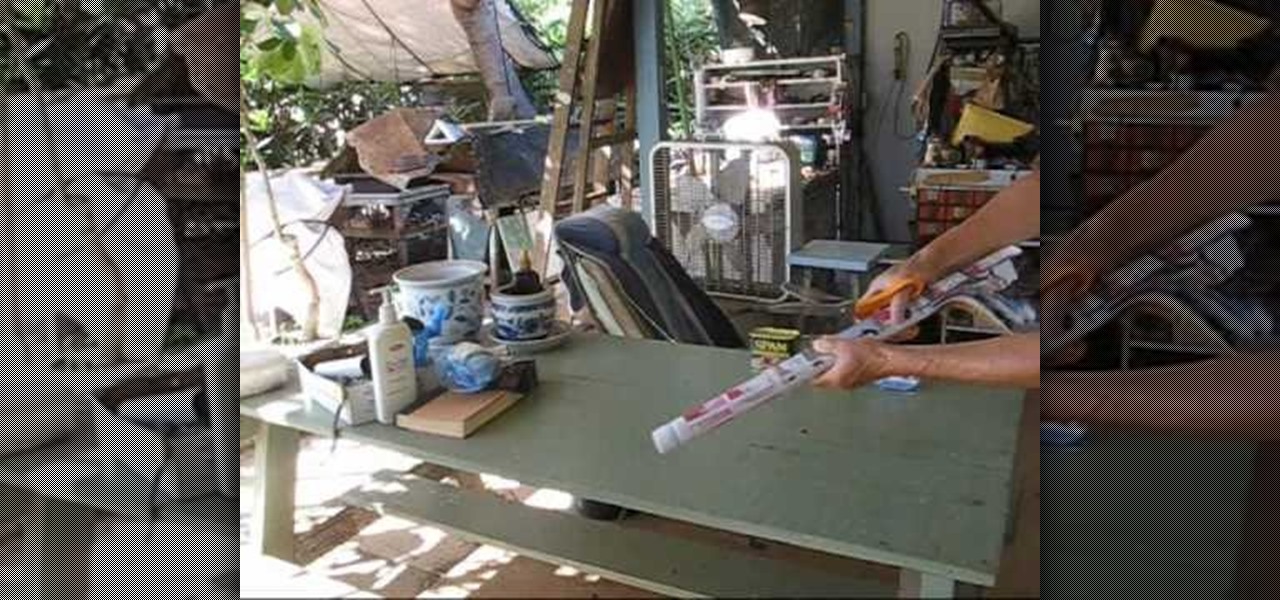
This video demonstrates how to make a christmas tree out of newspaper. The author suggests that you start with 3 full sheets of newspaper and have scissors and scotch tape ready to use. Begin the tree making process by rolling the newspaper tightly and then using the scissors to create multiple cuts on one end of the roll. After doing so the newspaper roll should achieve a frayed look on one end. Pull on the frayed side to elongate the other newspaper that was rolled inside previously and the...
This video shows how to weave paper. This paper can then be used to make crafts such as origami. You may want some supplies: a cutting board, a paper cutter, scotch tape, and square origami paper (6"x6"). Start with two sheets of paper. Cut the paper into thin strips, 1/2" each. Reassemble one of the squares. Carefully align the pieces close together. Place a piece of tape on the top, and tape it to the cutting board. Take a strip of the other color paper, and weave it through every other str...
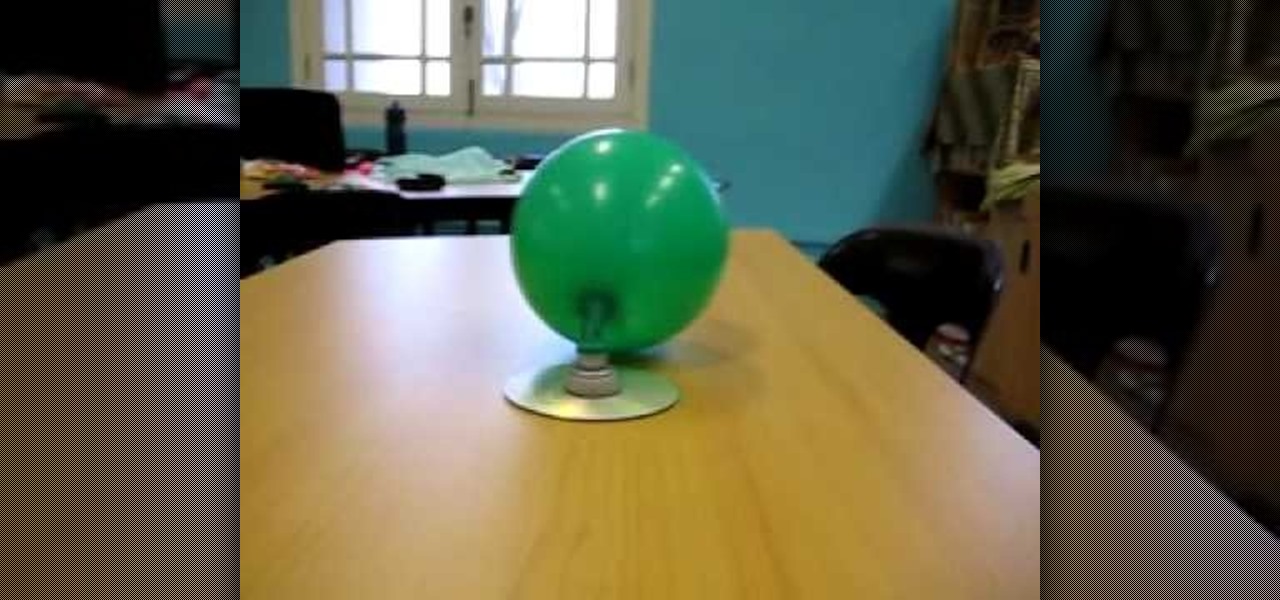
This video illustrate us how to make a hovercraft with common household items. To build one, first of all, collect all of the items required for making it. You need a CD, bottle cap, balloon and super glue. Then start by applying glue to the lower end of the cap and sticking it to the center of the CD and let it dry. After it has dried, blow up the balloon and secure it up on the bottle cap tightly. Now open the bottle cap and let the balloon deflate.
Whether you're new to Adobe Photoshop or a seasoned digital photographer after a general overview of CS5's most vital new features, you're sure to be well served by this official video tutorial from the folks at Adobe TV. New Photoshop CS5 helps you achieve the visual and emotional effects you’re after with re-engineered features for reducing and adding grain, performing post-crop vignetting, and sharpening. CS5 reinvents HDR imaging with Exposure Merge, which makes it easy to preserve the fu...
This video shows the viewer how to make an electromagnet using common items. This is done using a broken microwave, a spool, a cordless drill, a battery and a coat hanger. The microwave transformer is dismantled and the enamel insulated wire is removed. Using the cordless drill the wire is then coiled around the spool. The iron coat hanger should then be cut into small pieces and placed in the middle of the spool. It should be secured tightly. The battery was then connected to the wired coile...
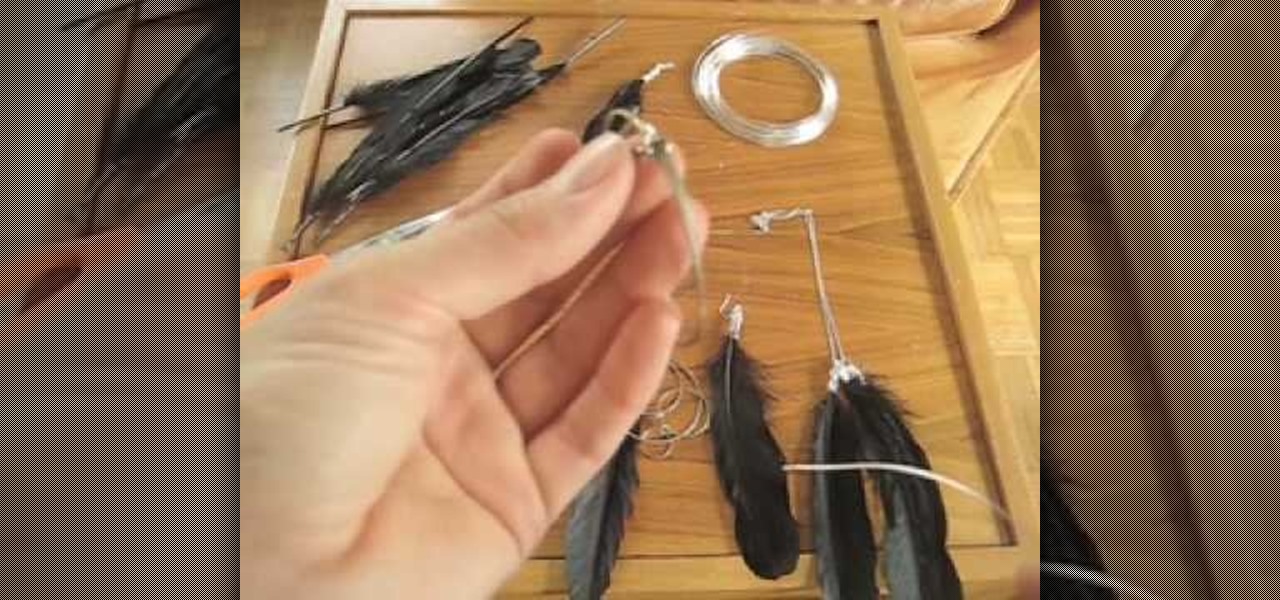
Here is a way you can make your own jewelry for little money and have fun doing it. In this video we are shown how we can add feathers to existing earrings and necklaces. For this project we need some feathers, a pair of earrings, some silver plated copper wire, needle nose pliers, and scissors. The earrings used in the video are already made circle earrings. The first step is cut about a circle's length of copper wire and grab a feather. Wrap the wire nice and tightly around the quill of the...
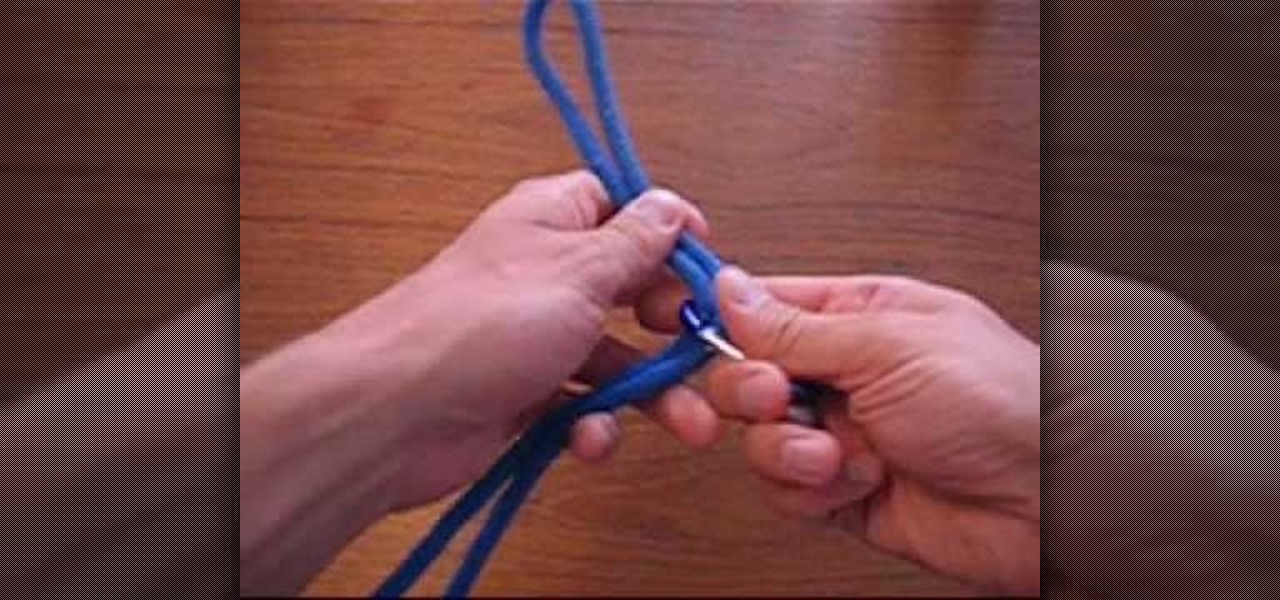
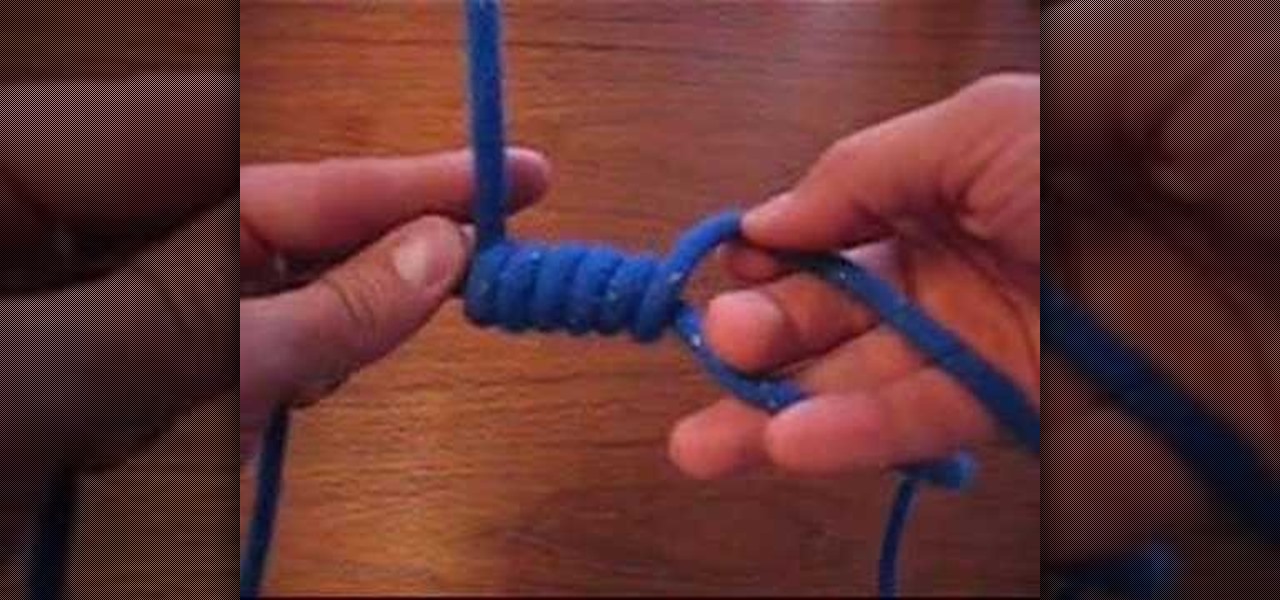
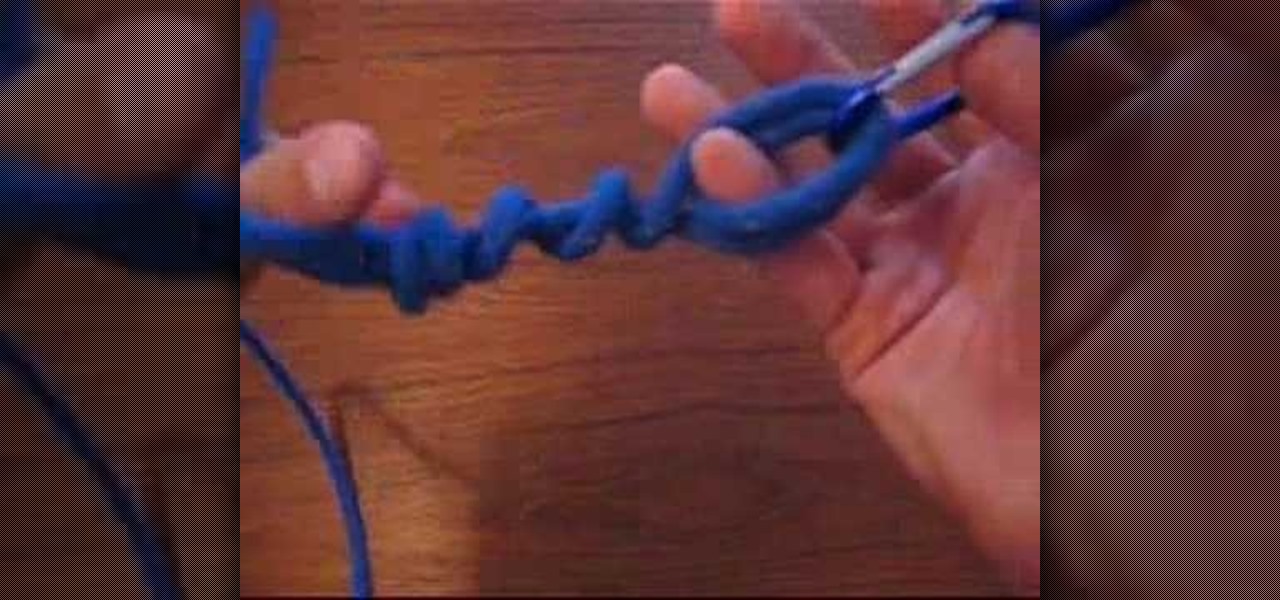
He explains how to tie a "blood knot" and what the blood knot is used for, which is joining two separated rope/string ends. He demonstrates the knot, which starts by taking the two lines and lining them up one on top of the other, so they are parallel to each other. Then, start winding one end around the other, at least 3 or 4 times. Do the same with the other loose end as well. Then, place the first end through the wound part of the two ropes where you started. You pass the other end through...
If you need to paint the screw heads you can do it without making a mess. If you try to hold them in your fingers and paint them you will get paint all over your fingers. Now you don't have to do that. Take a plastic shopping bag and cut the bottom off of it. Take that bottom piece of bag and stretch it over a can like a drum. Tape the bag tightly to the can so that the bag is stretched tight. Take the screws and screw them into the plastic on top of the can so that they are standing up. Now ...
One of the best features of Apple's Final Cut Studio is the disc designing feature DVD Studio Pro. With its ability to create high-end DVD masters, you can easily make discs for your indie film, or maybe even a professional movie. DVD Studio Pro is tightly integrated with Final Cut Pro and Motion, rendering the projects into DVD format without encoding to intermediary formats.
Use 12 inches of fishing line and a fishing hook. Make a large loop, folding the fishing line in half and put the fishing hook through it about a quarter of the way down the fishing line. Take the loop under the hook, draw it through the hole that was created. Pull to tighten. Next, take the small, loose end of the loop and place it around the fish hook. Pull the fishing hook through. Pull the end of the fishing line tightly so that the knot is firm and secure. Watch the video for more inform...
In this video, we learn how to install dry acoustic flooring with Fermacell. To start, you will level the floor and apply compound if you need. Next, you will lay the Fermacell around the room on top of the leveling compound. Push the flooring tightly together so there are no spaces in between them. You may need to cut the flooring to make sure it's the correct shape for the wall. After this, apply flooring adhesive to the seams to make sure they are secure as they are laid down. After this, ...
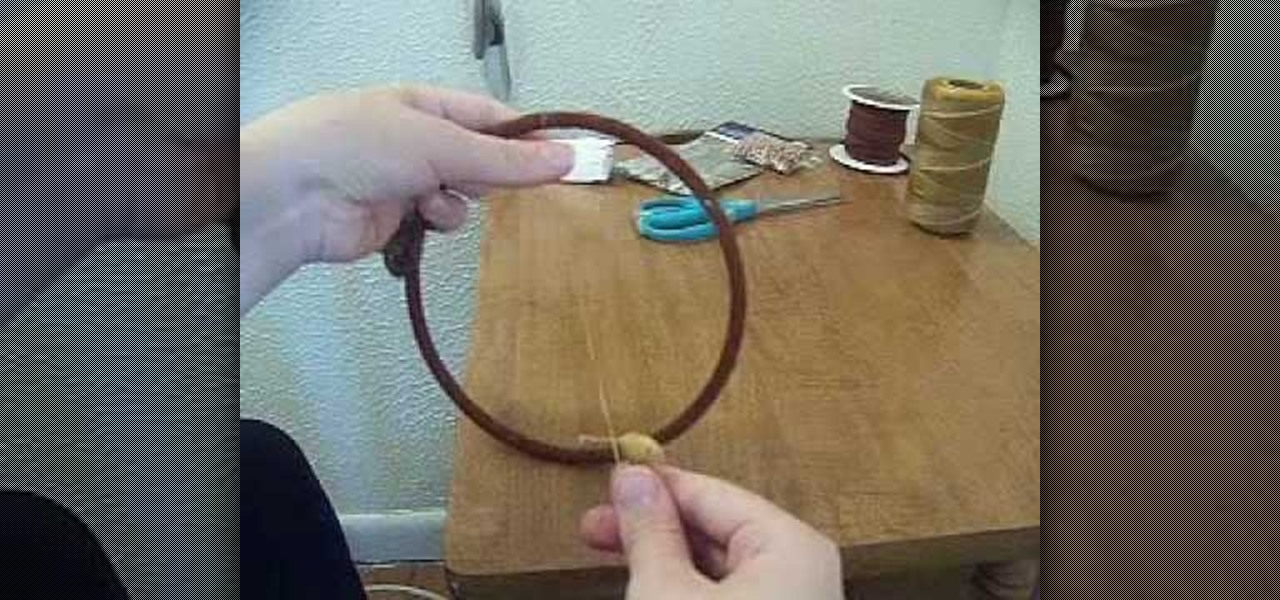
In this tutorial, we learn how to make a dream catcher. You will need: 1 metal ring, leather, sinew, decorations, scissors, and a clothes pin. First, wrap the leather tightly around the ring. Clip the clothes pin on the top so you don't have to hold it as you go around the circle. After this, remove the clothes pin and cut the leather off. Then, tie it at the bottom with a double knot. Next, measure the sinew to 3 yards, then pull it apart. You will be left with very thin strings. use a folde...
In this video, we learn the basics of Irish dance. First, you need to tie your shoes onto you tightly, then make a cross and go underneath your foot with the strings. You will see a lot of pointing with the toes when you are dancing, and you should never be able to see in between the legs. Your arms should be right by your side and not flared out. When you lift, bring the other right in front of it immediately. Another popular movement is to do a skip with a hop and a jump in between. After y...
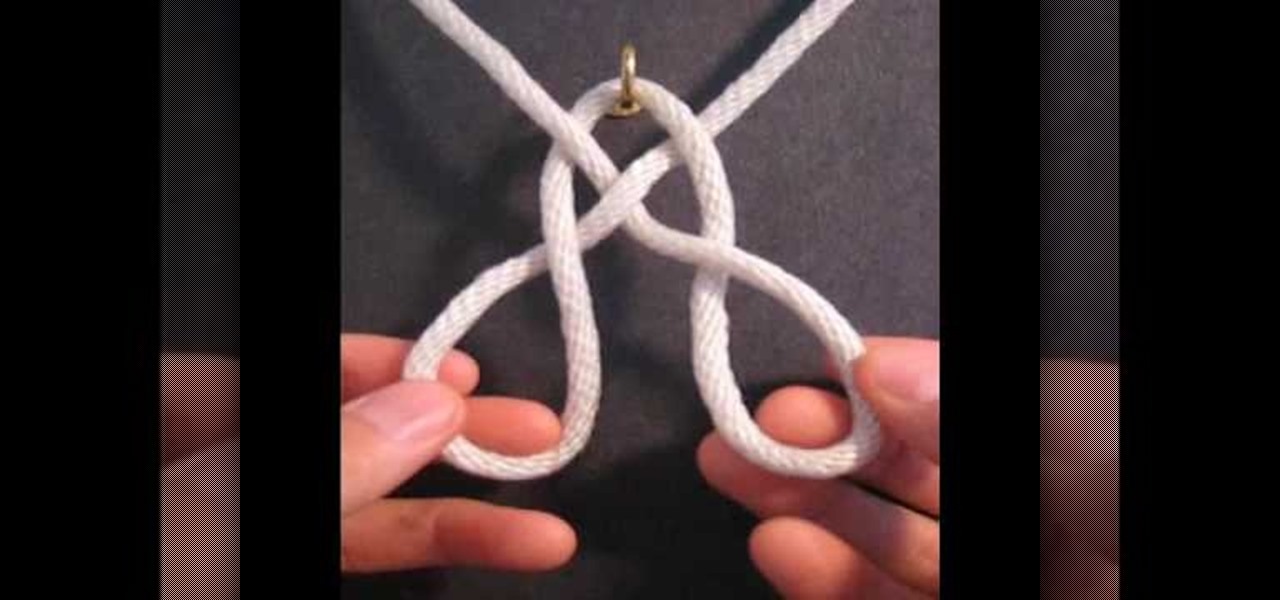
In this tutorial, we learn how to tie the Djinn bottle decorative knot. First, make a loop on the left side of the string, then bring the other side around it and pull the top up. After this, twist the two strings underneath the bottom of the knot and push the right string through the side of it. Then, push the left string into the left side of the knot through the back. Pull on the top, then twist it into a loop and push the left string through the back, making a loop, then pushing the right...
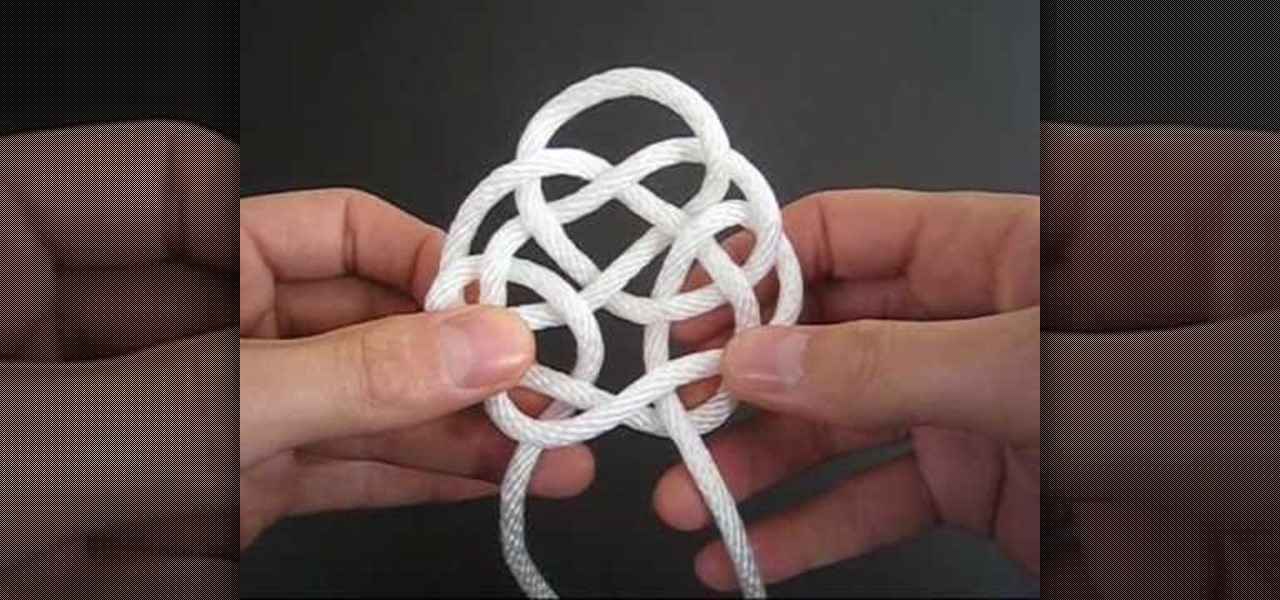
In this tutorial, we learn how to tie the rising sun decorative knot. First, loop your string on the left side, then pull the right side over the top. Now, bring the bottom of the right side over and place the end into the first loop going over the other string. Next, remove the string from the last loop it was in, then bring the right over to the right loop and push through to the bottom. Next, bring the right string over to the left side and thread through the left loop closest to it. Next,...
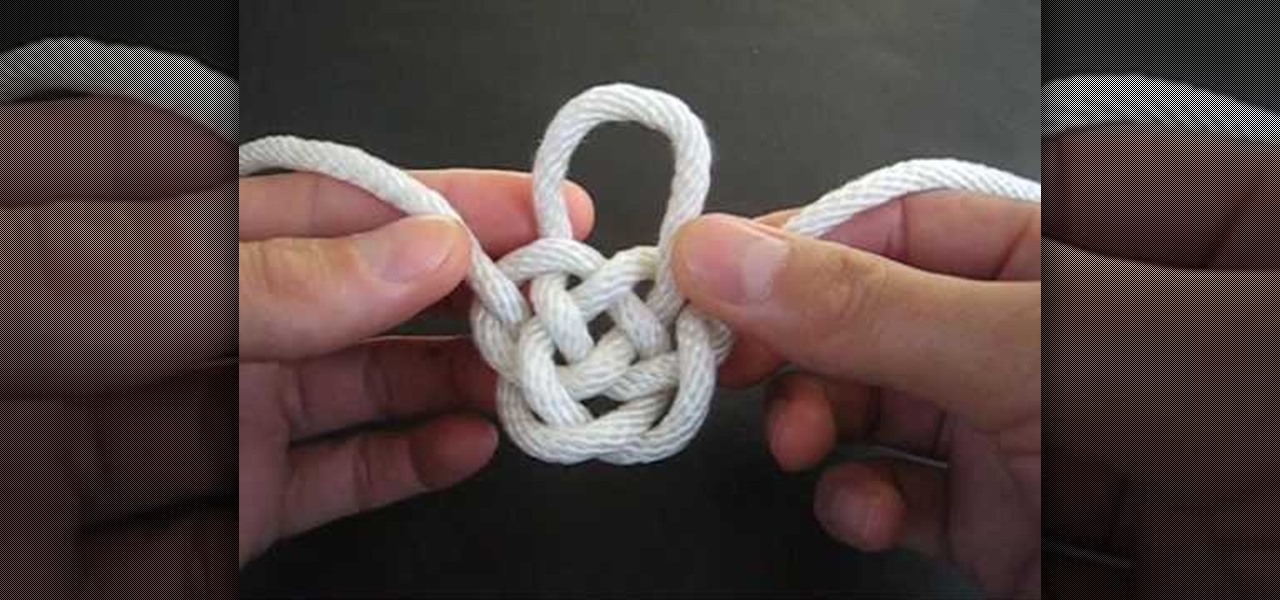
In this tutorial, we learn how to tie the Basket Weave decorative knot. First, hook your string to a hook, then tie a loop that is wide. After this, bring the strings to the top and make a heart shape. Now, twist the two loops on the side and twist them around each other. Now, bring the right string through the right loop and up through the left. Do this for the left string except using the opposite loops. When you are finished, pull on this tightly and release the string from the hook. Make ...
In this tutorial, we learn how to properly tape a hockey stick. Start at the base of the stick and start to tape down the blade. Try not to have too much tape overlap. Keep taping until you reach the end of the blade, taping over the toe if you prefer. If you have a rounded toe, you will have to use scissors to cut the tape, then fold it tightly at the end so no tape is hanging loose. Now, flatten the tape out with something hard and flat. To finish, store this in a cool and dry place and enj...
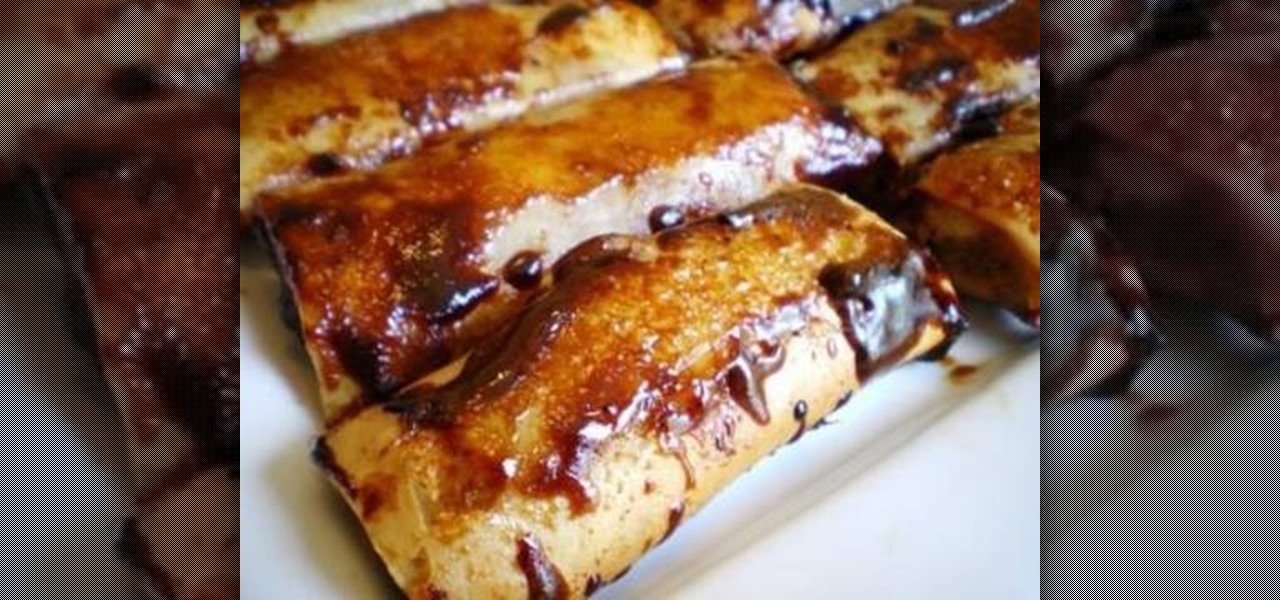
In this tutorial, we learn how to make Filipino turon. Ingredients you will need include: A bag of whole steamed Saba bananas, spring roll pastry, and brown sugar. First, take your bananas and cover them completely with brown sugar and place onto a plate. After this, roll the banana into the spring roll tightly so nothing falls out. Place water on the outer edge of the spring roll before finishing, to make it stick together. Repeat this step for all of the bananas, then fry them in a skillet ...
Expand your crocheting repertoire by learning how to crochet a crinkle stitch, which does indeed replicate fabric crinkles. With very hole-y yet tightly woven vertical lines of yarn intersection with horizontal ones, this type of stitch creates excellent warm fabric for scarves and cold weather gear.
Learn to Use the Lathe Editor for lathe-machined objects in Swift 3D v6. A lathe machine operates by spinning an object really fast while it is held tightly at both ends. The lathe operator uses cutting tools and coolants on the side to shape the object. Whether you're new to Electric Rain's popular Flash-oriented 3D modeler or just looking to better acquaint yourself with the program, you're sure to find much of value from this free video software tutorial. For more information, including a ...
This video illustrate us how to hit the baseball the right way. Here are the following steps: Step 1: First warm up your body as hitting the baseball requires a lot of your energy.
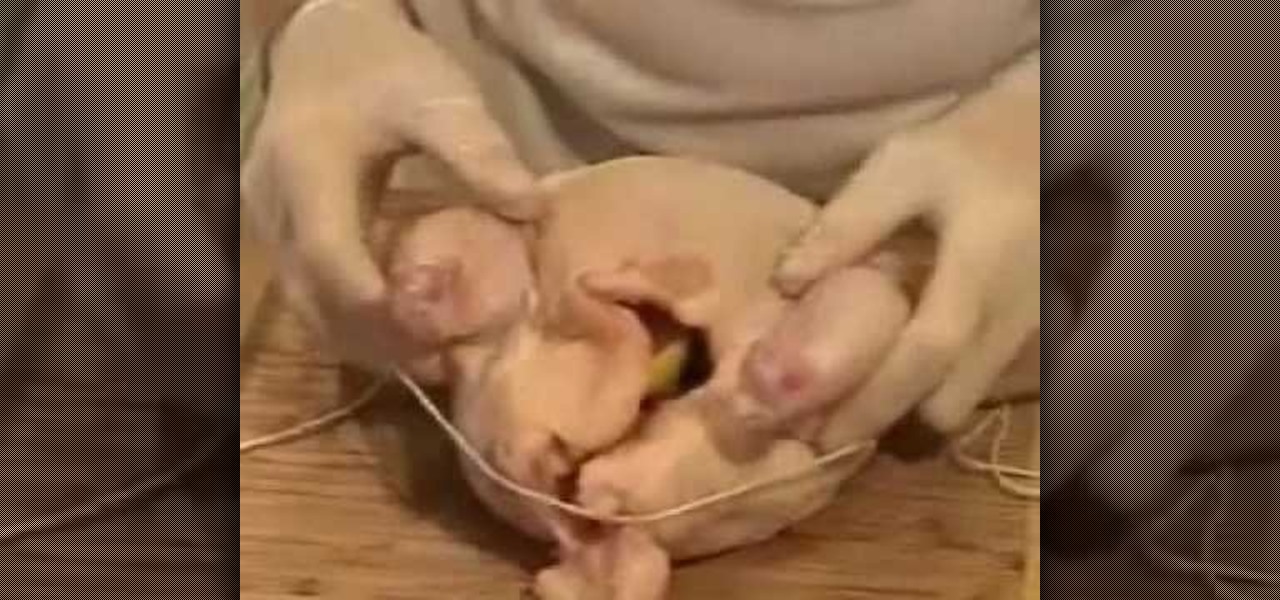
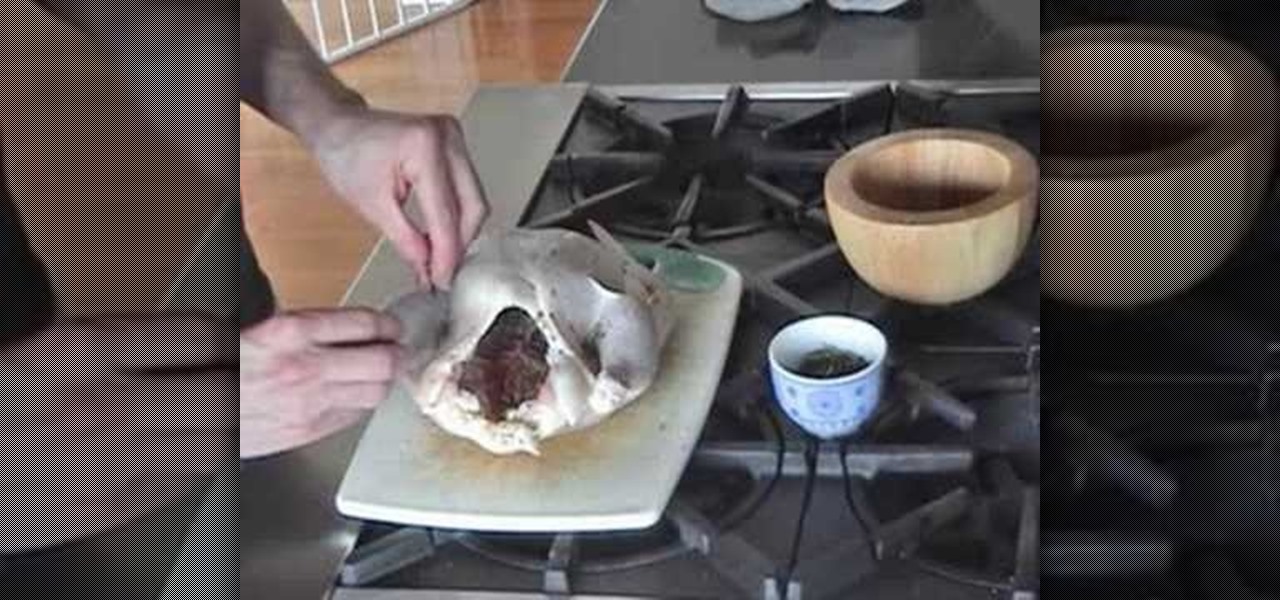
This video explains how to truss chicken. First, it is explained that trussing is the process of tying a chicken such that it is better suited for cooking. One benefit is that trussing keeps the tips of the chicken's wings from burning during the cooking process. Another benefit that is explained is that trussing a chicken allows you to stuff the cavity of the chicken with something like onion or lemon while the chicken cooks. A figure eight pattern is made around the end of the drumsticks wi...
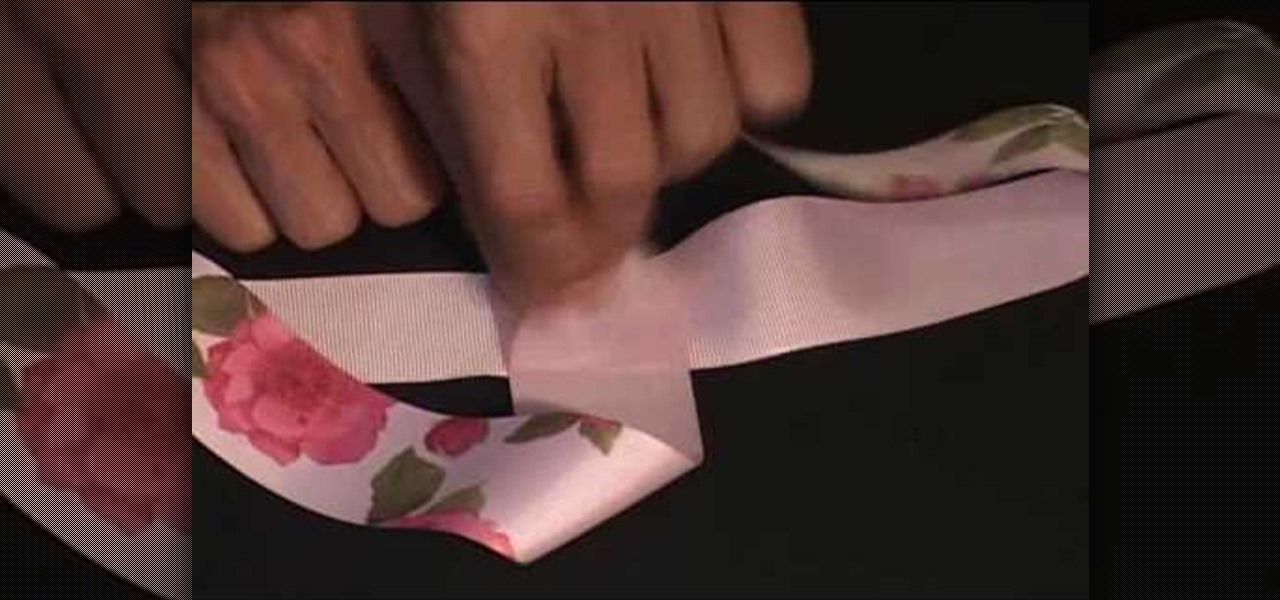
get a long piece of ribbon, put the ends together and make a crease at wear the ribbon folds, that'll be your center point. Now get one end of the ribbon, and without it flipping over, bring the end to the center of the ribbon and lay it perpendicular to the direction of the ribbon. Also bring the other end of the ribbon to the center of the ribbon but from the other direction. Hold the ribbon together using a gator clip. Obtain a piece of string or plastic strip, tie the folded ribbon tightl...
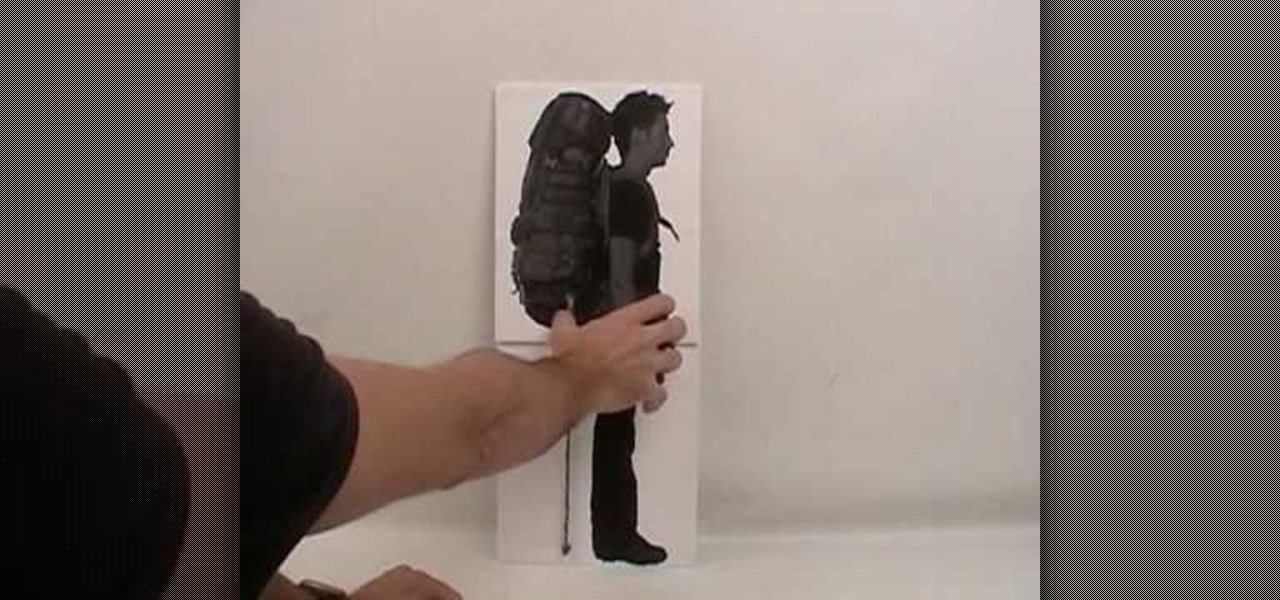
This video illustrate us how to wear and distribute the load of your hiking backpack. Here are the following steps:
This video by Matt Wright will teach you the easy way on how to truss and roast a chicken. Matt likes his roast chicken with a lot of pepper and salt on the outside. He seasons the insides of the chicken with a generous helping of fresh chopped rosemary, coarsely ground sea salt and freshly ground black pepper. Then the joints of the chicken are rubbed with the seasoning. The chicken is trussed up by bending the wings backwards on the body and tying a string across the breast and over the win...
In order to prepare Cappuccino with your home espresso machine, you will need the following: milk, coffee, an espresso machine. Fill steamed milk container 2/3 full of milk. Submerge the milk underneath the spinner, before you turn it on. Allow it to steam the milk, until it is warm and frothy. Keep an eye on it, judging the consistency for your self. Remove, when the milk is warm and frothy. Turn the machine off, before you remove the cup. Clean your wand.
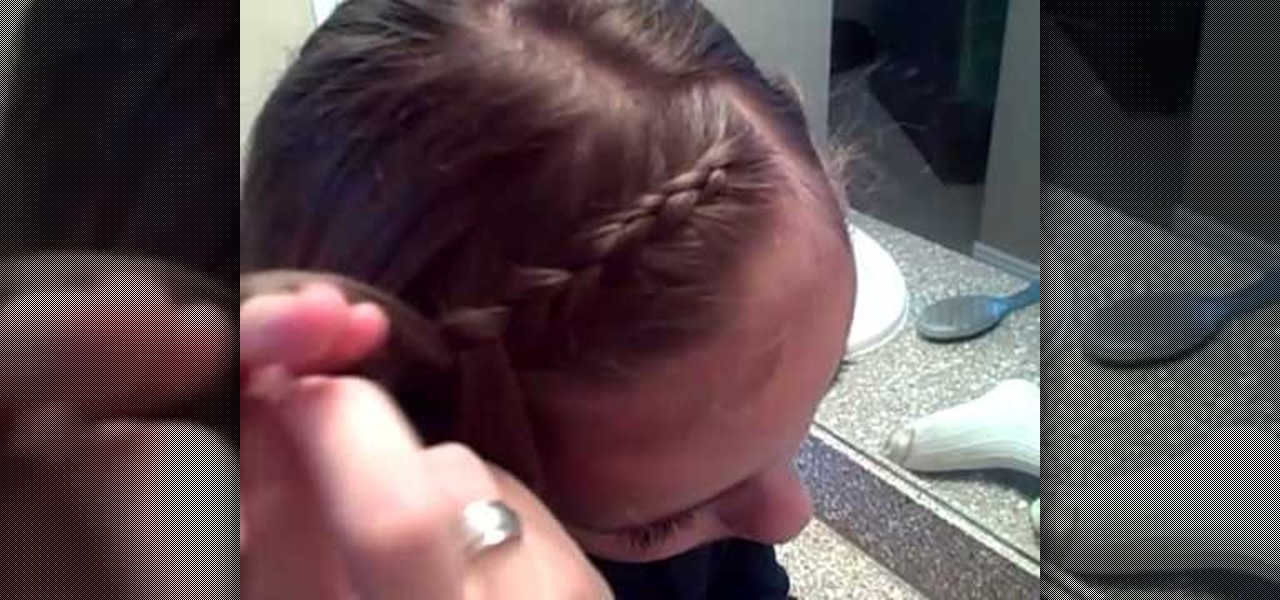
This video shows how to make an inside-out French braid across the front of the head. First divide the hair into three pieces like a normal braid at the very front off to one side. Instead of braiding the normal way, make the middle piece go over the top alternately on the left and right. Keep picking up more hair and adding it in, like you would do for a normal French braid. Continue braiding across the top front of the hair. The braids can be done tightly or loosely however you like, and th...
This video demonstrates how to devein shrimp. In order to devein shrimp, you will need the following, raw shrimp and a knife. The first thing you will need to do is remove the head of the shrimp. Remove the head by placing one hand on the head and the other hand on the body. Grasp tightly. Twists hands in opposite directions. Discard the head.
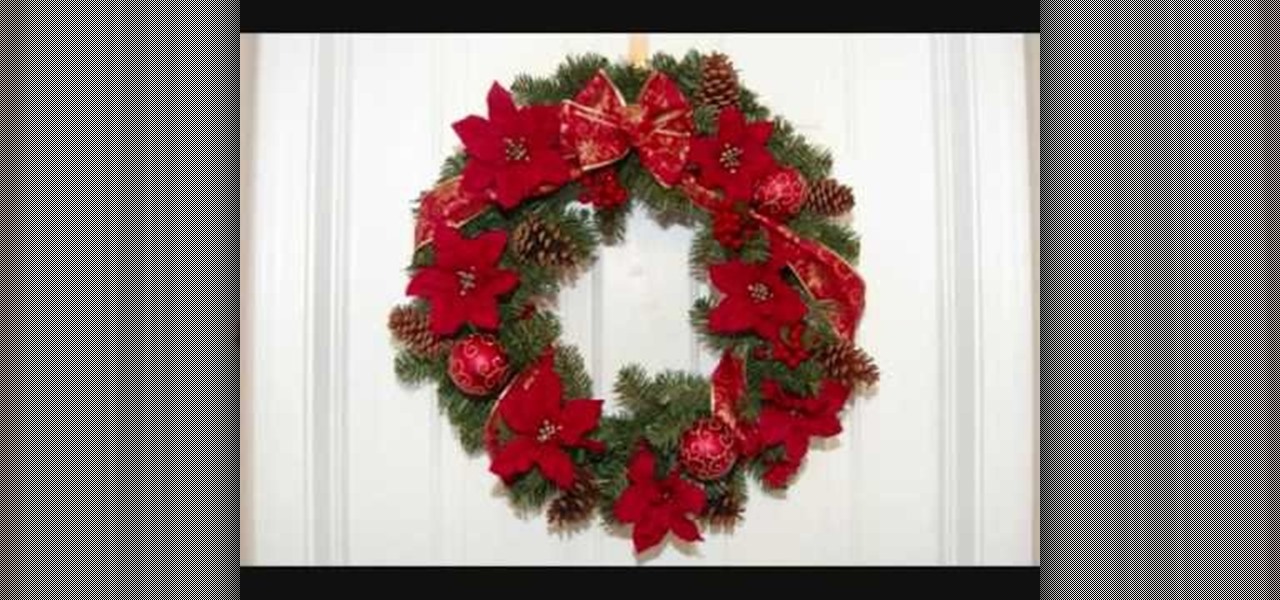
To make a Christmas wreath with poinsettias, by using synthetic materials you will need a Christmas wreath, pine cones, ribbon, berries, poinsettias, and any other picks you may want to use. You can purchase these items at any craft store. First, shape wreath, make bow out of Christmas ribbon (or pre-purchase bow), and attach on wreath. Next, wrap excess ribbon around Christmas wreath and align evenly poinsettias around wreath. Then, wrap around wire from the ornaments, pine cones, berries, a...
This video shows a demonstration of how to machine sew the binding of the quilt, especially the tricky corners. She starts with the binding already sewn onto the front of the quilt and points out how she made the corner like a little pocket. As she sews along the side and approaches the corner, she folds up the binding on the edge that's past the corner and pins it, so it keeps the corner in shape. Then she folds that entire edge up all the way to the corner, holds the corner down tightly wit...
This video teaches you how to tie a blood knot which is used to tie two lines together in a very strong knot. Fly fisherman use this knot for making their own fly leaders. Wrap the right line around the left line five times. Take the end of the right line and put it in between the left wrapped line and the back of the right line. Wrap the left line around the right line five times, repeating the earlier procedure. Make sure you bring the line up through the hole that is created in front of th...
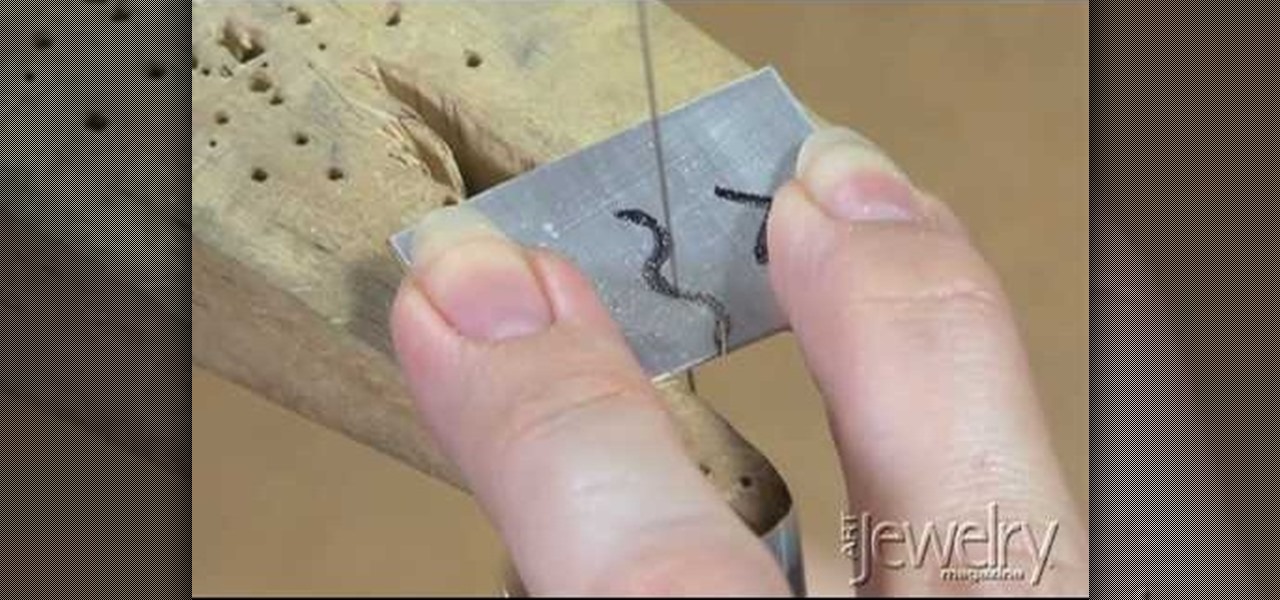
This video tutorial is about basic sawing techniques. Before practicing it you need to wear safety goggles for protecting your eyes. First of all, make a practice sheet. Draw three lines in a metal piece. One line is straight, one is curve and another is zigzag. Lubricate the saw blade and start sawing. Hold the saw straight and move forward. Blow the dusts away. For making curve don't move the saw, rotate the metal piece to cut it. Hold the metal piece tightly when you sawing it. Addie kid h...
The Trilene knot is a multi-purpose knot that can be used in fishing to attach hooks, swivels and lures. This is a great knot because it resists slips and failures.