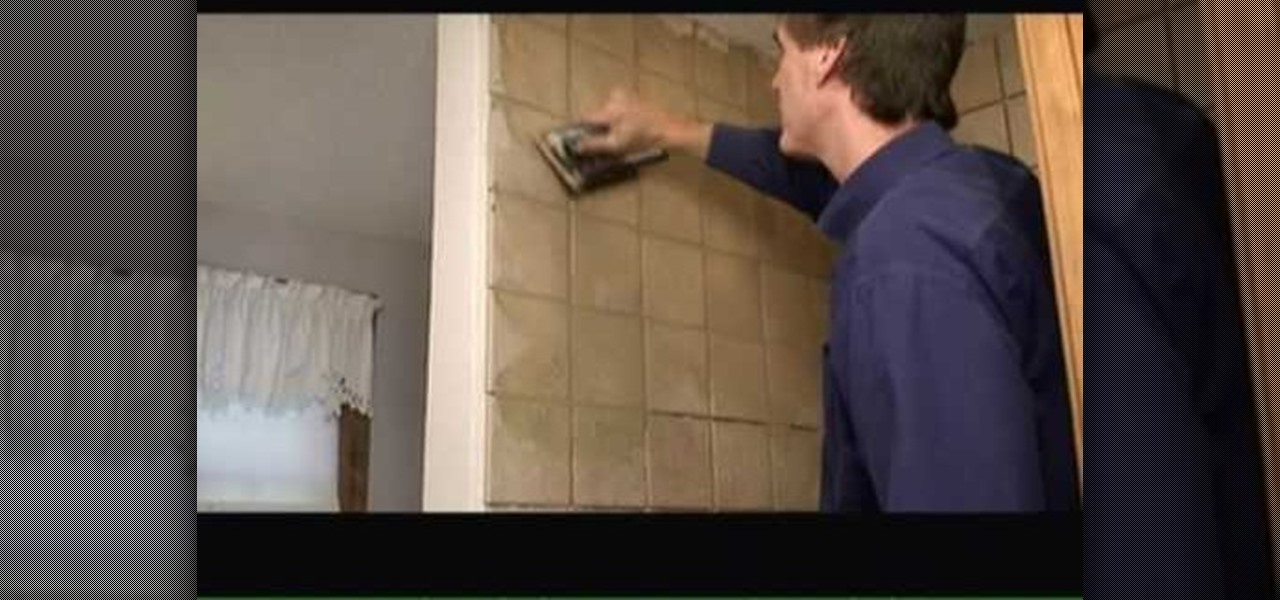
To tile with large format and natural stone tiles onto walls you must first make sure the walls are flat, clean, dry, and free of any dust, dirt, oil, grease, and any other loose material. Ensure that surfaces are suitable and prepared as advised. Then use the Dunlop Universal Bonding Agent where you will be applying the tile. For gypsum plaster and gypsum plasterboard, apply two coats of Dunlop Universal Bonding Agent, diluted with one part bonding agent, two parts water. Then allow primer t...

Creating mosaic tile art with broken or cut tiles can be as simple or complicated as an artist chooses. Learn how to make broken tile mosaics in this free art video.

This video is showing you how to hide or show tiles on your homepage of your HP TouchSmart. You can look at all your available tiles on your homepage by tapping on the "personalize" button. The tiles that are dimmed means that it is hidden, and the tiles that are bright mean that it is showing. To hide a tile, just tap on it and it will go dim. To make a hidden tile shown, just touch it and it will turn bright. When you are finished choosing which tiles to show and which tiles to hide, click ...
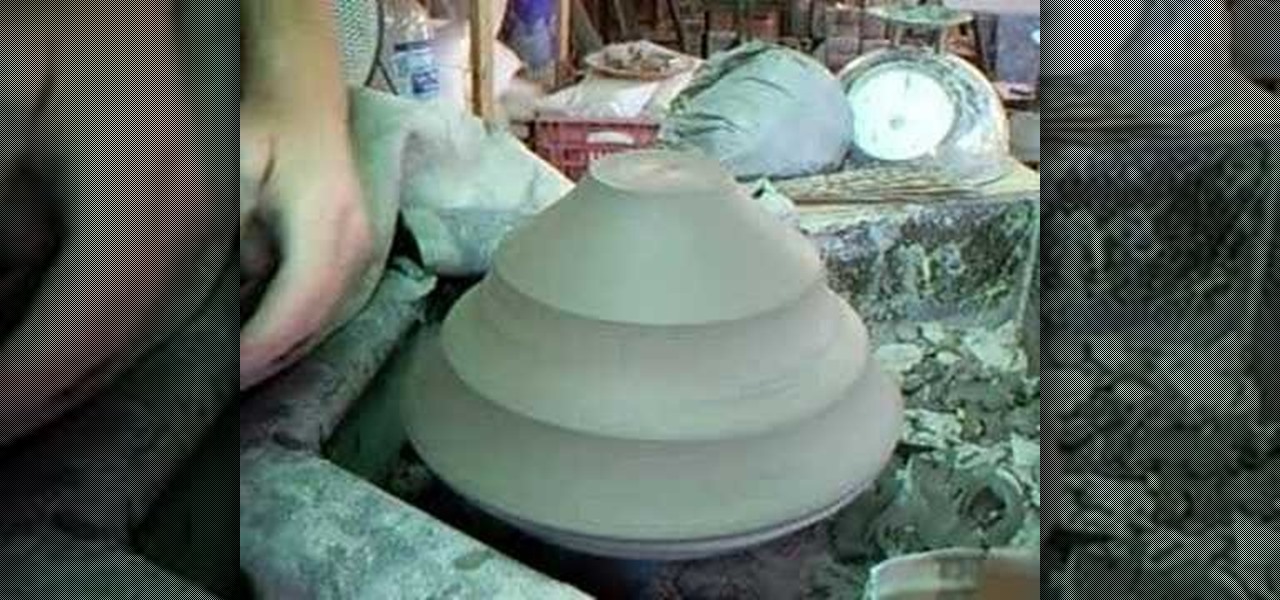
Watch this instructional ceramics video to learn how to trim a large tiered bowl with Simon Leach. With a thin bowl, one needs to be careful when balancing the upside-down bowl on the bat. Leach trims each individual tier with a large trimming tool. The large and possibly wobbly ceramic bowl can become once again even and graceful with some adventurous trimming. As we can see from the trimming process, when throwing a tiered bowl, it helps to leave some extra bulk.
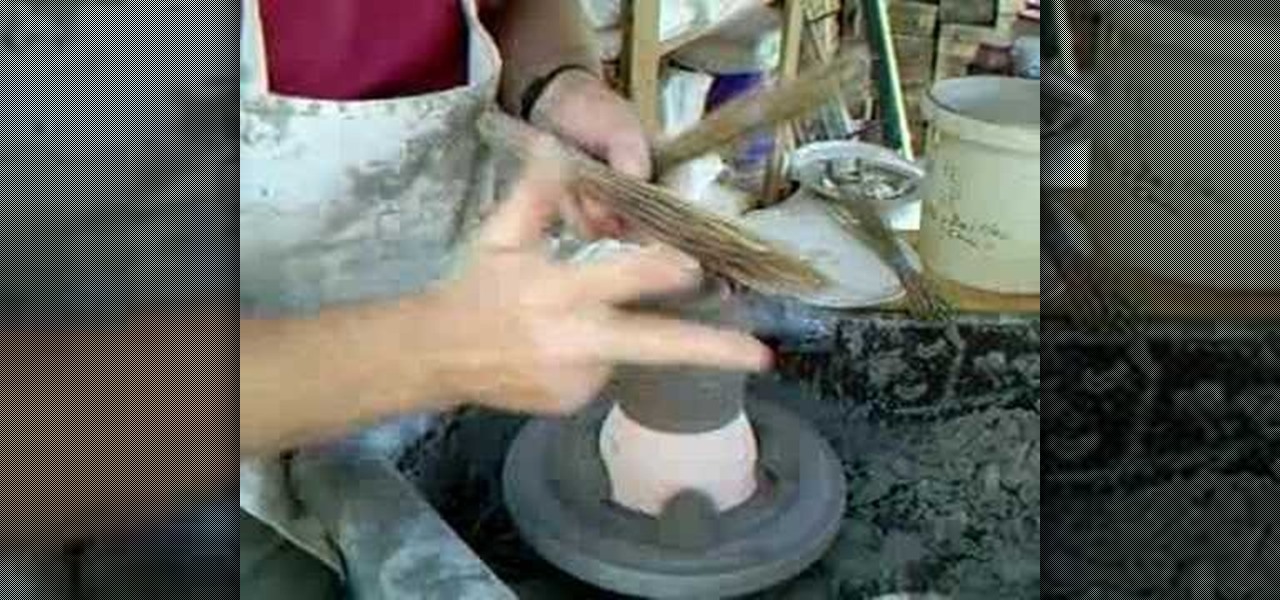
Watch this instructional video with ceramics expert Simon Leach to learn how to trim and glaze Hakeme tea bowls. Leach uses a groggy, toothy clay which contains high iron content. He then adds a white clay slip with Hakeme grass brushes, which provides a thin layer of natural white clay texture, using a scratching technique. The white slip should be applied when the clay is still quite soft. The striking effect of Hakeme ceramics becomes more apparent as the clay dries.

TouchSmart demonstrates how to edit or delete tiles on your HP TouchSmart homepage. Editing and deleting tiles is a useful way to keep your homepage up to date. To edit a tile, first tap the personalize button at the bottom of the screen. Then, tap the pencil icon next to the shortcut that you would like to change. Edit the information for the tile as desired. Tap the okay button when you are finished editing your tiles. To delete files, tape the pencil icon next to the tile that you would li...

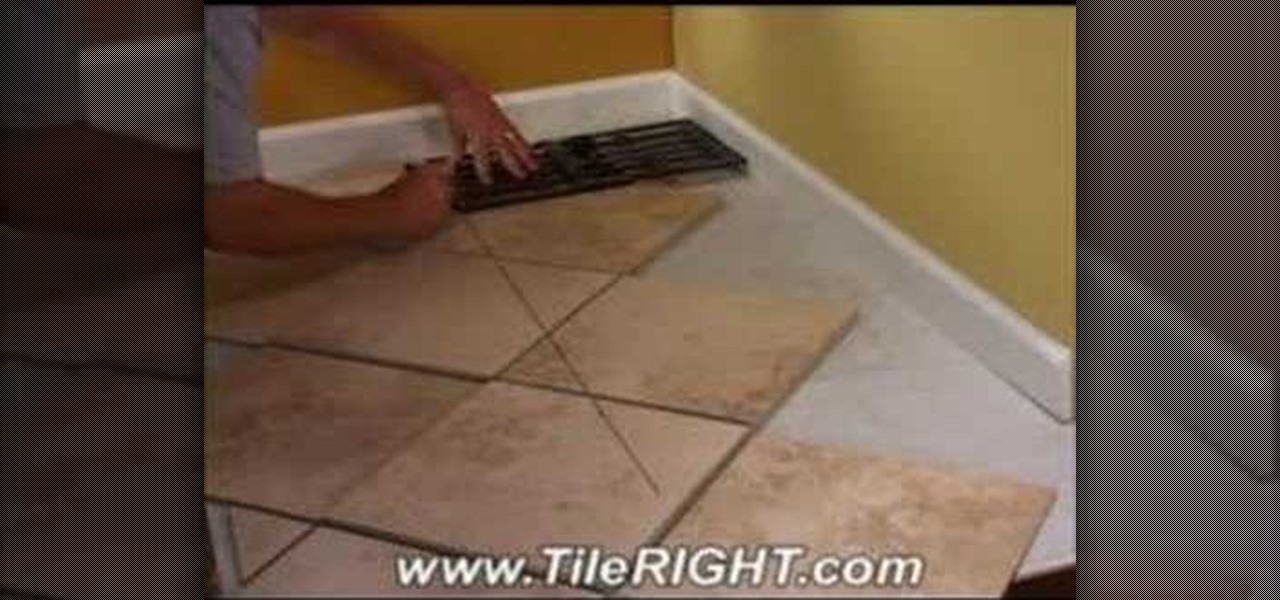
Tile RIGHT demonstrates how to tile a diagonally cut tile. First set the Measure Right Pro to the appropriate setting, extending it from corner to corner along your tile. Account for your grout line and the space up against the wall. Then, lock the tool. Next, place the tiles you're going to use on top of your set tiles. Slide the Measure Right Pro along the wall and mark the tiles. Place the sections in the appropriate place. Then, cut your tiles. Lay the tiles where you've previously marked...
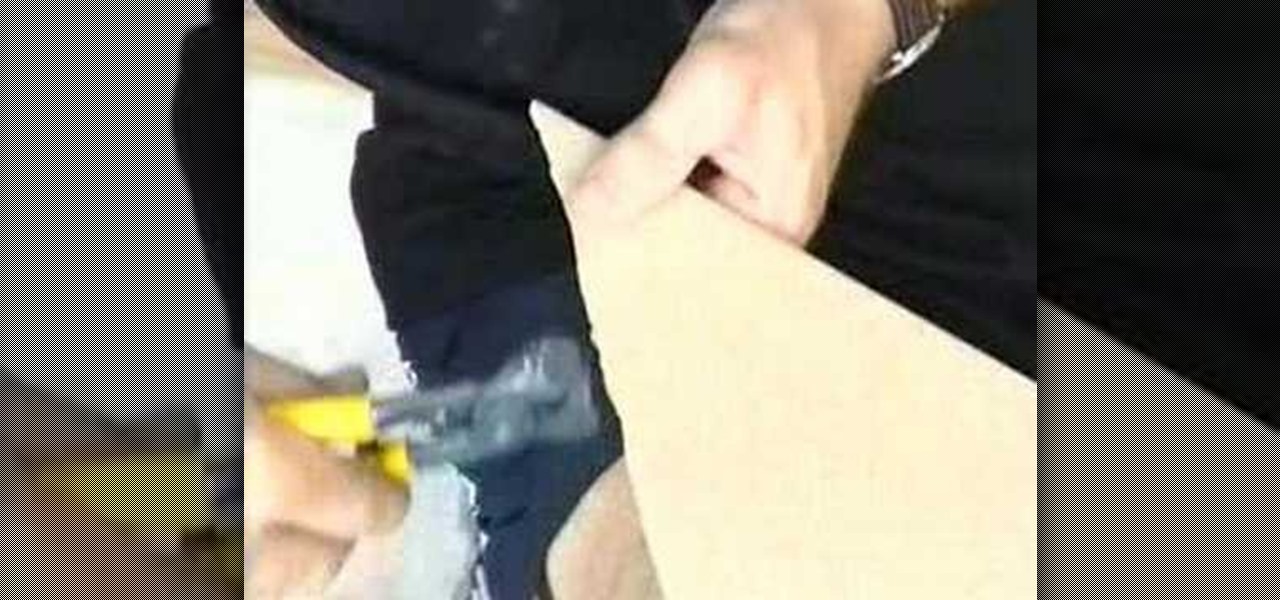
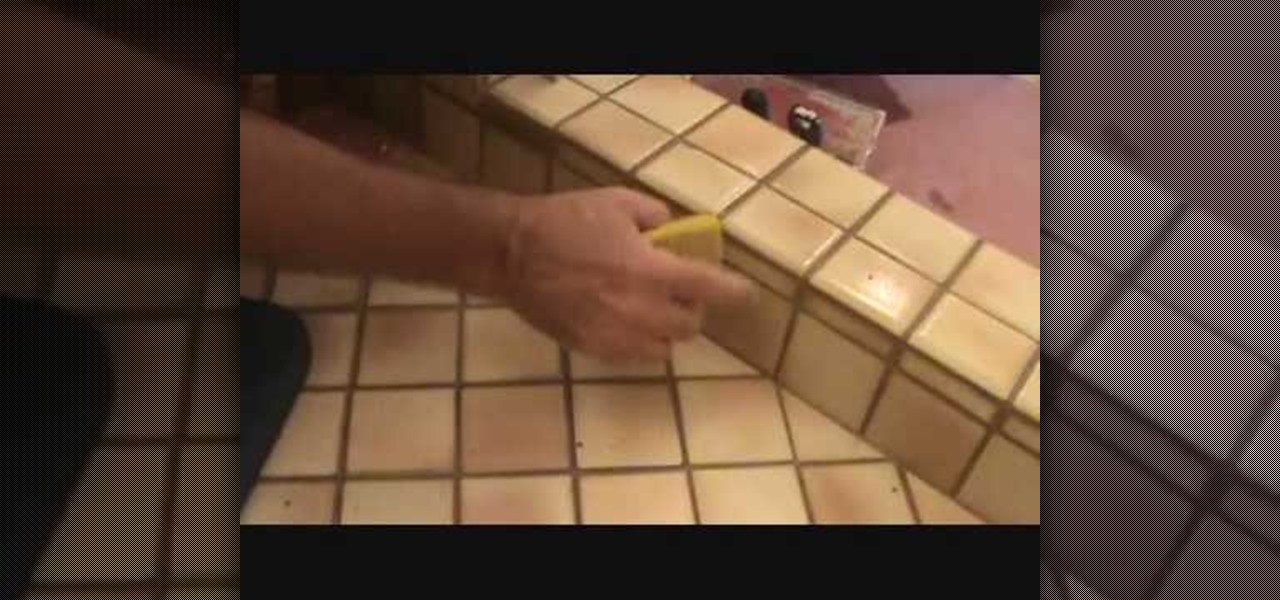
This how-to video explains how to use a tile file to remove a sharp edge from a piece of tile. To being you just need to buy a tile file (or a couple if you plan to use it a lot). A tile file would be used if a piece of tile has a sharp edge that you cannot hide in a corner or cover with another piece. To use the tile file simple rub the tile file against the tile like you would a piece of sandpaper on wood. Rub the tile file back and forth until the sharp edge has been smoothed out and then ...
Learn how to make tile mosaics with tips such as how to plan the mosaic pattern and cut the tile in this free video series.
Whether updating your home design or protecting against mold and mildew, the installation of kitchen tiles is a simple process that any home crafter can do. This video tutorial shows how to install backer board and tile your kitchen floor. Once you've cleaned the area where your backer board will go, measure to make sure all materials will precisely fit into place. Before setting the tiles, plan the layout on a sheet of graph paper to figure out if you'll need to cut tiles. Finally, apply gro...
In this video we learn how to decorate a ceramic lamp base with Simon Leach. First, grab a small paint brush and then apply paint to it. Once you have this, start to paint your chosen design onto the pot. Painting a leaf or a plant will be the most appropriate for a large jar or lamp base. Use a brush that will move along the pot and create unique lines. Go all around the pot until your design is finished. Let this dry and then rinse your pot off when you are done. Let your personality shine ...
In this tutorial, Simon Leach teaches us how to double dip or glaze ceramic. This trick will save you a lot of time, just make sure you practice a lot. First, mix your glaze up in a large bucket and grab your pot that you want to glaze. Now, place your piece into the glaze and then flick the wrist to lift the piece up quickly. Don't let the glaze go over the base of the piece or it will become too messy. Now, dip the piece back in, getting some glaze on the inside and swishing the liquid arou...
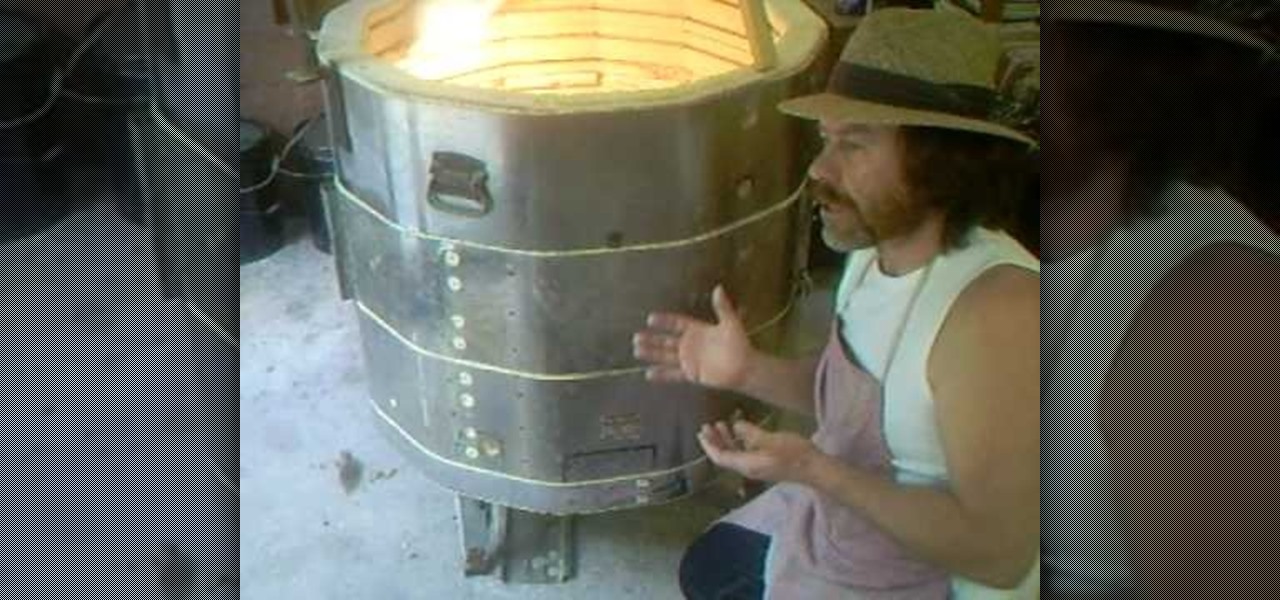
You may love your old electric kiln like a child, but it's time to get in touch with the times and update that sucker! Watch this ceramics tutorial by potter Simon Leach to learn how to turn your old electric kiln into a snazzy new propane gas kiln.
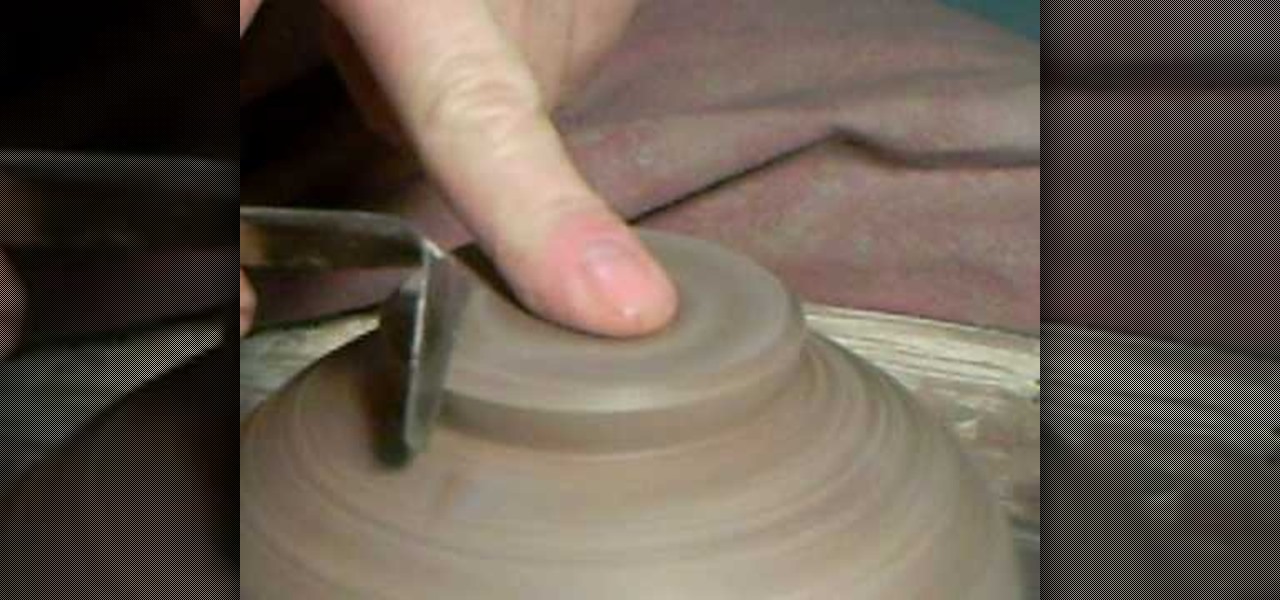
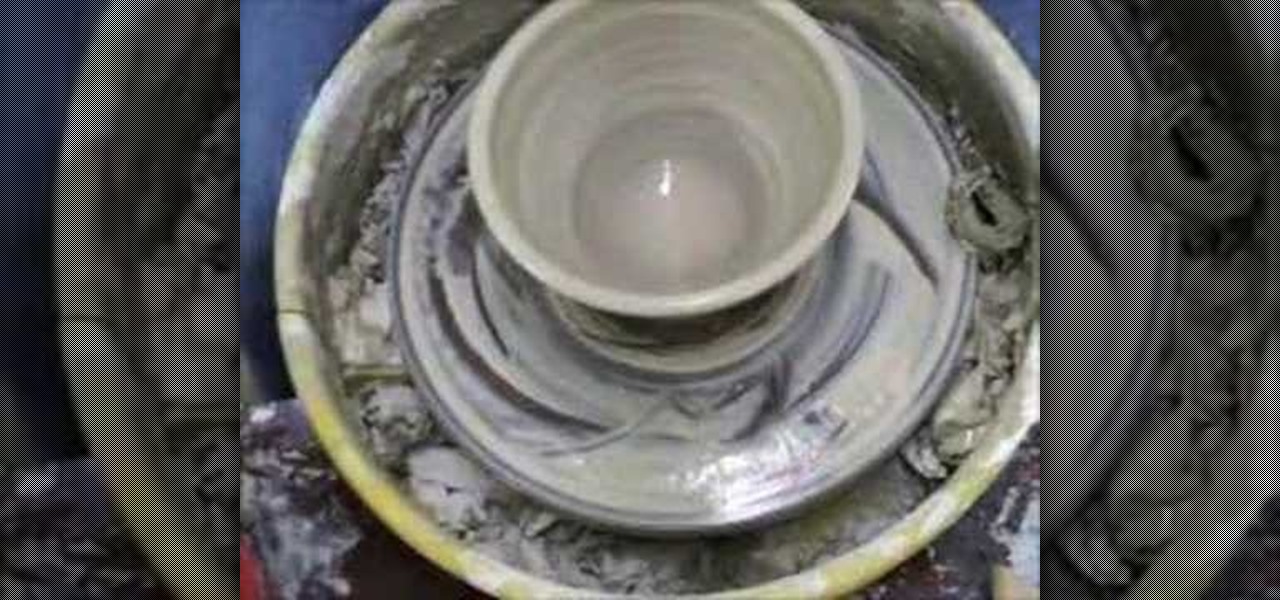
Simon Leach teaches you how to do ceramic trimming and sealing. You wet the top of the pot and place it on the wheel. You push down on the bottom, sealed side, when the wheel is spinning. You use the trim tool to cut into the base side. You do this at an angle and make sure you hold the trim tool like a stake knife, not like a pencil. You empty out the leg until you are pleased with it. You round off any sharp corners and you have to put the last piece, the seal. On the bottom you take a piec...
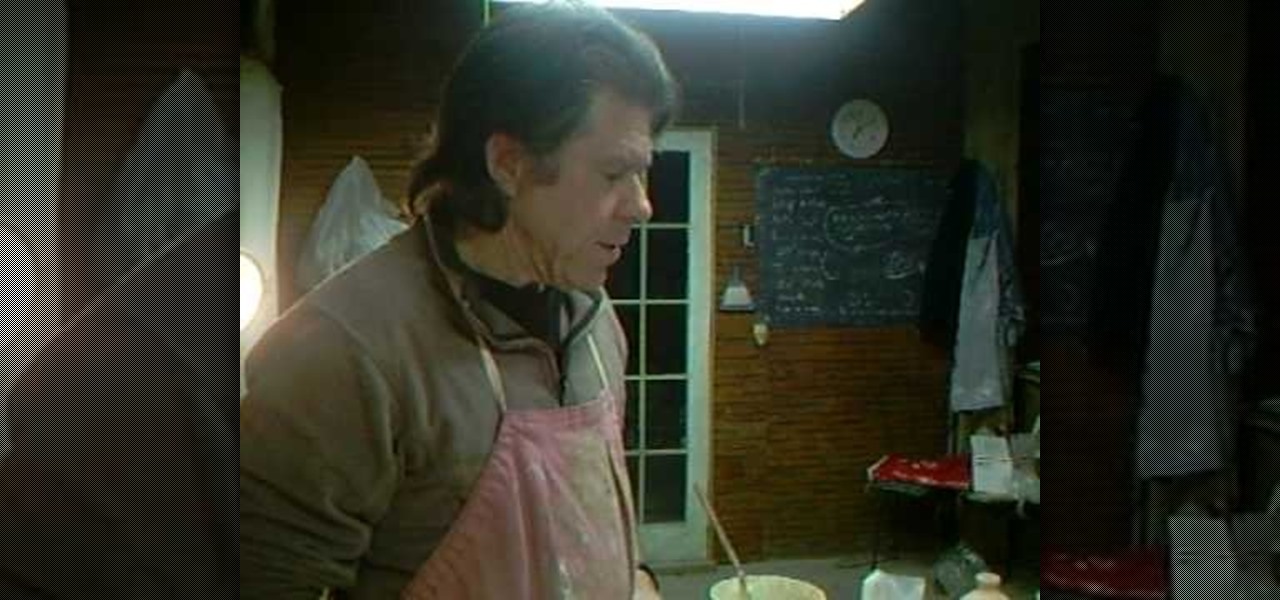
In this video, potter Simon Leach offers tips on how he decorates the ceramic pots that he has made. This video offers some great suggestions on decorating pottery that you have made, or have purchased unfinished. This video does not teach any specific decorating techniques, but focuses more on the process of a potter when contemplating decorating their creations. This video does cut off at the end, so do be sure to watch the continuation of Leach's tips in which he gets into more specific de...
Pottery glazing tools are a very important part of apply pottery glaze to any piece of ceramics. Learn all about glazing tools for pottery with tips from a ceramics expert in this free art lesson video.
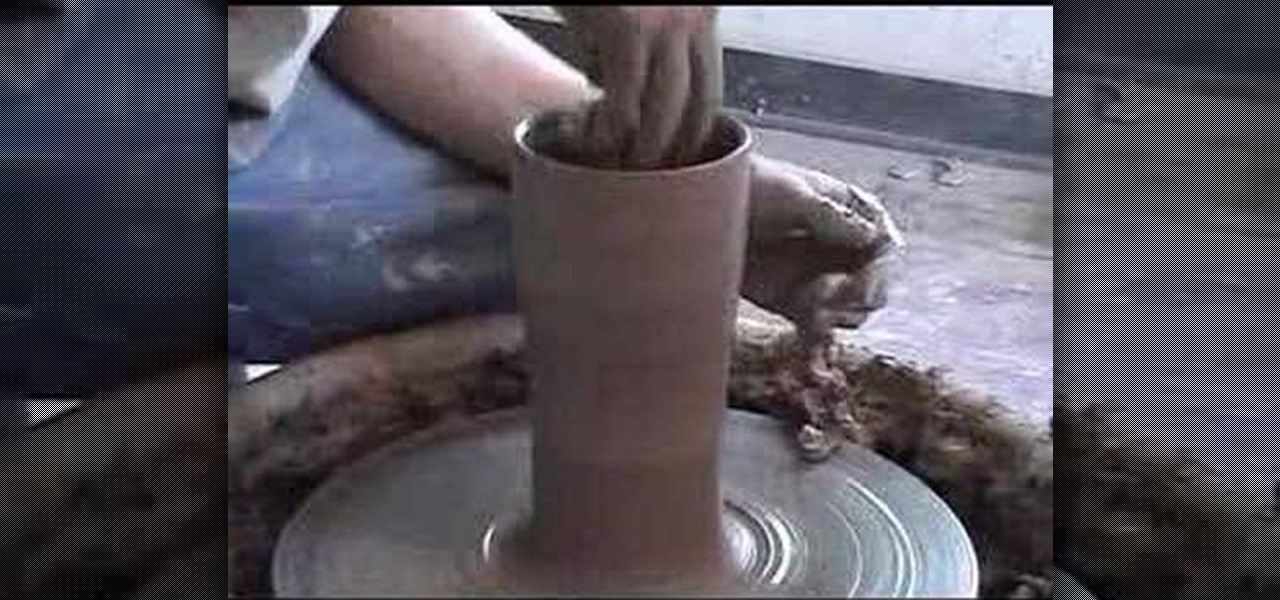
Watch this instructional ceramics video to learn how to throw and shape with two ribs at the same time. Learn some basic tips of coning on a pottery wheel by squeezing slowly all the way up. It's another process in the wedging department that compresses the clay. Once you get the rhythm of the pottery wheel, give it a try and soon you'll be producing your own ceramics.
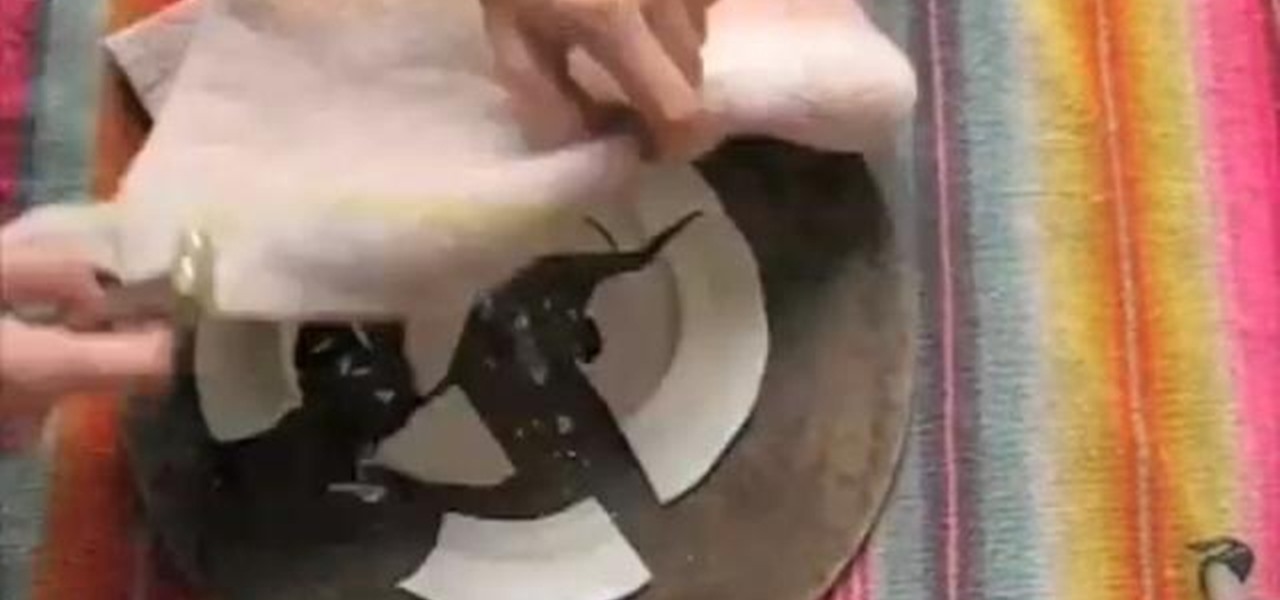
In this video, learn how to turn an old broken plate into a beautiful new, ceramic jar! This project will cost you next to nothing and only requires things you already have around your home. Check out this clip and create a very cool, fractured ceramic vase that can be used for many different things!
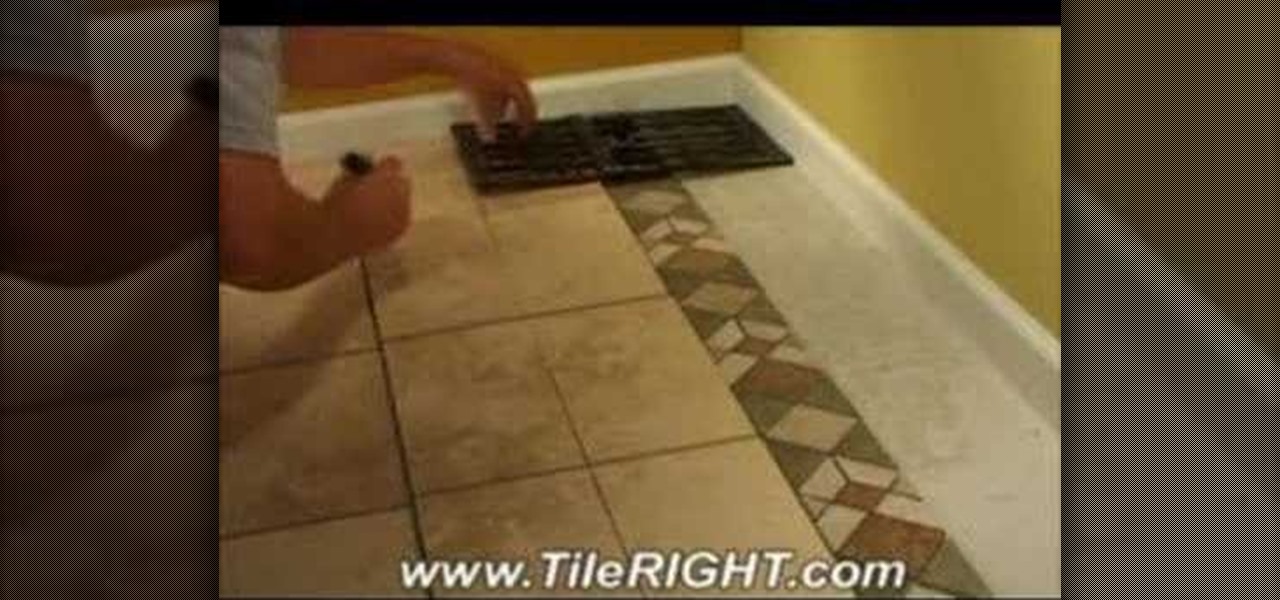
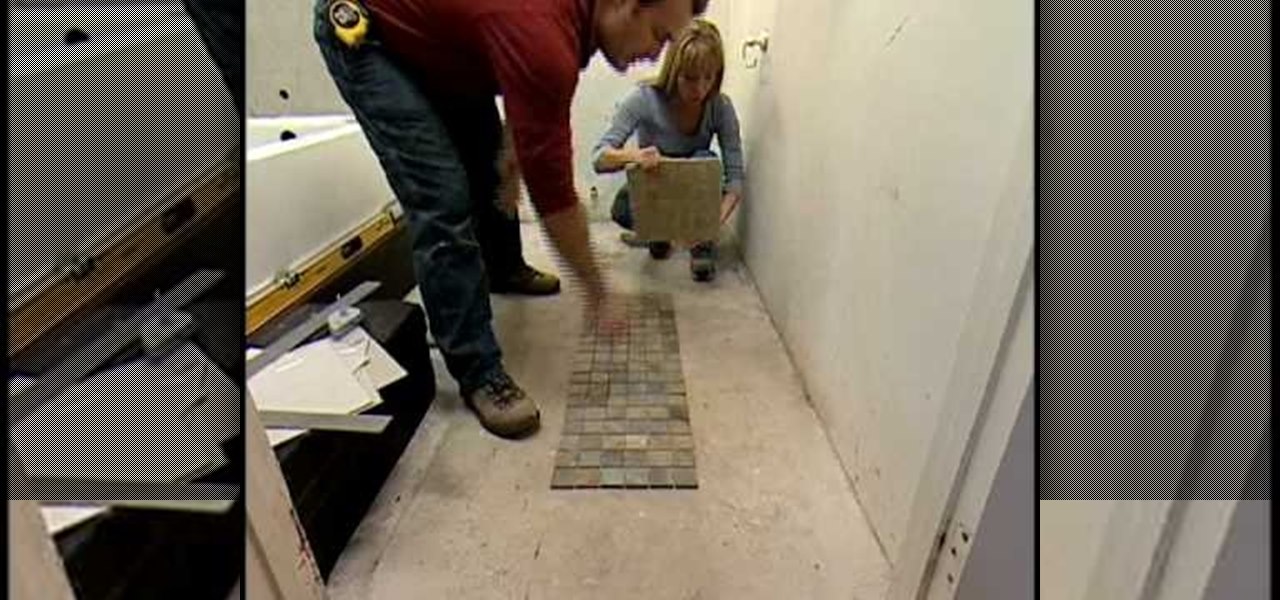
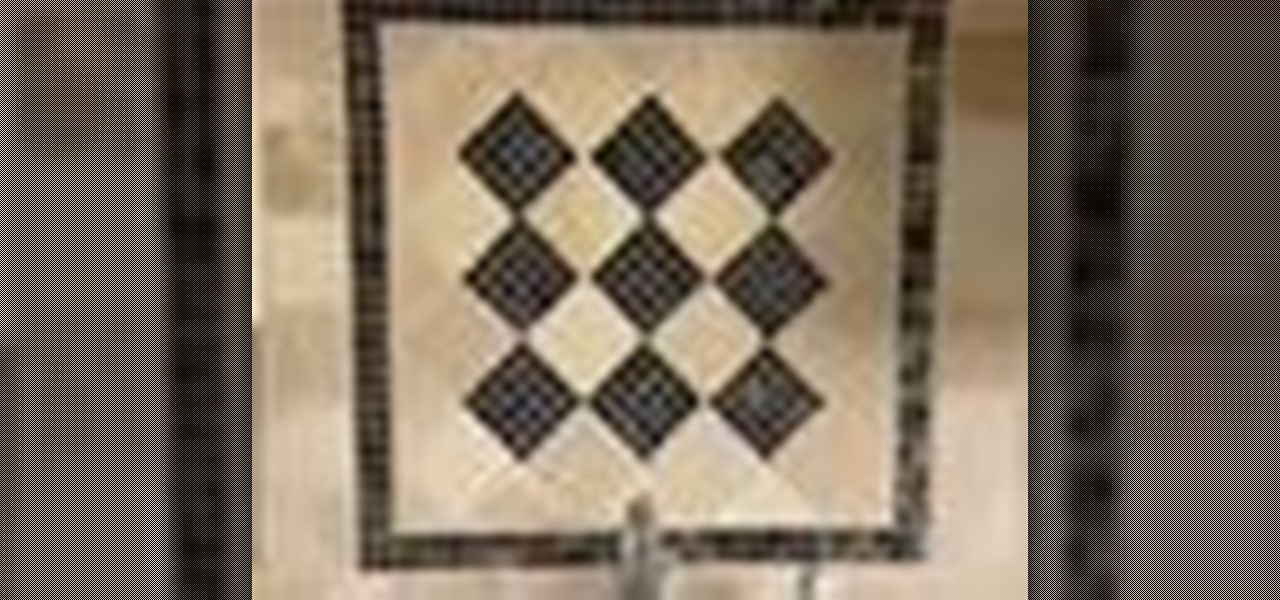
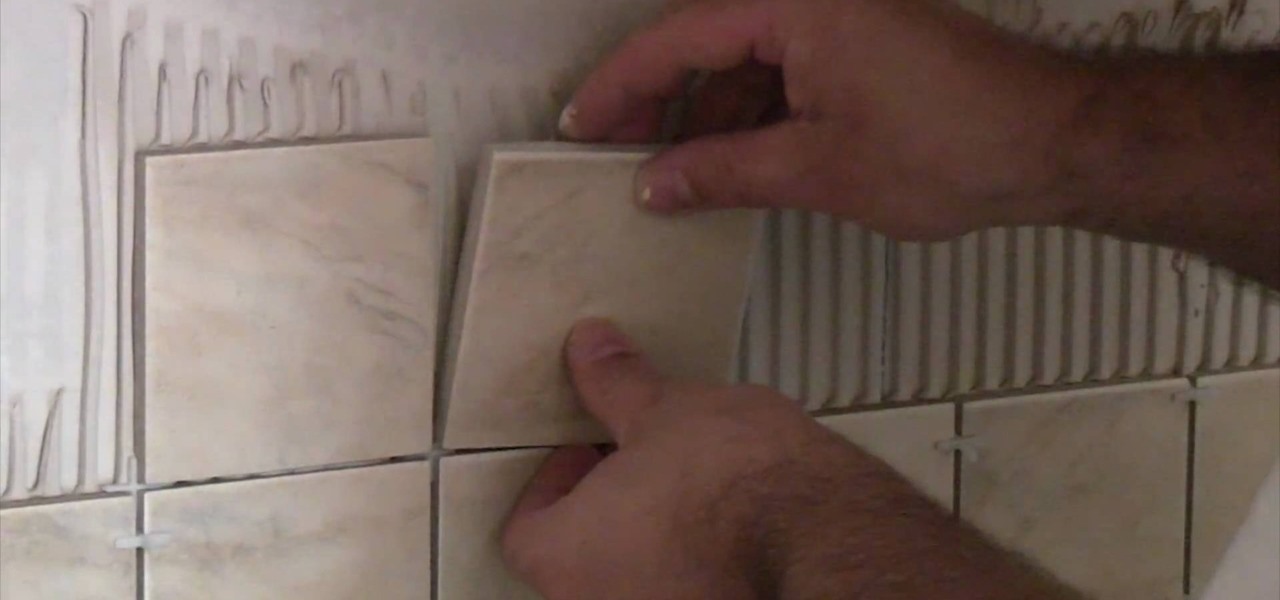
In this Home & Garden video tutorial you will learn how to install a decorative tile border. Decorative borders add a beautiful accent to any room. Start by setting the "measure right pro' tool. Slide the tool open to cover the entire tile and the width of the border. Next move out one eighth for the wall space and lock the tool. Now place the fill tiles on top of the set tiles. Then you slide the "measure right pro' along the wall and mark the tiles. Write the sequence numbers on the tiles a...
This open source software tutorial shows you how to use the tile clone tools in Inkscape. The tile clone tool allows you to create the first few tiles and then clone them to create an entire grid or fill a specific area with the tiled pattern. Check out this Inkscape tutorial and start expanding your graphic design abilities.
Make an old drab garage floor look new with snap-together tile. In this how to video Matt Weber installs cool snap-together tile for garage flooring. You don't have to bother with the messiness of mixing cement, grout, or cutting dangerous tiles. Watch and learn how easy it is to snap tile into place.
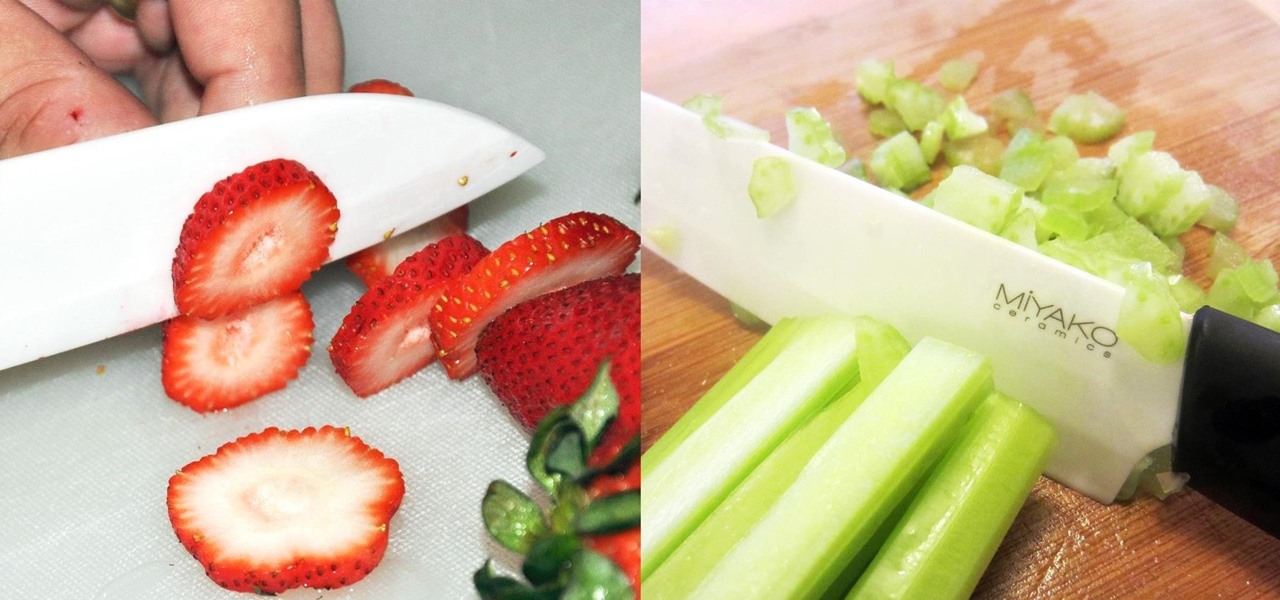
A good chef's knife is a thing of beauty and, with proper care, a joy forever. It can totally change the way you cook and turn even the dullest prep work into a glee-filled task.
In this tutorial, we learn how to tile a shower floor and curb in your own bathroom. To start, you will need to apply the foundation of your tile with a smoothing tool from corner to corner of each of the corners. After the mortar is lied, grab your tile and press it down firmly onto the mortar. Use your hands to press down on all the corners of the tile, then place another one next to it and continue until you reach the end of the shower. Use a straight edge to cut tiles where the are too lo...
In this video, we learn how to install a pebble tile wall with Lowe's. First, you will need to measure out your walls to figure out how much of the tile you need. Now, lay down a drop cloth on the floor so you don't get the floor messy. Next, turn the power off and remove the outlet cover and outlet from the wall. After this, wash the walls so they are clean, then apply your waterproof sealant from top to the bottom. Apply two full coats and make sure they dry completely before you move on. N...
In this tutorial, we learn how to grout tile in your custom tiled shower. First, you need to score away anything in between the seams of the tile. Now, grab a bag of sanded grout mixture and grout enhancer. Next, wash the surface of the tile with a damp sponge to take off any impurities. Then, mix half the bag with half the enhancer and stir until combined. Use a tool to rub the mixture onto the walls and leave it on for 15-20 minutes. Now, go over the area with the mixture and go over it wit...
In this video, we learn how to install tile in your home using SimpleMat. SimpleMat is a double sided adhesive mat that is designed to set tile on an existing counter top. Adding tile is a very easy way to add value to your home or give it a quick face lift. To apply, first remove the back of the adhesive, then apply it to the surface. Next, you will remove the protective tile and you can start to lay down your tile to the adhesive. Press it down where you want them and adjust them if needed....
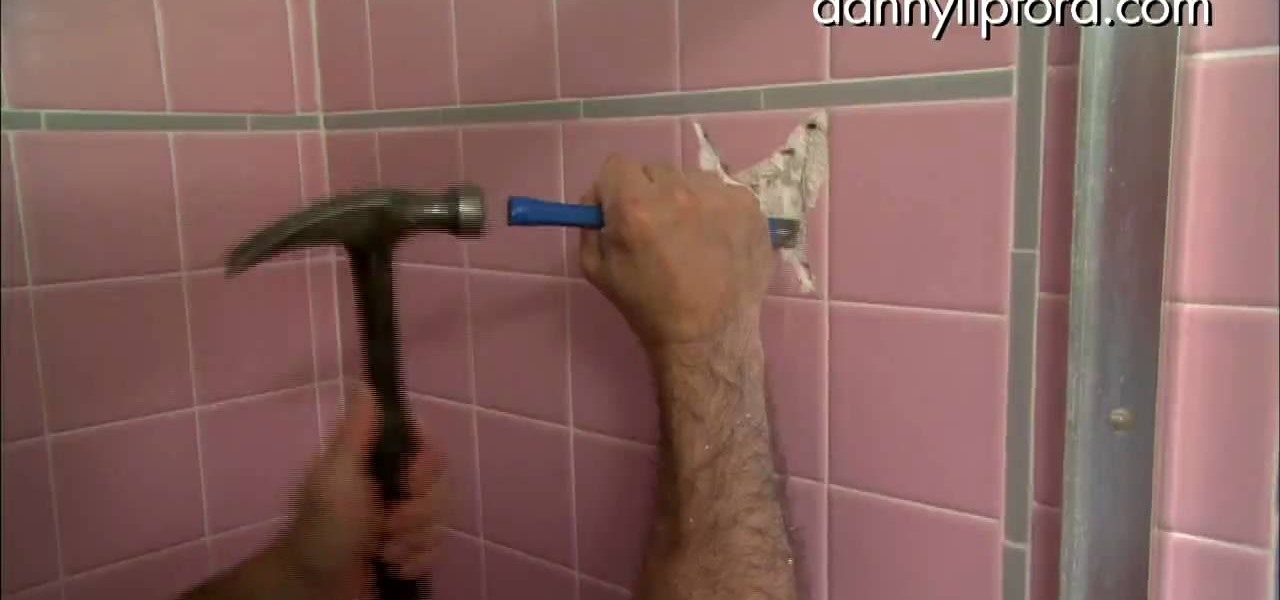
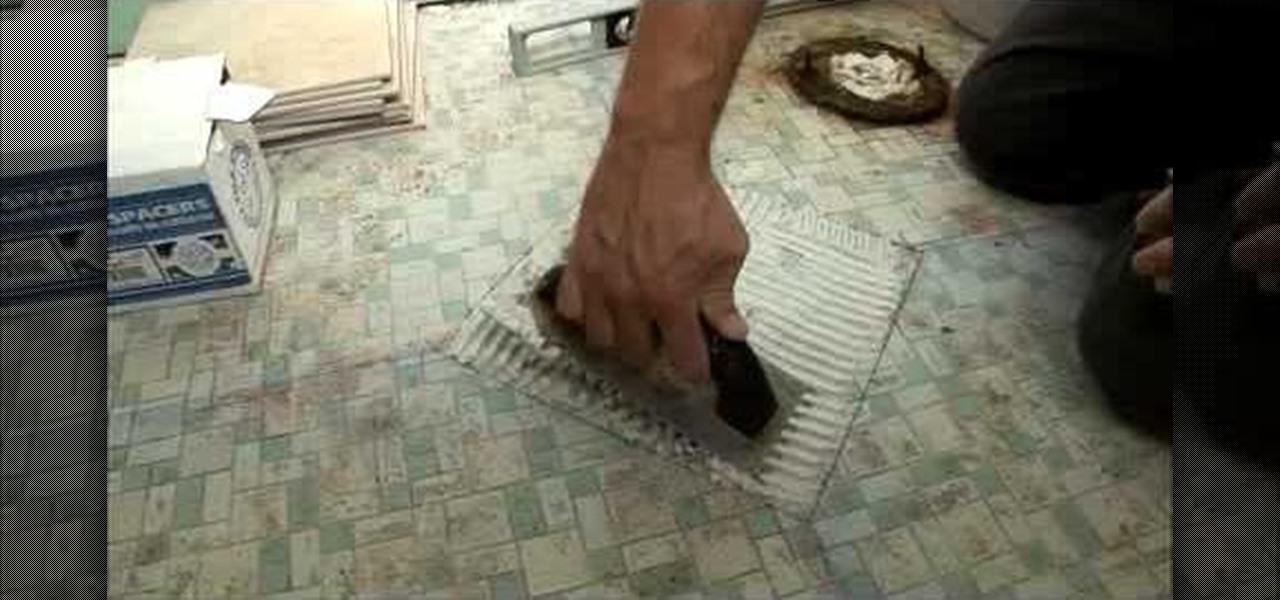
In this video tutorial, viewers learn how to remove a tile from a floor or wall. Begin by marking the tiles with a hammer and punch. These marks are used as guidelines for the drill. Create an X shape with the markings. Now use a drill to drill through the tile holes, but not through the wall. Now complete the X-shape pattern by connect the holes with a chisel and hammer. Then crack the tile into pieces and pry the pieces off the wall. This video will benefit those viewers who are doing home ...
One way to update your living space is by installing new tiles. This video tutorial shows key strategies with tiling projects in your home. By planning material quantities you'll able to estimate the cost of your project. This instructional offers helpful tips on tile care, trimming and cutting, and how to safely use snap cutters and wet saws.
This great video provided by Home Depot demonstrates the right way to install tile for your kitchen countertop with a sink. Make sure to make your measurements precise as any inconsistencies will stick out like a sore thumb.
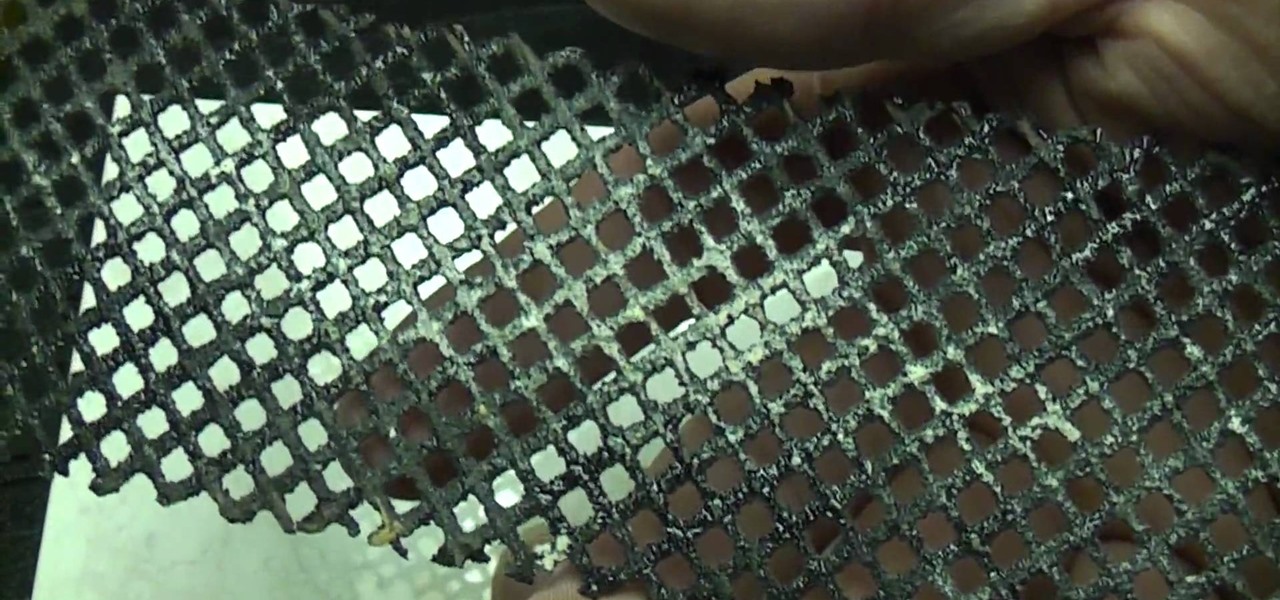
In this video tutorial, viewers learn how to tile a bathroom floor with Home Depot. Home Depot is an American retailer of home improvement and construction products and services. Tiling a bathroom floor can be difficult and can look awful if installation is done incorrectly. In this video, users will learn how to tile a bathroom floor. Mosaic tiles can be installed individually or pre-mounted on mesh-backed sheets. In this video you will learn how to install 12 x 12 inch sheets mosaics on a b...
If you knock down a wall, planning to extend an existing tile floor, you'll face a real problem trying to keep the tiles straight. In this tutorial, Tim Carter, of Ask the Builder, demonstrates how you keep your lines straight when laying tile. It's not complicated or expensive. All you need is some chalk and a bit of string.
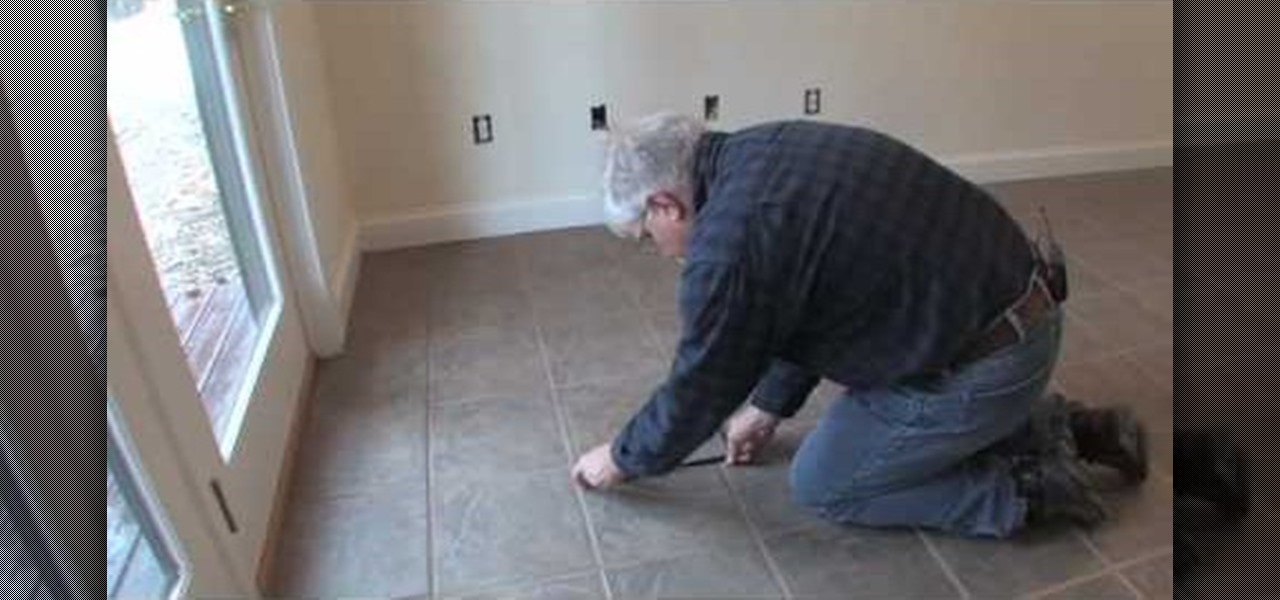
In this video, we learn how to lay floor tiles. Lay the tiles in a diamond pattern, using a tape measure to make sure you have enough of them. You will need to cut the corner tiles so they fit in with the rest of them. Lay the tile adhesive down first before you lay the tiles down and make sure they are pushed down into place securely. Continue to lay the tiles down until you have covered the entire area. After this, you will lay mortar in the middle of it and then wipe it off clean to finish...
This video tutorial is in the Home & Garden category where you will learn how to install a kitchen backsplash with glass tile accents. A tile can be attached to walls with the help of mastic. It doesn't require mixing and it is stronger than mortar. Before applying mastic, sand the wall surface lightly. Don't sand away the paint. Clean the surface with damp cloth. Layout the tile pattern below the space and measure the dimensions. Do the marking on the wall of the centerline. Apply a thin lay...
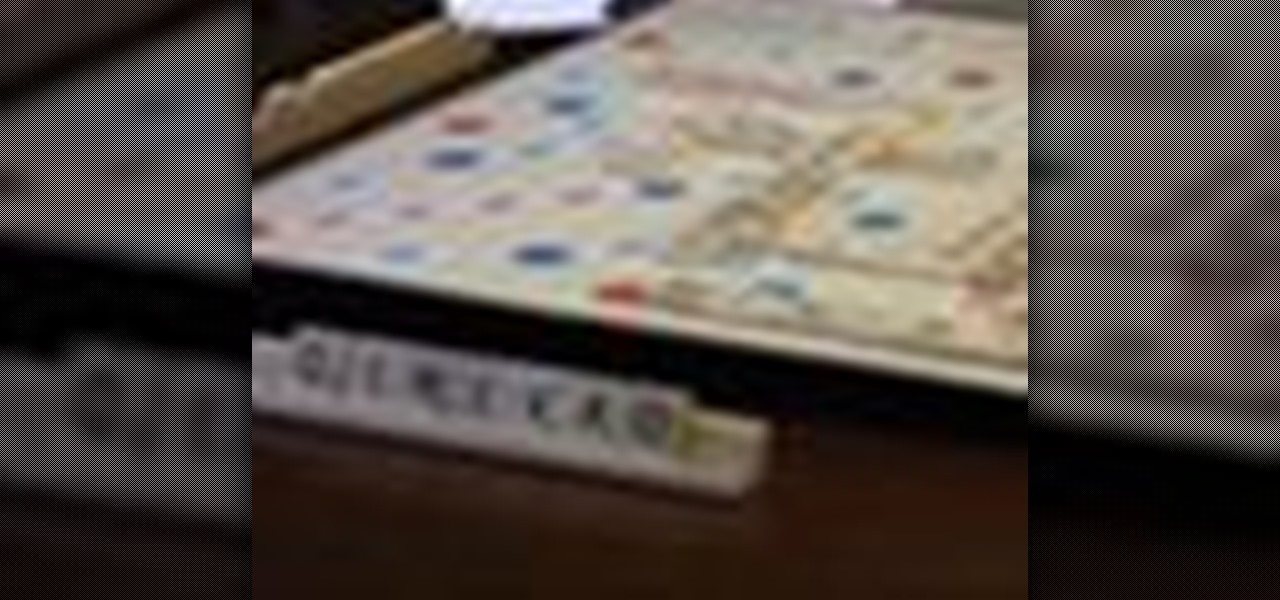
Everyone loves Scrabble, but not everyone knows how to play the game properly. Yes, there is a set up rules that come with each game, but who actually wants to read them? Isn't it better to learn from a more visual approach? This video will teach you the basics of gameplay.
This video is from DannyLipford and covers the proper technique to lay tile in the bathroom. The first step is to lay some chalk lines to find the exact center spot of the room. The first tile will be put down diagonally so that the corners sit on the four chalk lines. Next the mastic is put down on the floor for the first tile and the tile is set into place. The process repeats itself until the tiles reach the toilet where some cuts are required. The presenter is using a portable wet saw tha...
Watch this ceramics tutorial video to learn how to use some more advanced glazing techniques to make the inside different than the outside. The detailed instructions in this helpful how-to video are best for intermediate to advanced potters who want to glaze both the inside and the outside of their pottery.
Watch this ceramics tutorial video to learn how to throw a large soup bowl using 2.5 pounds of clay and a pottery wheel. The detailed instructions in this helpful how-to video will allow intermediate potters to easily make large soup bowls.
In this video, learn how to tile a kitchen backsplash. This video, hosted by the Home Depot will show you how to prepare and install this new improvement to your kitchen. This clip will walk your through a two-foot high backsplash with glass tile accents. You will also learn how to use mastic adhesive and the proper laying of decorative tile.
Adding a backsplash with tile to your kitchen area is a great way to add some character to your room and is easy to clean. This tutorial will show how you can tile a kitchen backsplash in your home today. It can be a difficult task for anybody who has not had any kind of experience working with tile. So, take your time, pay attention, and good luck!
To remove grout from a tile patch area, use a scouring pad on a sponge to gently go ontop of the tiles to remove grout and see where you need to rub harder, but dont rub hard on the actual joint. Don't get your sponge too wet. Once you have everything off the tiles, work on the grout. Make sure you get the grout lines to make them look neat and clean. Make sure the seams are tight and flush, run your sponge over it to clean it up a bit. If you have a missing tile filled with grout, use a wet ...