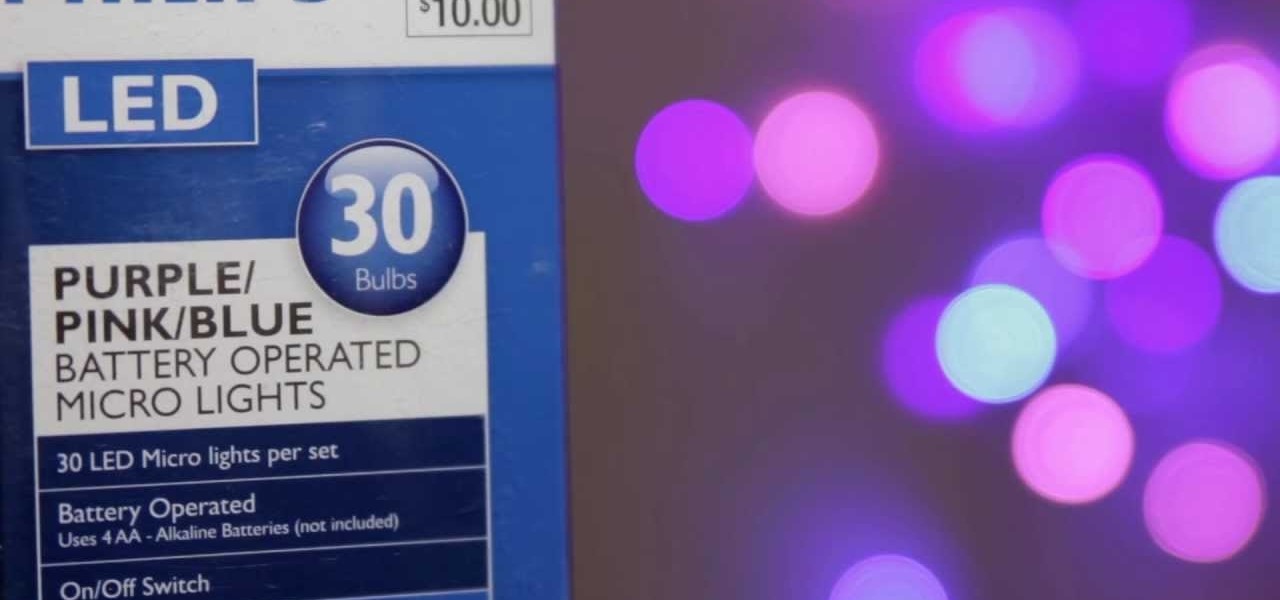
So what is Bokeh? Well, the word comes from the Japanese term "boke" (bo-keh) which means fuzziness. Bokeh describes the character of the blur in an image, but is often used specifically to refer to points of light rendered as fuzzy circles. These "circles of confusion" come from points of light not being perfectly focused. You know when you're taking a picture of your friend at night, and the lights in the background go fuzzy? That's it! Having a beautifully blurred background can help focus...
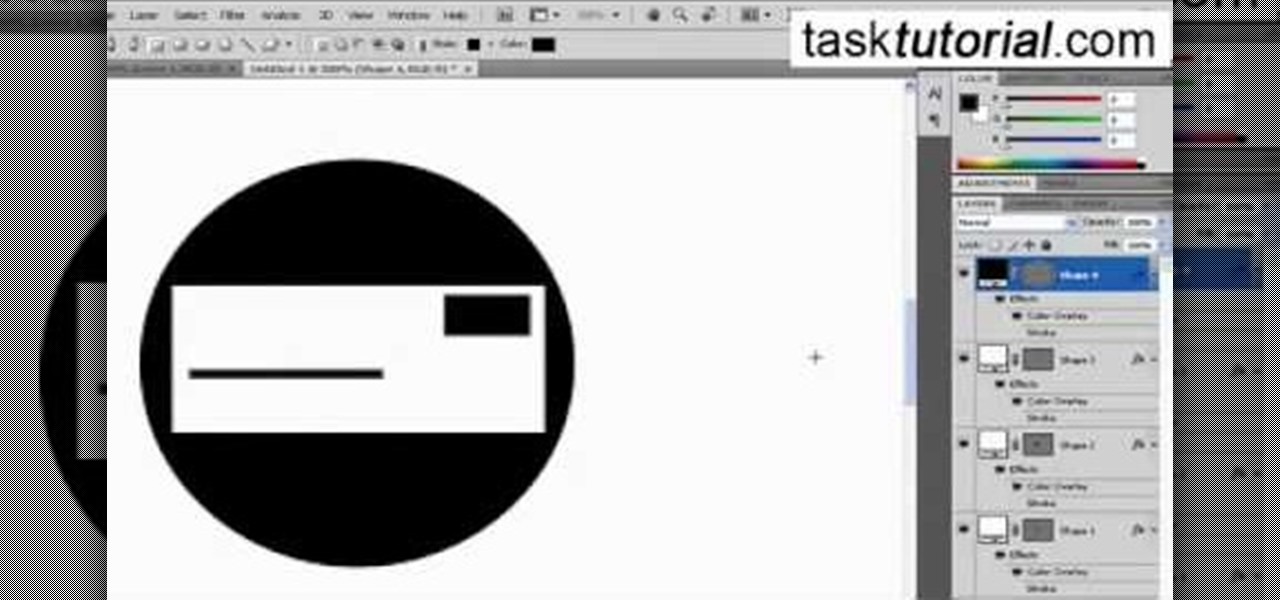
This video will walk you through the process of creating your very own icon to use for your email by using Adobe Photoshop. Photoshop is a great tool to use for a variety of purposes and in this instance can make the perfect icon in just minutes.
As someone who's dependent on glasses to see on an everyday basis, losing or misplacing them is obviously a bad thing. I can't even see clearly enough to find the glasses that I just lost, so I'm pretty much blind now.
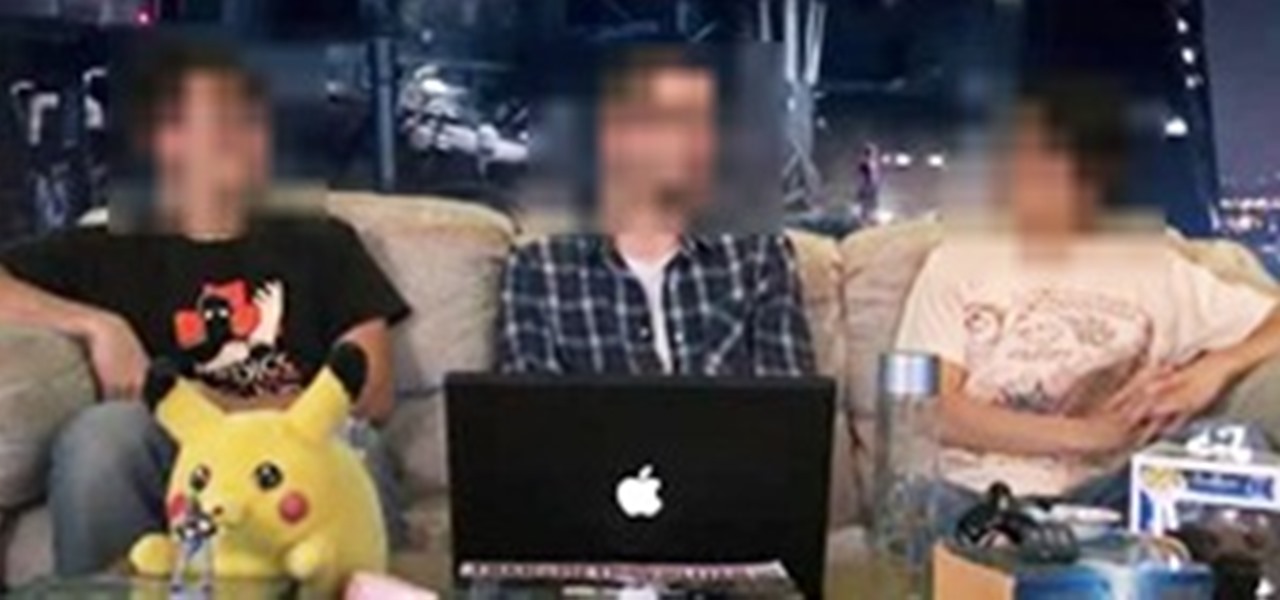
There's a strange grey area for "guerrilla filmmaking" on YouTube. Generally, someone shooting a video needs to get permission from the people in it to show their faces. But on YouTube, that "rule" is more of a suggestion (and sometimes not even that).
In this tutorial, we learn how to draw a galaxy in Photoshop. First, open up a new project and color the background black. Next, create different lines and circles inside of the black, and then blur out the image. Now, it will look like a galaxy in black space. Next, color a new background black and white with spots and mix it into the galaxy image that was made. Continue on to change different settings on the picture as you prefer, changing the opacity and different settings as you wish. Whe...
This how to video will show you how to remove blemishes and do other touch ups in Photoshop. First, open the image you want to touch up in the program. Now, choose the polygon tool and select the background of the image. Now, go to adjustments and change the brightness and contrast. You can also add a blur in the filters. Use the smudge tool to touch up any errors from using the blur filter. To fix blemishes, use the patch tool. Select the area you want to fix and drag it to an area of simila...

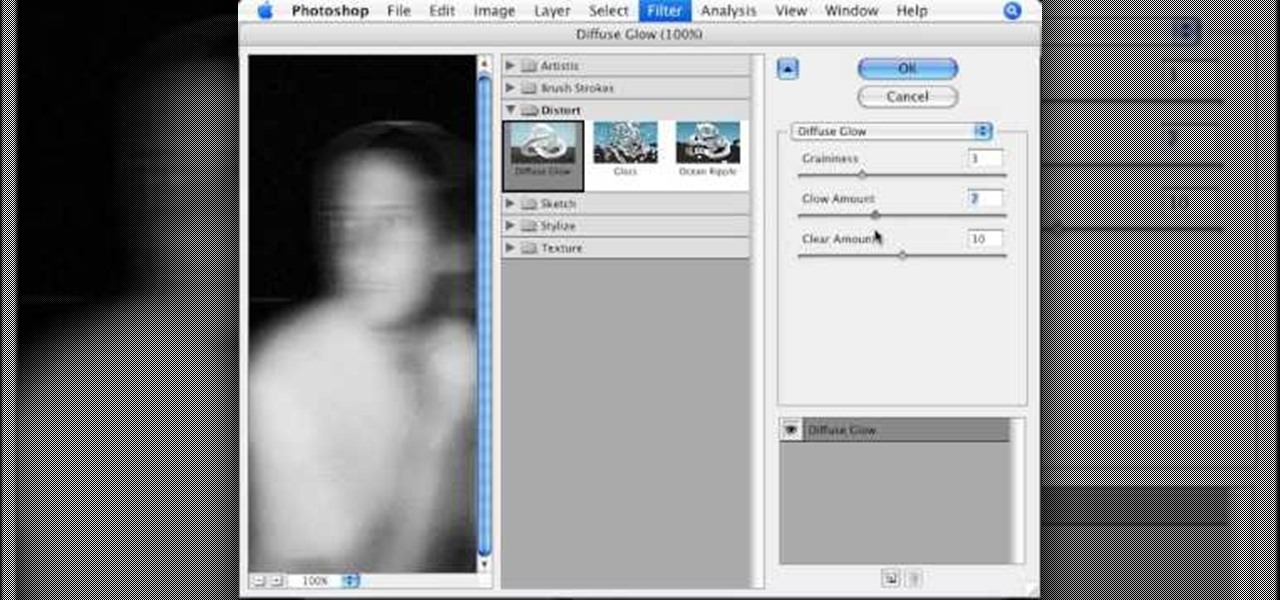
The video shows us how to create a dreamy effect in Photoshop. Firstly load the image in the Photoshop and then unlock the layer by double clicking on the layer, press unlock and OK. Now make sure your background and the foreground are black and white respectively and if it’s not then press D and it will reset. And then go to filter, click on distort and select diffuse glow. Here you put graininess as zero, glow amount as 6 and clear amount as 19 and press OK which will make the glow with lig...
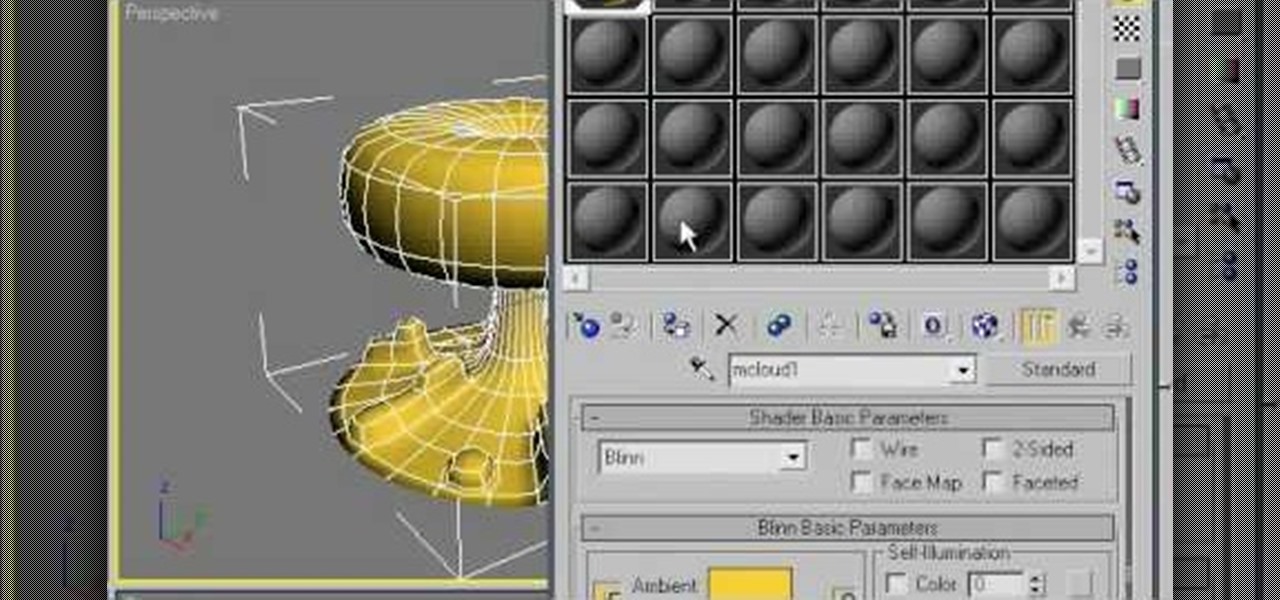
The mushroom cloud is one of the iconic images of the 20th century, calling to mind destruction, progress, and arguably the single most important event of the century. This video will show you how to create a 3D model of one using 3D Studio MAX 4 or higher. This can then be used in all kinds of video games and movies that you might be making.
In this how to video, you will learn how to make a reflection in water using Photoshop. First, open the image in Photoshop. Select the crop tool and select the whole photo. Click and drag the lower part down. Select the rectangular marquee tool and select the picture. Click on the selection and select layer via copy. Click the move tool and drag the upper point in the picture to the bottom of the document. Go to filter, blur, and select motion blur. Choose a -90 degree angle with a 35 pixel d...
The video is without voice. It describes abstract art. First a swirl of rings is formed which indicates potter's wheel. Four big pots of different styles are formed of which one has handles. Two earthen small shaped vessels with pointed tip is formed and also there is one very small pot. First the outline of all the images is done which is then continued by shading. However, the entire painting is blurred and is made using shades of orange. The background is in black color. The formation of t...
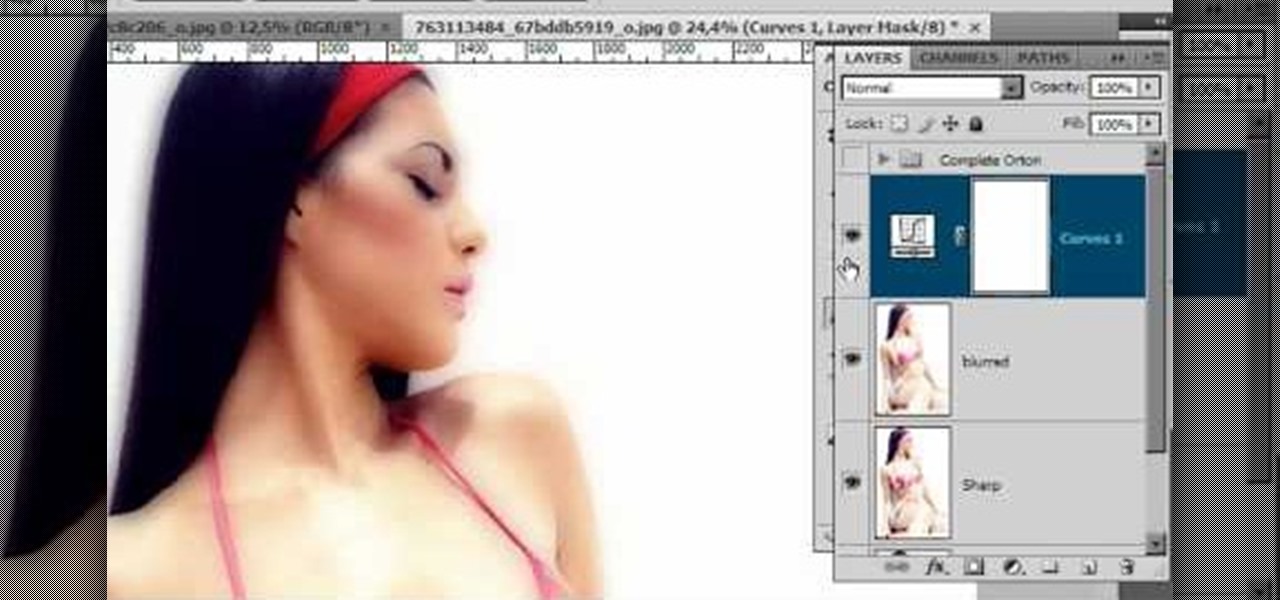
In this video tutorial, viewers learn how to create the Orton glow effect using Adobe Photoshop. The Orton glow effect is achieved by combining a sharp image with a duplicate that is deliberately blurred or softened. The overall result is often characterized as a dreamscape, diffusion, or softening glow. It is an effect used for landscapes and portraits. This video provides voice narration and step-by-step instructions for viewers to easily understand and follow along. This video will benefit...
StephanieValentin teaches you how to draw a realistic ear in Adobe Photoshop. You create a new document of 1300x1900 pixels and then create 9 layers named L00, L01 and so on until L08. The first layer should be black. On Layer 01 use a soft round brush with a white color, 100 pixels width and 50% opacity. This is the base sketch of the ear. You then apply a gaussian blur of 30 pixels. For Layer 02 you use a soft round brush with a white color, 50 pixels width and 50% opacity. Apply a gaussian...
Compositing and color correction are important and integral steps in processing a 3D render after it is generated in Cinema 4D, 3D Studio Max or any other 3D package. Compositing transforms simple renders and provides them with life, vibrancy and atmosphere. In this demonstration, Greyscale Gorilla breaks down a 5 second project from Rich Hinchcliffe and demonstrates how Rich uses Adobe After Effects, color correction, blurs, ReelSmart Motion BLur, Frischluft Lens Care and Lens Flares to tran...
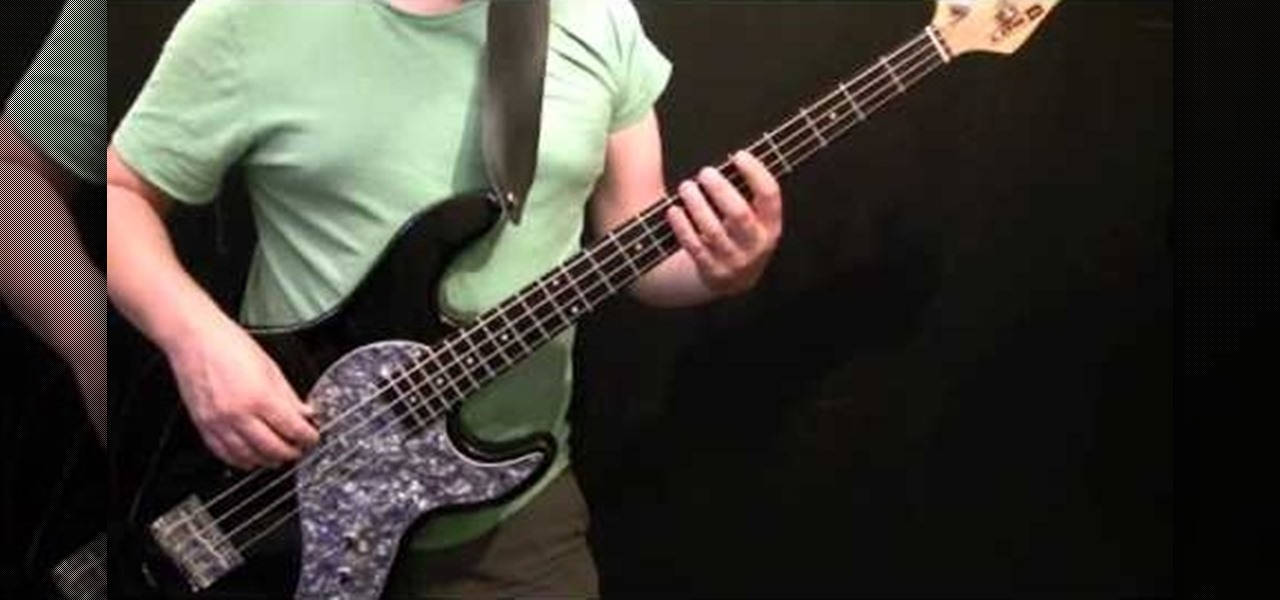
With learning any instrument, often the hardest part to gaining any fluency is being able to bend your fingers to stretch out even to the furthest notes and do so with finesse. So if you wish to become a famous bass player in a rock band, one of the best things you can do to help with finger fluency is simply practicing a few drills.
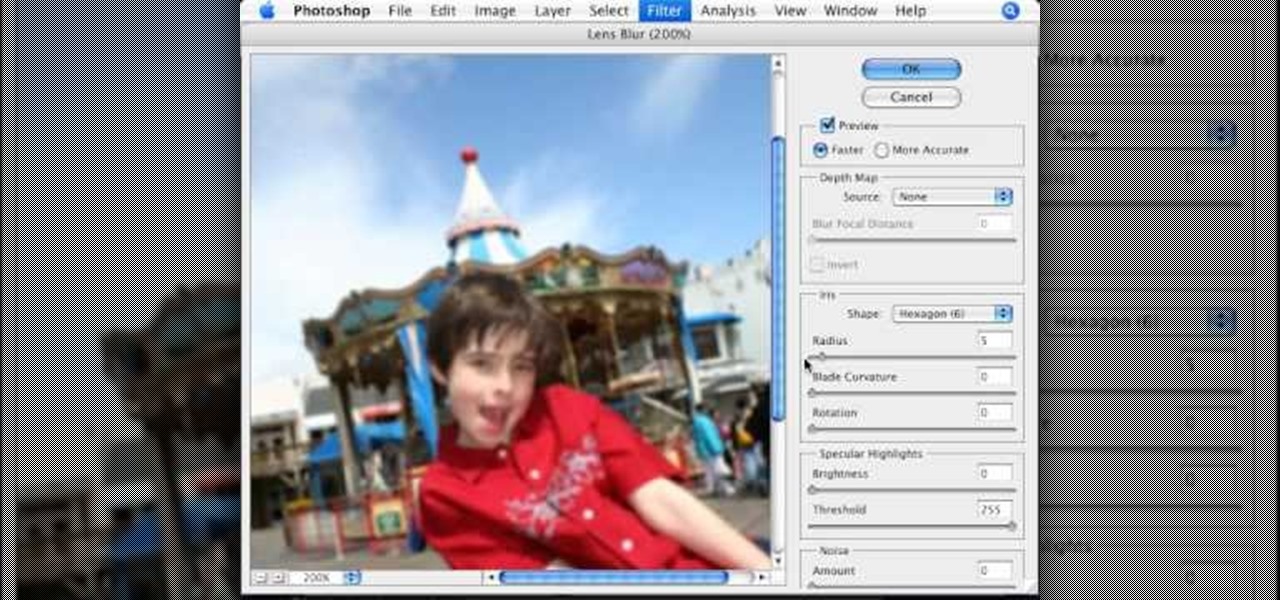
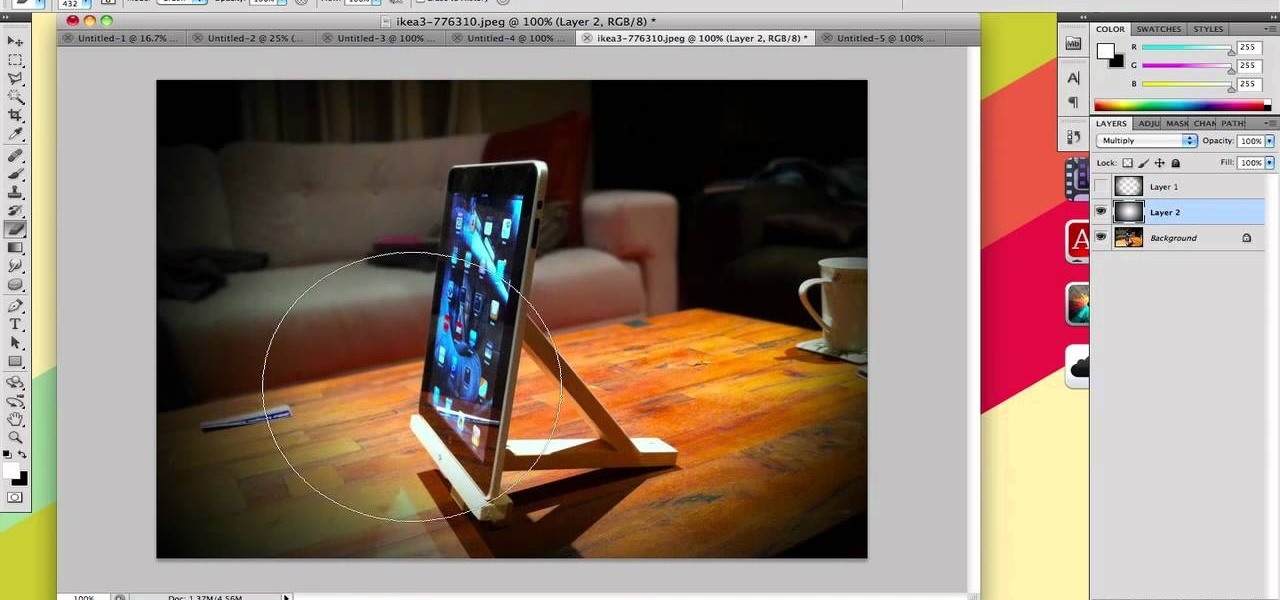
This video tutorial, by photoshopuniverse, shows you how to reduce the depth of field after a photo is taken using Photoshop. This enables you to ensure that your main subject is clearly in focus while the background is out of focus or blurry. First duplicate the layer using the short cut that was mentioned and apply the filter lens blur to the new layer and adjust the radius so that an adequate amount of blurring is achieved. Add a layer mask and bring the subject to focus by selecting the b...
One of the best features of Apple's Final Cut Studio is the graphics interface feature Motion. With its ability to create and edit motion graphics, you can easily create title sequences for your indie film, or maybe even a professional movie, with 2D or 3D visual effects compositing.
Learn how to create a cool blurred water effect in Photoshop.
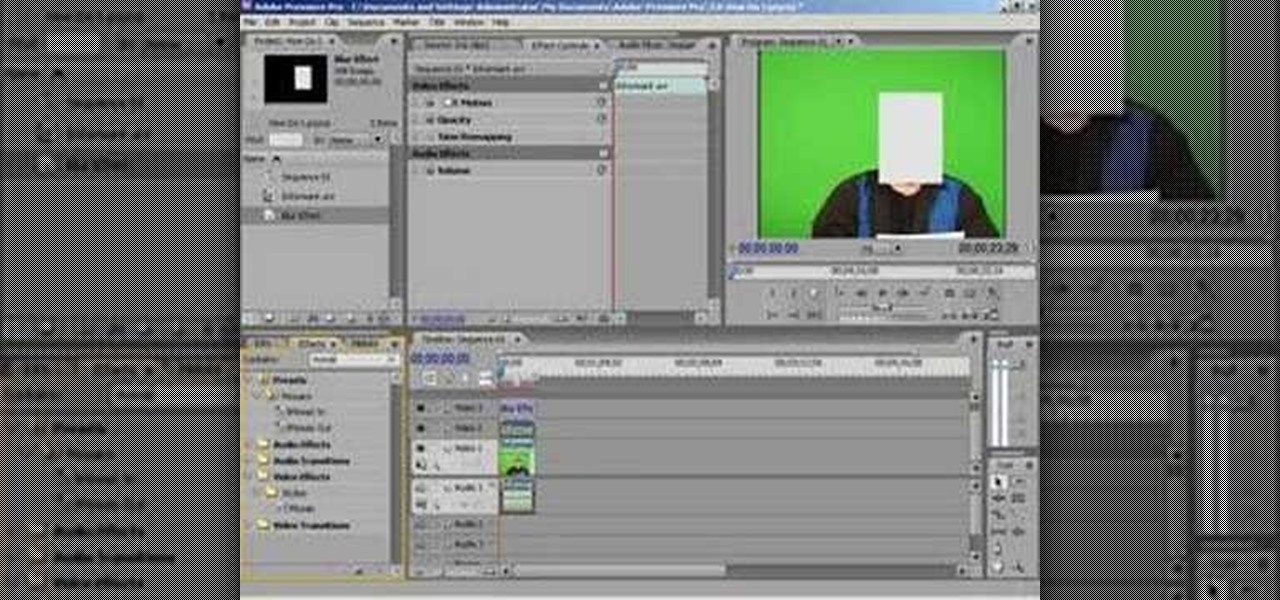
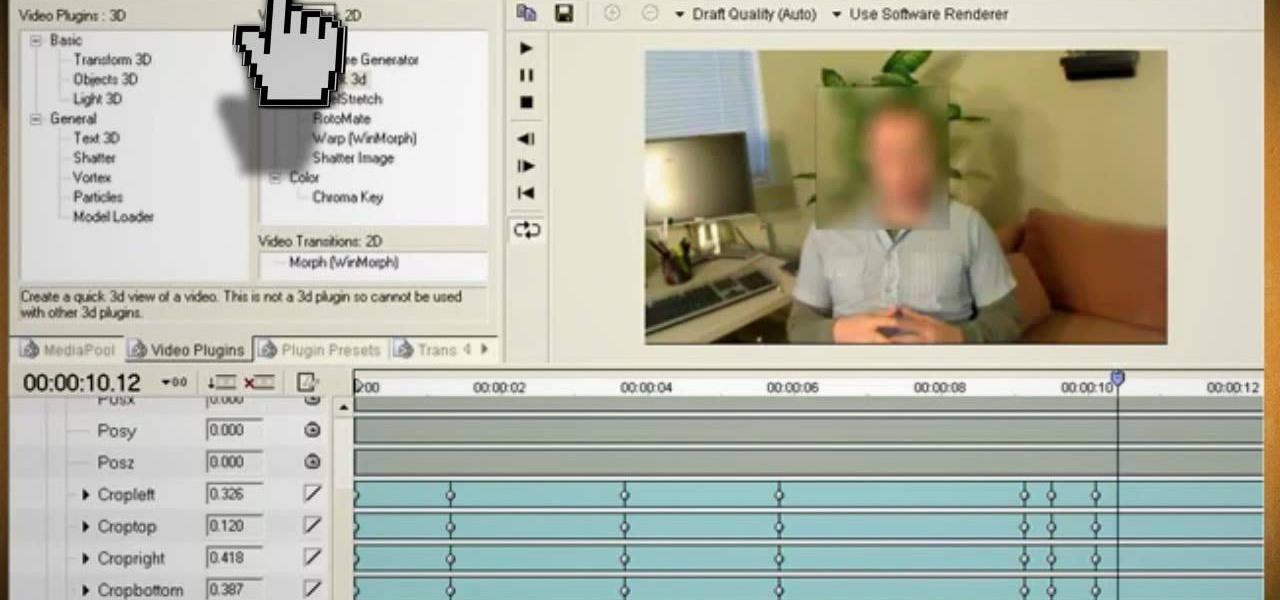
Need to hide the identity of an informant in your video? Maybe doing a spot for COPS or the Discovery Channel? Well, this tutorial shows you how to create a mosaic blur effect to cover someone's face in Premiere.
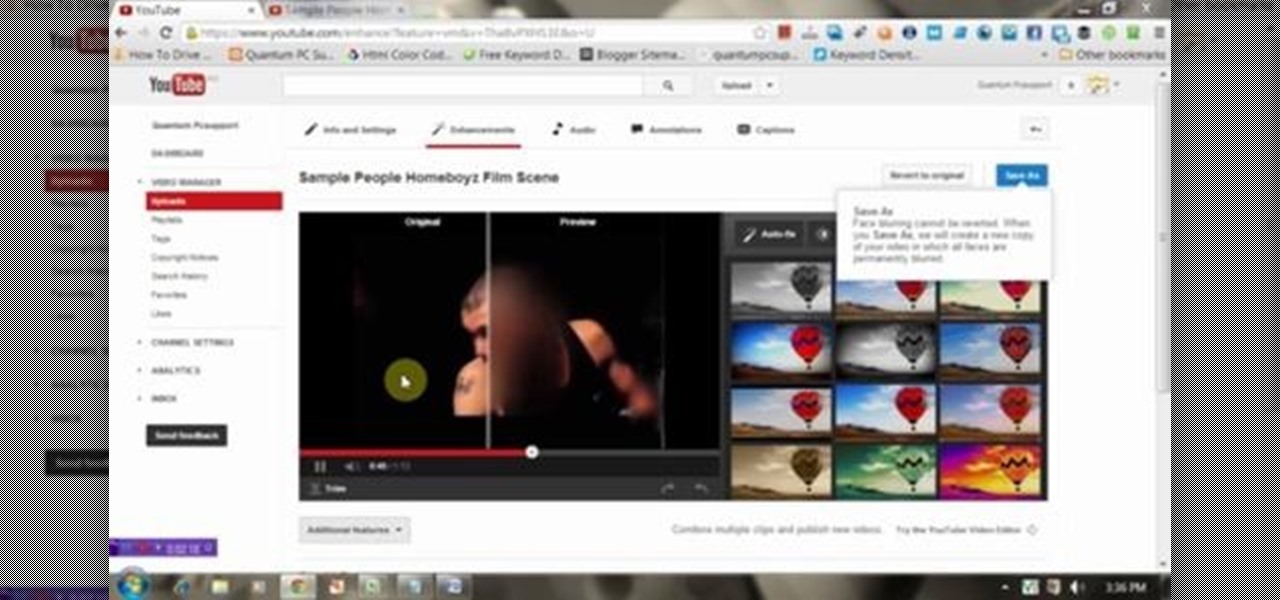
We know that YouTube is the most popular online video sites. But this video will provide an idea how to blur faces in YouTube video. So please watch the video and follow all the steps to do it yourself.
In this video, we learn how to draw a waterfall landscape by hand. Start out by drawing the outline for the drawing with a light pencil. From here, you will start to fill in the different areas with the shading where you would like it. After this, bring in your browns to the rocks and then bring in your greens and oranges. Once you have added the blues and whites, then complete the outline of all the different images. When finishes, you can add in the final details for the drawing. This will ...
When shooting action shots such as runners, bikers, cars, or sports shots, a cool effect that you will see in a lot of professional photography where the person is nice and clear, but the background is blurred to give the intention of being in motion and having a lot of speed. A slow shutter speed is a part of it to capture the image while still showing motion in the photo. In this video you will get tips on how to create the panning effect that will create the desired effect.
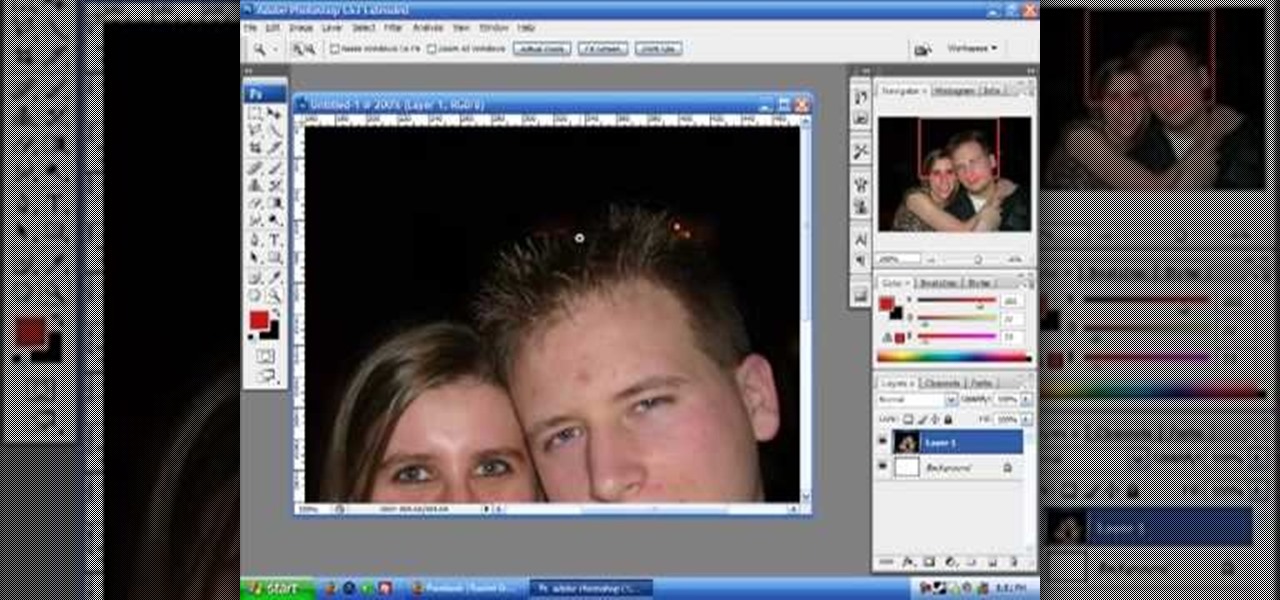
To manipulate photos and turn someone in a photo into a ghost, there are several filters that can be used in Photoshop. This video takes us through the steps of how to take an ordinary picture and turn the subject into a supernatural being using the motion blur technique and the diffuse glow filters among others to alter an image. The best types of pictures to use are ones where the background is relatively dark. By following these simple steps in Photoshop, you can turn anyone in an ordinary...
Pixel Perfect is the "perfect" show to help you with your Photoshop skills. Be amazed and learn as master digital artist Bert Monroy takes a stylus and a digital pad and treats it as Monet and Picasso do with oil and canvas. Learn the tips and tricks you need to whip those digital pictures into shape with Adobe Photoshop and Illustrator. In this episode, Ben shows you how to create fabrics in Photoshop.
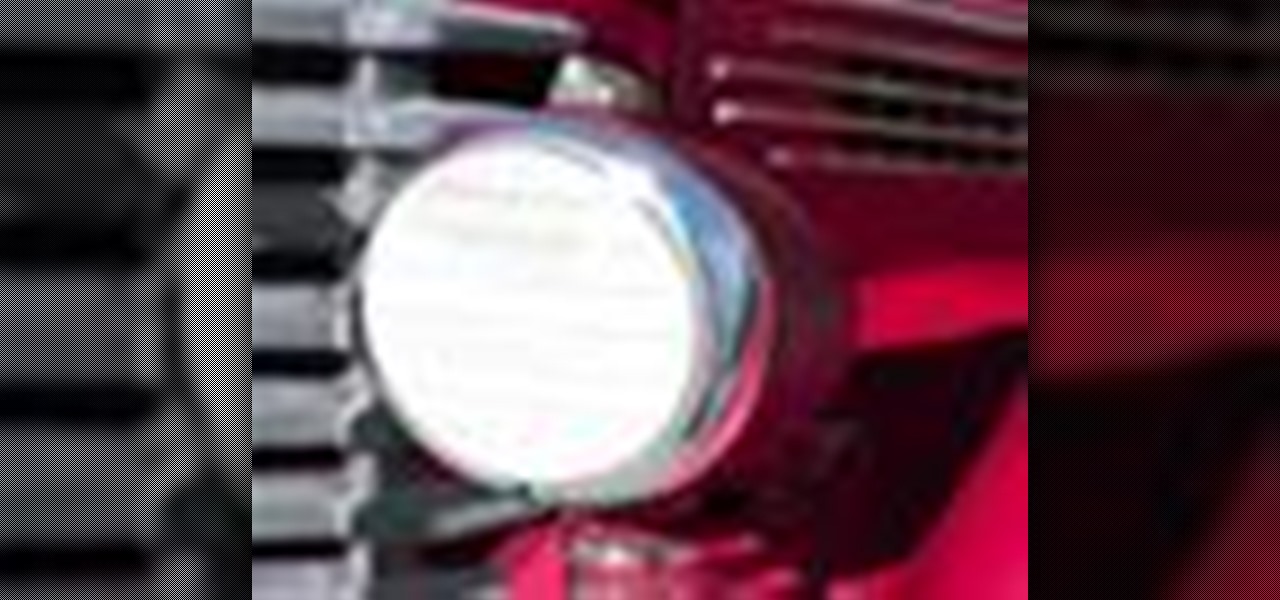
Pixel Perfect is the "perfect" show to help you with your Photoshop skills. Be amazed and learn as master digital artist Bert Monroy takes a stylus and a digital pad and treats it as Monet and Picasso do with oil and canvas. Learn the tips and tricks you need to whip those digital pictures into shape with Adobe Photoshop and Illustrator. In this episode, Ben shows you how to detail an automobile headlight in Photoshop.
Watch this video and learn how to protect your identity on the internet. This clip will help you learn how to blur out your face and alter your voice when posting videos on the web, where your identity is an important secret. Stay anonymous while portraying your opinions. This software can also be used to avoid release issues with strangers in the backgrounds of your videos. Preventing passers by from having there picture posted with your opinions opening you up for legal action. This can als...
You know that special faded, blurred edge effect you get when you take glamour shots at a photo studio? While it looks all professional and difficult to pull off, all it really takes is some basic Photoshop tweaking.
If you take a lot of photos with your smartphone or cheap digital camera, you can see the difference compared to results from a pro camera. So, if you want to get a professional camera look without dropping the money, check out this video to learn how to enhance your pics. This trick works with Photoshop, or any photo editing software that has a selection tool, a gradient tool and a gaussian blur filter.
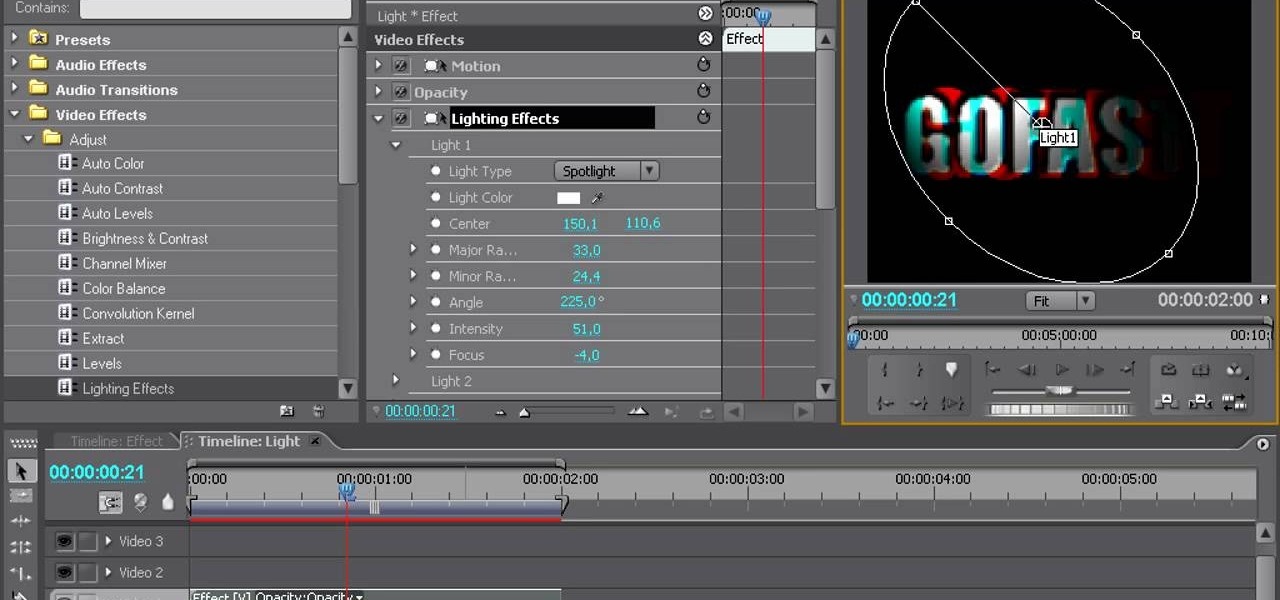
This video continues to elaborate the titles that the creators started working on in this tutorial on blur in-out effects in Premiere Pro. This time they focus on creating light spots and fast bumpmaps and how these techniques can be used to create even cooler titles.
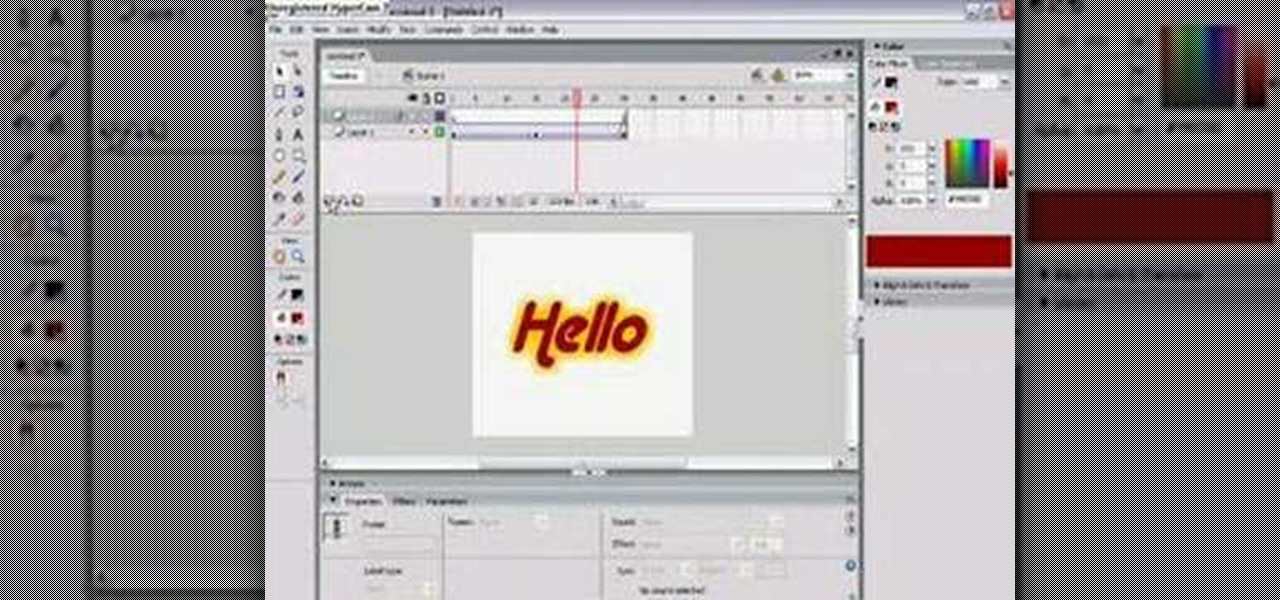
1. The following lines describes how to create animated glowing text on Flash. 2. Open a new Flash Project and select first Key Frame and place a Text Box and Type "HELLO" 3.Select TextColor as red. 4. Then Go to Filters->Glow a. select color as Dark Yellow b. increase the Blur x,y Property value to 5 c. strength value to 200 d. Quality: Low 5. Select 15th Frame and Right click->Select Insert KeyFrame. 6. Then increase the Blur x,y Property value to 50 and strength value to 300. 7. Then selec...
Pixel Perfect is the "perfect" show to help you with your Photoshop skills. Be amazed and learn as master digital artist Bert Monroy takes a stylus and a digital pad and treats it as Monet and Picasso do with oil and canvas. Learn the tips and tricks you need to whip those digital pictures into shape with Adobe Photoshop and Illustrator. In this episode, Ben shows you how to fix, enhance, and retouch photos in Photoshop.
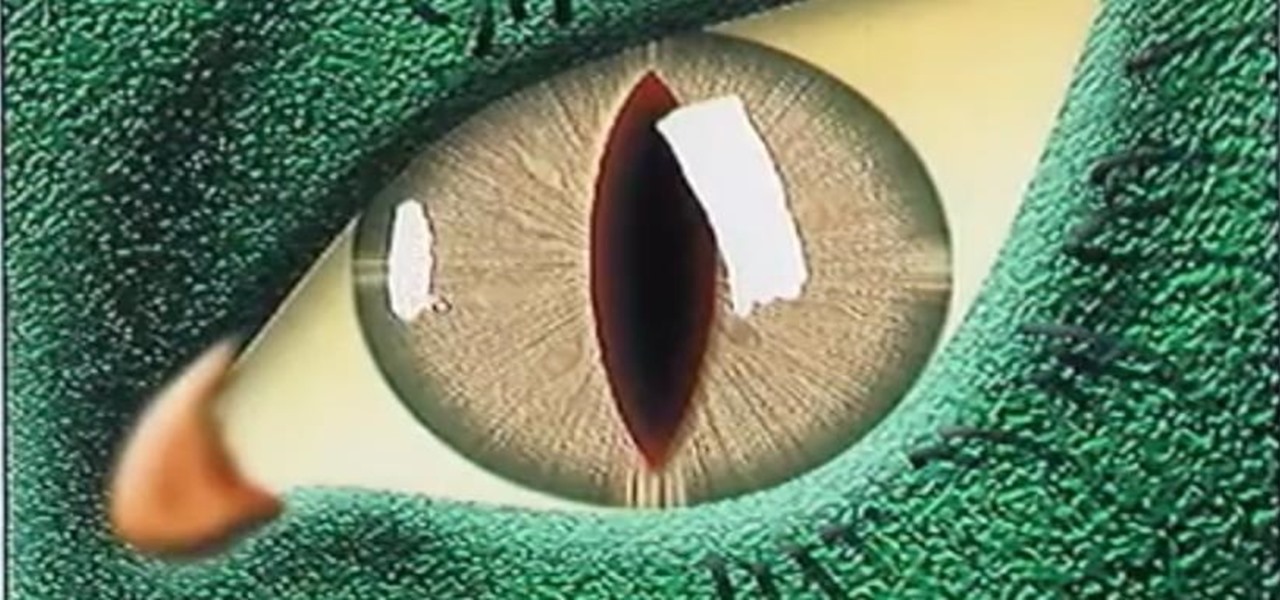
Bert heads to the dark side and teaches you how to create a reptile-like evil eye in Adobe Photoshop. Be afraid. The reptile-like evil eye's texture are created by using various photoshop filters - Radial Blur, Liquify, Texturizer, Craquelure. Carefully watch and learn how to create your own evil eye.
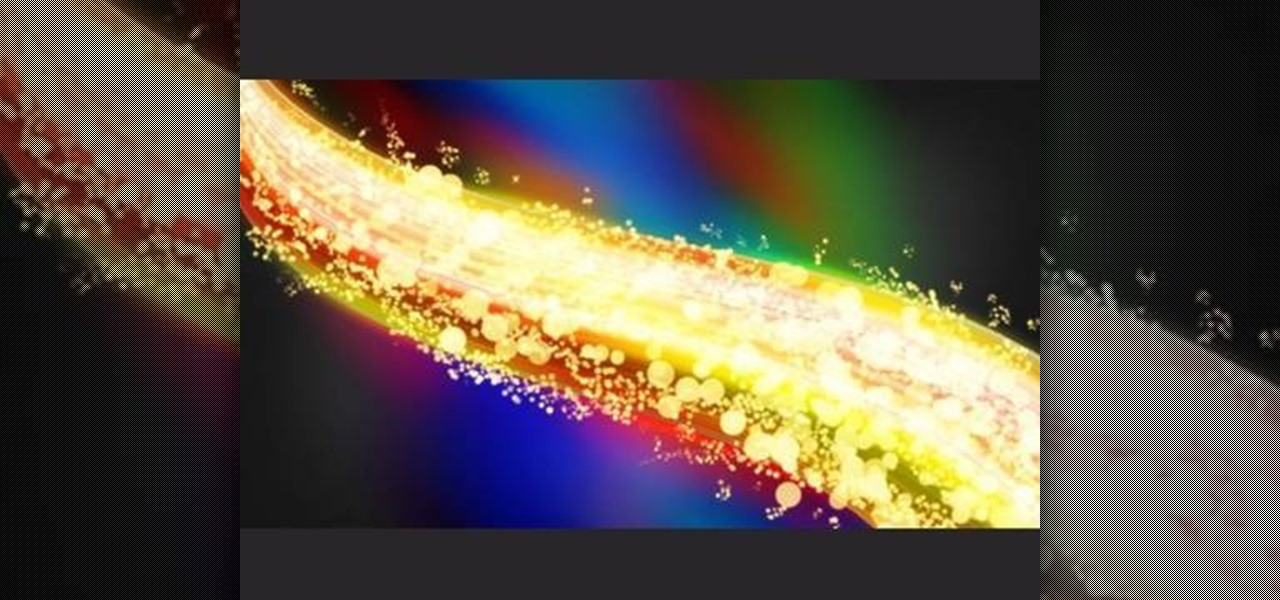
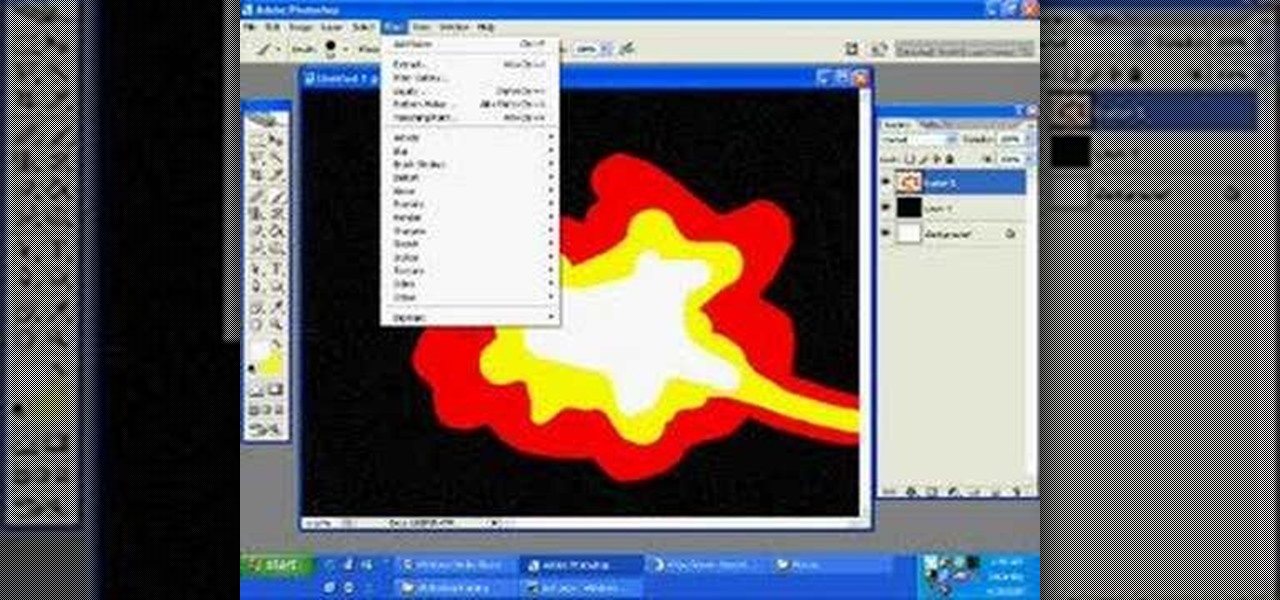
This video will help you learn how to create an Explosive rainbow color swath in Photoshop. First open a new file, keep the width 845, height 475, RGB color mode and white background.
If the subject of your photo doesn't look as fresh as you'd like, check out this tutorial and learn how to soften skin with the surface blur tool in Photoshop. This tool is quite easy to do and in less than five minutes you could make a dramatic difference to your photos.
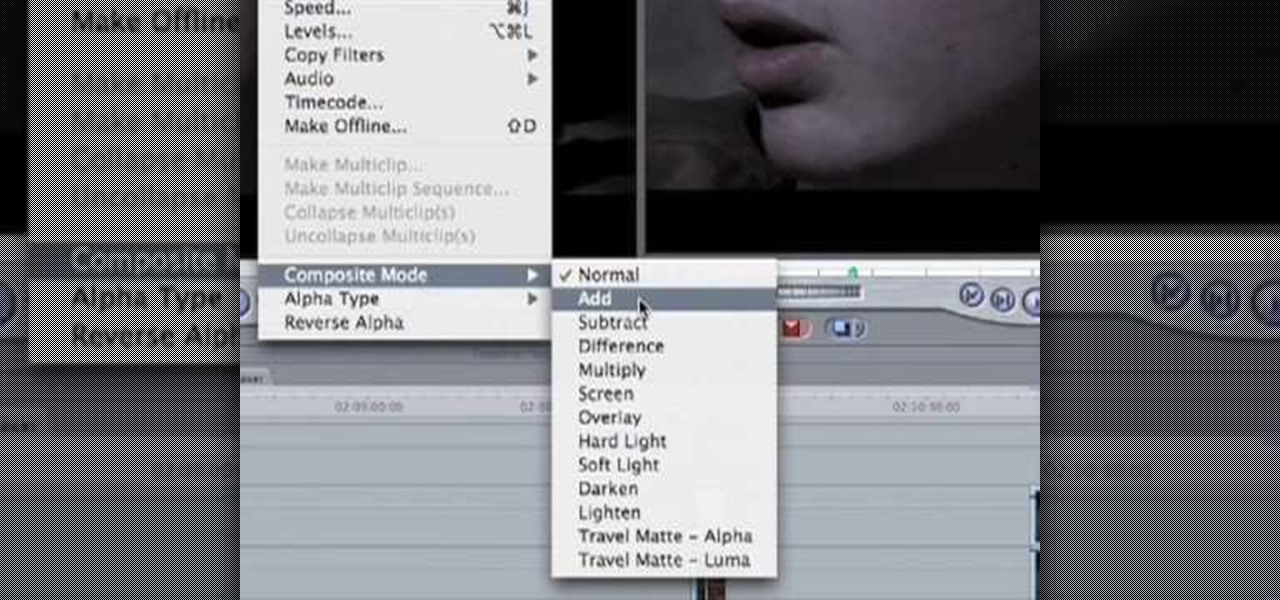
In this how to video, you will learn how to create a film look to your videos in Final Cut Pro. This effect will create a light and warm tone to the clip. First, take the original clip and copy and paste it. Grab it and place it on top of the original clip. Next, make sure that the top clip is selected and click modify, composite mode, and add. This will bring up the highlights in the video. Go to effects, video filters, and Gaussian blur. Go to the settings increase the radius of the blur. Y...
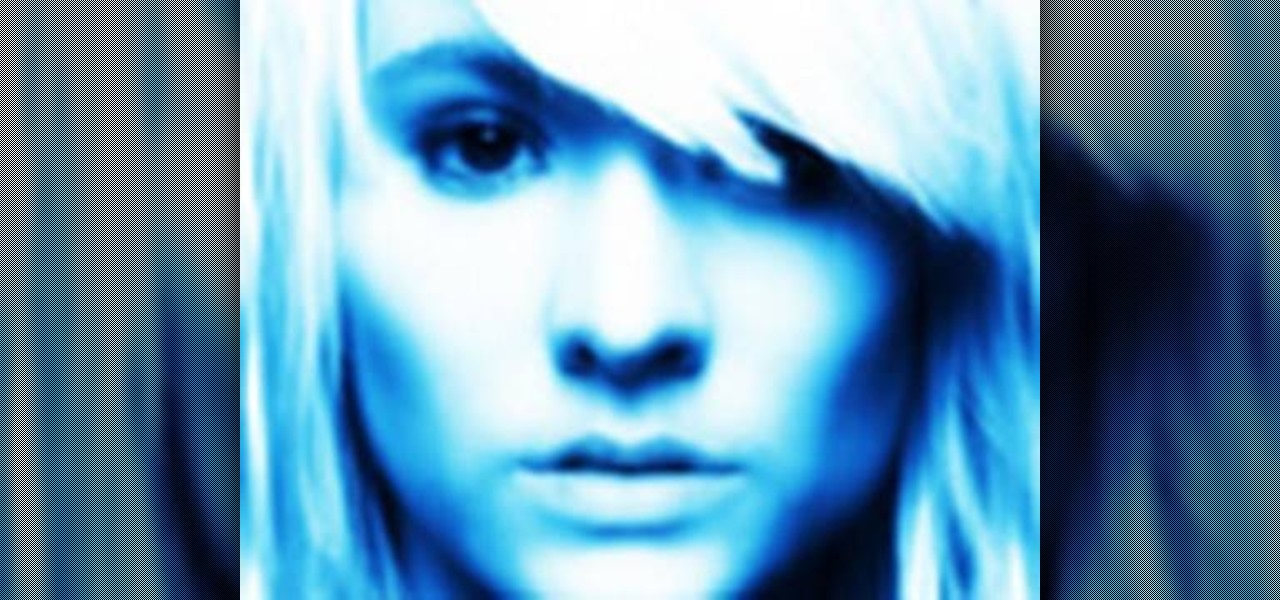
In this video, we learn how to created a chilled look on a photo using PhotoShop. First open up PhotoShop and open up the picture you want to change. First, duplicate the layer on the photo. Then press "control" then "u" and make the picture blue. Now, click "filter" then "blur" and add a small amount of blur to the photo. Now you can click on "overlay" and you can see the photo change. If you want to make it look more blue, duplicate the layer again and you will see more of a chill factor on...
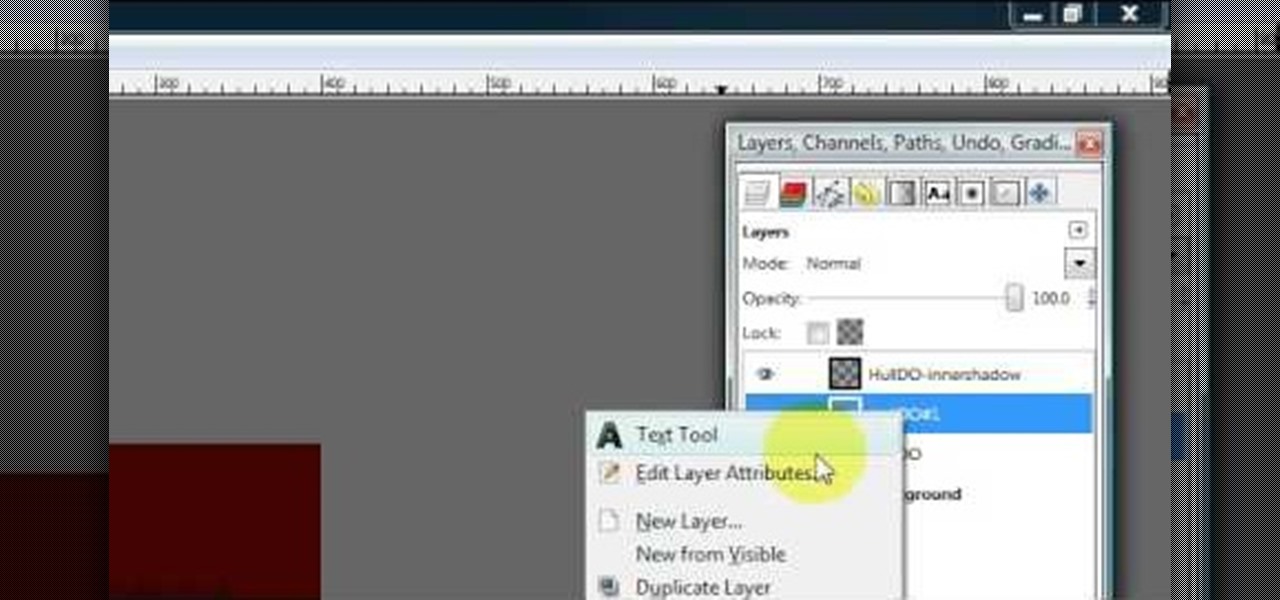
Hulldo teaches you how to create indented text in GIMP. First, create a new document of any size. Then use the text tool to write some words. Next, select that text and go to Script fu-layer effects-inner shadow. Once you've done this, duplicate the layer. You will now want to filter-blur-Gaussian blur. Apply that to your second layer. Now you can either merge the layers or leave them as they are. You can also play with the text settings, if you want a larger shadow, a bolder text and so on. ...
Thanks to technology, art savvy users can visually edit pictures with the click of a button. This video tutorial demonstrates how to color hair in Adobe Photoshop CS. In Quick Mask Mode, color over the hair area with a fairly large brush. Under Filter, select the Blur category and apply a Gaussian Blur to soften the edges of the mask. Revert back to Standard mode where the mask will appear as a selection, and under Select, choose the Inverse option. Finally, adjust the hue and saturation to s...
Update: May 7, 2014: Google's Camera has seen its first update, with a small yet important addition baked into the app—the ability to take pictures while recording a video. Now, when in video mode, simply tap on the screen to take a picture, while your recording continues as normal. The update to version 2.1.042 is set to hit today, but if you haven't yet received it, apply it manually by downloading the apk here.
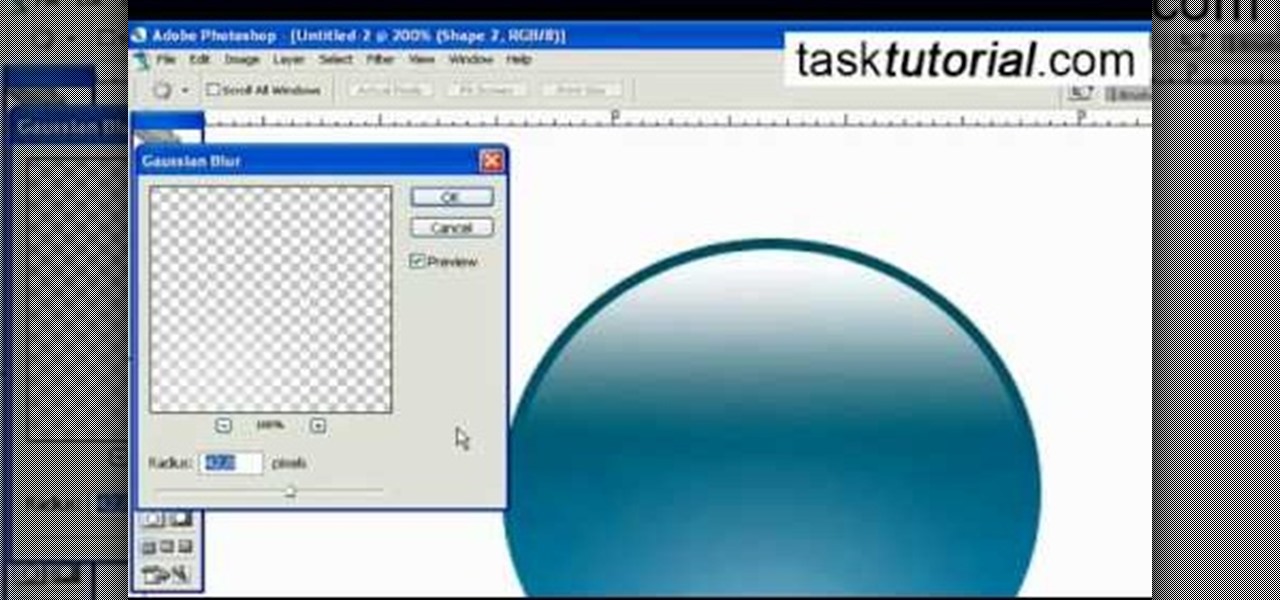
This video describes how to create an easy glossy button in Photoshop. This is done by "simpleretouch.com" website. First select the "Ellipse Tool" from the Photoshop tool bar and then drag it on the layer; it will give the ellipse shape in the layer. Select the "Blending options" from the "Layers" Menu by double click on the layer which is right below corner. From the blending options choose only the "Gradient Overlay" and in that we can choose color and its gradient as your wish. Now take a...
This tutorial teaches us how to touch up eyes while using Photoshop. First, open up Photoshop and zoom into the eyes on a picture you want to touch up the eyes on. First, select the adjustment layer icon and brighten the image. Next, invert the mass and select the "v" key, then pain the eyes on both sides. Next, click "filter" and then click "blur" so you will soften the edges so the picture doesn't look fake. Now, you can click on "before and after" to see what the picture results look like....