If you enjoy using the Bevel Tool in modo and you have a predilection for edges you will LOVE "Edge Bevel". This sparky little production examines the heartfelt story of edges who strive to be more than a single edge. Follow their story as they expand their horizons thru the use of the Edge Bevel tool in modo 101 and learn how to add details to edges on models and meshes.

In this two-part song tutorial, you'll learn how to play Aerosmith's "Livin' on the Edge" on the electric guitar. While this tutorial is best suited for intermediate and advanced guitarists, players of all skill levels can play along. Watch this lesson to get started playing "Livin' on the Edge" on your guitar!
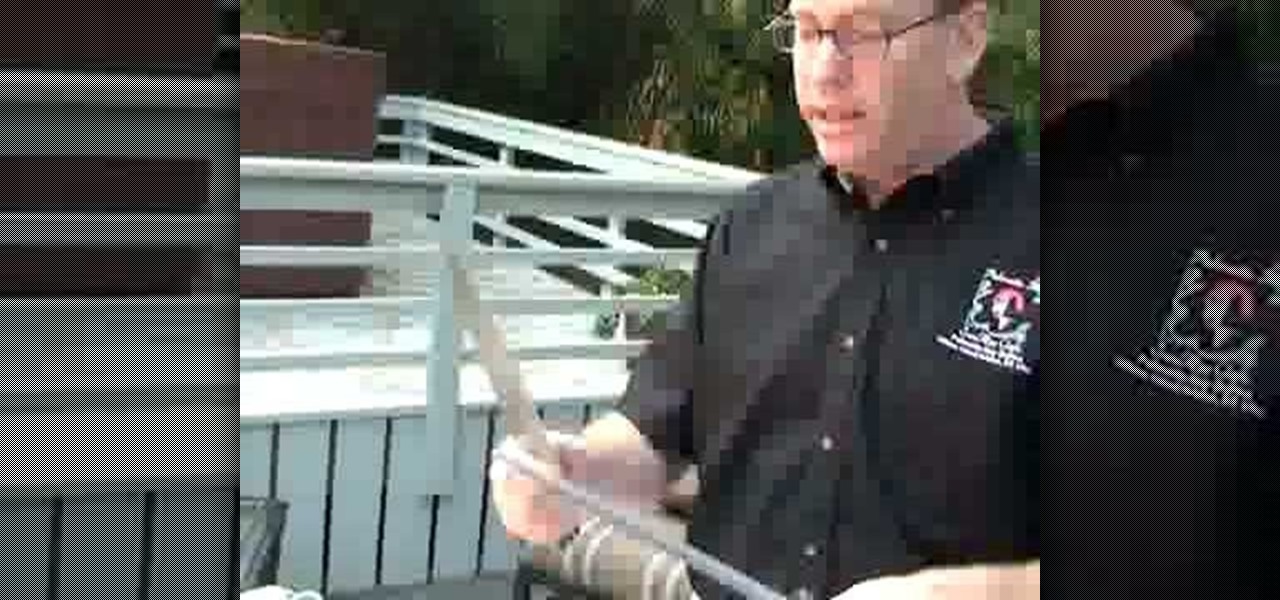
How to properly use an edge sander; get professional tips and advice from an expert carpenter on precision sanding tools in this free woodworking video series.
We don't know why exactly, but somehow fading the edges of a photograph makes it look more sentimental. Maybe it's because faded edges remind us of old timey photographs that have yellowed and softened with age, or maybe it's because faded eges endow a sort of dream-like atmosphere to your picture.
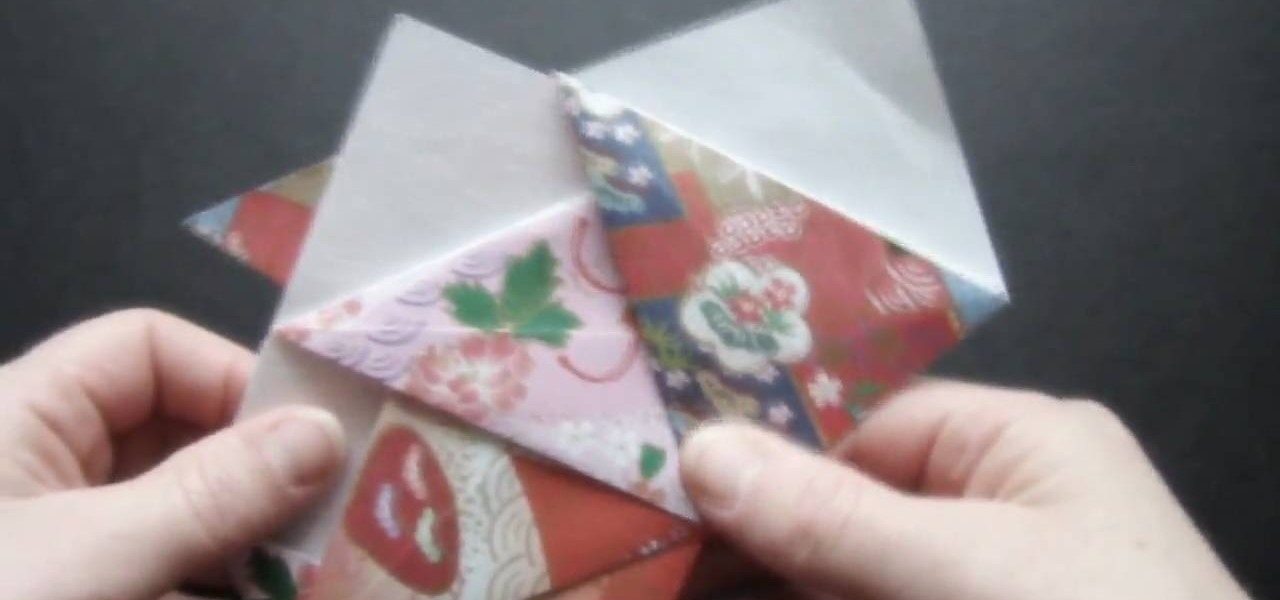
This is a video tutorial in the Arts & Crafts category where you are going to learn how to fold a five-point paper barn star. You will need a square sheet of paper. Fold it in half to make a rectangle. Take the right folded corner and fold it up to the left edge of the rectangle. Place the corner about 1/3 from the top edge and fold the sheet. Next take the left corner and fold it over the edge you just folded. Finally take the flap on the right and fold it over to the opposite side. Now cut ...
Crochet quilts, potholders, and mittens would just be endless jumbles of webs without the appropriate edges to finish them off and give them polish. There are many different ways you can create edges in crocheting, but the crochet foundation chain is among the more creative.

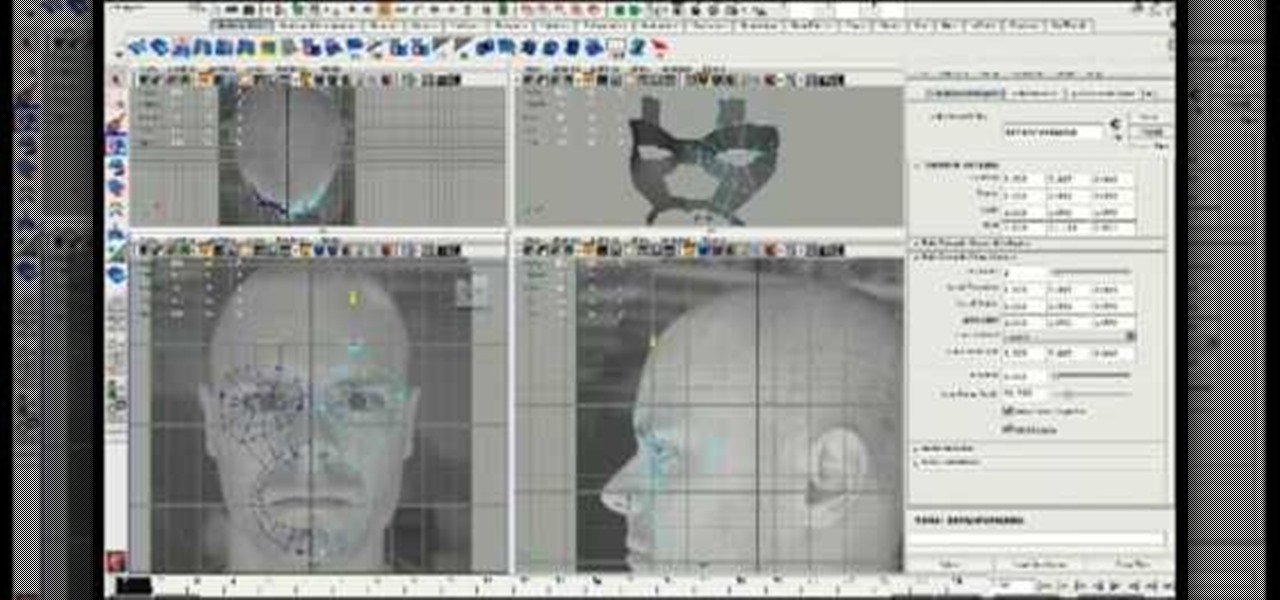
Modeling a face using Maya or any other 3D art program is tough to do without having the result end up looking like a zombie. See the film Final Fantasy: The Spirit Within if you don't know what I'm talking about. This six-part video will help you avoid this problem in your own 3D models by teaching you how to 3D model a face using the head extrusion method in Maya. You'll need a photo to start with (the creator does not supply the one he used here) but once you have that you should be able t...
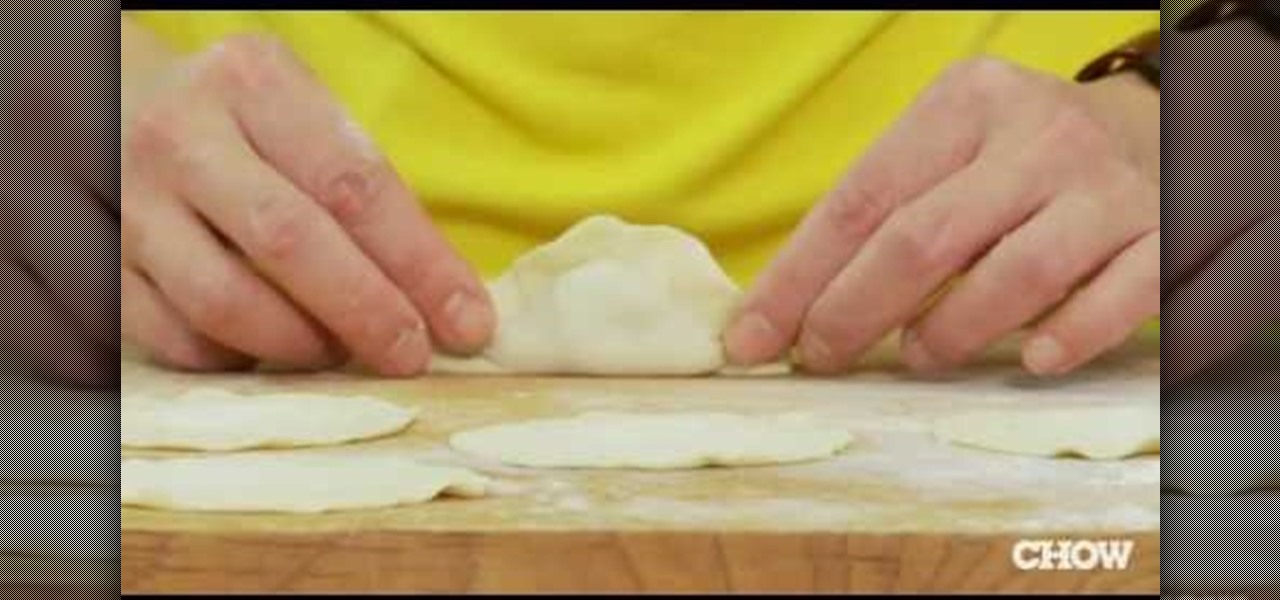
In this tutorial, we learn how to wrap a dumpling with Andrea Nguyen. First, you will need to scoop the filling into the dumpling. Then, fold the edge over it and push your fingers together on the sides to make it wrinkled. Then, you will crunch the edges together and they will be ready to cook! You can also fold the edges over to make them into little pockets that will taste the exact same! Have fun and get creative with these, just make sure they are sealed all the way around so the filling...
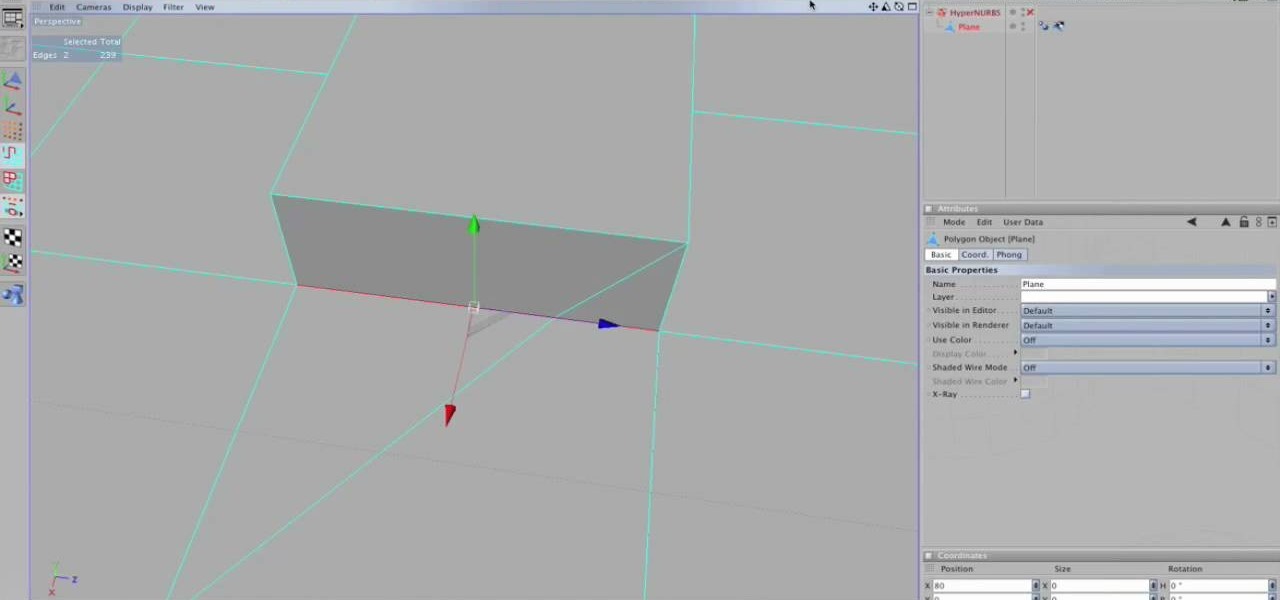
If you have Cinema 4D version 10 or below, then the lack of a spin edge tool has probably given you fits at some point. No more! This video will show you how to spin edges manually using mesh flow in Cinema 4D the old-fashioned way, without using the specialized tools in the newer software.
Watch how the F5 Networks BIG-IP Edge Client solution gets you connected automatically when you boot/start up your computer along with seeing the browser based version of the F5 BIG-IP Edge Gateway. Whether you're new to F5 Networks' popular network appliance or are a seasoned network administrator just looking to better acquaint yourself with BIG-IP, you're sure to benefit from this free video software tutorial. For more information, including detailed instructions, take a look.
This video demonstrates how to make a hexagon from a square paper. Fold a square paper into half horizontally. Fold this rectangle into half again forming a square one-quarter of the original size. Fold the open edge towards the center fold on either side forming a crease. Take the closed corner and fold towards the center crease. Open the center fold and fold it inwards. Fold the corner towards the diagonal edge on both sides, this forms a cone like structure with a paper edge at three-quart...
Fifty cent coins and quarters made before 1964 were made of 90% silver. This is considered jeweller's quality silver so can easily be made into a ring. Kennedy Half Dollars can be found at coin shops or on ebay for four or five dollars a piece. Begin with an anvil which can clamp onto a table. This will allow you to hammer without damaging the table. If you don't have a anvil, you can use any flat surface that is sturdy and made of metal. Next, take a small hammer, position the coin on its ed...
This is an instructional video that demonstrates how to make an origami spinning top. You need seven square pieces of paper, and she uses 6"x6" sheets. First fold the paper diagonally. Fold the short edges to meet the long edge. Unfold it and use that as a guide for the next fold. Fold the top triangles down and tuck on corner into the pocket. Make seven exactly the same. She shows how to slide one folded piece of paper into the next one and fold the edges over each other to hold them togethe...
Stampinmama1 shows us how to soften edges of paper with ink sponges. When you sponge, you get a little softer look onto the paper. You're going to want to use a round stamping sponge and you would want to cut it up into six pieces to have more control over them. Rub your sponge directly onto the pad, grind it on pretty hard. Go right along the edge of your paper, ink it up again and keep going. You will get a soft feathery edge instead of a fairly bland edge with no soft look to it.
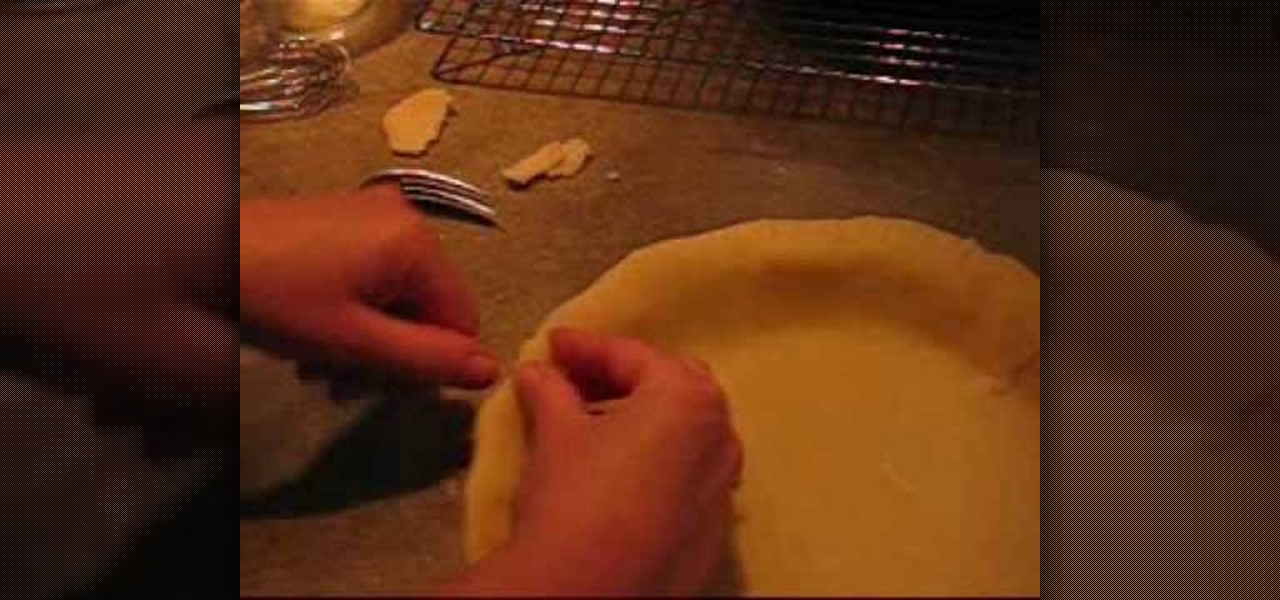
Angie shows us how to flute a pie crust which can be very helpful when baking pies. After dough is placed into a pie pan, the outer edges should be folded under the lip of the pan. The edge of the crust can be given a pattern. This can be accomplished by taking the prongs of a fork and making indents along the edges. You can also make a curved pattern. This is done by pushing in with your thumb from the outside, and with your other hand, pinching this area with your thumb and index finger. Th...
Shane goes into detail on a specific type of boof in which the paddler comes across the drop with angle and boofs into an eddy.
Take a look at this instructional video and learn how to use the eraser tool in Google SketchUp. Keep in mind that the eraser tool only works for edges in SketchUp, and you won't be able to erase surfaces with the eraser tool. This tutorial covers how to erase single or multiple edges easily and how to soften or hide edges with the eraser.
Take a look at this instructional video and learn how to use the freehand tool in Google SketchUp. This tutorial covers how to use freehand to draw free form edges. To do this, simply click and hold the mouse button to draw with the freehand tool. Like other drawing tools, be careful not to cross over edges while drawing, and draw to and from existing edges to properly break surfaces.
This is a short Blender tutorial that illustrates how to move a vertex along an arbitrary edge of an object no matter how the edge is rotated in 3D space. This 3D tutorial is from Stage6 so check it out and learn how to control the vertices on your Blender models.
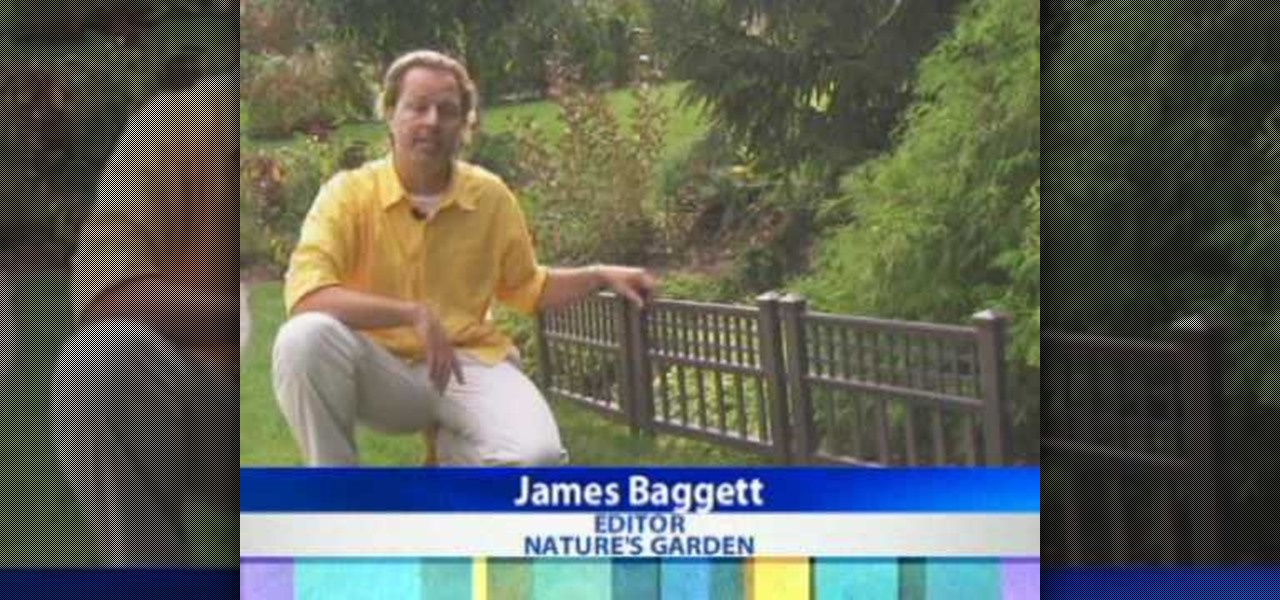
Add some pizzazz to your yard with some decorative edging. Watch this video tutorial to learn about the various garden fencing/edging options from Nature's Garden Magazine's editor James Baggett.
Improve you crocheting skills by learning different edging techniques. This how to video is a tutorial that will show you how to crochet a single crochet edging. Watch, learn and create your own decorative crochet edgings.
This video will show you two different methods of repairing the leading edge of a wooden aircraft propeller. Learn how to properly apply epoxy, clean the area of the repair, and make the edge look like it was never damaged!
Frank Crow talks about keeping the edges of your snowboard in shape. Edge maintenance is crucial to preserving your ride.
In this tutorial we learn how to edge a knitted piece with a single crochet. Start to attach the yarn to the right side, working in a forward direction. Now, work a slip stitch at the edge. From here, stick the hook in the fabric and pull through one loop. The, yarn over again and pull through both loops with the hook. After you do this, do it over again! You will repeat this process until you reach the end of the row. Once you're finished with the row, you will be finished with the edge and ...
In this video, we learn how to turn a composition book into a decorative notebook. First, measure your composition book, then measure out that same size on a piece of decorative paper. Next, put adhesive on the back of this on all four edges, then diagonally. Now, you will have a solid attachment for the paper to be placed on top of the composition notebook. Use a straight edge to push it down and it's completely flat. Then, use scissors to cut any excess paper off of the edges and corners. Y...
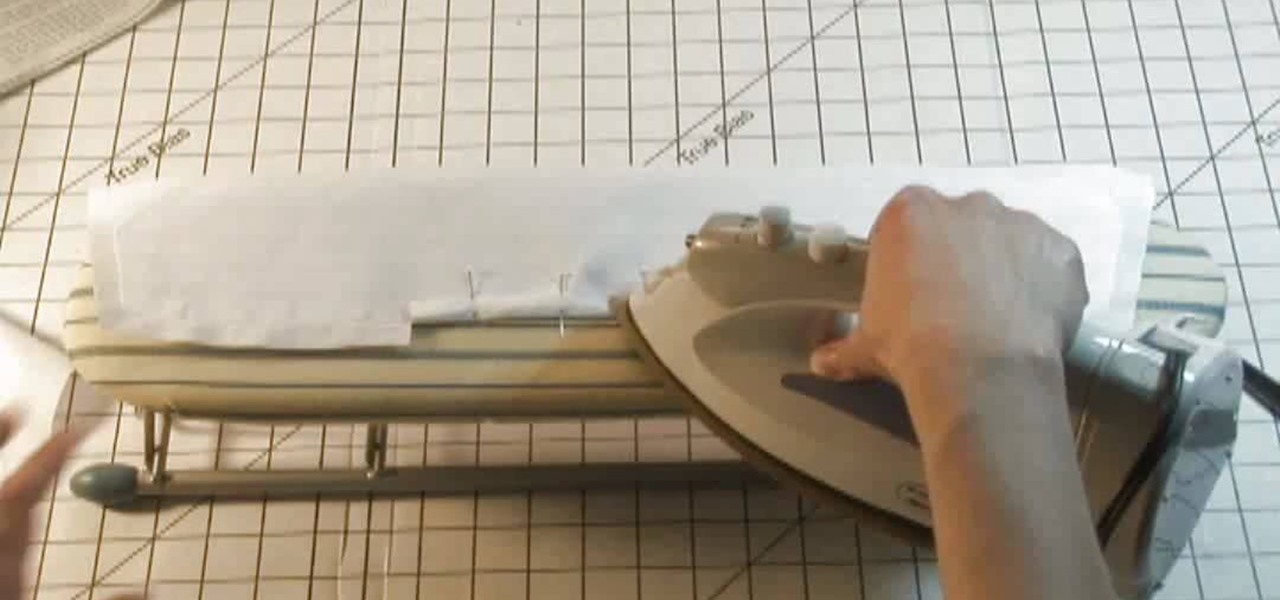
By using sewing pattern Simplicity 4670, the author of this tutorial video takes you through the steps needed to produce a great shirt collar. First you should attach interfacing to one piece of the shirt collar. Here you will be using fusible interfacing and taking the facing to the shirt collar iron the interfacing to the wrong side of the fabric. Sew a guide line that is 5/8ths of an inch wide along the notched edge of the shirt collar's facing piece. At the dot markings of the collar clip...
Missa shows how to ‘Distress Jeans’ in this video. She lays a pair of jeans to be distressed on a table. Next, the creases near the top, which are formed by bending the leg portion of the jean, are marked with a white pencil or chalk. A hard rock is then placed inside the jean, near the knee area. That portion of the jean is graded using sand paper to make holes. The pocket areas are graded next, using a nail file. A pair of scissors is scraped along the edges of the pockets to make cuts. (Al...
Samsung is rolling out the Android 6.0 Marshmallow update for Galaxy S6 and S6 edge today, February 15th, and with it come some good improvements to how S6 edge users can utilize the handset's curved screen.
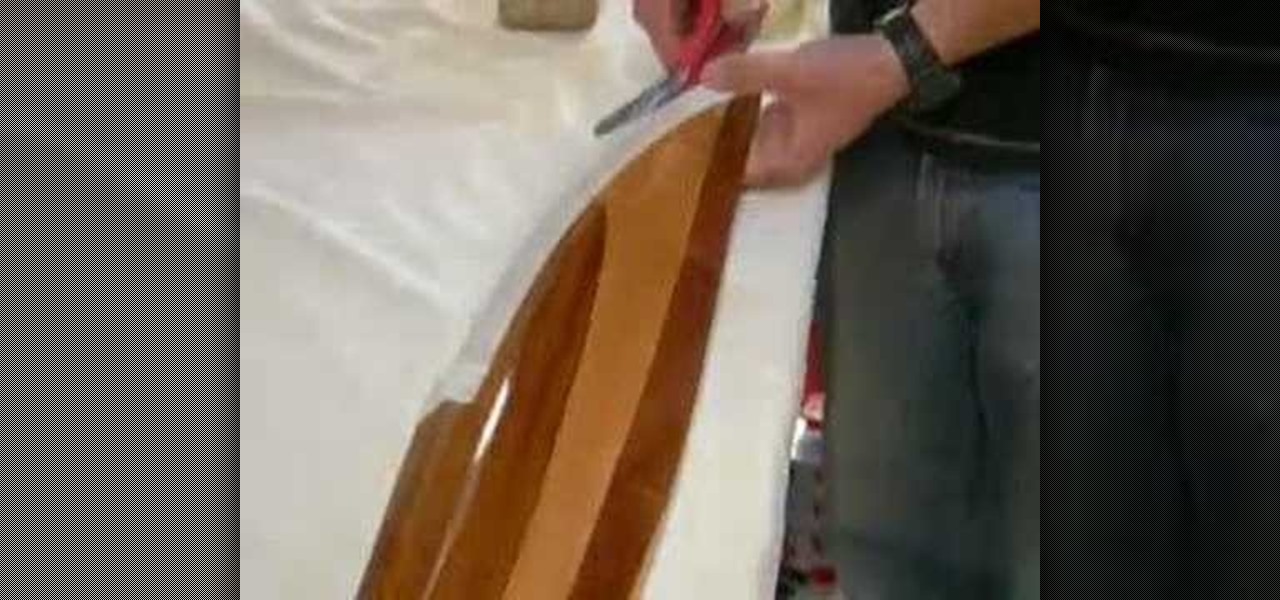
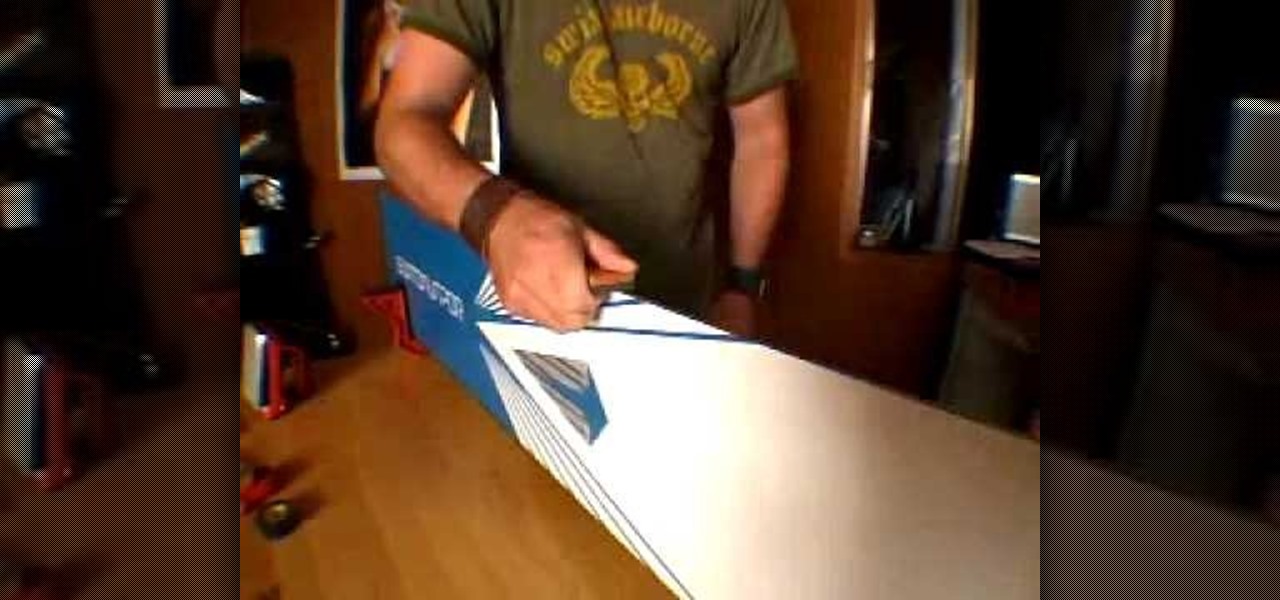
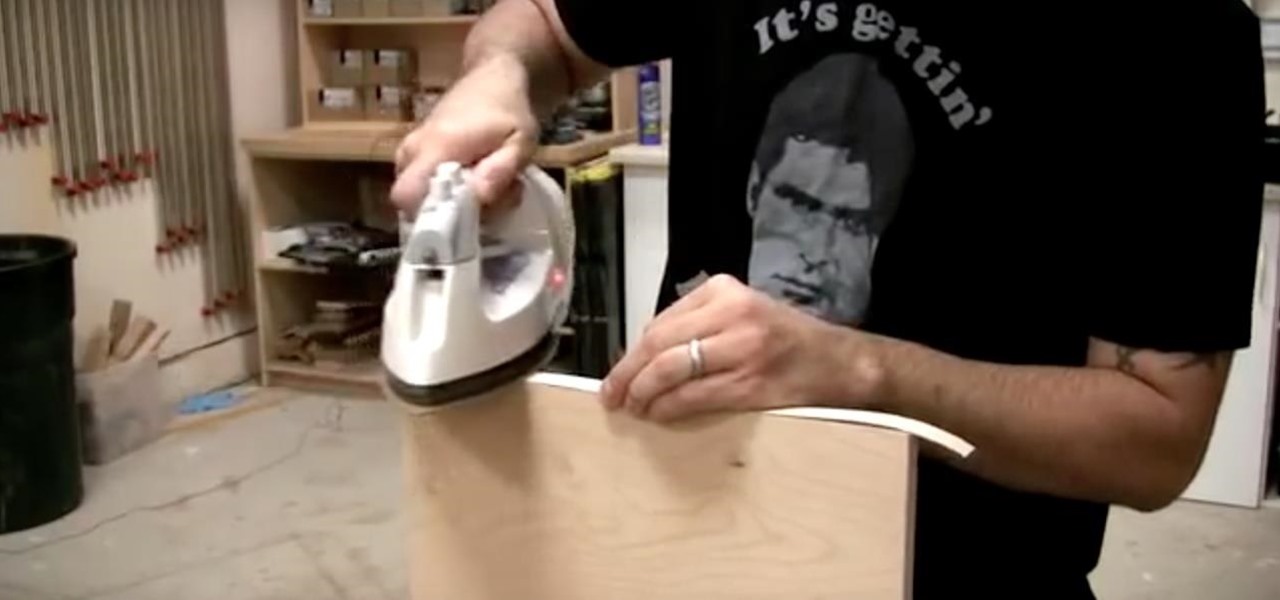
Plywood is flat, stable, and comes in lots of varieties. You can even use your plywood as a base for exotic veneers. But there is a consistent problem with plywood: how to treat the edges. This how-to video teaches you how to apply edge banding so it will hold up to wear and tear. All you need is iron edge banding, roller, sandpaper and an utility knife.
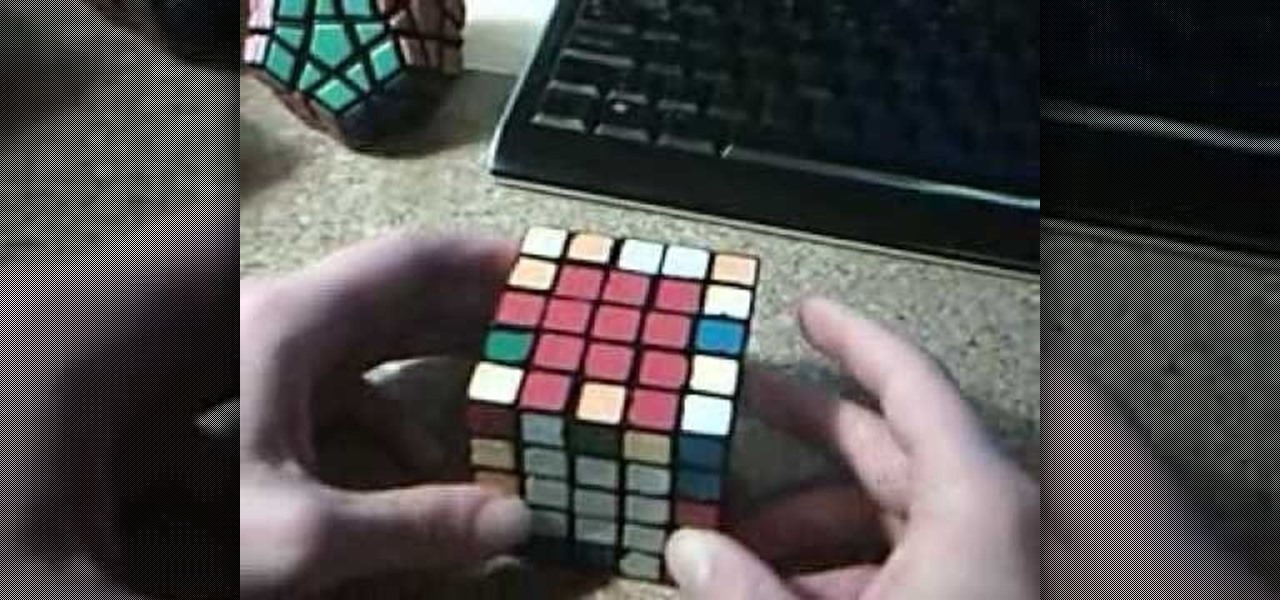
See how to pair the edges of the Olympicube (V-cube), the Rubik's Cube of all Rubik's Cubes! Watch this two-parter to help you on your way to brilliance, because you know you can't get there yourself.
In this video we learn how to knit a scalloped edge. This forms a shell along one edge! First, attach your needle to the yarn on the right edge. Then, make a slip stitch and yarn over. Then, stick then needle through the fabric and yarn over again so you have three on the hook. Then, yarn over and pull through the first two loops in the hook. Then yarn over and go into the fabric and over again. Pull through a loop and then yarn over through all the loops on the hook. Now, do another one foll...
This is a video tutorial in the Home & Garden category where you are going to learn how to recycle an old can to make a candle votive. Take an old can and cut it vertically along the side without cutting off the edges. Now cut along the top and bottom edges starting at the vertical cut and going outwards on each side. Cut up to about half of the circumference of the can. Now pull out the cut halves and you have the basic stand for the votive candle. Now you got to straighten out the jagged ed...
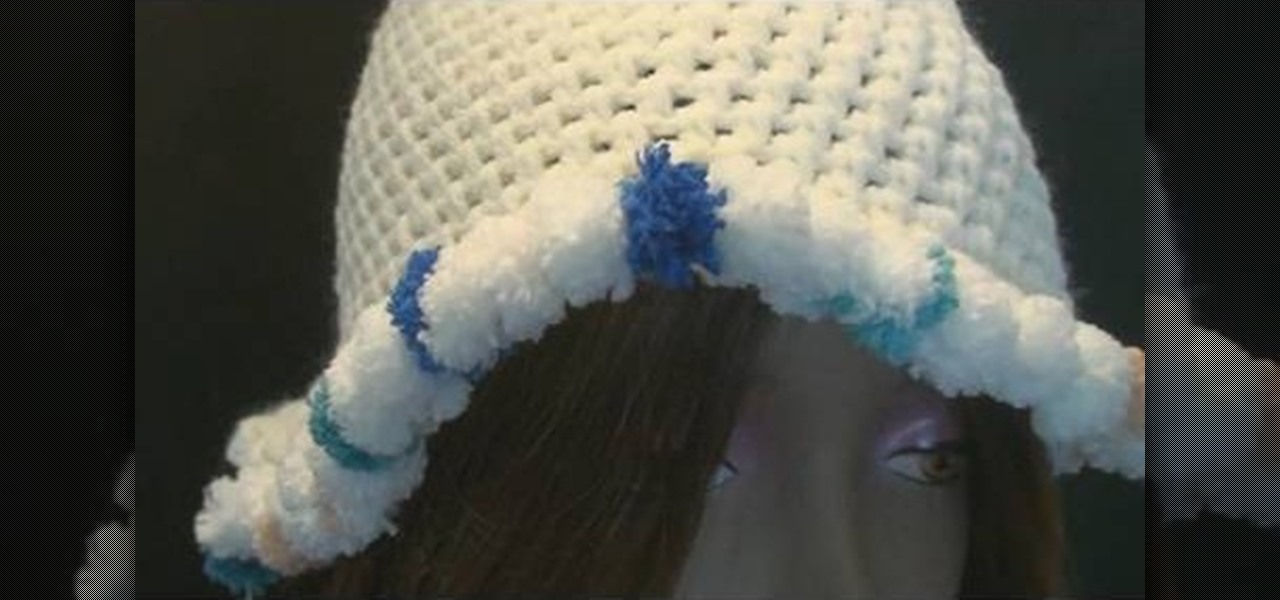
Despite what you may believe, making a crochet cap doesn't end at the last knitting row. In fact, crochet caps can be embellished in a number of different ways, including this Pomp-A-Doodle trim.
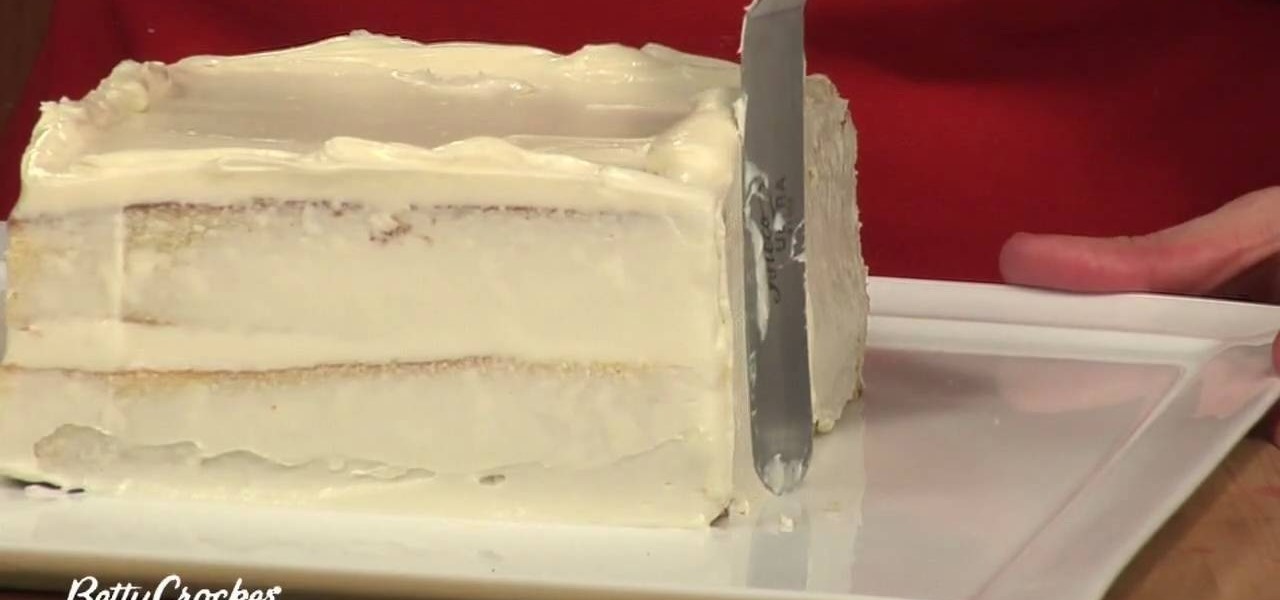
Leif Hanson for the Betty Crocker Kitchens shows how to crumb coat a cake. This is when you put a thin layer of frosting on the cake to hold the crumbs in. She starts with a square cake with exposed edges. First, you take a big scoop of frosting and put it on top of the cake. Next, you spread it around with a spatula. As you spread it evenly you want it to go over each edge and corner, but don't let the corners sag. Next, she loads the spatula, fills it from the top edge to the bottom edge, w...
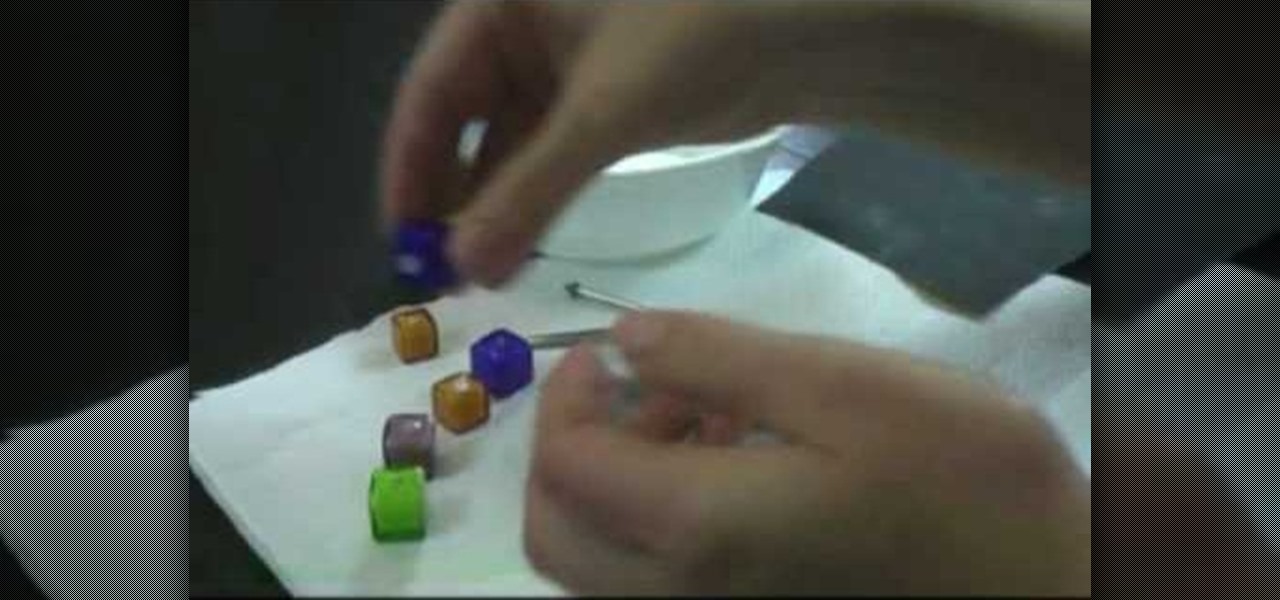
This video teaches us to use a bead reamer to smoothen sharp edges on a bead. You need a reamer, some water and the reaming tips. We need the large tip for enlarging and smoothening the holes and a 45 degree edging point for smoothening the edges of the hole. Twist the handle of the reamer and insert the tip in it. Take the bead and the reamer with the large tip & dip it into water periodically during the procedure so that the water acts as a lubricant. Begin filing the inside of the bead hol...
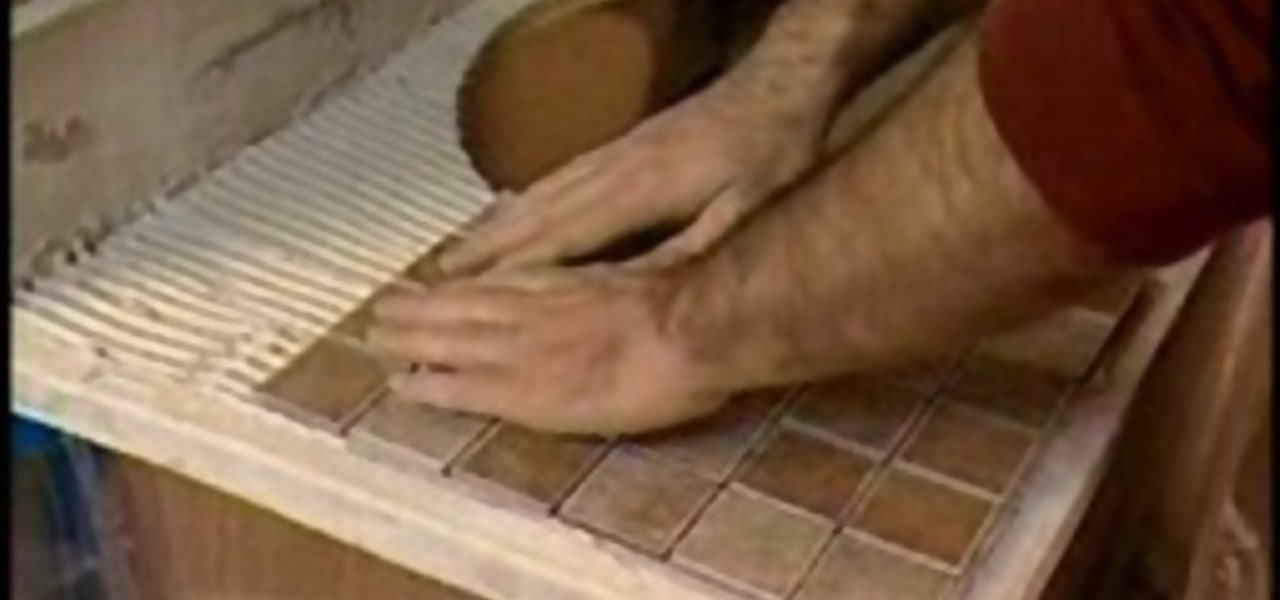
In this Home and Garden video you will see how to install mosaic tiles in your bathroom vanity using mesh pack sheets of 1 inch mosaic tiles and cap edge tiles. Hold a cap tile against the edge of the vanity and draw a line along the edge of the vanity. This will be the first joint line. Lay off the mesh pack mosaic sheets over the vanity top. The edges should be aligned with the line you drew. Mark the line near the joint on the last full sheet near the back splash. Also draw reference lines...
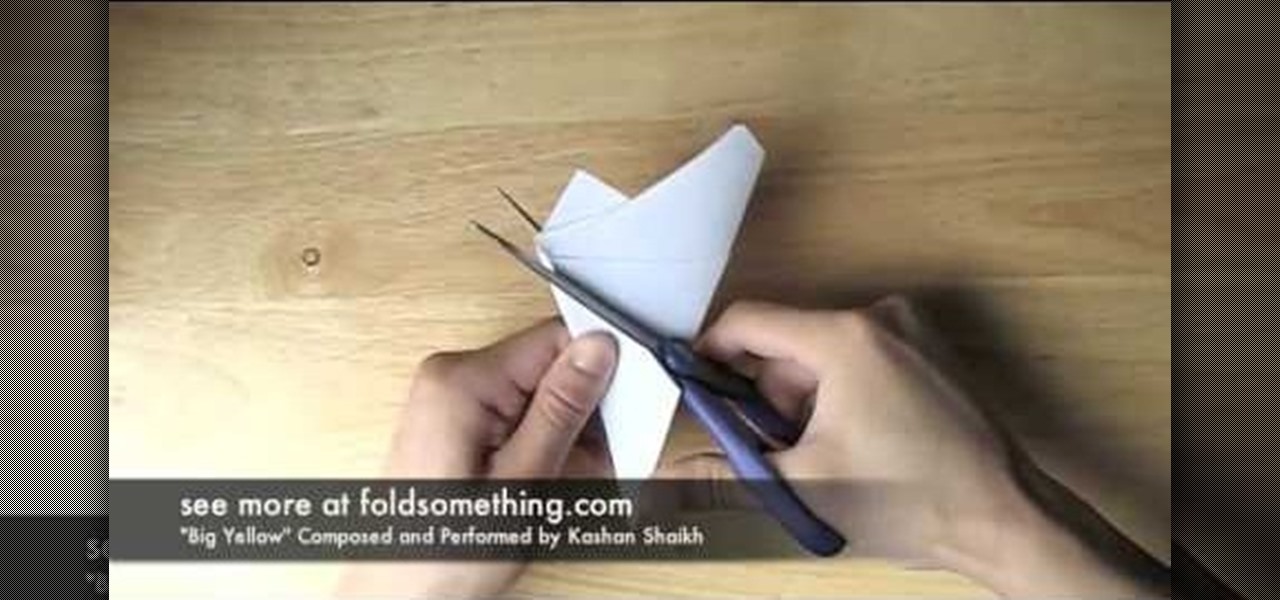
Watch this step by step tutorial to learn how to make a paper bird. Fold your paper in half so that it forms a long rectangle. Ensure you really fold down the crease--run your finger or a pencil along the top of the crease. Unfold the paper, turn it 90 degrees and repeat the fold. Your square should be divided into four squares by the creases. Flip the paper over to the other side and fold it into a triangle. Again, make your creases tight. Turn the paper 90 degree and fold again. You should ...
1) Create a rectangular sheet of paper by folding the left side in, like a book, about 1-inch and remove this excess paper. 2) Fold the rectangle in half, bottom to top like a newspaper, and then unfold and lay flat. Now take the bottom edge and fold it up (again like a newspaper) to meet the center crease that you made with your first fold. Unfold again. You will now have two creases in the bottom half of your paper. 3) Lift the bottom fold (bottom forth of the rectangle) up and line it up w...
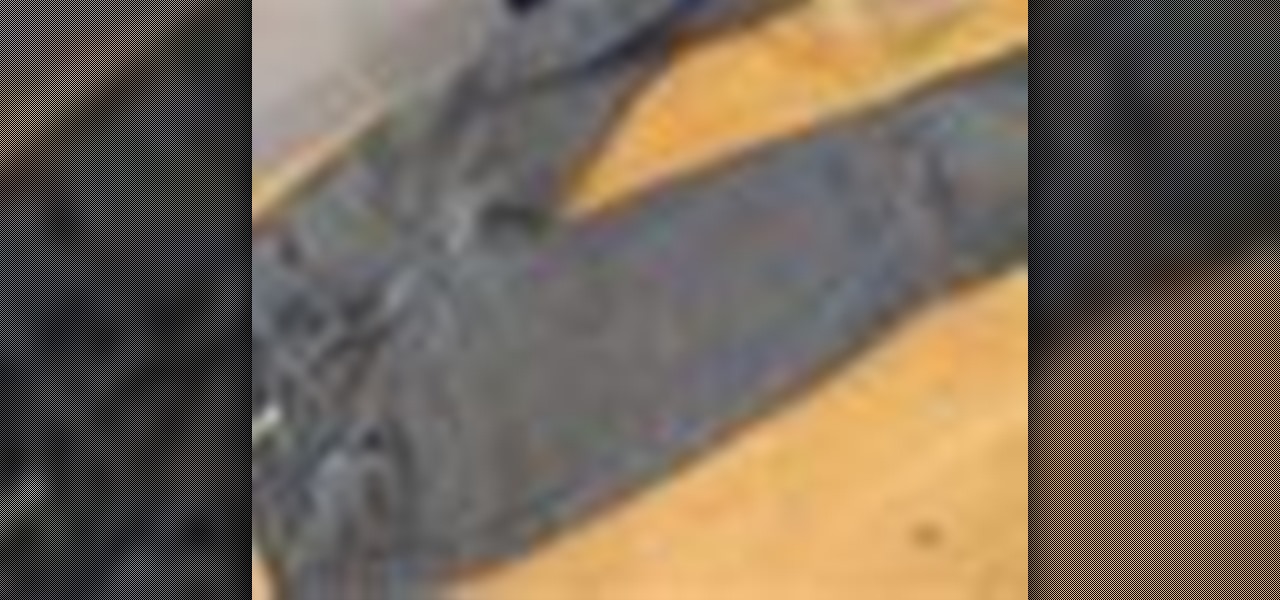
When you use your knife, you want it to be sharp. When you first buy your knife it has a factory edge, which is the sharpest it will ever be. To maintain a sharp edge on the knife you are going to need to invest in a sharpening steel. To sharpen the knife, take the sharpening steel in one hand and the knife in the other. Pull the knife toward you on the bottom and the top with gentle strokes. After you have gently pulled it across the steel a few times apply some pressure and speed up a littl...
Not sure what bottle of wine to get your wine-loving friend for their birthday? Don't sweat it. Get them a wine bag, and save money by making it yourself from old clothes!! Why spend money on wine gift bags when you can craft your own from stuff you already have in your closet?