Most of your who visit Fear of Lightning are probably well familiar with laser weaponry, thanks to Christopher's three-part series covering carbon dioxide, flashlamp, and semiconductor lasers. Another type of laser currently being developed as a weapon is the fiber laser, which is compact and efficient, but much weaker than a chemical laser. Fiber lasers are more commonly used in laser cutting and marking, telecommunications, spectroscopy, and of course... music.

I was just very amused by this commercial for Portal.
This video gives viewers an overview on how to use the manual settings of your DSLR camera. Aside from the Auto setting, your DSLR camera has the P-mode which is the program mode, S-mode which is the shutter priority mode, A-mode which is the aperture priority mode and finally the M-mode which is the complete manual mode. P-mode or program mode is more like the Auto-mode in your camera. You can't control your shutter speed and f-stops (aperture) however; you can manipulate the other settings ...
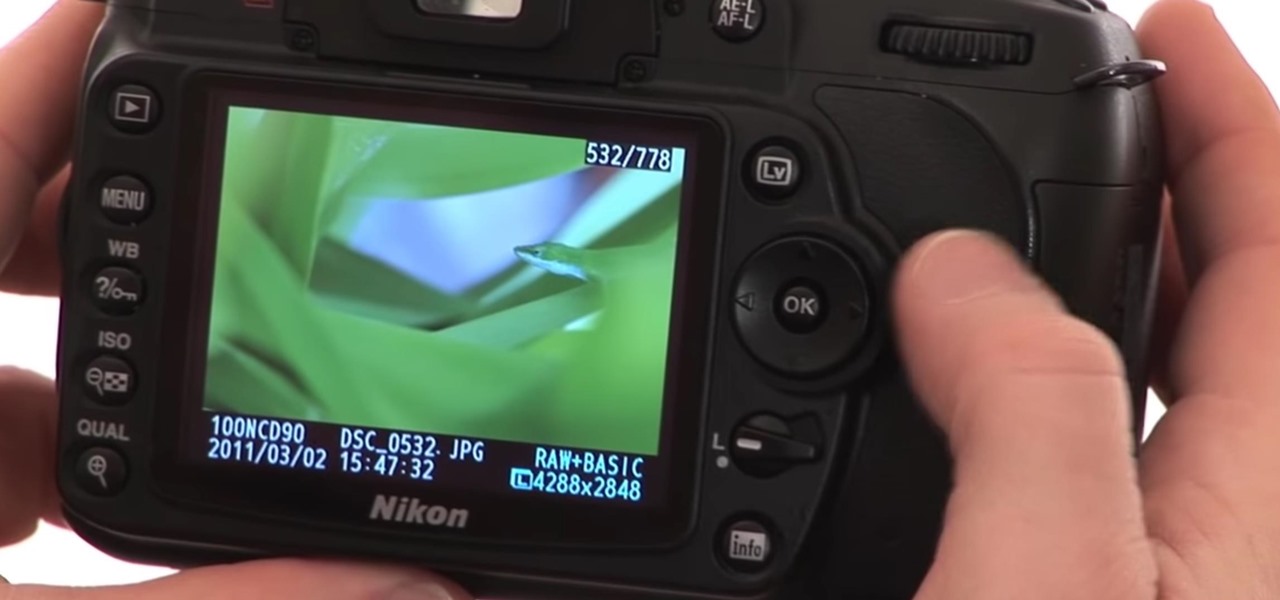
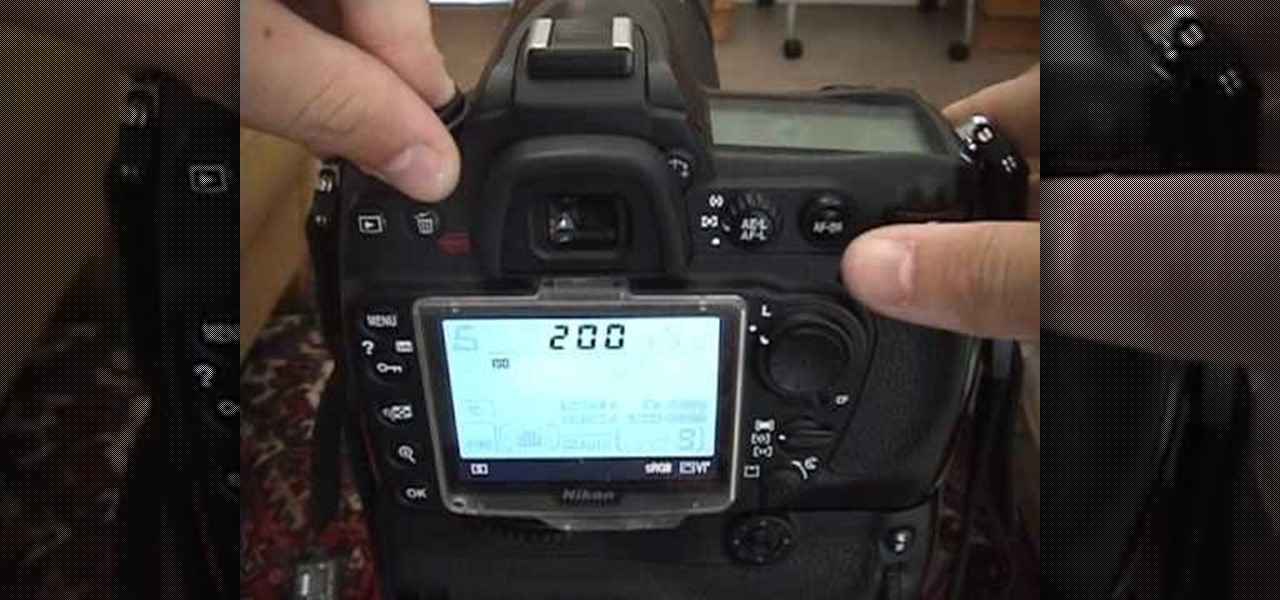
Watch this instructional video brought to you by Richard Berry to learn how to operate the Nikon D90. This Nikon D90 video tutorial demonstrates how to use the control dial (auto mode, scene modes, program [P], shutter priority [S], aperture priority [A], and manual [M]); read the display and viewfinder; adjust the aperture, shutter speed, focus, spot meter, matrix, exposure compensation, etc.; use the back command dial; and more. Use this Nikon D90 tutorial to familiarize yourself with your ...

If you're a medical student, you'll learn a lot from this video lesson on examining your patient's eyes. If the patient is having trouble seeing, like double vision, blurred vision, pain or any other problem, a proper eye examination is detrimental to properly diagnosing and treating him/her. You can also determine and potential problems which may arise bases on your family history. Watch to see the complete procedure outlined, which is great for any med student or doctor. Even nurses can ben...
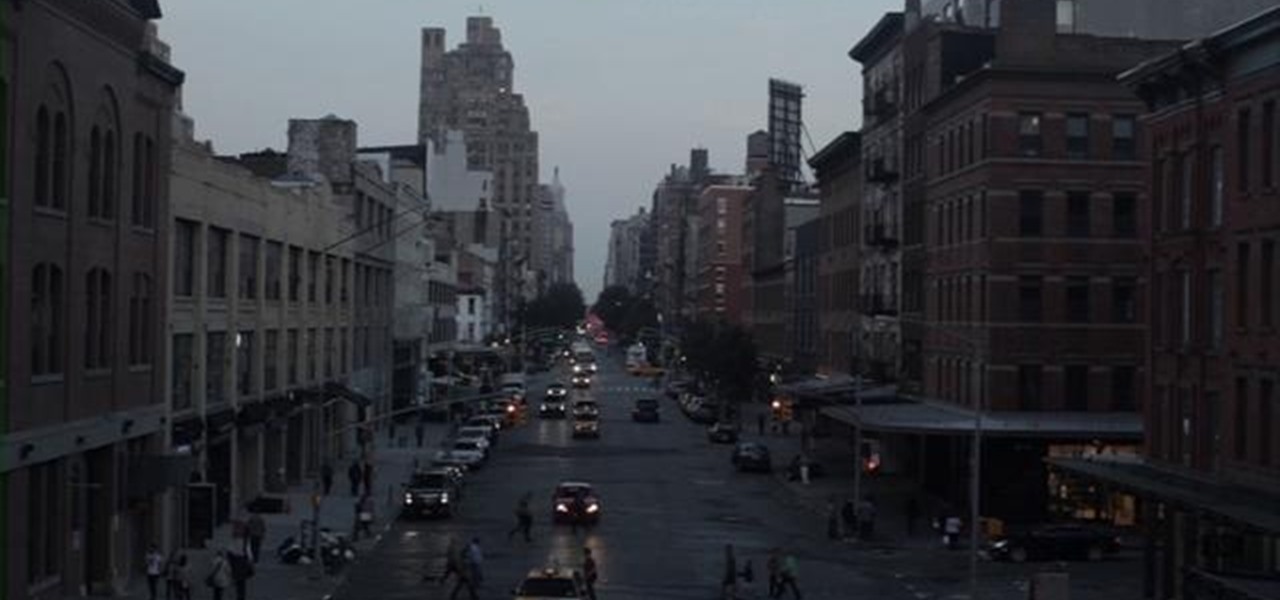
One task to which DSLRs are particularly well suited is nighttime shooting. Fast, wide-aperture lenses make the most out of available light. In this video tutorial from renowned DSLR cinematographer Philip Bloom and the staff of Vimeo, we receive some tips on how to film at night using, for example, a Canon 7D, T2i (550D) or 5D Mark II.

If you want to engage in macro photography and can't afford a close-up lens, you may be in luck. By using a "G" lens (that is, a lens that does not have a built-in aperture ring) it is possible to reverse the lens and take close-up shots with your camera, without having to buy any additional equipment.
All you science and astronomy nuts out there, pay attention, this detailed video tutorial series will tell you everything you need to know about using the Meade EQ Series Telescope to ogle the universe.
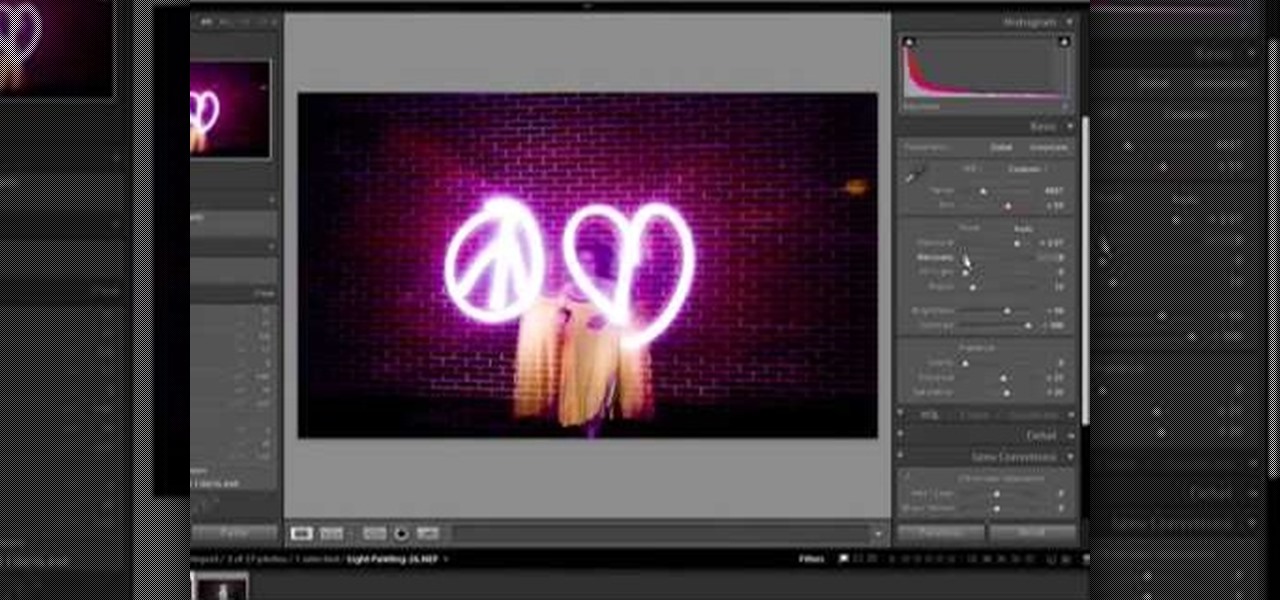
Light painting or light writing is one of the coolest of the coolest multimedia arts. It consists of setting a camera for a very long exposure in a dark area, then moving light sources around in front of the camera. When the aperture finally closes, you will have a photo where the light is preserved everywhere it was. Basically, you've drawn on a photo with light. How cool is that? This video will show you how to do it quickly and easily, allowing you and your friends to enjoy this exciting n...
Creating extremely impactful pictures can all be up to Depth of Field. You can either put more or less focus on your subject with various techniques. In this video you will learn how to determine distance with aperture, focal length, and distance from subject techniques.
This video shows you how to light a bottle with long exposure in photography. The end result is to have a picture of a bottle with glowing edges with a black background. For starters you set your SLR camera settings to a 30 second manual shutter speed and a f5. 6 set aperture. Put the camera on a tripod for steadiness and set up your subject. For the subject, on a table, place your bottle in front of your chosen drop cloth. It is best to choose a color similar to the bottle. Then you use a li...
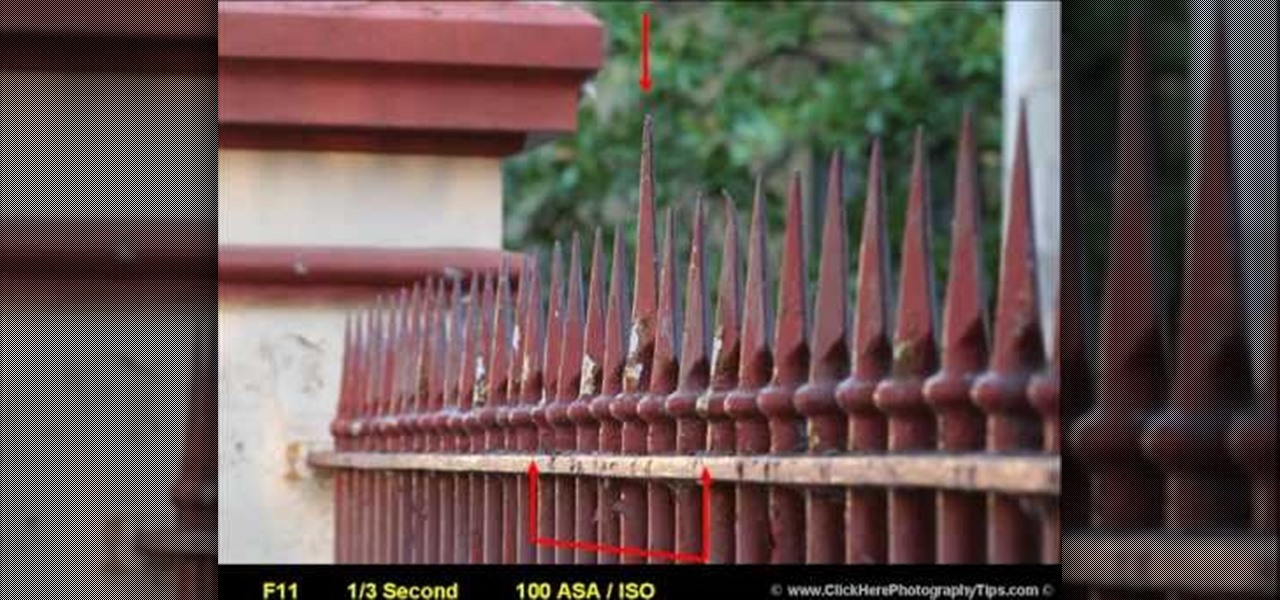
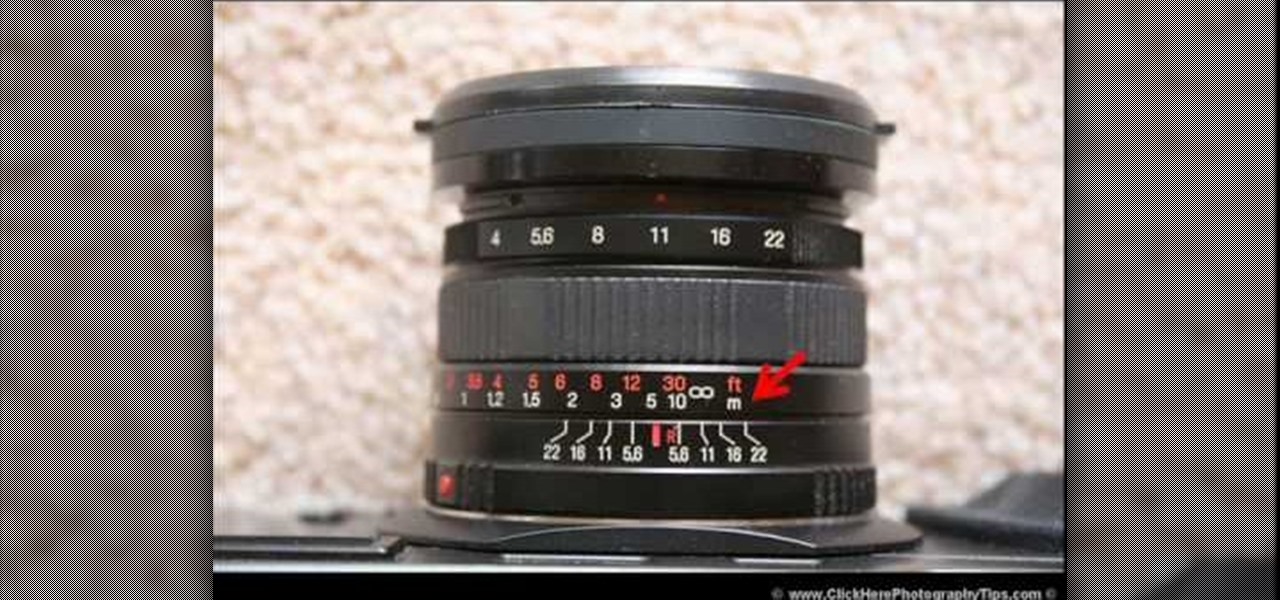
In this Fine Art video tutorial you will learn how to understand your lens and its effect on depth of field. The lens in the video has some inscriptions which are interpreted like this. 50mm is the focal length of the lens. The aperture is from f1.4, which is the widest lens opening to f16, which is the smallest lens opening. The higher the number the lesser the lens opening. Aperture determines the amount light that comes through the lens. Aperture also decides the depth of field. With a wid...
Mobile World Congress 2018 is here, and with it, Samsung has officially announced the highly anticipated Galaxy S9 and S9+. While we already knew much about the new phones, Samsung's presentation officially filled us in on what to expect from the S9's cameras, including dual aperture, two cameras, and super slo-mo.
In this video from clickherephotography we learn how to take great photos by using depth of field. In a picture of a bird he used an aperture of about 5.6 which increased the shutter speed on a 300mm Canon lens. With depth of field you can blow your background out. If you used a higher aperture, a lot more of the bird would have been in focus and a bit of the background would have been in focus. By using an F-stop and this aperture, you really bring the bird or whatever object is in the foreg...
Learn how to use depth of field with help from this photography tutorial. Although it may seem that depth of field is a confusing factor in photography, it's actually quite easy to understand & adjust once you've gotten the hang of it. Depth of field (or, DOF) is a great way to experiment with your photography & improve your skills as a beginner photographer. When taking your photograph using DOF, it is imperative to remember that the shutter speed and aperture (or F-stop) need to change at e...
In this video, we learn how to use and understand depth of field in photography. If you look at a photo, the depth is how deep the picture looks. You can change the depth by changing the aperture to make the depth of field look shorter or longer. The lighting can also change the depth of field and what you can see in the background. A big aperture will give you a large depth of field, with a small amount of light. If you want a big depth of field in a landscape, then you will use a maximum ap...
See how to manipulate exposure on the Canon EOS 5D MK II. This is a quick demonstration of how to get the Canon EOS 5D MK II in video mode to give you a wider aperture, even in bright light situations. This is a reliable and sound method of manipulating the aperture for recording videos on the Canon 5D Mark 2.
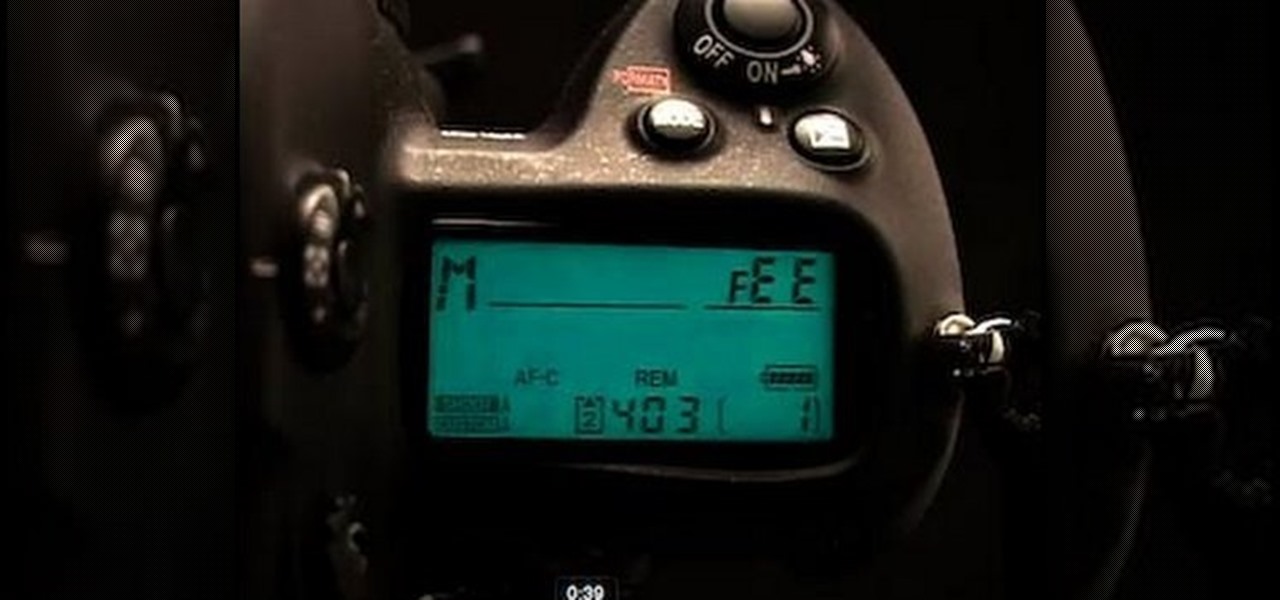
In this video, it is demonstrated how to get rid of a "FEE" error message on a Nikon DSLR camera. The solution is fairly simple and quick to do. First you will want to turn your camera on to where you see the "FEE" error message on the LCD screen. Next, you will set the camera's aperture ring to the highest number available. After this, the last step is to lock the aperture ring by using the switch. After doing this step, your camera should return back to normal working order and the "FEE" er...
If you're not looking closely, it's easy to mistake last year's Galaxy S8 for the brand new Galaxy S9. Design, build materials, screen size, software — it's all virtually identical, save for a few exceptions. But those minor differences can add up.
You need a flash to add light to dark photography settings, but a flash might make your picture look blown out or overexposed. Here are some good tips, like adjusting your aperture or manual ISO to maximize your available light. A tripod will also help you by allowing a longer shutter speed. Or, use a diffuser made over an old, translucent film canister!
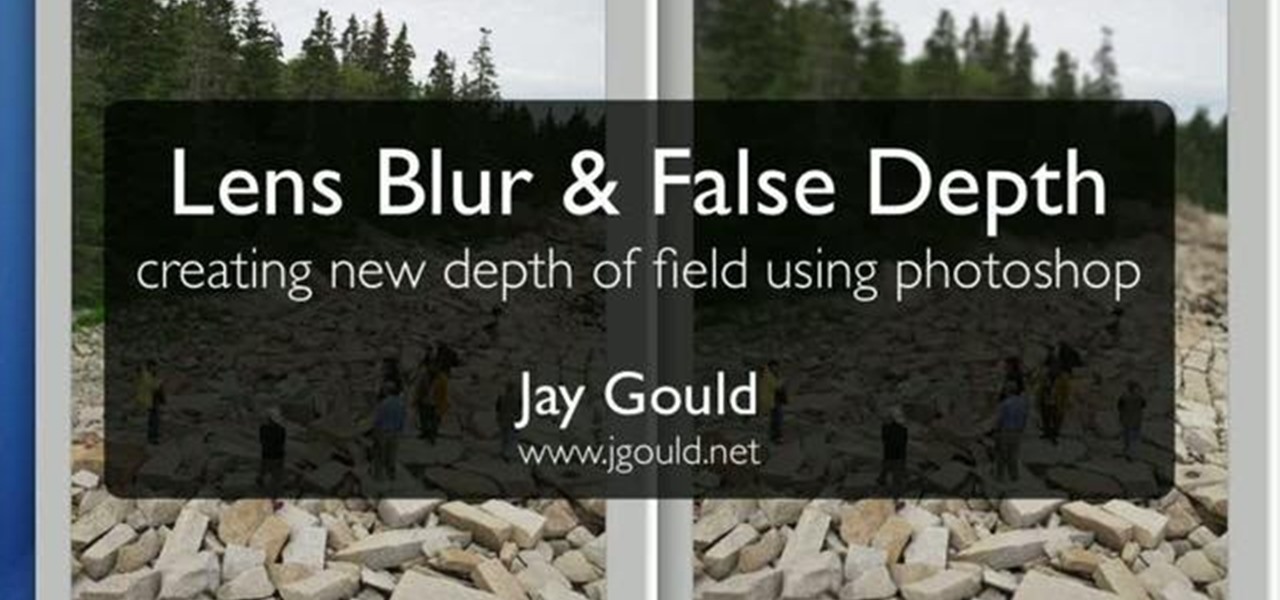
Want to blow out everything behind a foreground object but don't have $500 to drop on used DSLR camera? Then the filter trick outlined in this 17-minute Photoshop CS4 tutorial is for you. Using lens blur, one can create convincing depth of field reminiscent of a view camera or a wide-aperture lens. This technique is complex and requires some real observation and thought, but can produce beautiful results.
For years, smartphone makers have been caught up in a megapixel spec race to prove that their camera is better than the next guy's. But we've finally come to a point where even the lower-end camera phones are packing more megapixels than they need, so it's getting harder to differentiate camera hardware.
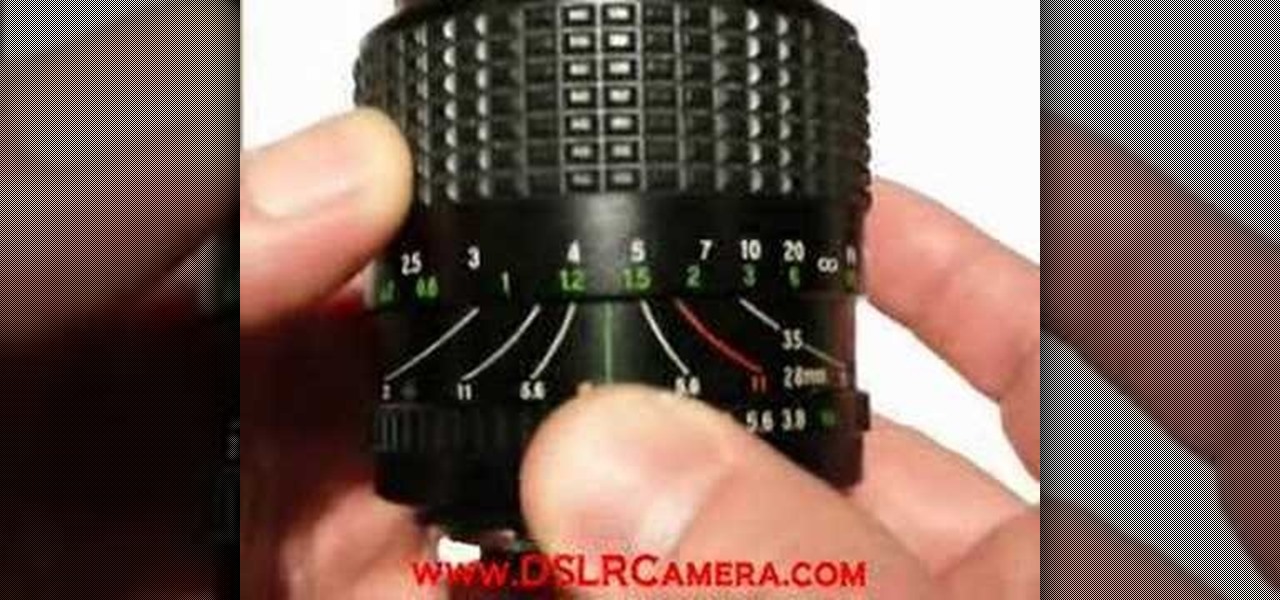
This is a video tutorial showing its audience how to relate the information that is displayed on your camera lens to your actual camera. The first step is to grab your camera and begin studying your lens. Next look at the mm reading on your lens and the aperture reading. These settings will assist you with setting your depth of field. Next look for your focus ring. Your focus ring will allow you to focus your photos in manual mode. Next look for the focus reading, this will tell you how far a...
In this episode of Digital Photography 1-on-1, host Mark Wallace goes in depth on the subject of light metering and flash balancing. Making use of a Sekonic light meter, Mark shows how to read the light levels in a room, and explains how to interpret those readings in order to adjust flash levels, ISO levels, and alternative light source manipulation. Mark also goes over the important roles that aperture settings and film speeds play when attempting to successfully balance flash and ambient l...
Have a passion for photography but know nothing about the basics? This video might be a great place to start on the topic of shutter speed. Shutter speed is the amount of time that the film, or your digital sensor, is exposed to the light. Whether it be outdoors, at night, or low indoor light, the shutter speed allows your camera to take a photograph with the correct amount of exposure in reference to how much light is readily available in your setting.
Want a way to reduce or increase the exposure of your camera's sensor without actually having to adjust ambient light levels? Apart from changing the aperture of your lens, you can adjust your camera's ISO setting, which will increase or decrease your sensor's sensitivity to light. To learn more about ISO, and to get started using custom ISO settings on your own DSLR, watch this free photographer's guide.
In this Fine Art video tutorial you will learn how to focus stack for great macro photos. This video is from EPhotoZine. The idea is to take several pictures of the same subject at different distances. For this you will need focus stacking. If you focus with a wide aperture, everything in front and behind the subject will be out of focus. The idea of focus stacking is to shoot several shots and put them together in a program that automatically brings them all into one. And that is focus stack...
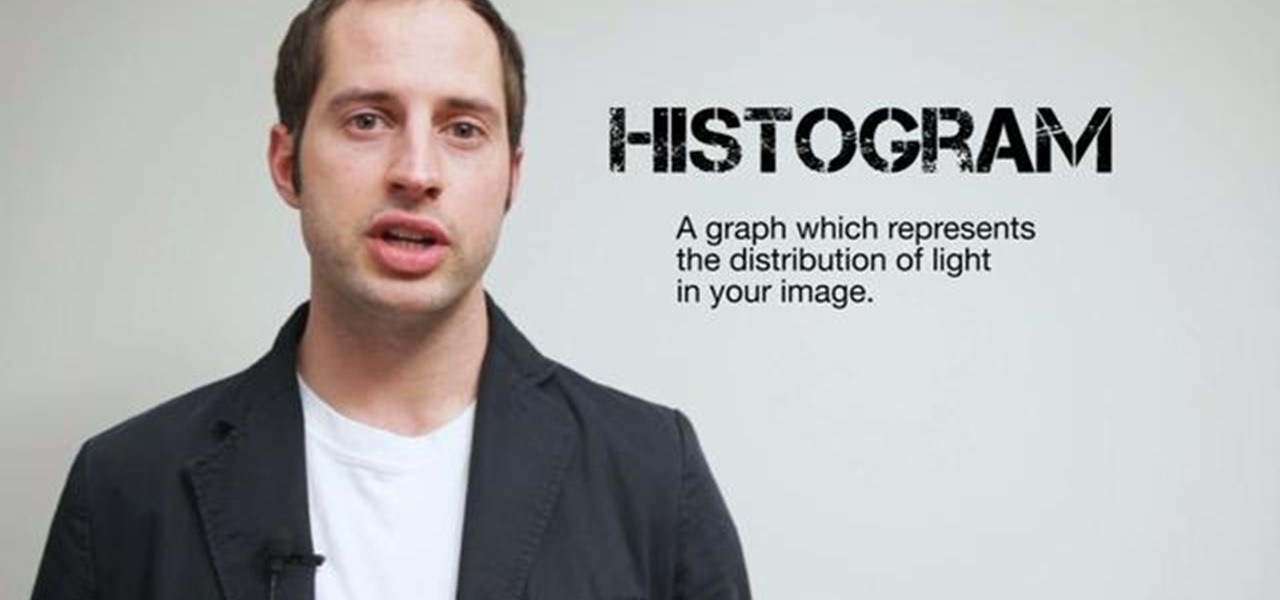
Ever wonder what those bars and lines on the LCD screen on your digital camera do? In this great tutorial, Ethan Wilding demonstrates how to read one of the most useful features on your camera: the histogram.
Taking a woman’s portrait isn’t just about photographic skill, it’s about flattery. You will need a single lens reflex camera, a female subject, a backdrop and a hurricane of compliments. Tip: to isolate the subject from the background, use a long telephoto lens at the widest aperture possible, and stand a minimum of 10 to 15 feet in front of the subject making sure she fills the frame.
Watch to understand the AV (aperture priority) mode on your digital SLR and how to use it.
This video will help you understand the three main parts of a DSLR lens that can change the depth of field in photographs. We will explain how the aperture, zoom and focus all effect the depth of field in a photo.
Learn how to use your camera (including how to choose an aperture setting) for blurring the background of portraits.
Are you tired of the auto settings on your digital camera? Break out of the norm with some of the advanced features and take your photos to a whole new level. Learn about shutter speed, aperture, and wide angle lenses and how you can manually adjust these to take better photos.
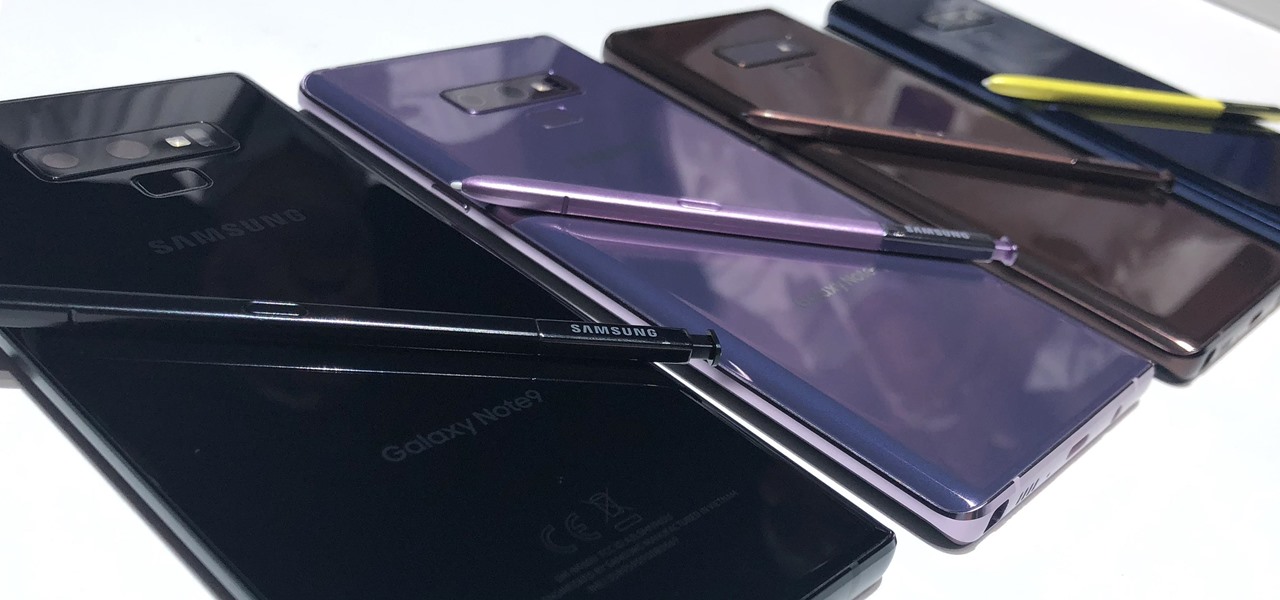
Samsung hopes to make a splash with the new Galaxy Note 9 to make up for the underwhelming sales of its signature Galaxy S9 series. This flagship is a radical departure from its predecessors — it's now optimized for gaming and paired with the most advanced S Pen stylus to date. Here's everything you need to know.
Making sure you have the best gallery app available for your Android device used to be as easy as just installing QuickPic. But late last year, Android's top photo-viewing app was sold to a company who is notorious for permission spamming, so QuickPic quickly lost everyone's approval.
Bokeh (which translates to "blur" in Japanese) is a photography technique referring to the blurred areas of a photograph. Basic bokeh photographs often have one point of focus, while the background falls away into a dreamy, blurred haze.
Ever wonder how people make those wonderful and awe-inspiring time-lapse films? Well, this video shows you the bare basics of creating a time-lapsed movie. First, you'll need to set your digital camera on a tripod and set it to take stills at your desired intervals. Then, you'll need to import all of these photographs into Aperture or iPhoto on your Mac computer. Then it comes times to turning those pics into a time-lapse film. Watch and see how!
Make sure your camera is set to the Manual Mode. Then, adjust your camera to your desired shutter and aperture settings. Make sure the pop-out flash button in your camera works. Prepare night lights such as sparklers, glow sticks, and flash lights as props.
This video tutorial is going to show you how to use the Nikon SU-800 Commander speed light. It requires only one 123A 3V Lithium Battery. A tiny switch allows you to switch between close-up. Another flash can be connected to it by a long cord. SEL button allows you to select. With the left and right arrow buttons increase or decrease the flash power. You will use the MODE button to program the speed light. TTL is for through the lens, AA for auto aperture, M for manual and so on. Watch the fu...
This video shows you how to photograph lightning in the daytime. Set the ISO to 100.The aperture set at f32 and set for half of a second. Meter should be showing averaged. Photograph in the manual mode so that the setting won't change between photographs. Manually focus lens to infinity so you won't have to wait for the focus to lock on. A remote shutter to just hit the button. Be safe and keep camera safe when taking lightning photographs. Don’t get under trees. When lightning starts strikin...