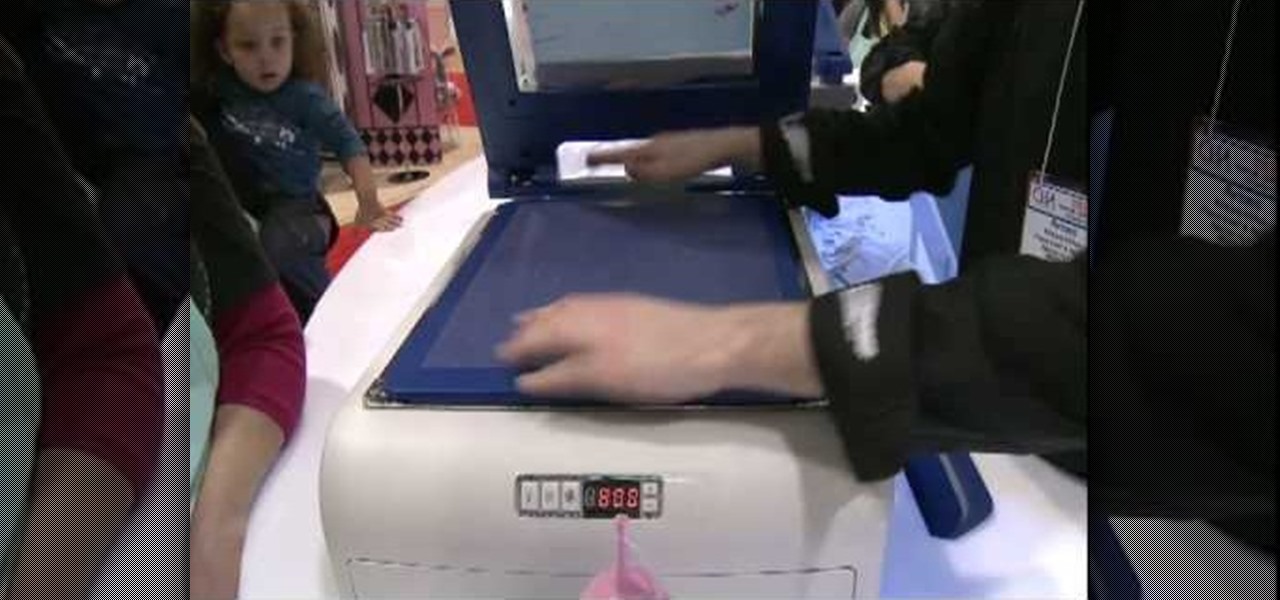
CreativeXpress shares a video regarding the usage of the Yudu personal screen printer. Put the plastic foil over the design you want on your t-shirt and turn on the light on the printer. This will cause the design from the page to be transfered onto the foil. Then you simply place the shirt onto the foil and place a good amount of ink on top of the foil. Use the squeegee to spread the ink over the design and onto the shirt. Let it dry for a bit, then iron the shirt using a cloth or piece of p...
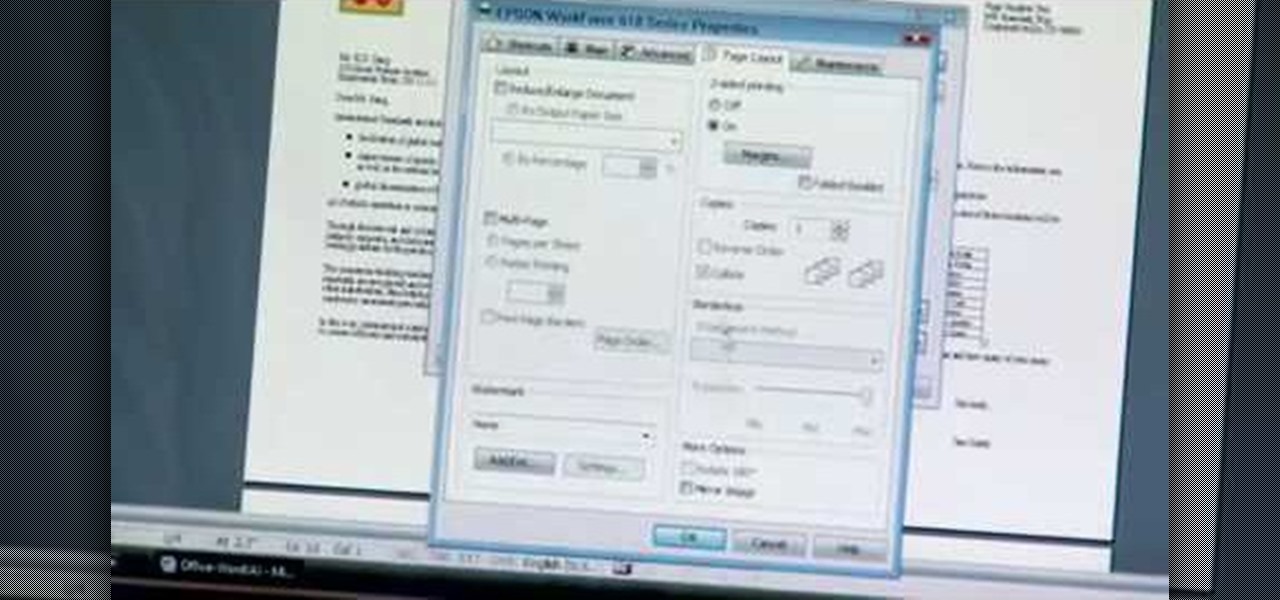
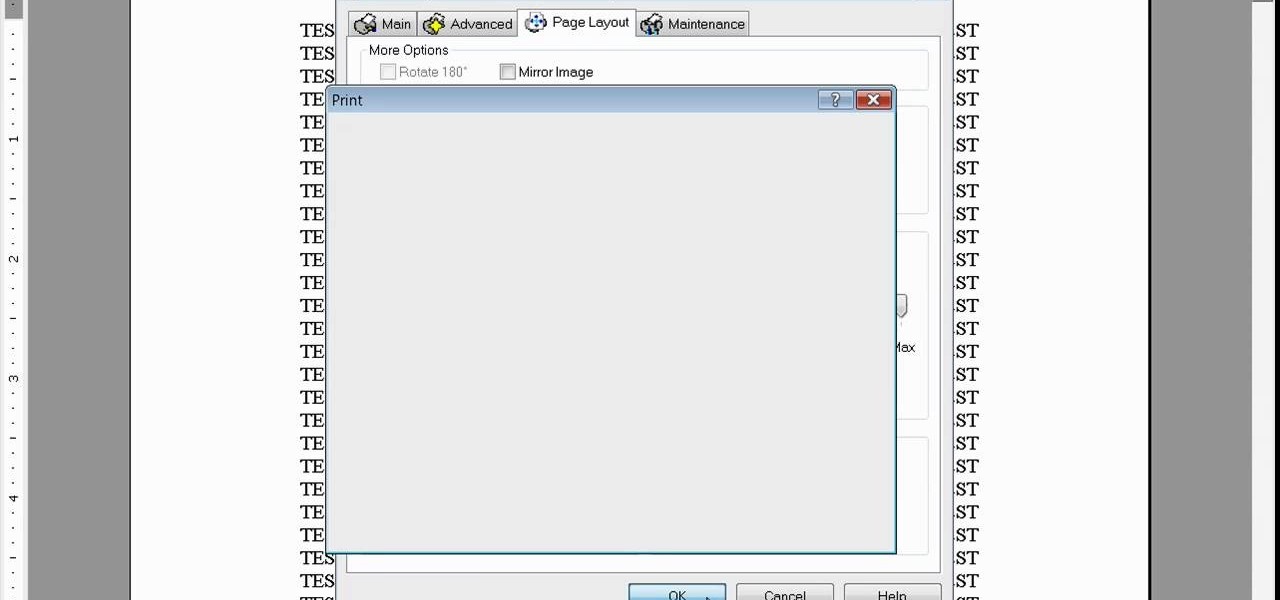
The Epson video describes how to print two-sided on one piece of paper. When document is ready, go to "File" and then "Print". Click the "Properties" button and select Page Layout tab and turn on the two-sided printing option. Click "OK" in print window. Wait for Epson printer to complete the first page. Take paper, flip over and put it back upside down in the paper feeder. There are instructions that will pop out on screen for this. Click resume and the second page will be printed on the bac...
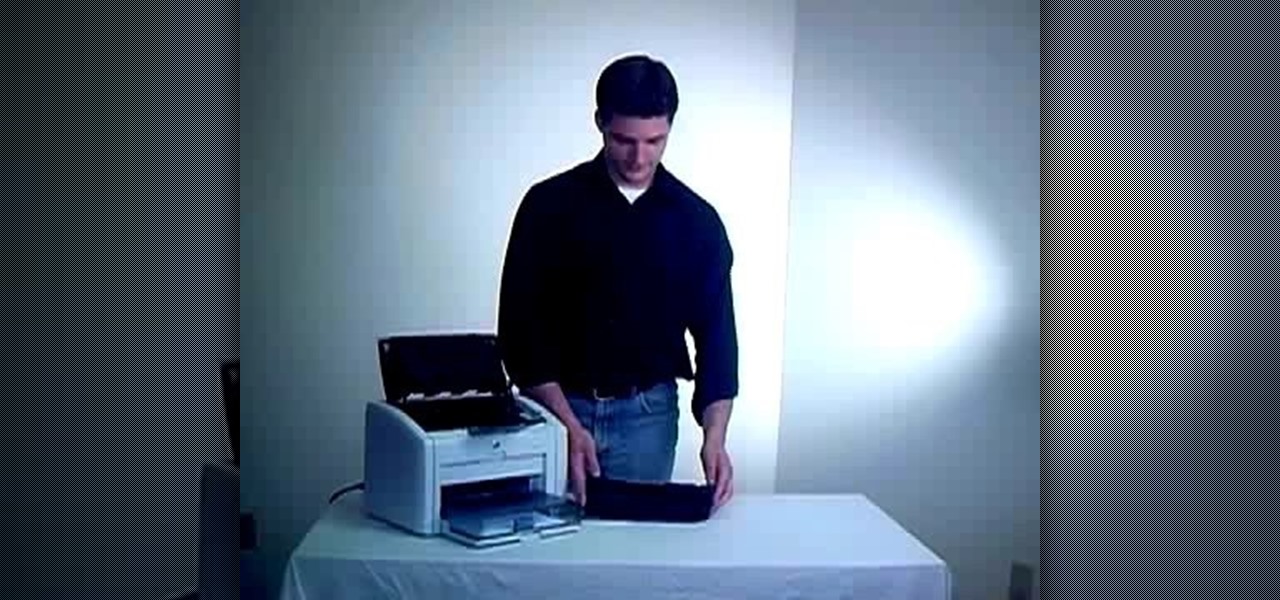
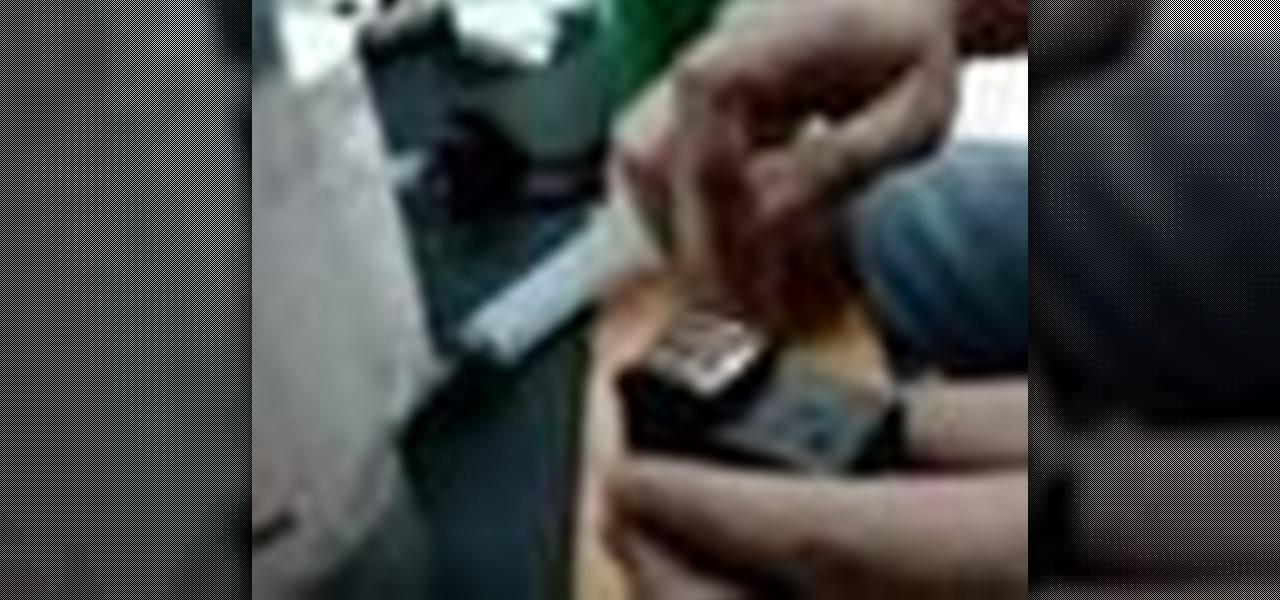
Running low on toner in your HP LaserJet 1022 printer and having trouble installing the new toner? In this video tutorial, go through the few steps to make the LJ1022 toner replacement quick and painless. For more information, and to get started replacing your own LaserJet printer cartridges, watch this helpful video guide.
Is your HP printer's black ink cartridge spent? Ready to throw it out? Not so fast: This video tutorial provides a short number of simple-to-follow steps for refilling your HP ink cartridge yourself in less than 5 minutes. Save money and reduce waste with this inky how-to.
In this video you will see how to transfer a photograph onto a piece of flannel fabric. You will have to treat the flannel with Bubble jet Set 2000 to help the photo stay on the fabric longer. Use an inkjet printer to make sure the ink soaks into the fiber. Tape the treated flannel onto the printed picture and run the paper through the printer again. The printer should print directly onto the fabric without trouble!
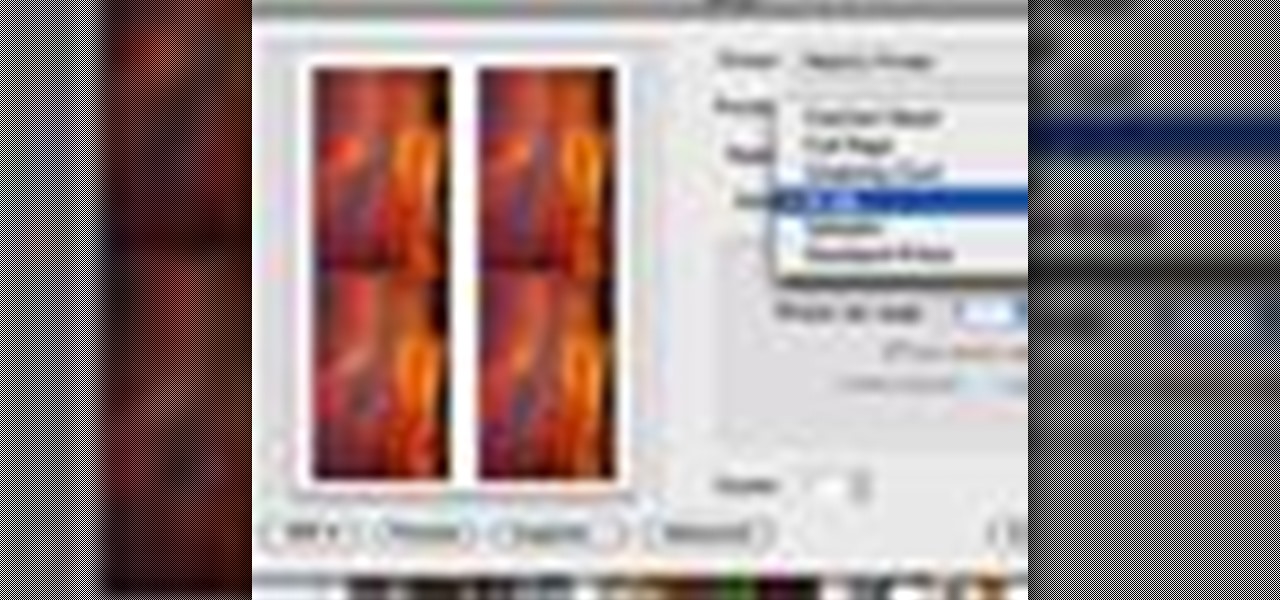
Learn proper color management technique and calibrate your monitor to your printer and vice versa in Photoshop.

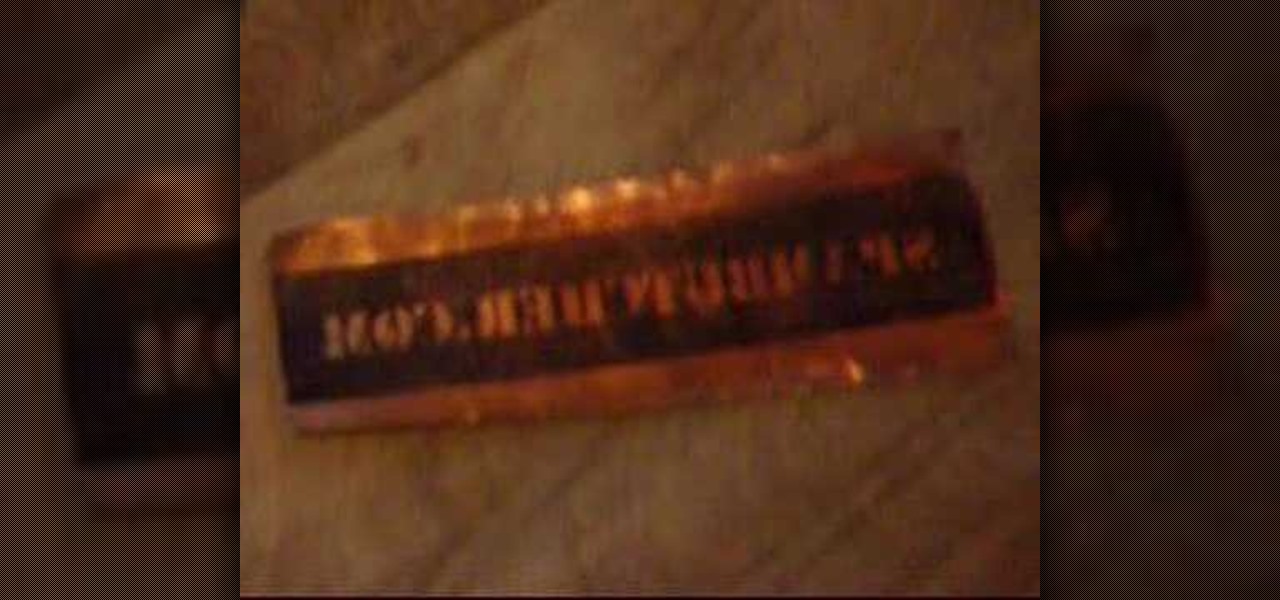
Make a copper stencil using your laser printer, etching solution, and the backing from some mailing labels.
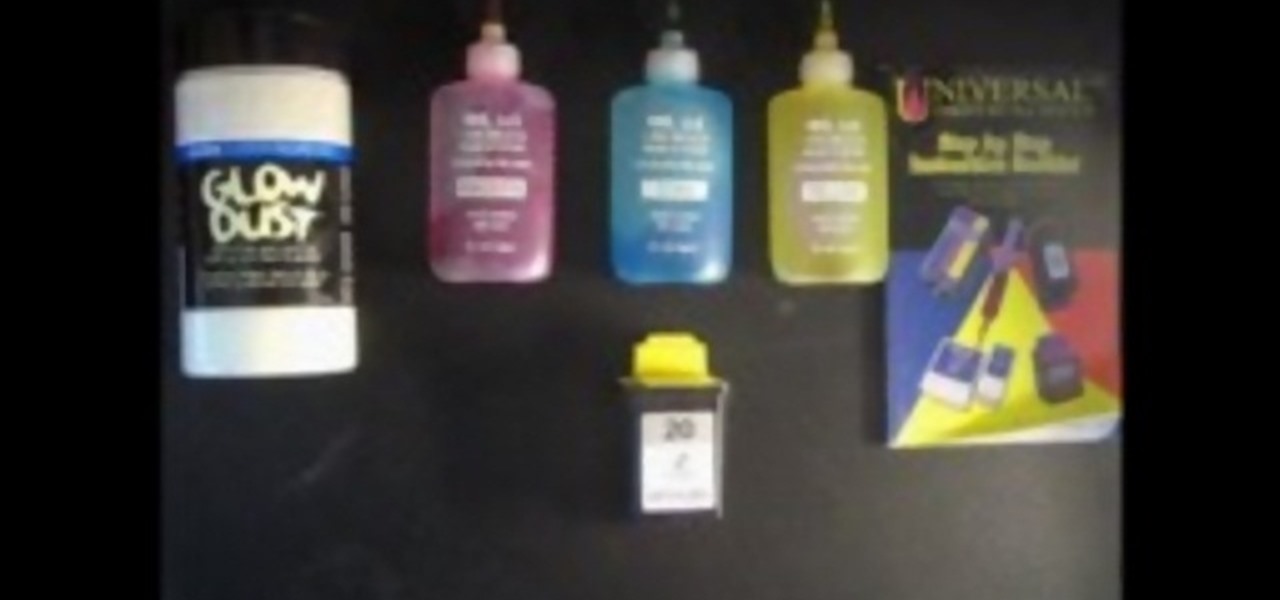
Use your printer to make glow in the dark ink at home. The ink can be used to make posters, stickers, or even glow in the dark tee-shirts!
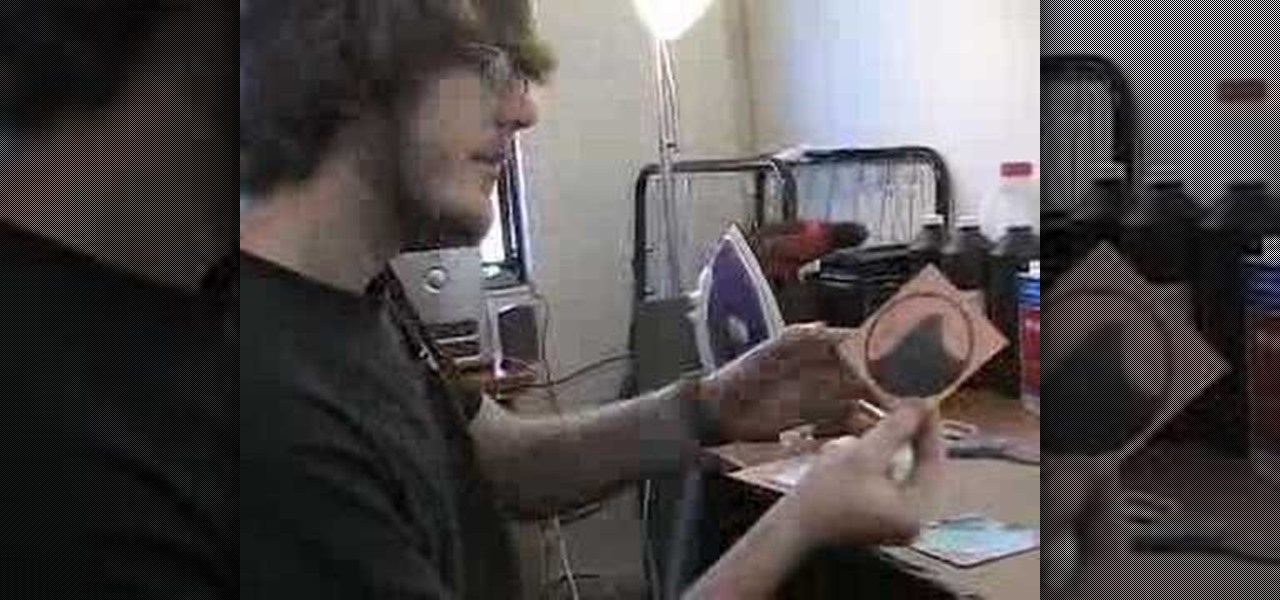
If you haven't made your own PCB (printed circuit board) yet, perhaps you we're just missing the proper instructions. But now, watch and learn from AP Digital light! They show you a fast and easy prototyping technique using a laster printer, photo paper, and a regular household iron. It's the heat toner transfer method of making PCBs.
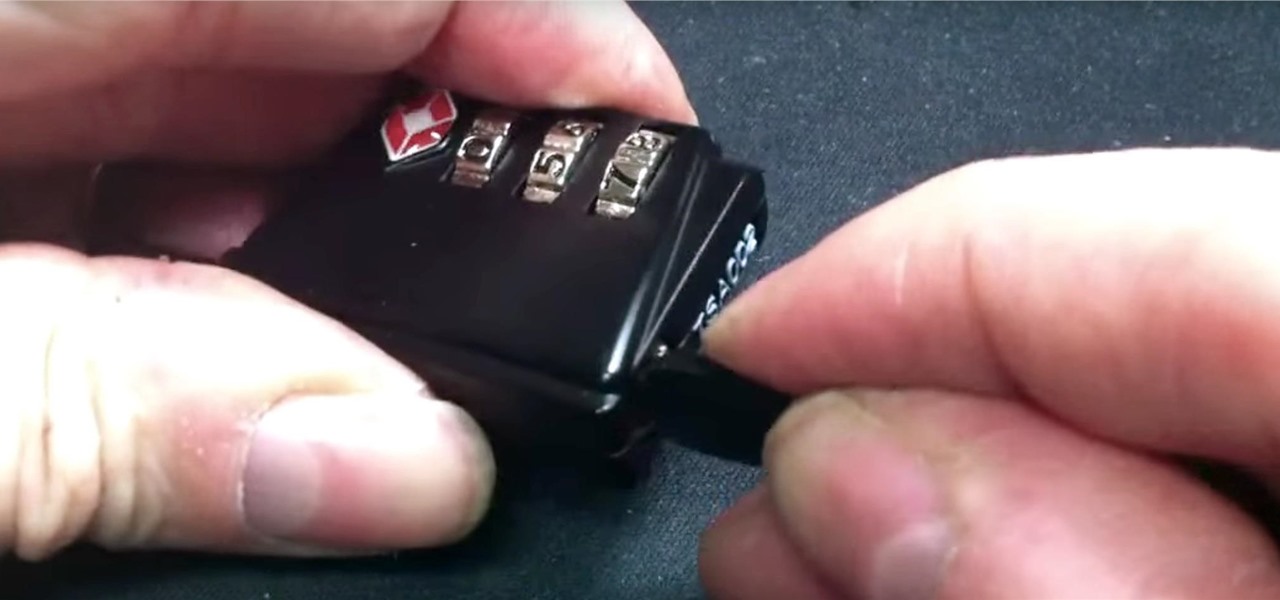
Last year, the Washington Post's Ashley Halsey wrote an article on what really happens to your luggage at airports. In it, they unwittingly published a photo of the master keys the TSA uses for TSA-approved baggage locks. Now, thanks to that picture and a French lock-picking enthusiast, anyone with a 3D printer can make their own master keys to unlock any TSA-recognized locks.
A man by the name of Marc Kerger is out to prove that he's the number one fan of the game TETRIS by building a playable TETRIS shirt for the game's 30th anniversary.
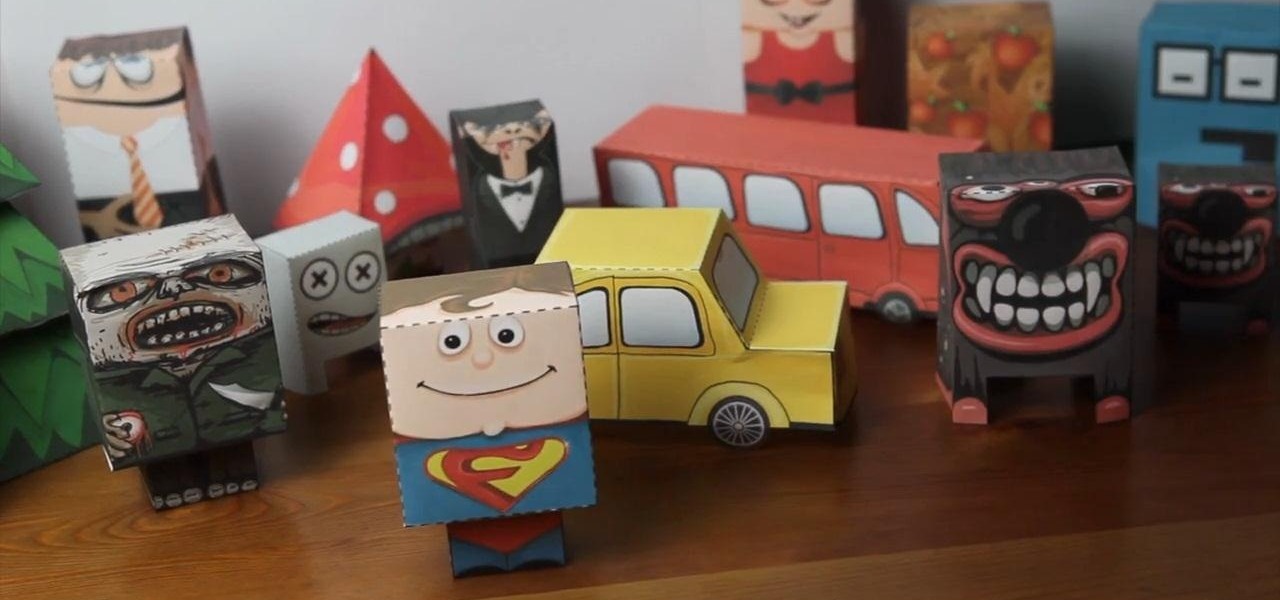
In the papercraft world, nothing is beyond its reach. Anything from a Rolex watch to PSY doing his famous Gangnam Style horse dance has been converted to papercraft. That's great and all, but what if you want to make your own custom papercraft? Foldify, which releases next week in the iTunes App Store for the iPad, allows users to create their own custom foldable papercrafts in real time 3D.
In this tutorial, we learn how to make light using a stepper motor generator. First, take the motor out of an old printer that you don't use anymore. After this, find a few LED lights. You will need to solder the LED lights, then connect them with a soldering iron to the printer motor. Now connect these to a generator, and the light should now shine so that you can see in the dark! This won't use any additional electricity, so you are helping the environment. All of the pieces used to make th...
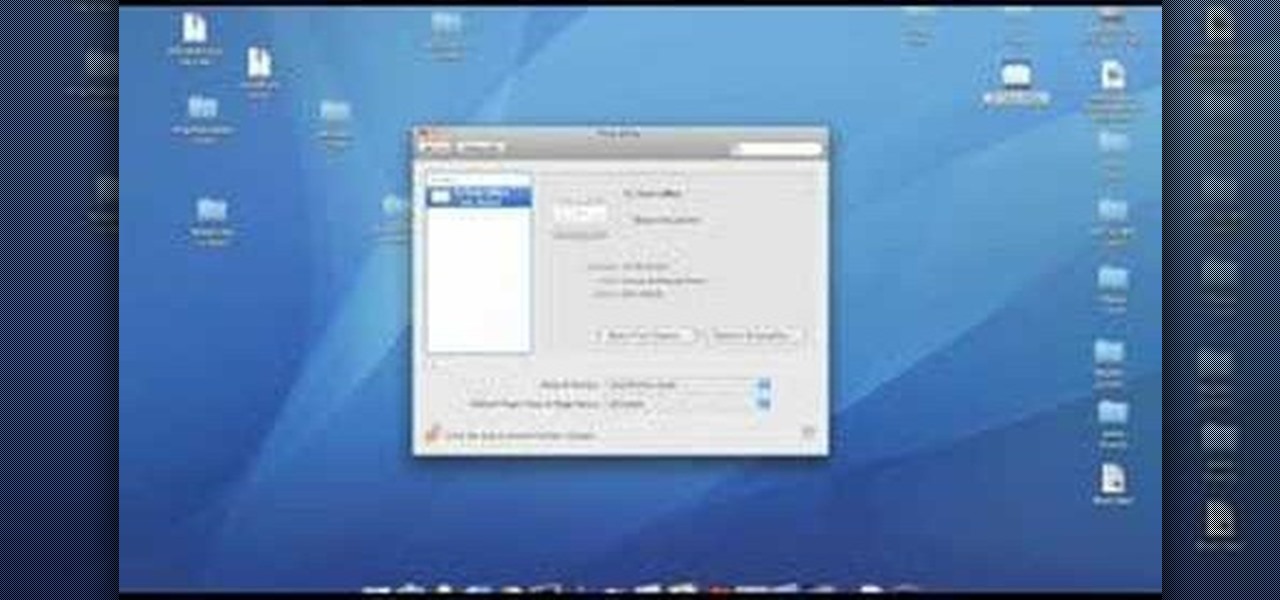
In this video from MacTipsOrg we learn how to print directly form your desktop on a Mac making printing very quick and easy. First, open your system preferences, and then click on print and fax. Now take the printer icon you see there and drag it to you desktop. Place it anywhere on your desktop. Whenever you need to print now, you can take your item, drag it, and drop the item right on the printer that is now on your desktop and it will print! This is a quick time saving technique to use for...
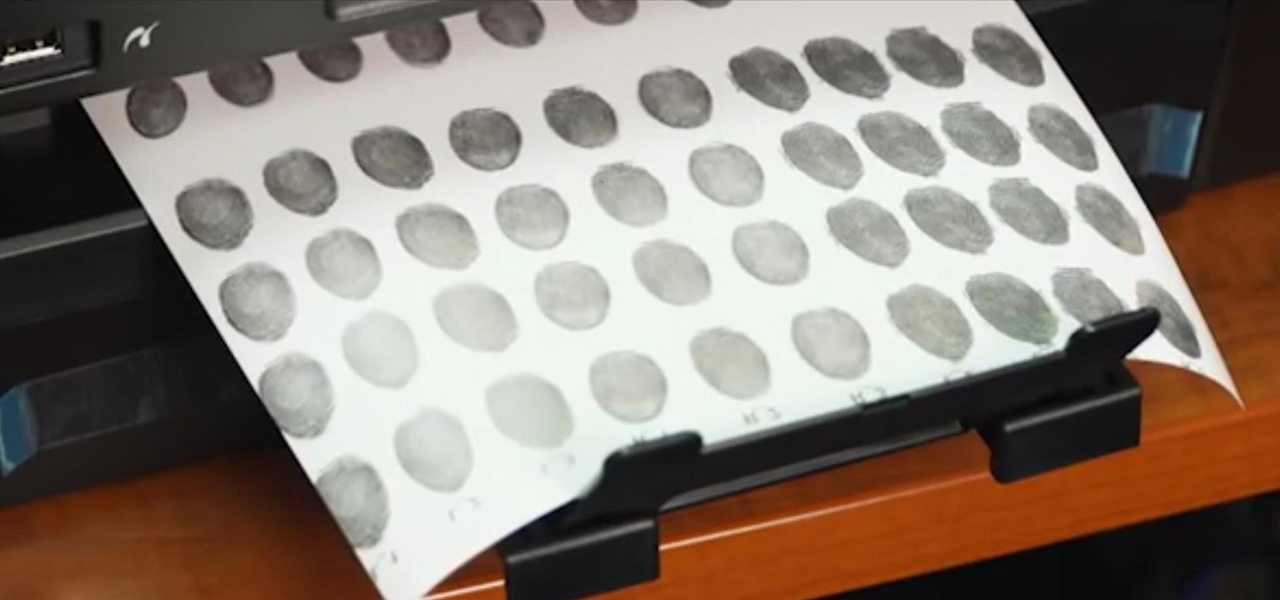
Using a fingerprint scanner to keep intruders out of your phone might not be as secure as you think. Two researchers from Michigan State University, Kai Cao and Anil K. Jain, developed a relatively cheap and effective way to beat fingerprint readers, and successfully tested their method on a Samsung Galaxy S6 and Huawei Honor 7.
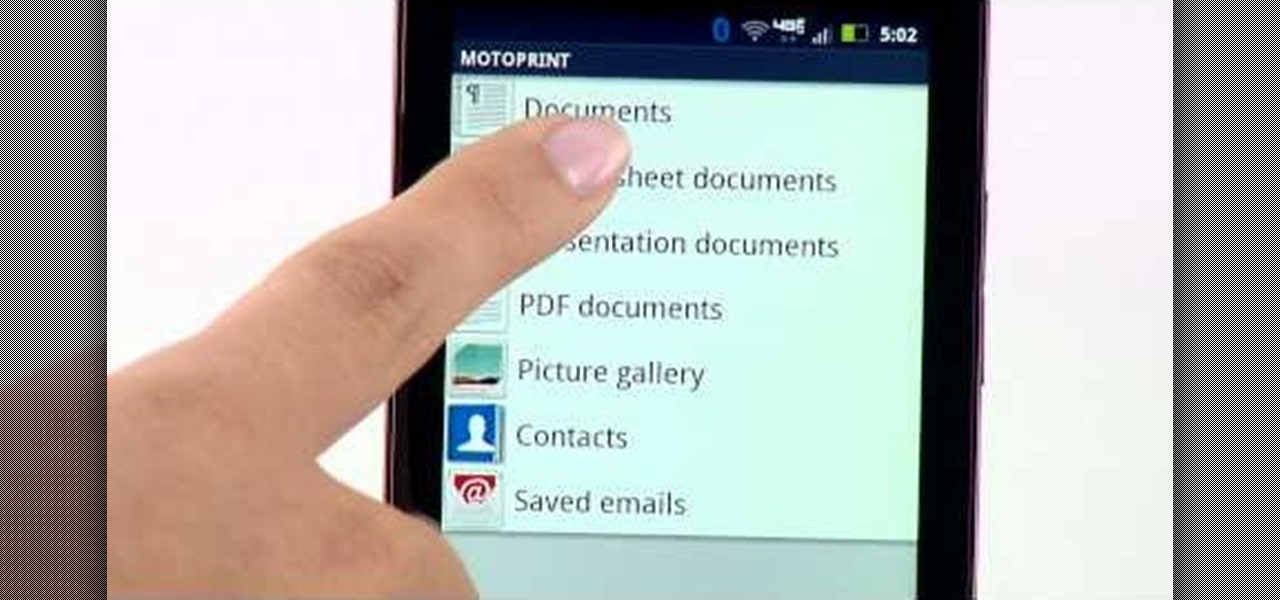
Motorola's Droid Bionic has several Android apps built into the device that allow you to speed up your workflow. For example, with the MotoPrint app you can print from the Verizon Wireless smartphone to a printer. With it, you can print everything from photos, PDF's, documents, or emails directly from your Bionic.
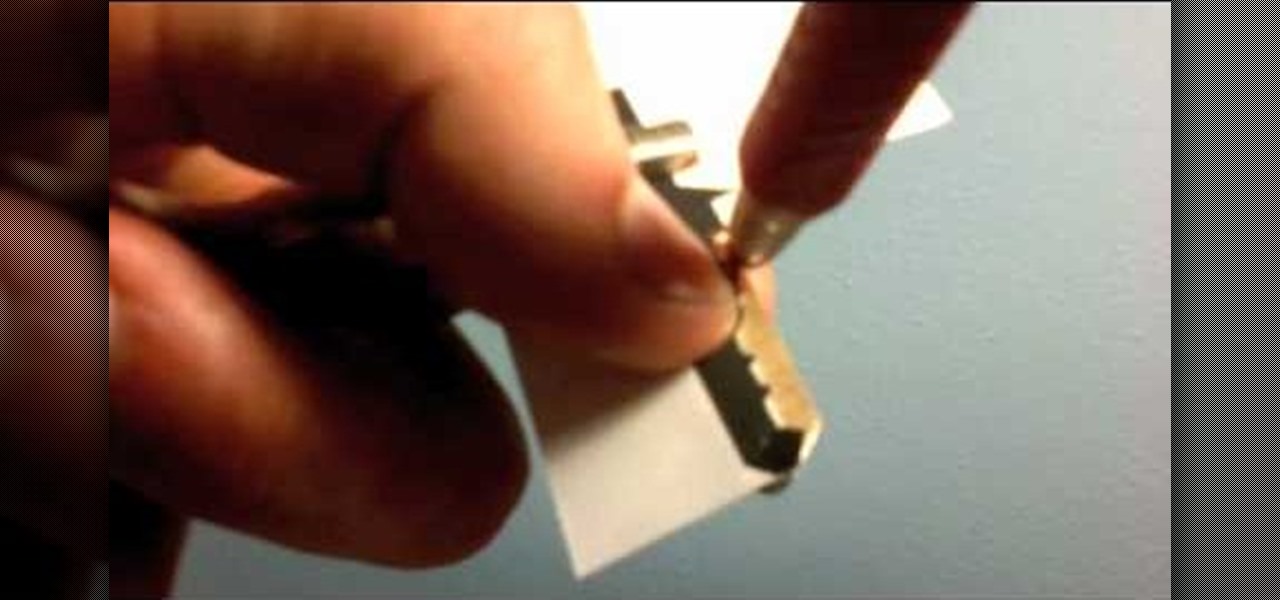
In this ten-step video tutorial, you'll learn how to quickly copy keys using a camera, printer and Dremel tool. With this ten-step process you'll learn the necessary steps to copy almost any key... even if you only have access to it for a brief period of time.
Origami is a lot of fun (okay, and also a lot of frustration), but what often turns beginners off from the Japanese art form is simply that it requires special origami tissue paper. While it's true that thin paper made exclusively for origami is preferable for any origami project, you can substitute plain old printer paper instead if you're low on money or just out of origami tissue paper.
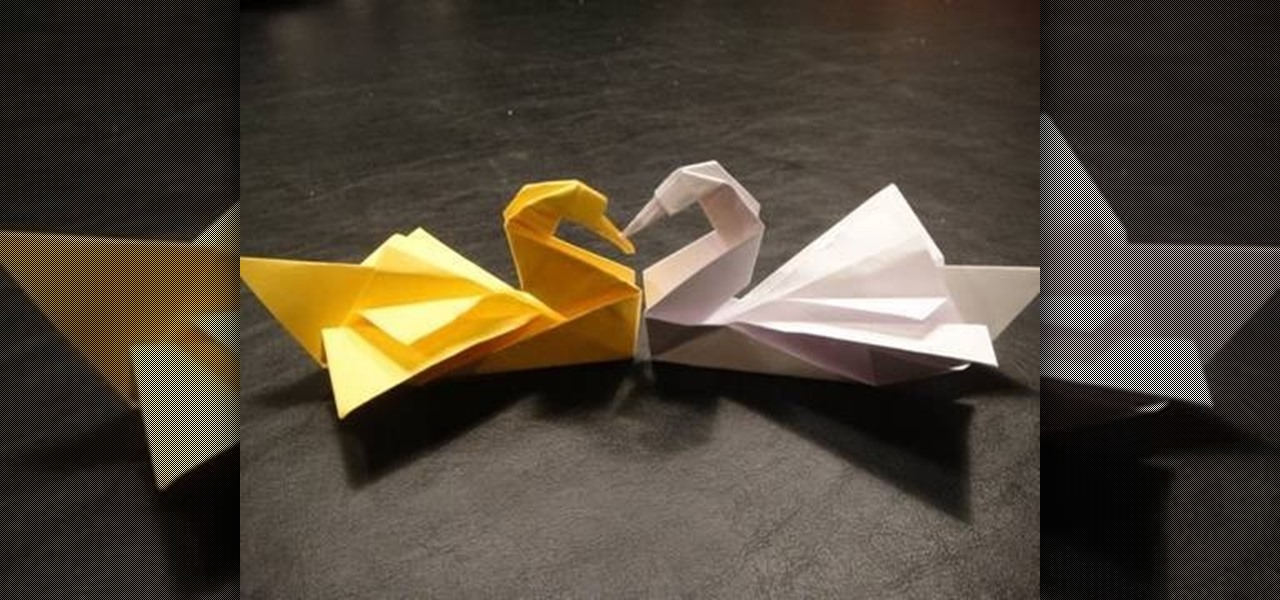
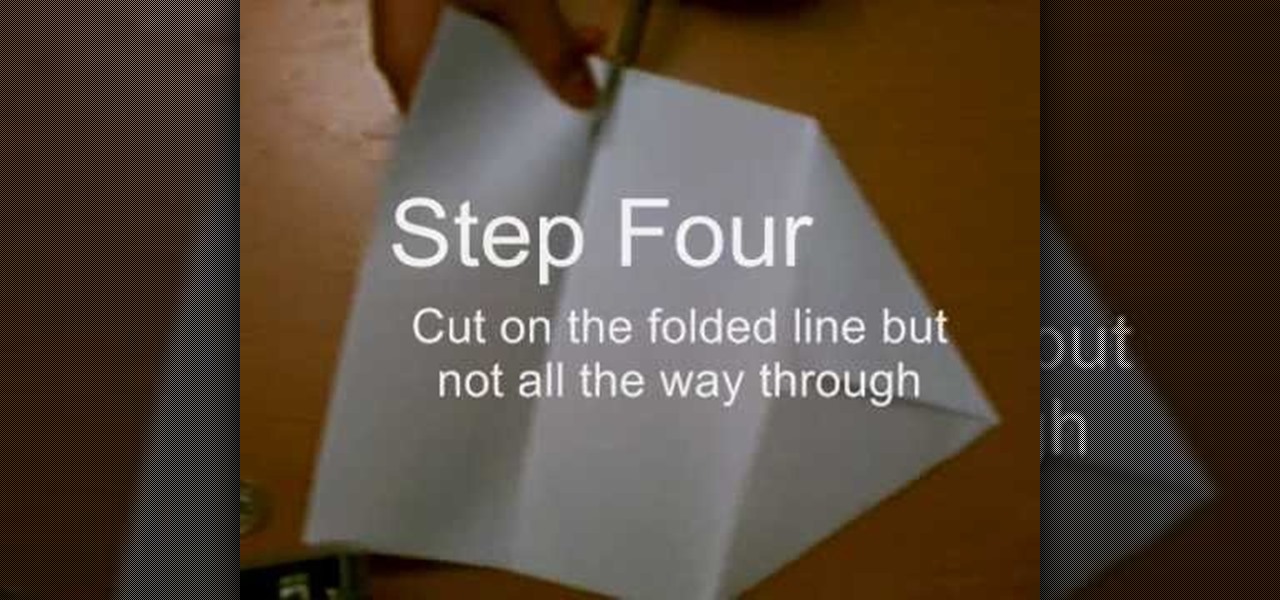
In this video, we learn how to make a whirlybird paper helicopter from printer paper. First, fold two triangles together on the paper. Next, fold the back to the triangle you just created. Next, fold the paper back and, then cut on the folded line but not all the way through. After this, fold the middle flaps until they reach each other. Then, cut through the middle of the bottom and fold one flap on the top, then fold the other flap on the flip side. Now you will be finished with your helico...
If you are new to Windows Vista or are just starting to set it up to share with other local computers, you will need the help of this tutorial.
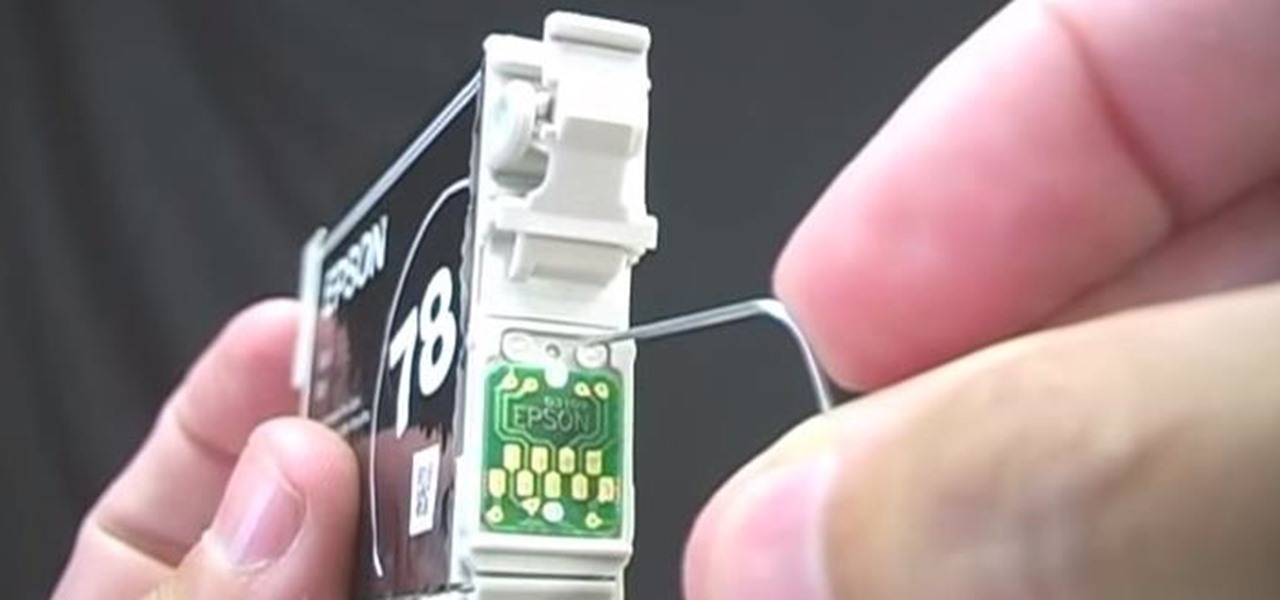
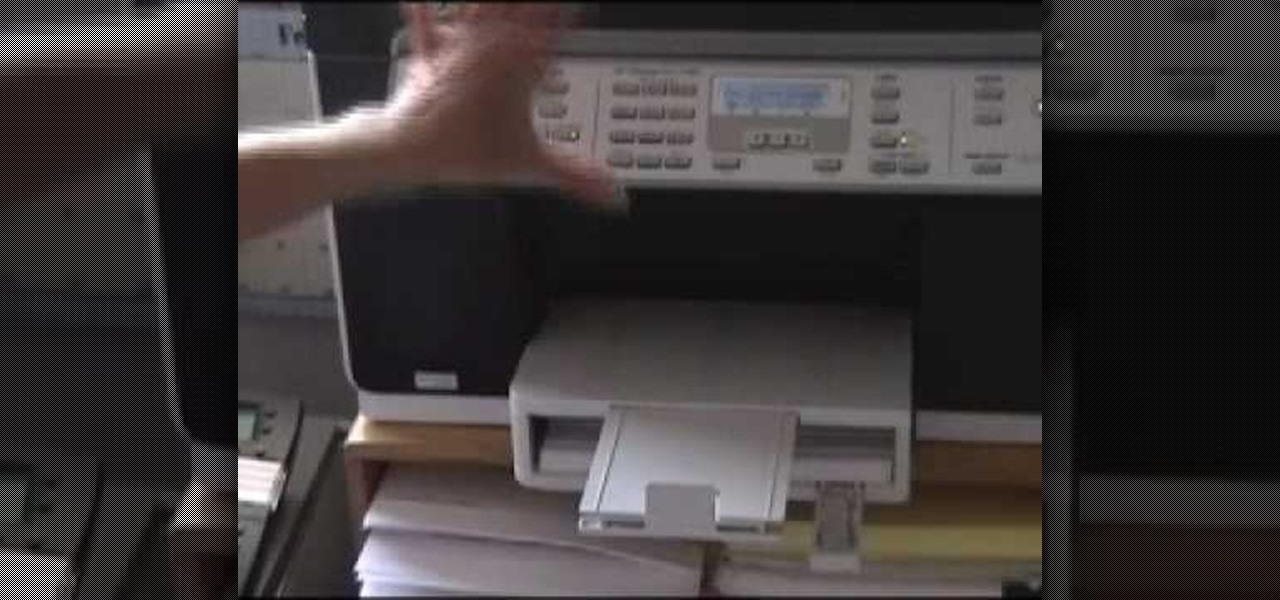
We all know how frustrating it can be to replace ink cartridges in a printer. With the Epson Artisan printer, the task is simple and easy. The hardest part about replacing the cartridge is selecting the correct one. Even this job is made easy by the numbers on the cartridge casings. Simply pull off the tab before replacing, pop in the new one until it clicks, and you're ready to start printing whatever your heart desires. Exceed your vision!
Have you ever wanted to make your own personal coloring book? With the Epson Artisan all-in-one printer, a project like this is a snap. Make some coloring books based on your digital pictures. Have your kids color in their memories of the last trip to Disneyland, or the silly photo of themselves goofing off in the bathtub. These personalized coloring books make great gifts for everyone!
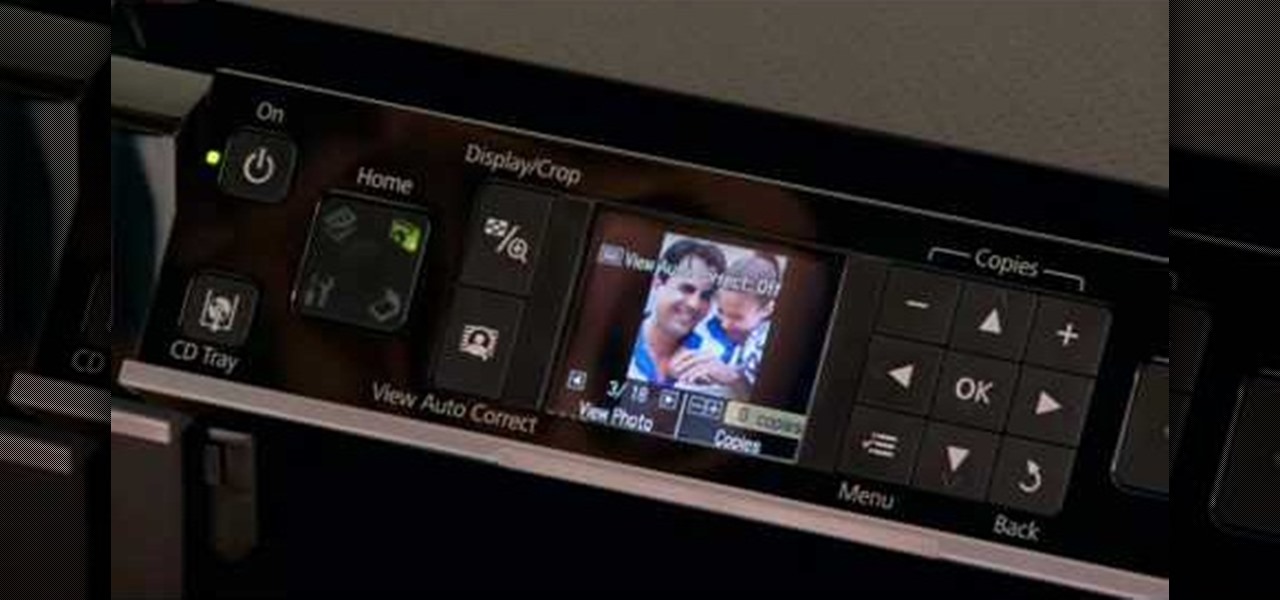
This all-in-one printer's versatility will help you in any aspect of home office printing, whether it's business documents or family photos. Learn how to print photos without even turning on your computer. Printing and organizing photos will now be a breeze!
To make your own journal with household items you need a hole punch, scissors, yarn needle with string, some beads, a piece of construction paper, and at least 4 pieces of printer paper. Take your piece of construction paper, fold it in half and then unfold it. Do two hole punches in the crease of the fold at the top and bottom of the paper. Then do a half hole punch in the middle of the paper. Do the same fold, unfold and punches to the printer paper. Be sure to match up the holes in the pri...
This video is by chilled chaos demonstrates how to make a moving catapult in LittleBigPlanet. In materials first use the cardboard to draw and two legs at the bottom. Detach it from the ground. Take the rubber tool from the tool box and make two wheels. Take bolts and attach to wheels. Make the switches on it and set the right and left direction. Do the setting for the wheels. Make a basket and attach it with the previous structure that it can move up and down. Set the timings to set the spee...
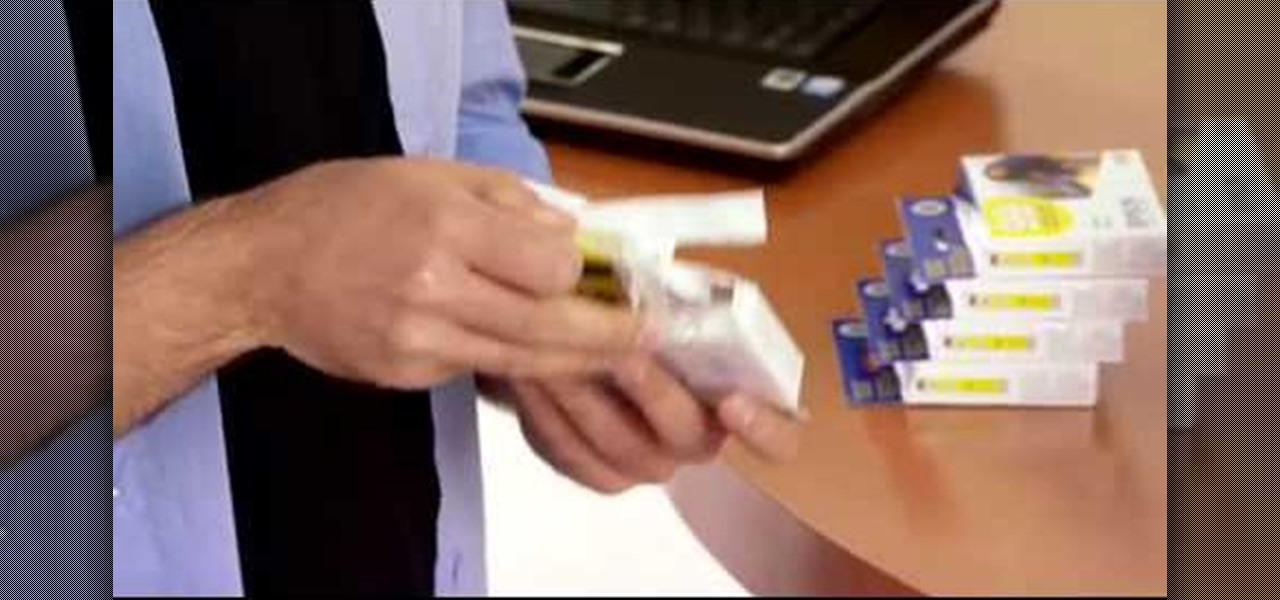
This video reveals to us about the secret of ink cartridges. It is a very common problem faced by those people with ink printers that run out of ink, but this video shows us that even though it signals that we are running out of ink, do not throw the ink cartridge into the waste bin.
Learn how to print double-sided and reverse printing order in Microsoft Word. * Go to the Start menu and open Microsoft Word.
The mushroom cloud is one of the iconic images of the 20th century, calling to mind destruction, progress, and arguably the single most important event of the century. This video will show you how to create a 3D model of one using 3D Studio MAX 4 or higher. This can then be used in all kinds of video games and movies that you might be making.
Clothing a 3D model properly is almost as hard as making the model in the first place. Fortunately, 3D Studio MAX and this video are here to help. Watching this you will learn how to create splines, simulate cloth animation, and use good smoothing techniques, among other things. Now your 3D models can be as stylish as you! If not more so.
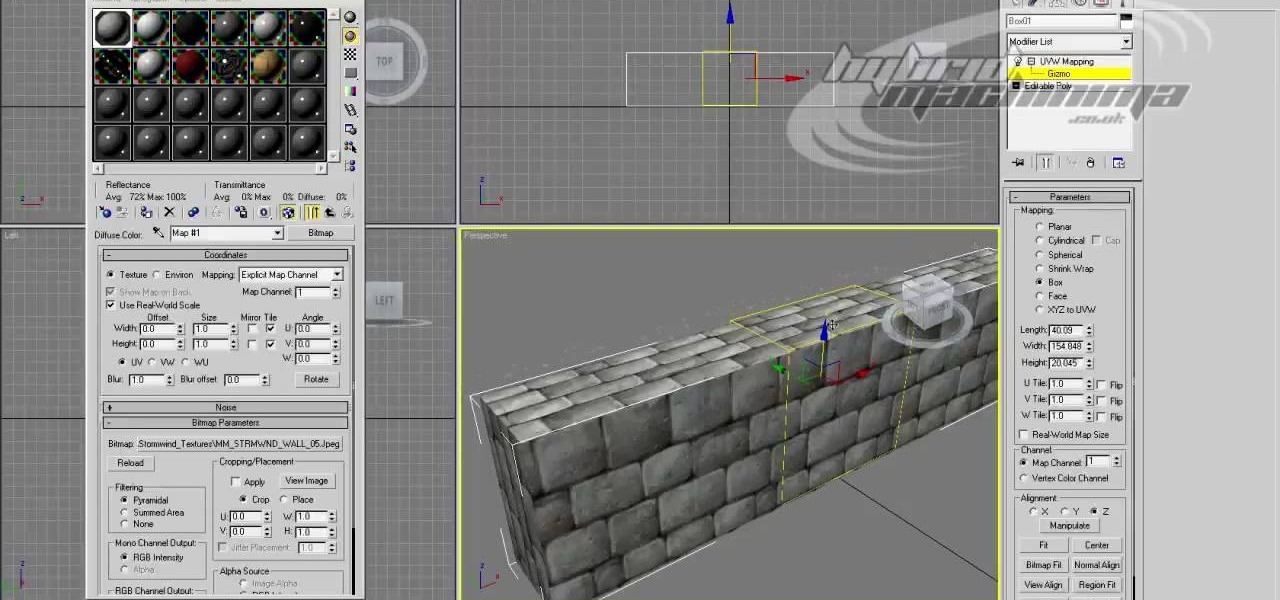
If you are modeling a 3D game in 3D Studio MAX, you are going to need to know how to correctly model the destruction of many of your beautiful 3D models. This video is focuses largely on that. It will show you how to use the procutter tool and booleans in 3DS MAX to break up a wall without making it unrecognizable, and also how to use the fracture reactor constraint to simulate an object making impact on the wall. Your poor wall will never know what hit it.
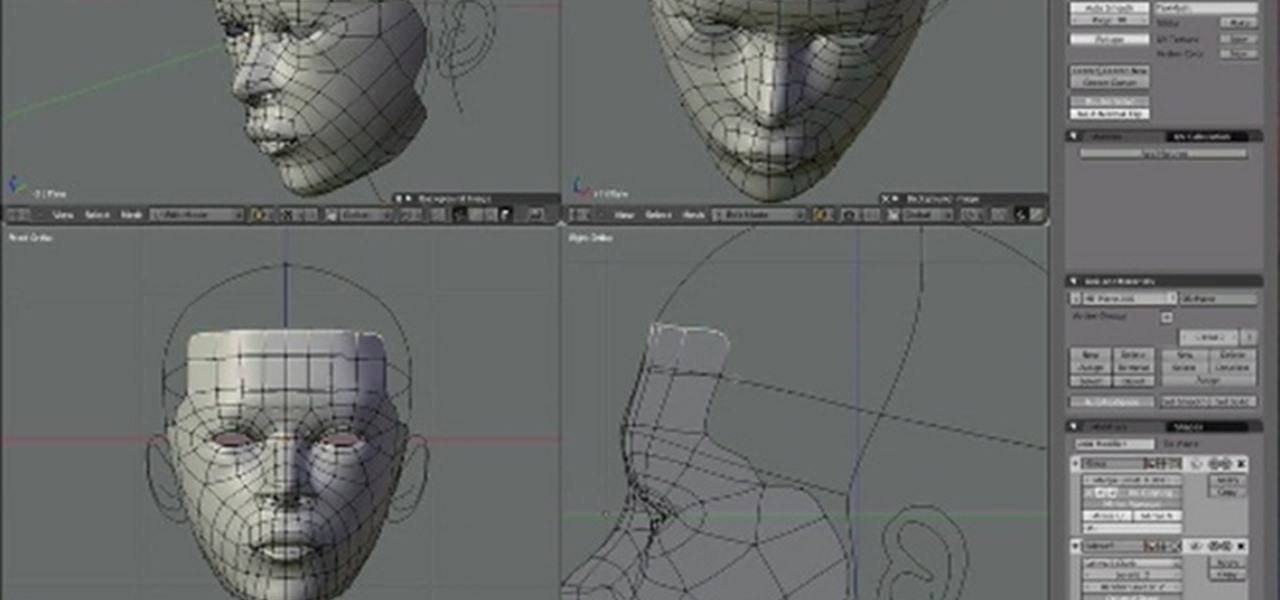
In this four-part tutorial, you'll learn how to create a full human head with Blender's 3D modeling tools. Whether you're new to the Blender Foundation's popular open-source 3D computer graphics application or are a seasoned digital artist merely on the lookout for new tips and tricks, you're sure to be well served by this free video software tutorial. For more information, including step-by-step instructions, and to get started modeling your own 3D heads in Blender, take a look!
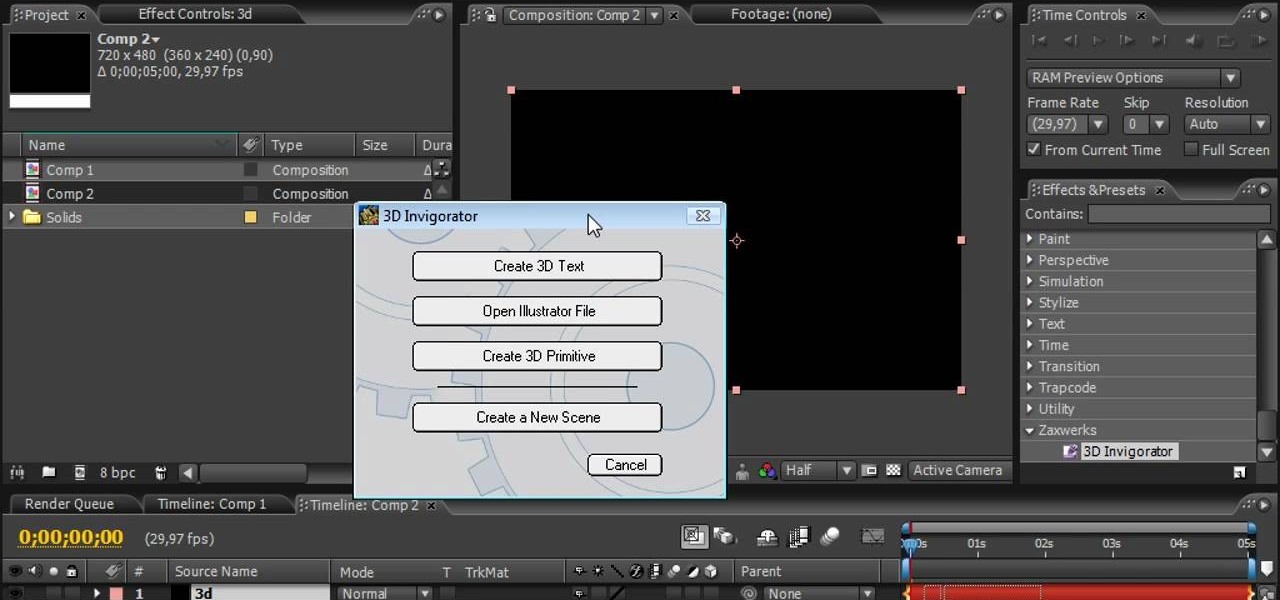
Most people don't think of After Effects as a program that can be used to create 3D images. That's Cinema 4D and 3DS MAX territory. No more! This video will show you how to use Photoshop and After Effects in conjunction with a free plugin called 3D Invigorator to create 3D titles without ever opening a 3D modeling program. Simple, but very easy and useful!
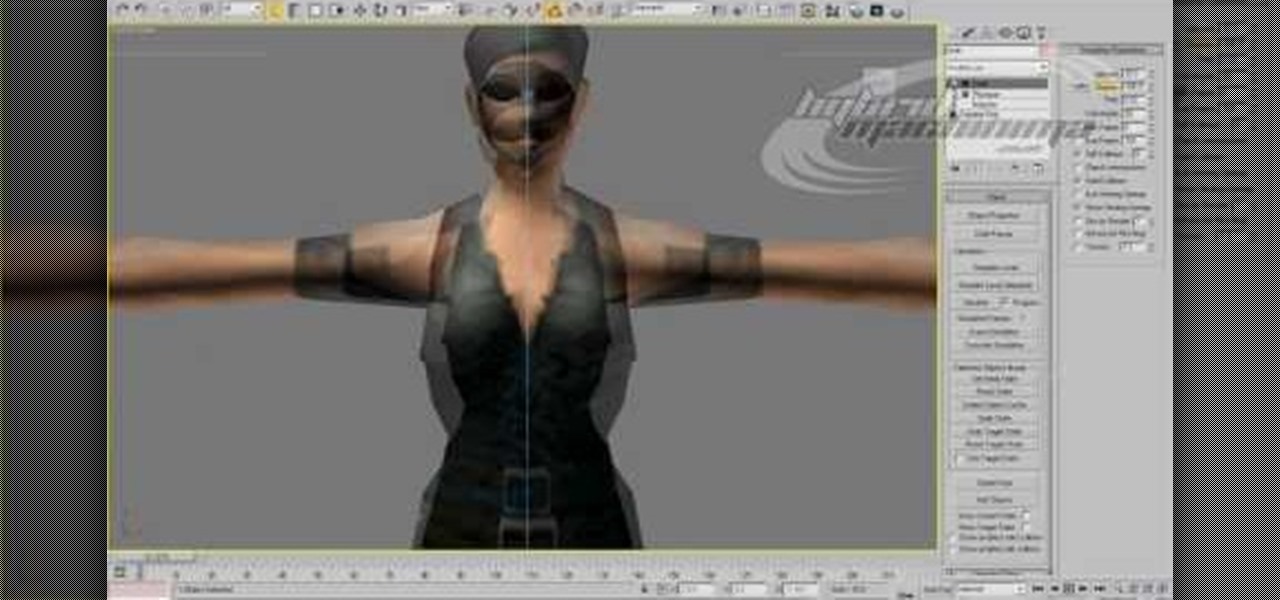
Making a head is hard enough with pen and pencil or with clay. Doing it in a 3D graphics program can seem impossible. This video is here to prove that such is not the case. Its eleven parts feature incredibly detailed instructions for modeling a human head using 3D Studio Max, one of the most popular software suites for 3D modeling. Follow along at your own pace, and you should be making your own head in no time!
Aaron Betsky, director of the Cincinnati Art Museum and previous director of the Netherlands Institute of Architecture, reports on the world's first postage stamp to employ augmented reality. Dutch advertising agency Gummo, the NIA and the Dutch postal service teamed up to present five unbuilt models by different Dutch architecture studios in 3D form. When held in front of a webcam, the illusion of a 3D building is projected in your hand. By slowly moving the stamp, you can experience the vir...
Creating a good 3D model of the human face is massively challenging. This five-part video will teach you how to do just that using the popular 3D modeling software 3D Studio Max. It goes into great detail, and should be very helpful for anyone looking to improve their 3D modeling skills.
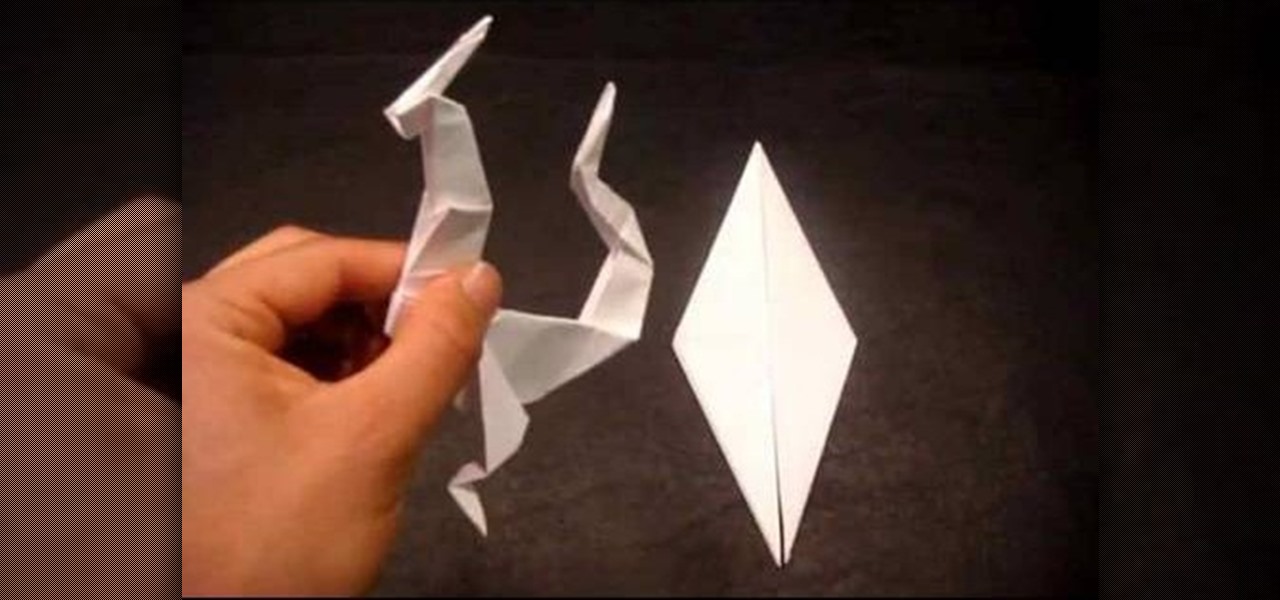
In this video, we'll learn how to make a little dragon using the ancient Japanese art of origami. This is rather complicated projected for beginners to attempt, but if you've already made origami cranes and other relatively simply shapes, this is a good project to take your skills to the next level. All you need is some printer or origami paper, and you're ready to get started.
Instead of using Photoshop, why not give Apple's Aperture a try? Aperture is designed more for post-production work for professional photographers, letting you cull through shoots, enhance images, manage massive libraries, and deliver stunning photos.
With a photo printer and photo-quality paper, you can create high quality prints of your photos. Using iPhoto, you can print a single image, multiple images, an album, or a reference page of thumbnails called a contact sheet.
A step-by-step how-to video from grooveshark.com explaining how to make your own circuit board or PCB. It's a simple, but long process for copper etching a printed circuit board, so pay attention and pause when needed.
Do you have CDs without case? You will not believe how easily you can make one. Make an easy and nice CD case in few minutes. No glue. You need normal printer paper.