
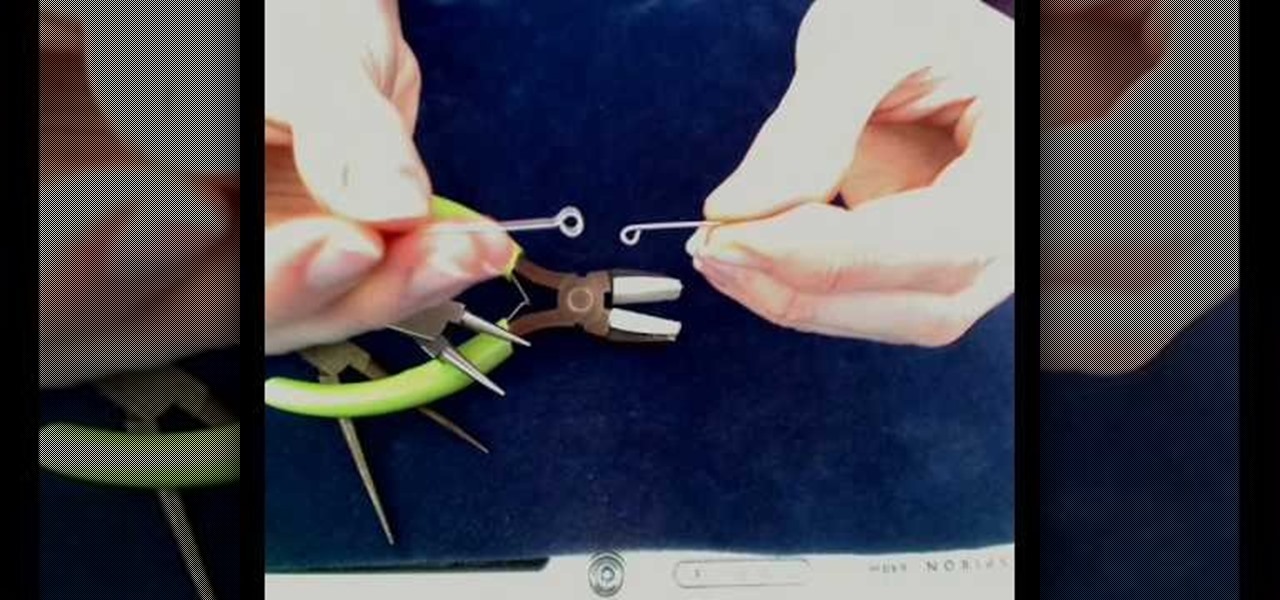
How To: Wire wrap briolettes
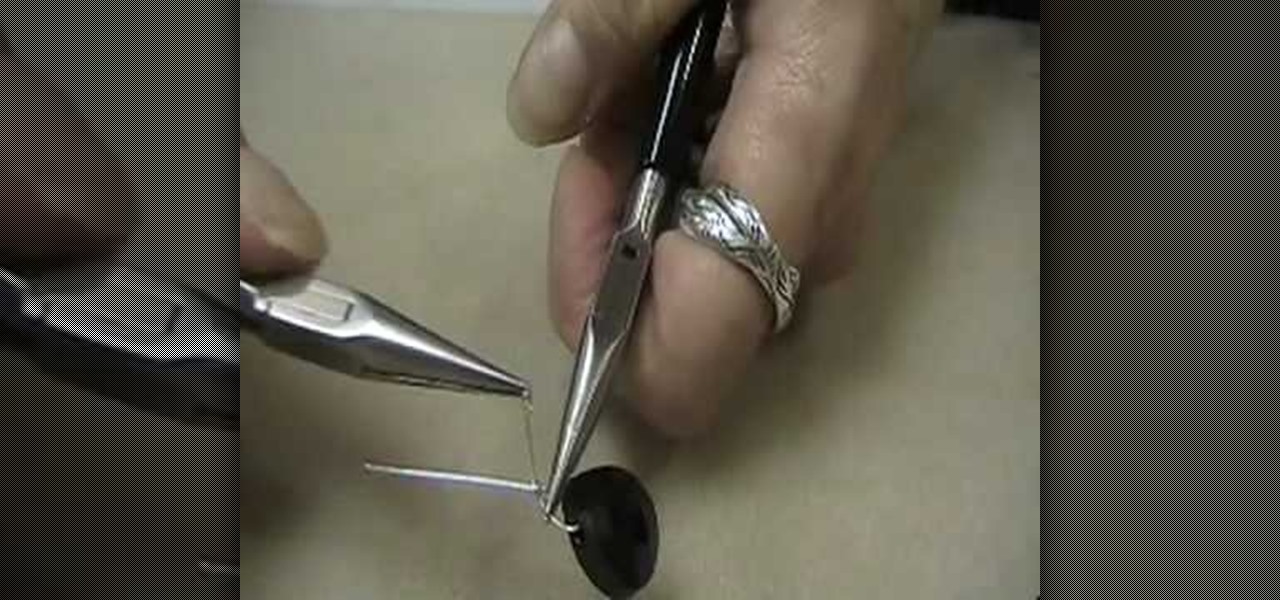
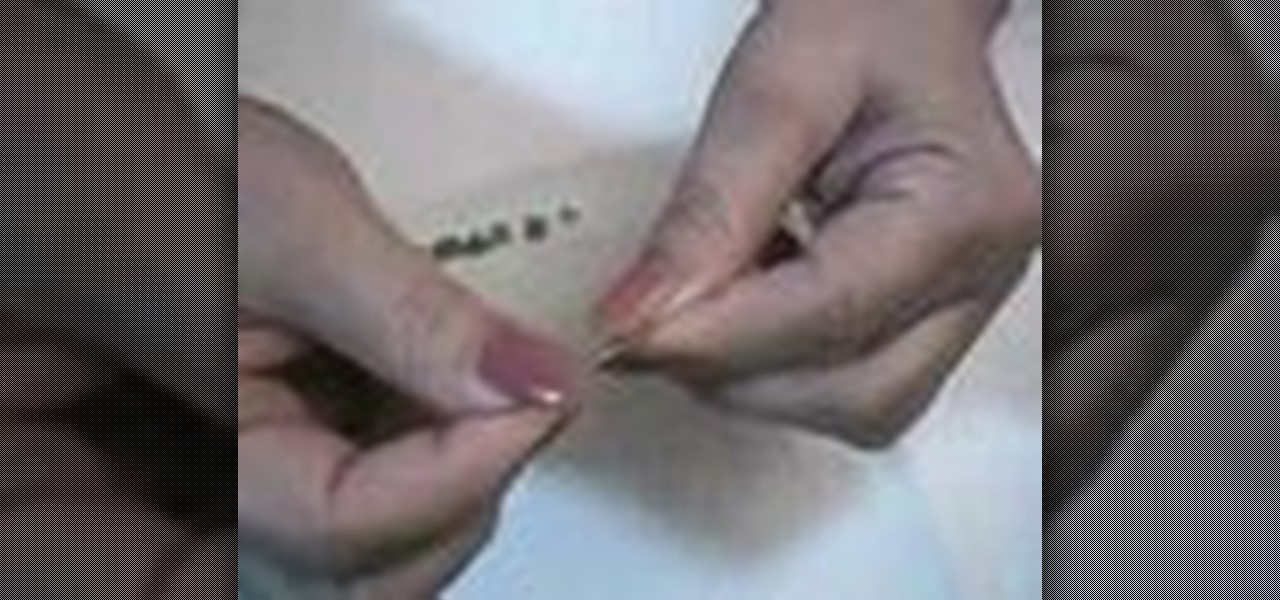
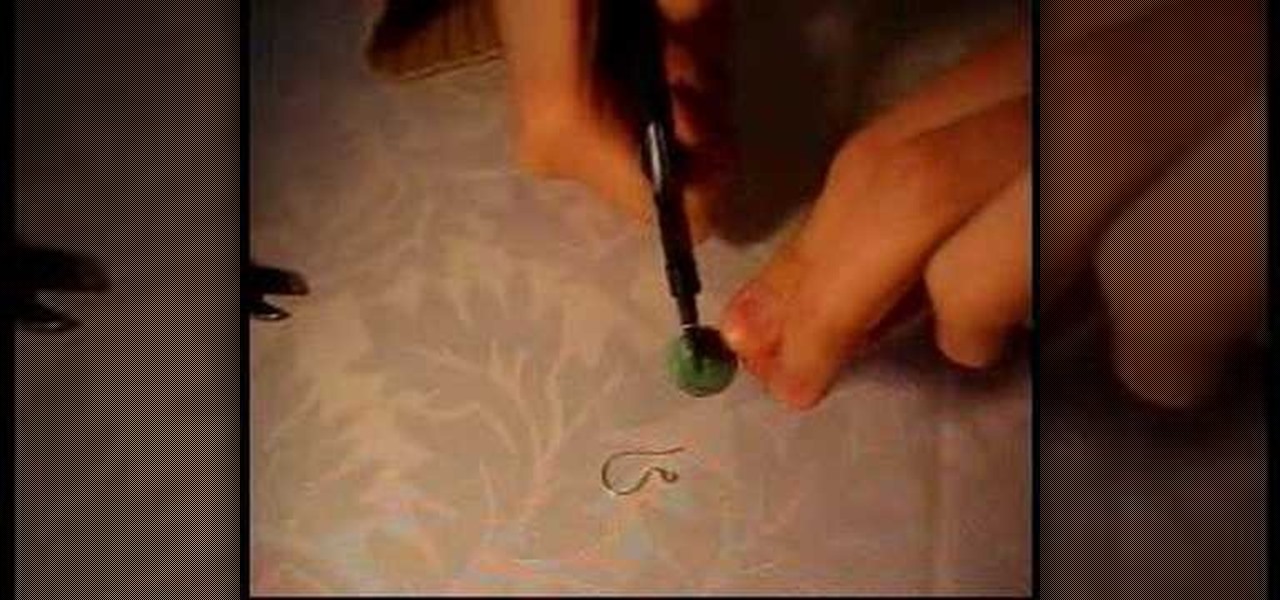
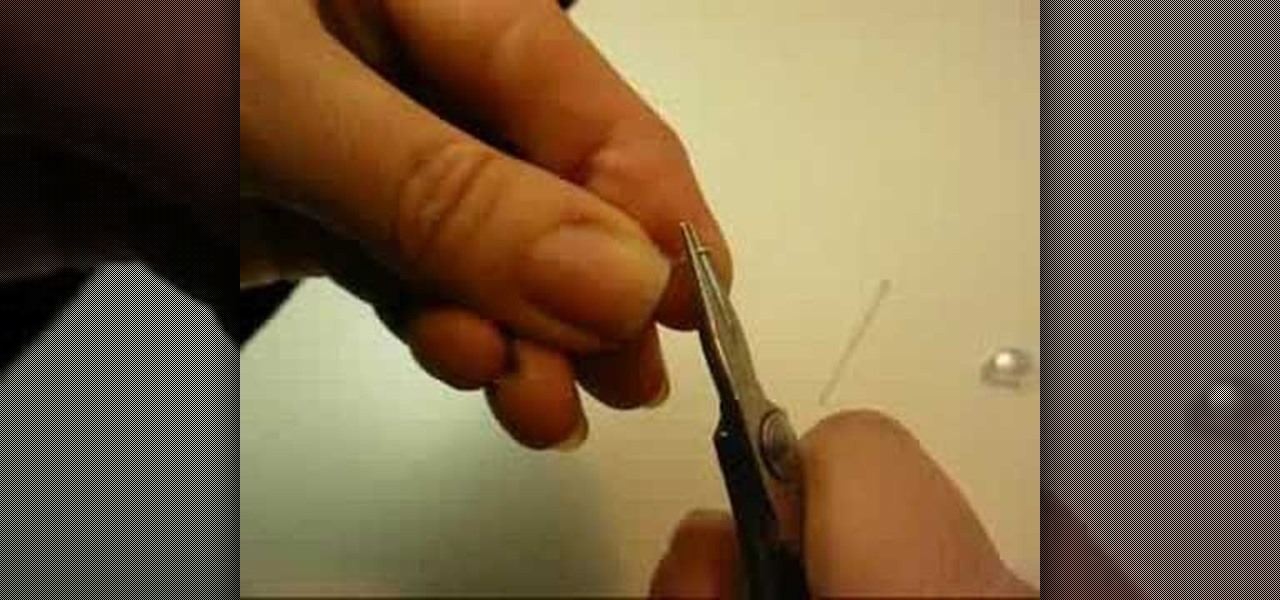
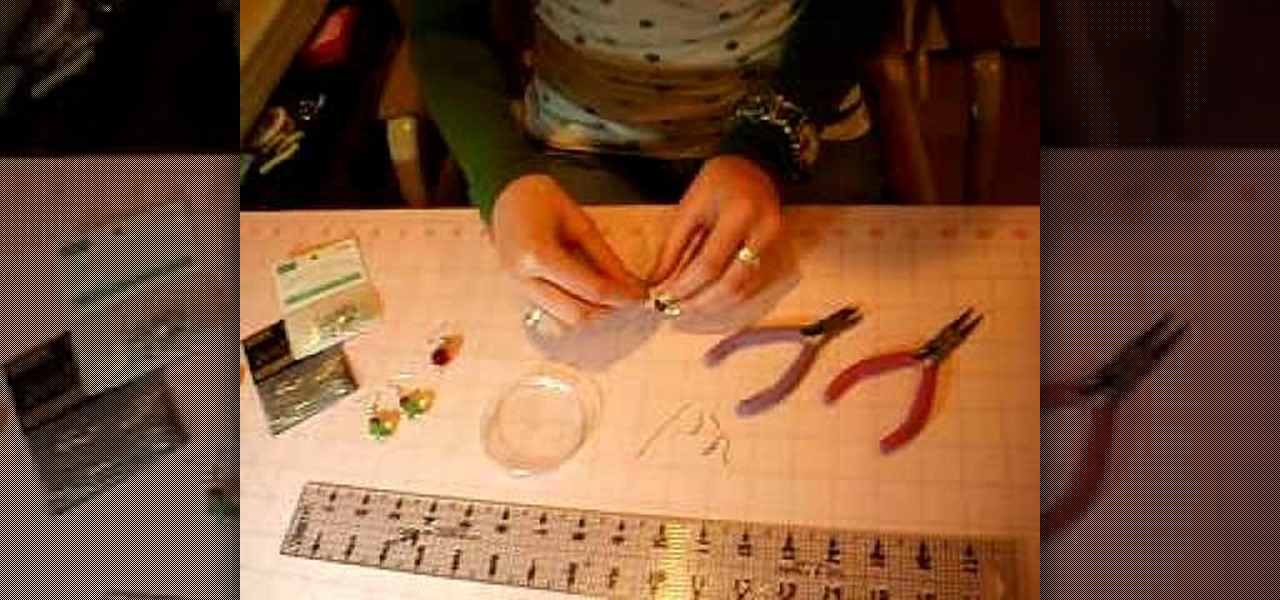
In order to wire wrap briolette, you will need the following: wire, wire cutters, chain nose pliers, flat nose pliers, and briolette,

In order to wire wrap briolette, you will need the following: wire, wire cutters, chain nose pliers, flat nose pliers, and briolette,
This video tutorial belongs to the Film & Theater category which is going to show you how to build a light diffuser to improve your film lighting. Joe Richardson explains how to do this. You will need four pieces of pine wood 1" x 2" x 8 feet long, framing nails, duct tape and light cloth material. Cut the wood at the edges at a 45 degree angle and lay them out on ground to make the frame and hammer in the framing nails. Now spread the cloth over the frame and start stapling it. Pull the clot...
In this tutorial, we learn how to perform polymetric fitness exercises. Before you begin doing these exercises, make sure you are conditioned properly and have stretched out thoroughly. First, you want to jump up and down controlling your movement and not bouncing around a lot. Next, practice jumping onto a step without having to stop at the top or the bottom. Your next exercise is to jump on this step again, except doing a lunge this time at 90 degree angle, and not stopping at all. Now, on ...
In this tutorial, we learn how to do a total body stretching routine with just a towel. Start off by gripping the towel shoulder width apart and pull your arms apart while tensing your body and hold this for around 20-30 seconds, the try again. For the next exercise, bring the towel behind your head and face your hand behind you and pull the hand with your right and left while maintaining a 90 degree angle with the hand that's above you. The last exercise take the towel and stand on one leg. ...
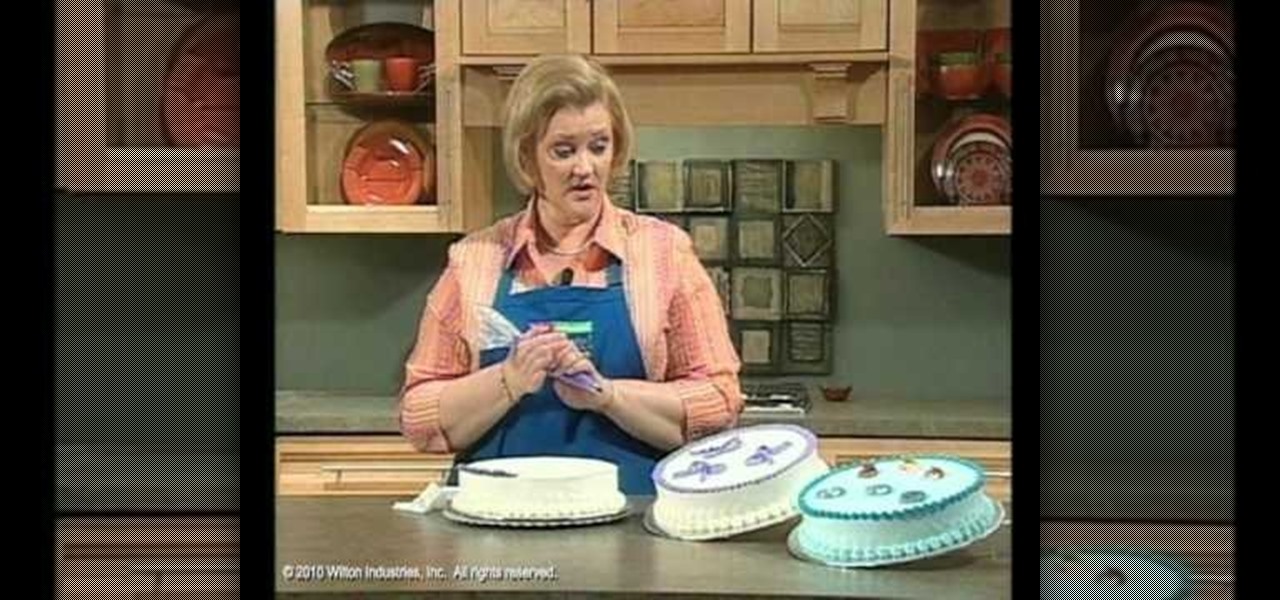
Wilton Cake Decorating demonstrates how to do a ruffle and a ruffle bow cake decorating techniques. Use a #104 petal tip to create this effect. Also use a medium icing consistency and hold the bag at a 45 degree angle. A petal tip can be used to make ribbons and bows. The icing tip has a narrow end and a larger end. Place the larger end down and move your hand up and down to create the ribbon. Make a figure eight to make the bow. Add a knot in the middle, if desired, and add strings. Star tip...
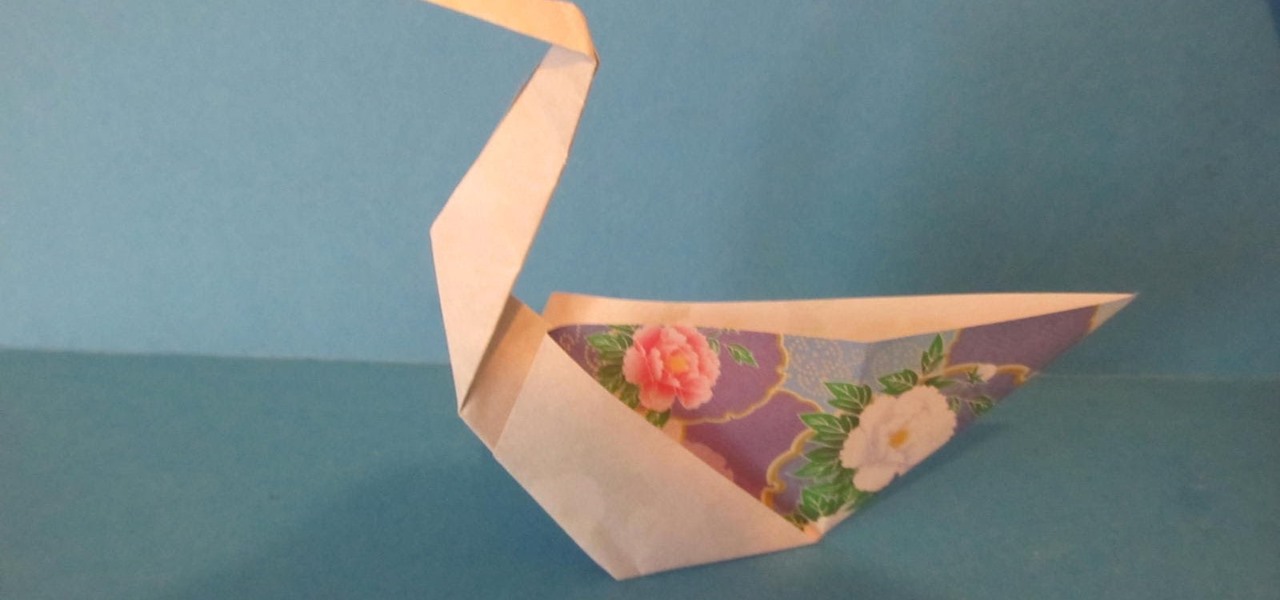
This video shows us how to fold a simple origami swan. Here are the following steps: Step 1: First of all take a paper and then crease it diagonally and then open the crease and then fold the paper on the crease line so that a cone is obtained with a triangle on the top.
The first step in getting Taylor Swift curls is to wash and blow dry your hair. After that, apply a heat protector spray and brush it through. To section your hair, twist the top lairs up and clip them up on top of your head. Next, take a curling wand and place it under a small section of hair at the root and wrap your hair around the wand. Leave a little bit that is unwrapped for you to hold onto. Hold the wand at a 45 degree angle. The longer you leave your hair wrapped around the wand, the...

This video shows how to make little paper birdies that have paper clips for their feet. Trace your bird onto the paper. Then you need to cut out the birdies. Then you need to make two paper clips into ninety degree angles. After that you must attach the birdie feet to one side of the bird using scotch tape. Then you must attach the two pieces of the little birdie together. To do this you should be using double sided tape. After that you are basically all done creating your little colorful pap...
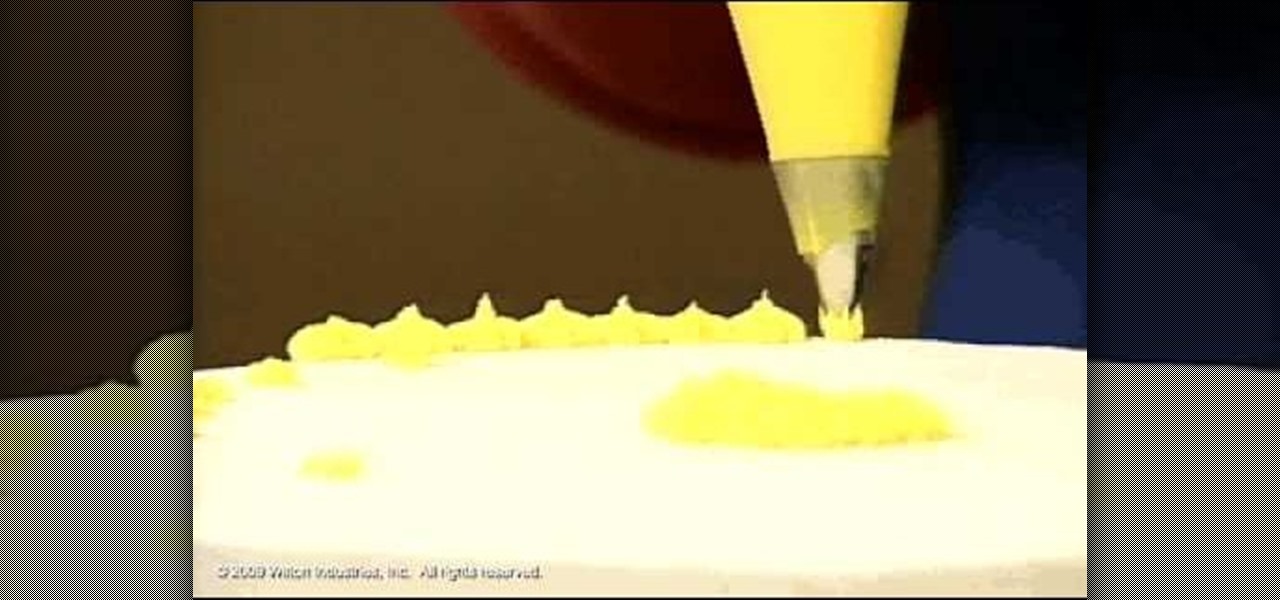
Decorating Tips demonstrates how to use the star tip to decorate a cake or cookies. Use a medium consistency icing and position the bag at a 90 degree angle. Hold the tip 1/4 of an inch above the surface of the cake or cookie. Use the count squeeze, stop squeezing and stop to create a delicate star look with a size #13 star tip. With a size #18 star tip, shorten the count and put the icing stars right next to each other to fill in a cake. Use different colored icings as accents. You can also ...

In this video tutorial by Tasktutorial, learn how to make a paper scroll in Photoahop. Select the rounded rectangle tool and draw a shape similar to the shape shown. Open layer options. Go to gradient. Select the indicated gradient and delete the marker shown. Adjust the other markers as indicated and use the control+g shortcut to duplicate the layer. Position the shape as shown and using the pen tool draw the paper outline by clicking and holding to obtain the required shape. move the paper ...
Outcomes are endless in Adobe Illustrator. You can create pretty much whatever you can think of and what you can create. This tutorial will demonstrate how to create a glass bar in Adobe Illustrator. You will need to:
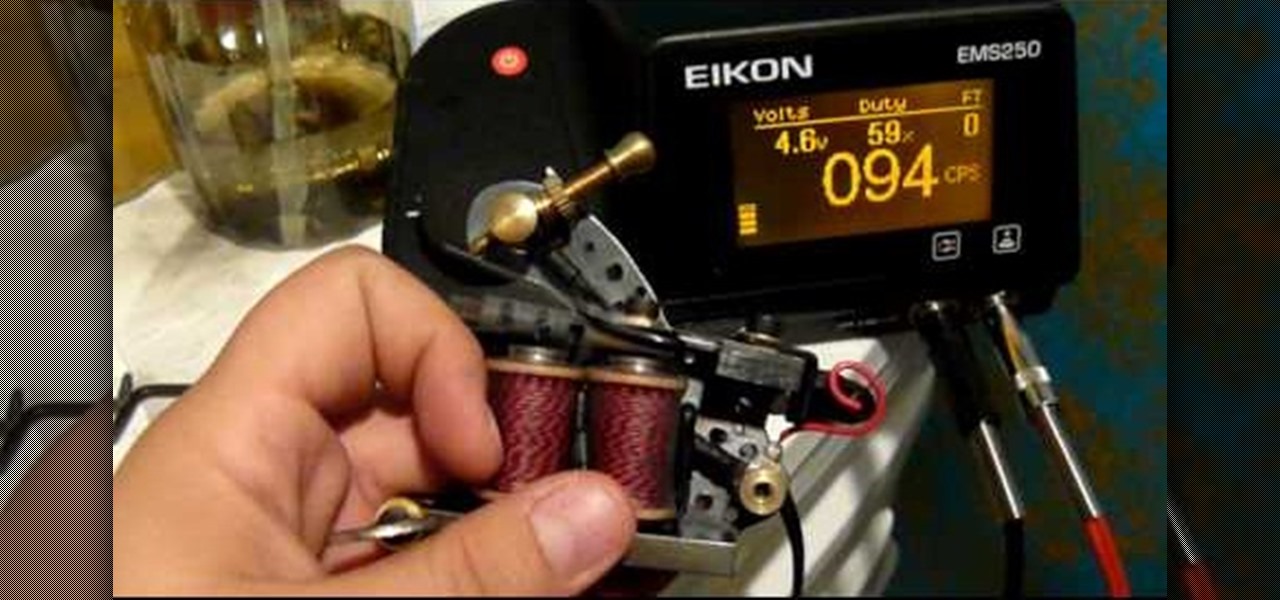
This video shows you how to setup a tattoo machine to do lining and shading. Make sure the armature bar and front spring has about a 4mm gap. Once that is on, set it to about a 30-degree angle. Next with the contact spring you need to set the armature bar and the tool should be set to about 2mm. A good way to check this is with a dime. Now as long as the tattooing machine runs and sounds correctly you are all set to go. For shading, the throw on the armature bar should be 3-4mm--just a little...
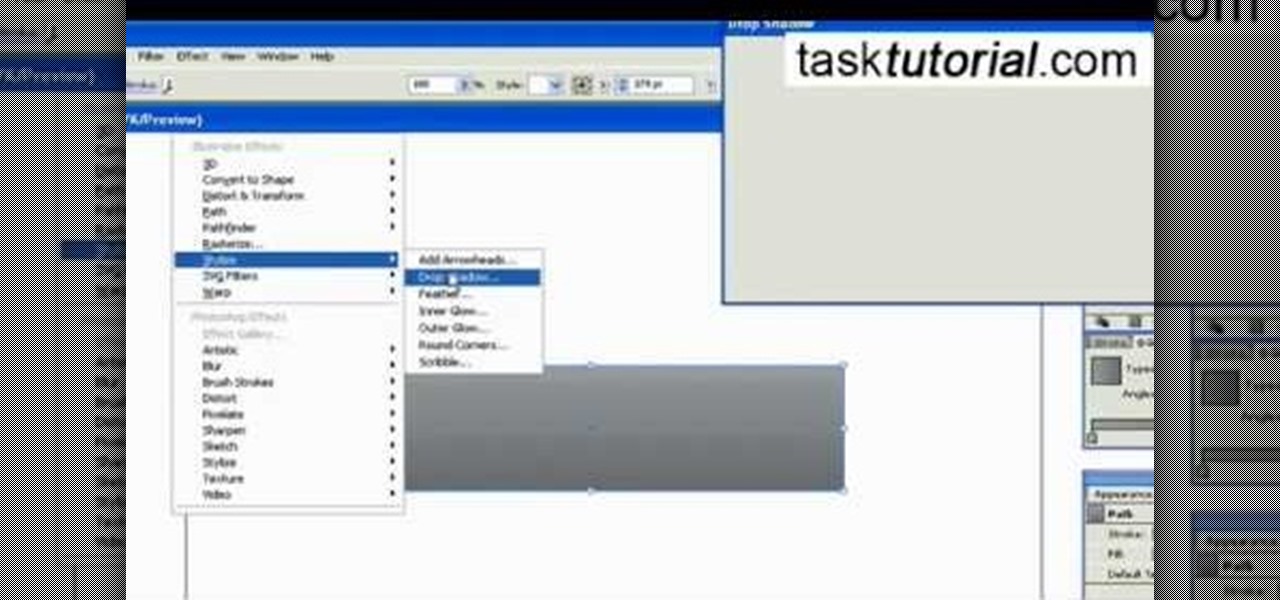
This video tutorial by Tasktutorial shows you how to create an Apple style bar in Illustrator. First, select the rectangle tool in Illustrator and draw a bar as shown. Now select the path, go to gradient and choose the black and white gradient from the swatches. Select two shades of gray and change the angle to -90 degrees as shown. Tweak the colors and go to effects-stylize and select drop shadow, change the opacity value and select black color, normal blend mode as shown. Select the type to...
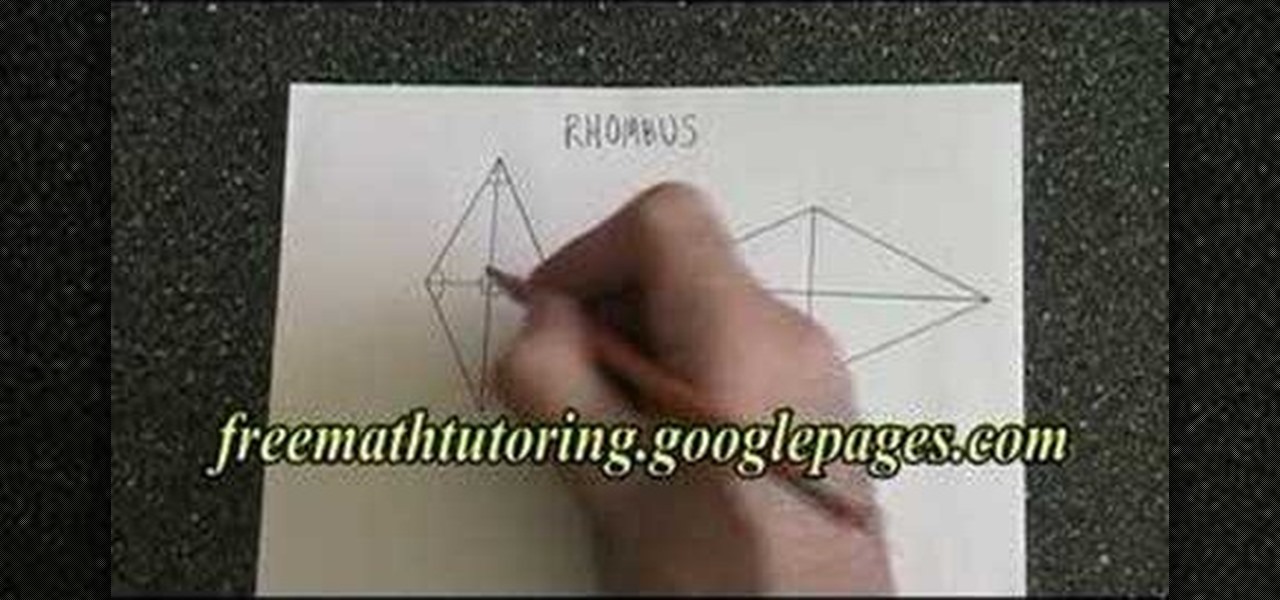
In this math tutorial the instructor discusses the properties of a rhombus. He begins by saying that the properties of a rhombus are similar to the properties of a square. He says that the rhombus is a quadrilateral and hence the sum of internal angles of it is 360 degrees. He says that four sides of a rhombus are equal in length. He says that a rhombus has two diagonals which cross each other at their mid points and are perpendicular to each other but says that the lengths of diagonals are d...

As useful as they can be, 360-degree photos are a total pain to create. The process usually involves taking a bunch of pictures with expensive equipment or software, and not just anyone can do it. But a new iPhone app called CupChair changes everything—it lets you take 360-degree photos with nothing but your iPhone and a cup.
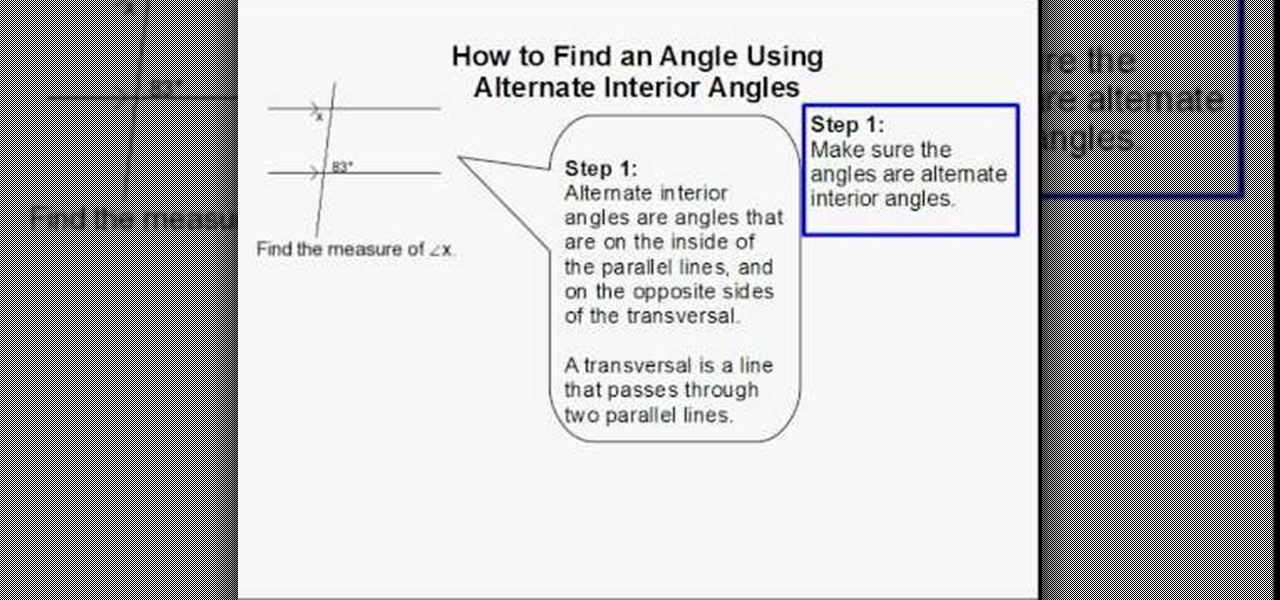
In this video tutorial, viewers learn how to find an angle using alternate interior angles. Make sure that the angles are alternate interior angles. Alternate interior angles are angles that are on the inside of the parallel lines, and on the opposite side of the transverse. The transverse is the line that passe through the two parallel lines. If both angles are inside the line and are opposite to the transverse, then they are alternated interior angles. If you know two angles are alternate i...
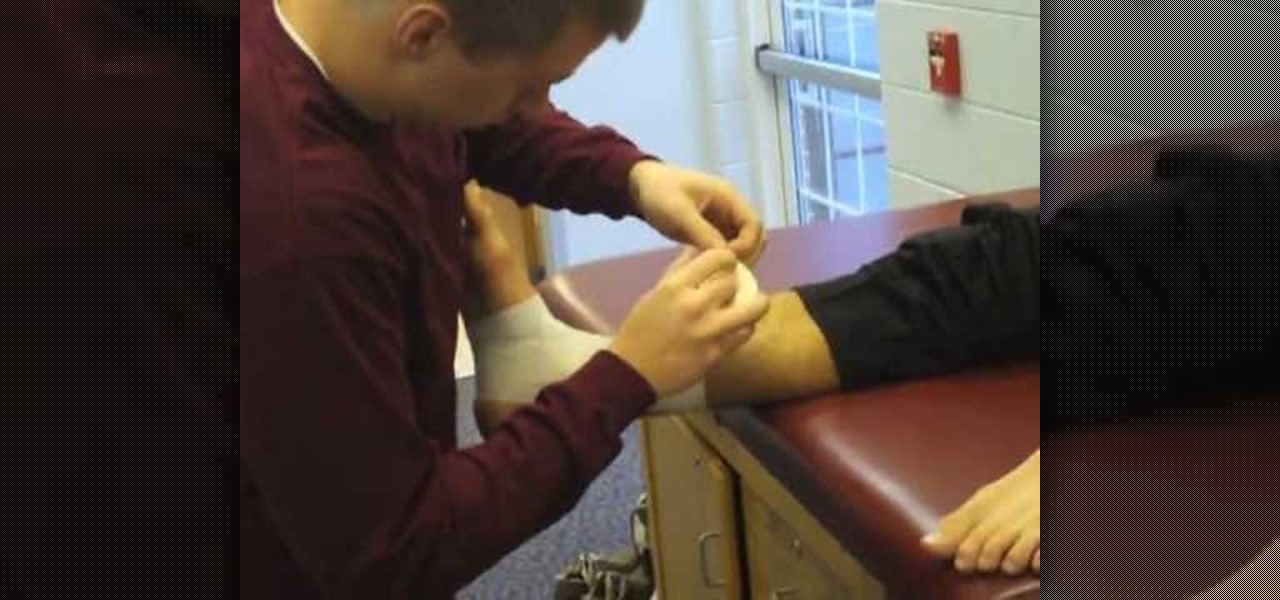
This wrap is intended to support and stabilize the ankle joint. Supplies needed include a 1 - ½'' – 2'' adhesive tape, pre-wrap, and heel and lace pads. Apply heel and lace pads at high friction areas, including the distal aspect of the Achilles tendon, and the dorsal aspect of the ankle joint. Apply under-wrap to secure them in place. It is critical that the foot remains at a ninety degree angle for this portion of the procedure. Apply an adhesive tape anchor strip at the lower leg, approxim...
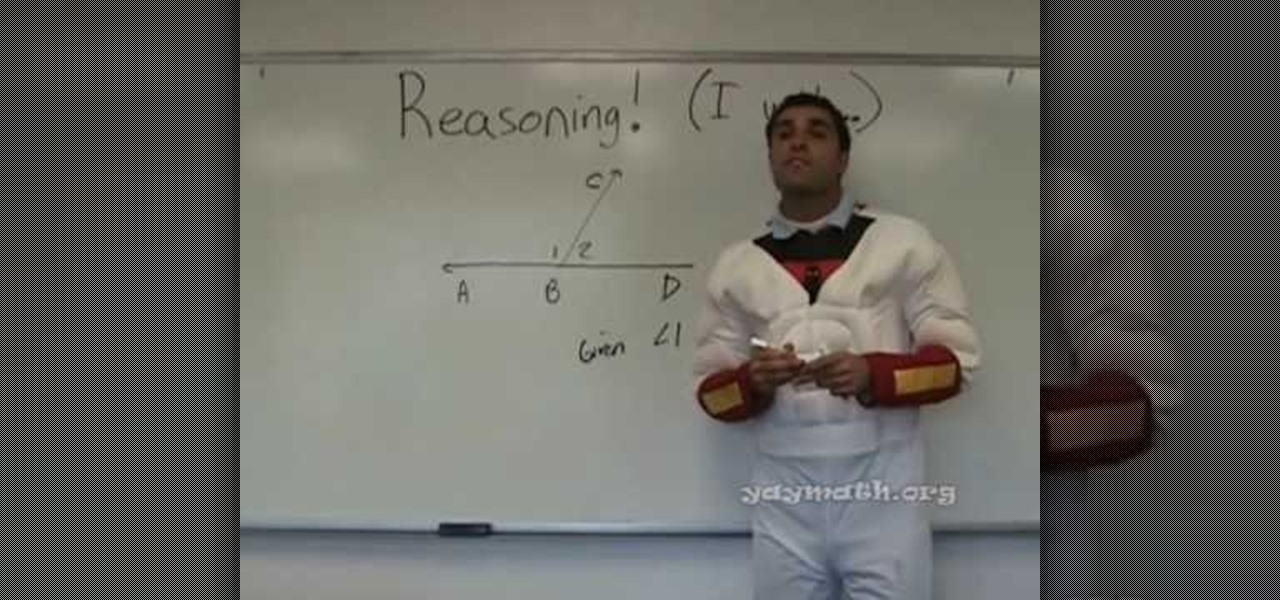
In this tutorial we learn how to use inductive reasoning. Start out with your equation that is giving you your statement. You need to prove whether this is true or not by figuring out the equation. Look at the different angles to see if they are a linear pair and then see if they are the same. Compare them to see if they add up to 180 degrees and use your mathematical logic. Once you understand the backbone to doing this type of math and what the exceptions are, then you will be able to figur...
In this video, we learn how to get a bigger butt with squats. First, place your feet wider than shoulder width apart. Then, point your toes out at a 45 degree angle and look straight ahead. Squat down as deep as you can while carrying a bar. Repeat this again, making sure you are keeping your head up and looking straight ahead. The deeper your squats, the larger your butt will be from the muscle you are building. Continue to do this for several reps, then add in more weights as your body gets...

In this video, we learn how to use a protractor to measure the height of any object. First, attach a level to the protractor, followed by a straw at the 45 degree angle. Next, walk back form the object while looking through the straw. Keep walking back until you spot the top of the object through the straw, then measure to the base of the object. After this, you will have an isosceles triangle that has two equal sides. Use these sides to help find what the size of the object is. After this, a...
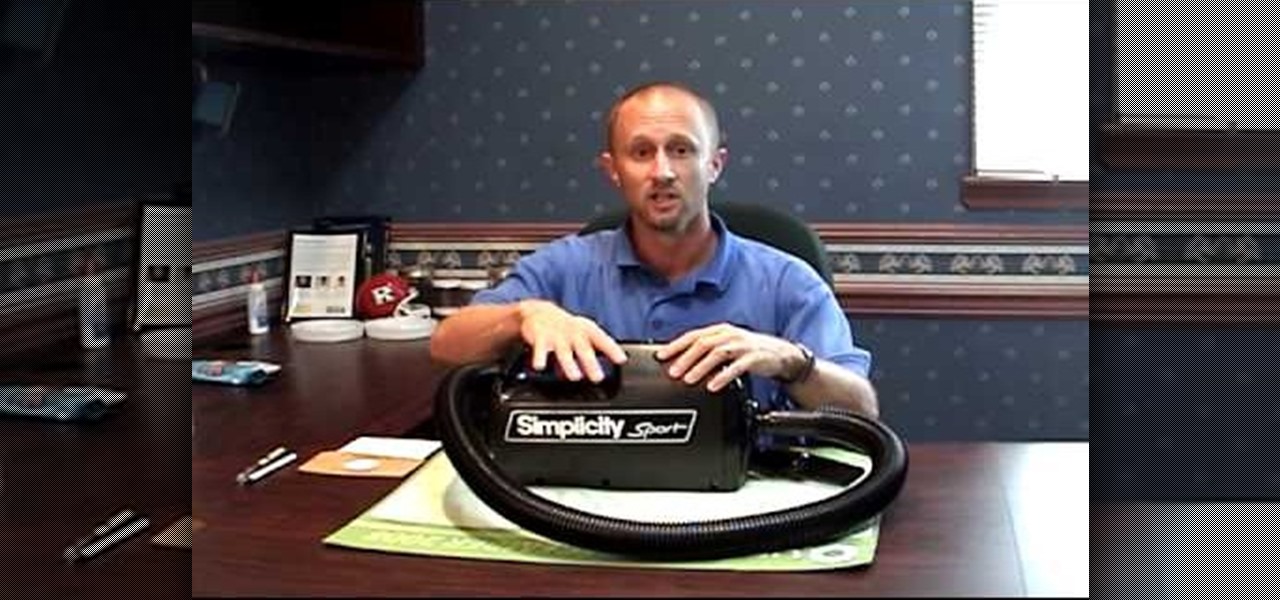
You can use a vacuum to help with bed bug management and control. Some bed bugs are tolerant and resistant to pesticides. So, spraying alone may not be a solution for you. In this case, a vacuum is a good tool. A vacuum alone will not solve all of the infestation problems. Vacuums aren't able to pull up all of the eggs on furniture.

In this video, we learn how to use cones when jewelry making with Christina. First, take a half inch hard wire with a looped end and use a pair of pliers to open up the loop slightly. Next, take your strands of beads and place them onto the loop. After this, close the loop making sure it's secure and the beads won't fall off. Then, take the cone and insert the wire through the wide end and pull it through the narrow end. Using your fingers, bend the wire to a ninety degree angle, then trim of...

Where making jewelry, there are a lot of times that you will have to make a simple wire loop. This is how to do it.

In this video tutorial, viewers learn how to find the length of a triangle using sine. This task is very easy, fast and simple to do. This formula can only be done on right triangles. Begin by finding the angle first and figure which trigonometric ratio to use. Then find which sides are given. For sine, users need to divide the opposite and hypotenuse of the triangle. Then cross multiply it with the sin degree to find the length of the triangle. This video will benefit those viewers who are s...
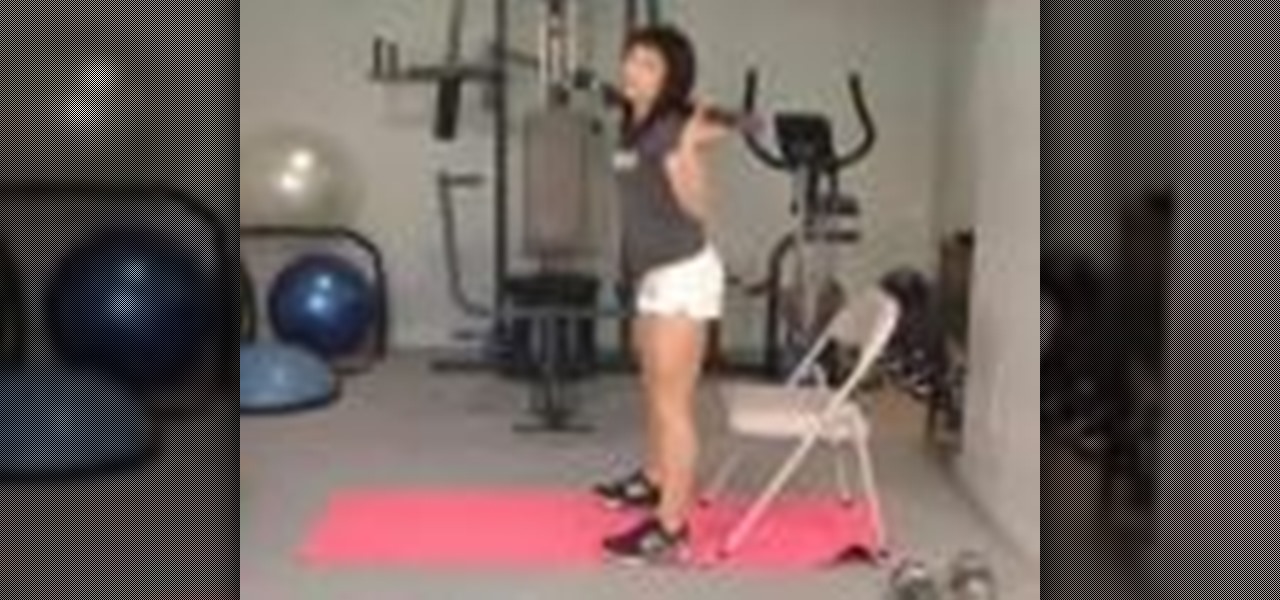
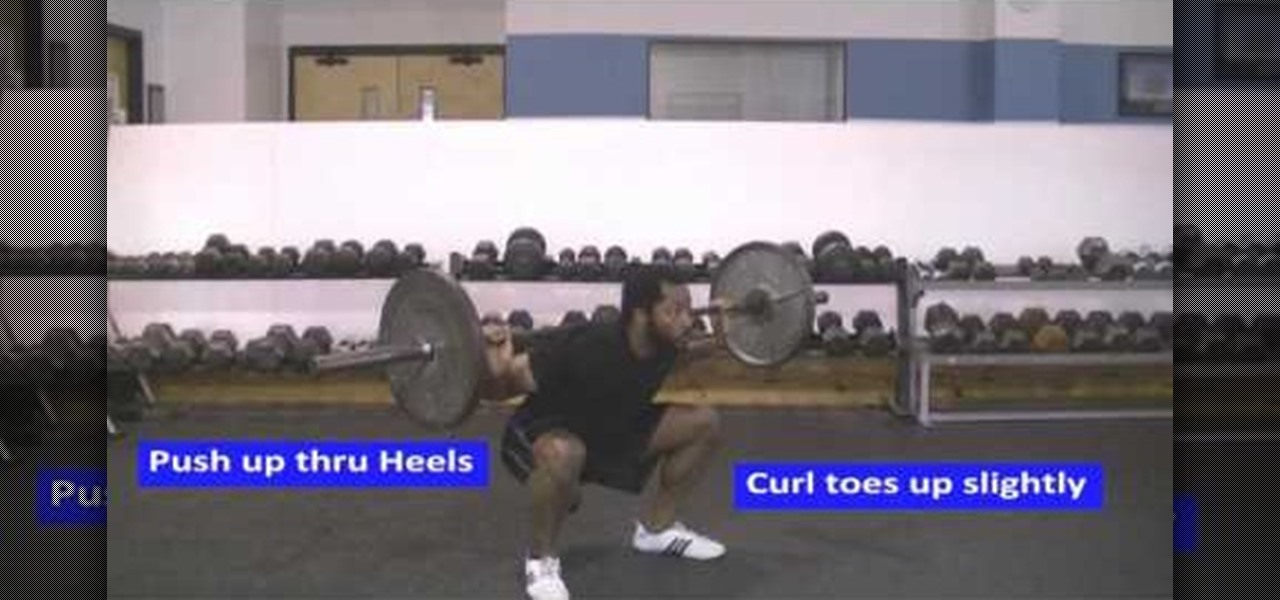
In this video, we learn how to train legs to avoid failure using post exhaust training. First you will do a hack squat, which is where you will hold dumbbells and place your heels on a step, then squat down through the heels. Keep your chest up while doing this and you will work your butt, hamstrings and lower back. The next exercise you can do is a front lunge, which includes you lunging to make a 90 degree angle alternating between legs. The last exercise you can do is to hold a bar and squ...
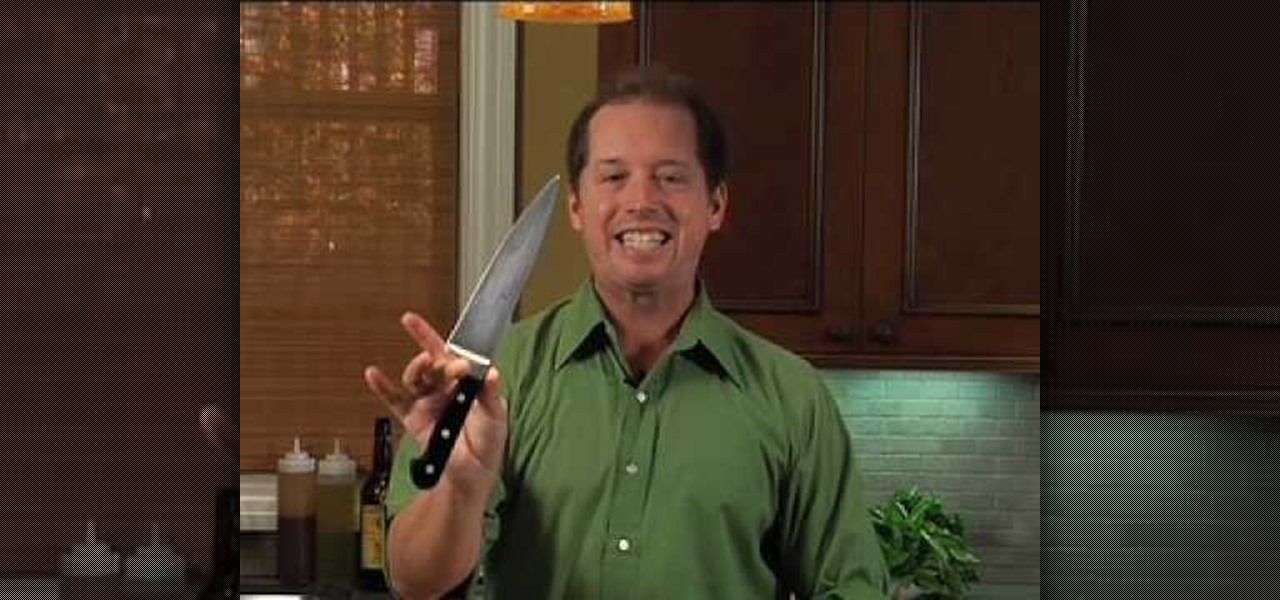
In this video, we learn three different ways to sharpen a knife. The first way is to grab a traditional stone and place either some water or oil on it and sharpen it my scratching it against the stone. Another way to sharpen your knife is to scratch it on a diamond tip, which does the same thing as a stone, takes some of the metal off of the knife. The last way to sharpen a knife is to buy a product called an AccuSharp. It has a sharpener that is built into the side of it. All you have to do ...
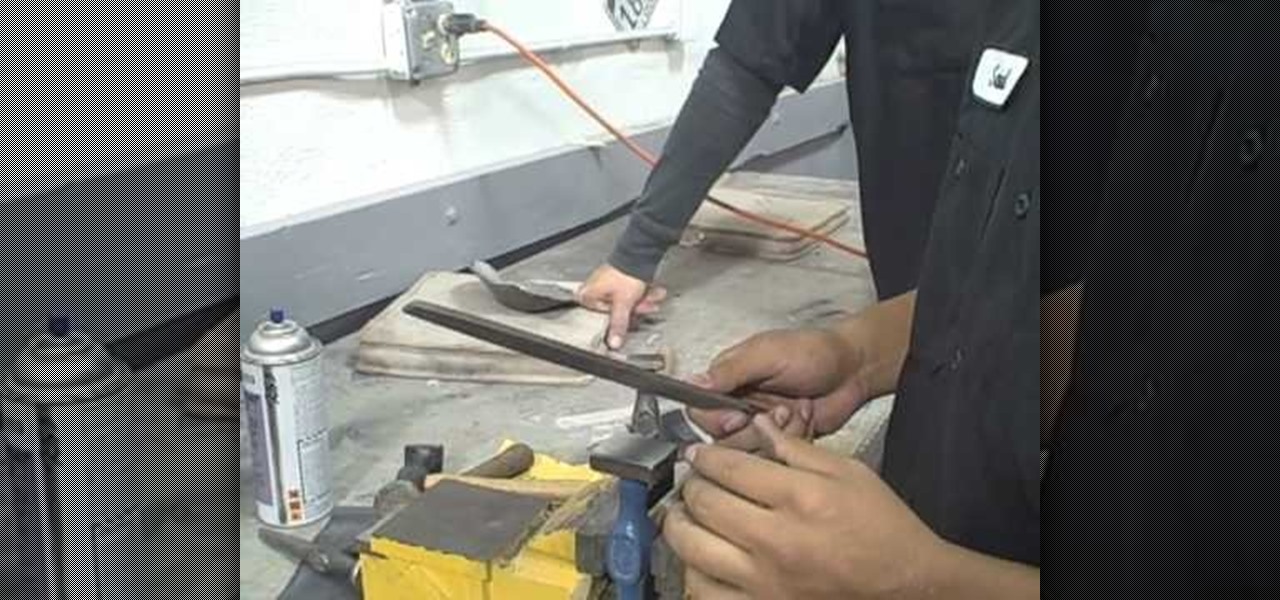
In this video tutorial, viewers learn how to hold and dress a body hammer. To hold a body hammer, grip the hammer's handle with all 4 finger and place the thumb against the handle. When using it, make sure that you hit directly onto the targeted area. Swivel only the wrist of your arm as you hit with the hammer. To dress a hammer, place a filer at a 45 degree angle and move it back and forth along the hammer head. Then use some sandpaper to smooth it out. This video will benefit hose viewers ...

In this video, Caroline gives you a few tips on how to lose your love handles easily, Caroline herself lost her love handles during a 9 day cleanse in which she lost 2 inches off her waist. In order to do this exercise, you need to first stand with your legs about shoulder length apart. Then, placing one of your arms at your hip, extend the other one far above your head, touching your ear on the same side. Begin to stretch to the opposite side, stretching your side until you are at about a 45...
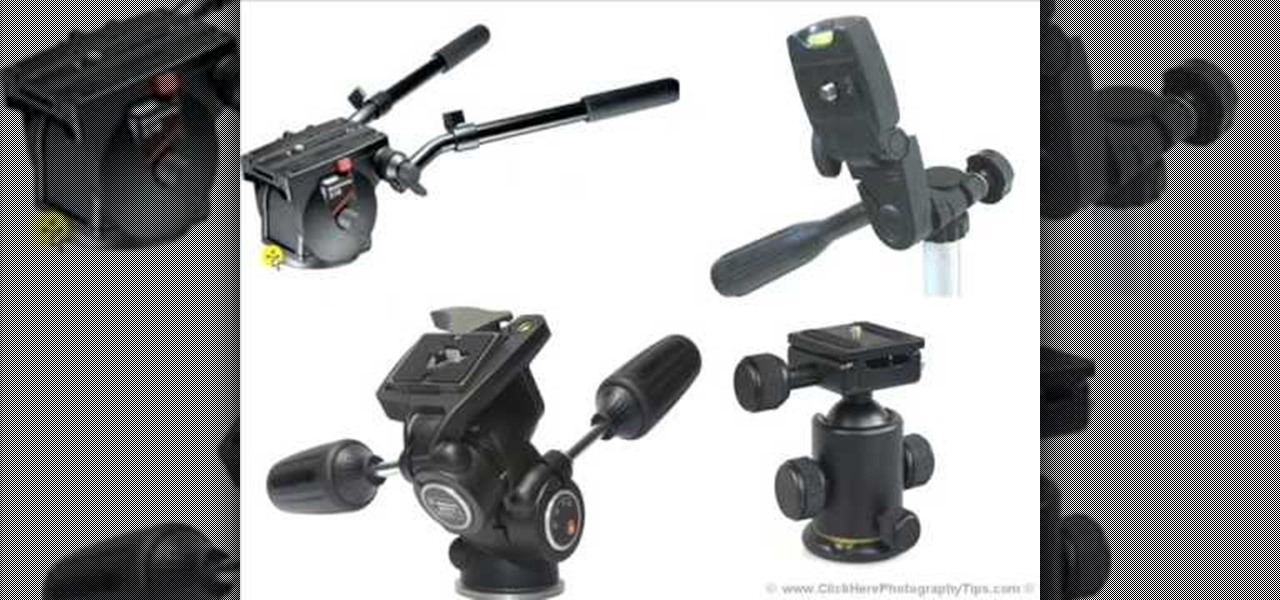
In this video tutorial, viewers learn how to use a tripod to improve photography. There are many different tripod manufacturers, but the operation of most tripods is similar. Look for a tripod that is easy to use. Make sure that the tripod can tilt forward, backward and side to side easily. It should be able to rotate at a 360 degree angle. This video also provides 4 different types of tripods in an image. Each tripod has different functions, size and movement. This video will benefit those v...
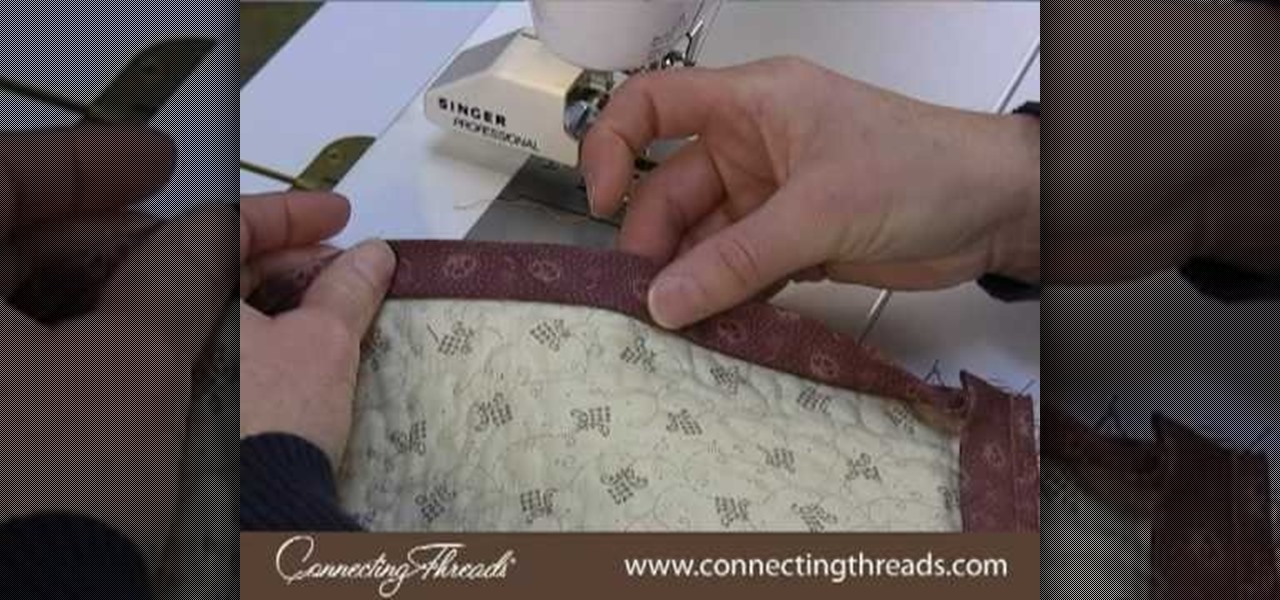
In this video we are shown how easy it is to complete the finishing join on a quilt binding. Just before the final join 6 inches of binding should be left over at the beginning and the end, while the rest of the binging should already be sewn down. The two ends of the binding should overlap by at least 6 inches. You will then need to cut the thread and remove the quilt from the machine, then measure the binding width and overlap the two pieces and cut off the excess binding to match the width...
In this tutorial, we learn how to maintain a butane lighter. There are a variety of butane lighters available, but basics for all of them are all the same. First, adjust the flame dial all the way down to negative. Then, purge the lighter using the back of a wooden match. You will hear a hissing noise as the butane and air escape. Do this until you can no longer hear the noise. You will now clean the lighter by holding a canister of air at a 45 degree angle 3 inches away, spray a few times an...
Not enough storage space? No problem! In this tutorial, learn how to recycle an old cereal box into a very cool magazine holder. This video will take you step by step and soon you will be on your way to being both more organized and more eco-friendly!
Marianna takes us through the process of creating a beautiful set of earrings! For this project you will need two sterling silver head pins, four fresh water pearls, some gemstones of your choice, two sterling silver ear wires, round nose pliers, flat nose pliers, and a cutter. Take your head pin and string your beads and gemstones on the head pin. Next using the flat nose plier, bend the end of the head pin to create a 90 degree angle. Then make a simple loop where the ear wires will be plac...
In order to make a simple hair pin you need a couple things first, a small and big bead (although you can use other items), an ear wire and a head pin. Tools that you will need are a pair of round nose pliers and a pair of cutlets. Now take the head pin and loop the beads through it. Take the nose pliers and bend it, about half way up the head pin and gently bend it with your fingers, making a 90 degree angle. Twist the pliers up and bring the head pin over the nose pliers. Then twist it cloc...
This video explains how to create a pair of Swarovski crystal earrings. You will need a tooth headpin, two pear-shaped crystals, two spacers, two diamond beads, and sterling silver ear hooks. First, slide the pear-shaped crystal onto the head pin. Follow with a spacer, a bead, then use a pair of pliers with a side-cutting edge to cut the wire and bend at a 90 degree angle. Use round-nose pliers to then create a circle at the end of the wire, then 'squash' a bit with the other pliers. Then ope...
To begin you will need to gather the following supplies: needle-nose pliers, wire cutters, two fish hook wires, two head pin wires, and a few beads of your choosing. First take the head pin and string your beads onto the head pin. Once all of the beads are on the head pin bend the top of the pin at a 90 degree angle, then cut the wire about 3-4 cm from the top of the wire. Next use the needle nose pliers and bend the wire into a circle, place the fish hook wire on top of the head pin wire to ...
This video tutorial explains How to Levitate Like David Blaine. You do not actually levitate but create an illusion that your feet are off the ground. This effect is based on the point of view of the spectator (what can be seen and what cannot be seen). When you perform the effect, do not tell the spectator what you will be doing, this prevents them from looking for things. To perform the effect, you need to stand at a 45 degree angle so that the spectator can see your left foot and only the ...
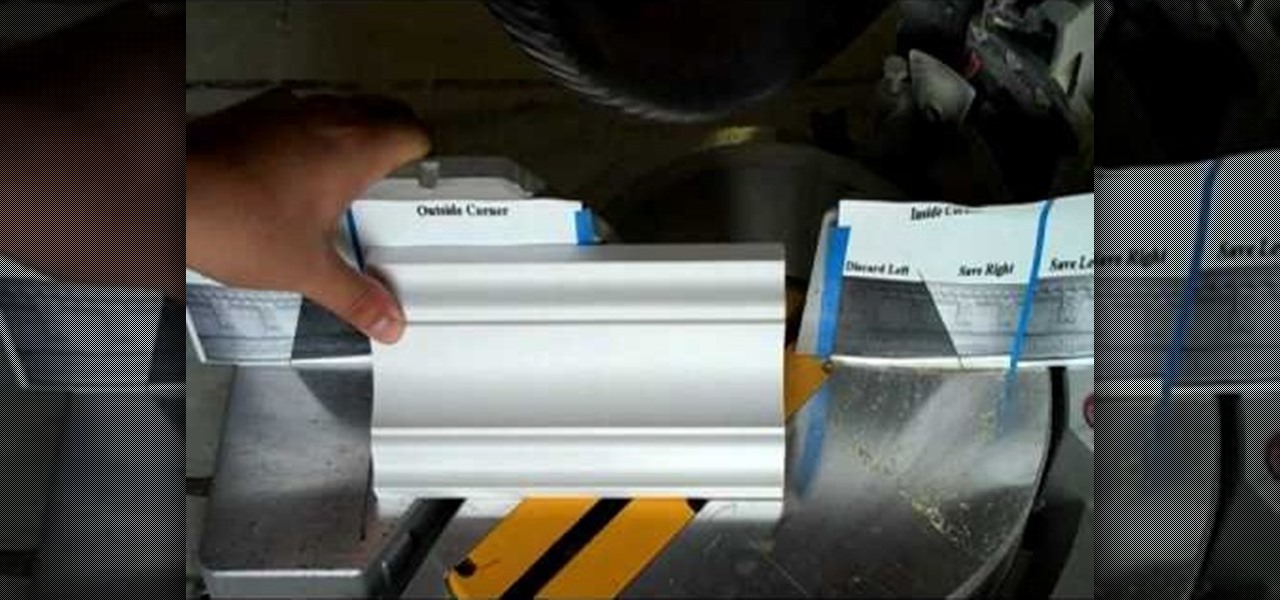
This video, from Superior Building Supplies, demonstrates the proper technique for cutting the inside corners of crown molding. The presenter suggests downloading several diagrams from the Superior Building Supplies website. These diagrams show the correct position of the miter for several different cuts. When using a miter saw think of the fence as the ceiling and the table as the wall. Cuts for inside corners will always be made using 45 degree angles on your miter saw. Using these techniqu...
Starting out with a brief summary of what type of pliers to use when making a wire loop with tips on how to prevent markings on wire when using a certain type of plier. This video is used to teach crafters on how to make loops with wires that are useful for many jewelers Making the loop requires 2 certain types of pliers, one called needle-nose plier used to create the loop. Tips near the end on how to fine-tune the loop so it ends off perfectly as well as explanation on why a 45 degree angle...

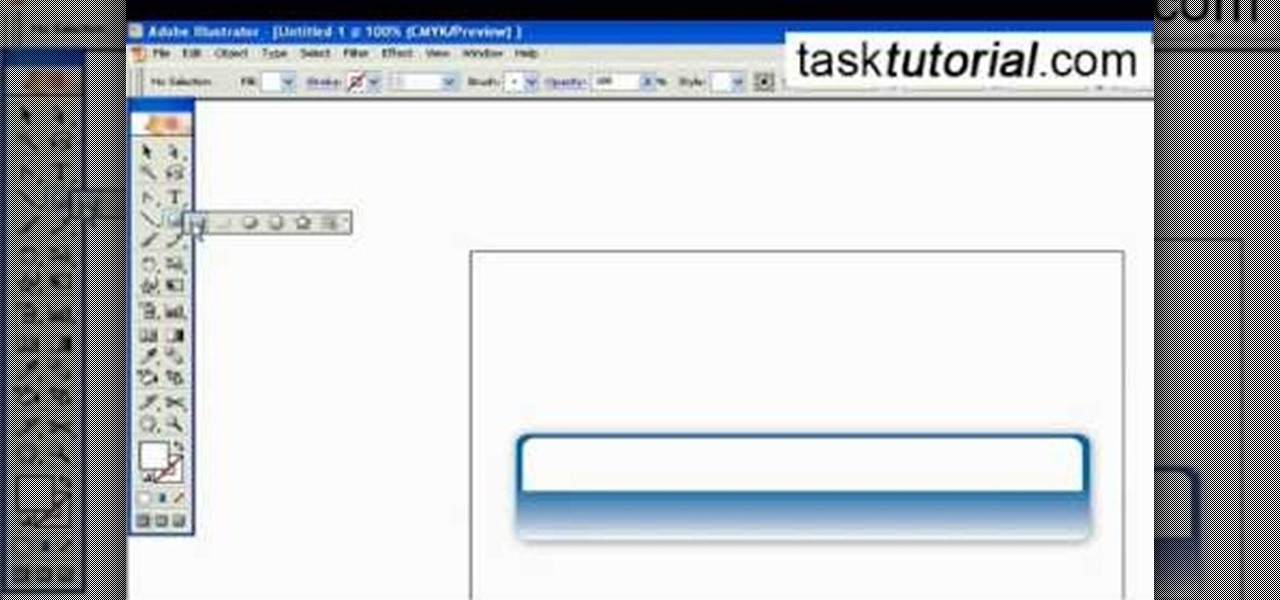
In this Tasktutorial video, learn how to create a button for a website using Illustrator software. To begin, create a rectangle with the rectangle tool and then make the outline gray with a stroke of 3 points. Fill this box with a gradient and change the angle to 90 degrees. A second box within this rectangle, will contain the actual text. Then follow the rest of the steps in the tutorial to show how to change the opacity and color so that the two boxes match in color. To actually animate thi...