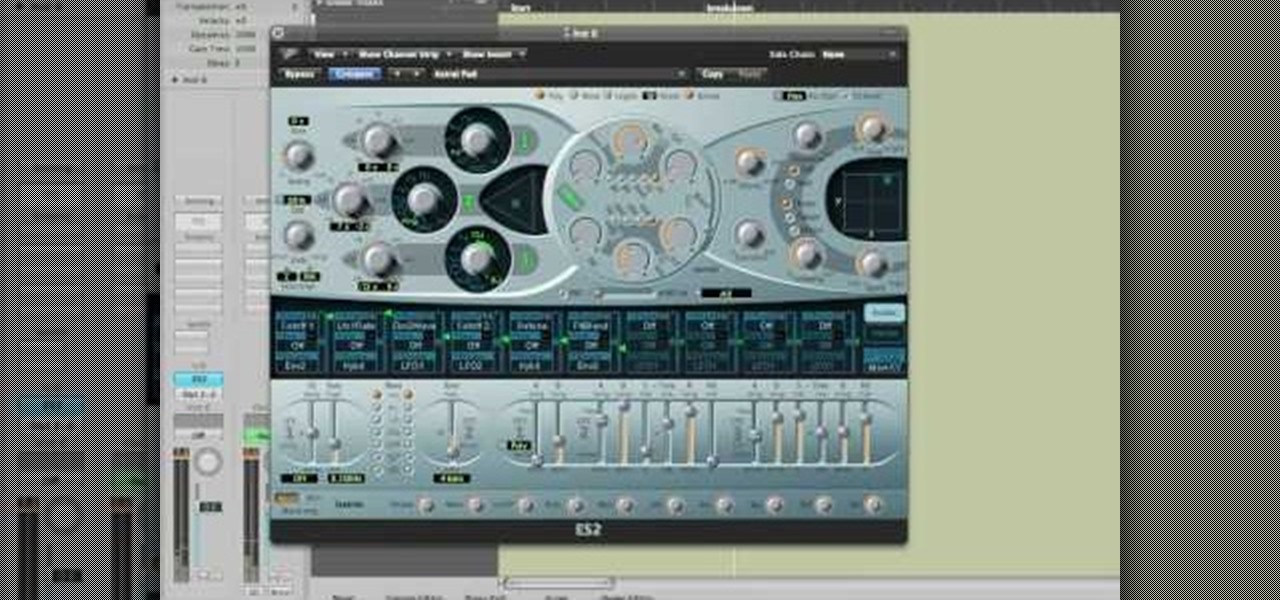
In this video, we learn how to use Logic Pro: Changing presets in Logic instruments. First, insert the ES2 and add in a preset that you like. You can also use key strokes to step through presets instead of using the mouse to click through all of them. By doing this, you will save time while you are going through presets to audition a bunch of presets to find the one you want. Use the drop down menu within the instrument to find the different presets and then choose one you would like to inser...
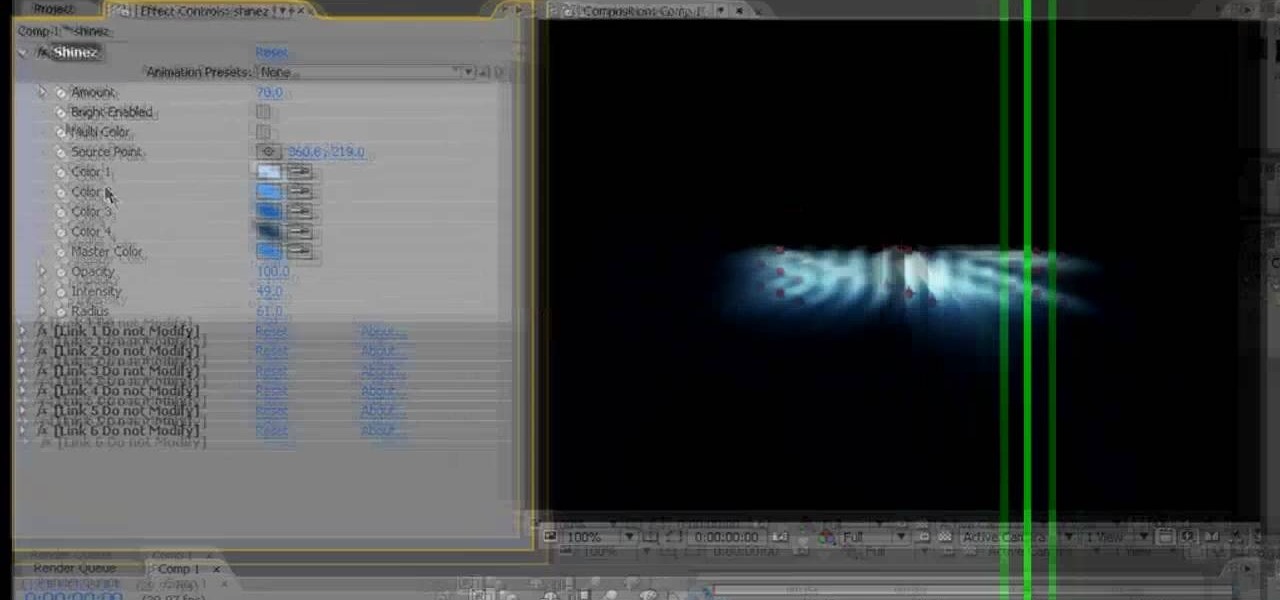
People like shiny things. Especially titles it would seem, since so many modern titles seem to have had shine effects put on them using After Effects. Now you can do so at home! This two-part video will show you how to create shine effects in After Effects without downloading any expensive plugins like Shine. It does use some custom presets which are available for download below and should help you speed up the process.
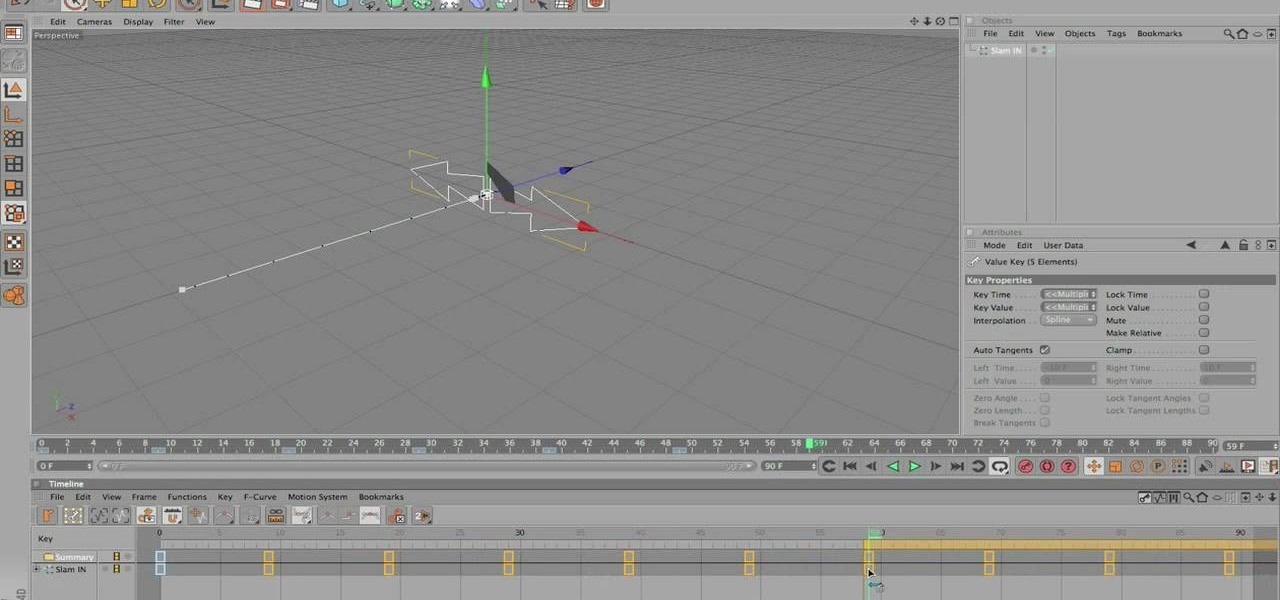
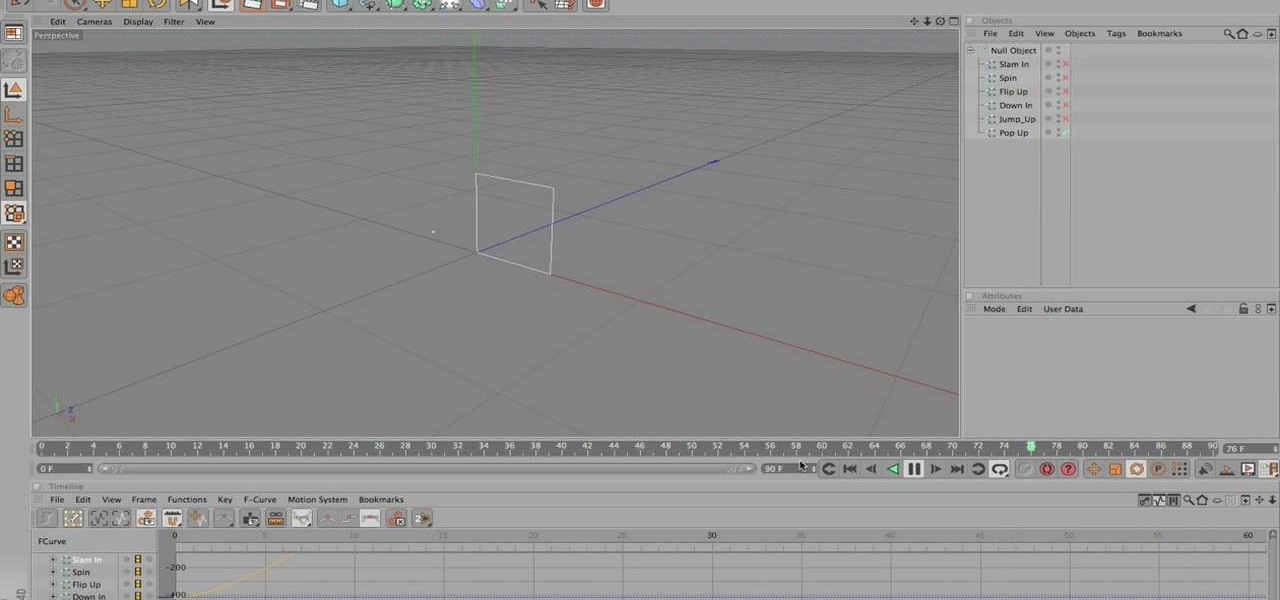
Animation presets are a very handy way to save 3D animating time when working with Cinema 4D. This video will teach you the basics of creating and using animation presets to automate animation tasks that you perform repeatedly, saving valuable time and effort.
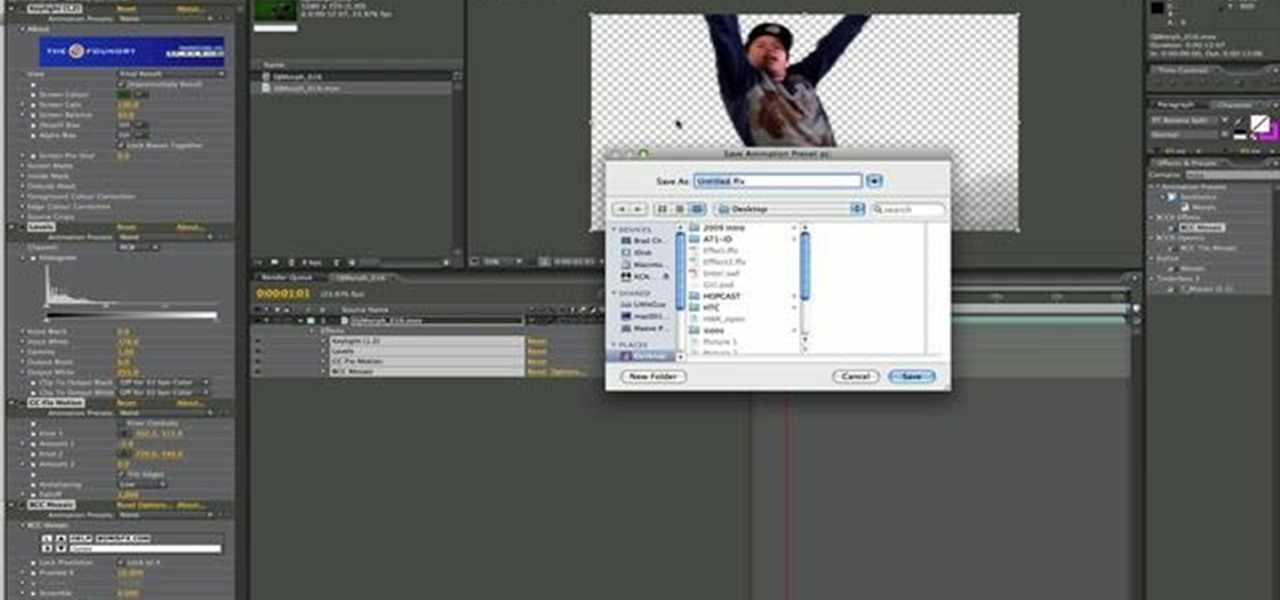
In this clip, learn how to save and work with animation presets within Adobe After Effects. Whether you're new to Adobe's popular motion graphics and compositing software or a seasoned video professional just looking to better acquaint yourself with the program and its various features and filters, you're sure to be well served by this video tutorial. For more information, including detailed, step-by-step instructions, watch this free video guide.
Whether you're new to Adobe's Creative Suite or a seasoned graphic design professional after a general overview of Adobe InDesign CS5's most vital new features, you're sure to be well served by this from the folks at Lynda, which presents a detailed, step-by-step overview of how to use create and edit motion presets within InDesign CS5.
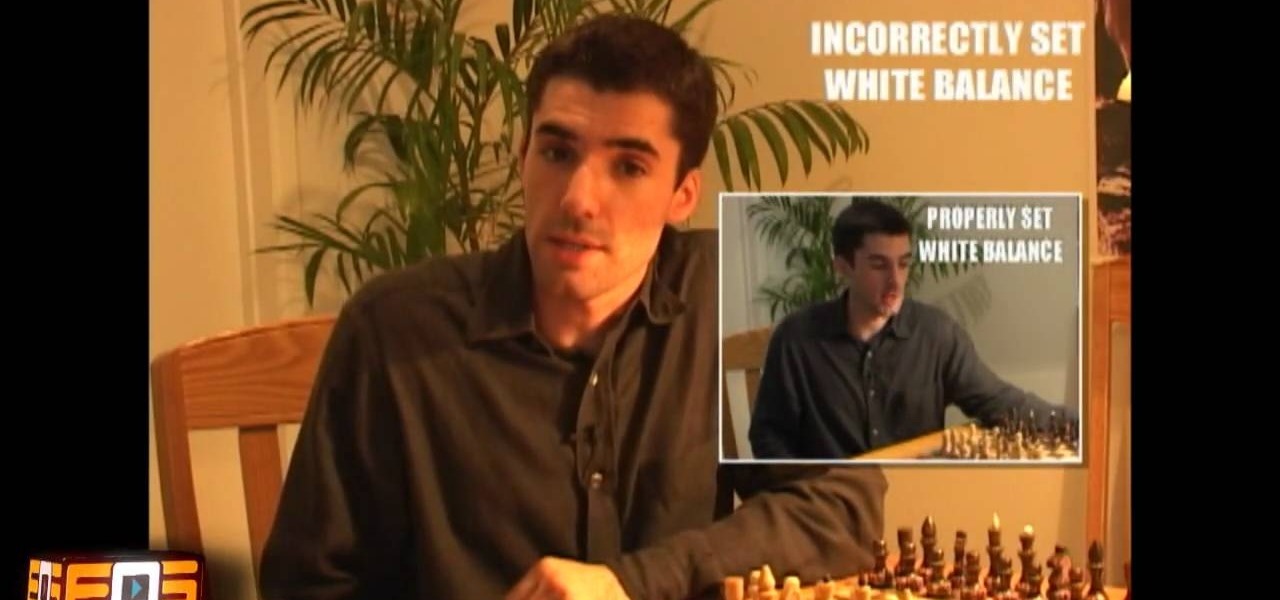
When a scene is filmed, problems can occur in the final outcome of a scene if the white balance is not set correctly. If the white balance is off, a scene may look too orange, blue, or the color is just off in general. This video tutorial shows how to set the correct white balance on your video camera. White balance is what the camera considers to be white. Most cameras have white balance presets for both indoor and outdoor. This is because the light we perceive will vary depending on whether...

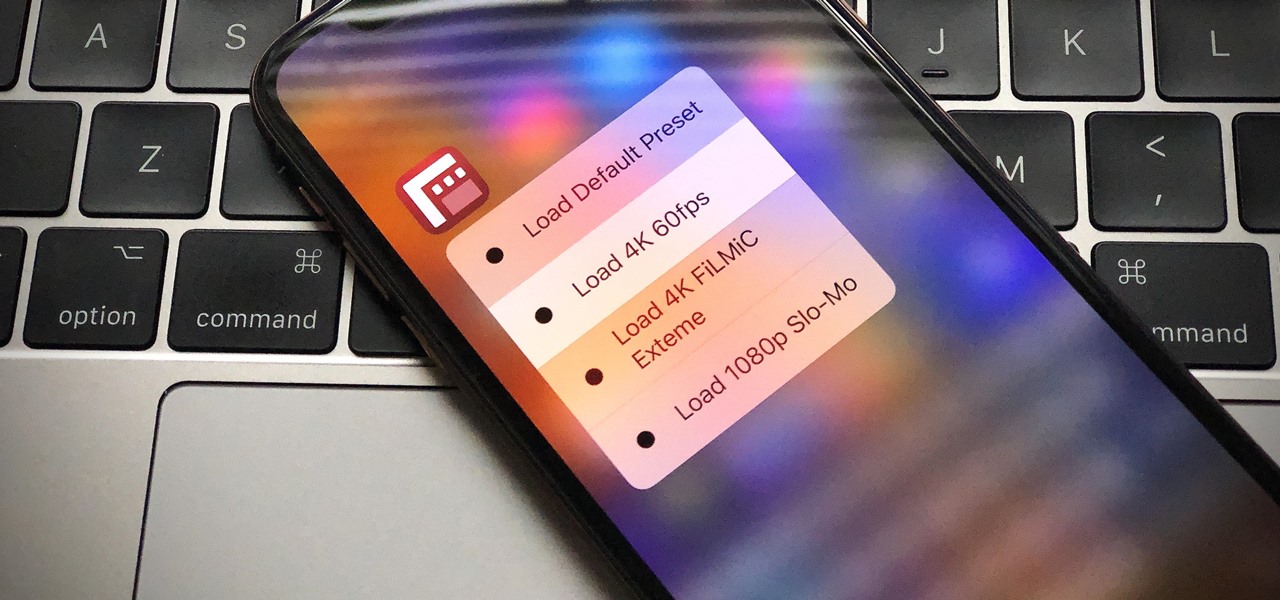
Filmic Pro has a superb suite of professional settings — bit rate, frame rate, and mic choice, to name a few — which can enable you to capture the best footage possible. But different shots require different setups, and it can be frustrating to change settings on the fly. Filmic Pro lets you skip that whole process by saving your favorite settings as presets for quick and easy access.
If you use Cinema 4D to work with 3D animations regularly, chances are that you have tons of animation presets lying around that you could be using more efficiently. This video will teach you how to manage your animation presets effectively, making them easy to access and allowing you to create your 3D art more quickly and effectively.
Editing photos can be tedious, especially if you are using a similar theme for all of your photos. It takes time to select every tool, play with the bars, and find an adjustment that you're happy with. Luckily, there's a faster way. Adobe Lightroom for Android and iPhone allows you to save your favorite editing presets so you don't have to change every photo every time.
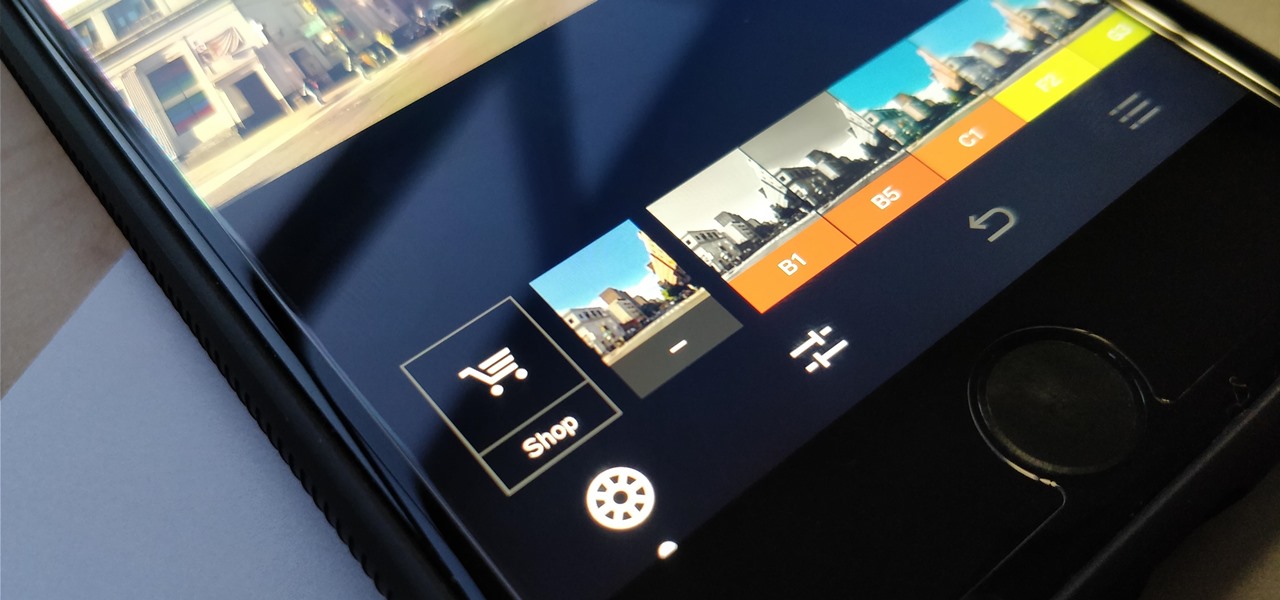
One of the best features VSCO has to offer is its presets, also known as filters — they reduce the labor it takes to make your images look better by applying unique preset edits to each. Presets can make your photo look like it came from a professional studio or a black and white camera from the '70s. Sounds great, right? So, how do you get started?
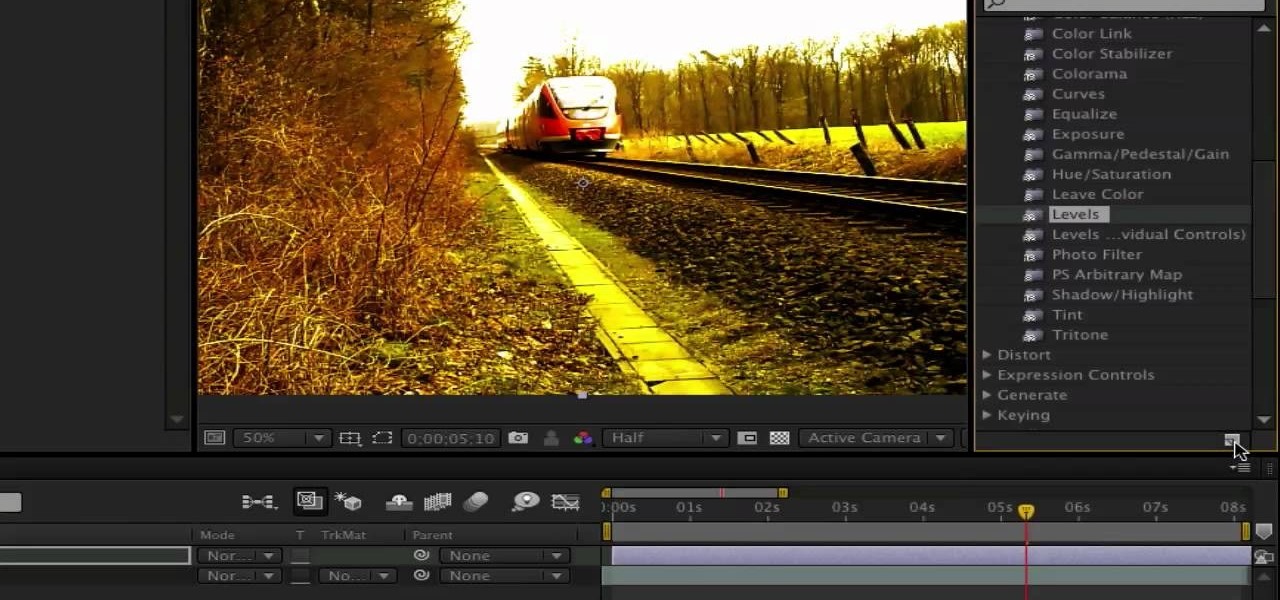
Make your job a little easier by setting presets in After Effects. This will allow you to save time while you add visual effects to your film. Having custom presets makes it much simpler to achieve consistency is your VFX.
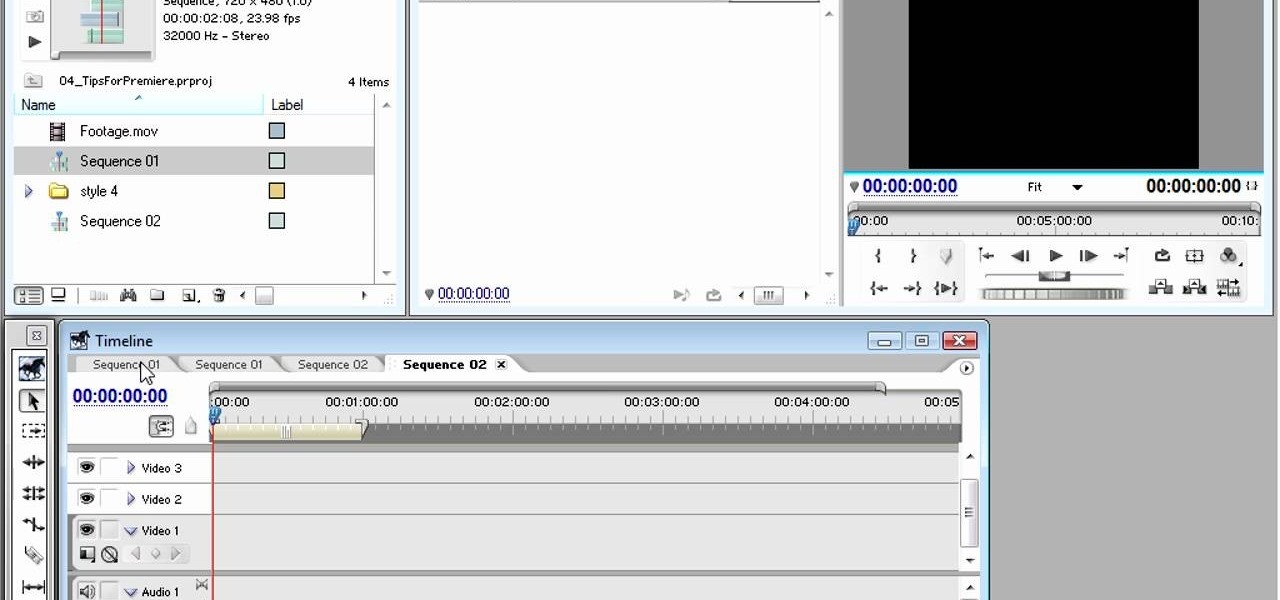
Adobe Premiere Pro is one powerful piece of software if you want to make your videos look professional. This video will teach you how to use preset styles with the software to create cool visual effects like those in the movie 300 and others. Download the project file to get the presets, then apply them to your films and see what you get!
Learn how to create a preset for printing panoramas in Lightroom. Along the way you’ll pick up some tips about good features to use for this in the Print module as well as tweaking the Page Setup options to get the right sized print.
This Lightroom tutorial is all about saving presets. Not just ones you find or get from others but any of the presets you’ve made too.
Your Canon 7D camera can film in video as well as take still photographs, however, the settings will be different. To get the best picture quality possible, here is how you can set up your camera's presets when filming in live action.
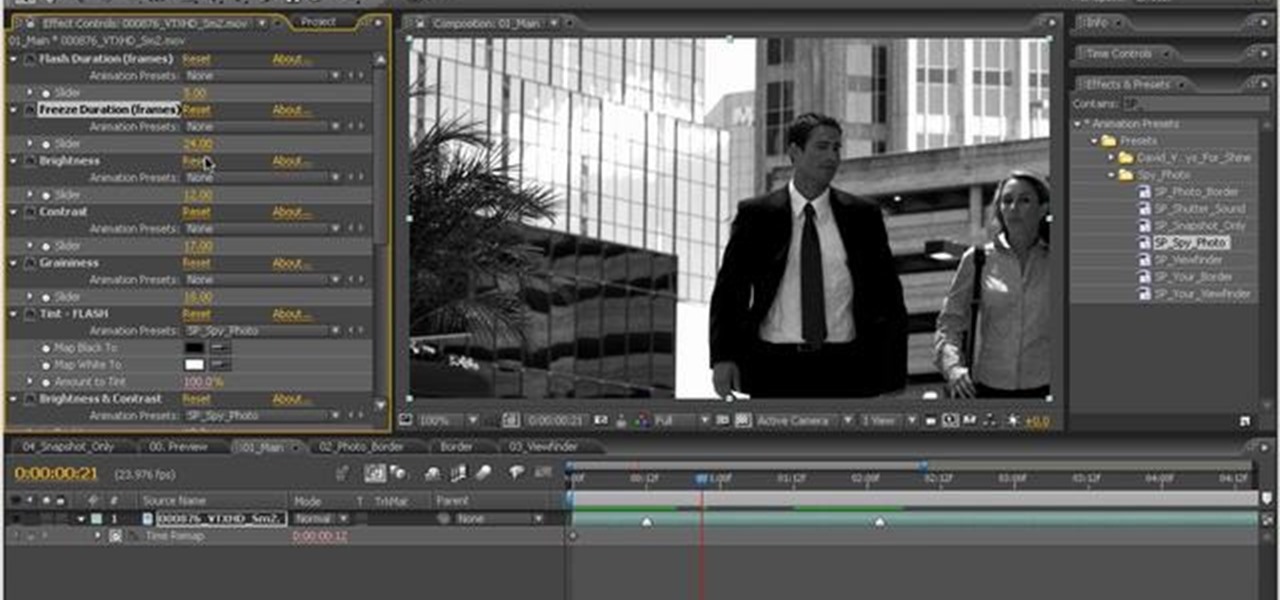
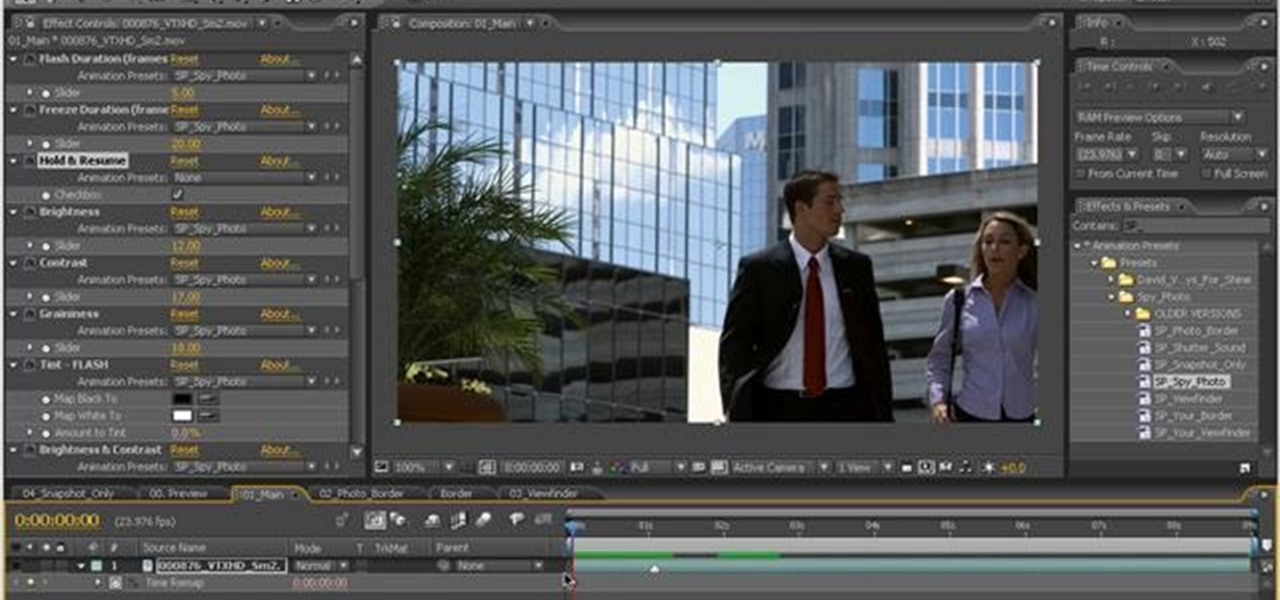
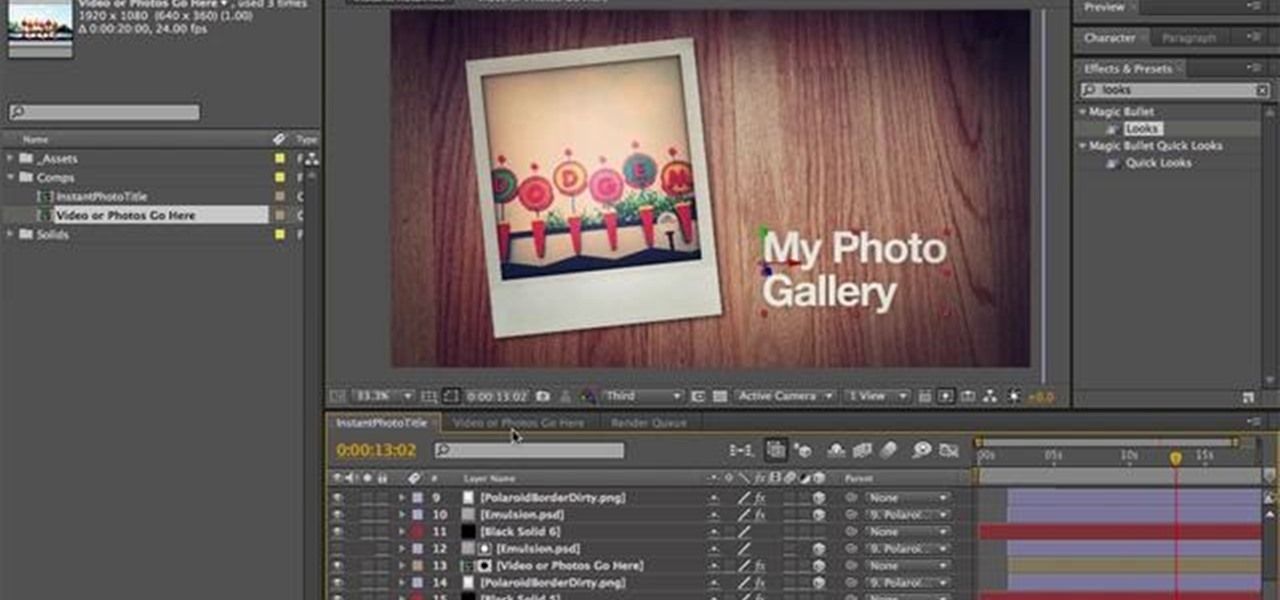
Simulate the look of snapshots in your After Effects video footage with Spy Photo, a free set of presets that dynamically automate and generate the effect. This 17-minute tutorial from Aharon Rabinowitz of All Bets Are Off demonstrates the features of this cool new addition, which includes camera sound effects and viewfinder overlays.
This quick guide well help you get started using effects and presets when editing video in Adobe After Effects CS4. Whether you're new to Adobe's popular motion graphics and compositing software or a seasoned video professional just looking to better acquaint yourself with the program and its various features and filters, you're sure to be well served by this video tutorial. For more information, including detailed, step-by-step instructions, watch this free video guide.
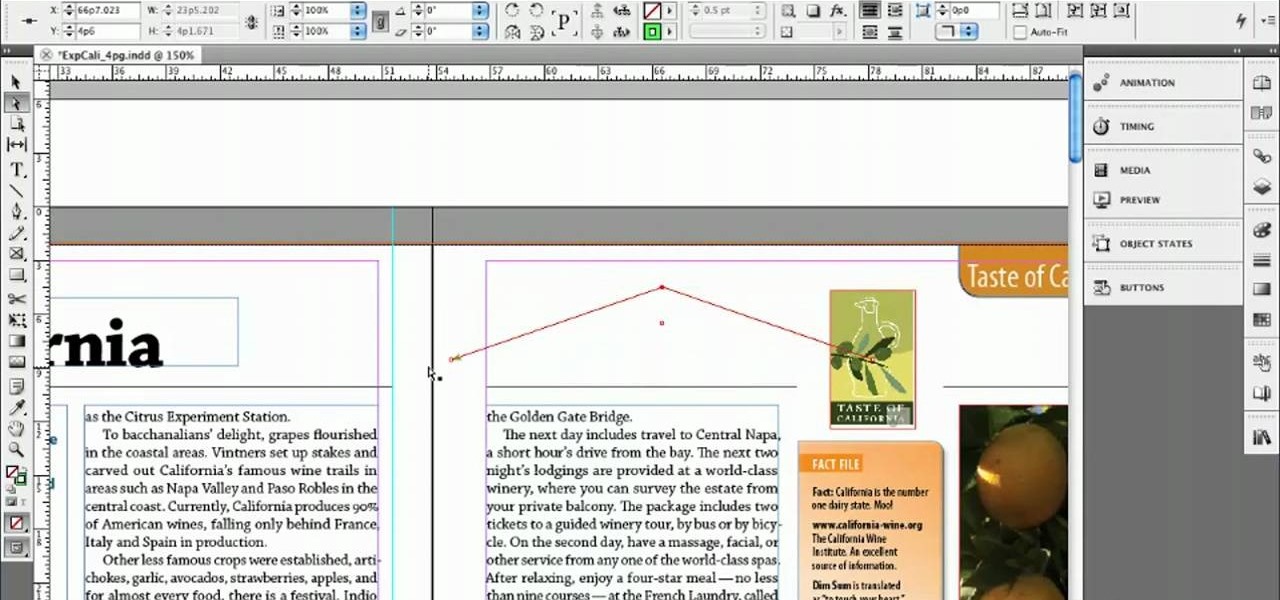
At the end of the day it’s all about what we get OUT of InDesign that matters. Whether you’re printing proofs to your printer or exporting to PDF, you have specific settings for your environment. In this video you’ll learn to take advantage of InDesign’s Presets to streamline your daily output.
Wow friends and colleagues by learning how to make preset and custom PowerPoint animation, to enliven your next deck and keep your audience riveted.
Create an effect in your video where the video footage is converted to black & white, pauses, and resumes playback in regular color. This effect is demonstrated by Aharon Rabinowitz with Spy Photo, a brand new set of free presets for Adobe After Effects.
This Photoshop tutorial explains using tool presets. Learn how to set up and quickly grab your favorite tools, brush tips and options in one easy to use palette.
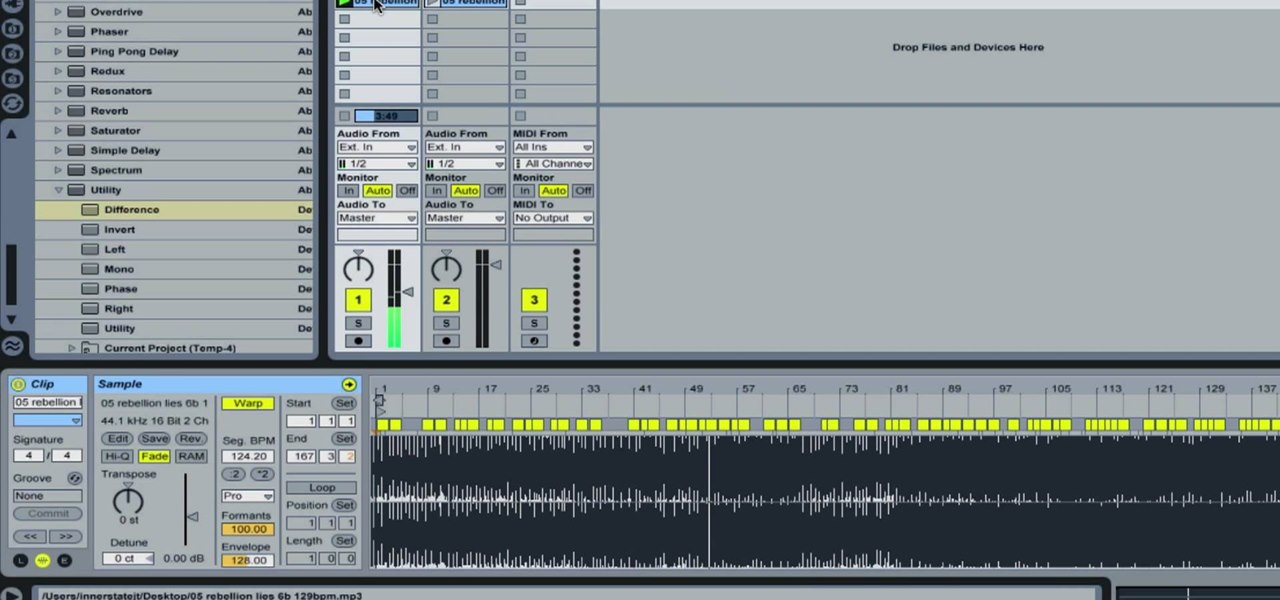
In this how-to video, you will learn how to remove the vocals on songs using Ableton. First, open the tracks you want to remove the vocals from. Go to utility and select the preset difference. Drag it to the audio track. This will remove vocals.
Looking for a quick overview of how to take advantage of the AE presets included with Vintage Film for Looks? Look no further. Whether you're new to Adobe's popular motion graphics and compositing software or a seasoned video professional just looking to better acquaint yourself with the program and its various features and filters, you're sure to be well served by this video tutorial. For more information, including detailed, step-by-step instructions, watch this free video guide.
This video tutorial belongs to the software category which is going to show you how to add a watermark in Camtasia Studio. Open up Camtasia Studio and either import a video or open up a saved video to add a watermark. You got to edit your video and be ready to publish it because adding a watermark is the last step. Now click on 'produce video as' and the production wizard will come up. Here you can select a preset mode or create a custom one. Then you go to 'add / edit preset' and click on 'e...
A shuffle LFO (low-frequency oscillator) is a cool effect in many synths that gives bass lines a swing feel to them. In this video you'll learn how to apply a shuffle LFO to any sound that you can access on your computer using NI Massive, a quasi-analog PC synth.
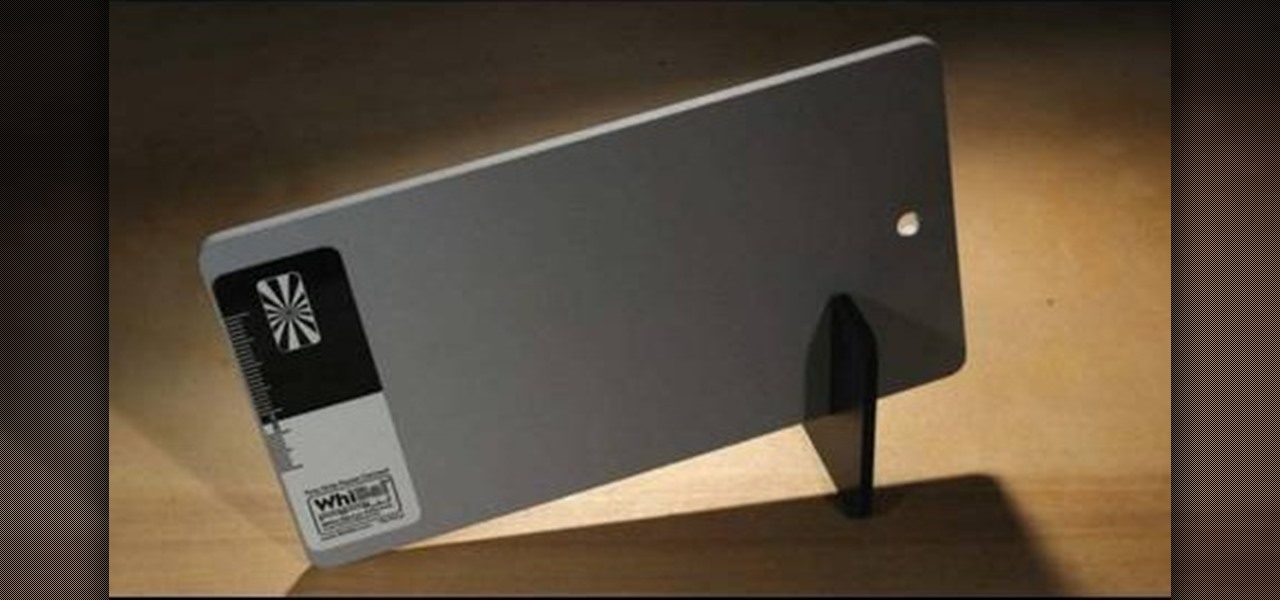
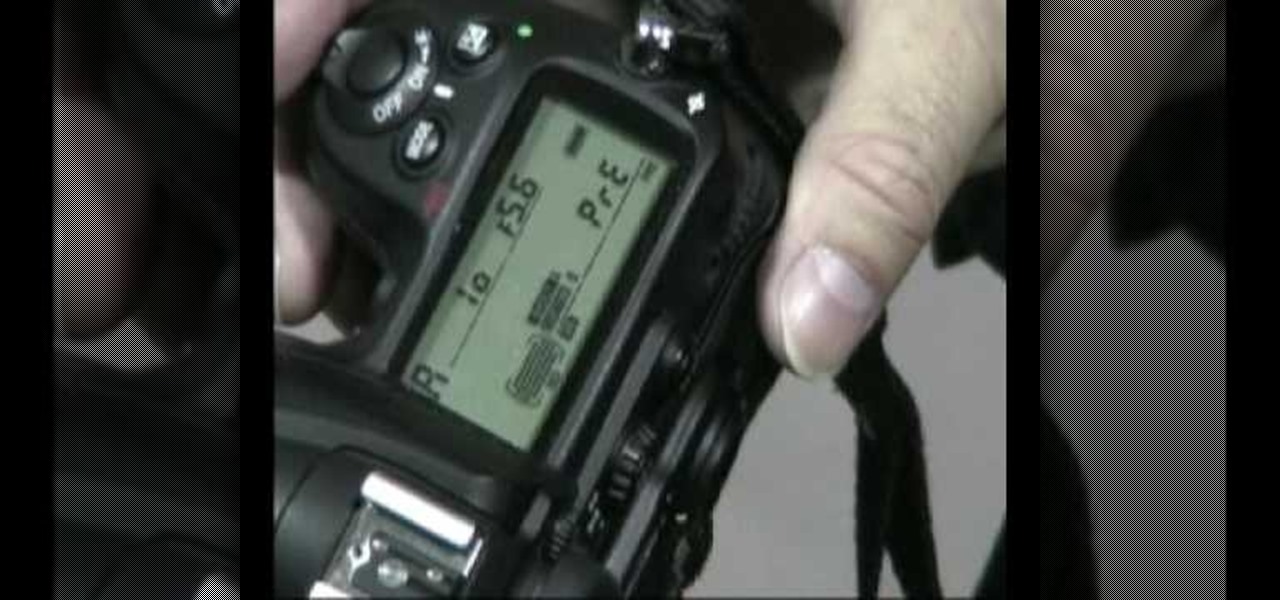
This fantastic, in-depth video dives into the gray card in probably every imaginable way that you could think using the Nikon D3 . Going over various different lighting it can be used for, custom white balance for preset manual, gray source point for white balance correction, accurate exposure in spot metering mode, and adjusting the camera's LCD display brightness, on top of a ton of information!
This video tutorial details how to set up Canon 5D MK II footage on Final Cut Pro. After watching this, you'll be able to create an easy setup for your project. It covers using the Audio/Video Settings option and using the Sequence Preset Editor to maximize your project workflow. See how to create the Easy Setup!
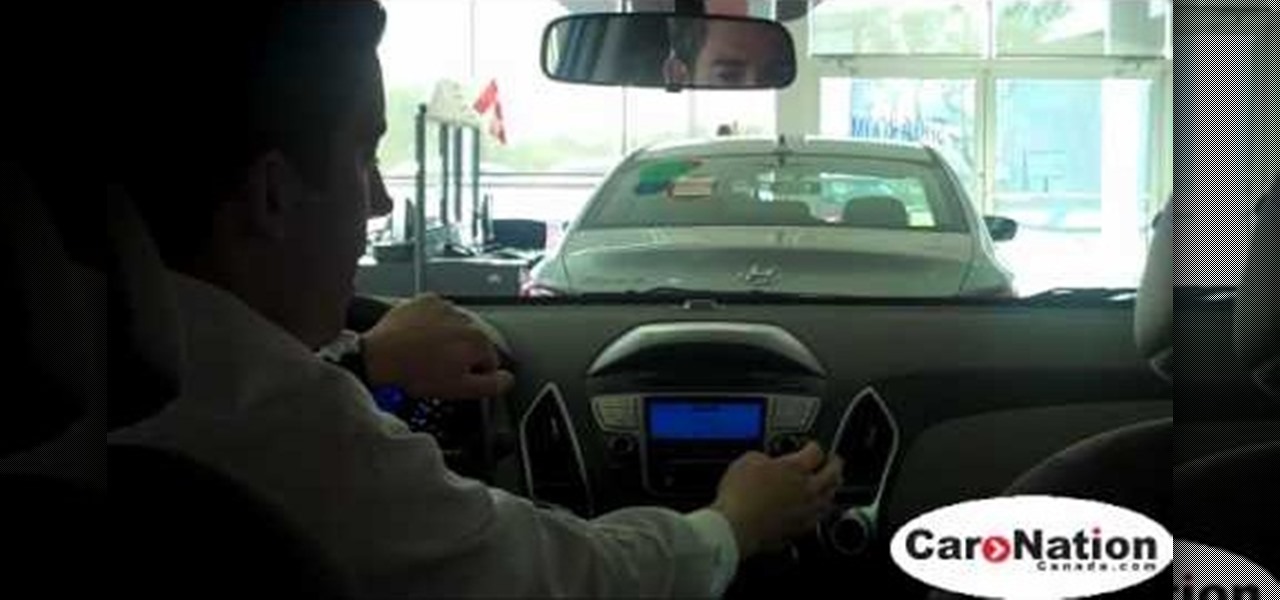
Each year, new gadgets and features are being put into cars to help the overall experience when driving. Massagers, seat warmers, and mp3 player jacks are just a few of the new things. One thing that remains true, but has gone through a bit of a change, is the car radio. People can still tune in and listen in to their favorite stations with just a push of a button. But setting the radio stations is easier than ever. Instead of always switching back and forth from AM to FM, there are ways that...
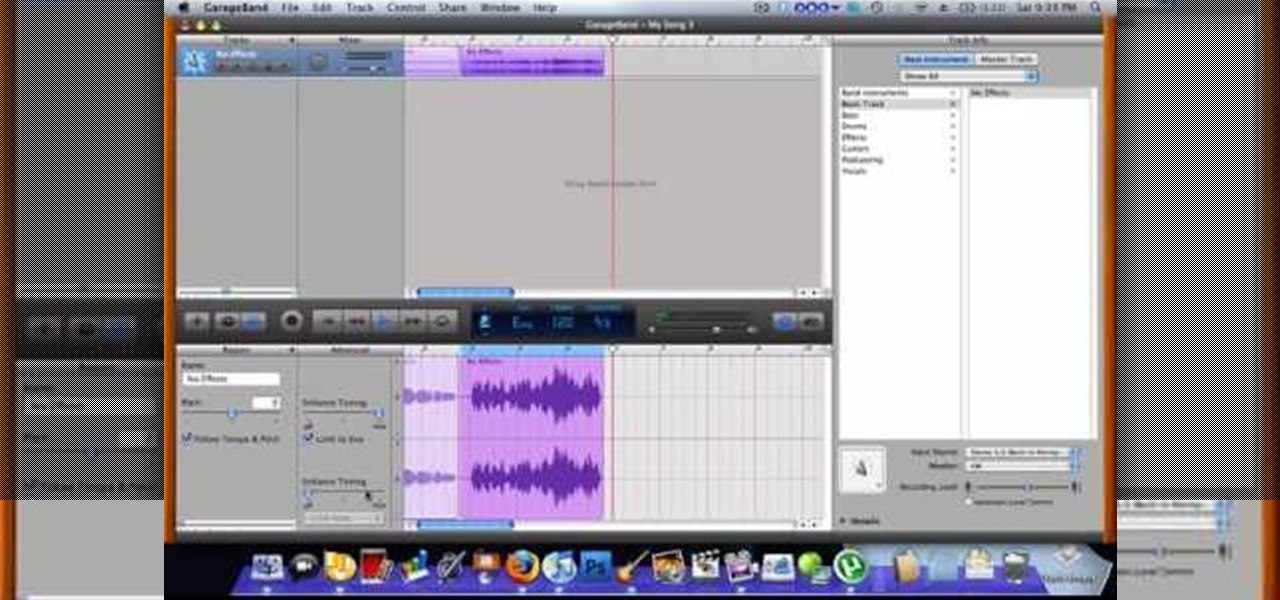
Use autotune on Garageband with your MacFirst, create a new track. Click on real instrumental track. Create. Record your voice. Listen to the recording. Go to view, hide track editor. Go to enhance tuning. You can bring it to max for the TPain effect or choose the enhance tuning setting that you want. If you choose limit key, the program will keep you in the same key as your vocal key. (That was determined by the software.) For vocal effects, record a new track. Choose real instrument track, ...
In this video from SocialMacbook we learn how to get HD in ScreenFlow. He teaches how to get the best quality you can get when using ScreenFlow. When you finish your video, go to File, Export, and save as whatever you want. Then change the preset to Web - High (Best Quality). In dimensions, click 100% and click export. Depending on the time of your video the export time will vary. Using these steps you will get great quality for ScreenFlow videos and they will look great on YouTube. For more ...
You can learn how to use After Effects to make an interesting introduction for your YouTube video by following the steps in this video tutorial. You will need to use a preset called Trapcode Particular 2. 0. Once this trial version is downloaded, go into After Effects and select New Composition. Create any name you want for the file and then select HDV/HDTV for the Preset. This video outlines how to create the introduction from the initial layer to the final layer, which is up to you to decid...
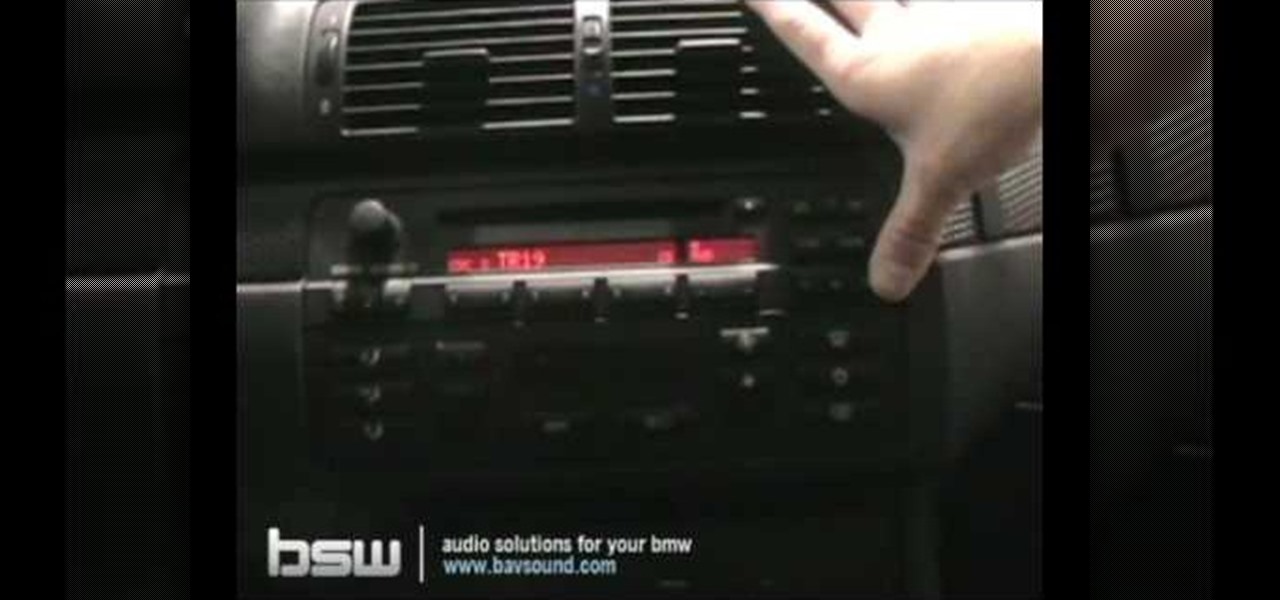
Shows how the BMW HD Radio & iPod Kit Integration Kit by DICE functions and is used. (This kit works for most 1996 and newer BMW's). This video demonstrates: Controlling your HD Radio in your BMW, setting presets and browsing presets.
Soon all Android users will be able to use Samsung's cool Soundcamp app to write and record music. The announcement was made at the Samsung Developer Conference 2016, stating that the app, which was released last year for Samsung devices only, will become available to all phones and tablets running Android 5.0 or higher very soon.
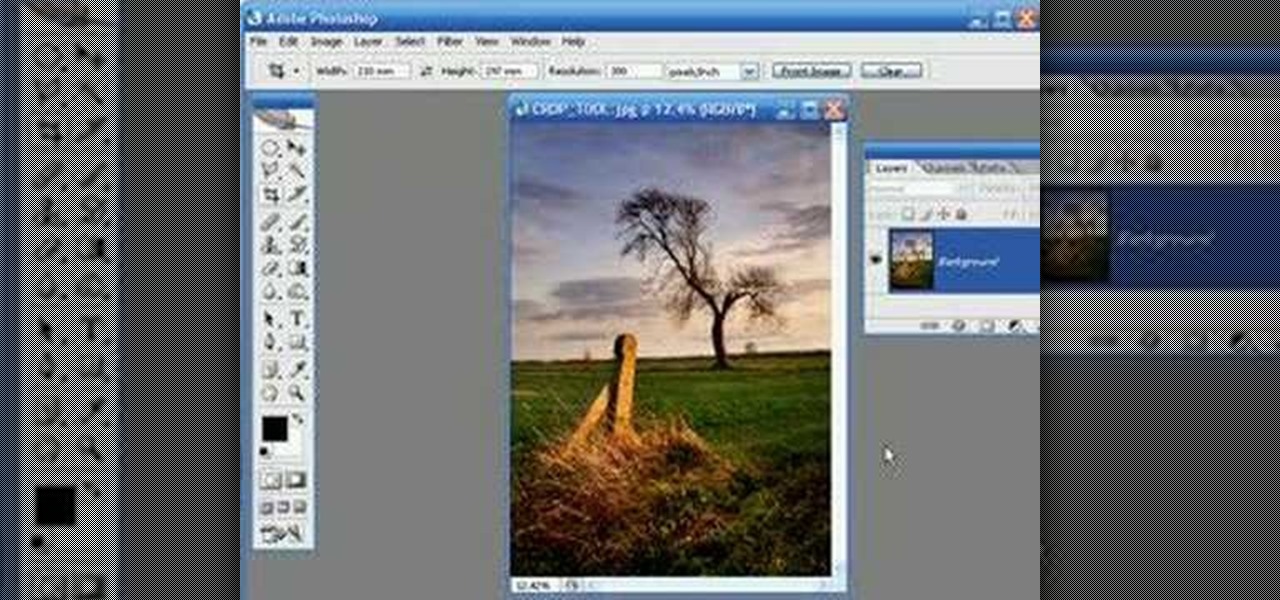
Kingsley Singleton teaches us about cropping images in Adobe Photoshop. He discusses the importance of properly cropping pictures, and the basic ways to do so. He first shows us how to properly crop images to ensure that printed pictures are the proper size for the paper. Clicking on the image and then dragging the marquis over the picture will select the area of the picture that you would like to use. Moving the corner arrows will adjust the size of the area selected. Then, to properly size ...
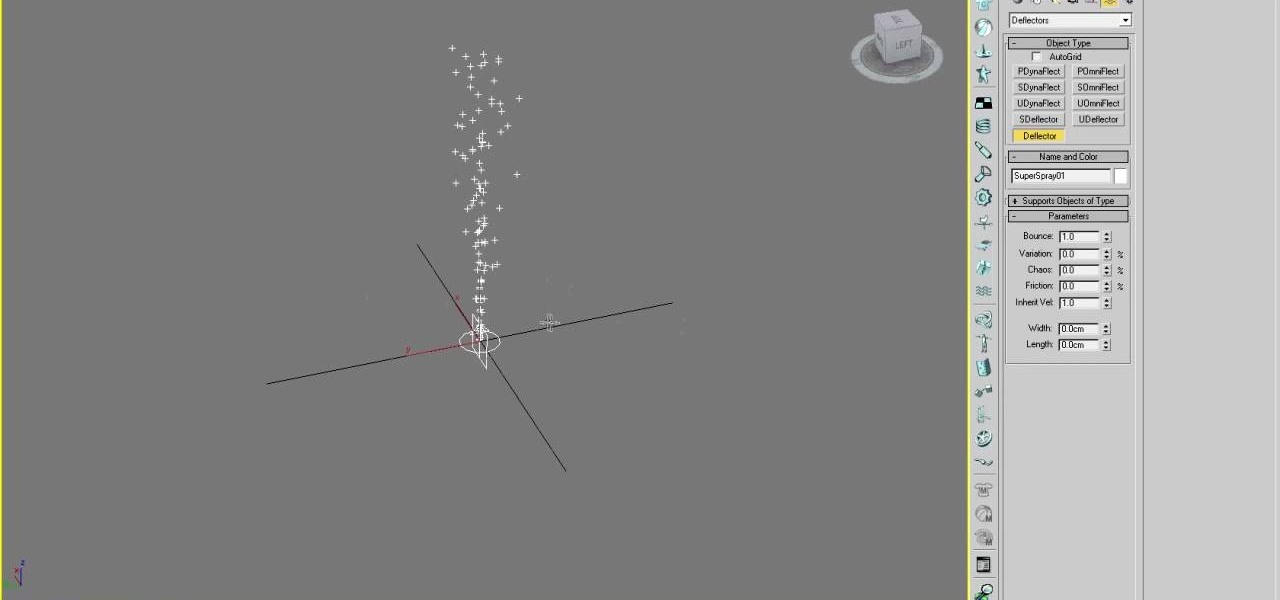
3D particles allow you to create all sorts of cool effects in 3D Studio MAX, like 3D fire, clouds, and other visible gases. This video is an introduction to the use of particles in 3DS MAX, covering the basics of particle presets, defectors, and gravity space warps. These tips will have you well on your way to creating really cool particle effects.
In this video you will learn how to manually white balance a Nikon camera using the Ba-lens. Paul Franklin explains in a few simple steps. First take the lens cap of the appropriate size and put it on the lens. Then go to the camera and set the meter to spot meter he says its important because it measure the amount of light going through the little dome as he shows. Once you've set it all you need to find the white balance button. Then scroll through the icons until you reach preset. Then hol...
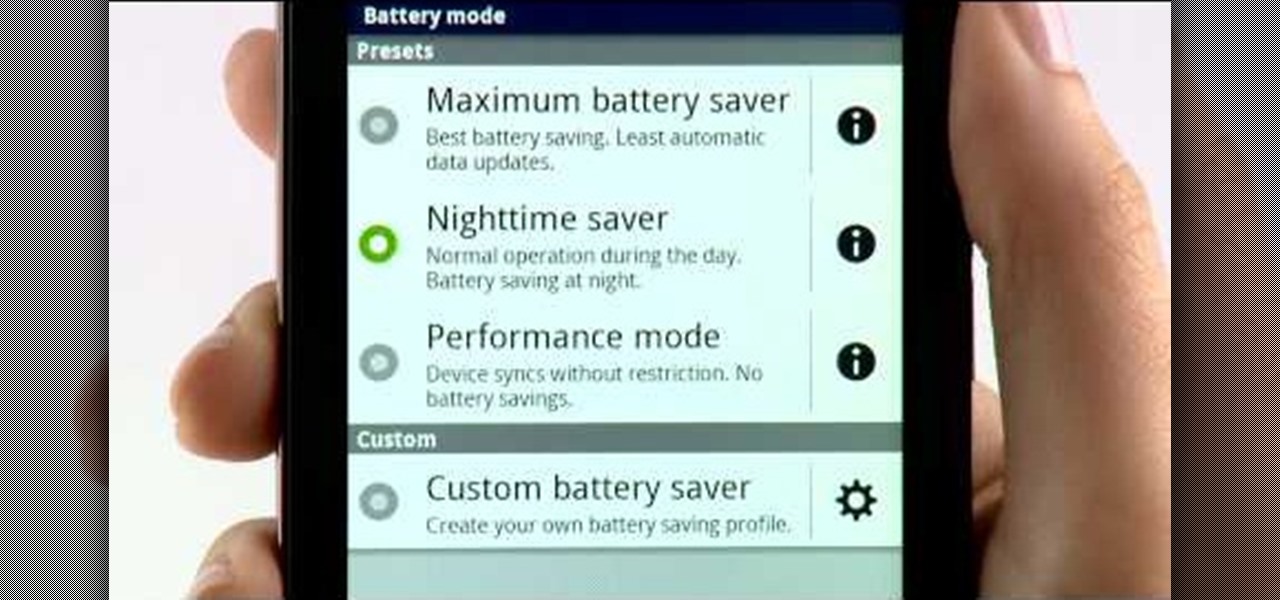
The battery manager is a tool in the settings of the Droid Bionic Android smartphone. With it, you can create profiles that help you increase the battery life on your Droid Bionic with presets such as "Maximum battery saver", "Nighttime saver", and "Performance mode." Pick the option that best suits you so that you can take advantage of that 4G Verizon Wireless connection.
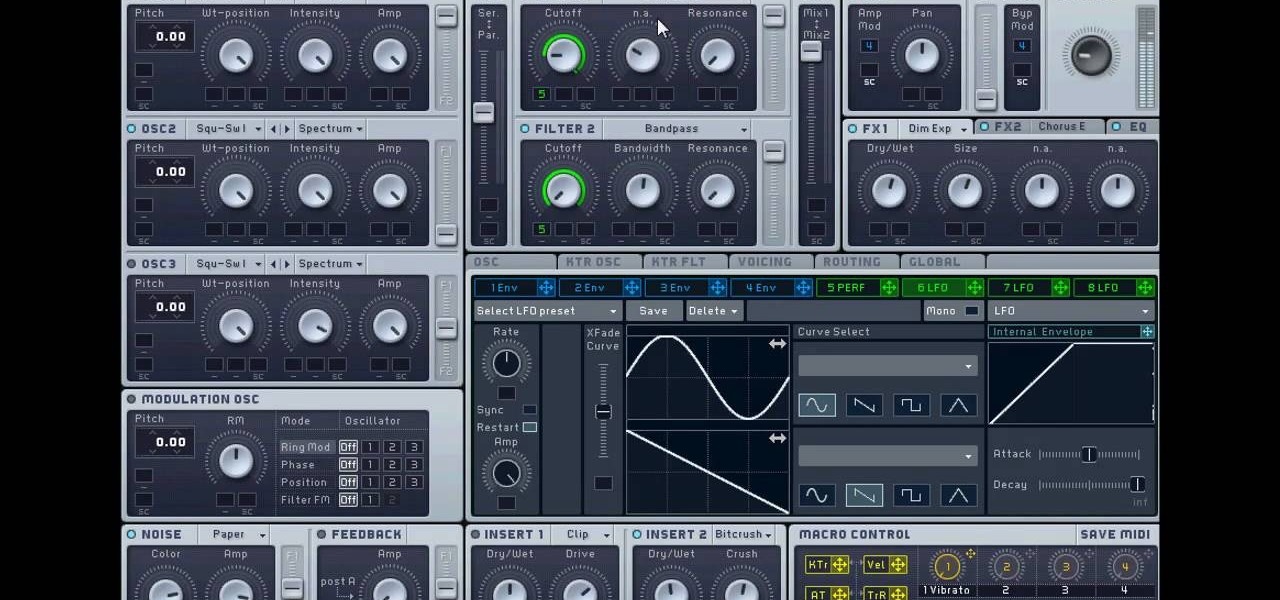
Dubstep and drum and bass have brought the "wobble bass" style of synth beat to the masses, and you'd better learn how to make one if you want to keep your tracks modern. Watch this video to learn all about making dirty wob-wob bass lines using Massive a quasi-analog PC synthesizer.
Maximize the display capabilities of your LCD computer monitor! Set up your contrast just how you want it by using test patterns, adjust the backlight, adjust the color display for over- or under- saturated colors, and then play with your monitor presets.
This video shows you how to make a simple, DIY ring light for your point and shoot Canon G10 or G11 camera. By using either cool white or warm white LED lights, you can set your white balance presets to daylight or tungsten. Ring lights are incredibly useful in fashion photography for an even, soft light with a striking eye light.