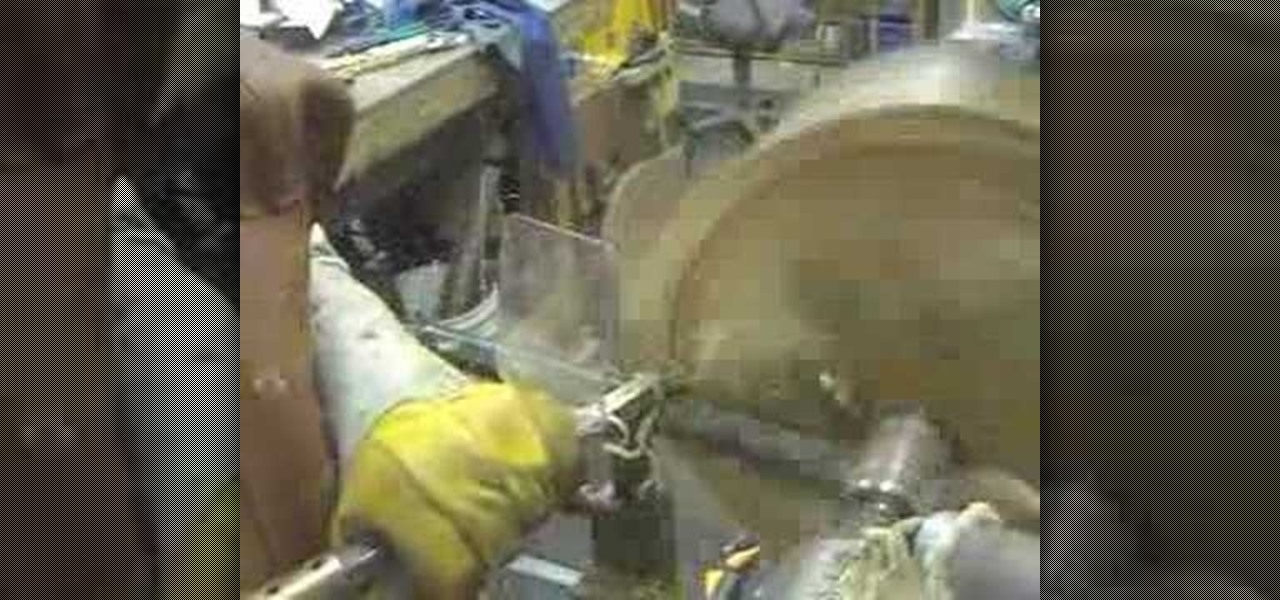
In this tutorial, you'll see how to rough out a natural edge bowl with a Ci1 Easy Rougher (using a suboptimal piece of wood). The wood used in the tutorial is "shinoki," which is a kind of oak, and the lathe is a Nova DVR 3000 wired for 200V. Watch this video to get started roughing out your own natural edge bowl.

This is a video tutorial in the Home & Garden category where you are going to learn how to recycle an old can to make a candle votive. Take an old can and cut it vertically along the side without cutting off the edges. Now cut along the top and bottom edges starting at the vertical cut and going outwards on each side. Cut up to about half of the circumference of the can. Now pull out the cut halves and you have the basic stand for the votive candle. Now you got to straighten out the jagged ed...
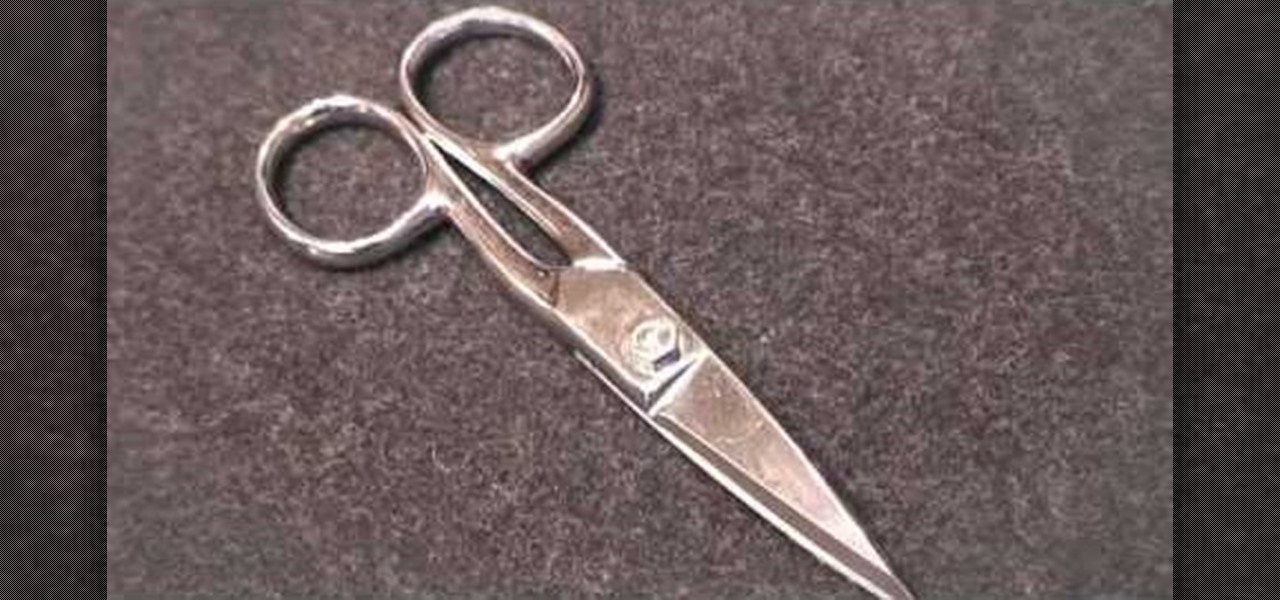
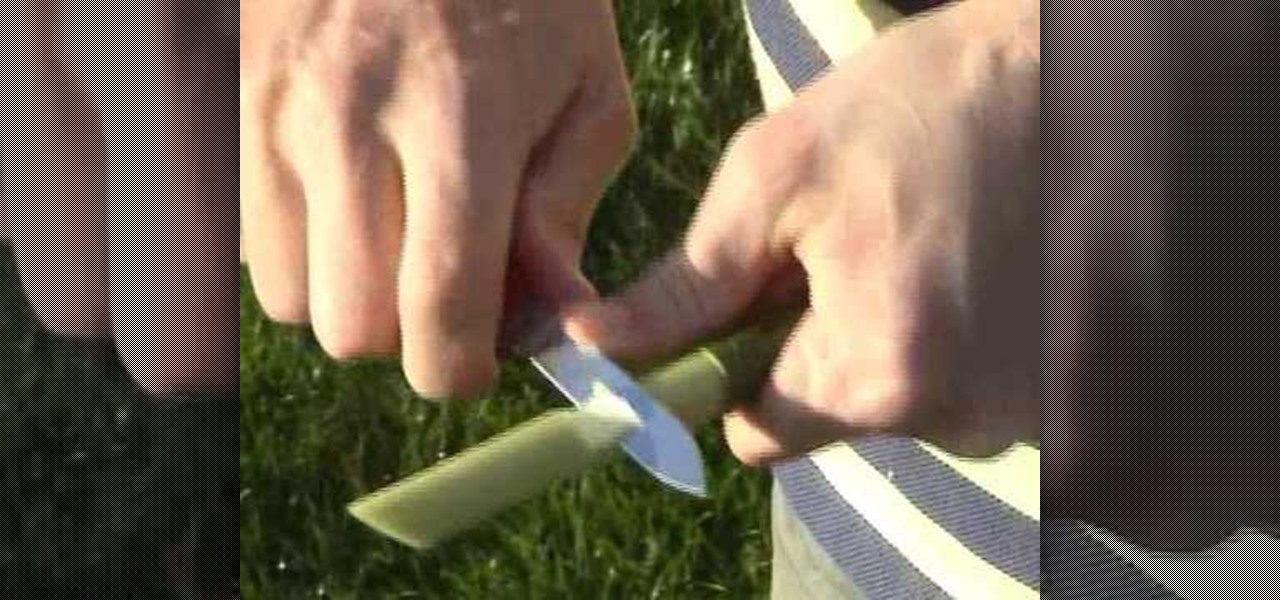
In this video tutorial, viewers learn how to use tailor point scissors. These scissors are short, have a broad spine on the blades and contains both a knife and bevel edge. The knife edge allows the scissors to go through the fabric and the bevel edge allows users to cut in layers without cutting what's underneath. The broad spine prevents the separation of the blade points. The short blades allow better control and easily movable. This video will benefit those viewers who enjoy stitching and...

Here is an educational video for ART (Advanced Robotic Technology) Plasma customers. The HDP Plasma SX Profile Cutter is designed for heavy duty manufacturing environments where power, precision, speed, quality low cost, productivity, and durability are demanded by business owners. See in these sixteen videos how it works, from the inside out, and another video on what it actually is.
We don't know about you, but making selections around oddly shaped areas of an image is one of the most frustrating single tasks in Photoshop. Odd shapes are really hard to navigate around by hand and often you can't get a perfect cut. Luckily, this Photoshop tutorial will guide you through how to make complex selections easily in Adobe Photoshop CS5.

On this video from Bushcraft Machete, he explains the purpose of a scandi edge and how to use it. He uses the machete as a planer, stripping the bark from a log by holding the machete almost flat against the log and tapping the back of the blade with a stick. He explains that a scandi edge is sharpened all the way down to a point and has a very low angle. This type of edge makes the machete useful for carving off thin strips of wood. He has sharpened his machete with a scandi edge near the ha...

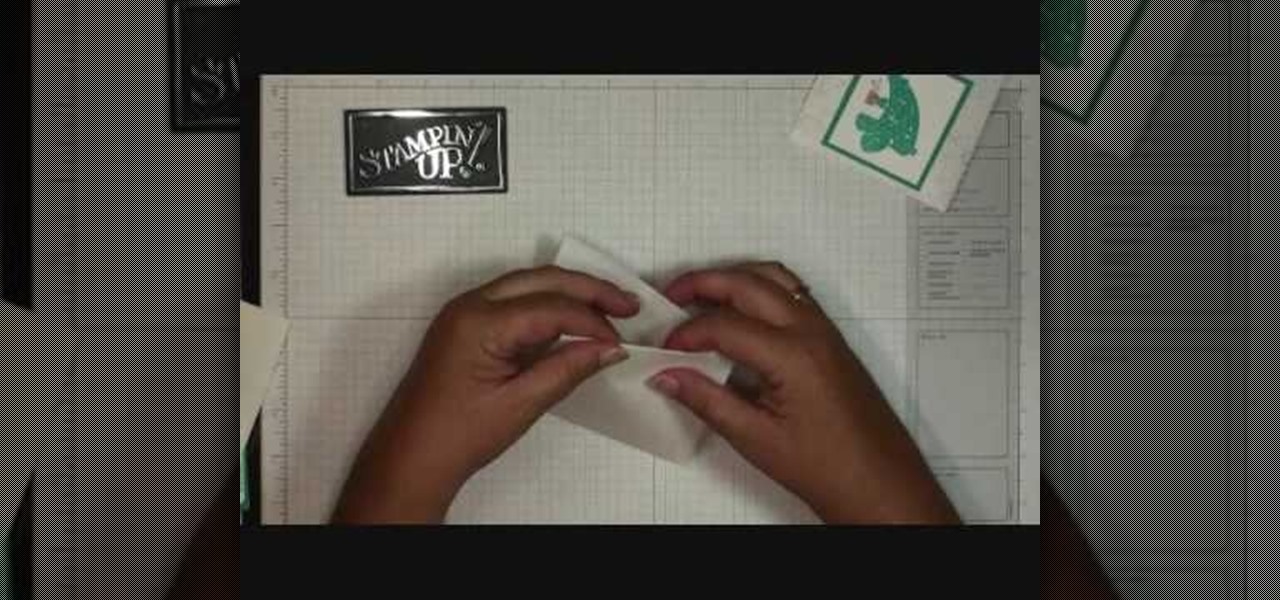
In order to make hot cocoa holders with Stampin' Up, you'll need the following: a whisper white Stampin' Up envelope, scissors, a paper cutter, cocoa, a jumbo wheel, ink pad, adhesive, stamps, ribbon, pen, stapler, glitter, and card stock.
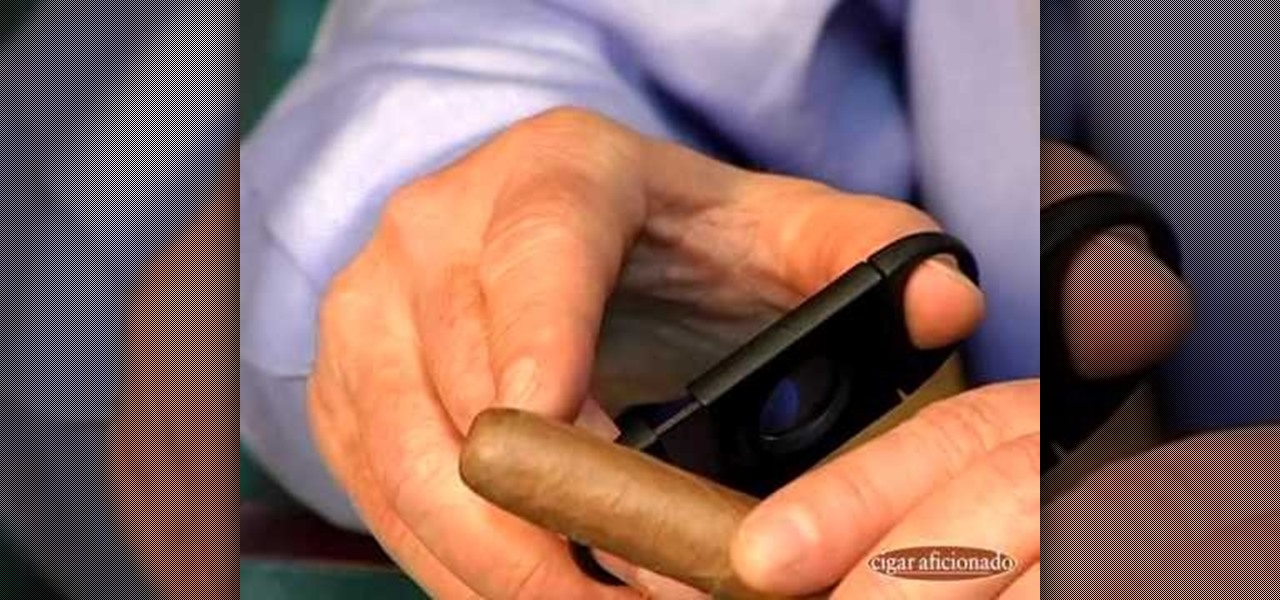
Many people ruin a good cigar by a badly placed cut. YouTube user Cigaraficionadovideo is here to help. First in order to understand the cutting mistakes you must first know how a cigar is put together. A hand made cigar is held together a the tip by, what is called, a cap. When cutting this cap you want to do it above the shoulder. Be carful here because a bad cut a little lower could result in the wrapper falling it apart can lead to a mouth full of tobacco which will pretty much ruin your ...
This video shows you how easy it is to cut and make holes in cement backer board. The first thing you want to have is safety glasses to protect your eyes. To make a punch out hole you have to draw an outline of the hole with a pencil or pen. Use a drill to make several holes inside your outline. A jigsaw will cut out your punch hole. Push the punch hole out. Make a straight cut by marking the front of the board with a pen and a straight edge and use the scoring knife along the straight edge t...
In this tutorial, we learn how to make a Lace Cardigan with the Sewing Studio. First, you will need to gather all of your tools and the material. Now, cut out a piece of fabric into a large rectangle. Now, draw and cut out the pattern from the diagram you see in the video. After this, finish up the raw edges with stitching, then line up the two lower edges and sew along the edges. This will be the seam on the center back of the cardigan. Next, attach the triangle to the top of the neckline an...
You may know how to cut and sand plywood, but bending it is a totally different skill set you need to master, but this woodworking how-to will show you the right moves in seven easy steps. In the video, a bend is being applied to plywood for a curved chair leg, but this method could be used for any kind of plywood bends.
In this tutorial, we learn how to make an array of paper roses. Use any colors of paper you want with this to add a special touch to them! Now, you will take the pattern or color of your choice and fold it up into a square. after this, fold it into a triangle and then cut the edges of this off. After this, cut the bottom off and open it up, it should be a flower shape with a hole in the center. After this, repeat with several other papers and then cut the flowers up into halves. From here, yo...
You hunt and you hunt, but you can never find the right pillows to go with you couch. Even your reupholstered chair needs a little pillow love, but it seems impossible to find the right color and design to make a perfect match. That's when you know it's up to you save the day. Why settle for simple decor when you can make your own chic throw pillow to match any room?
Make a Christmas Gift Card Holder Materials
-Fold paper where you want it cut -Take a wet piece of string and insert it in the fold, pressing it firmly
In this tutorial, we learn how to make a paper snowflake. First, take a copy paper and fold a quarter of it over to the other edge. Next, cut off the excess paper so you have a triangle shape. Now, fold a corner to the next corner, and repeat so you have another triangle. You can now cut corners off so they are even and you have a rounded snowflake. Then, cut a triangle starting from your edge points that you just created. Now cut slits a quarter inch apart into the middle of the paper all th...
In this how to video, you will learn how to make the finishing edges on pieces of ribbons. The hardest part is getting the spikes even on both sides. Fold up the ribbon so the two ends meet. If the spike is just a single angle, tape the edges at the top. If the spike has a center to it, bring the ends together and fold it in half. Take a piece of tape and place it around the ribbon ends. This will hold them in place for when you make the cut. If you want to make an angle cut, take your scisso...
Turn that dusty old tome into something you will actually use – a sneaky stash for your best stuff. You Will Need
In this video, we learn how to recycle cans and make decorative candle votives. First, you will use a straight edge to remove any paper from the top of the can. Then, use the straight edge to cut parallel holes in the bottom of the can. Grab sharp scissors and continue to cut the holes from the bottom all the way up to the top of the can. After this, use scissors to help pry the folds up and into the air for a cute design. Make sure not to use your hands to pry these up, as the edges will be ...
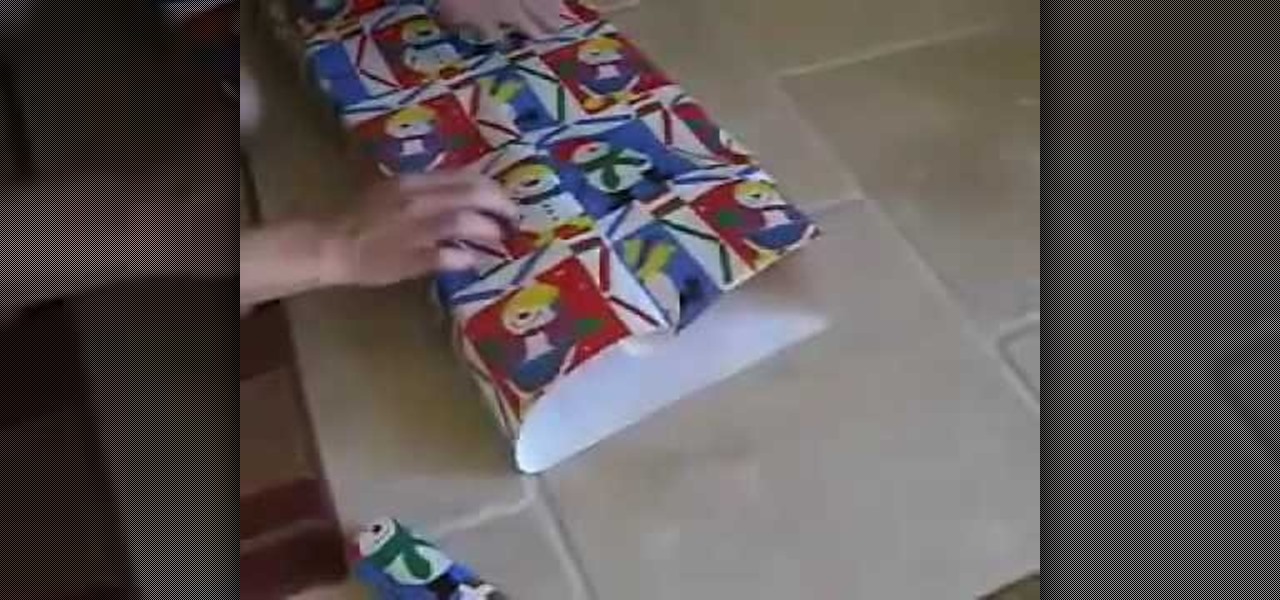
In this video, we learn how to wrap a gift. You will need: scissors, your gift, tape, and wrapping paper. First, place your gift down on the rolled out wrapping paper upside down. Measure out the paper so you have enough, then cut the paper from the roll. Next, you will fold the edges of the paper down, then center the gift on the paper. Bring the sides of the wrapping paper into the middle, then tape it. If you have too much paper on the edges, cut it carefully with the scissors. Now, push d...
This tutorial shows you how to use the Cut it Out tool in the Essentials 2 plug-in for Photoshop Elements. Learn how use the magic pen tool in Cut it Out to quickly cut out hard edged subjects or objects. The Essentials 2 interface makes cutting out with hard edges a snap in Photoshop Elements. Cut out hard edges in the Essentials Elements plugin.
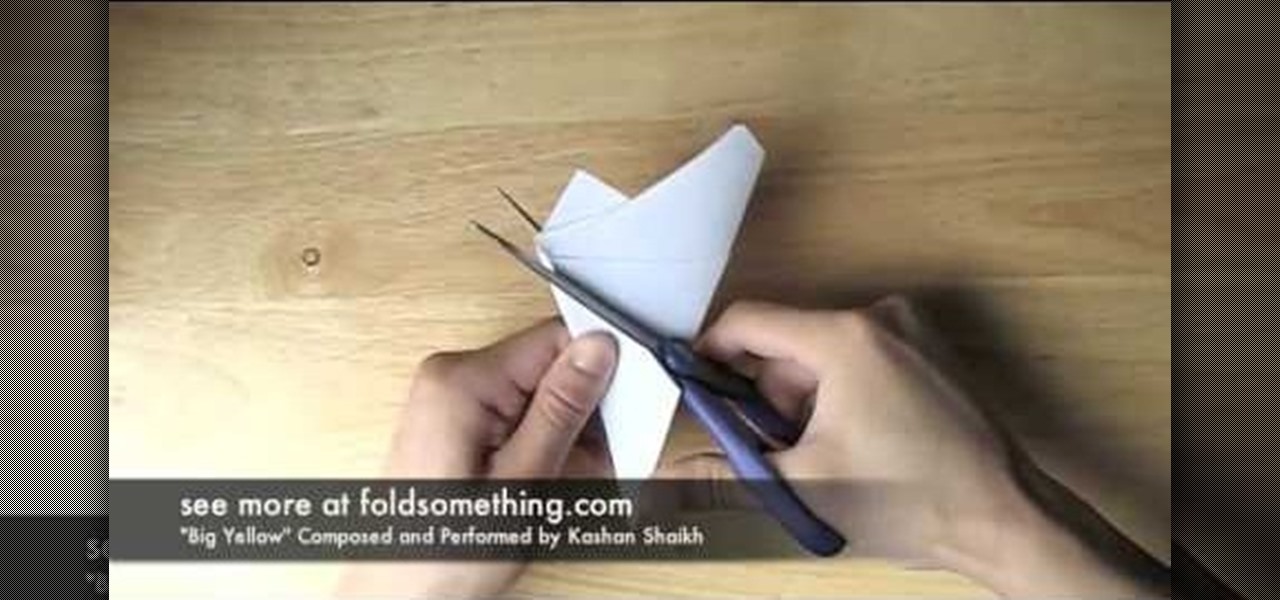
This video shows how to make a 3D five point paper star. First cut a pentagon using a sharp flat blade and a ruler. Folding halfway between each two corners to the opposite corner. These folds are the points of the star. Make a mark half-way between the edge of the paper and the center point created by the folds. Using the ruler and X-acto knife, cut straight along the fold from the mark to the edge. Cut two small triangles off of each side 1/4" up from the middle of the edge, cut a line stra...
It is simple to make a booklet from one piece of paper. Take one A4 size paper then fold it to equally, then unfold it and you can fold it to right of edge and left of edges both sides are equal. Then unfold you can see like zigzag and cut it to middle point of the paper and fold it to use booklet. It is comfortable and easy to use it.
In this video, we learn how to create a realistic looking cut using cinema makeup. Start out by using silicone putty on the face to help make the cut on the face look more real than ever. Use brushes and a spatula to help mix colors together and apply to your face flawlessly. Also make sure you have fake blood with you so you can apply to the face to make look more realistic. After you have let the silicone dry, start to apply the red, dark red, and black colors onto it and blend to create a ...
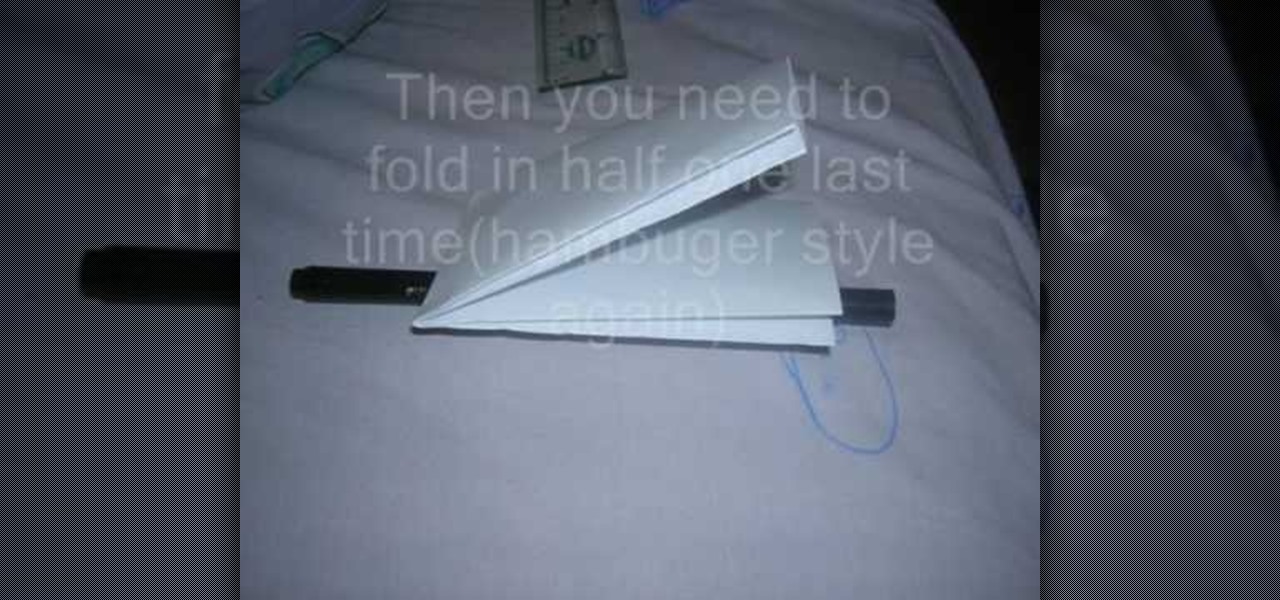
In this video, you will learn how to make a wallet out of paper. First, you will need a piece of paper, a pen, a straight edge, and something to cut the paper. Place the paper on a flat surface. Fold the paper in half, hamburger style and unfold. Fold the bottom half up to the middle crease. Now fold the top half to the middle crease. Fold this in half again and fold it in half one more time in the hamburger style. Now, unfold the paper. Draw lines where you need to cut the paper. Once this i...
This instructional video shows us how to make a Japanese flag fan. The materials required are: Foamy (Red and white), four popsicle sticks, glue and scissors. First cut two circular shapes (with one straight edge) from the white foamy, then glue on the popsicle sticks to the straight edge of one of the circles to make the handle. After this, glue down the other white circular piece of foamy to cover the tops of the popsicle sticks. Then cut out two smaller circles from the red foamy and glue ...
Missa shows how to ‘Distress Jeans’ in this video. She lays a pair of jeans to be distressed on a table. Next, the creases near the top, which are formed by bending the leg portion of the jean, are marked with a white pencil or chalk. A hard rock is then placed inside the jean, near the knee area. That portion of the jean is graded using sand paper to make holes. The pocket areas are graded next, using a nail file. A pair of scissors is scraped along the edges of the pockets to make cuts. (Al...
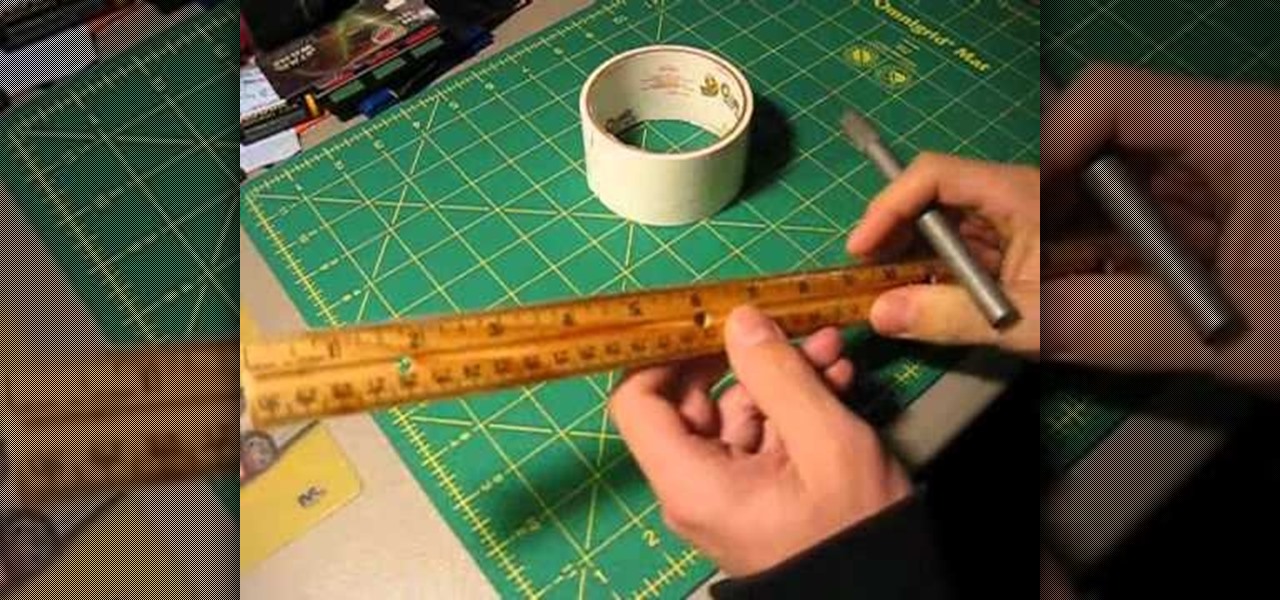
Any duct tape project starts with pieces of duct tape that have been cut with clean, sharp edges. But how you can you get that for yourself? This tutorial shows you how to use craft knives and cutting mats to perfectly cut your duct tape.
This video in the Fine Art category will show you how to use the refine edge in Photoshop. This video tutorial is from Yanik Photo School. This feature is available in Photoshop CS3. If you are shooting objects in isolated background and you want to cut that object out and put it on a different background, the object will have jagged edges. Refine edge will help in smoothing those jagged edges. First select your object, then go to ‘select’ and click on ‘inverse’ and you have selected your obj...
Watch an experienced quilter glide through four layers of fabric to make a clean cut with a rotary cutter. This instructional quilting video shows how a right handed person would cut fabric. You will also need a straight edge and a cutting mat in addition to a rotary cutter in order to make straight cut in quilting fabric.
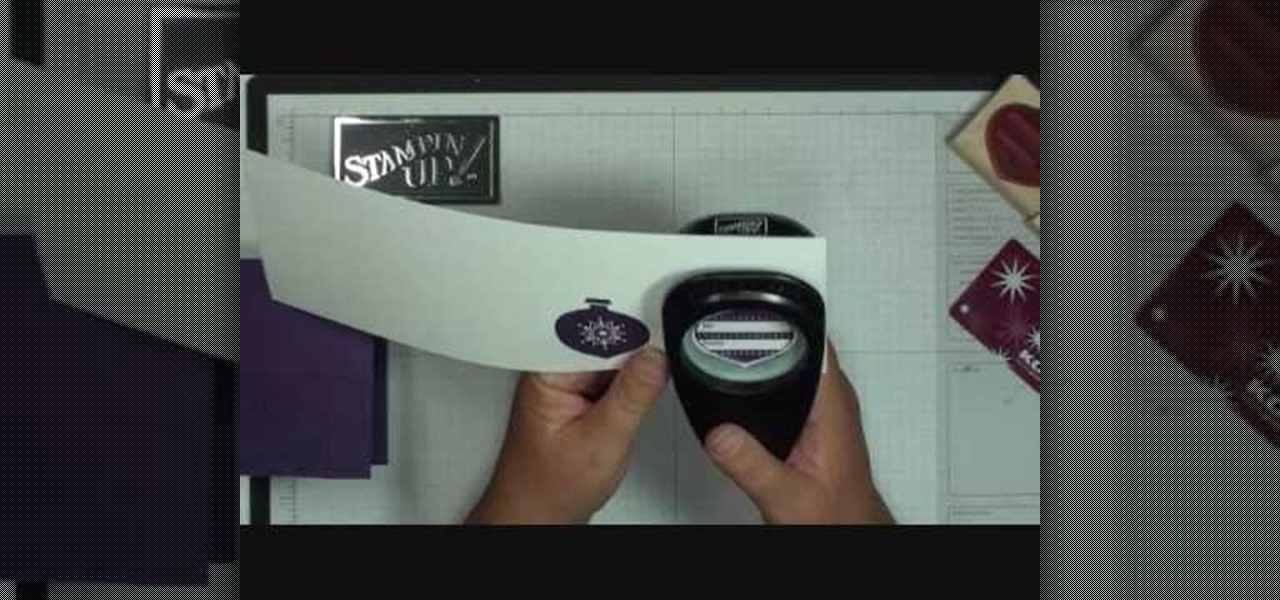
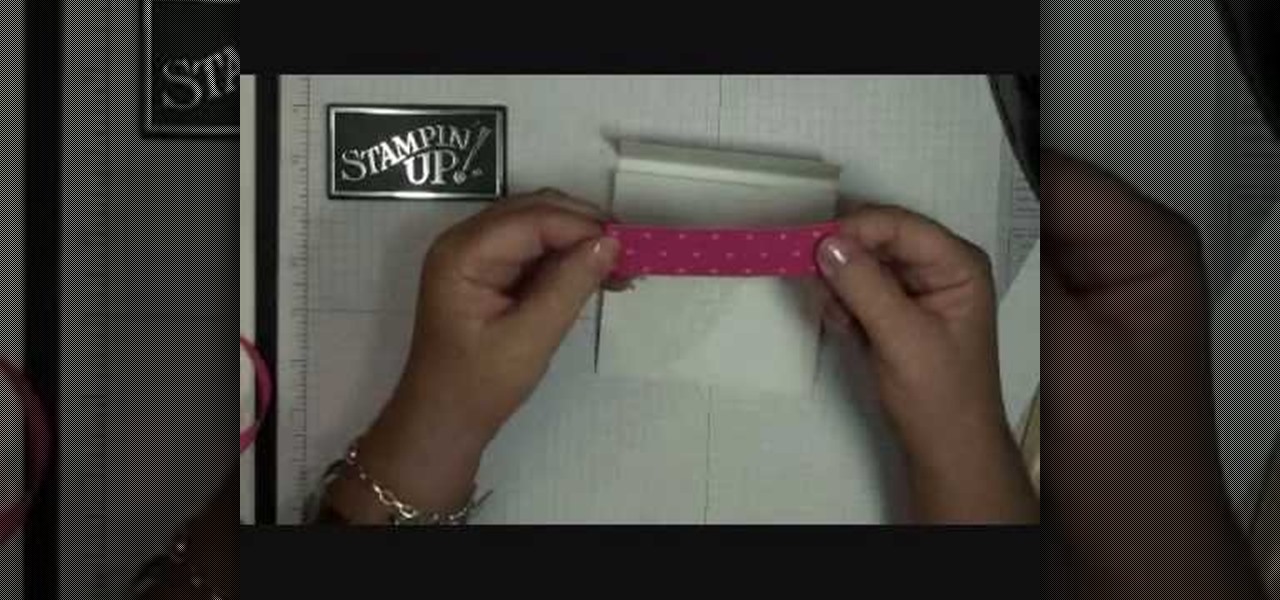
This video shows the method to make a gift card holder with "Stampin' Up." First, we use the Movers and Shapers to cut a heart shape on a paper. We use the add-ons cut by the Movers and Shapers to punch windows. Next, we use the Big Shot machine. Next, put a piece of Whisper White in the machine and cut at four and a quarter to eleven inches. Fold it into half and cut an inch and a half off the front top. Score the back panel at one and quarter inch. Take bags measuring 3 5/8 inch to 6 5/8 in...
In this tutorial, we learn how to scribe break an acrylic sheet. You just need a Stanley knife and a straight edge to do this to any acrylic sheet. First, put some gloves on and safety glasses. From here, level out the area you want to cut on your sheet, then clamp the angle while laying down. Next, use your knife to cut along the edge, going over the same spot several times. Press down hard to ensure it's completely cut. To finish, all you have to do is to bend the excess piece down and it s...
In this video we learn how to make a decorative paper rose. First, take a piece of paper and cut several heart shapes out of it, making them different sizes. Once these are cut out, curl the edge over with a toothpick, pencil, or by hand. Set these aside, then use a grab a green sheet of paper. Roll the edge of the paper up and then cut the rest of the paper from it. Create a leaf in this and then tape it all around. Now, twist this tightly and place the curled ends of the heart shapes away f...
You will use an old work glove to make the string. First cut the seems of the glove to the finger tips with scissors. Cut out the palm part of the clove. Remove the elastic off of the back with a knife. remove the hem with your scissors. Next, start cutting at the edge up around the shape of the glove. Keep going round until it starts turning into one long piece. Go back around the leather and trim up the rough edges and corners. He ends up with about seven foot of string. It's a cheep free w...
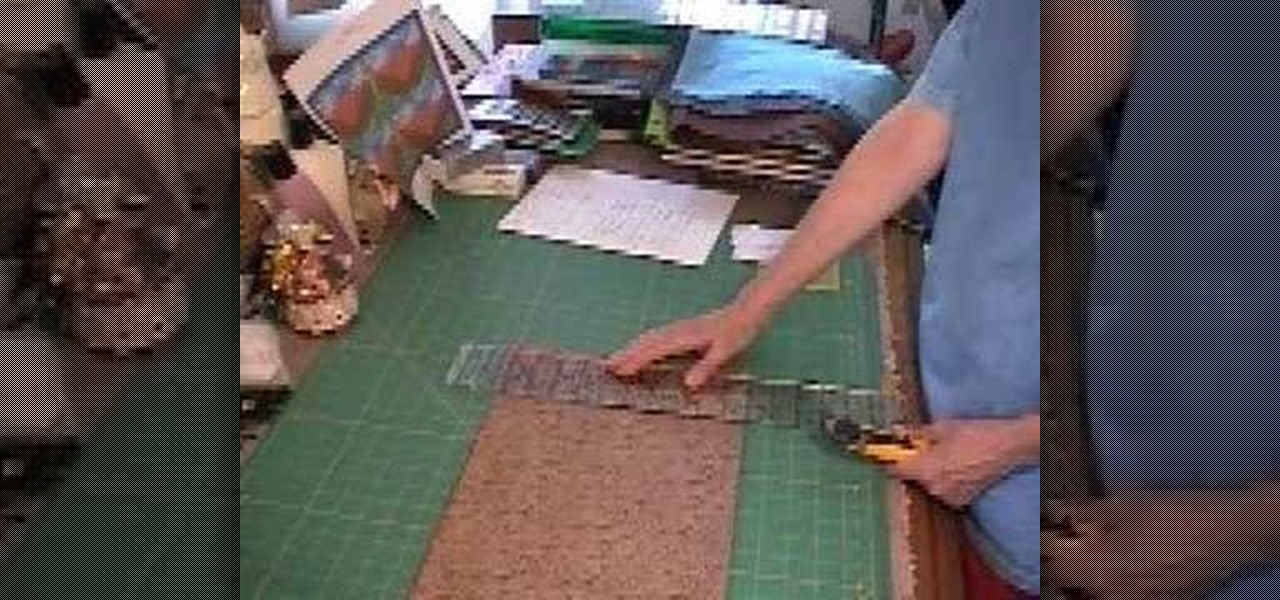
When measuring for borders on your quilt, begin by spreading your quilt out on your work surface making sure that it is laying flat but not pulled tight. With a tape measure, measure from one edge to the opposite edge across the length of the quilt. You should measure along two or three different seam lines and cut the border material to correspond with your longest measurement.If you would like a two-inch wide finished border then you should cut your border material two-and-a-half inches wid...
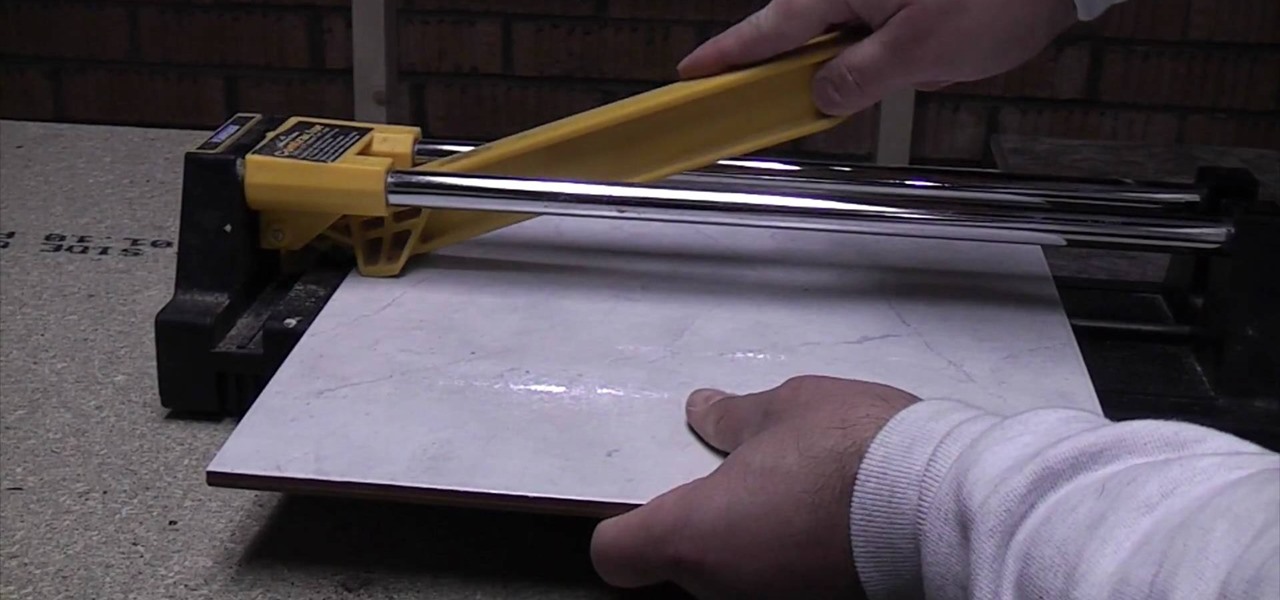
A standard tile cutter will cut ceramic and porcelain tiles but not natural stone tiles. To use the standard tile cutter adjust and lock the guide. Then, slide your tile into position in the tile cutter. Next, position your cutter on the edge of the tile. Push down on the cutter while sliding the cutter across the tile. When the cutter gets to the end of the tile, press down. The tile should then break into two smooth, clean pieces. Run a tile file over the edge of the tile to reduce the shar...
The video guide shows us how to make our very own willow whistle. -Find a willow branch with green bark, cut a small wedge into the bark and in the wood.
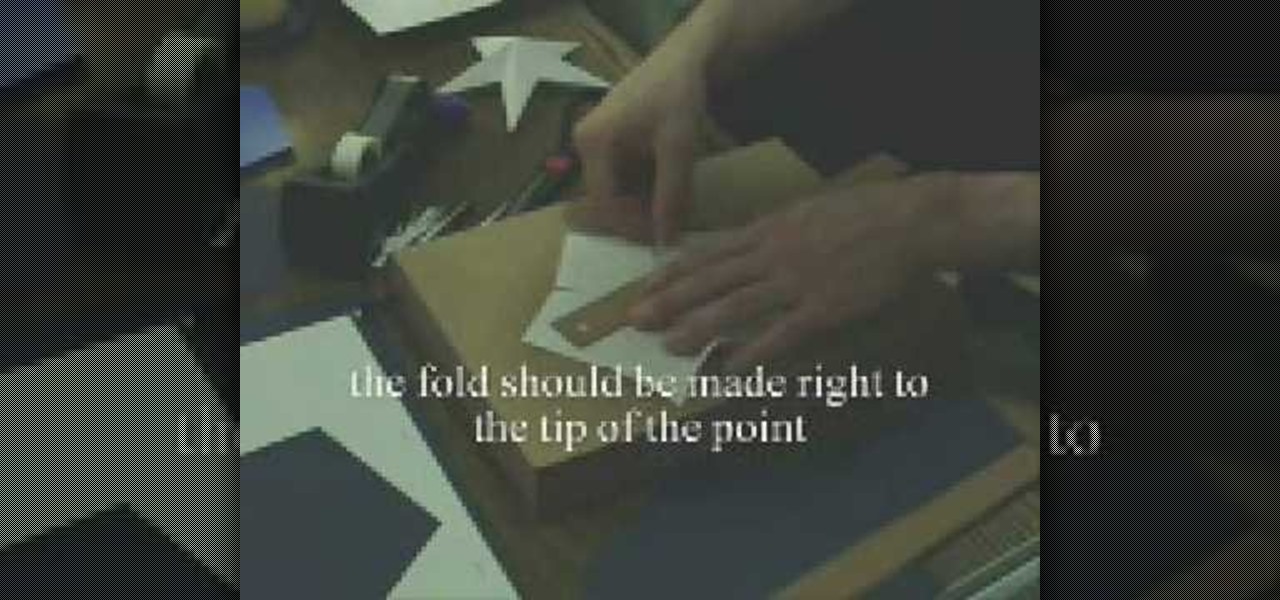
This is a video tutorial in the Arts & Crafts category where you are going to learn how to fold a five-point paper barn star. You will need a square sheet of paper. Fold it in half to make a rectangle. Take the right folded corner and fold it up to the left edge of the rectangle. Place the corner about 1/3 from the top edge and fold the sheet. Next take the left corner and fold it over the edge you just folded. Finally take the flap on the right and fold it over to the opposite side. Now cut ...
You will need marking pencils or chalk, scissors, seam ripper, pins and good quality matching thread. Mark desired length on each pant leg. Option 1: Stand on pants and place a pin where fabric hits the floor. Option 2: Fold pants up to desired length & pin. Take pants off; turn the leg inside out. Note original hem size after it is 1 1/4 to 1 1/2 inches. Mark pin position/finished length. Rip out original hem stitching using seam ripper or point of scissor. Find right loop to pull & it will ...
Augmented reality headset and software maker Meta Company announced today board member Joe Mikhail will serve as the company's chief revenue officer.