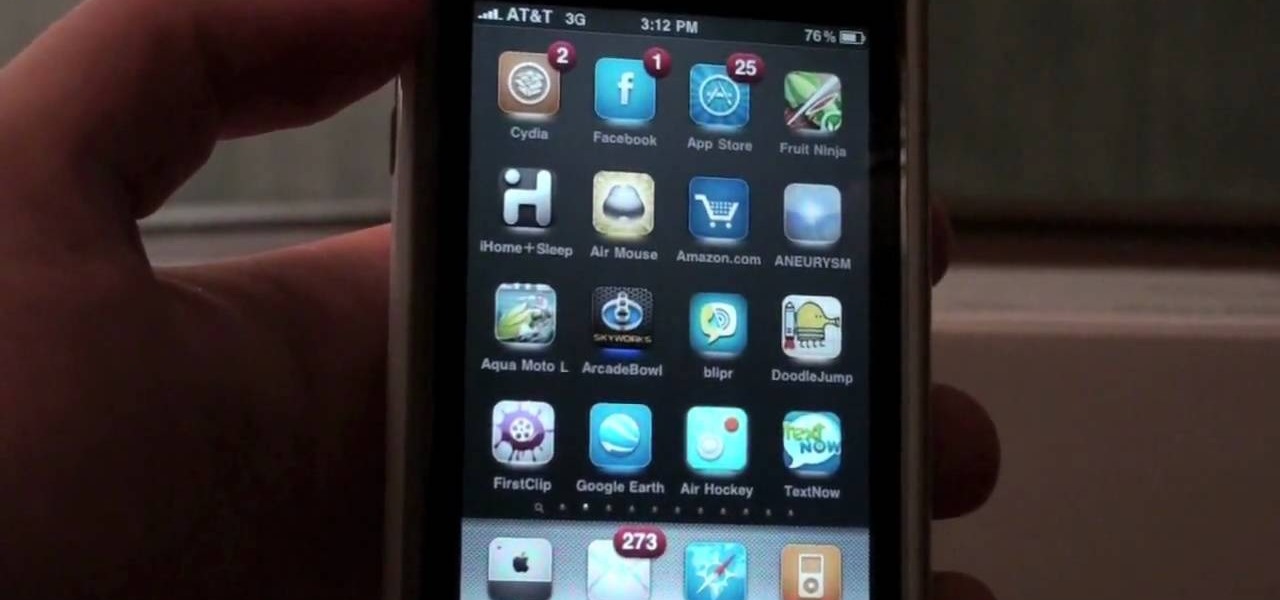
TextNow is a great App for the iPhone that allows you to, for a $1 initial fee, send unlimited text messages to any other TextNow user without using any of the precious limited texts on your AT&T plan. The App is very easy to use, requires only a modest amount of additional money to keep using it forever, and will probably wind up saving you money in the long run by cutting down your monthly billed texts.

In this tutorial, we learn how to draw a Chibi Orochimaru from Naruto. Start off by drawing the outline for the character, then add in the details for it as well. After this, you will start to draw in the shading and the additional lines to give it more details. Then, you will need to erase the background lines that you used as a guide to draw the final product. From here, you will start to shade in colors on the character and then draw in any additional details or facial features. To finish ...
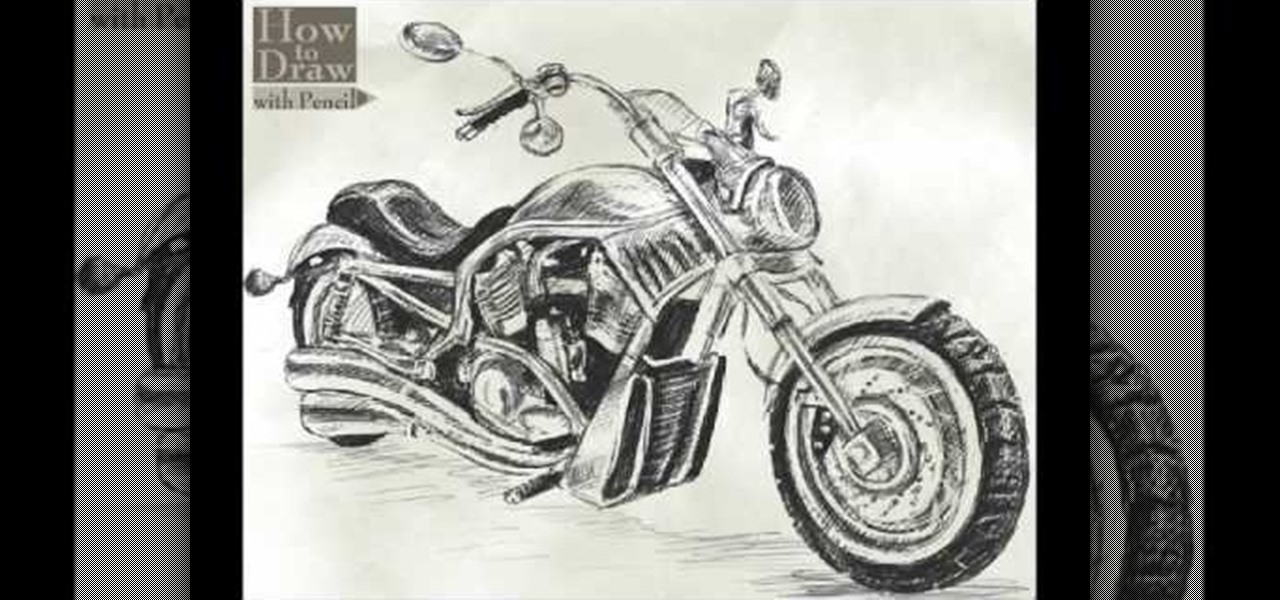
In this video, we learn how to draw a Harley-Davidson V-ROD. First, draw the outline of the vehicle using a light pencil. After this, start to add in the details of the wheel and front of the motorcycle. From here, add in shading and additional details to make it look more realistic. Make sure you draw on the small details of the motorcycle because this will make all the difference. Shade in additional details on the drawing and then erase any lines that you don't need. Use the eraser to crea...
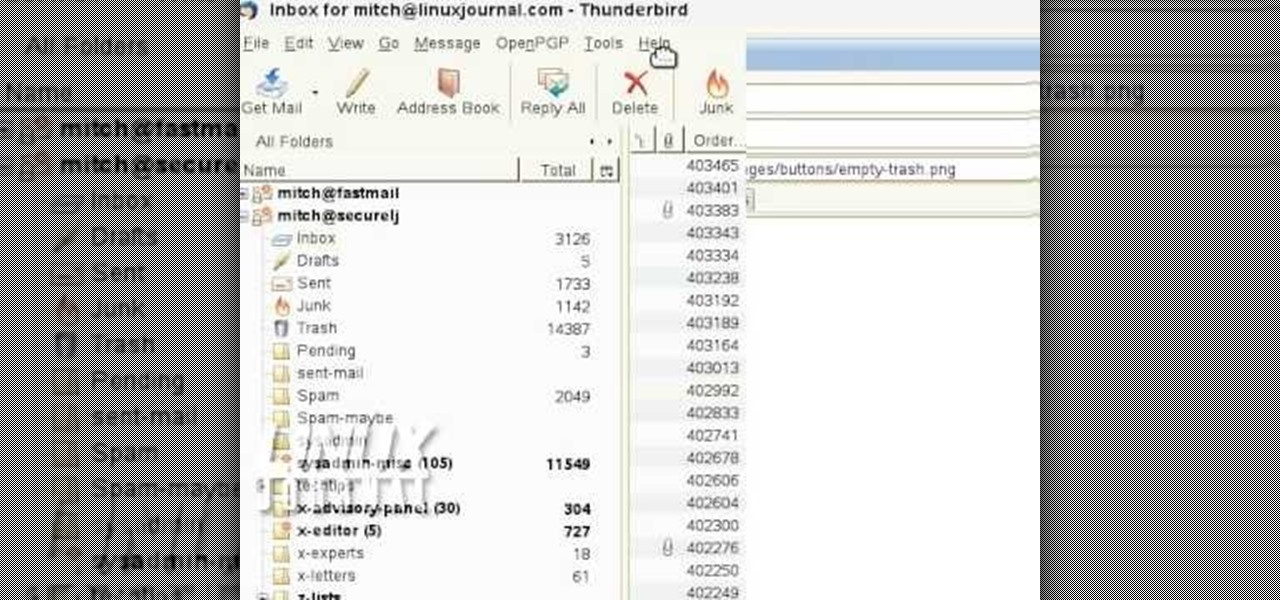
In order to add additional buttons to your Thunderbird Tool Bar, you will need an add-on called "Custom Buttons". It will allow you to add additional buttons to your tool bar. You will need to give instructions for the buttons, which you will use Java Script in order to set it up. Otherwise, the button will not have a function.
Learn how to capture a screen shot of your desktop, an active window, a website, or anything else use Microsoft Windows XP and without installing additional software.
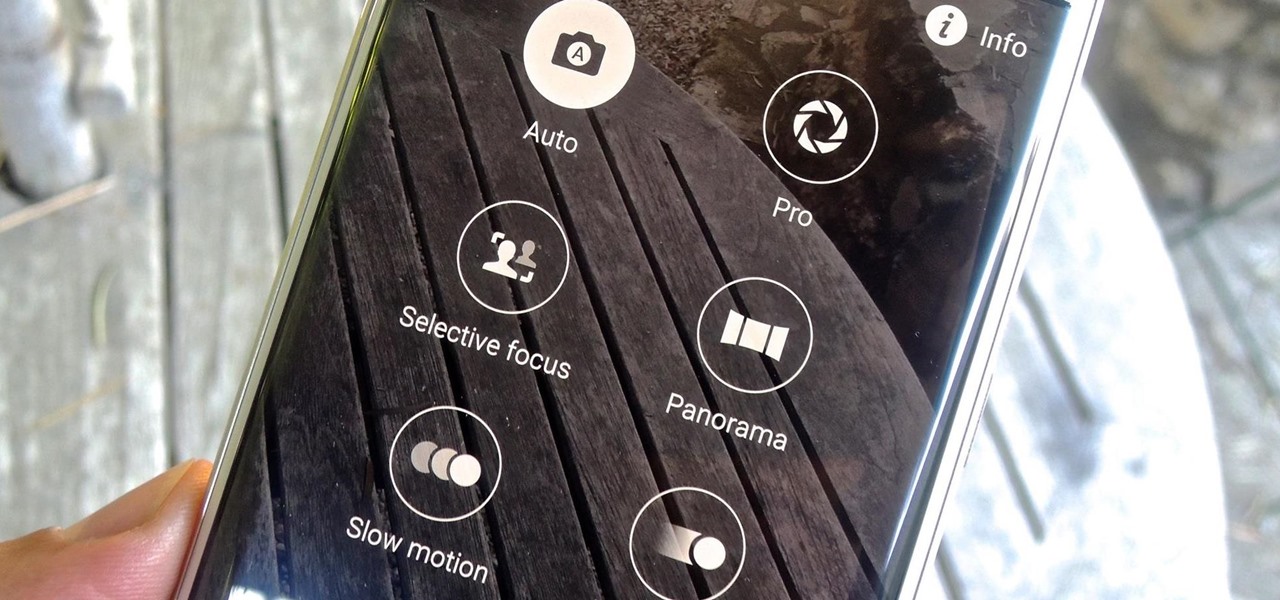
With 16 megapixels and optical image stabilization technology, it's safe to say that the Samsung Galaxy S6 is well-equipped to take badass pictures. Packed with additional camera modes, like Panorama, Selective focus, and Virtual shot, there's always a way to capture an image as intended.

In order to format graphs and charts using Microsoft Word 2007, click on Chart Tools. The tabs at the top of the screen provides you with your options. You can change the type of chart or graph by clicking on Change Chart Type. If there is a particular type of chart that you would like to use again and again, then you can save it as a template via the Save As a Template icon. You can edit the data in your chart of graph by clicking on Edit Data. You can modify the chart layout by clicking on ...
PowerPoint 2008 for Mac can help you turn boring old bulleted lists into something nobody would forget. With SmartArt graphics in PowerPoint you can now make your bullet lists pop using pre-formatted charts, graphs, and more. The Microsoft Office for Mac team shows you just how to make a bulleted list more visual in this how-to video.
Dull and drab bulleted lists are no longer necessary with the help of PowerPoint 2008 for Mac. When you make a bullet list in PowerPoint, you can now transform those boring text charts with actual visual charts and graphs and more. The Microsoft Office for Mac team shows you just how to convert text to a SmartArt graphic in this how-to video.
The recently released HTC One M8 and the upcoming Samsung Galaxy S5 are both boasting selective focus features for their camera apps, but with a 13 megapixel camera, the GS4 can take some pretty stellar pictures, too.
In this video tutorial, viewers learn how to remember Windows Explorer positions. Users will need to download the Shell Folder Fix program provided in the video. Once downloaded and installed, the program will remember the position of every Windows Explorer window that is opened. Now whenever ever the user opens that folder in the future, it will be displayed in the same location as before. There are also some additional features to the program such as: displaying the windows title and saving...
Street Fighter IV : Blanka, the Brazilian Beast unleashes havoc upon the World Warriors once again. Street Fighter IV is a 2008 fighting game produced by Capcom. Street Fighter IV is currently released for PlayStation 3 and Xbox 360, with a Microsoft Windows version in the works as well.
Street Fighter IV : Vega, the beautiful Spaniard delivers gruesome damage. Street Fighter IV is a 2008 fighting game produced by Capcom. Street Fighter IV is currently released for PlayStation 3 and Xbox 360, with a Microsoft Windows version in the works as well.
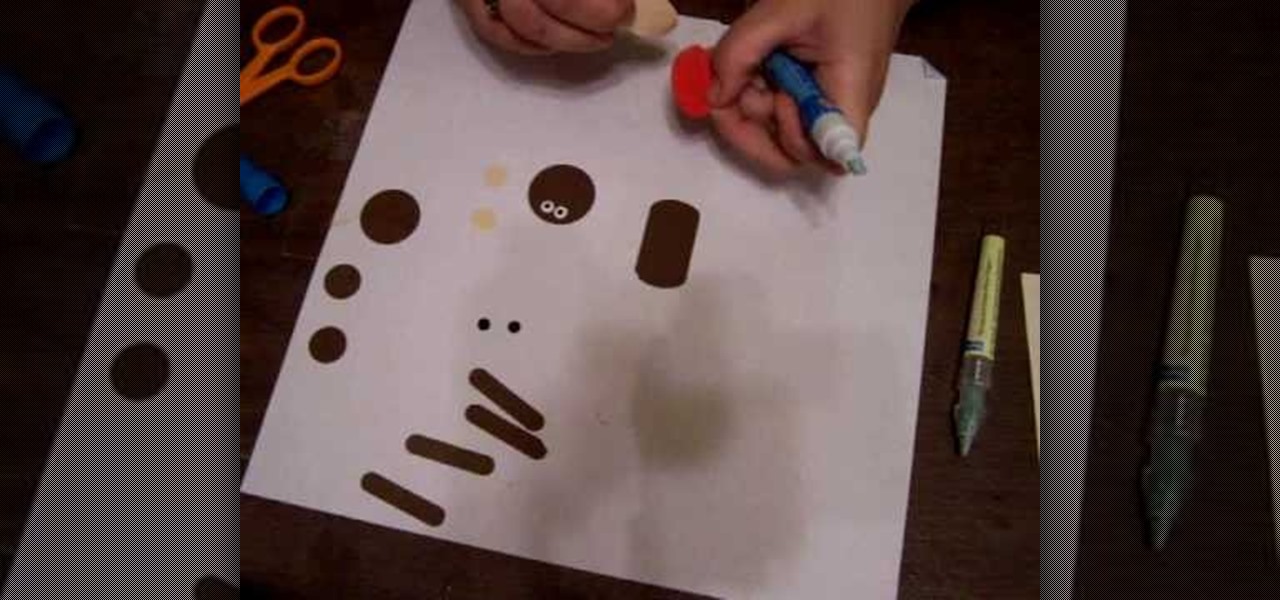
In this tutorial, we learn how to make a monkey with Stampin' Up punches. First, you will need to punch out all the appropriate punches that you need to make this. Once you have them, start to assemble by starting with the head. Place the eyes and the mouth on the appropriate spots, then use a black pen to add in further details on the face. As you continue, make sure to glue the different pieces together until you reach the bottom. Once you are done, add any additional details with the black...
In this tutorial, we learn how to set up work resources in MS Project 2007. First, go into your chart and click on the resource sheet from the file menu. Now, you will be able to change the different sections that show up on this sheet. Go through the different columns to change the information and type in additional information, the more you insert the better. When you click on the tabs, you will have more options where you can enter in notes and make custom fields. Go through the entire she...
Street Fighter IV: Ryu, An old favorite returns, stronger than ever. Street Fighter IV is a 2008 fighting game produced by Capcom. Street Fighter IV is currently released for PlayStation 3 and Xbox 360, with a Microsoft Windows version in the works as well.
Street Fighter IV: Quick, cunning, and flashy, Ken Masters brings his A game to the latest Street Fighter.
Street Fighter IV : Rufus may be portly, but his size obviously doesn't slow him down. Street Fighter IV is a 2008 fighting game produced by Capcom. Street Fighter IV is currently released for PlayStation 3 and Xbox 360, with a Microsoft Windows version in the works as well.
After you've published your site, you might decide you want to add additional pages over time. To add an additional page to my site, all I have to do is click the "Add Page" button in iWeb.
Do you need additional hard drives in your computer for additional drive or storage space? Learn how to install a second IDE hard drive in a desktop PC all by yourself, in just a few simple steps.
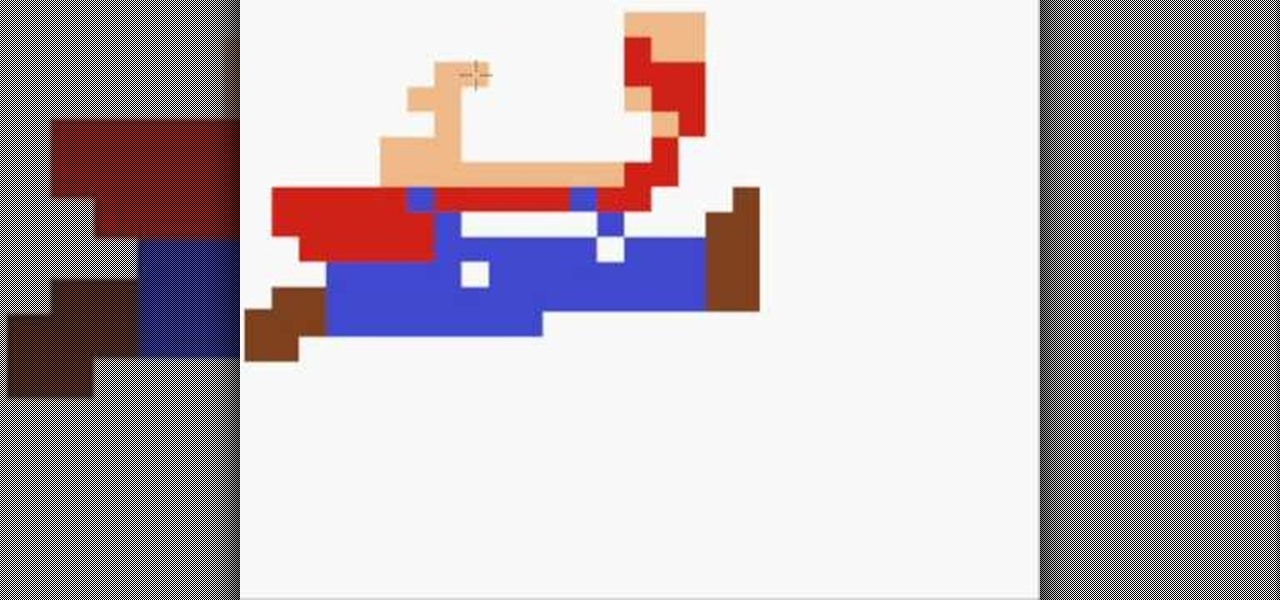
In this video, we learn how to draw an 8-bit Super Mario jumping. To start, you will use a square paint tool on your computer to create rectangles on the blank sheet. Use red, tan, brown, white, and blue to create the character. Use the square too to draw in the shape of Mario, making his legs spread apart to show he is jumping. Use white to create open space and make sure to show the edges of the squares to make the drawing more realistic. When finished, add in any additional details, then y...
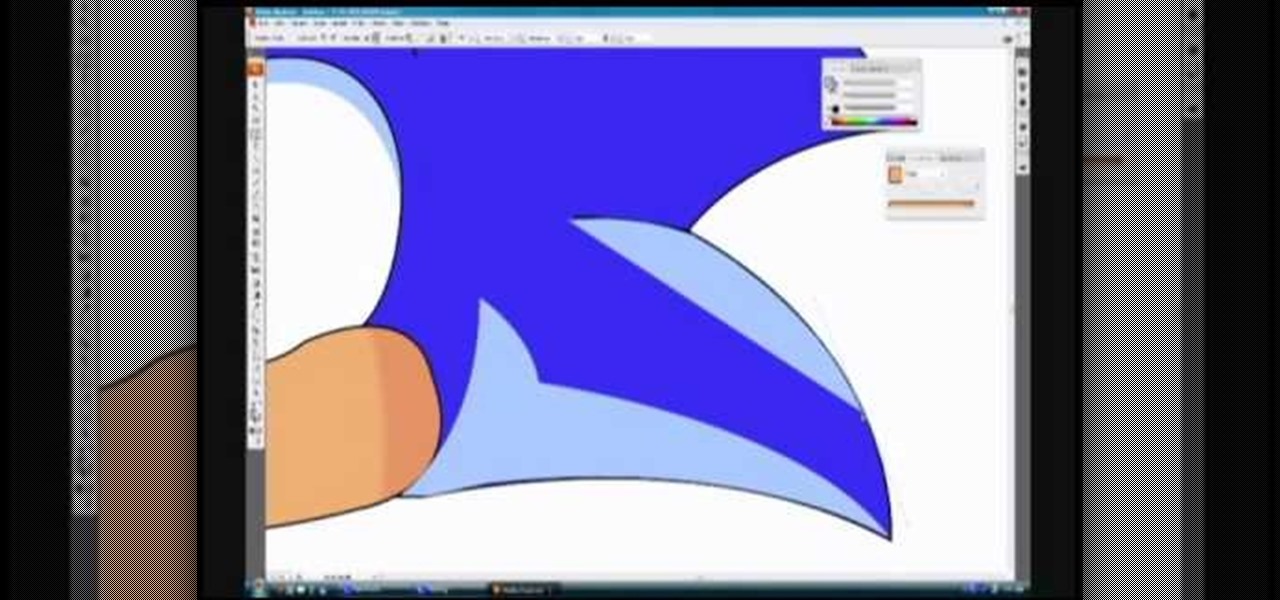
In this video, we learn how to draw Sonic in Adobe Illustrator. First, draw out the muzzle and the nose with a pen. From here, you will draw out the eyes and then make the outline for the ears and the hair. Next, draw in the details around the face. Once you do this, add color to the hair and to the face as you see fit. Then, add in additional lines to show creases and make him look more realistic. After this, add in shading with darker colors on the sides of the face and the hair. When finis...
In this tutorial, we learn how to draw Uncle Scrooge McDuck. Start off by drawing the outline of the hat, heat, neck, upper body, instrument, and lower body. After this, draw on the eyes, glasses, and the beak. From here, you will start to add in additional details and erase the outline lines from where they aren't needed. Start to add in lines to create folds on the character and then color him in with the appropriate colors. After this, add in shading to different parts of him and his instr...
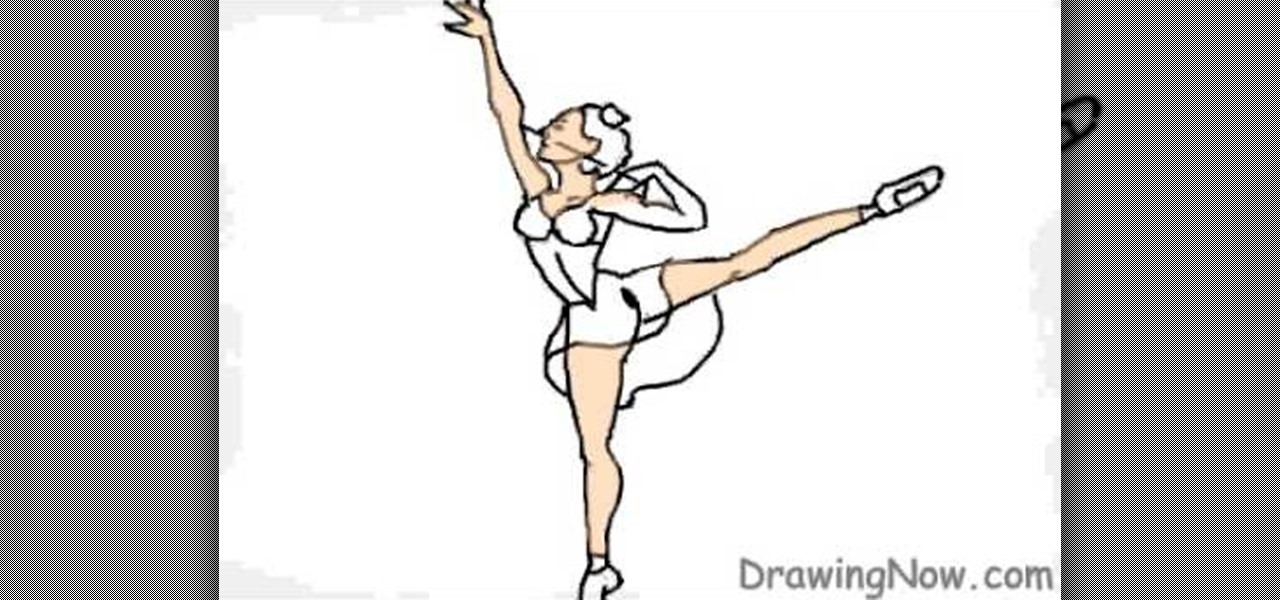
In this tutorial, we learn how to draw a ballerina. Start off by using circles and basic lines to draw the outline of the ballerina's body. Then, use a darker brush to create the body and add in the details of it as well. Draw one leg up in the air, while the ballerina is standing on the other with her arm raised high in the air. Erase any background lines, then start to draw in details of what the ballerina is wearing on her body. Draw in additional details around the figure, then when you a...
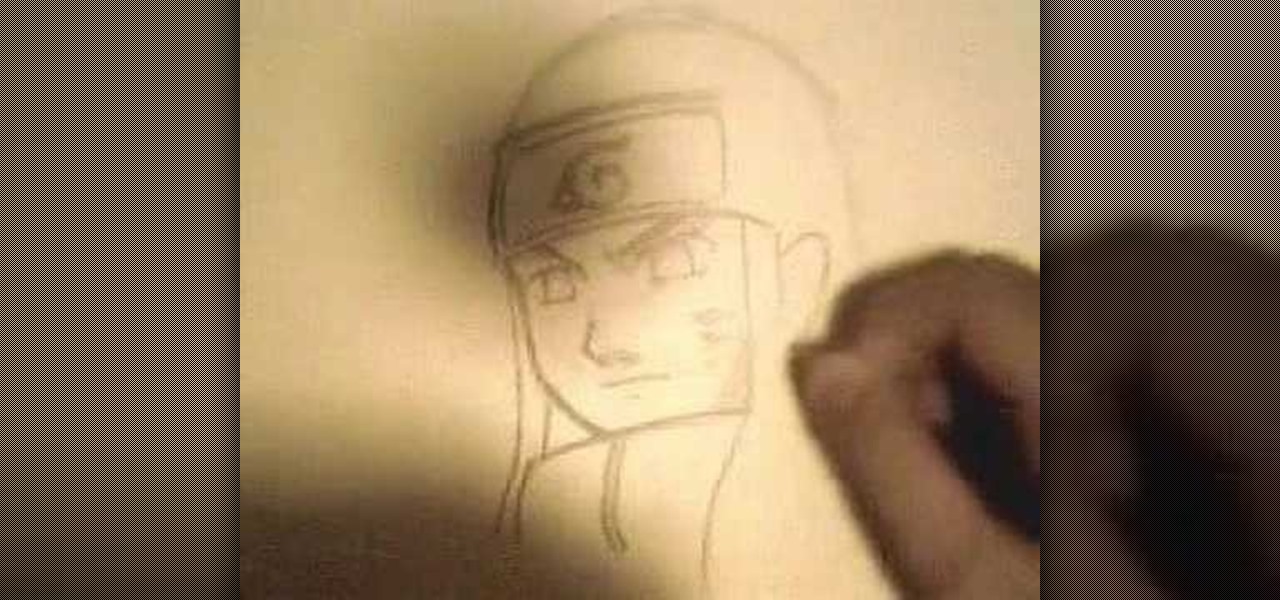
In this tutorial, we learn how to draw manga Neji. Start off by drawing the outline of the character. Don't forget to include the parts where the facial features, limbs, and hair are at. From here, you will use a darker pen to draw in the rest of the character. Next, you will start to draw in the additional lines and shading to make the character look more realistic. Once you do this, you can start adding some color! Use any colors that you would like or use the normal colors that are on Neji...
In this tutorial, we learn how to draw The Incredibles. Start out by coloring the background orange, yellow, and white. Then, draw the outlines of the bodies for all of the characters in the family. After this, draw in the details, giving them a 3D type of image. Next, you will color in the clothing and add in the fine details for the hair and the face as well. Erase any background lines from the drawing to clean it up, then add in some shading to make it look more realistic. To finish this, ...
In this tutorial, we learn how to draw curvy steps using pencil. To start, you will draw a thin horizontal line with a small point on it. After this, you will draw lines out from this, using a ruler to keep them straight. From here, draw your steps on the bottom of the page using the lines to keep them proportioned and in place. Draw them in a triangle wedge shape and then color them in. Shade the bottom and the sides to give them depth and dimension. After this, draw in the area around the s...
In this tutorial, we learn how to draw a human skull. To start, you will use your pencil to draw a light outline of the skull on your paper. After this, you will start to add in more shading and lines throughout the face to make it look like it has depth and contours. From here, you will draw in the teeth and then create the nose and the pits for the eyes. After this, you will start to shade in the sides of the skull darker and then add in any additional details like small cracks on the face....
In this tutorial, we learn how to draw Little Sack Dude. Start out by drawing the outline of the body for the character. After this, draw on the limbs and then add in the details of the face. Once finished, draw in the details of the clothing, then the hands on the character as well. Draw in additional details along the feet and arms, then shade the entire character with the pencil. Once you do this, darken the eyes with the pencils to make them black and then darken the parts of the details ...
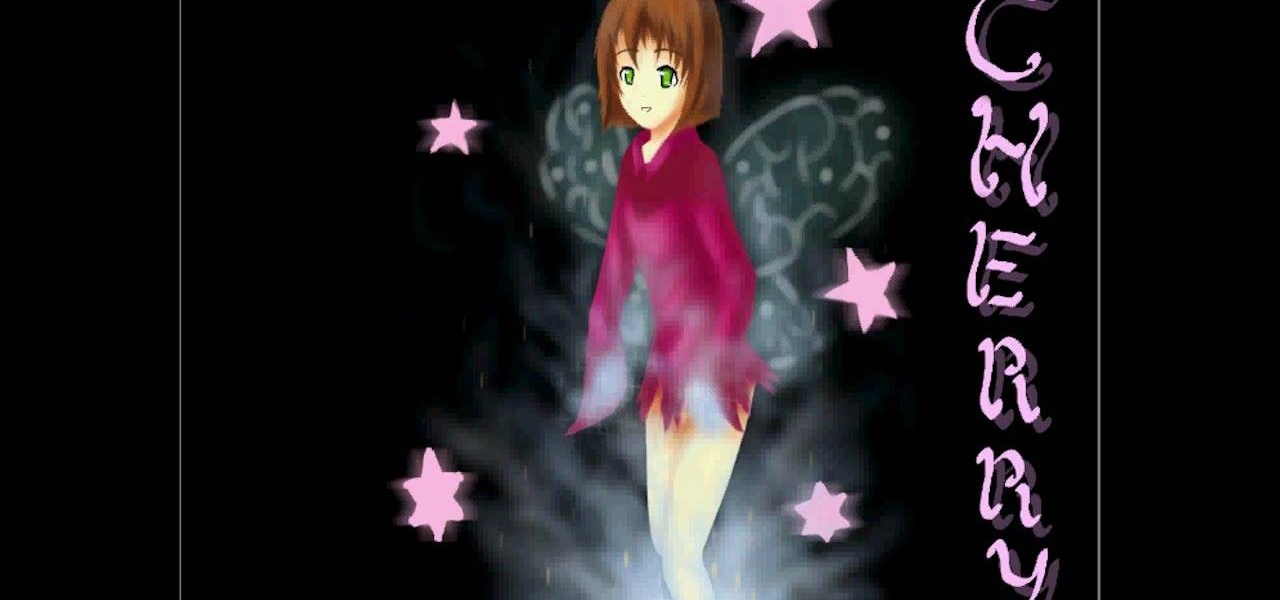
In this video, we learn how to draw a cherry fairy. First, sketch the entire picture before you start to draw in any detail. After this, draw in darker lines where you want the features of the body to go, then start to add in features of the face. Next, add in color to the face and to the outfit of the fairy. Make sure you give her hair and bangs that are surrounding her face as well. Once you have the color completed, create a white light coming from the bottom of the fairy and going up into...
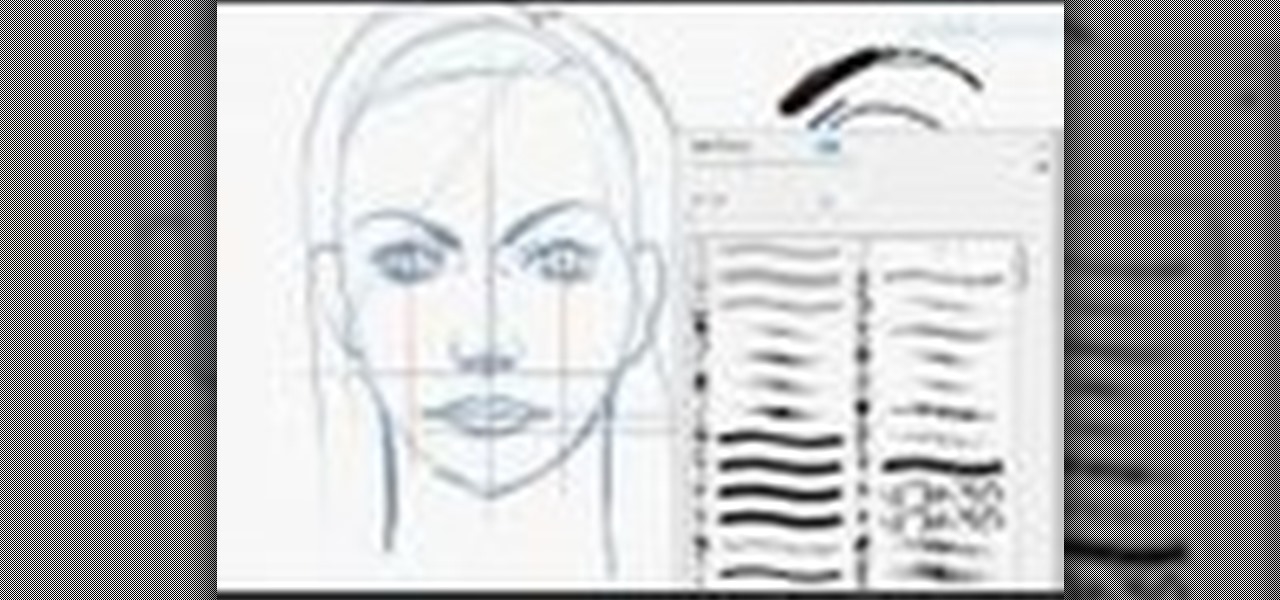
In this tutorial, we learn how to sketch a female face. Start with an upside down egg shape for the face, then draw in the contours of the chin. Use reference lines on the face to help you place where the eyes, nose, and mouth are going to go. After this, start to draw in the additional features, using a lot of lines to contour the face and make it look as realistic as possible. It's very important to use the lines in the background of the face so everything is even and lined up. After this, ...
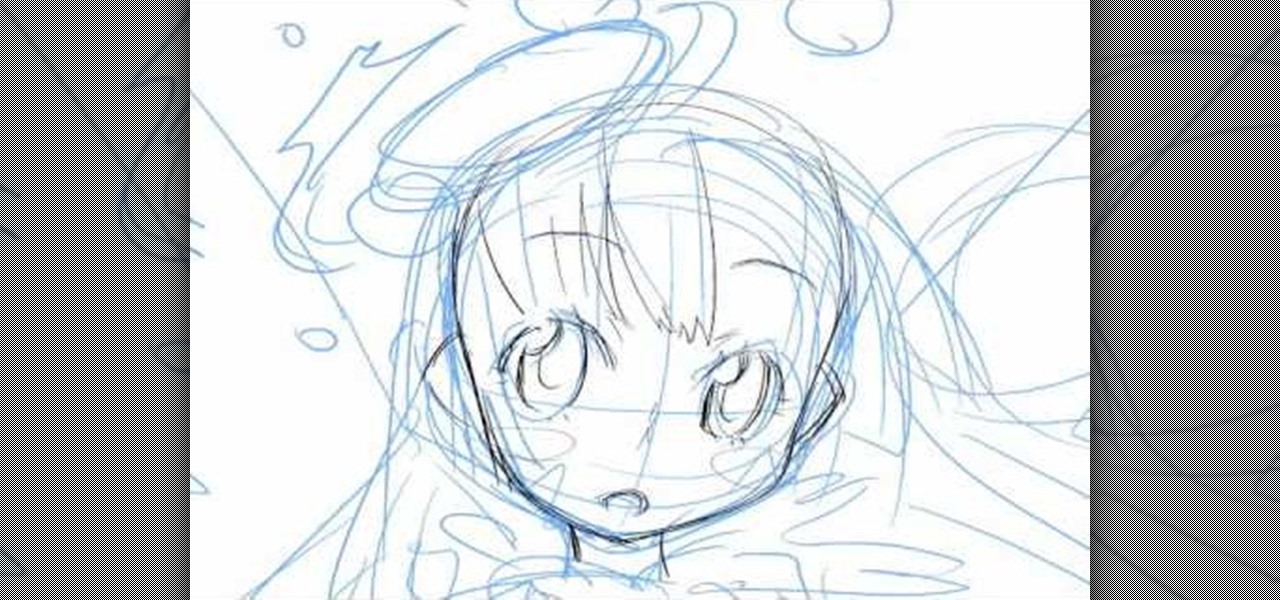
In this tutorial, we learn how to draw an anime or magna illustration on your computer. To start out, you will open up a new draft and start to create the outline of the anime together. As you continue, you will draw in darker lines that will be the outline and the details of the character as well. Erase any background lines from the drawing that don't fit in, then create new additional lines. When you're done, start to add in the facial features and details, then add in the hair and clothing...
In this tutorial, we learn how to draw Tohru Honda. Start out by drawing a circle for the head, then lines on the face to reference where the facial features go. After this, draw a stick for the body alone with a neck. Draw in circles where the shoulders go, then start drawing around that to create the body. Draw on the school uniform for her, then draw on the ear and additional details for the uniform. After this, draw on the bangs and the hair, then add on the bows to the hair. Then, draw o...
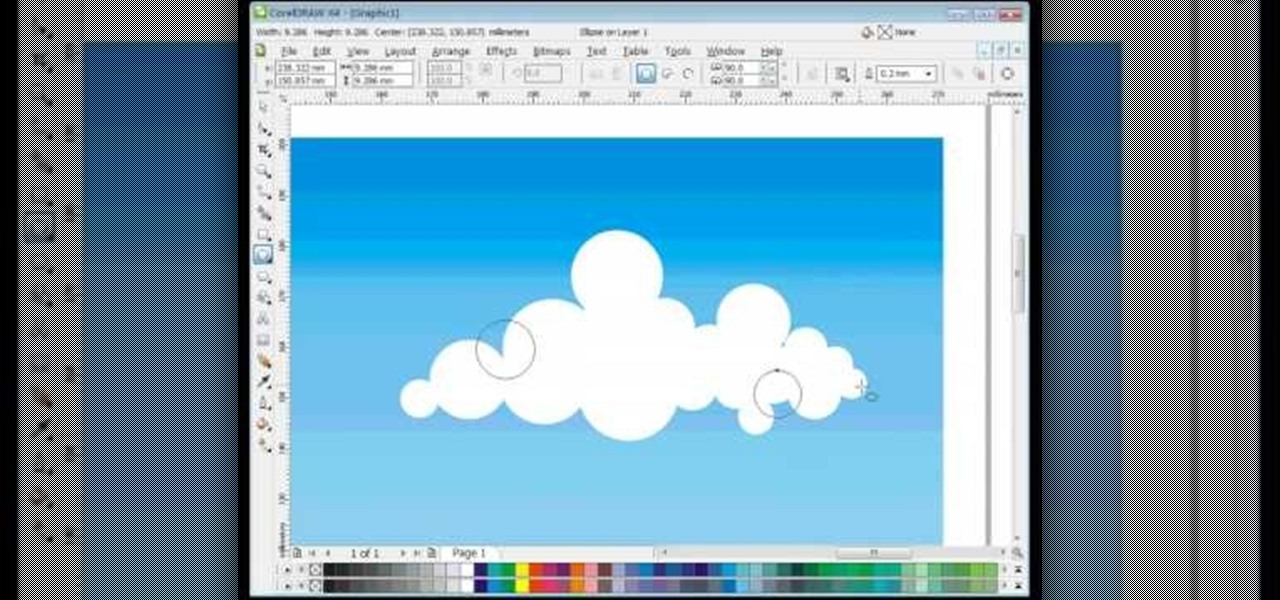
In this video, we learn how to draw vector clouds in CorelDraw X4. First, open the program and make a circle using "ctrl+shift". Make these circles touching and overlapping each other on the top of the page. After this, select all and then weld it. Next, press "ctrl+k" to break the curves apart, then erase the parts inside of the clouds. When this is done, select all, then copy and paste for additional clouds. Trim the bottom to make the clouds sit on a mountain or straight edge, then you are...
In this video, we learn how to draw Hamtaro. Start off by drawing the large head, followed by the body and the ears. After this, draw the arms and legs onto the character. Next, outline the drawing in a darker pen, then add in additional details. Draw on the eyes, nose, and pupils. Don't forget to draw on the paws and feel as well as lines to make it look like fur. To finish up this picture, you will need to add colors to the hamster. You can go with the traditional colors, or change them up ...
Learn how to add special lens flare effects to a logo in Pinnacle Studio with this tutorial. You will select the picture to be edited and drag it to the video screen. Select the lens flare effect from the Studio Plus RTFM which is standard with the program, you don't need to purchase any additional effects to create the lens flare. You can preview the effect and change the direction and color of the flare. Once you are happy with how the flare effect looks on your logo, you can save it to a f...
In this clip, we learn how to download additional Ovi Maps-compatible maps when using a Nokia C5 mobile phone. The C5 is the first offering in Nokia's new "C" series of mobile phones. It runs on Nokia's Symbian OS and features a 2.2-inch screen and 3.2-megapixel camera. Want more? Search WonderHowTo's sizable collection of C5 video tutorials.
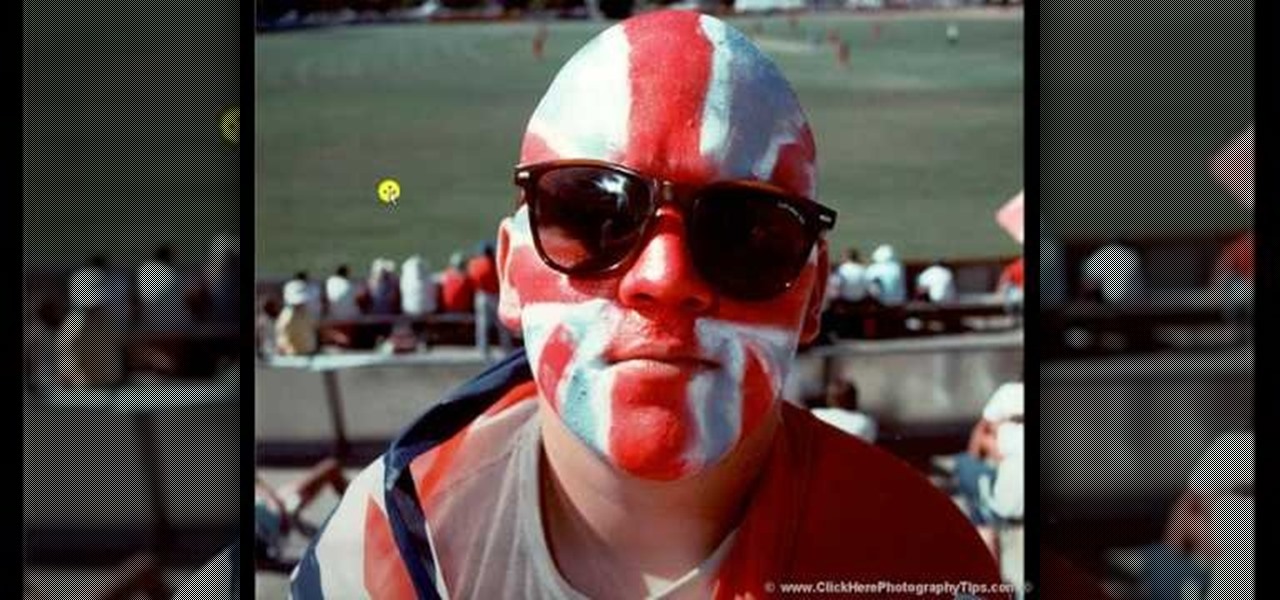
In this Click Here Photography instructional video, learn how to photograph using a fill flash to produce a great photograph. Equipment, how to set-up, and additional props are gone over. Although a fill flash takes some time to set-up & is an additional item to carry, it will produce better photographic results in certain lighting situations. Learn how to experiment with your fill flash and maximize your photo's potential with the advice, tips, and information given here.
Take a look at this tutorial and learn how to get additional features on your iTUnes with Growltunes. On top of polling features, this application allows you to use various instant messagers such as amsn, msn, and skype.
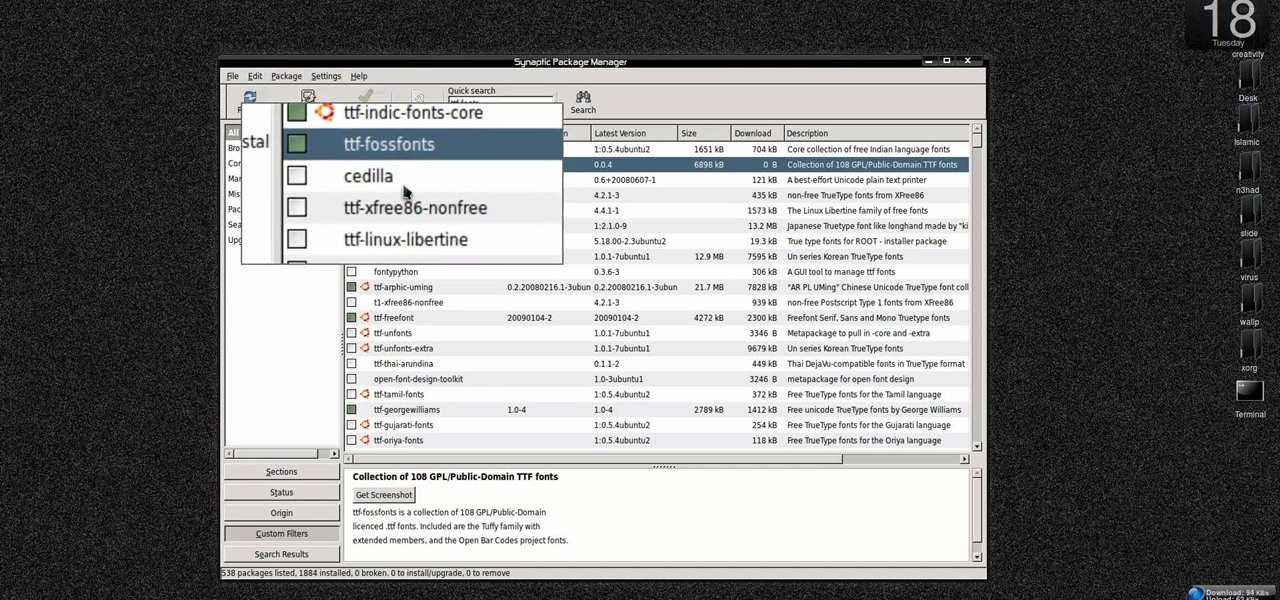
New to Ubuntu Linux? This computer operating system could be a bit tricky for beginners, but fret not, help is here. Check out this video tutorial on how to install additional TTF fonts on Ubuntu Linux.