Whether you're a first day beginner or have been playing the drums for several years, learning the fundamentals of technique, rudiments and music reading is very important. In this installment from his video tutorial series on the fundamentals of snare drumming, Mark Wessels will walk you through the process of playing a duet while heeding dynamic markings (e.g., the forte and mezzo forte) symbols.
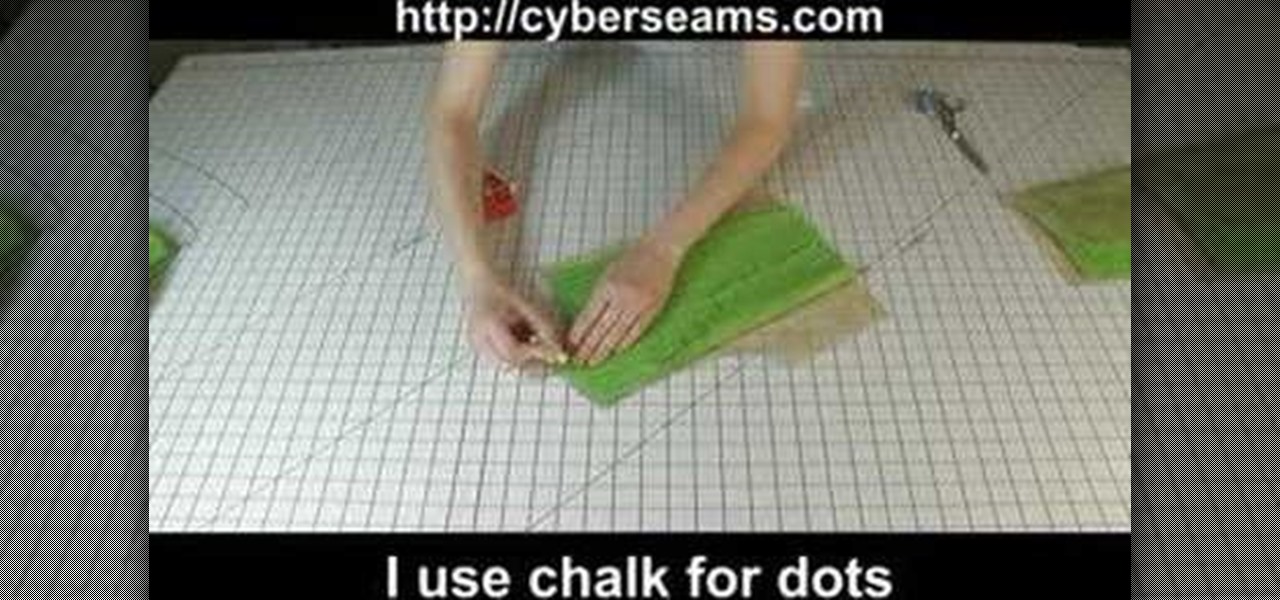
In this how to video tutorial, learn how to transfer pattern markings. Get the basics on how to transfer sewing pattern markings. Different methods covered in the video include transfer paper, wheel and chalk, plus a couple of other sewing tricks.
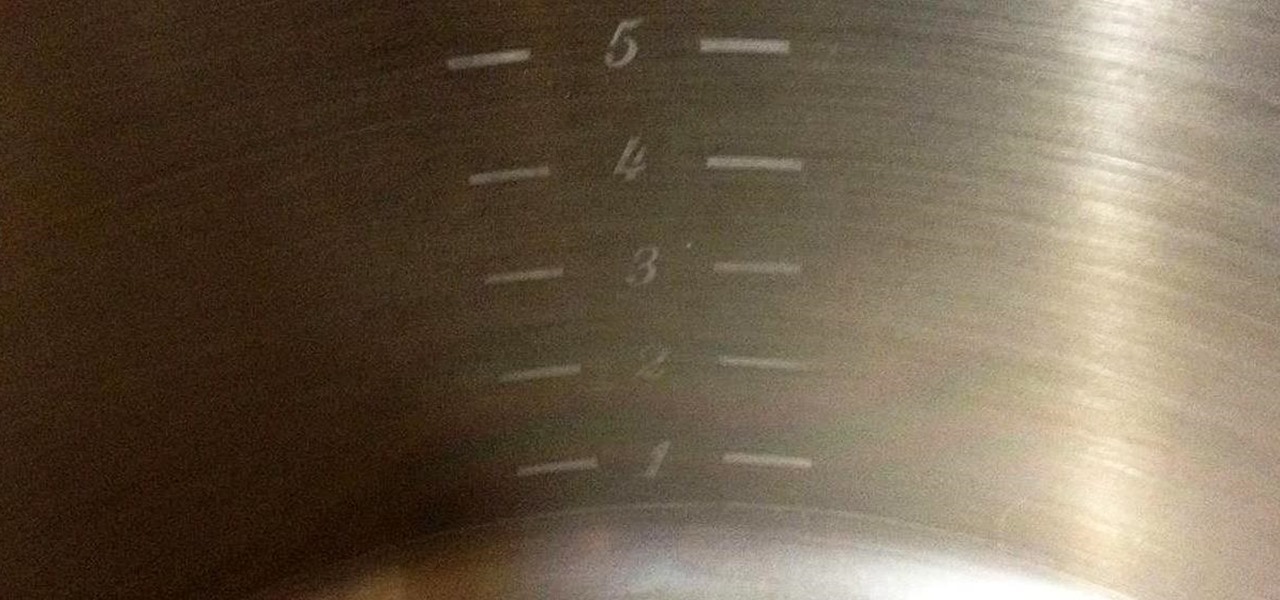
Volume markings on large pots and mixing bowls make life so much easier. They cut out the step of measuring and save you the trouble of washing measuring cups. However, there aren't many containers out there that actually have volume markers in them.
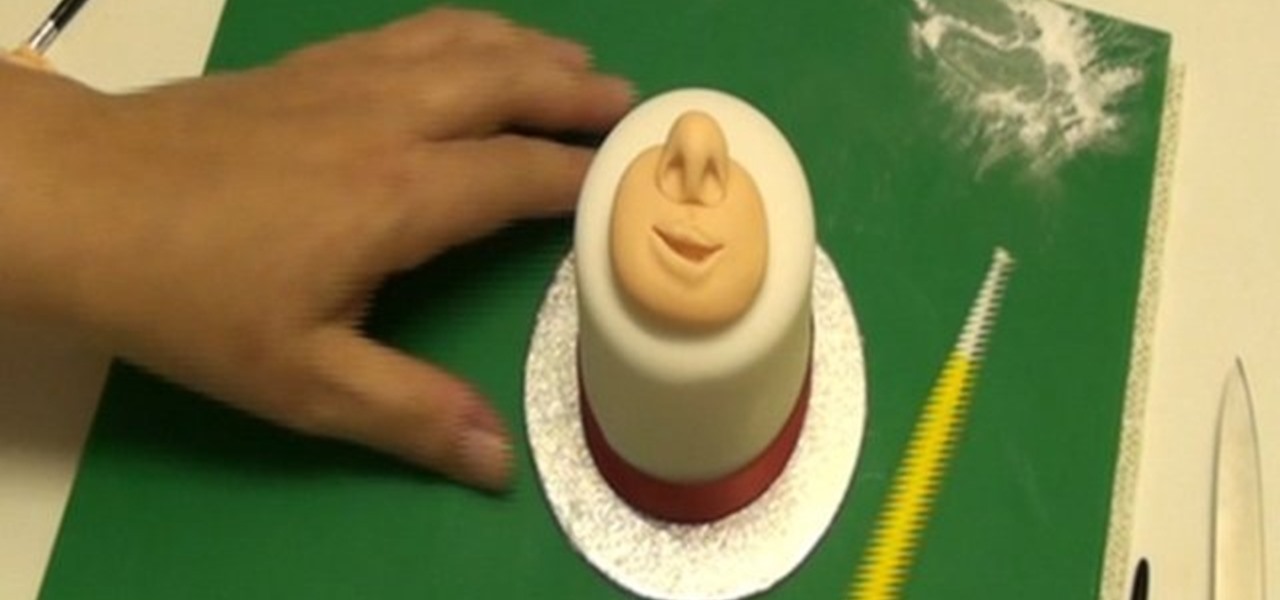
Lorraine McKay shows us how to make a Scottish tam o'shanter figure with fondant. First, take a hat shaped piece of cake with fondant, then take a smaller ball of fondant and roll it into a small sausage shape, then glue it onto the cake. Use a smaller piece of fondant for the nose, pressing it in with a knife, then use the knife to create a smile on the mouth. Push into the mouth to smooth out the cut. Then use a ball tool on the bottom of the mouth to create lips on the figure. Use a piece ...
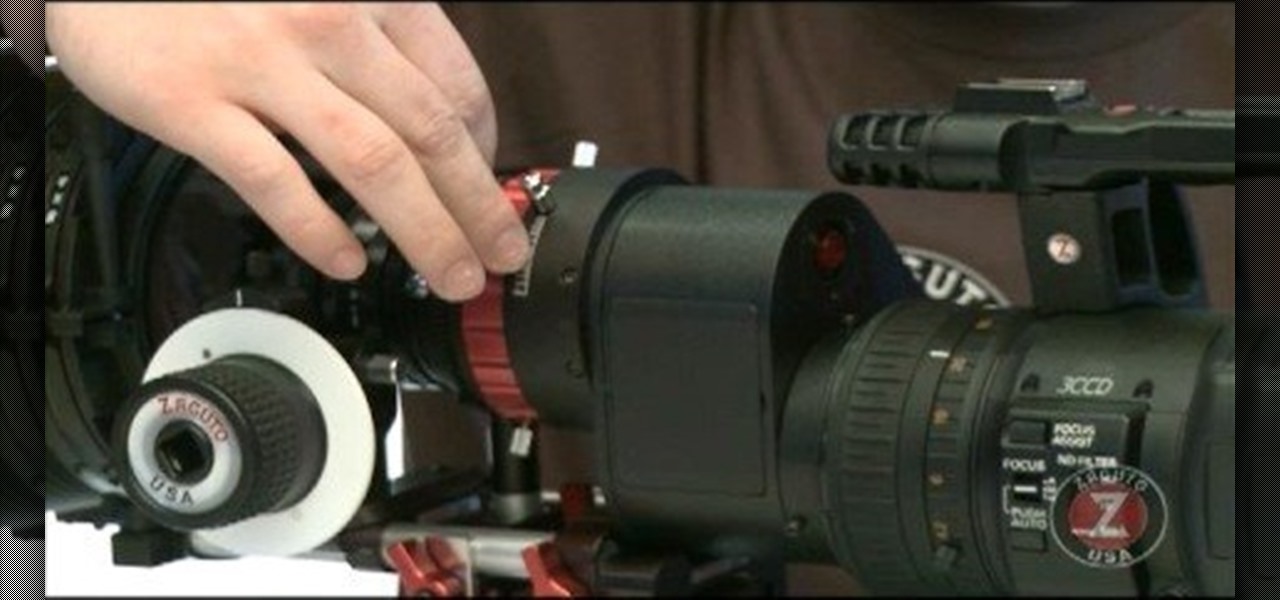
Zacuto Letus35 Elite Backfocus DOF Tutorial

This video will show viewers how to simply make a 3 string guitar using an empty cigar box, a piece of oak, some string, and a few eyebolts. You start with a 1 by 2 piece of oak which is about 3 feet long. First, you should begin by making some markings along one side of the oak, first at 1/2 an inch and then at 1/4 inch spacing after that. Drawing 3 symmetrical lines where the strings should go, drill holes at the intersections of the lines you have drawn. The holes should be made using a 1/...

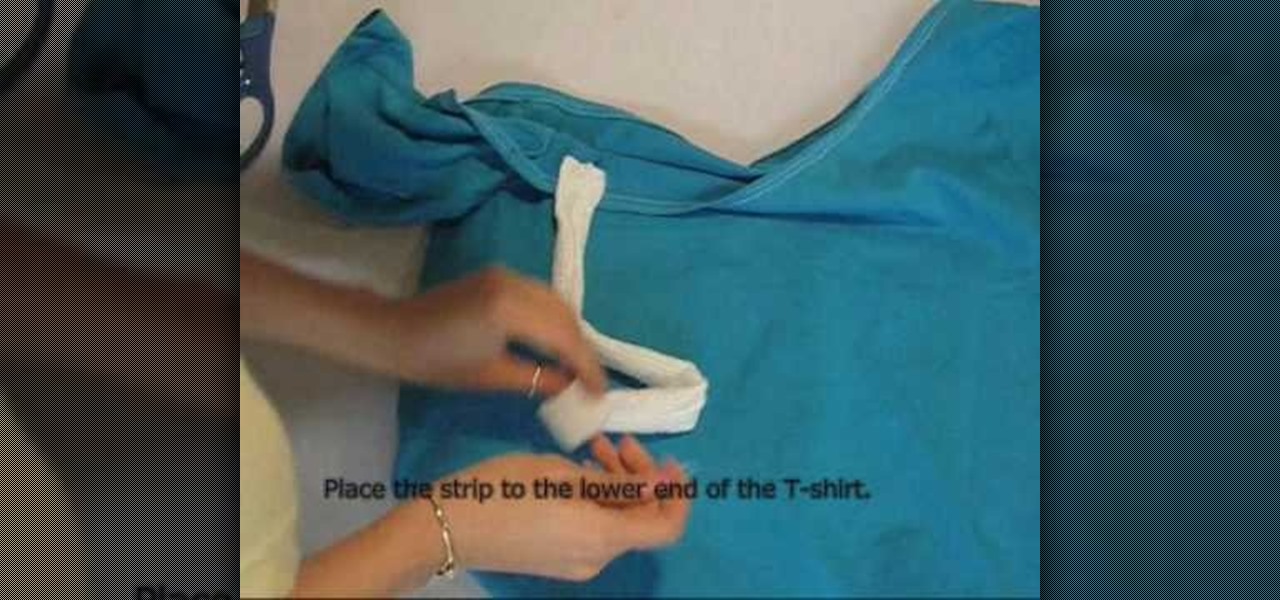
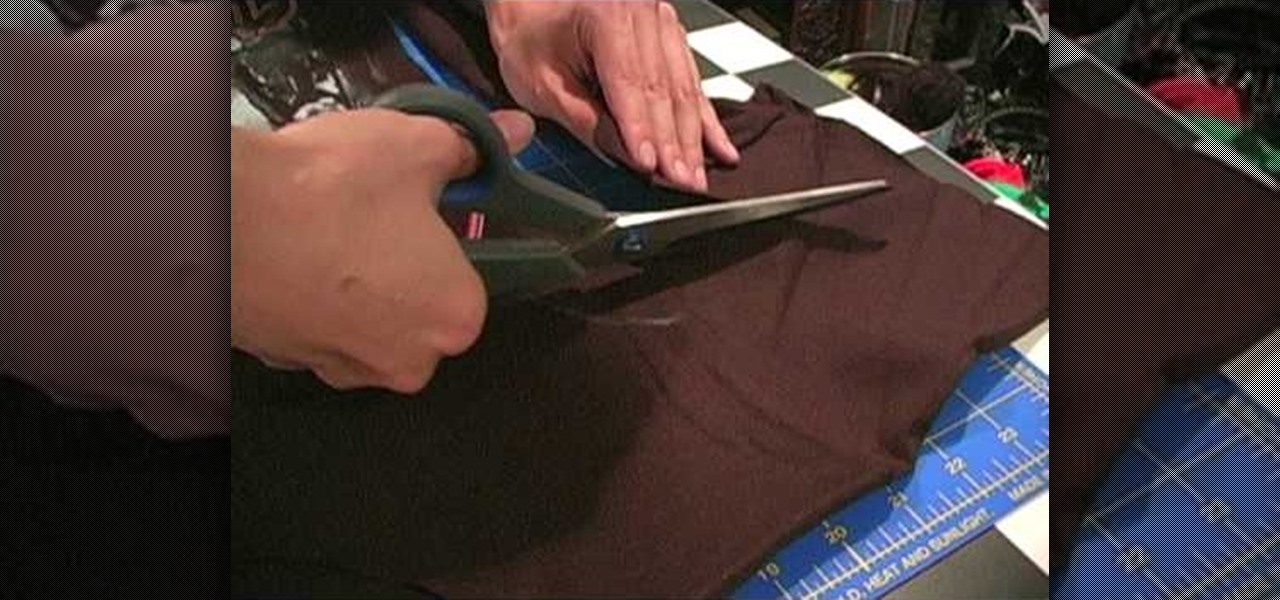
In this video, we learn how to reconstruct a t-shirt into an off the shoulder top. First, take a large shirt of your choice color and cut along the line on the shoulder, leaving a 1/4" seam allowance. Next, roll the hem and sew with a sewing machine. Next, cut a strap 4" wide and fold in half, then sew along the edge. After this, use a safety pin to pin one side to the shirt and then to the other side of the shirt. After these are secure, draw marks along the neck line of the shirt. Cut out t...
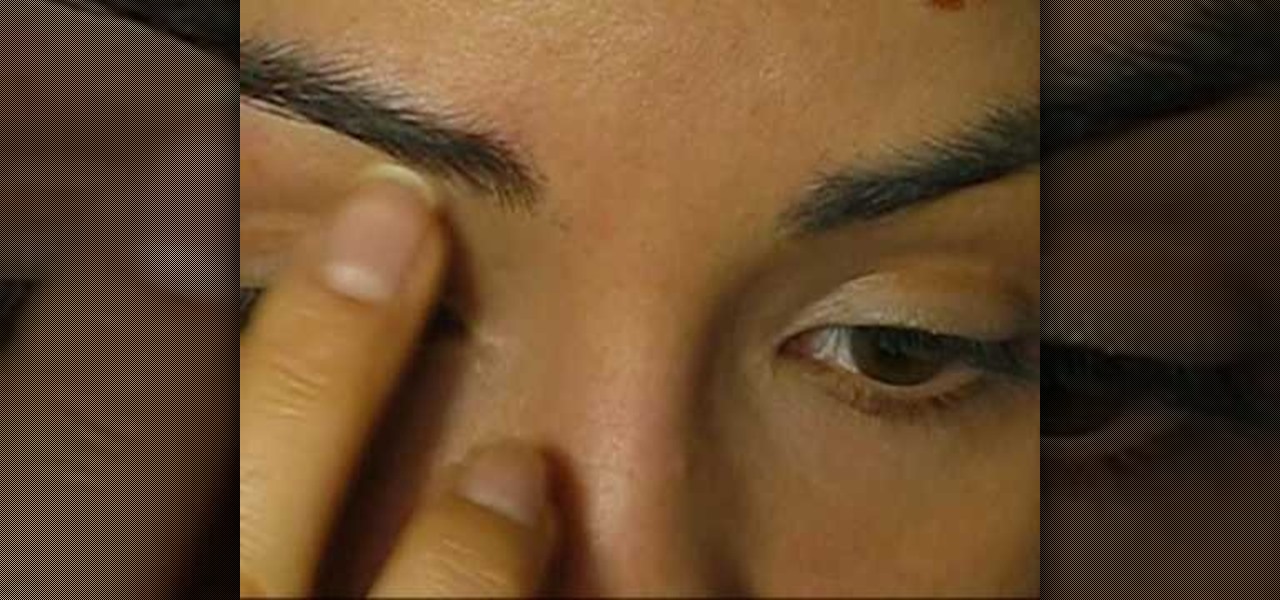
No two eyebrows and faces are the same, so why should you think that just one eyebrow shape looks the best? Each face shape demands eyebrows with a particular angle, curve, and length in order to look the most attractive.
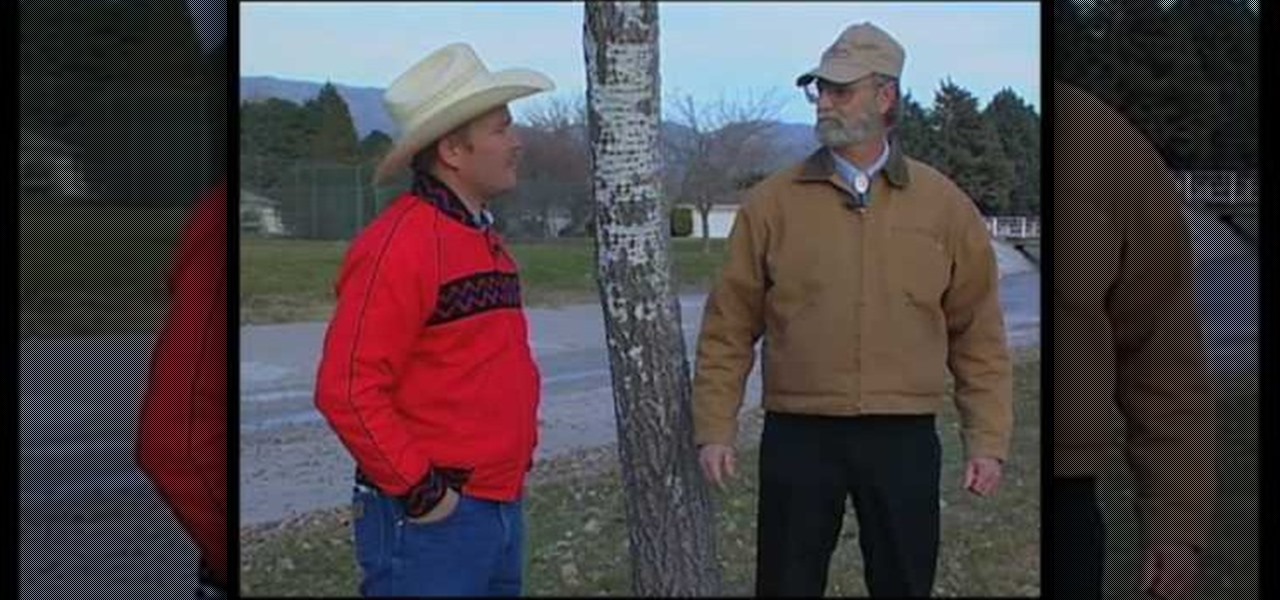
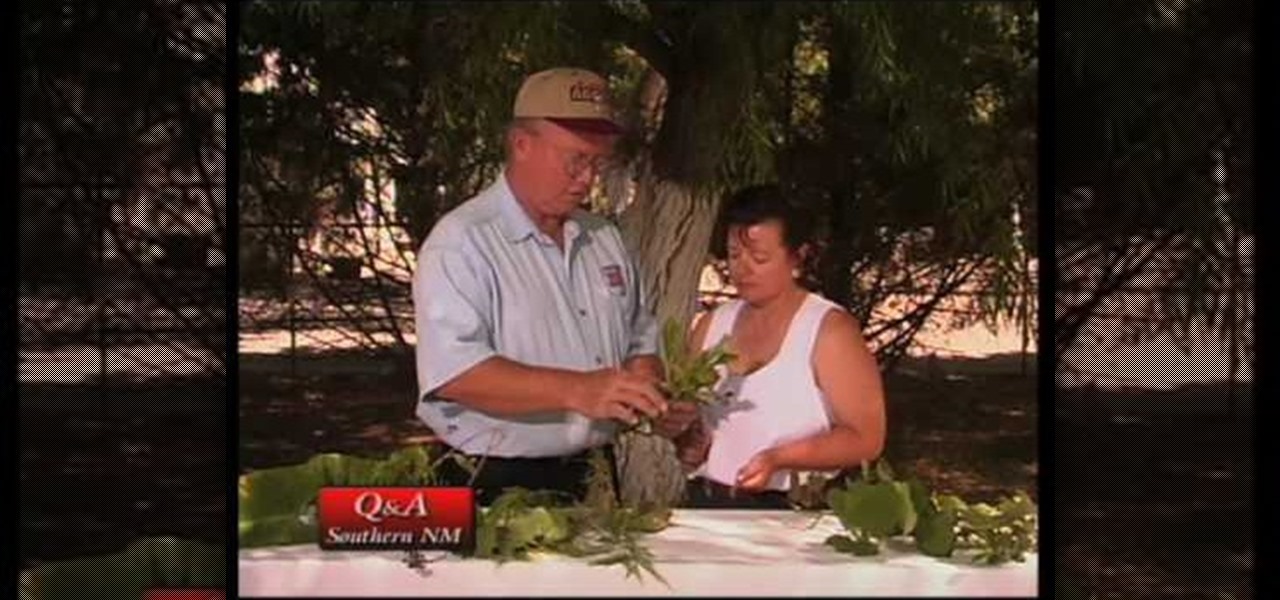
Curtis Smith (Extension Horticulturist) and Rick Daniell (Bernalillo Co. Horticulture Agent) examine the bark of a poplar tree. The young bark is smooth and will furrow as it grows older. There are straight horizontal lines on the bark that look like sap-sucker damage but in this case, the markings on the poplar is the normal bark development of the poplar. They also look at and discuss Fall Web Worm cocoons which look like bird nests on a tree. Web worms do not do as much damage to the tree ...
Follow these instructions to apply mascara using a business card with no smudge. What you need:
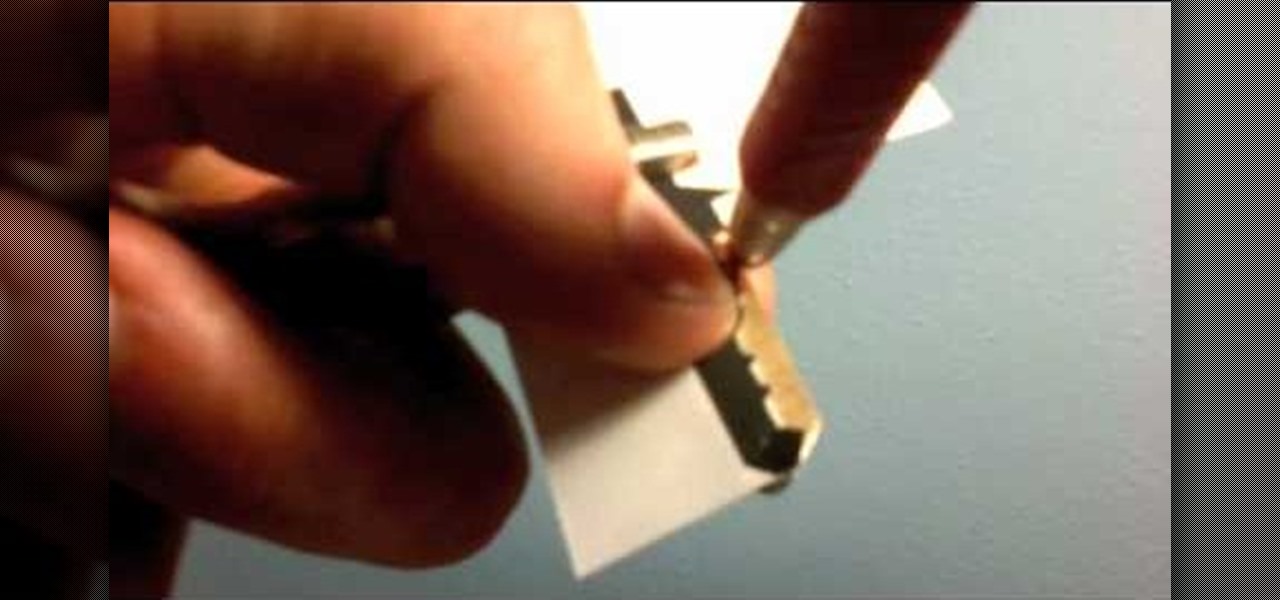
In this ten-step video tutorial, you'll learn how to quickly copy keys using a camera, printer and Dremel tool. With this ten-step process you'll learn the necessary steps to copy almost any key... even if you only have access to it for a brief period of time.
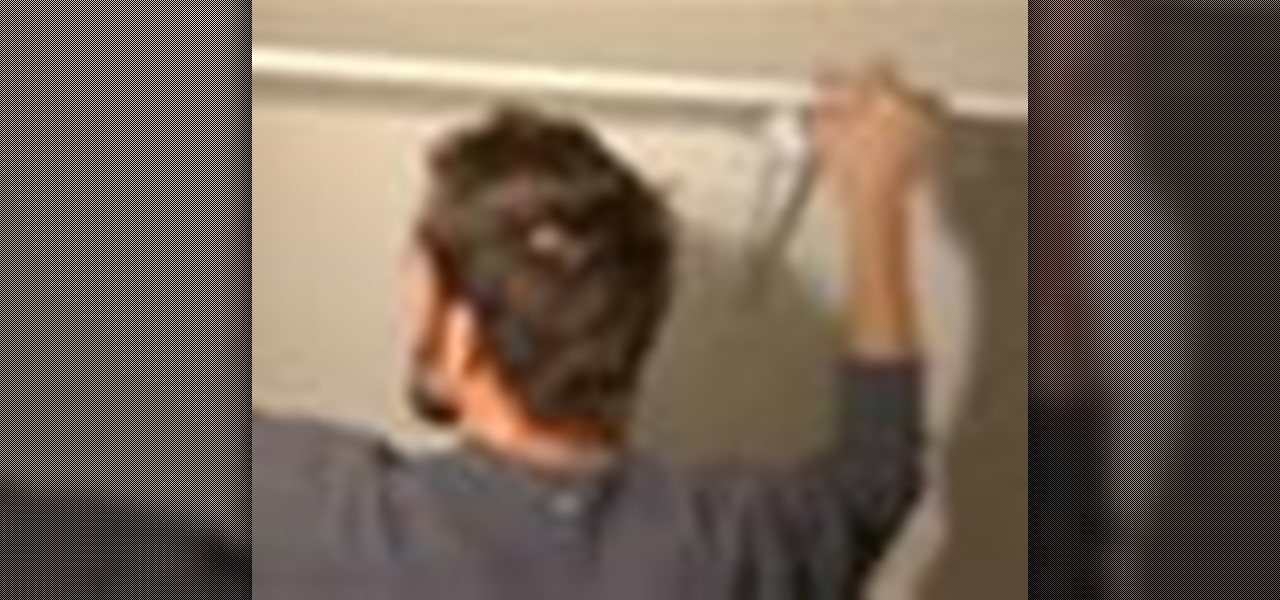
Installing shelves in a closet turns dead space into useful storage. You Will Need:
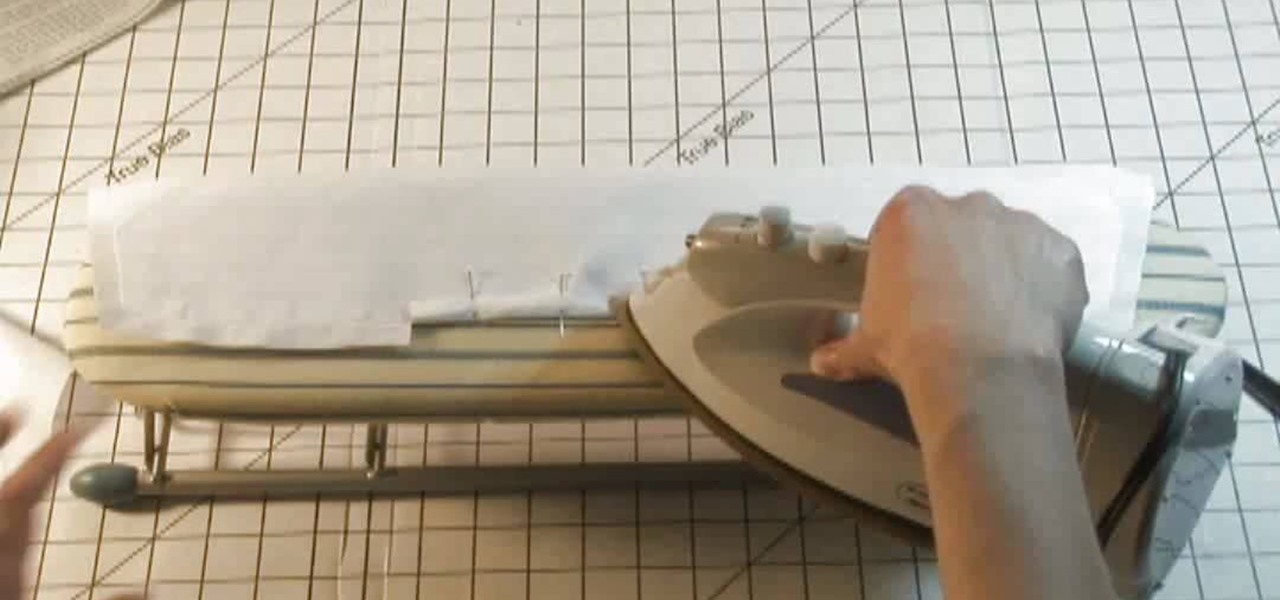
By using sewing pattern Simplicity 4670, the author of this tutorial video takes you through the steps needed to produce a great shirt collar. First you should attach interfacing to one piece of the shirt collar. Here you will be using fusible interfacing and taking the facing to the shirt collar iron the interfacing to the wrong side of the fabric. Sew a guide line that is 5/8ths of an inch wide along the notched edge of the shirt collar's facing piece. At the dot markings of the collar clip...
This tutorial is about how to create Avatar inspired makeup. Go in with a white full coverage makeup and go over with a light layer all over the face. The white is going to give the blue something to stand out in front of. Don't forget to do your neck and ears. For the blue, you can use a powder or cream or liquid. Use a baby blue and with a big fluffy brush start applying it all over the face. Go in with an invisible setting powder to set the blue. In order to be Avatar you want your nose to...
In this tutorial, we learn how to make an off the shoulder t-shirt dress. You will need: t-shirt, scissors, pins, and needle/thread. First, cut a wide scoop and cut off the bottom hem. Next, cut the sides and turn it inside out. After this, measure your bust, waist, and hips and then mark them on the shirt. Now, trim away the excess fabric according to your markings, then stitch up the sides. Once finished, cut off the sleeves making sure the angles follow the arm holes. Now, stitch those hol...
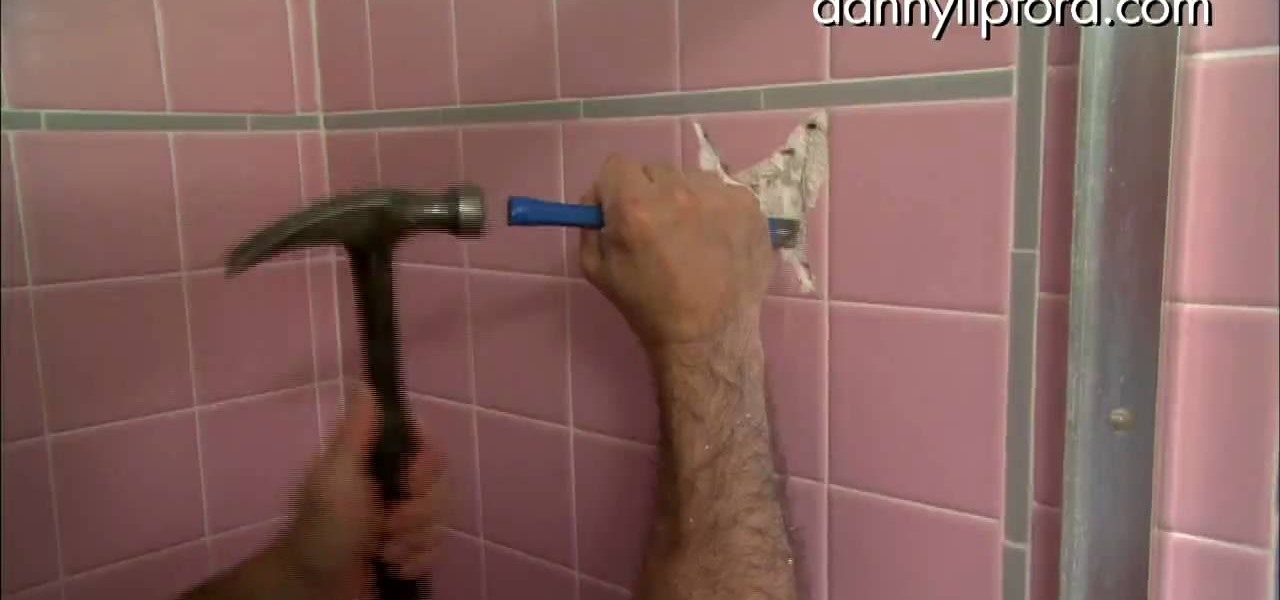
In this video tutorial, viewers learn how to remove a tile from a floor or wall. Begin by marking the tiles with a hammer and punch. These marks are used as guidelines for the drill. Create an X shape with the markings. Now use a drill to drill through the tile holes, but not through the wall. Now complete the X-shape pattern by connect the holes with a chisel and hammer. Then crack the tile into pieces and pry the pieces off the wall. This video will benefit those viewers who are doing home ...
Feeling blue this Halloween is now a good thing. Thanks to James Cameron's insanely popular "Avatar," we're sure to see plenty of blue-bodied and blue-faced girls and guys prancing around WeHo this Halloween. But the difference between a mediocre "Avatar" costume and an excellent one lies in the makeup.
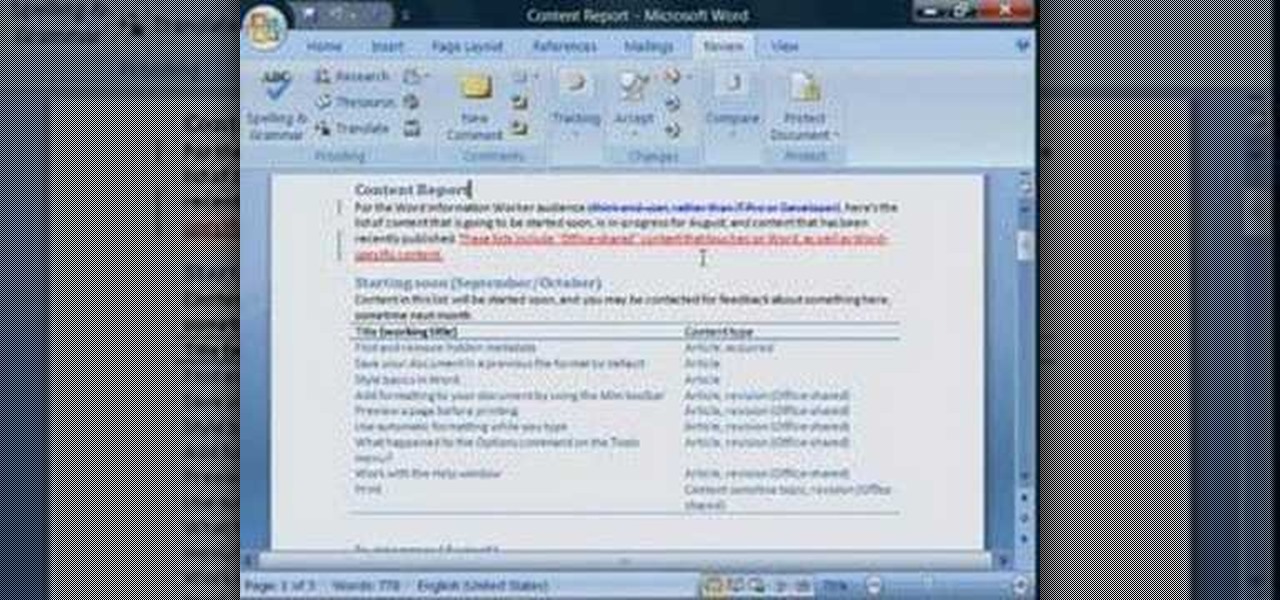
Leaving visible revision marks and comments in a document that you thought was "final" can be embarrassing. In this instructional video, a Microsoft employee demystifies what's going on with those tracked changes that you thought were gone from your Microsoft Office Word 2007 document. He also shows you how to banish those markings permanently in two ways and gain peace of mind.
Do you wonder if what you are seeing on your trees or plants is a problem, or simply natural? John White and Lois Pierce discuss various issues with Manzanitas, Red Buds, Viburnums, Mexican Buckeyes, and Cacti.
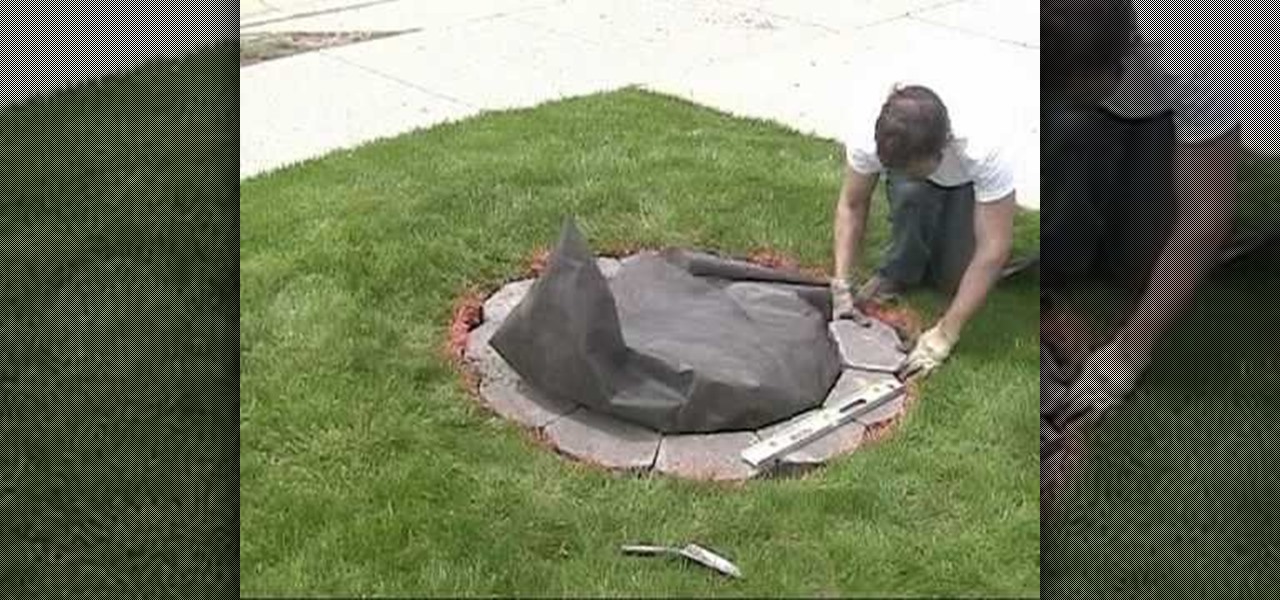
Chris from Backyard Gardening shows us how to build a raised island garden bed with retaining wall bricks.
In this tutorial, we learn how to read a tape measure like a professional. Rulers are awkward and you can't measure something over 13 inches with them. A retractable tape measure will measure as long as you would like and it has different markings on it. It has an inch, half inch, and goes on and on. The smallest is 3 32nd's of an inch. As you become more familiar with measuring the tape measure, you will take more accurate measurements for the projects you're working on. When finished learni...
This video begins by showing what a folding painting canvas looks like and what the final stretched canvas should look like. The first step shown is to make sure the bars are measured and marked with a simple A and B for easy measurement recall. After a wood frame is added over the canvas you must fold the material over the back of the wood and nail in place. Once the canvas is nailed to the frame you must add A, B, C and D markings to continue proper alignment procedure. The last step shown ...
In this tutorial, we learn how to create a nice drawing composition. First, use your pencil to sketch a light outline of the still life objects that you're drawing. After this, you will add in lines on the side of them for their shadows, then shade the area in between the lines in. Next, you will darken up the sides of the shapes to make them appear more in-depth and make them look more real. Use your pencil to blur the pencil markings and make everything look more realistic. When finished, y...
In this tutorial, we learn how to draw a sphere in 3D. First, draw a circle and a square around it with a light pencil. From here, you will use the side of the pencil to shade in the sides of the circle. Then, draw a half circle next to the circle to make it look like it's shadow. Shade that in and then add in more dark markings to the circle, leaving a small white area on the top of it. After this, draw in the outline of the circle and erase any stray lines. This will complete your sphere, e...
In this video, we learn how to make & decorate a bearing birthday balloon cake. Use a three dimensional pan to make this and use pound cake for a more firm cake. Start with outlining the mouth and doing the facial features. Then, fill the ears in with pink and place stars with icing piping onto the top of the entire area of the bear. To put the bear on the cake, you will place a plastic food rod into the bottom and into the top of the cake. Use markings on the cake to place him in perfectly t...
In this tutorial, we learn how to draw the anime character Tobi. Start off by using light pencil markings to outline the face and the head. After this, use a marker to draw in the eyes and pupils. Next, draw in the eyebrows over the eyes, then make a small mark for the nose. Draw in a line for the mouth, then make one of the eyes a diagonal line, like the character is winking. Start to outline the chin, then draw in the ears and start making the hair. The hair should be spiked and going down ...
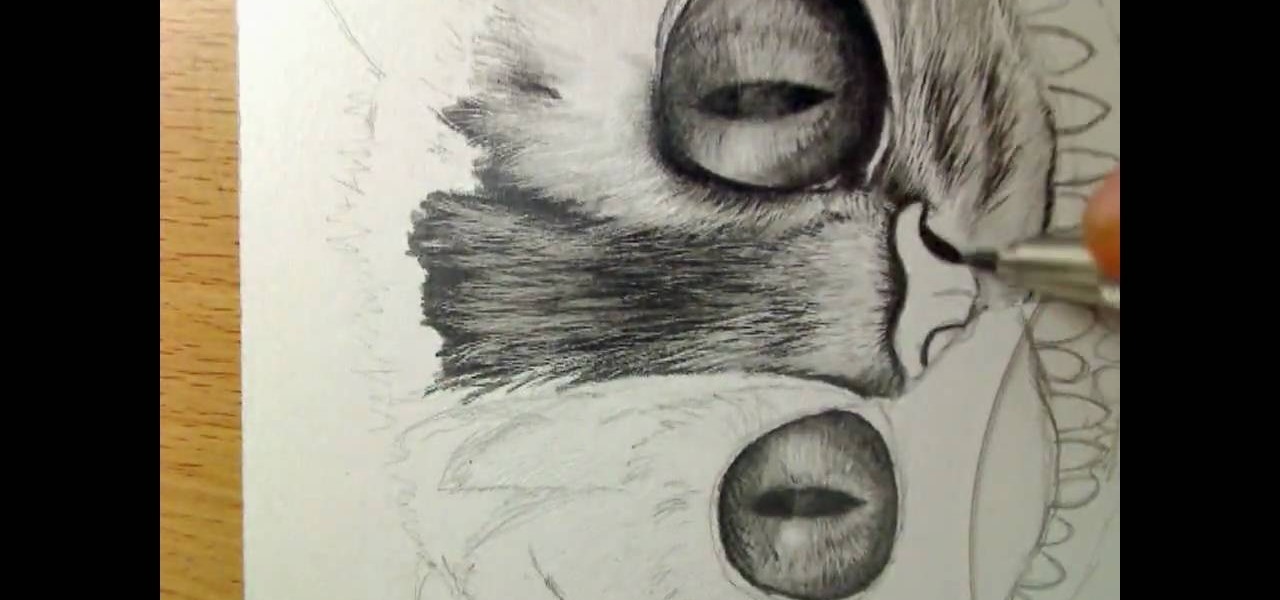
In this tutorial, we learn how to draw transparent objects. Start out using light pencil markings, and draw the basic shape of the bowl. After you have the round top and have make it three dimensional, add shading to the bottom circle in the bowl so that you can see the bottom of the inside. After this, add shading to the side of the bowl to give it a realistic feel like it's sitting on a table. Next, use your eraser to remove some of the shading, then fill in darker pencil marks onto these s...
In this tutorial, we learn how to draw Cheshire cat in Tim Burton's Alice in Wonderland. Start out by drawing the large eyes, then drawing in the nose and face around the cat. Add in the many teeth, then draw on the ears of the cat. Shade in the eyes and make the pupils diamond shapes for a more realistic cat look. After this, shade in areas and make it look as though there is hair on the cat. After this, shade in the nose and add hair around the outside of the cat. To make this look more rea...
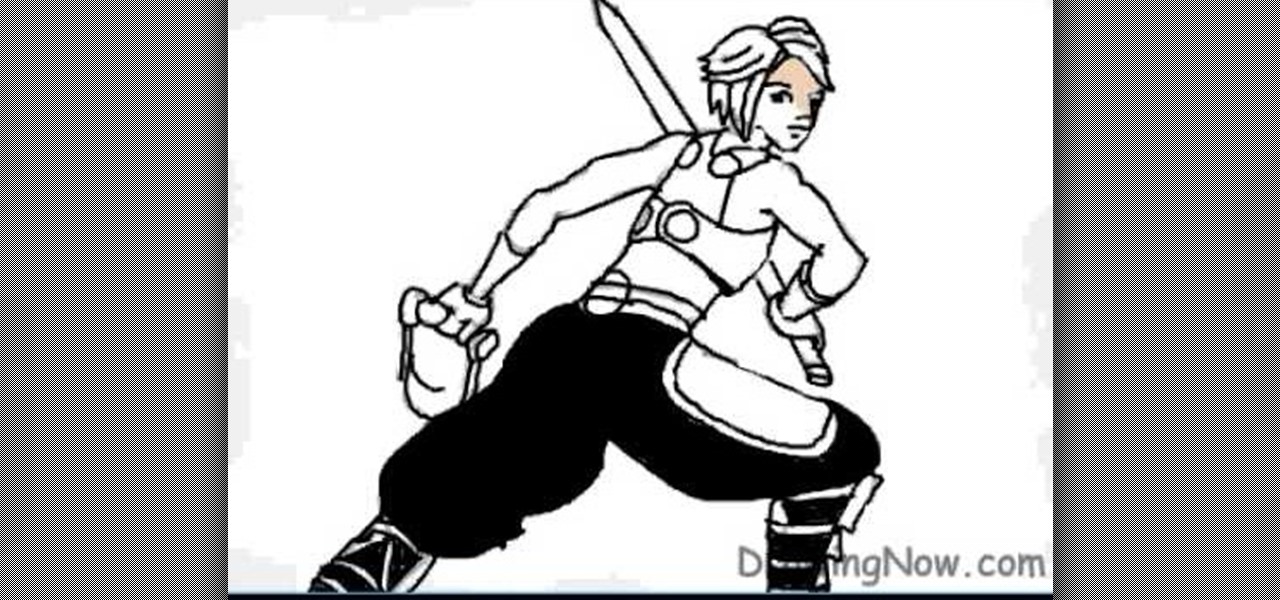
In this video, we learn how to draw a Final Fantasy character. Start out by drawing a rough outline of the entire body, starting with the head then doing the rest of the body and ending with the hands and arms. After this, draw over the initial markings with a black paint brush. Draw in eyes and hair, then start to draw in the details of the body armor and clothing. Make sure to draw on pants and make a sword that the character is holding. After this, fill in the painting with different color...
In this tutorial, we learn how to draw a husky puppy. Start off by drawing the head, don't use a straight line at the top, make it look like it has hair. After this, continue and draw teeth and a tongue hanging out of the dog if you want it to look happy. Next, add ears to the top of the head and eyes to the face. Give the dog markings and pupils on the eyes. Then, add the nose on with a button shape at the top. Draw out the collar and chest of the dog, then add on the two front feet, the bel...
In this video, viewers observe the auto reversal magic trick. The magician begins by telling the spectator to select the card. Once selected, the magician places the card back into the middle of the deck. The magician then reveals that he/she has no card markings. Now the magician tells the spectator that he will find the card behind his own back. The magician starts shuffling the cards behind his back. The first card that shows up is not the selected card, so the magician goes through the de...
The video is about Wiccan Runes and to use it for prediction. Runes are small gems or stone with certain markings used for prediction. Firstly sit in a place where you can sit and meditate in peace. Place a clean cloth napkin in front of you where you can place the runes as per the natural elements. Sit and meditate on your questions and try to draw the divine power into yourself. Now pull out the runes one by one from the cloth bag. Place the first rune in the earth corner which is on the ri...
Here is a simple technical to measure hole you dug with a post hole digger. Take measuring tape. Place it with the post hole digger from bottom to the end of the post hole digger. Mark each foot division on the post hole digger with a marker. So now you can measure depth of the hole you dug with post hole digger without the need of a measuring tape. If you want to dig 2 feet deep down the earth and you could not find a measuring tape to measure, but markings on the digger will help you to mea...
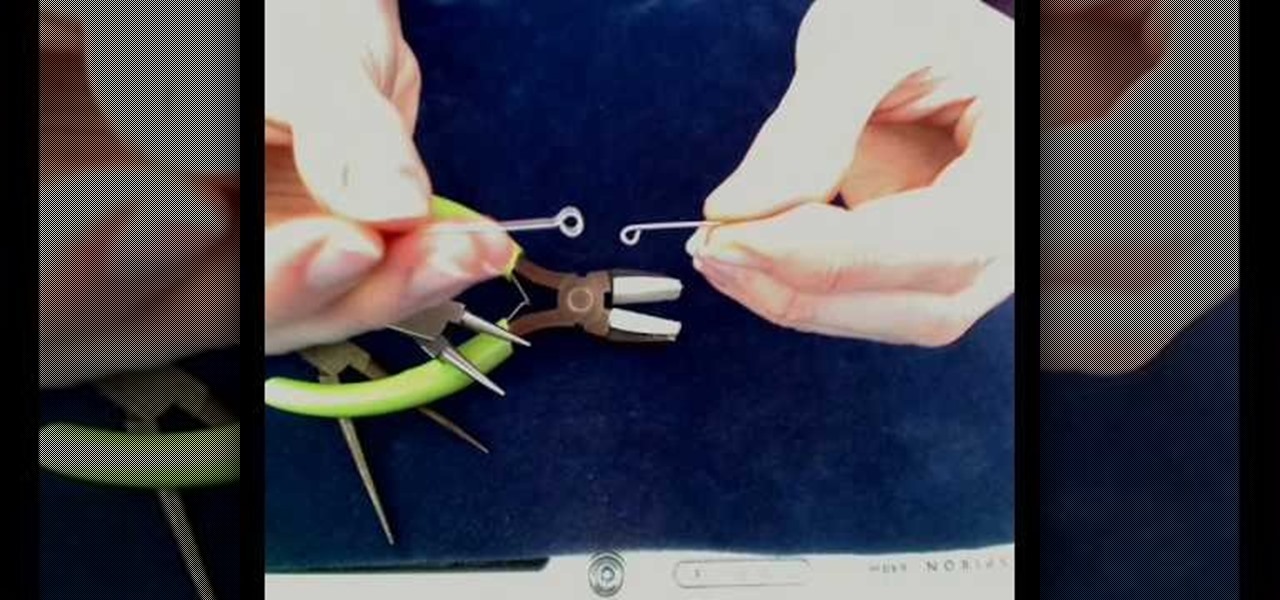
Starting out with a brief summary of what type of pliers to use when making a wire loop with tips on how to prevent markings on wire when using a certain type of plier. This video is used to teach crafters on how to make loops with wires that are useful for many jewelers Making the loop requires 2 certain types of pliers, one called needle-nose plier used to create the loop. Tips near the end on how to fine-tune the loop so it ends off perfectly as well as explanation on why a 45 degree angle...
In order to thread your sewing machine and wind a bobbin, you will need the following, a sewing machine an empty bobbin, thread, and a pedal control for your sewing machine. Choose a good quality thread. Place the thread in the holder on top of the machine. Place the cap on the end of the thread, in order to hold it in place. Loop the thread around the first guide. String the thread through the hole in the bobbin. Place the bobbin in the slot on the top of the machine. Hold the thread in you ...
This video shows how to make a swing or flip card. These are called swing or flip cards because when you open them the middle swings out to show the message. To make the card, you need a piece of cardstock that measures five inches by seven inches. Stamp or emboss the card while it is still whole. Then make two score marks on the long side of your card at two and three fourth inches and four and one fourth inches. Next, measure one and one half inches from each side, toward the middle, markin...
In this video from kandeejohnson we learn how to tweeze, shape, and groom eyebrows. Must have tools for this are tweezer, a curved pair of cuticle scissors, an eyebrow brush, and mini razors. First find the dimensions of your eyebrow. Take the eyebrow brush and using the stick part of it and place it on the side of your nose and go straight upwards. Right where it goes straight up is where your eyebrow should begin. So tweeze everything between there. To find the arch, go from side of the nos...
Learning how to read a compass might just save your life one day! Know how to use a compass and you'll never get lost in the wild. Follow these simple steps & you'll learn this valuable skill.
You can learn to confidently and accurately sew a straight seam. You Will Need
You don't need to be an expert designer to make your own clothes, only the patience to work step by step. This video will show you how to follow a sewing pattern.