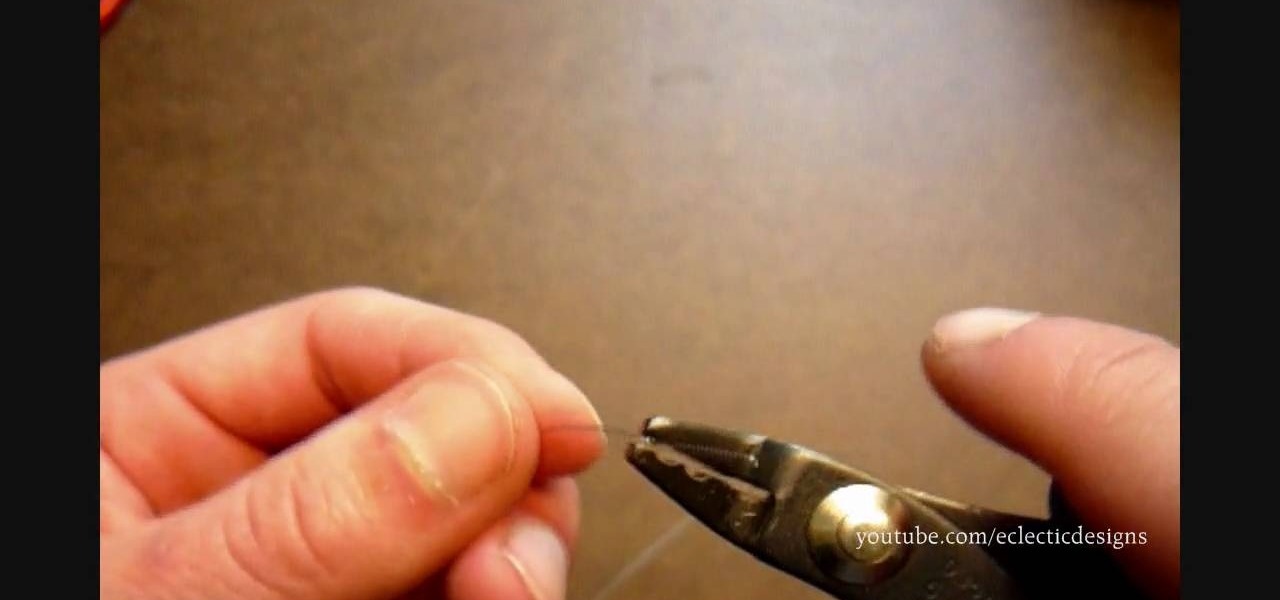
Attention jewelry makers! When making your own unique jewelry designs, one must learn how to secure the end crimp beads with crimping or chain-nose pliers. Crimp beads can be used for finishing off your strung jewelry or as "stoppers". In this tutorial, learn how to hone your jewelry-making skills!

In this video arsbeadsvideos instructs you on the use of crimping pliers, crimp tubes and how to use crimp covers. Make sure you use jewelry wire that is fine enough to fit through the holes in your jewelry. On your crimping pliers you'll notice there are two notches, also called stations. The first notch is furthest from tip of the pliers and has a raised bump or dimple in the middle. This helps to created figure-eight crimps. The second notch is used to form the crimp into a tube shape. To ...

Watch this video to learn how to use three different crimp tools and different crimp beads.
If you want to shake up your style or pay tribute to the 90s, then bust out that crimping iron. You will bring the party with this fun and funky style that can worn down, up or added to bring a little flare to more traditional styles.

Improve your jewelry making technique, watch this video and learn how to do basic crimp bead or tube crimping.
Jewelry-making Techniques demonstrates how to finish your jewelry with crimps and covers. To use crimps and covers to finish your jewelry you will need 2mm crimps, 3mm crimp covers, crimping pliers, a clasp and beading wire. First, attach the clasp by stringing the crimp bead and one part of the clasp onto the wire. Take the end of the wire and string it back through the crimp bead to make a loop. Adjust the crimp bead up to the clasp and use the crimping pliers to crimp the bead. Repeat on t...

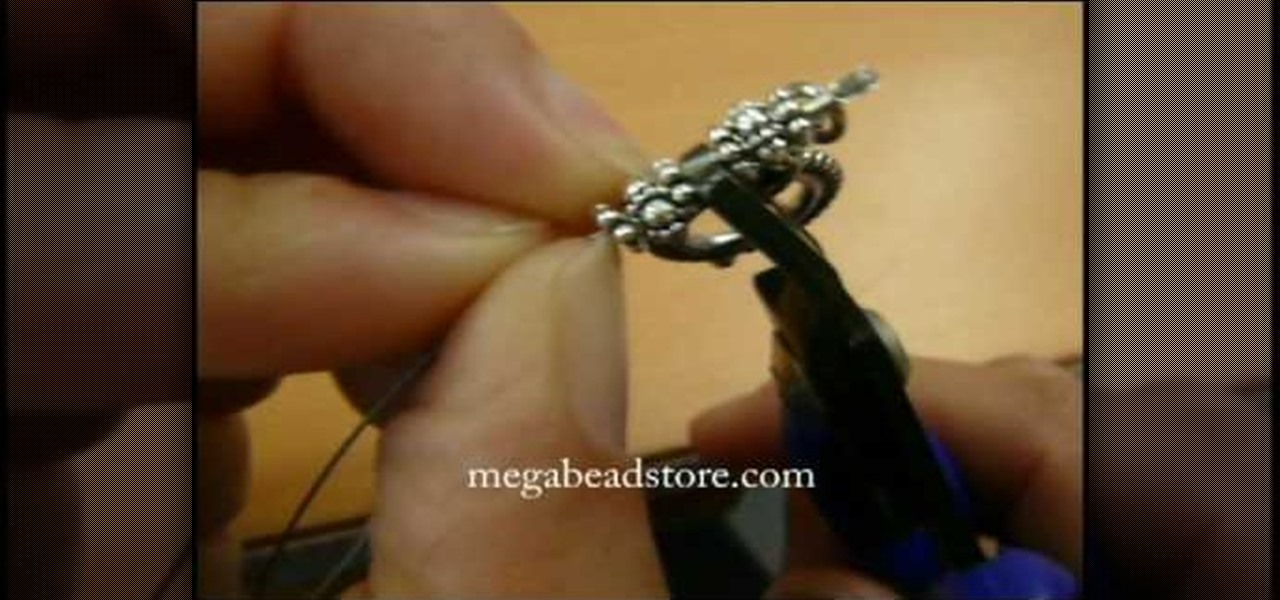
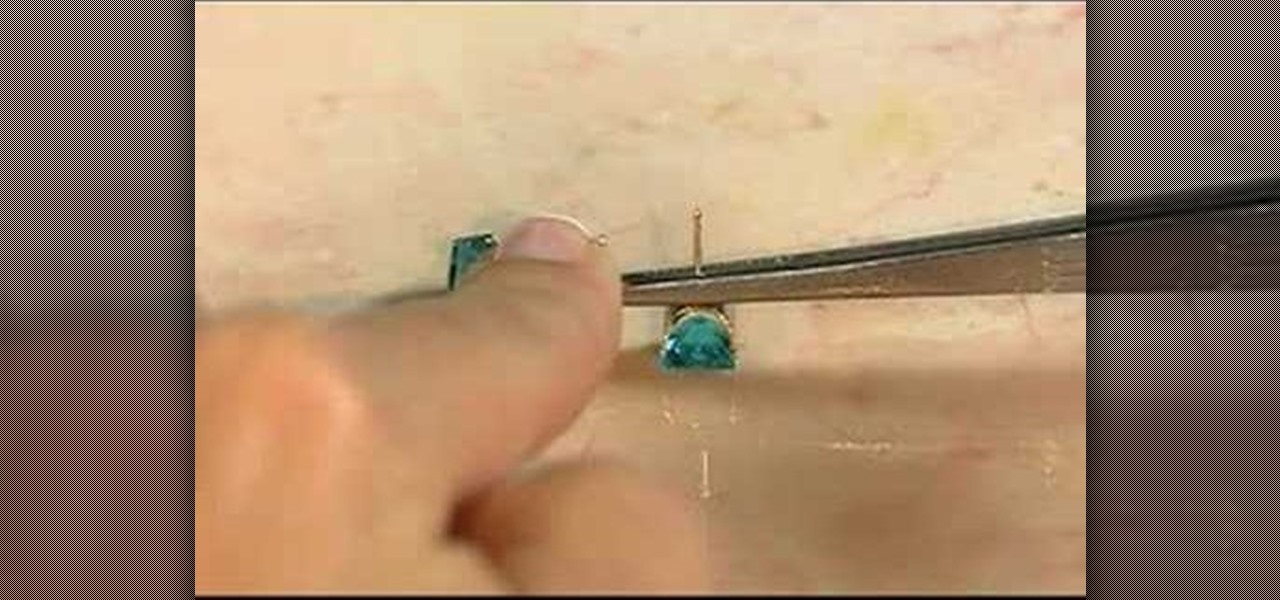
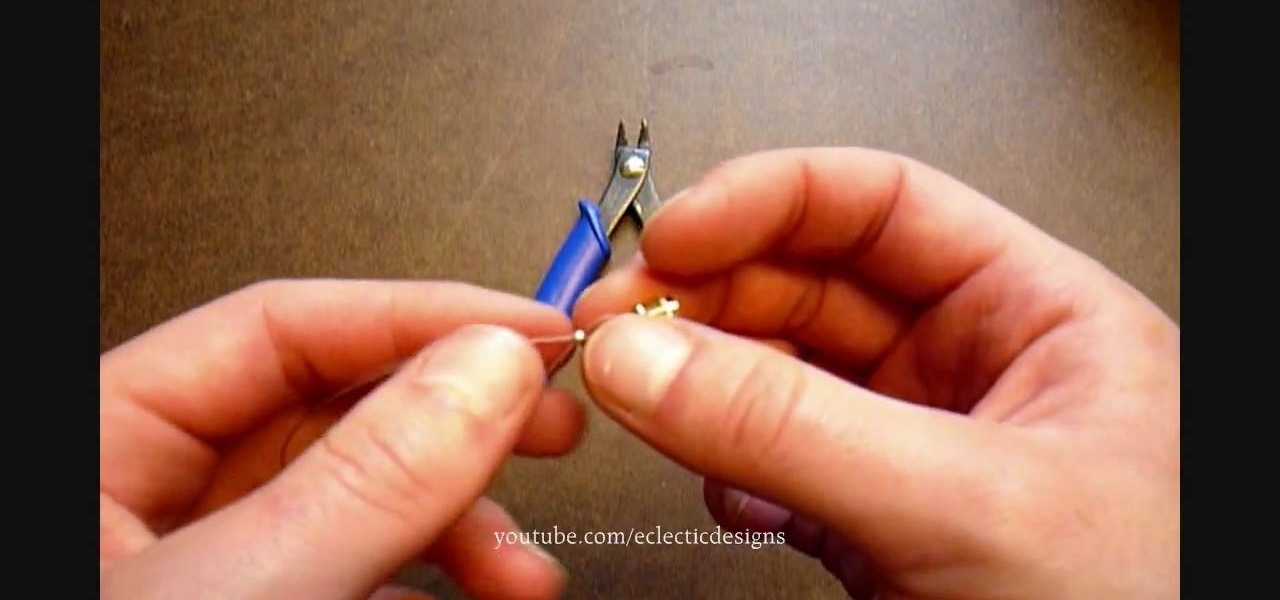
This video shows the viewer how to secure crimp beads using both crimping pliers and chain-nose pliers for the purpose of jewelry making. The video uses two millimeter crimp beads, beading wire, and both sets of pliers to demonstrate the technique. To crimp using the crimping pliers, the viewer will utilize both notches of the pliers to crimp the bead onto the wire. In order to crimp using the chain-nose pliers, one must simply flatten the bead onto the wire. Crimping is a good method to secu...
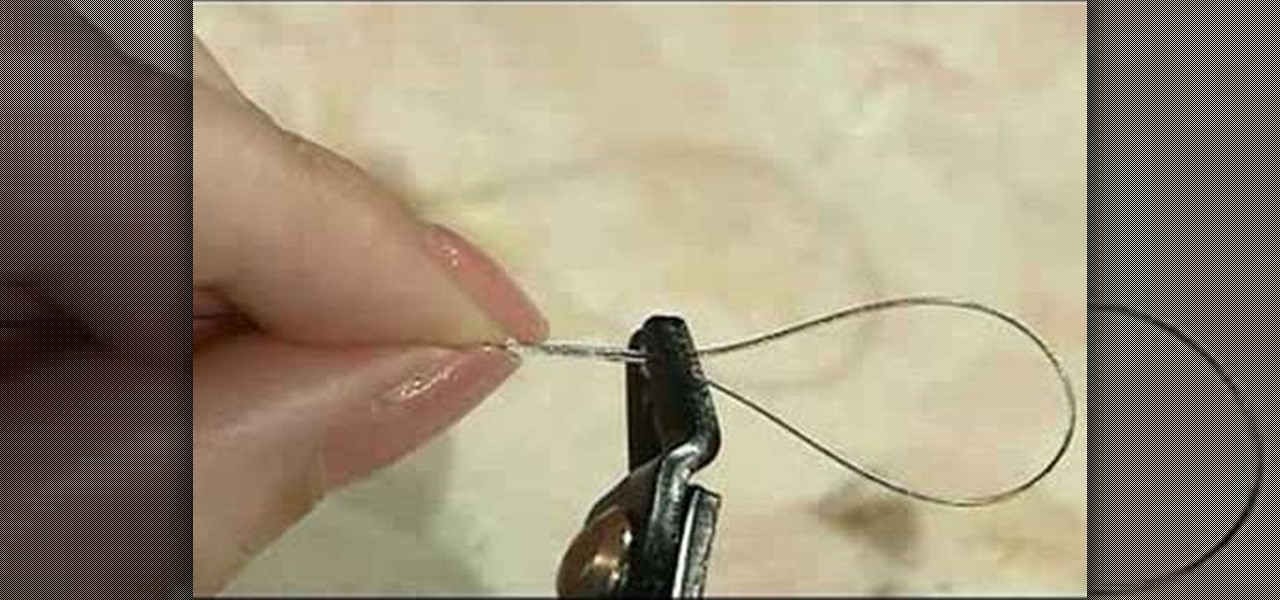
One important part of jewelery making involves properly crimping beads. This jewelry how-to video demonstrates the proper way to crimp beads on a wire. With the crimp bead on the wire place the bead in the first notch of the crimping pliers. Gently squeeze the tube until it is flat and secures the wire.
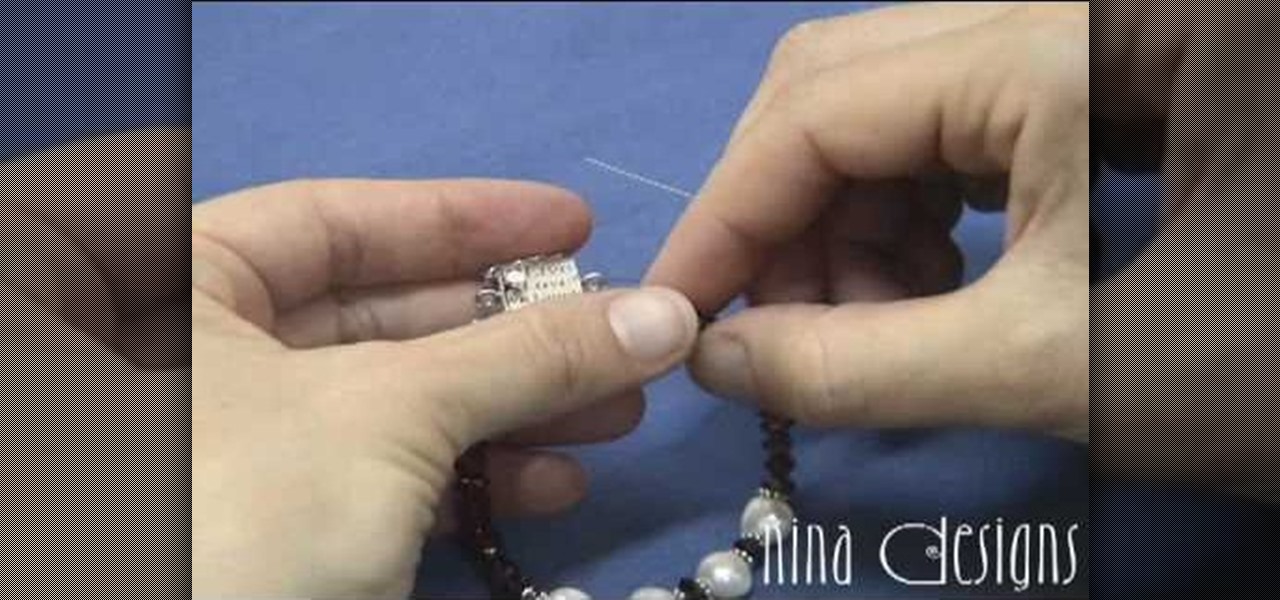
Learn how to finish a bracelet with crimps and covers to finish a bracelet start by putting a crimp bead over your beading wire and then add a clasp. After putting the clasp on the wire run the beading wire back through the crimp. Move the crimp bead up toward the clasp leaving a little room for play in between the clasp and crimp bead. Take your crimping pliers and put the crimp bead in the backspace of the pliers. Squeeze the pliers firmly to smash down the crimp bead. The crimping pliers w...
In this video, we learn how to hide a crimp bead with a crimp bead cover. First, string your spacer followed by a crimp bead and another spacer. At the end, you will have the end piece with the wire protector next to it. Then, bring the piece of jewelry through the crimp bead twice, then through the spacer once more. Now the spacers and crimp beads will be pressed with the crimping tool tightly. Pull on the string to test it out, then slip in your crimp bead cover so it looks like another bea...
Crimp can be made easily and covered to the jewelry by using the following instructions. First purchase the proper supplies of crimping tool. This tool acts like pliers and is used by placing the bead in the appropriate slot at the tip and then squeeze the handle together. The multiple slotted tips are the key to the tool, and are needed to create a proper crimp. Then, select the proper crimp bead. The thin metal crimp beads come in a variety of materials and sizes. This will be used to secur...
Crimped hair makes a stylish comeback, as shown in this how-to video from Elle magazine. Most will remember crimping from the tragic 80s, but find a way to make it look modern and fresh. Watch this video hairstyling tutorial and learn how to crimp hair without looking like a fashion victim.
Throughout the meticulous and dexterous process of jewelry making, when you get to the end of your bracelet or necklace, there's a feeling of accomplishment and satisfaction. But to seal the deal, you need to crimp. Crimping is a necessary process for the ends of your homemade jewelry. This demonstration video will help walk you through the process of this crimping end beads on soft flex.
In this tutorial, we learn how to crimp your own Ethernet cables. First, grab your cable and take the end of the crimper. Place the cable inside of the crimper, then cut off the first few inches of the cable. Next, unwind the different cables and then use your crimper to straighten on the edges. Cut the wires so they are even, then strip it again if you cut the cable too short. If you have never dealt with crimping cables before, you might want to have someone experienced to help you. Make su...
When you think of flower brooches, you probably imagine those dusty, ancient things your grandmother used to wear on her wool cardigan. But brooches can be uber cool - and even street chic - when done in a vintage/Steampunk style.
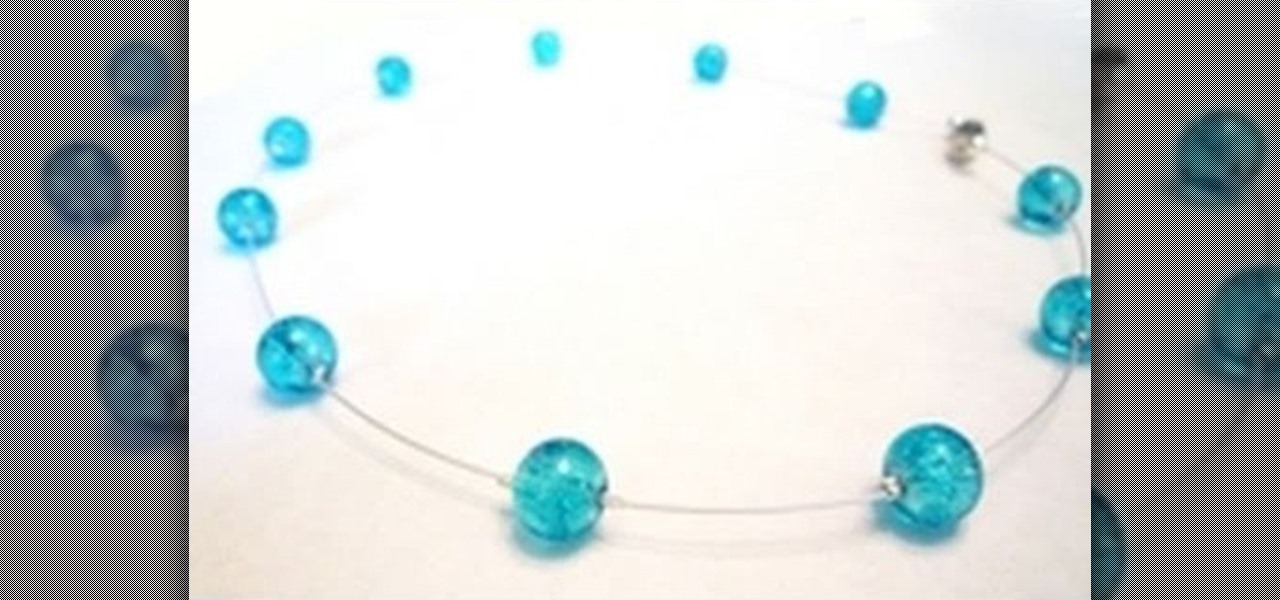
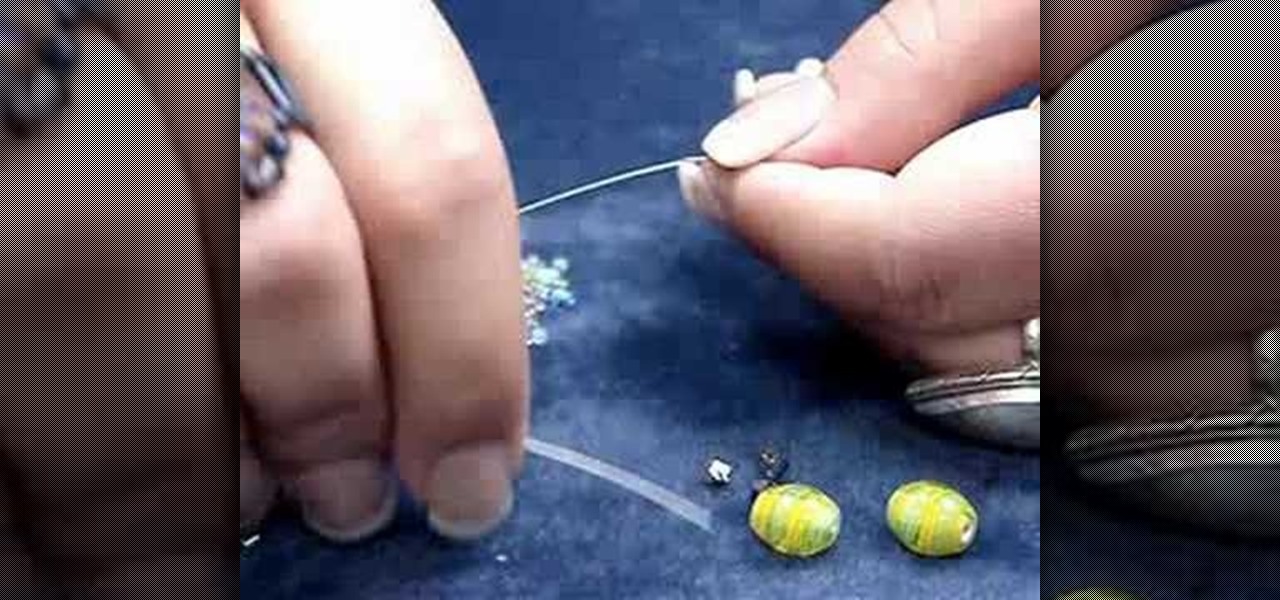
In this tutorial, we learn how to make a floating illusion style necklace. You will need: beading wire, crimping pliers, wire cutters, beads (your choice), crimp beads, crimp covers (3mm), and a clasp (barrel clasp). First, cut your beading wire to the length you want your necklace, add 3-4 extra inches. Next, space your beads out on a beading board evenly, 1 1/2" apart. Now string a crimp bead onto your wire and take the end of the wire and string it through the crimp bead on the opposite si...
Watch this video and you'll learn the simplest and most effective way of creating your own ethernet crossover cable. Starting with a general overview of what you'll be needing a crossover cable for, this video walks you step-by-step through the process of stripping the cable, separating the color-coded component cables within, organizing them for easy transfer to an rj45 adapter, and finally, crimping. Special detail is payed to organizing the colored cords, since they must be placed in preci...
This video jewelry-making tutorial shows how to make these origami crane earrings. You will need tiny origami paper, crimping beads, crystals, earring findings, and jewelry wire. Learn how to fold a crane using the traditional Japanese art of origami and craft it into earrings by watching this video jewelry-making tutorial.
In this tutorial, we learn how to make a beaded bookmark or "book thong". First, take a wire and add on a small horse shoe shaped bead. After you do this, use pliers to help bend the wire around this pin to keep it in place. Next, add on a peace sign pendant, then tie the wire around and push the wire into a cylinder bead. Continue to add on more beads to the wire until you reach the end. Use different types of bead to make it more unique and completely your own design. To finish, apply a cla...
Those interested in learning how to make their own jewelry, can learn how to make a floating illusion necklace by following the steps in this video tutorial. You will need a beading board, beading wire, crimp beads, beads of your choice, a barrel clasp, wire cutters, and crimping/flat-nosed pliers. First measure out how much wire you will need. The tutorial is making a 16-inch necklace. Make sure to cut extra wire. For a 16-inch necklace, this means you should cut approximately 20 inches of w...
The author of this video demonstrates how to make beaded jewelry by using simple household items. The materials she uses are assorted beads, crimping beads, string, leather, and earring hooks. First, the author plans her design before she starts creating any jewelry. Once she has decided what she wants to make, the author cuts off a piece of string that is the desired length of the item. Then, she adds a clasp to make sure all the beads she plans to add stay in place. Next, she slides the des...
Wavy hair is a classic, glamorous look, but not everyone has the exact hair for it. With this video, we learn a quick and easy way to get that timeless wavy look using extensions. It's entirely easy. Beginning with a spritz of water or your best anti heat damage spray, you then merely use your crimping or curl iron the same way you would with your normal hair, applying a light touch, not going for actual curl, and checking your results often. When done, you can spritz your hair again, and run...
One important part of jewelery making involves properly doing setting snap tension mounts. This jewelry how-to video demonstrates the proper way to set stone with a tension mounts. With the crimp bead on the wire place the bead in the first notch of the crimping pliers. Begin with your stone face down on a flat surface. Place the casting over the stone. Firmly press the casting over the stone and you stone should snap into place. Use this technique to create beautiful earings.
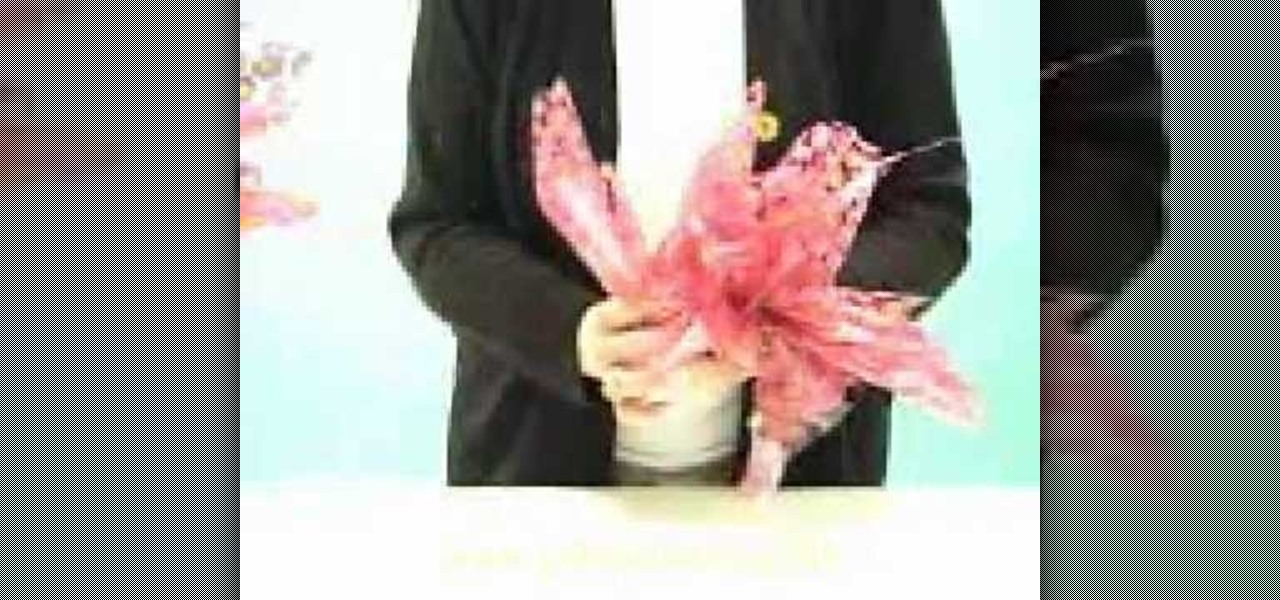
Learn how to make your homemade gift basket exciting by creating plumes with Debra Paulk. This method for adding spice to your gift basket is simple, cheap, and makes your gift basket look professionally made. These baskets are great for birthdays, a loved one, someone in the hospital, or any special occasion. Debra starts by rolling out several feet of cellophane, and folding the cellophane into a square, then folding the square in to a triangle. She then cuts the crease in the triangle, cre...
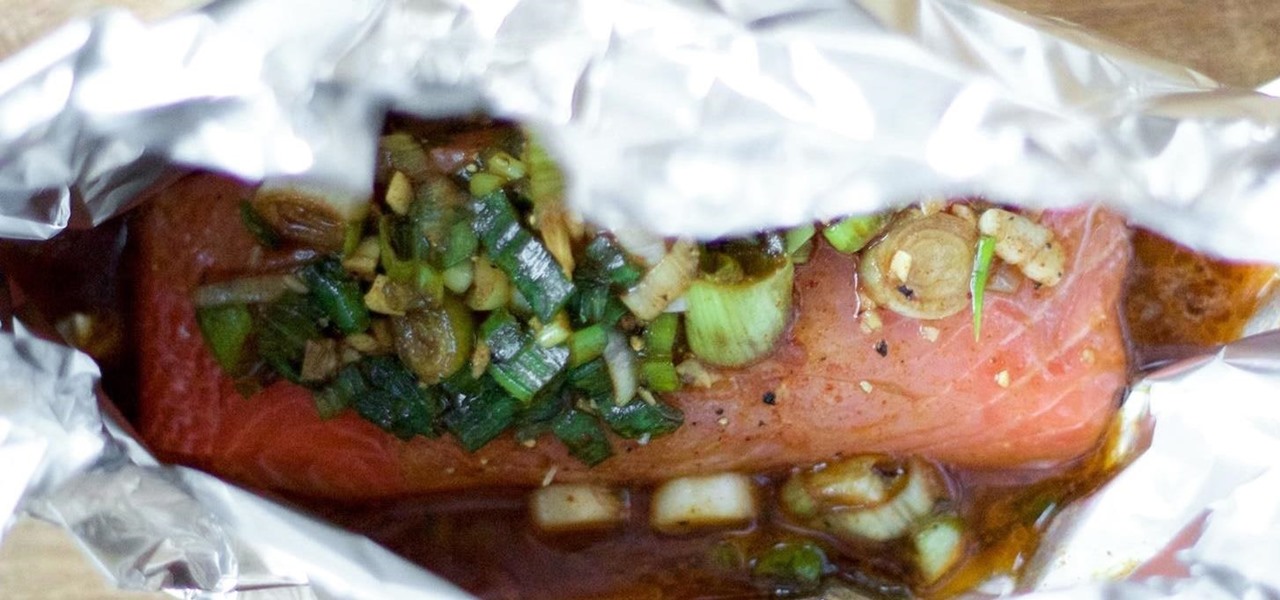
En papillote may sound like a difficult French cooking method you'd never use at home, but don't be fooled by its fancy name—it's actually a really easy way to cook food that is moist and flavorful, and all you need is some parchment paper and your oven.
Sometimes the idea of cooking fish, especially for a group of guests, can be intimidating. There's the fear of the fish not cooking right, or sticking to the pan or grill. And even if you cook it right and the fish doesn't stick, you're left with the inevitable fishy-smelling cleanup. Not fun!
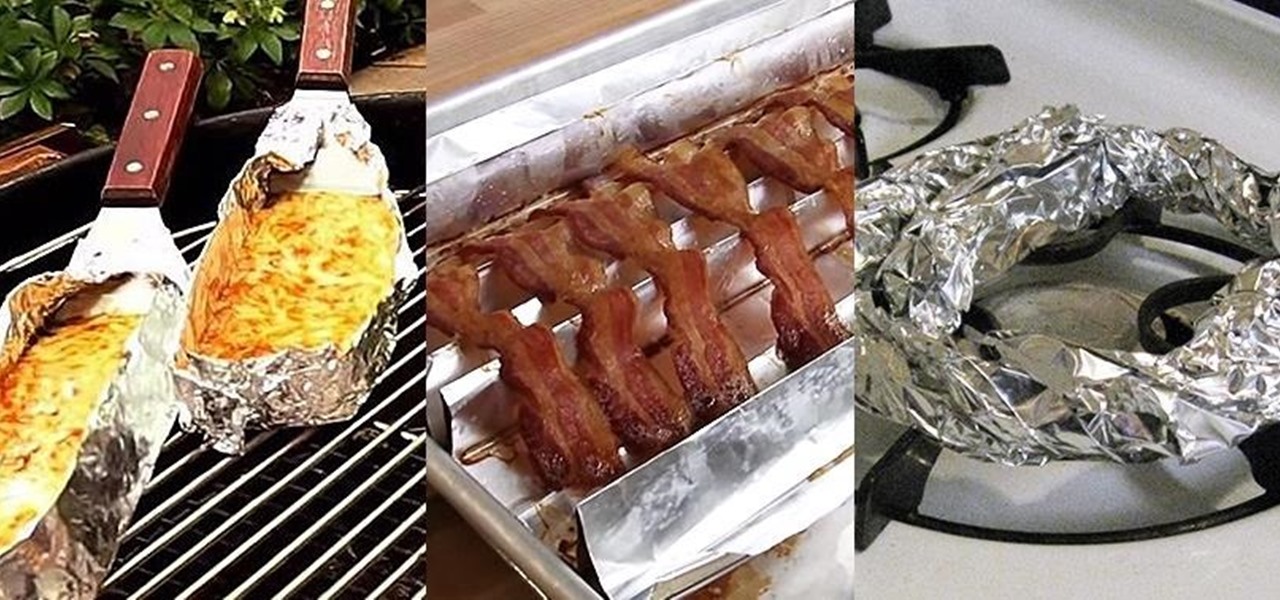
Aluminum foil is one of those things that every cook, experienced or just starting out, has in their kitchen. And while we may think we know how useful this handy material can be, there are hundreds of ways we could be utilizing tinfoil to make our lives a whole lot easier.
The clam shell is a clasp for homemade jewelry. Putting a clam shell on can be difficult, because jewelry making is meticulous and dexterous, but with a crimper, it should be easy. But a crimper isn't all, a pair of pliers is also needed. This demonstration video will help walk you through the process of this clam shell attachment.
The long name of this technique makes the meticulousness and dexterity skills of making jewelry a must. If you aren't perfect in all your techniques, this might stump you, but practice makes perfect. Wire wrapping a center-drilled, single-end stone takes skill. This demonstration video will help walk you through the process of doing a center-drilled single-end wire-wrap.
Though jewelry making can be meticulous and dependent on dexterity, using the right wire makes the whole process easier and faster. Wire necklaces and bracelets are simple when using the soft flexible wire, or soft flex. This demonstration video will help walk you through the process of this threading with soft flex.