

November 11th isn't just Veterans Day— it's Origami Day in Japan, where they celebrate the traditional art of paper folding. November 11th is also the last day of World Origami Days, a 2-1/2 week celebration held internationally.
So, you haven't folded anything? Better get cracking! And if you're going to fold any origami today, it should be the paper crane. The paper crane has become a symbol for peace in Japan, and if you have the time— fold a thousand of them. Japanese legends suggests that anyone who folds a thousand paper cranes will be granted a wish by a crane. Seems a little more work that the genie in the bottle, right?
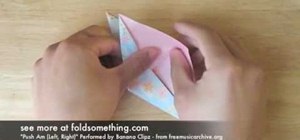
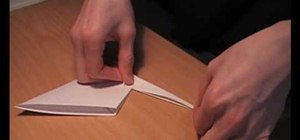
Okay, so you only have enough time (and energy) for one origami crane. That's okay. This step-by-step tutorial from foldsomething will have you folding a Japanese-style paper crane in no time. He's quite the origami artist, who's developed a skill for walking you through the folds.
Learn how to make the basic creases, then shape, unfold and refold the paper to make the body of the paper crane. Further folds give the crane its head, tail and wings. After watching this video and carefully following the instructions, you should know how to make a simple origami model for Origami Day 2010.
Just updated your iPhone? You'll find new emoji, enhanced security, podcast transcripts, Apple Cash virtual numbers, and other useful features. There are even new additions hidden within Safari. Find out what's new and changed on your iPhone with the iOS 17.4 update.


1 Comment
Always wanted to give this a try
Share Your Thoughts