Making your own Mondrian-inspired cushion cover is demonstrated in this clear and concise crafting video. Materials required are a plain cushion cover( preferably in a tight weave such as canvas or cotton; water; medium size, firm, flat edge paint brushes; scissors; one inch wide masking tape; a sturdy piece of cardboard , saran wrap and 4 jars of textile paint - one color should be black or graphite. You may choose plain or glitter paints. Cut the cardboard about one inch smaller than the si...
The problem with a lot of DIY projects is that they can require a lot of materials. You still end up with the satisfaction of something you built with your own hands, but the shopping trips can get pricey.
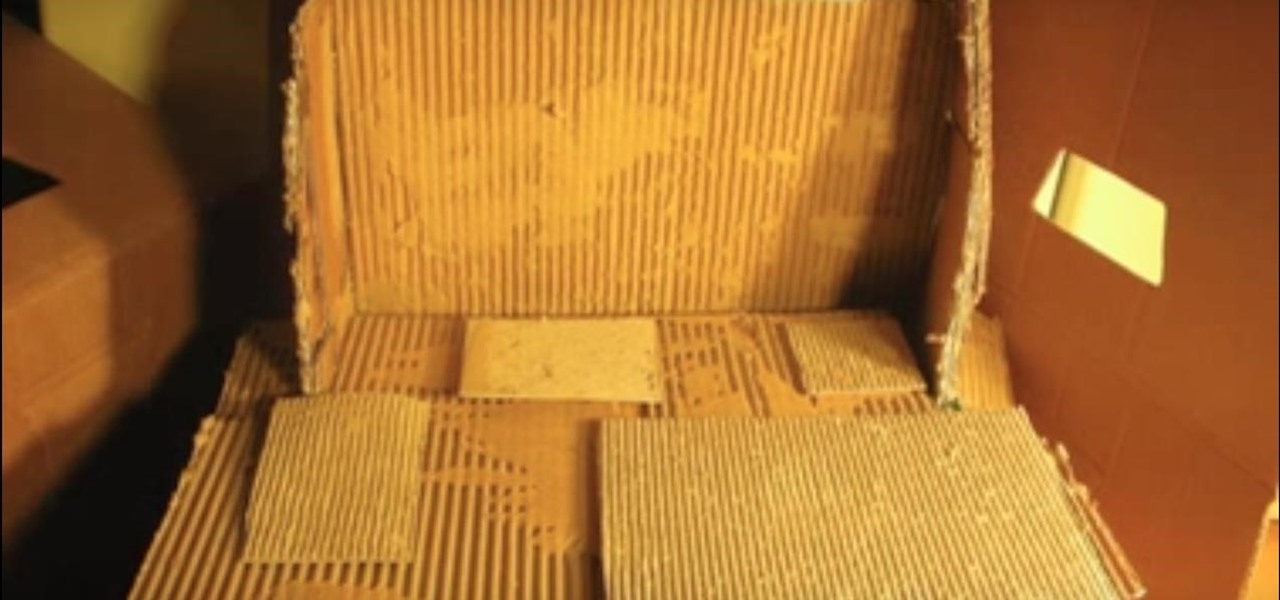
In this tutorial you'll learn how to make a cardboard shield, quickly and cheaply. All you need is some stuff you've probably already got around the house. Get to work, so you'll be ready to defend yourself against any barbarian invaders with cardboard swords!
Make sure your winter wardrobe survives the summer by putting it away properly. Learn how to store your winter clothes.
Having a congo drum there for those impromptu African dance groove sessions at your pad is a smart idea, but authentic drums are quite costly.
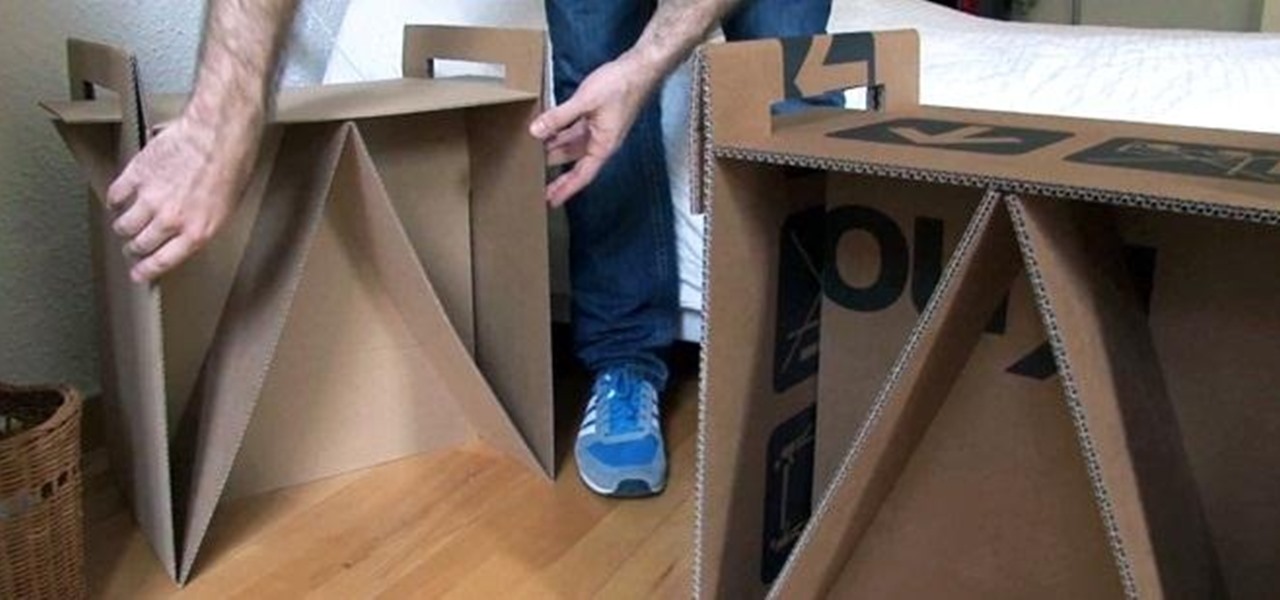
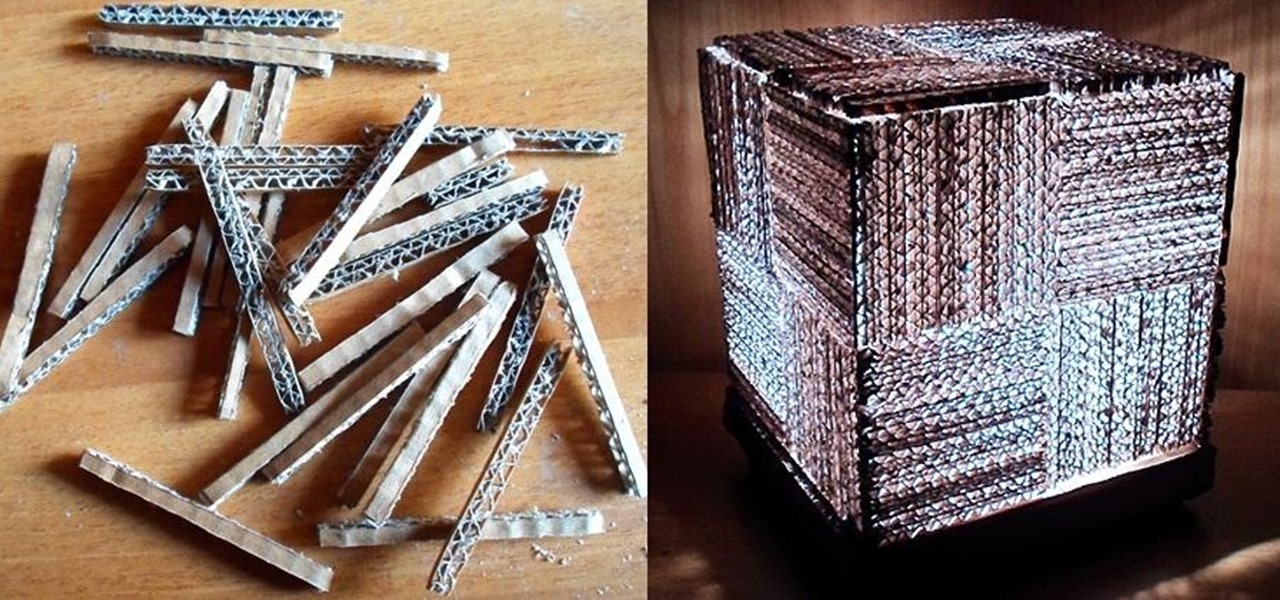
We recycle cardboard, but Gomi Style is going to re-use the cardboard and create chairs with the fine found material. The gang at Gomi style made a two different types of chairs from tossed out cardboard, simple and easy

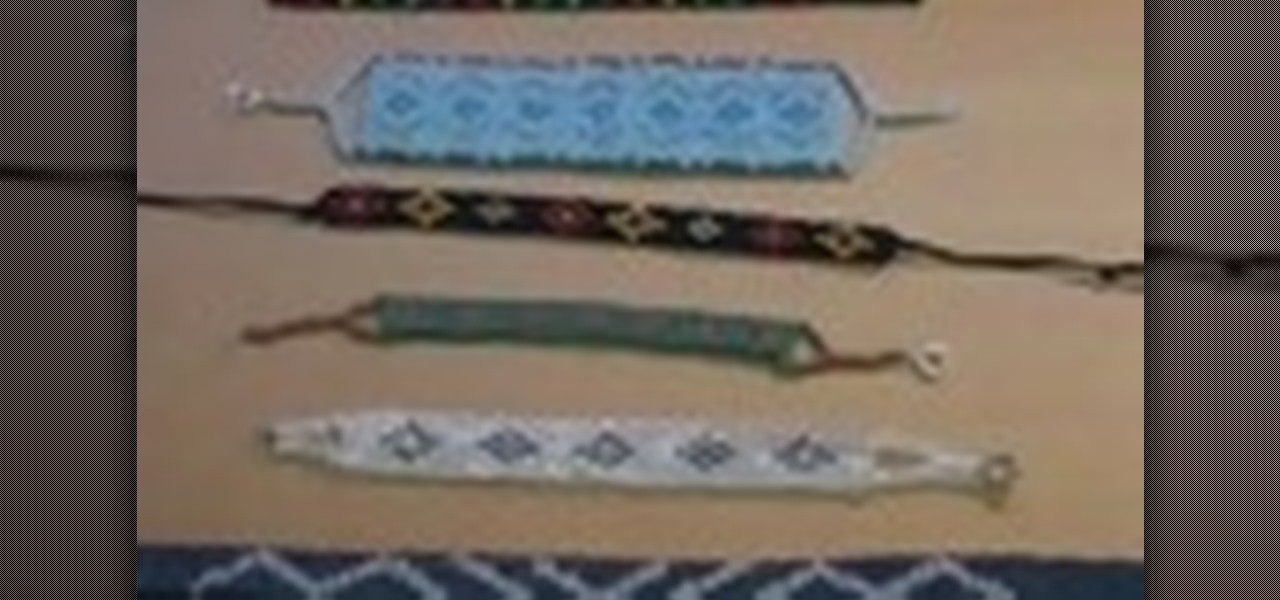
You can make beautiful beaded bracelets without much monetary investment at all; in fact, all you need are pretty beads, string, and a cardboard box. You don't even need to tweak the cardboard box at all - just take off the lid and start using it as a makeshift loom! So cheap, so easy, and with such great results.
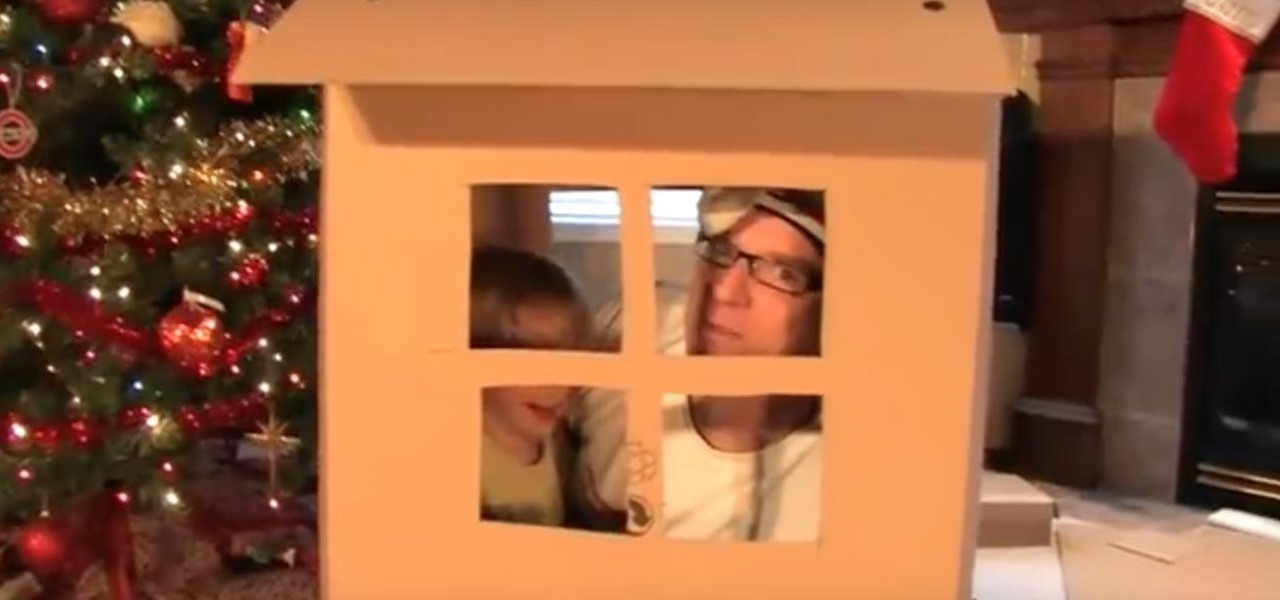
In this video tutorial, learn how to make a cardboard house with leftover cardboard that you may have sitting around from the holidays. You will need cardboard and plastic box rivets.
This academic tutoring video, made by BrainKindle, defines acceleration in simple to understand terms and shows how to measure acceleration. He shows how a plain cardboard box, pencil and string are used to make a simple pendulum, which moves as the car accelerates. Using data from the arc of the pendulum, he shows how to calculate acceleration. This is an easy method to use if you do not have an iPhone with an application to measure acceleration. A great trick for a budding scientist or phys...
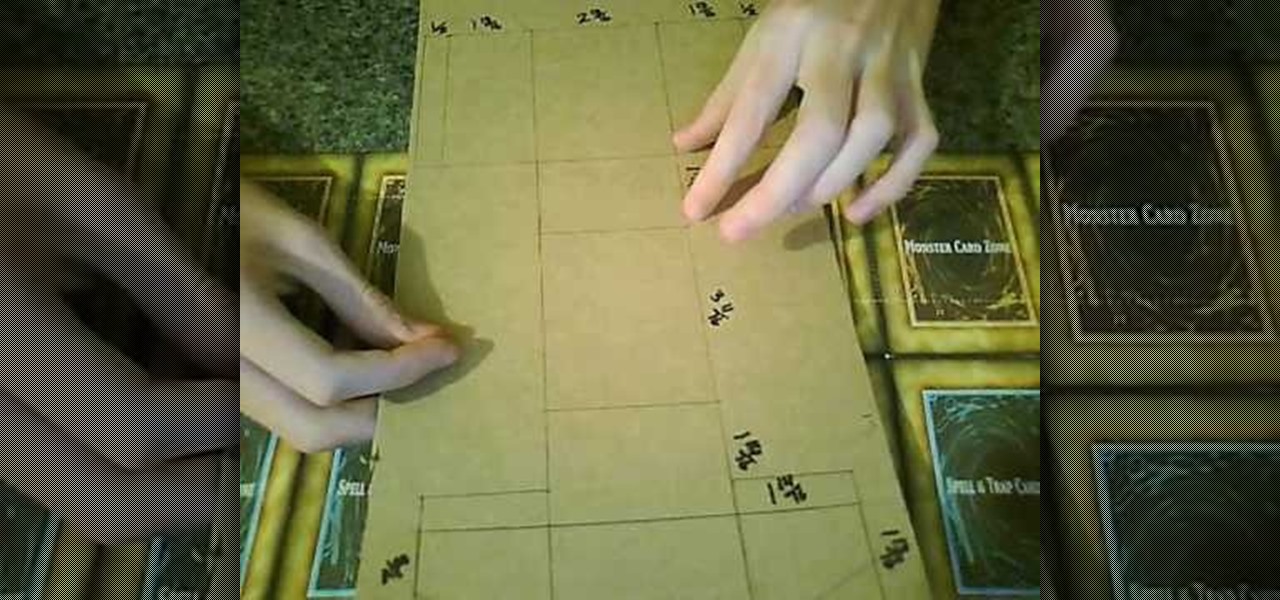
If you're really into Yu-Gi-Oh! or any other collectible trading card game, you know that protecting your valuable cards is important. This video will teach you how you can circumvent having to buy a deck box to protect your cards by building your own out of cardboard.
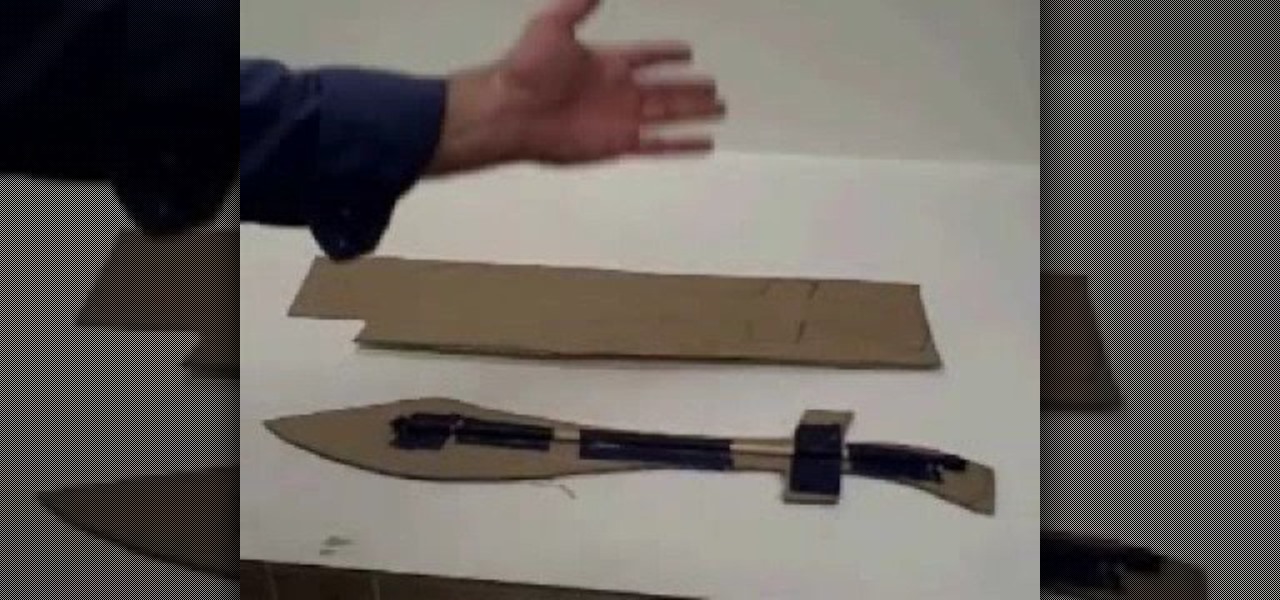
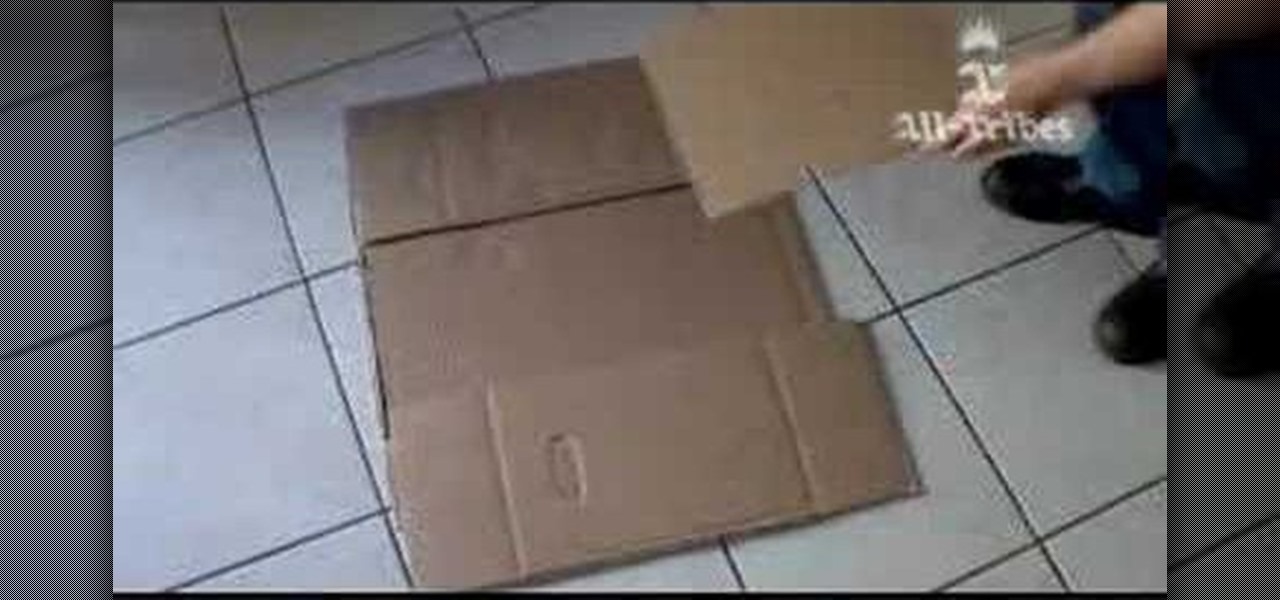
Learn how to make a sword out of cardboard with this video. Materials:
For anyone who lives in a space that may frown upon making holes in the walls, or for anyone who may not want to take on such a task, there's a simple alternative to hanging curtains or drapes. And the answer is brilliantly simple.
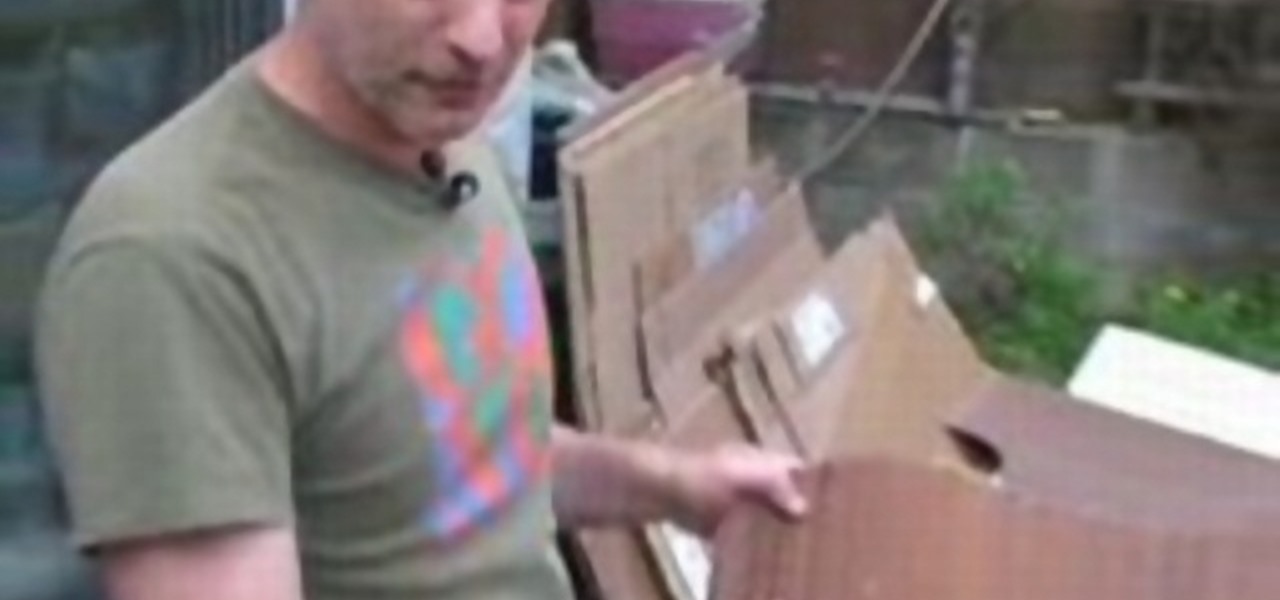
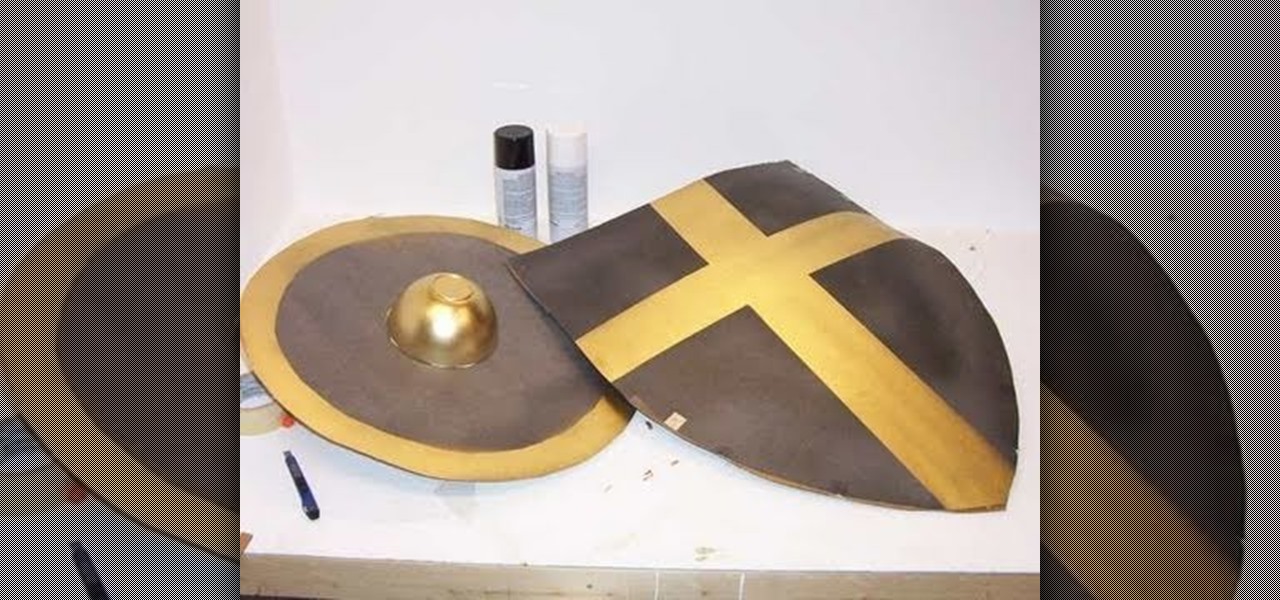
This tutorial shows you how to make a fun boffer shield out of foam and cardboard. You'll need four pieces of corrugated cardboard cut into 18 inch diameter circles, a craft razor, spray adhesive and paint.
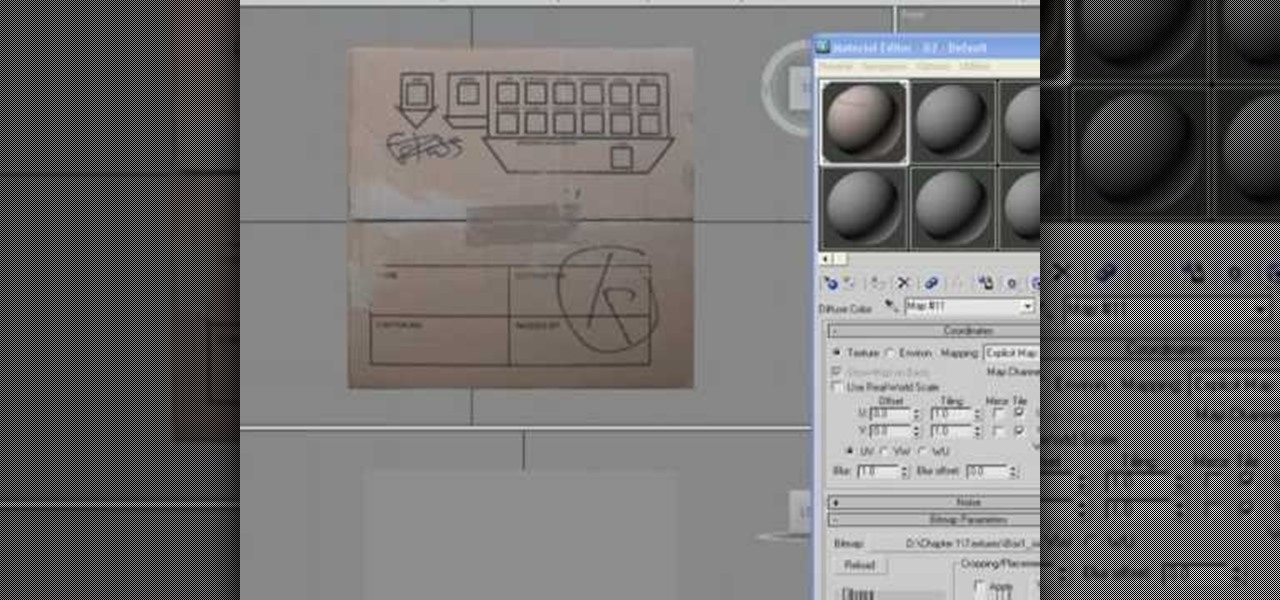
This very simple tutorial is ideal for a beginner to Autodesk 3ds Max. Start your project by creating a simple cardboard box. Then apply texture mapping, add graphics to the face, and then set the animation so your box behaves like a real one would!
For the first part, make chroma key blood: Ingredients: glue, flour, mix with water like papier mache, three drops of green and two drops of yellow food color. This combination gives more of a fluorescent chroma key look.
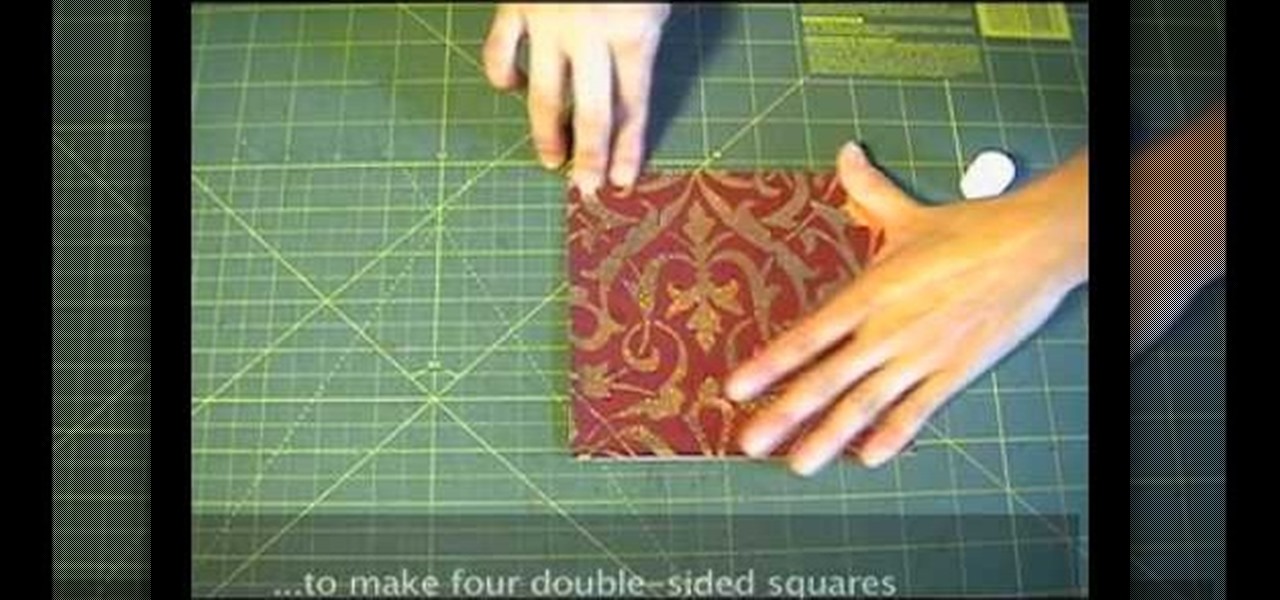
Shiho Masuda Teaches you to make 3-D origami star using recycled materials. The materials required are leftover wrapping paper, ribbons, two 3. 25" cardboard squares, ruler, scissors, glue, double sided tape and an X-acto knife. She cuts out 8 6"x6" squares from paper and glues them back to back to make four double sided squares. The four pieces are folded into 3"x 3" squares and stuck together with double sided tape. The 2 cardboard pieces are covered with paper and 12" ribbons are taped to ...
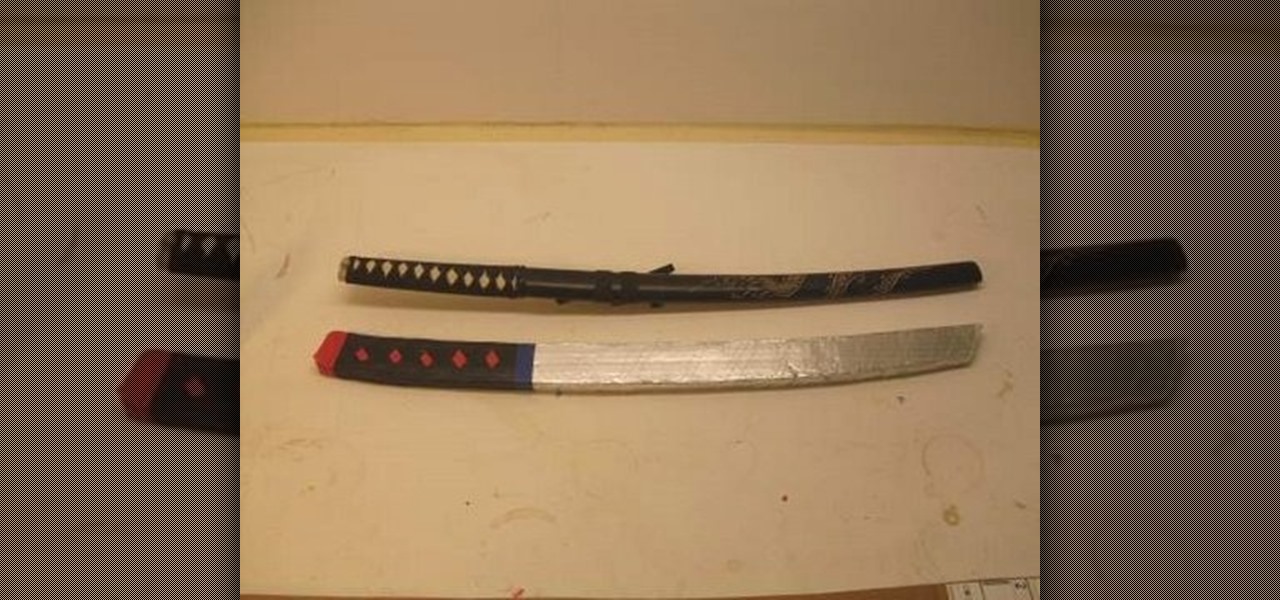
The katana (also known as the samurai sword) originated in Japan's Muromachi period (1392–1573). These curved blades are known worldwide for their elegance and craftsmanship. But if you can't afford your own antique model you can create your own reproduction using junk you've probably already got in your garage.
The claymore is one of the most insidious weapons ever devised, responsibile for millions of limbs lost in the Vietnam War. This video will show you how to make a much safer prop version out of cardboard and papier-mache to use in a film that still looks quite realistic.
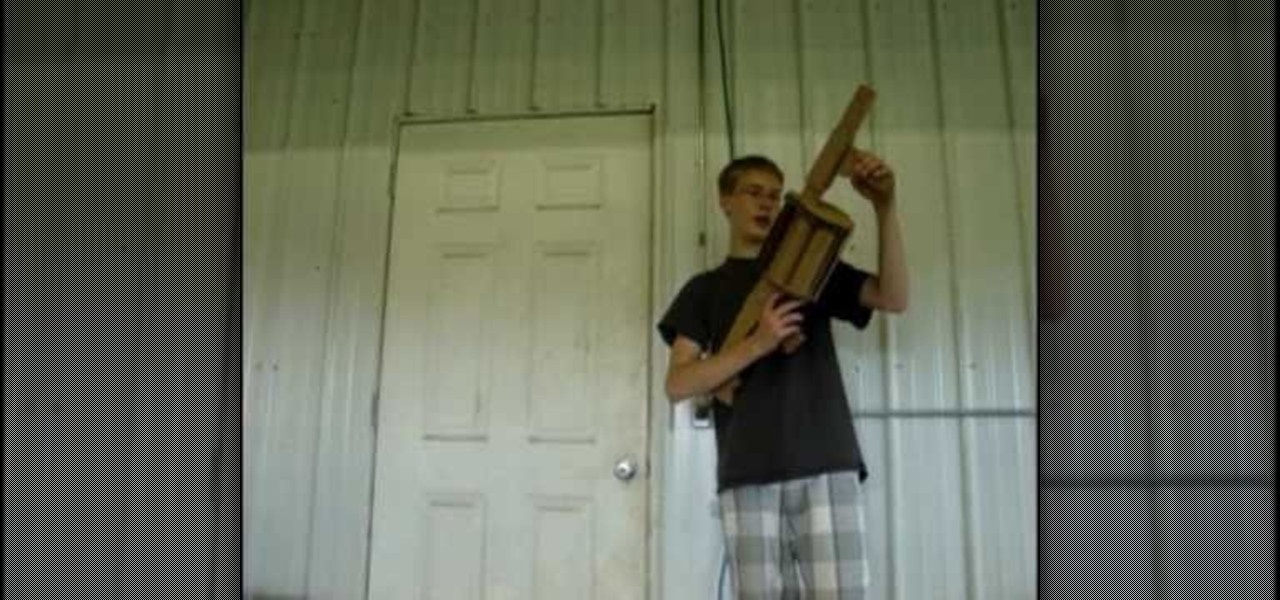
Far Cry 2 set the bar for video game graphics when it came out, and it's grenade launcher is one of the best-looking in games. This video will teach you how to bring the grenade launcher into reality by making a replica out of cardboard and clay, perfect for a film or costume.
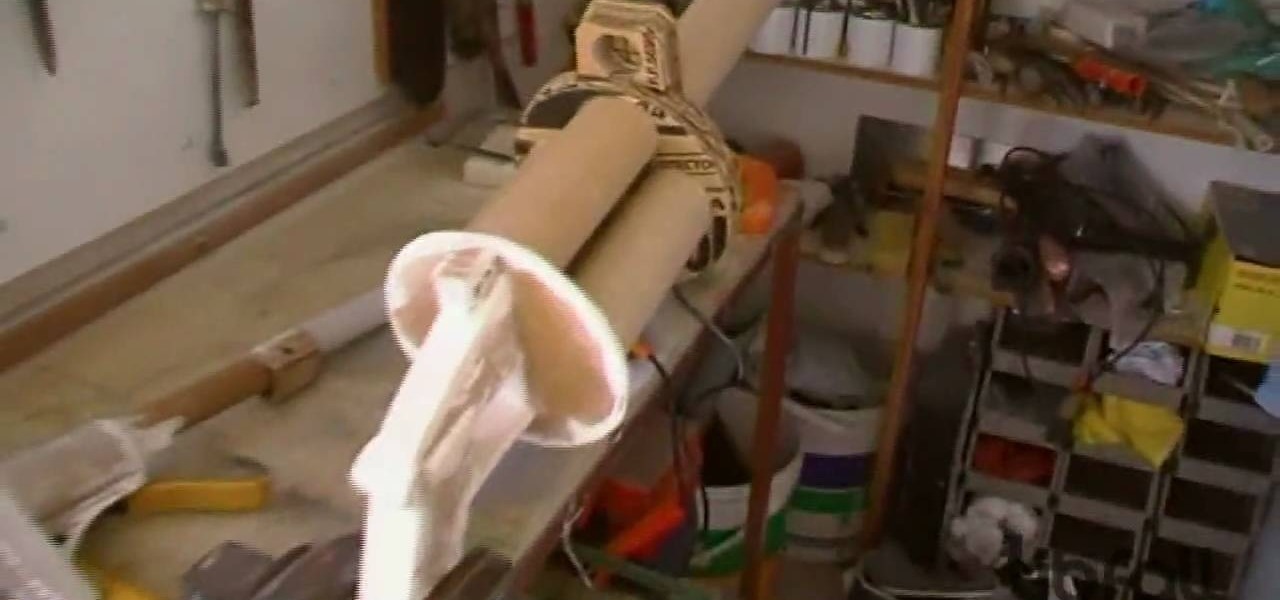
Grenade launchers are some of the most important heavy weapons used by the world's infantry, but getting one for yourself is hard even in gun-loving America. This video will teach you how to make a cardboard replica of an M32 grenade launcher perfect for filmmaking or an elaborate costume.
Hammering nails seems like such a common skill. Yet we all must admit that when it comes to those first few strikes of the hammer, it's hard to hold the nail perfectly perpendicular to the slab of wood. This means we often hit our own nail or knock the nail we're hammering off course.
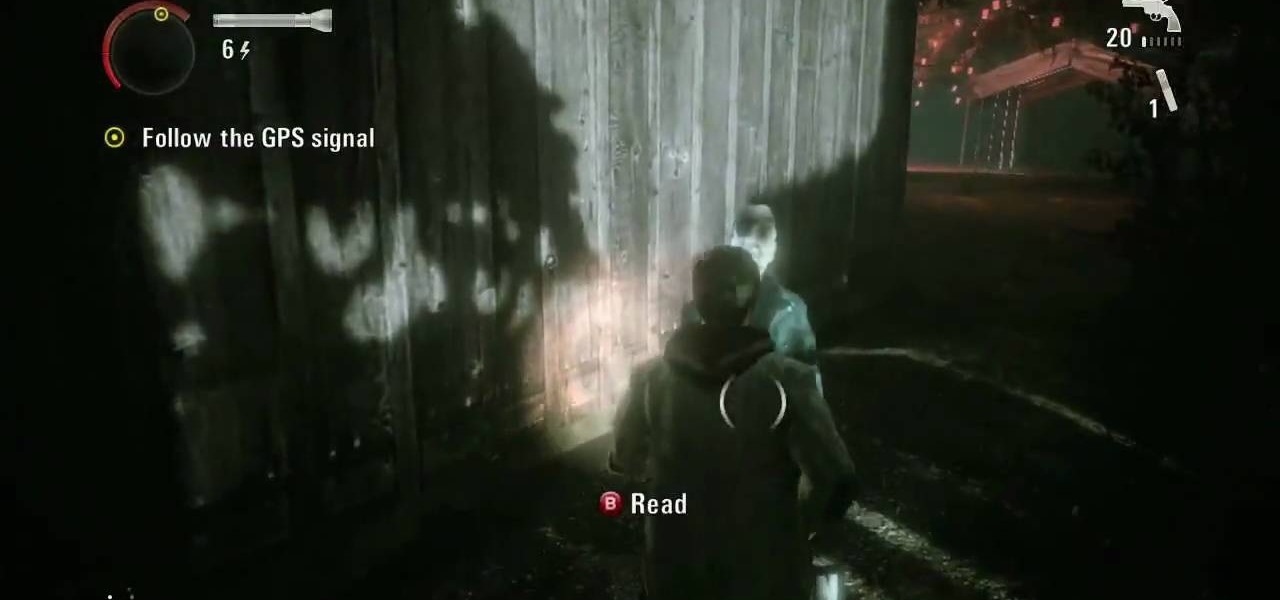
It's time for another Achievement Hunter video from the guys who know how to do it best. The game they're playing this time is the first DLC for the psychological hit thriller, Alan Wake. The Signal takes players deeper into the story of Alan Wake and find out what's actually going on with his life.
In order to make furniture out of old cardboard boxes, you will need cardboard boxes, rods, nuts, and washers.
Turn your home or patio into an incandescent flower garden with plain holiday lights and egg cartons.
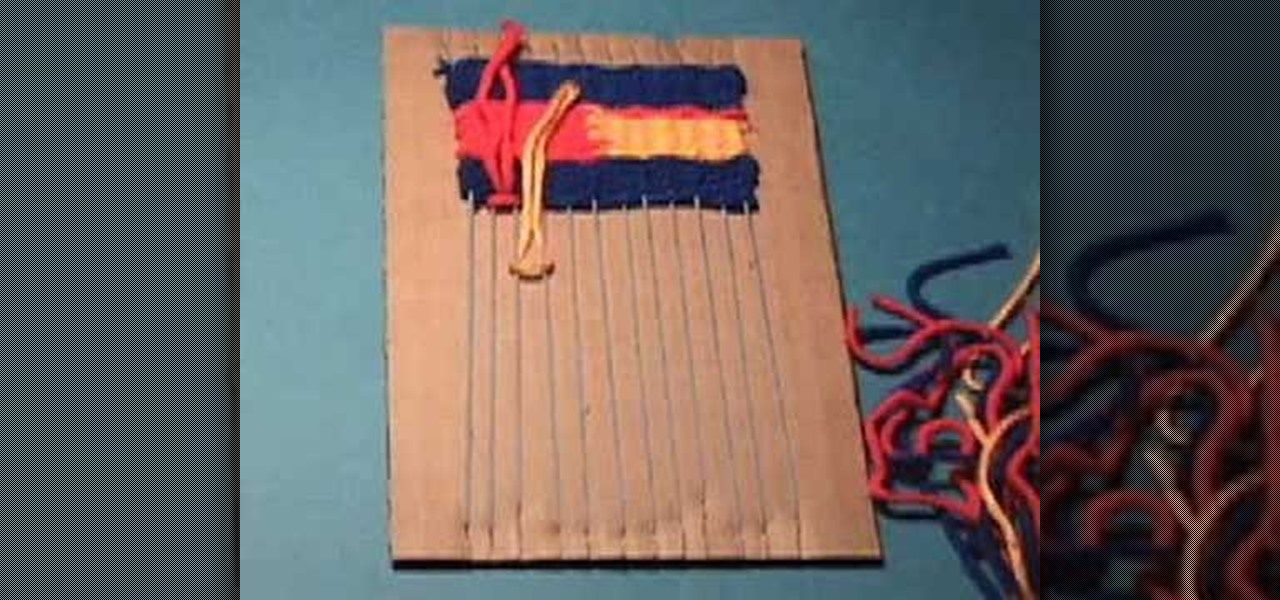
Learn about the basics of weaving with this stop motion weaving tutorial video. Several different weaving and knot techniques are demonstrated, even showing common mistakes in the weaving process. Watch and learn a simple technique for weaving on a cardboard loom.
Learn how to make a folding reflector from cardboard and foil. This is essentially free if you have all of the materials already, like cardboard, golden aluminum foil, tape and scissors. This foldable light reflector is a good choice for outdoor film shoots on a low-budget. When you can't bring lights to your film shoot outdoors, let the light come to you!
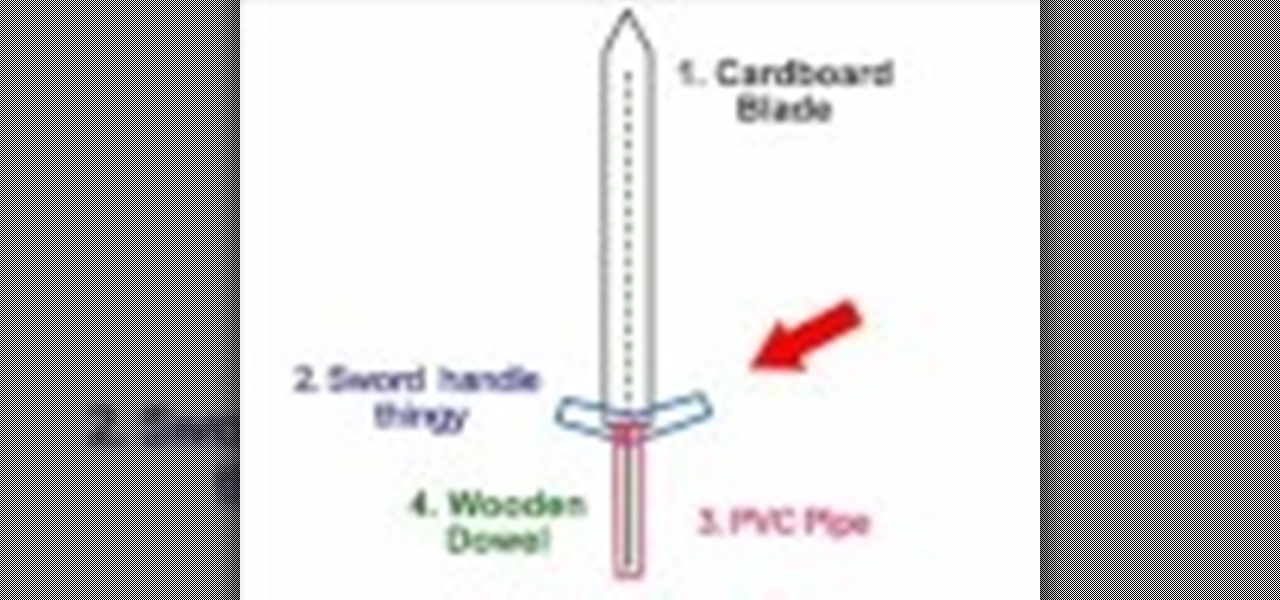
Check out this step by step instructional video to learn how to make a Cosplay Sword from cardboard and wood! Make sure you have all of the following materials to start making your Cosplay sword: spray paint, hard cardboard, wooden dowel, bendable metal wire, silver colored tape, embellishment, super glue, hand saw, paper clay, masking tape, scrap papers, pen knife, and a PVC pipe. Watch this Cosplay video and enhance your role playing with this tutorial!
There have been numerous chairs made out of recycled or reclaimed cardboard. This week on the GreenerBusiness Podcast, we attempt to build our own unique comfortable cardboard chair.
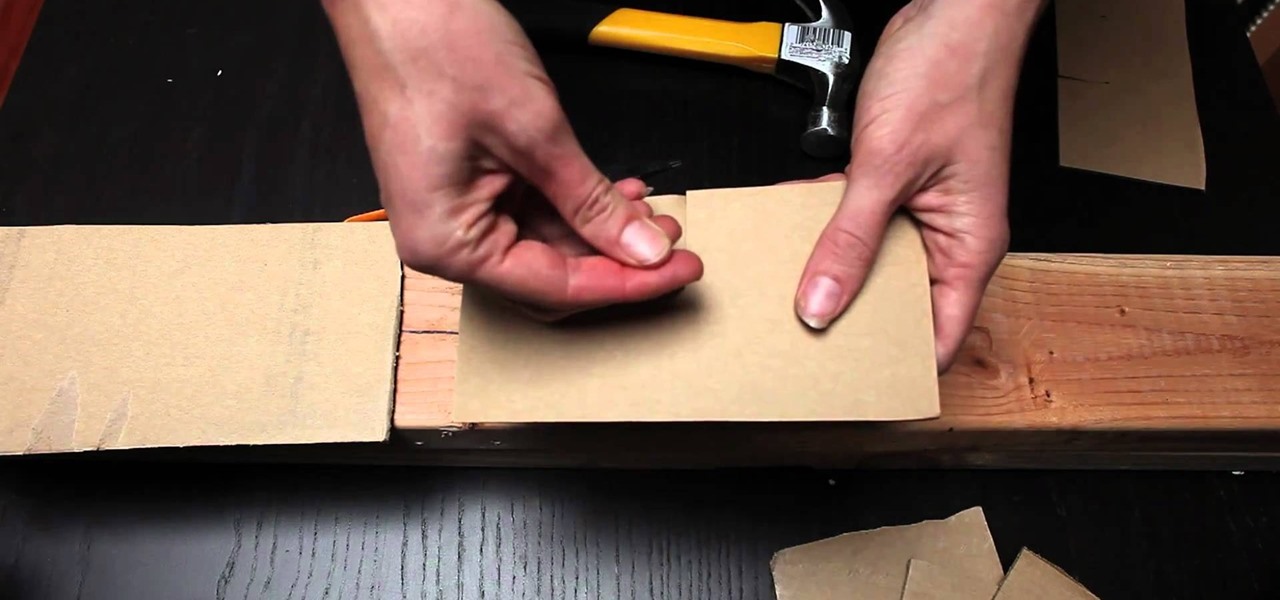
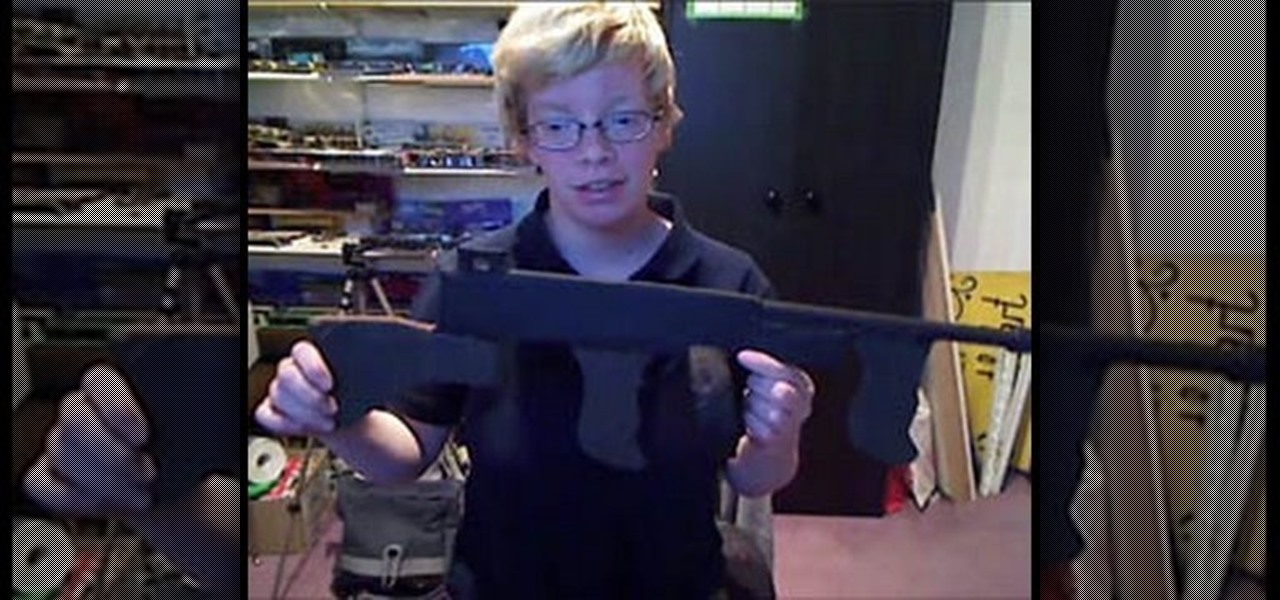
This video begins by showing the necessary tools needed to make a prop tommy gun out of a cardboard base. The first step is to trace a simple handle shape on the cardboard and repeat eight more times until you have eight exact copies of the handle. Then using an image of a tommy gun make an outline on the gun to cut in another piece of cardboard. You must cut and make eight more copies of the entire gun body to have the appropriate thickness for realism. The handle must be glued to the gun bo...
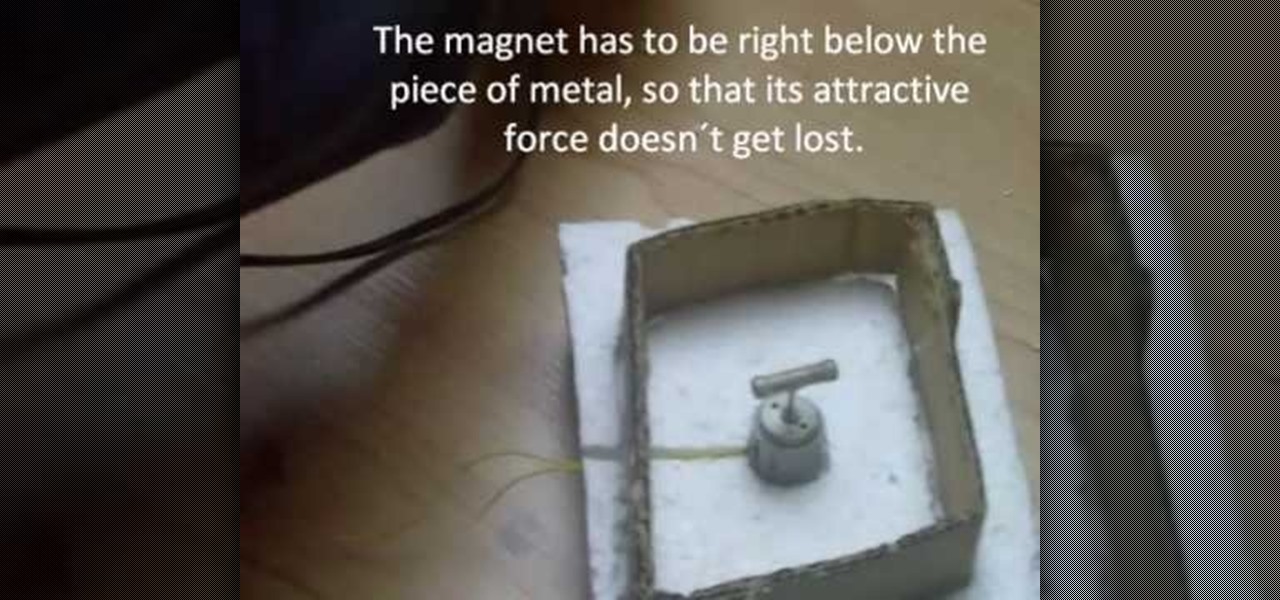
In this video, we learn how to build a magnetic stirring device. First you will need: a block of 1 inch thick Styrofoam, a piece of cardboard, 2 magnets, a small electric motor, a piece of non-magnetic metal, a hot glue gun, and a soldering iron. First, draw the shape of your cardboard square on the foam and cut it out. After this, take your soldering iron and melt away the Styrofoam from the outside. Then, make a hole in the middle for where the motor will be placed and push it inside. After...
In this tutorial, we learn how to fold a t-shirt using cardboard. First, cut out a piece of cardboard so the it's 72 cm x 25 cm, and make sure it's completely flat. Next, place two flaps on the side of the cardboard and one underneath. Now, place your shirt inside of it and fold the top down, then the sides. After this, fold up the bottom and you will have a nicely pressed and folded shirt! This will save you time over folding the shirt by yourself and it will also come out more nicely than f...
Decorate a Cardboard Sun Mirror- Acrylic Painting Project- Art and Craft
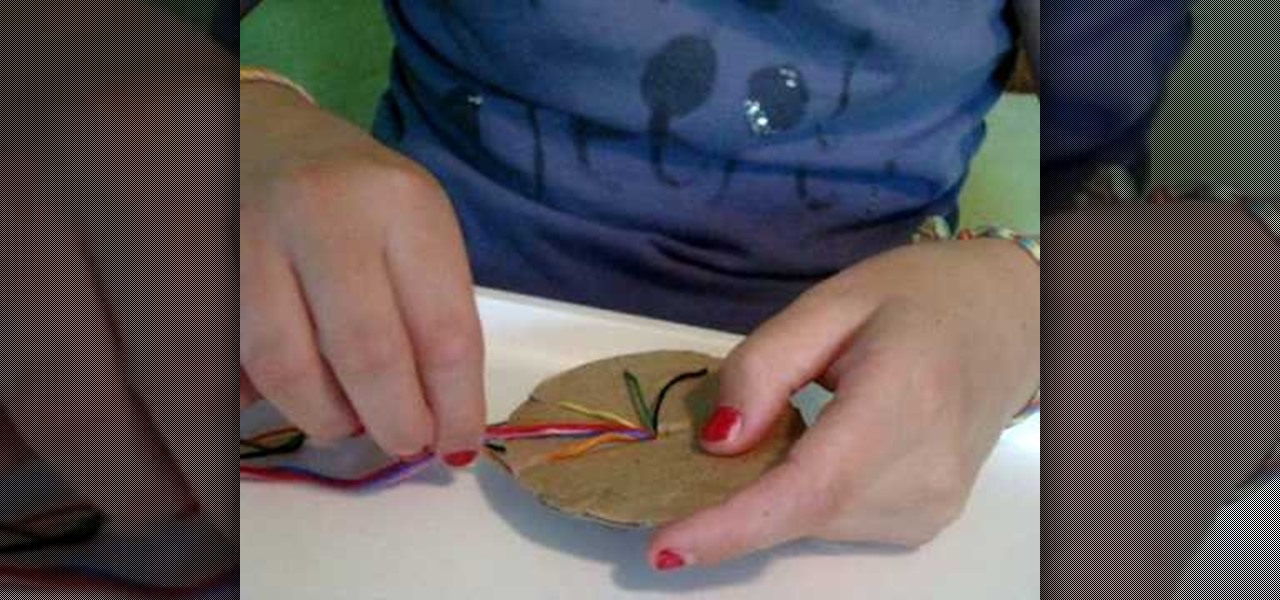
A little girl from Live Love Embroidery explains, in this video, how to make a circle woven friendship bracelet. The process involves seven strands of embroidery thread tied at the end with a simple half-hitch knot. The knot is fed through a small hole in the center of a circle of cardboard. The strings are then individually latched through seven of eight notches located at the end of the cardboard. After that, rotating in a circle pattern around the cardboard, the strings are exchanged aroun...
Learn how to recycle an old jeans into a earth friendly sandals with Gianny L! In order to make sandals out of a pair of blue jeans, you will need the following: scissors, cardboard, needle, thread, a sewing machine, a pair of jeans, a pair of flip-flops, chalk, and foam.
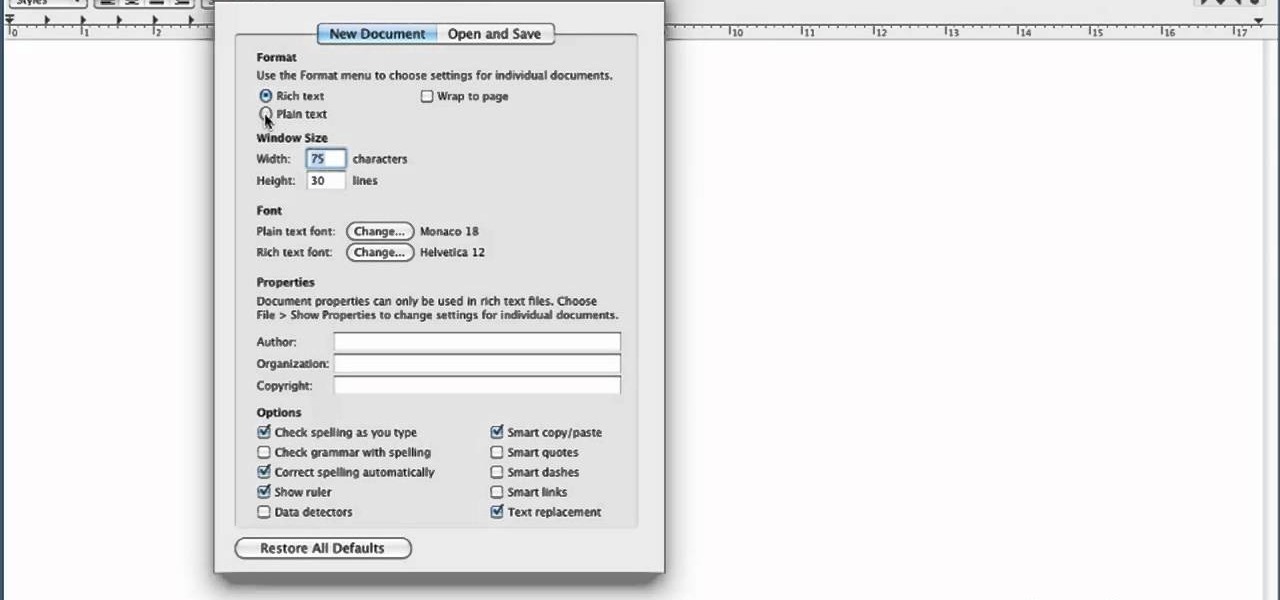
In this clip, we learn how to create a plain text file. You can use the built-in TextEdit (Mac) or Notepad (Windows) applications to make a plain text file. Microsoft Word is not a good choice for creating plain text files.
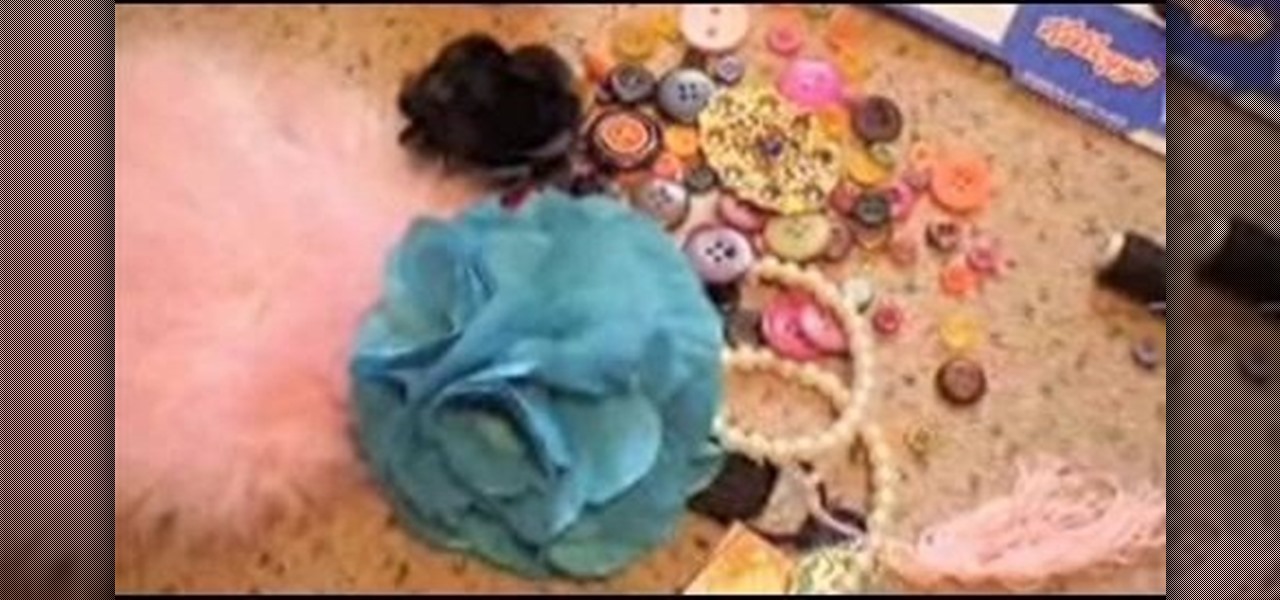
Materials: Scrap fabric, elastic thread, cardboard, scissors, cellophane tape, and other bits and bobs ie feathers, buttons
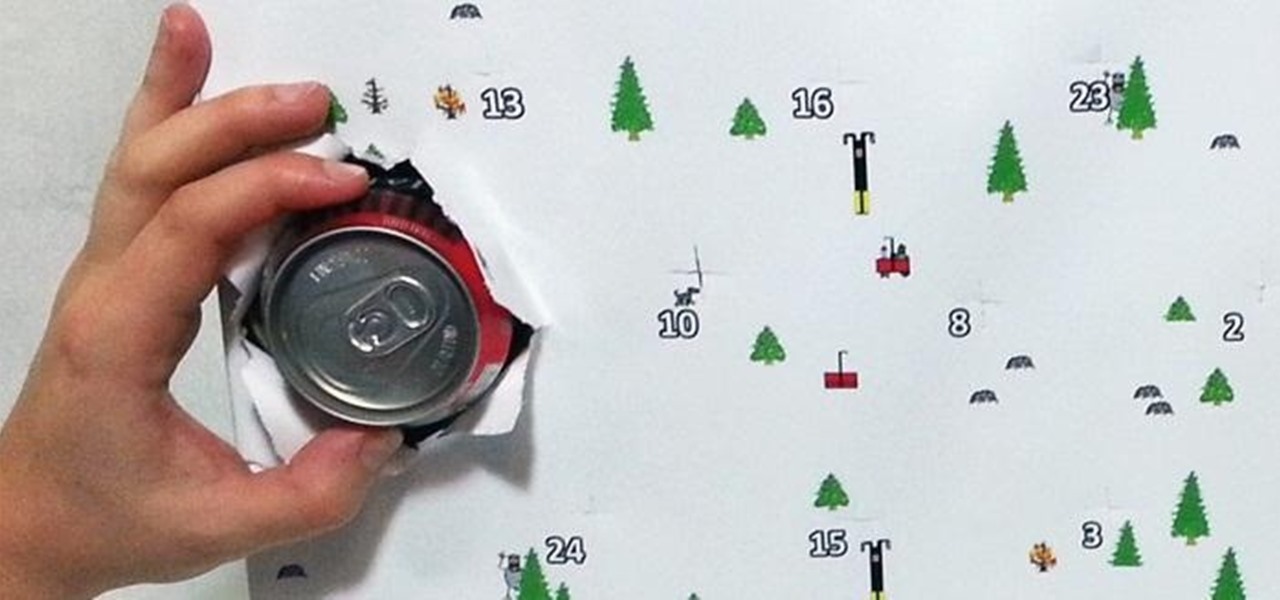
Sure, you can buy one, but making an Advent calendar is a nice family project—and you can use better treats!
Contrary to popular belief, IKEA can get pretty expensive. You find something that comes pretty cheap, but then, you decide that your GORF will look good with the BLERGH, and you really need the SPLOOF to tie it all together. Pretty soon, your living room looks like an IKEA magazine ad, and your bank account has seen better days. Instead of spending so much money at IKEA, why not build your own pieces of furniture?
Make a splash at your next masquerade party with this purr-fect black cat costume. You Will Need
The holiday season is here, and most people have already started counting down. Advent calendars are a very traditional way to keep track of how many days are left, but most of the ones you see are either boring, made for little kids, or just plain ugly.